
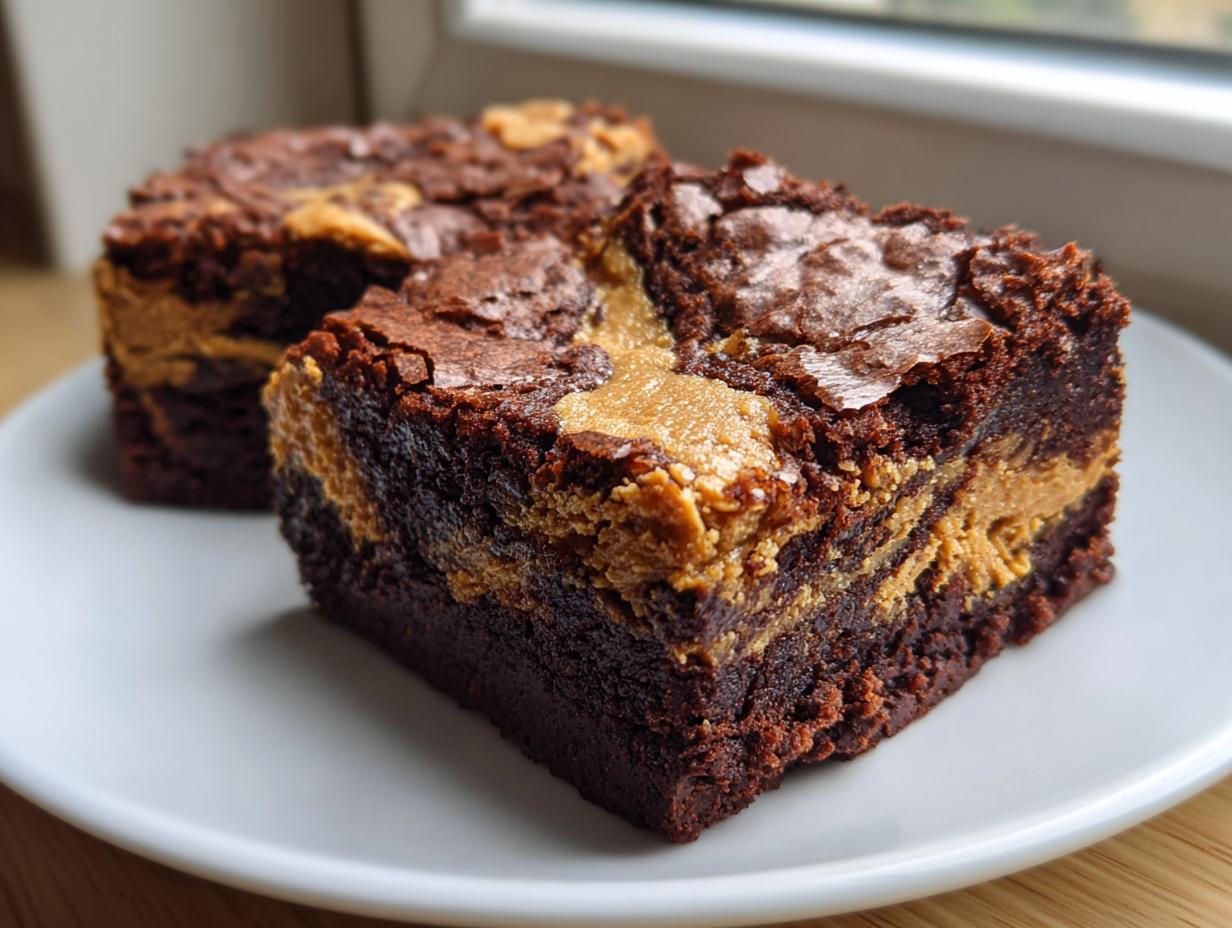
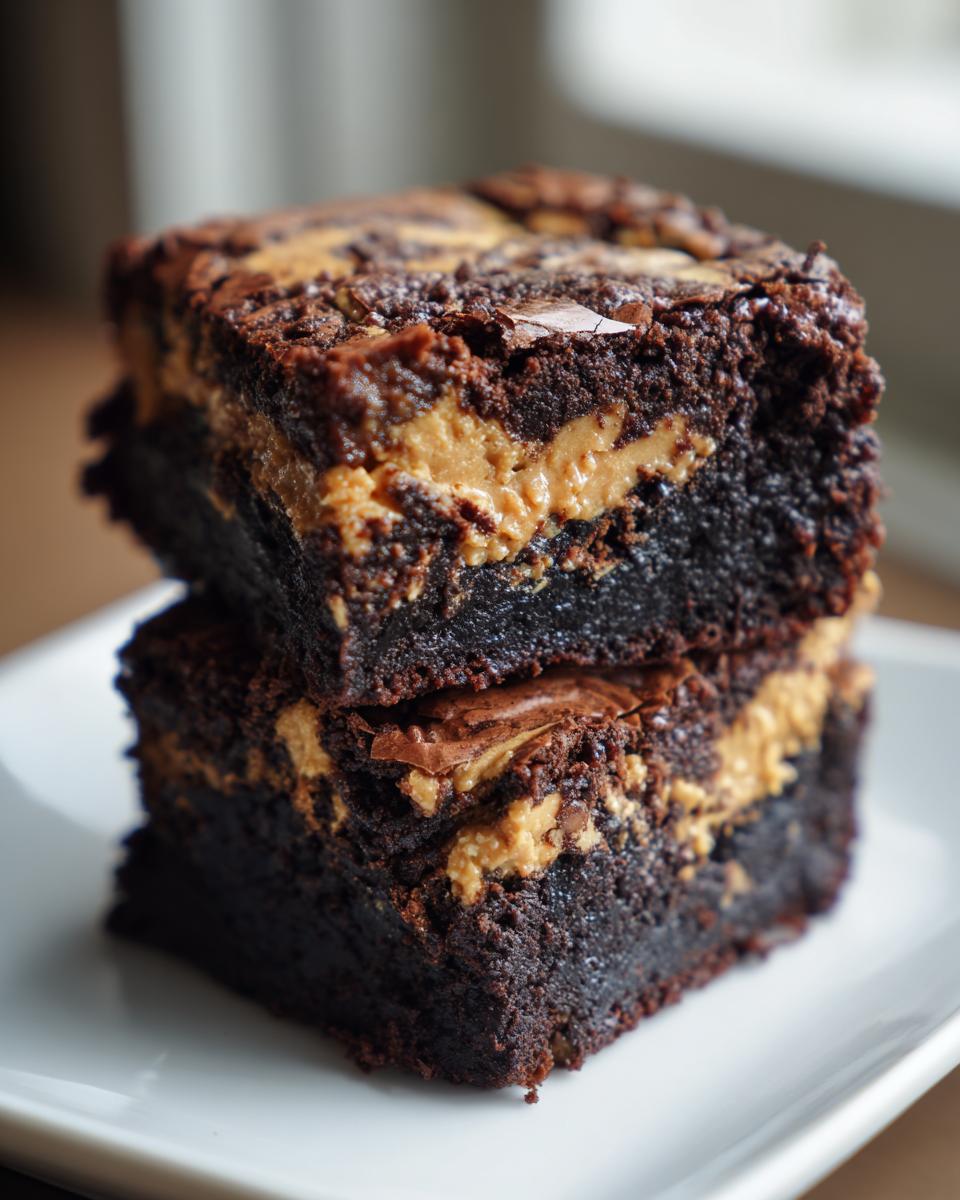
There are some flavor combinations that just feel like coming home, aren’t there? Chocolate and peanut butter are absolutely at the top of my list. When you marry that deep, velvety chocolate with creamy peanut butter, something truly special happens. Forget those dry, cakey brownies you sometimes see! We are aiming for decadence here, friends. I’m sharing what I genuinely believe are the ultimate fudgy peanut butter swirl brownies—the kind that stay moist for days and have that perfect, messy, marbled look when you cut into them. This recipe honors the hearty, comforting classics I grew up seeing on every Midwestern dessert table. If you’re looking for that ultimate, rich dessert baking experience that tastes like it came straight from a well-loved family cookbook, you’ve landed in the right spot. It requires the same care we put into making my signature fudgy brownies with a crackly top, but with an added burst of nutty goodness!
- Why You Will Love These Peanut Butter Swirl Brownies
- Gathering Ingredients for Your Peanut Butter Swirl Brownies
- Mastering the Chocolate Base for Fudgy Peanut Butter Swirl Brownies
- The Art of the Peanut Butter Swirl Dessert Technique
- Baking and Cooling Your Gooey Swirl Brownies
- Tips for Perfect Peanut Butter Swirl Brownies Every Time
- Storage and Reheating Instructions for Rich Dessert Recipes
- Frequently Asked Questions About Peanut Butter Brownies Recipe
- Serving Suggestions for Chocolate Peanut Butter Swirl
- Serving Suggestions for Chocolate Peanut Butter Swirl
Why You Will Love These Peanut Butter Swirl Brownies
I’m not trying to be dramatic, but these aren’t just *a* recipe; they are *the* recipe. They hit every single craving note. If you need a reason to stop what you’re doing and preheat that oven, here are mine:
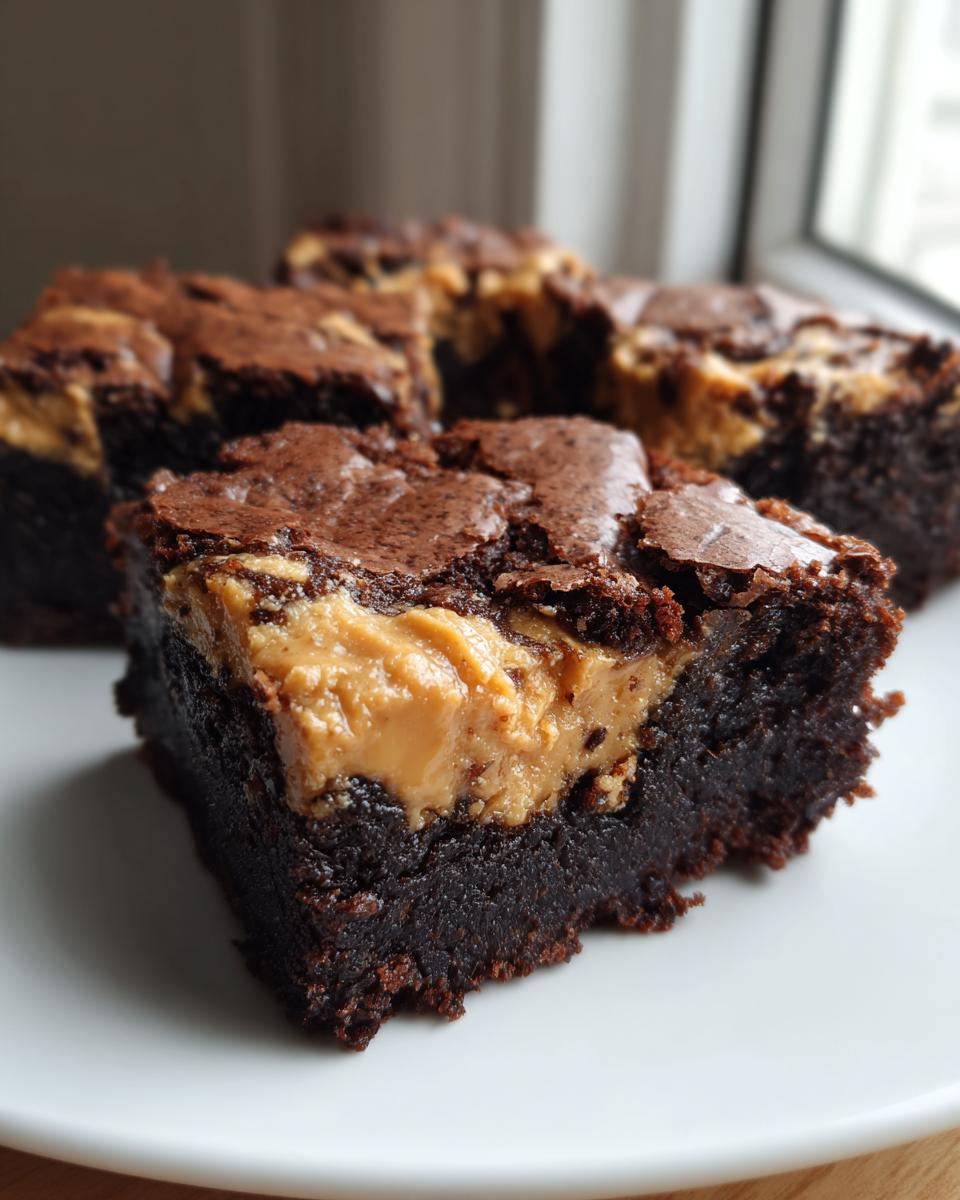
- They are outrageously fudgy and definitely on the gooey side—we are aiming for that molten center!
- That perfect marriage of rich, dark chocolate and sweet, salty peanut butter is simply unmatched.
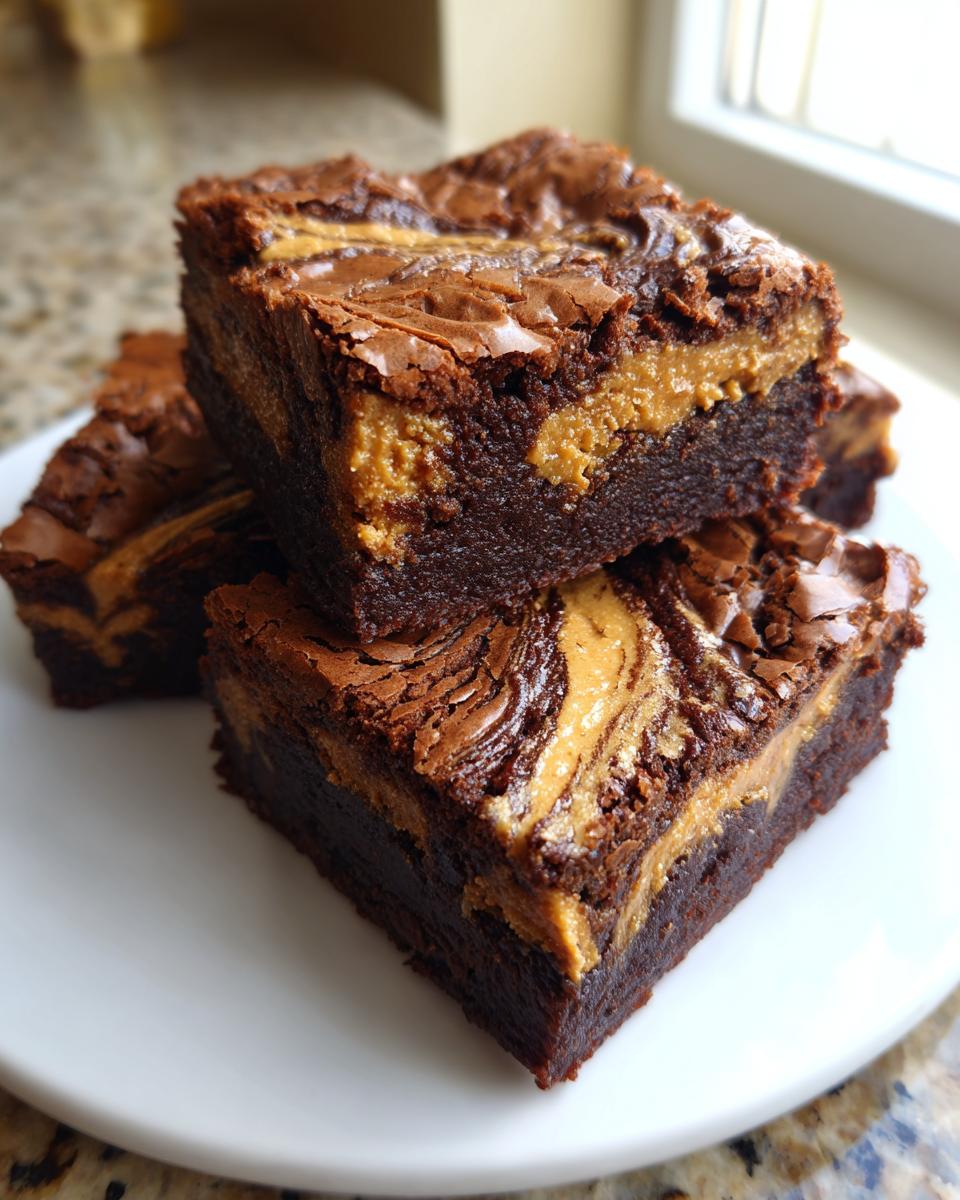
- You get that stunning, homemade marbled appearance without needing any complicated pastry skills. They look impressive, trust me!
- They are genuinely easy to put together, even on a weeknight when you need a serious comfort food baking fix.
Gathering Ingredients for Your Peanut Butter Swirl Brownies
When we talk about making homemade brownies that hit that perfect rich dessert recipe mark, quality ingredients are what make the difference between a decent snack and true comfort food baking bliss. For this version, we’re keeping the ingredient list short and sweet, just like the best traditional recipes should be, because the magic is truly in how we combine them. I want these to be the kind of Peanut Butter Brownies Recipe you keep forever!
You’ll notice we don’t use any fancy additions here—just straightforward ingredients that yield incredibly decadent results. If you want to see how I handle other nutty favorites, you should check out my recipe for Peanut Butter Cup Cookies!
Here’s exactly what you’ll need to pull together the base and that beautiful creamy topping for our Chocolate Peanut Butter Swirl:
Chocolate Brownie Batter Ingredients
- 1/2 cup (115g) unsalted butter (You want the real stuff for the best texture, trust me!)
- 1 cup (200g) granulated sugar
- 2 large eggs
- 1 teaspoon vanilla extract
- 1/3 cup (40g) unsweetened cocoa powder
- 1/2 cup (65g) all-purpose flour
- 1/4 teaspoon salt
- 1/4 teaspoon baking powder
For the Creamy Swirl
- 1/2 cup (120g) creamy peanut butter
Now, about that peanut butter: make sure you use the smooth, creamy kind! If you use natural peanut butter where the oil separates, you’ll end up with streaks of oily separation instead of those gorgeous, melty ribbons we’re aiming for in these Marbled Brownies. The conventional creamy style mixes into the batter so beautifully!
Mastering the Chocolate Base for Fudgy Peanut Butter Swirl Brownies
Okay, this is where the magic—and the fudginess—really starts. We have to treat our chocolate base gently if we want those Gooey Swirl Brownies to have that signature dense, melt-in-your-mouth texture. It all comes down to how we handle the fat and the flour. We are avoiding anything cakey here; we want that rich, deep chocolate flavor we get when we use good cocoa. If you’ve ever been tempted to just dump everything in one bowl, hold back! Slow and steady wins the brownie race here. Creating this rich chocolate batter reminds me a bit of building flavor in my famous homemade chocolate pudding—it takes patience!
Preparing the Pan and Oven
First things first, get that oven warming up to 350°F (175°C). You don’t want your batter sitting around waiting for the oven to catch up! I use an 8×8 inch square pan because it gives us the perfect thickness for these squares. Make sure you grease it really well, and then here’s my big secret for easy cleanup: line it with parchment paper, leaving an overhang on two sides. That overhang acts like built-in handles later, making lifting these decadent bars out so much cleaner. Trust me, wrestling a sticky, fudgy brownie out of the pan is no fun!
Combining Wet and Dry Components
We start on the stovetop, just low heat, to gently melt that butter—don’t let it sizzle! Stir in your sugar while it’s off the heat until it’s smooth. Then, whisk in those two eggs, one at a time, followed by the vanilla. That mixture should look glossy. In another bowl, just give your cocoa, flour, salt, and baking powder a quick whisk to break up any clumps. Now, here is the most crucial step for that fudgy texture: add the dry stuff to the wet stuff in stages, mixing ONLY until you see everything barely come together. I mean it—stop mixing the second you don’t see white flour streaks anymore. Overmixing develops gluten, which is great for bread, but terrible for achieving the dense, incredible result you want from a Moist Brownie Recipe like this one. I often finish the last few stirs by hand with a spatula.
The Art of the Peanut Butter Swirl Dessert Technique
Now that we have our luscious chocolate base ready, it’s time for the showstopper: marrying that chocolate with the peanut butter into those gorgeous, distinct ribbons! This is what separates a good brownie from truly special peanut butter swirl brownies. It’s all about layering and being deliberately gentle, which feels a bit against our instincts when we’re excited to bake, I know!
First, check your peanut butter. If it’s straight from a cold cupboard, it might be too stiff to drop nicely, so I usually microwave the 1/2 cup of creamy peanut butter for just about 10 to 15 seconds—just enough to soften it so it globs off the spoon easily, but definitely not long enough to make it runny. We want it pliable, not liquid.
Take half of your brownie batter and spread it into the prepared pan. Then, grab a spoon and drop dollops of that slightly warmed peanut butter evenly distributed right over the chocolate layer. Don’t try to cover every inch; think happy, random puddles.
Next, gently pour the remaining chocolate batter over the peanut butter dollops. You’ll notice the brown blobs peeking through, which is what we want! Now for the swirling—this is the expert tip that makes or breaks the visual appeal. Take a table knife or a thin skewer and cut through the batter in slow figure-eights or gentle S-shapes, moving only about half an inch deep into the batter. You only need to go through the layers two or three times total across the whole pan. If you keep cutting and churning, you’ll blend them completely, and you’ll end up with a dull, tan-colored mess instead of those striking marbled patterns. We are aiming for ribbons, not full integration!
If you love making other rich peanut butter delights, you absolutely have to save my recipe for Peanut Butter Fudge Recipe—it’s pure decadence in square form!
Baking and Cooling Your Gooey Swirl Brownies
Time for the oven! Pop that pan in where you’ve got it preheated to 350°F (175°C). Resist the urge to open the door constantly; these are sensitive little guys. They’ll need about 25 to 30 minutes. How do you know they’re done, especially if you want that ultimate fudgy texture? Well, the edges should look set, and that toothpick test is your best friend—but listen closely: you want the toothpick to come out with moist crumbs clinging to it, not wet batter, and definitely not bone dry! That tiny bit of moistness is what keeps these Gooey Swirl Brownies perfectly decadent.
Now, this next part is the hardest, but it’s non-negotiable for clean cuts. You must let these cool completely! I know, I know, the smell is intoxicating—maybe sneak a tiny corner piece hot from the pan like I do—but for nice, neat squares you can serve at a gathering, they need time to set up. I usually let them cool for an hour on the rack, and then I move the whole thing into the fridge for about an hour more. Trust me, chilling them solid helps the knife glide right through the melted peanut butter without tearing up your beautiful swirl. If you want to see another one of my favorite no-bake chilled desserts, check out my tips for the Brownie Refrigerator Cake!
Once they are chilled, grab those parchment paper handles and lift the whole block out. Use a sharp knife to slice them, and check out that pattern! Aren’t those ribbons from the perfectly moist fudgy recipe just stunning?
Tips for Perfect Peanut Butter Swirl Brownies Every Time
You know how much I love sharing the secrets that turn good baking into great baking! Even following the steps exactly, sometimes you want that extra ‘wow’ factor, whether it’s more fudge or a sharper design. Since these are such wonderful crowd pleasing desserts, I wanted to round up a few adjustments that really elevate these brownies from great to absolutely unforgettable. This is the kind of advice that gets passed down through generations of bakers!
Think of these not as changes, but as little ways to personalize your favorite Baking Classics Brownies. If you’ve mastered the basic recipe, try adding one of these next time you’re feeling inspired—maybe before tackling my rich Red Velvet Brownies recipe!
Achieving Next-Level Fudginess
The recipe as written is already dense and moist, but if you are truly dedicated to the fudgiest texture imaginable, I have one addition for you. Remember how I mentioned using melted chocolate chips in the notes? Seriously, do it! Cocoa powder gives you that deep chocolate color and flavor, but melted chocolate—especially a good quality semi-sweet or dark variety—gives you that smooth, fatty richness that guarantees a melt-in-your-mouth experience. Simply substitute about half of the sugar called for with an equal weight of finely chopped chocolate melted into the butter mixture. It adds body and richness without making the batter too runny.
Making Your Swirl Cleaner and Sharper
We talked about chilling the batter to help with the swirl, but let’s talk about the peanut butter itself. If you want those streaks to remain perfectly distinct ribbons and not bleed too much into the chocolate during the bake, you need to chill the peanut butter topping before you dollop it in. After you slightly warm it just to soften (remember, don’t make it liquid!), pop the bowl of peanut butter into the freezer for about 15 minutes. It will firm up just enough so that when you drop those spoonfuls onto the bottom batter layer, they hold their shape beautifully. When you pour the top layer of batter over them, they resist blending immediately, giving you that stunning contrast on top.
The Secret to That Shiny Top
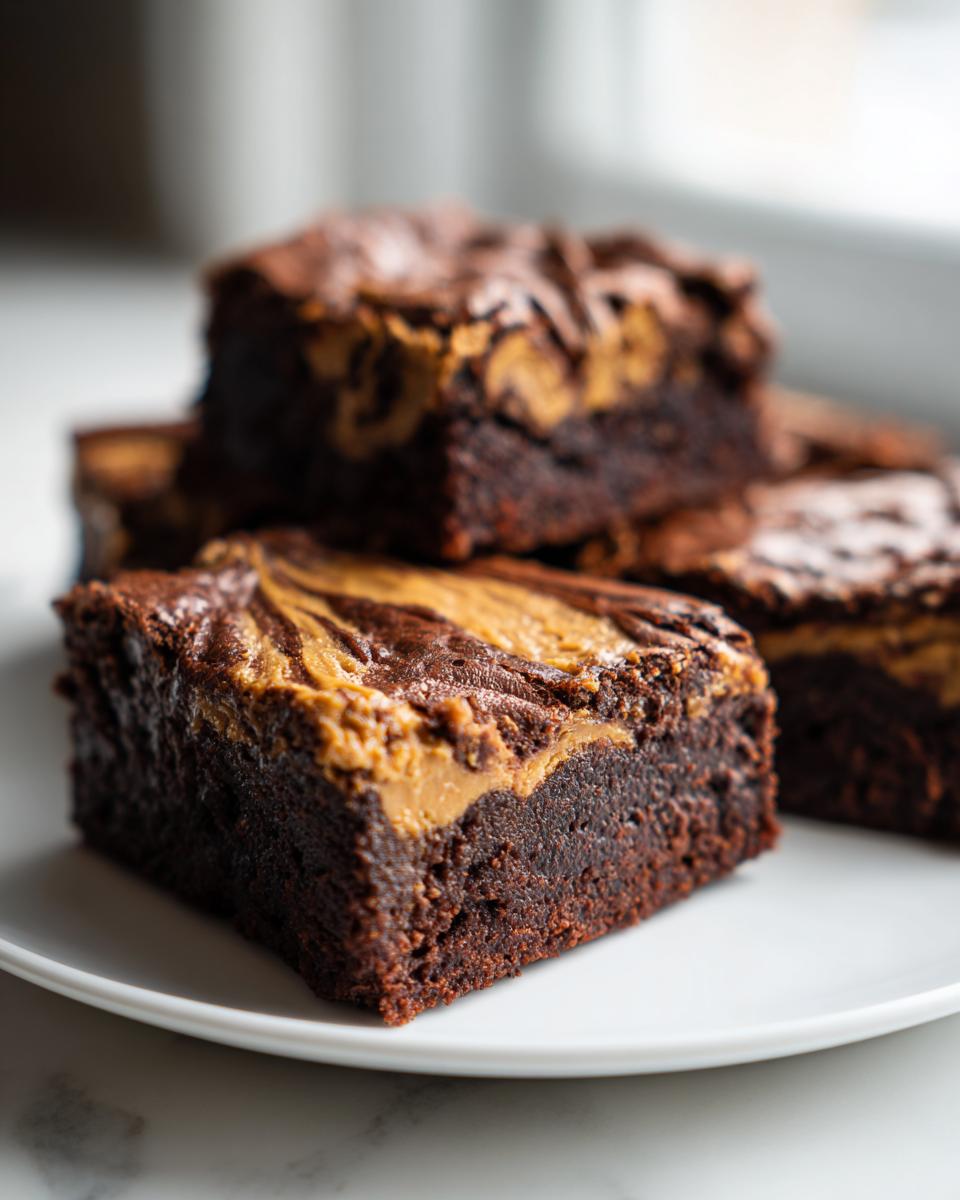
If you are looking for that super glossy, crackly top that people often mistake for being difficult—it’s not! It comes down to the sugar and the eggs. Make sure you are vigorously whisking the sugar and melted butter until it’s completely dissolved and smooth before you even touch the eggs. Then, when you add the eggs, whisk them in really well, just until the mixture is light in color and slightly thickened. That brief bit of intense mixing of sugar into the fat and egg mixture is what creates those micro-bubbles that pop during baking, leaving behind that beautiful, shiny, slightly crisp crust on your otherwise gooey center. It’s a little bit of elbow grease for a huge visual payoff in your Decadent Chocolate Baking!
Storage and Reheating Instructions for Rich Dessert Recipes
One of the best things about a true, rich dessert recipe like these peanut butter swirl brownies is that they actually taste *better* the next day! They have time for all those luscious chocolate and peanut butter flavors to really settle in and deepen. But, you have to store them right, or that glorious fudgy texture can turn sticky or dry out too fast. We certainly don’t want that after all this hard work!
Since these are incredibly moist—thanks to that wonderful peanut butter component—they don’t usually need refrigeration, which is great because cold brownies can get a little firm for my taste. The main goal is keeping air away from them so they don’t dry out around the edges.
Keeping Them Fresh at Room Temperature
For the best experience, I always store these decadent chocolate baking squares in an airtight container right on my counter. It sounds simple, but the airtight seal is everything! I usually line the bottom of my container with a sheet of parchment paper first, just to make sure nothing sticks underneath. They will stay perfectly soft and delicious at room temperature for about three to four days. Honestly, though, when I make a batch, they usually disappear within the first 48 hours!
Can You Freeze Peanut Butter Swirl Brownies?
Yes, you absolutely can freeze them! This is perfect if you are making them ahead for a big party or just want to have a single, decadent treat ready for a cozy night in later. The key here is wrapping them individually. Cut your cooled brownies into squares first, then wrap each one tightly in plastic wrap. After they are individually wrapped, I place about four or five of those wrapped squares into a heavy-duty freezer bag. They freeze beautifully for up to three months. They don’t really need reheating if you plan to eat them cold or let them thaw on the counter for an hour or so.
If you happen to be making a large batch and have leftovers you just can’t eat right away, you might want to try making a batch of my Easy No-Bake Ice Cream Pie next time—that’s for when you *definitely* need to store something long-term in the freezer!
A Quick Way to Soften Chilled Brownies
If you did decide they needed a trip to the fridge or freezer, and you want that fudgy texture back right away, resist microwaving them for too long! A quick 10 to 15-second zap in the microwave on a microwave-safe plate is usually enough time to bring that gooey center right back to life. If you are serving them warm, that time is perfect. Just watch them closely—we want soft centers, not lava!
Frequently Asked Questions About Peanut Butter Brownies Recipe
I know that when you’re following a tried-and-true recipe, sometimes little questions pop up right when you’re about to dive in. Don’t worry, that’s totally normal! I’ve gathered a few things folks often ask me about ensuring these Peanut Butter Swirl Dessert creations come out perfectly every time. I want your experience making these to be just as smooth as the peanut butter filling!
Can I substitute the creamy peanut butter?
This is the big one! If you try to use natural peanut butter—the kind where the oil separates and you have to stir it constantly—you’re going to have trouble. That natural oil won’t emulsify with the other ingredients properly, and you’ll end up with oily puddles instead of those gorgeous, soft ribbons running through your chocolate. Stick to the conventional, stabilized creamy peanut butter for the best swirl results in these gooey swirl brownies. If you’re keen on finding other great nutty snacks, my Easy Peanut Butter Cookies Recipe would be a fun next step!
How do I get a shiny top on my peanut butter swirl brownies?
Oh, that beautiful, crackly sheen! It’s one of my favorite parts of any great brownie. As I mentioned in the tips section, that shine comes mostly from how you handle the sugar and eggs. You need to whisk the sugar into the melted butter until it’s really smooth, and then give the eggs a good, vigorous whisking before adding the dry ingredients. That light aeration of the sugar mixture creates the magic crust as they bake. It’s definitely a key feature of any good indulgent chocolate fudge brownie!
Can I use a boxed brownie mix instead of making the base from scratch?
You absolutely can, especially if you are short on time and just craving a quick snack! If you do use a mix, you want to treat the peanut butter swirl topping exactly the same way—prepare the peanut butter until soft, dollop it on top of half the prepared batter, pour the rest of the mix over, and swirl gently. The biggest difference you’ll notice is that the homemade base tends to be denser and more fudgy than most commercial mixes, but you can certainly boost a boxed mix with this topping for a fast, crowd pleasing dessert!
My swirl disappeared! What did I do wrong?
Don’t feel bad; this happens to everyone when they first try to make marbled brownies! Most of the time, the swirl disappears for one of two reasons. First, you might have over-mixed the batter after you layered the peanut butter on. Remember, we only want two or three gentle passes with the knife—stirring too much blends the layers right back into a uniform color. The second reason is if your peanut butter was too hot or runny and melted immediately into the chocolate base before it even hit the oven. A slightly-warmed, but still chunky, peanut butter droplet is your best friend here!
Serving Suggestions for Chocolate Peanut Butter Swirl
Honestly, these Chocolate Peanut Butter Swirl brownies are often perfect just by themselves, maybe cooling slightly on a napkin after that crucial cutting stage. They are rich and decadent enough to stand alone! But, if you are serving them up as a proper dessert after dinner or for a fun gathering, dressing them up just a tiny bit can take them over the top.
Here are my favorite ways to serve these stunning squares:
- A simple dusting of powdered sugar immediately after cooling gives them a beautiful contrasting look against the dark swirl.
- Warm them up just slightly—maybe 15 seconds in the microwave—and serve with a scoop of good quality vanilla bean ice cream. The contrast between the cold cream and the warm, gooey center is heaven.
- For an extra adult treat, a little drizzle of salted caramel sauce on top pairs wonderfully with the peanut butter flavor.
No matter how you serve them, they are always a winner. If you are looking for another cozy beverage pairing, be sure to check out my recipe for Whipped Hot Chocolate—it’s creamy perfection on a chilly night, just like these brownies!
PrintUltimate Fudgy Peanut Butter Swirl Brownies: The Perfect Marbled Chocolate Treat
Make rich, fudgy chocolate brownies with a distinct, creamy peanut butter swirl. This recipe focuses on achieving a dense, moist texture and a beautiful marbled top for a decadent homemade dessert.
- Prep Time: 15 min
- Cook Time: 30 min
- Total Time: 45 min
- Yield: 9 servings 1x
- Category: Dessert
- Method: Baking
- Cuisine: American
- Diet: Vegetarian
Ingredients
- 1/2 cup (115g) unsalted butter
- 1 cup (200g) granulated sugar
- 2 large eggs
- 1 teaspoon vanilla extract
- 1/3 cup (40g) unsweetened cocoa powder
- 1/2 cup (65g) all-purpose flour
- 1/4 teaspoon salt
- 1/4 teaspoon baking powder
- 1/2 cup (120g) creamy peanut butter
Instructions
- Preheat your oven to 350°F (175°C). Grease and line an 8×8 inch baking pan with parchment paper, leaving an overhang for easy removal.
- In a medium saucepan over low heat, melt the butter. Remove from heat and stir in the granulated sugar until combined.
- Whisk in the eggs one at a time, mixing well after each addition. Stir in the vanilla extract.
- In a separate bowl, whisk together the cocoa powder, flour, salt, and baking powder.
- Gradually add the dry ingredients to the wet ingredients, mixing only until just combined. Do not overmix the brownie batter.
- Pour half of the brownie batter into the prepared pan and spread evenly.
- In a small bowl, slightly warm the creamy peanut butter if it is very stiff, making it easier to dollop.
- Drop spoonfuls of the peanut butter mixture over the batter in the pan.
- Pour the remaining brownie batter over the peanut butter layer.
- Use a knife or a skewer to gently swirl the peanut butter into the chocolate batter to create a marbled effect. Do not over-swirl; you want distinct ribbons.
- Bake for 25 to 30 minutes. A toothpick inserted near the edge should come out with moist crumbs, not wet batter, for a fudgy texture.
- Let the brownies cool completely in the pan on a wire rack before lifting them out using the parchment overhang and cutting them into squares.
Notes
- For an extra fudgy texture, use melted semi-sweet chocolate chips in addition to the cocoa powder.
- If you prefer a cleaner swirl, chill the peanut butter mixture slightly before dropping it onto the batter.
- These rich dessert recipes keep well stored in an airtight container at room temperature for up to four days.
Nutrition
- Serving Size: 1 brownie square
- Calories: 310
- Sugar: 28g
- Sodium: 150mg
- Fat: 18g
- Saturated Fat: 6g
- Unsaturated Fat: 12g
- Trans Fat: 0g
- Carbohydrates: 34g
- Fiber: 2g
- Protein: 7g
- Cholesterol: 45mg