
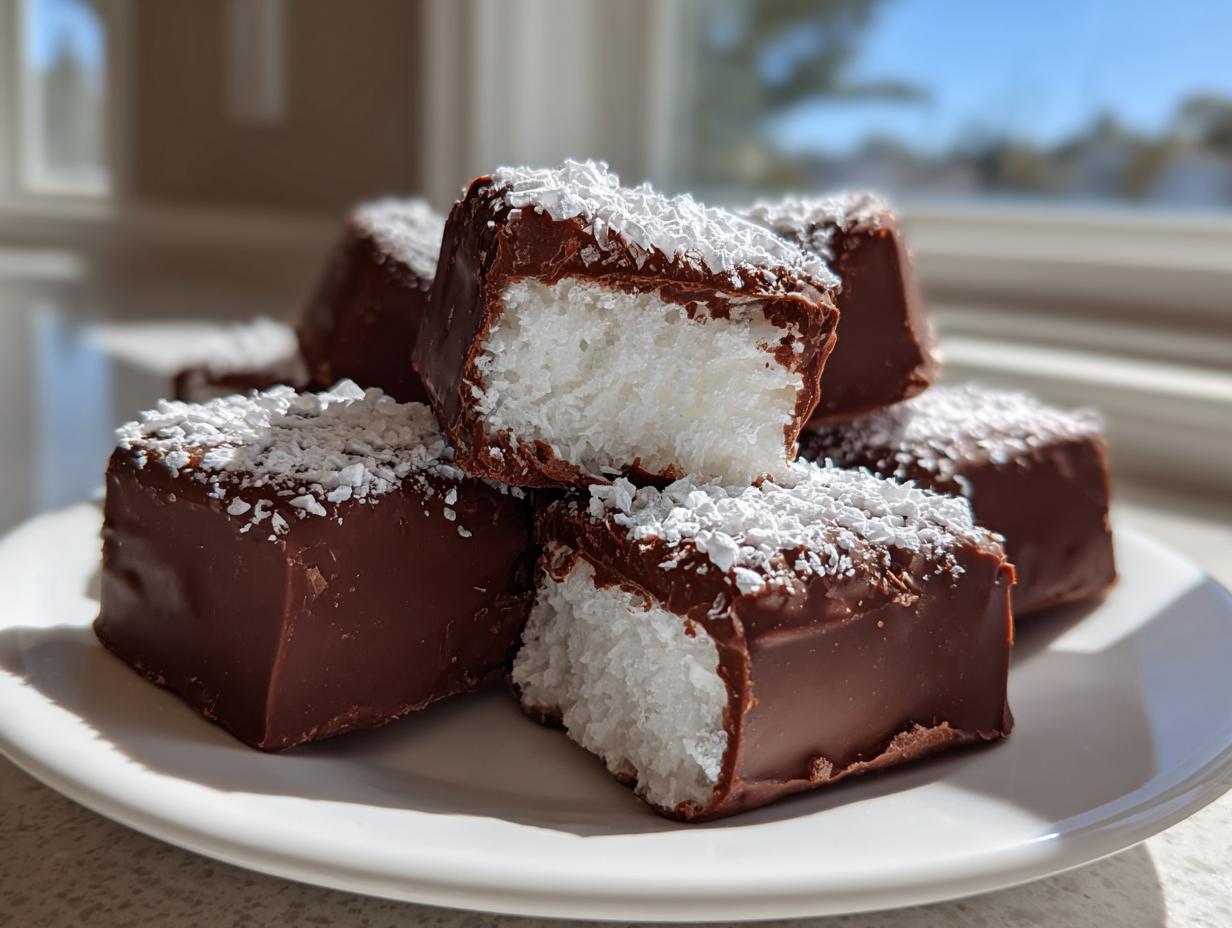
You know those flavors that just punch you right in the happy memory center? For me, it’s the light, airy sweetness of a perfectly made candy bar that somehow tastes like Christmas morning even in July. If you’re looking for a total sweet snack shortcut, you have hit the jackpot here! This **cool whip candy** recipe is legendary in our little corner of the internet because it’s no-bake, requires almost zero effort, and tastes unbelievably close to a fluffy 3 Musketeers bar. Here at Cookin’ Corner, Sarah Jane Thompson believes great food doesn’t need complication; it just needs care. Trust me, this is the simplest, most reliable way to get that melt-in-your-mouth dessert feeling without ever needing to turn on the oven. If you love this simple vibe, you simply must check out our recipe for ultimate chewy cookie bars too!
- Why You Will Make This Cool Whip Candy Again and Again
- Gathering Your Few Ingredients for Cool Whip Candy
- Step-by-Step Instructions for Cool Whip Candy
- Tips for Making the Best Easy Homemade Candy
- Storage and Freezing for Your Whipped Topping Candy
- Serving Suggestions for Your Cool Whip Candy
- Frequently Asked Questions About Cool Whip Candy
- Nutritional Estimate for This Simple Dessert Shortcut
- Share Your Quick Holiday Treats Experience
Why You Will Make This Cool Whip Candy Again and Again
Honestly, after a long week, who has the energy for complicated baking? That’s why this recipe rules the roost around here. It’s the definition of effortless indulgence. You can whip up the base in literally fifteen minutes before you even think about turning on the TV.
- It’s strictly **No Bake Candy Recipes** allowed! Pop it in the freezer and forget it.
- We are talking a true **3 Ingredient Desserts** situation—you probably have everything already.
- The texture is unbelievable—super light, fluffy, and just melts in your mouth. It’s truly an **Easy Fix Dessert**!
If you need a last-minute party contribution that looks way fancier than it is, this is your answer. Check out my foolproof no-bake ice cream pie if you love simple freezer sweets!
Gathering Your Few Ingredients for Cool Whip Candy
I love recipes that sound complicated but are actually just magic hiding in plain sight. This **Cool Whip Candy** is definitely one of those! Seriously, we’re talking about one of the simplest **3 Ingredient Desserts** you will ever pull together. You mostly just need the freezer to do the heavy lifting for you. You’ll want to grab your ingredients and make sure they are prepped right, because that’s where we lock in that amazing texture we are aiming for.
Here is exactly what you need to pull this off:
- One 8-ounce container of frozen whipped topping—and yes, it has to be thawed!
- One cup of powdered sugar, plus a little extra if you want that pretty snowy finish on top later.
- One full cup of semi-sweet chocolate chips for dipping.
If you want awesome cookies to go alongside your candy, you have to try my peanut butter cup cookies! They are another big winner in my house.
Ingredient Notes and Substitutions for Cool Whip Candy
Okay, let’s talk quality control, because this works best when we follow the rules just a tiny bit. The most important tip here is regarding the whipped topping. You MUST use the frozen kind that comes in a tub, not the pressurized can or the refrigerated tub style. Why? Because the frozen version has stabilizers that hold that beautiful, airy structure when it freezes solid. If you try the refrigerated type, your candy center will turn sad and soupy underneath that chocolate coating. Trust me, I learned that the hard way!
When it comes to the chocolate, semi-sweet gives the best counterbalance to the sugary middle, but you are certainly welcome to swap it out if you’re feeling adventurous. Milk chocolate chips work great if you want something sweeter. Or, if you really want to present a festive look, use white chocolate chips—you can even add a drop of food coloring to the melted white chocolate for a pop of color!
Step-by-Step Instructions for Cool Whip Candy
Alright, let’s get this show on the road! Since this is a **Sweet Snack No Oven** treat, our main work is mixing and freezing. It’s so straightforward you’ll be amazed at the result. First things first: grab an 8×8 inch pan. You absolutely need to line this with parchment paper, and make sure you leave a nice overhang on two sides. Think of it like handles—these handles are what you’ll use later to lift the whole frozen block out like a giant chocolate-covered slab. This parchment-paper sling is a lifesaver!
Next, we mix the fluffy center. Carefully fold that thawed whipped topping and the powdered sugar together. Then, press it all down firmly but gently into your prepared pan. Now, this is where patience comes in. Pop that pan into the freezer! It needs a solid three hours, minimum, until it’s rock hard. Once it’s firm, you use those parchment handles to lift it out, and then—careful now—cut it into small, bite-sized squares.
While those little squares are chilling out, melt your chocolate chips. I use the microwave for speed, but you have to pulse it—30 seconds at a time, stirring in between, or that chocolate will seize up faster than you can say *effortless sweets*. Once it’s smooth, get ready for the best part! If you want perfect looking **chocolate covered candy**, you have to dip fast. Make sure those little squares are straight from the freezer when they hit the hot chocolate. Let the extra chocolate drip off back into the bowl before placing them back onto fresh parchment to set up again in the freezer for about fifteen more minutes. If you are looking for another great no-bake winner, you have to try my cake mix cookie bars!
Mastering the Fluffy Center of Your Cool Whip Candy
This step is critical for getting that **3 Musketeers Copycat Recipe** texture. You are folding, not beating! When I first tried this years ago, I grabbed my electric mixer because I’m always rushing, and *whoosh*—the whole thing deflated into a sugary puddle. Oops! You have to gently fold the powdered sugar into the already-thawed topping. Use a rubber spatula and turn the mixture over onto itself slowly. You only want to combine them until you don’t see stark white pockets of topping anymore. If you overmix, you introduce air, and that air escapes in the freezer, turning your cloud-like center into something dense. Remember, we want that light, creamy, melt-in-your-mouth dessert feeling!
Achieving the Perfect Chocolate Covered Candy Coating
Dipping these frozen cubes requires speed and temperature management, which is why this recipe is such an awesome **Party Dessert Recipe**. The candy centers must be totally frozen—like little ice blocks. If they are even slightly soft, they will stick to your fingers or the chocolate will heat them up too fast and melt them into sad puddles.
When dipping, just place one frozen square onto a fork, dip it completely into the melted chocolate, and use the side of the bowl to scrape off any huge drips hanging off the bottom.
Pro tip: Work quickly! If you see the chocolate starting to look dull or thick while you are dipping, pop the bowl back in the microwave for 10 seconds. That little burst of heat keeps the chocolate flowing smoothly against that cold surface. It makes all the difference for a glossy, clean finished look!
Tips for Making the Best Easy Homemade Candy
Even though this is one of the easiest **Easy Homemade Candy** recipes out there, tiny little tweaks can take it from *good* to *absolutely unforgettable*. Since we are aiming for that light, fluffy, **3 Musketeers Copycat Recipe** texture, we need to pay attention right up until it’s ready to serve. Don’t skip the freezer time; seriously, that’s the secret sauce holding everything together!
Speaking of texture, when you’re cutting those frozen blocks, use a really sharp, thin knife. If your knife isn’t sharp, you’ll end up squishing the air out of the sides as you press down, and that defeats the purpose of our gentle folding technique! Wipe the knife clean between cuts—it keeps the chocolate coating looking nice and sharp on the sides.
Presentation is everything, especially when you’re serving these up for parties. Once you’ve dipped the candy and the chocolate is set, remember that little dusting I mentioned in the instructions? If you take a fine-mesh sieve and lightly dust the finished squares with extra powdered sugar, they look just magically snowy!
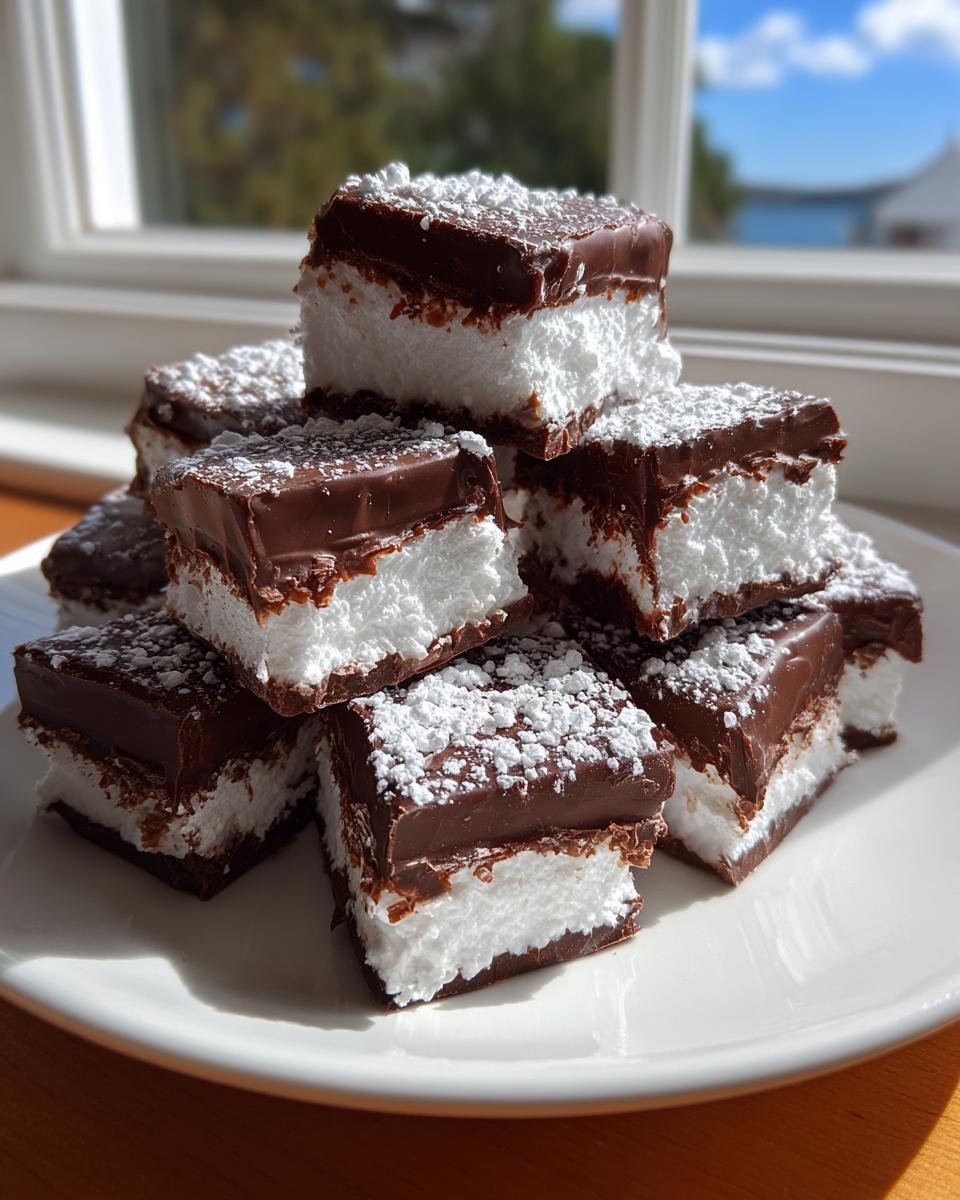
It gives the whole batch of **Whipped Topping Candy** a beautiful, professional finish, kinda like they came right out of a fancy candy shop window. It also keeps my tips for my amazing snickerdoodle cheesecake tucked away for next time!
If you want to see how another fantastic cook handles this, check out the tips over at Delish Craze! They have some great pointers on keeping things neat during the dipping process.
Storage and Freezing for Your Whipped Topping Candy
Since this is a frozen treat, storage is super simple, but you do have to keep it frozen if you want to maintain that amazing texture. These **Cool Whip Candy** pieces are rock-solid when they come straight from the freezer, which is exactly how we want them for the best experience! Think of these like ice cream—you can’t leave them sitting on the counter while you wait for guests, or you’ll end up with a sticky, chocolate-coated puddle.
The best way to keep these **No Bake Candy Recipes** perfect is in an airtight container. I usually layer them between sheets of wax paper or parchment paper inside a sturdy freezer-safe container. This stops them from sticking to each other, which is a major problem when they’re cold and slightly sticky from the chocolate!
How long do they last? Well, honestly, they rarely last longer than a week in my house, but they should hold their texture beautifully for up to two months in the freezer. Because they are so easy, I always make a double batch around the holidays—one to eat immediately and one to squirrel away for those random mid-January cravings we all get. If you’re into making desserts that stay perfect in the fridge or freezer, you need to check out my recipe for a brownie refrigerator cake!
Serving Suggestions for Your Cool Whip Candy
You’ve gone through the effort—the folding, the freezing, the dipping—so now you have to show off these little nuggets of joy! These **Cool Whip Candy** pieces are tiny, decadent, and feel wonderfully indulgent, making them perfect for almost any occasion. Since they are frozen, they hold up beautifully on a big platter, which is why they immediately upgrade any spread.
They are a must-have centerpiece on any of your big **Holiday Dessert Trays**. Seriously, mix them in with fudge, some homemade peanut butter cups (if you have the energy!), and maybe some shortbread cookies. The contrast between the chewy and the fluffy in this candy is amazing.
Because they are so rich and sweet, they actually make fantastic little after-dinner bites. I love serving them when we host friends for coffee in the afternoon. Just three little squares next to a warm mug of coffee? Perfection. They aren’t too heavy, so they don’t weigh you down, but they satisfy that deep, sweet craving.
If you are hosting a big party, they slot right into your collection of **Party Dessert Recipes** because they are individually portioned—no cutting required when they come out of the freezer! Just grab and go. They pair equally well with a hot beverage. Speaking of delicious drinks, if you ever want to take your hot chocolate game up a notch, you have to try my recipe for whipped hot chocolate. It’s just as easy as this candy!
Frequently Asked Questions About Cool Whip Candy
Can I use real whipped cream instead of the frozen whipped topping?
Oh, honey, I really wouldn’t advise it for this recipe. The magic in this **Cool Whip Candy**—especially if you want that **Chewy Nougat Candy Copycat** texture—comes from the specific stabilizers in the frozen whipped topping. Real heavy cream, even if you whip it yourself, won’t freeze up with the same structure. It tends to get icy or separate when totally frozen and then thawed again. If you want that light, fluffy center that’s almost like a cloud, stick with the store-bought frozen tub stuff. It’s one of those simple dessert shortcuts that just works!
How long will this candy last if stored properly?
Because this is a frozen treat, it lasts a good while, which makes it amazing for making ahead! If you keep your **Creamy Frozen Candy** tightly sealed in an airtight container, laid between sheets of parchment paper so they don’t fuse together, they stay perfect in the freezer for up to two months. I always try to finish them within four weeks, just because I can’t resist them, but they definitely last longer! They are one of the best **Quick Holiday Treats** because you can make them weeks before the big event.
What happens if I skip the chocolate coating entirely?
Well, you still have a delicious, sweet, frozen puff of sugar, but you miss out on that key element that truly makes it feel like a candy bar! Without the chocolate, you just have the frozen filling. It will be extremely sticky and soft much faster once it hits room temperature. The chocolate coating acts like a shell, making them easier to handle and giving you that satisfying snap against the soft interior. If you skip the chocolate, you need to make sure you serve them immediately straight from the freezer, maybe dusting them extra heavily with powdered sugar for presentation.
Is it possible to get a firmer texture, more like fudge?
This recipe is designed specifically for that light, airy, melt-in-your-mouth experience, so getting it truly firm like fudge is tricky because of the whipped topping. If you really wanted a firmer texture, you’d have to fundamentally change the recipe and use melted marshmallows instead of whipped topping, which turns it into a traditional nougat recipe. If you love making recipes where you don’t need the oven but want something richer and firmer than this puff, you should check out my recipe for easy dirt cake—it’s dense and decadent!
Nutritional Estimate for This Simple Dessert Shortcut
Now, I know some of you are watching macros, and some of you just want to know what you’re getting into when you sneak one of these little treasures! Since this **Cool Whip Candy** is made with such simple ingredients—powdered sugar, whipped topping, and chocolate—the numbers are fairly straightforward for a sweet treat. Remember, because this is such a fun, **Simple Dessert Shortcut**, these are just estimates based on standard grocery store brands and how many pieces we get out of the batch.
Here is the estimated breakdown per serving piece:
- Calories: 120
- Sugar: 14g
- Fat: 7g
- Protein: 1g
- Carbohydrates: 15g
- Sodium: 15mg
It’s important to note that these figures are approximations for one piece (we yield about 24 servings). The actual numbers can shift a little depending on the exact brand of chocolate chips you use for your **Chocolate Covered Candy** coating. Basically, it’s a light and sweet indulgence perfect for your **Holiday Dessert Trays**!
If you’re after something a little lighter but still sweet, you might enjoy my recipe for an easy moist plum cake—it cuts down on some of that rich chocolate.
Share Your Quick Holiday Treats Experience
Now that you’ve seen just how simple it is to whip up these soft, chocolate-covered bites, I really, truly want to hear from you! This **cool whip candy** has been a staple in my freezer for years, and knowing it’s out there bringing smiles to your kitchen is the best part of running Cookin’ Corner.
Did you try the **3 Musketeers Copycat Recipe**? Did you dust them with that extra powdered sugar for a cool, snowy look? Tell me everything!
Jump down into the comments section below and let me know how they turned out. I love seeing your photos, so if you share your creations on social media, please tag us! It helps other bakers see just how reliable and amazing these **Quick Holiday Treats** truly are.
If you’re looking for another super simple option for your next dessert spread, you have to try my easy crescent roll apple dumpling recipe—it’s warm, sweet, and totally different!
And hey, if you took inspiration from this recipe and shared it with friends, feel free to send them over to check out other fantastic versions, like the one found on Princess Pinky Girl’s site! Happy sweet making, everyone!
PrintEasy 3-Ingredient Cool Whip Candy (3 Musketeers Copycat)

Make this simple, no-bake Cool Whip Candy that tastes like a fluffy 3 Musketeers bar. It uses only three ingredients for a creamy, melt-in-your-mouth treat perfect for holiday trays or quick desserts.
- Prep Time: 15 min
- Cook Time: 5 min
- Total Time: 3 hr 20 min
- Yield: About 24 pieces 1x
- Category: Dessert
- Method: Freezing
- Cuisine: American
- Diet: Vegetarian
Ingredients
- 1 (8 ounce) container frozen whipped topping, thawed
- 1 cup powdered sugar, plus more for dusting
- 1 cup semi-sweet chocolate chips
Instructions
- Line an 8×8 inch pan with parchment paper, leaving an overhang for easy removal.
- In a large bowl, gently fold the thawed whipped topping and powdered sugar together until just combined. Do not overmix, or the topping will deflate.
- Press the mixture evenly into the prepared pan.
- Freeze the mixture for at least 3 hours, or until firm enough to cut.
- Remove the block from the pan using the parchment overhang and cut it into small, bite-sized squares.
- Melt the chocolate chips in a microwave-safe bowl in 30-second intervals, stirring until smooth.
- Dip each frozen candy square into the melted chocolate, allowing excess to drip off. Place the coated candies back onto the parchment-lined pan.
- Return the chocolate-covered candy to the freezer until the chocolate sets completely, about 15 minutes.
- Before serving, you can lightly dust the candies with extra powdered sugar for a snowy look. Store leftovers in an airtight container in the freezer.
Notes
- For the best light and fluffy texture, make sure your whipped topping is fully thawed but still cold when you mix it.
- If you prefer a different coating, you can use milk chocolate or white chocolate chips instead of semi-sweet.
- This recipe is a great budget friendly candy option for parties.
Nutrition
- Serving Size: 1 piece
- Calories: 120
- Sugar: 14g
- Sodium: 15mg
- Fat: 7g
- Saturated Fat: 4g
- Unsaturated Fat: 3g
- Trans Fat: 0g
- Carbohydrates: 15g
- Fiber: 0g
- Protein: 1g
- Cholesterol: 5mg