
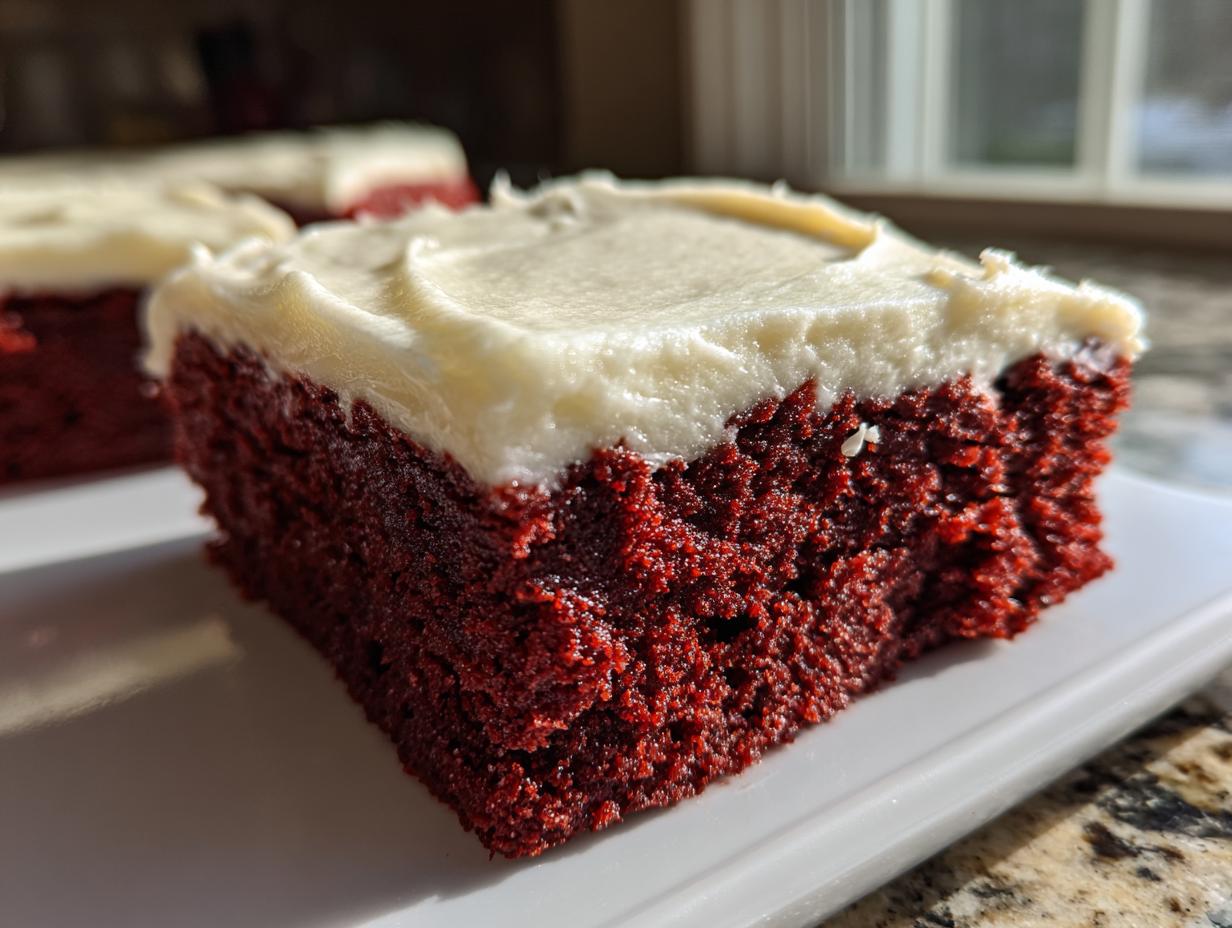
Oh, trust me on this one—some desserts just hit different, especially when they promise pure decadence without fuss! If you’ve ever dreamed of biting into something that has the rich chocolate flavor of a classic brownie but the gorgeous color and tang of red velvet cake, you’re in the right place. We’re making the ultimate **red velvet brownies** today, topped with that dreamy, slightly tart cream cheese frosting.
This recipe is all about bringing that beautiful, bakery-style magic into your own kitchen. Just like my grandmother taught us back home, the best food is made with care, turning simple ingredients into real moments of joy. These fudgy bars are perfect for spoiling the ones you love, whether it’s for Valentine’s Day or just a Tuesday craving. We’re going to nail that perfect chewy texture and vibrant look! If you love the richness here, you might want to check out my chocolate raspberry cake recipe too.
- Why This is the Ultimate Recipe for Fudgy Red Velvet Brownies
- Gathering Ingredients for Rich Red Velvet Brownies
- Step-by-Step Instructions for Bakery Style Red Velvet Brownies
- Tips for Success with Homemade Red Velvet Brownies
- Serving Suggestions for Your Red Velvet Brownies
- Storage and Keeping Red Velvet Brownies Fresh
- Frequently Asked Questions About Red Velvet Brownies Recipe
- Estimated Nutritional Data for Red Velvet Brownies
- Share Your Decadent Red Velvet Brownies Creations
Why This is the Ultimate Recipe for Fudgy Red Velvet Brownies
So, why should you drop everything and bake these instead of grabbing a box mix? Because these deliver that intensely rich, deeply satisfying bite that separates a good brownie from a truly amazing one. We’re talking about texture that rivals any proper chocolate cheesecake ultimate no-bake recipe. These **red velvet brownies** hit that perfect trifecta: incredible fudginess, that signature bold red, and the perfect creamy topping!
If you want Bakery Style Brownies, you have to pay attention to the little details. These tricks are what separate my batch from a dry, crumbly mess. That tang from the frosting cuts right through the rich chocolate perfectly, too!
Achieving the Perfect Fudgy Texture in Red Velvet Brownies
The secret to not ending up with cake in a pan is simple ratios. We need more fat—lots of butter and sugar—and less flour than you might think is appropriate. When you’re mixing, go easy, especially after the flour comes in. If you mix too much, you develop gluten, and gluten means chewy cake rather than those amazing, gooey Fudgy Brownies. Seriously, just mix until you don’t see white streaks anymore. That’s it!
Tips for Vibrant Color in Your Red Velvet Brownies
Look, red velvet needs to look the part, right? A tiny splash of liquid food coloring just won’t cut it here; you’ll end up with a sad, muddy pink. My absolute rule for getting that deep, stunning hue in these **red velvet brownies** is to use gel coloring, not the liquid stuff you find in the little plastic bottles. Gel is super concentrated, so I use way less, and it doesn’t water down the batter one bit. Mix that into your buttermilk first—it dissolves beautifully!
Gathering Ingredients for Rich Red Velvet Brownies
Alright, it’s time to talk supplies! For these truly rich **red velvet brownies**, you can’t just throw things in a bowl haphazardly. We need precision, darling, especially when we’re aiming for that perfect texture. I’ve broken the list down so you know exactly what goes into the dark chocolate base and what makes that tangy topping sing. Make sure your butter is right, your sugar is packed, and your coloring is top-notch! If you’re ever unsure about cream cheese techniques, my cream cheese pound cake recipe has lots of tips on softening dairy just right.
Ingredients for the Decadent Red Velvet Brownies Base
For the body of the brownie that’s going to taste like heaven, grab these items:
- 1 cup (2 sticks) unsalted butter, make sure it’s melted!
- 1 3/4 cups granulated sugar
- 1 cup packed light brown sugar (don’t skimp on packing it!)
- 4 large eggs
- 1 tablespoon vanilla extract
- 1 teaspoon white vinegar
- 2 1/4 cups all-purpose flour
- 1/2 cup unsweetened cocoa powder
- 1 teaspoon salt
- 1 teaspoon baking powder
- 2 tablespoons of red food coloring (Seriously, get the gel kind!)
- 1/2 cup buttermilk
Ingredients for the Tangy Cream Cheese Frosting
This part is crucial for cutting the richness. Remember, we need the cream cheese and butter softened—room temp is key here so you don’t end up with lumps!
- 1/2 cup cream cheese, softened
- 2 tablespoons unsalted butter, softened
- 1 1/2 cups powdered sugar
- 1/2 teaspoon vanilla extract
- 1 tablespoon milk or heavy cream
Step-by-Step Instructions for Bakery Style Red Velvet Brownies
Okay, we have our beautiful ingredients, now let’s get these **red velvet brownies** into the oven! Remember, baking is theater, and presentation starts before you even turn on the heat. We are going for that perfect, gooey center, and the steps matter a lot!
Preparing the Pan and Mixing the Wet Ingredients
First things first: Preheat your oven to 350°F (175°C). This is non-negotiable! Next, grab your 9×13 inch pan. I always line mine completely with parchment paper, making sure I leave that big overhang on the sides—that’s your secret handle for lifting the whole slab out later. Grease that paper lightly, just in case. Then, in a big bowl, get that melted butter, granulated sugar, and the packed brown sugar whisked together until they look smooth, almost like wet sand. Whisk well!
Combining Dry Ingredients and Achieving the Red Velvet Batter
In a separate bowl, give your flour, cocoa powder, salt, and baking powder a quick whisk; this keeps everything evenly distributed. Now, back to the butter mixture: add your eggs one by one, then the vanilla and vinegar. When adding the dry stuff, only mix until it *just* comes together—I mean it! If you mix too much now, they turn cakey, and we want fudgy, remember? Finally, mix your buttermilk and that lovely red food coloring until the color is deep and uniform, then gently fold that into the main batter until any streaks disappear.
Baking Times and Testing for Fudgy Red Velvet Brownies
Pour that gorgeous batter into your prepared pan nice and evenly. Pop them into that 350°F oven for about 25 to 30 minutes. Here’s the fudgy secret: don’t bake them until a toothpick comes out clean! If it’s clean, they are overdone. You want that toothpick to come out with some moist, sticky crumbs clinging to it when you test near the center. Pull them out right when you see that—they keep baking a little bit on the counter!
Making and Applying the Cream Cheese Frosting
This is the best part! Let those brownies cool completely. I mean *completely*—if they are even warm, the frosting will slide right off into a sticky mess. While they chill out, beat your softened cream cheese and butter until it looks smooth. Slowly add the powdered sugar, vanilla, and milk until it’s light and fluffy enough to spread. Once the brownies are totally cool, spread that tangy topping over the top evenly. For super clean slices of your decadent brownies, pop them in the fridge for about 30 minutes after frosting!

Tips for Success with Homemade Red Velvet Brownies
Even the best recipes need a little nudge sometimes, right? These tips are little things I learned over years of baking because, honestly, I mess things up too! But these tricks guarantee you get those rich, **red velvet brownies** everyone talks about, not just a regular chocolate bar. You want these to taste like they came straight from that high-end bakery downtown, and it’s totally doable!
If you’ve read my notes on the apple spice cake recipe, you know I preach using the best ingredients I can find. That principle applies just as much here!
Ingredient Quality and Cocoa Powder Choice
Please, please, please don’t use your dusty old can of generic cocoa powder if you can help it. Since the red color slightly dulls the chocolate flavor, the cocoa you use really has to stand up for itself. I always reach for a Dutch-processed cocoa if I can find it for these brownies because it gives such a deep, intense chocolate foundation. It makes everyone ask what kind of chocolate you used!
Alternative: Making Cream Cheese Swirl Brownies
Now, if you find the idea of a thick layer of frosting a little too much sweetness—though I personally love it—you have an easy out! Instead of frosting the cooled sheet, you can do a cream cheese swirl before baking. Just take that cream cheese mixture and dollop it right over the raw batter. After that, take a knife or a skewer and gently swirl it around until you get lovely marbled ribbons in your **red velvet brownies**. It gives you that tangy flavor everywhere!
Serving Suggestions for Your Red Velvet Brownies
These absolute showstoppers of **red velvet brownies** are rich enough to stand alone, but I always love serving mine slightly warm with something cold on the side. Because they have that rich chocolate base and tangy frosting, they pair perfectly with bright, sharp flavors. If you’re serving these up around Christmas time, you have to try them with a tall glass of my non-alcoholic Christmas punch recipe!
For real indulgence, especially when these are headed out as Valentine Desserts, a scoop of vanilla bean ice cream is divine. If it’s a hot day or you just want something truly decadent, smash one of these fudgy squares into a bowl with my frozen hot chocolate recipe. It turns dessert into an experience!
Storage and Keeping Red Velvet Brownies Fresh
Now that you’ve made these perfect **red velvet brownies**, you need to know how to keep them tasting fantastic! Since we have that beautiful, soft cream cheese frosting on top, we can’t just leave them sitting out on the counter forever, or the frosting starts to get a little… sad. For the best results and to keep that tang sharp, airtight storage is your friend.
I always store mine in a single layer—if you stack them, the frosting definitely sticks to the layer above! They do great in the fridge for up to four days. The cold keeps the frosting firm and happy. If you want to serve one later, just set it out on the plate for about 20 minutes before taking a bite. It softens up just beautifully!
Frequently Asked Questions About Red Velvet Brownies Recipe
I know sometimes the best recipes still leave you with a few little nagging questions once you get to baking! That’s totally normal when you’re working with delicate textures like these. I’ve gathered up the most common things people ask me when they are making their first batch of these **red velvet brownies** to ensure you have total confidence.
How do I ensure my red velvet brownies are fudgy and not cakey?
This is the big one, isn’t it? The secret sauce for amazing Fudgy Brownies is all about keeping the fat high and the handling low! Don’t overmix once you start adding the flour and cocoa mixture. You are aiming for a barely combined batter texture. If you whip it too much, you build structure, and that means cake, not the gooey centers we want. Stop mixing as soon as you see the last streaks of dry ingredients disappear!
Can I make these red velvet brownies without buttermilk?
Oh, I completely get it; buttermilk isn’t always in everyone’s fridge! You can absolutely make a quick substitute right in your measuring cup. Just take your regular milk—or even just water in a pinch—and add about a teaspoon of white vinegar or lemon juice for every half cup of milk you need. Give it a quick stir and let it sit for five minutes. You’ll see it curdle a tiny bit, and boom—you have the necessary acid to make the baking powder do its job without making the brownies too dense!
What is the best way to cut clean squares from cream cheese brownies?
This is a battle I have fought many times! Trying to cut through thick frosting and a fudgy base with warm brownies is a recipe for disaster—you get crumbs and messy edges. The absolute best way to get those gorgeous, clean, bakery-style squares is to refrigerate the fully frosted brownies for at least 30 minutes before you slice them. A sharp, thin knife works even better if you wipe the blade clean between every single cut. It really helps keep that frosting looking sharp!
Estimated Nutritional Data for Red Velvet Brownies
Now, let’s talk about the numbers, though I always say the flavor is the most important metric! Because we are using rich ingredients like butter and sugars, these **red velvet brownies** are definitely an indulgence, and they come tagged for sharing with family and friends—not for counting strict macros! Just remember that these figures are estimates based on dividing the recipe into 16 squares, and your exact numbers might wiggle around a bit depending on your frosting thickness.
Here’s a quick look at what you can expect per delicious square:
- Calories: Around 350
- Fat: Roughly 20g
- Carbohydrates: About 40g
- Protein: Close to 4g
This is just a ballpark, of course. If you skip the thick cream cheese frosting and go for just a light dust of sugar, those numbers change fast! Enjoy them responsibly, or don’t, I won’t tell!
Share Your Decadent Red Velvet Brownies Creations
That’s it! You have made the most incredible, fudgy dessert. I truly hope you love these **red velvet brownies** as much as my family does!
Now, this is where the fun starts for me—I need to know how yours turned out! Did you go for the thick frosting or a lighter swirl? Please drop a comment below and tell me what you thought. If you snapped a beautiful photo of your vibrant red squares, feel free to share it! You can always reach out if you have any questions via my contact page, but I bet you nailed it!
PrintFudgy Red Velvet Brownies with Tangy Cream Cheese Frosting
Make rich, fudgy red velvet brownies with a vibrant color and top them with a simple, tangy cream cheese frosting for a decadent homemade dessert.
- Prep Time: 20 min
- Cook Time: 30 min
- Total Time: 50 min
- Yield: 16 brownies 1x
- Category: Dessert
- Method: Baking
- Cuisine: American
- Diet: Vegetarian
Ingredients
- 1 cup (2 sticks) unsalted butter, melted
- 1 3/4 cups granulated sugar
- 1 cup packed light brown sugar
- 4 large eggs
- 1 tablespoon vanilla extract
- 1 teaspoon white vinegar
- 2 1/4 cups all-purpose flour
- 1/2 cup unsweetened cocoa powder
- 1 teaspoon salt
- 1 teaspoon baking powder
- 2 tablespoons red food coloring (gel preferred)
- 1/2 cup buttermilk
- 1/2 cup cream cheese, softened (for frosting)
- 2 tablespoons unsalted butter, softened (for frosting)
- 1 1/2 cups powdered sugar (for frosting)
- 1/2 teaspoon vanilla extract (for frosting)
- 1 tablespoon milk or heavy cream (for frosting)
Instructions
- Preheat your oven to 350°F (175°C). Line a 9×13 inch baking pan with parchment paper, leaving an overhang for easy removal. Lightly grease the paper.
- In a large bowl, whisk together the melted butter, granulated sugar, and brown sugar until combined.
- Whisk in the eggs one at a time until fully incorporated. Stir in the vanilla extract and white vinegar.
- In a separate bowl, whisk together the flour, cocoa powder, salt, and baking powder.
- Gradually add the dry ingredients to the wet ingredients, mixing until just combined. Do not overmix.
- In a small bowl, mix the buttermilk and red food coloring until you achieve a deep red color. Gently fold the red buttermilk mixture into the batter until streaks disappear.
- Pour the batter into the prepared pan and spread evenly.
- Bake for 25 to 30 minutes. The edges should look set, and a toothpick inserted near the center should come out with moist crumbs attached for a fudgy texture.
- Let the brownies cool completely in the pan on a wire rack.
- Prepare the frosting: In a medium bowl, beat the softened cream cheese and butter until smooth. Gradually beat in the powdered sugar until fully combined. Add the vanilla extract and milk/cream, beating until the frosting is light and fluffy.
- Once the brownies are completely cool, spread the cream cheese frosting evenly over the top.
- Cut into squares and serve.
Notes
- For an extra rich chocolate flavor, use high-quality cocoa powder.
- If you prefer a cream cheese swirl instead of frosting, reserve half of the batter, mix the cream cheese mixture into the remaining half, then swirl the two batters together before baking.
- Chill the brownies for 30 minutes after frosting for cleaner cuts.
Nutrition
- Serving Size: 1 brownie
- Calories: 350
- Sugar: 35
- Sodium: 250
- Fat: 20
- Saturated Fat: 12
- Unsaturated Fat: 8
- Trans Fat: 0.5
- Carbohydrates: 40
- Fiber: 1
- Protein: 4
- Cholesterol: 75