
Sometimes, the best luxuries in life are the simplest ones, aren’t they? I remember watching my grandma in our Midwest kitchen, taking time for every single step, but for those cozy winter evenings, we sometimes needed something quick that still felt truly special. That’s where this amazing whipped hot chocolate comes in! It’s the ultimate shortcut to cafe-style luxury without needing a fancy espresso machine or a long ingredient list. Trust me, you need this indulgent chocolate treat in your rotation.
This recipe proves that you can transform warm milk into something decadent in under 10 minutes using just a handful of common pantry staples. We aren’t messing around with complicated steps here; we’re just aiming for that perfect, creamy, airy cloud of cocoa goodness floating right on top of rich, warm milk. It’s pure, heartwarming magic, straight from my corner to yours. If you love slow cooker recipes like our Crockpot Hot Chocolate, this quick version is the perfect counterpart for a busy weeknight!

- Why This 3-Ingredient Whipped Hot Chocolate Recipe Works (The Cookin’ Corner Difference)
- Gathering Ingredients for Your Whipped Hot Chocolate
- Step-by-Step Instructions for Whipped Hot Chocolate
- Tips for the Best Whipped Hot Chocolate Experience
- Variations on Your Whipped Hot Chocolate
- Serving Suggestions for This Warm Comfort Drink
- Storage and Reheating Instructions for Whipped Hot Chocolate Components
- Frequently Asked Questions About Whipped Hot Chocolate Recipe
- Share Your Homemade Whipped Cocoa Creations
Why This 3-Ingredient Whipped Hot Chocolate Recipe Works (The Cookin’ Corner Difference)
When I developed this recipe, I wasn’t aiming for fancy; I was aiming for fantastic texture super fast. That’s the Cookin’ Corner way! The magic here isn’t just mixing chocolate into milk; it’s about creating stable air pockets in that topping. Knowing exactly how the heavy cream reacts when sugar and cocoa are introduced is how you nail this Easy Whipped Hot Chocolate every single time. It’s about technique, not time.
We focus on these details so you get that beautiful, cloud-like topping that melts so luxuriously against the warm mug. It’s your Quick 5 Minute Drink Recipe upgrade that tastes like you spent way more time on it!
Achieving the Perfect Fluffy Hot Chocolate Topping
You need to incorporate air, and you need stabilizers. That heavy whipping cream is the workhorse here. When you beat it with the powdered sugar (which helps keep the structure firm) and the cocoa powder right from the start, you’re essentially making a very stiff, chocolate-flavored whipped cream. You have to mix until you see those stiff peaks—meaning when you lift the whisk, the peaks stand straight up and hold their shape perfectly. That’s your sign of true expertise!
Quick 5 Minute Drink Recipe Assembly
Honestly, once the topping is whipped, the rest takes maybe 60 seconds. You warm your milk—just hot enough to warm your hands around the mug—and then you spoon that fluffy topping right on top. That contrast between the warm, smooth milk and the cool, airy cocoa topping is everything. It’s the best simple upgrade for standard cocoa, period.
Gathering Ingredients for Your Whipped Hot Chocolate
Okay, let’s gather what we need for this dreamy drink. Remember the title? We are keeping it super minimal here because I want you sipping this in minutes! You’ll need just a few things to make this decadent chocolate beverage. I’ve listed the core three for the topping, plus the milk base. Don’t stress if you don’t have everything; we’ll talk substitutions right next!
Ingredient Notes and Substitution Ideas
My biggest piece of advice on the cream: use heavy whipping cream, please! It has the necessary fat content to reach those stiff, stable peaks we’re aiming for. Skimping on fat means you’ll just end up with chocolate foam, not that lovely fluffy hot chocolate topping. If you’re trying to cut down on sugar, you can absolutely swap the powdered sugar for maple syrup or honey, but you might need to mix a tiny bit longer to keep the topping firm. Also, while I love the optional vanilla in the milk, skip it if you need to—the dark cocoa flavor is the star!
Step-by-Step Instructions for Whipped Hot Chocolate
Alright, let’s get this amazing creamy whipped cocoa made! This process moves fast once you get started, so have your mug ready, and let’s go. Following these steps ensures you get that incredible texture contrast that makes this drink so famous. It’s worth every second you spend whipping!
Creating the Fluffy Hot Chocolate Topping
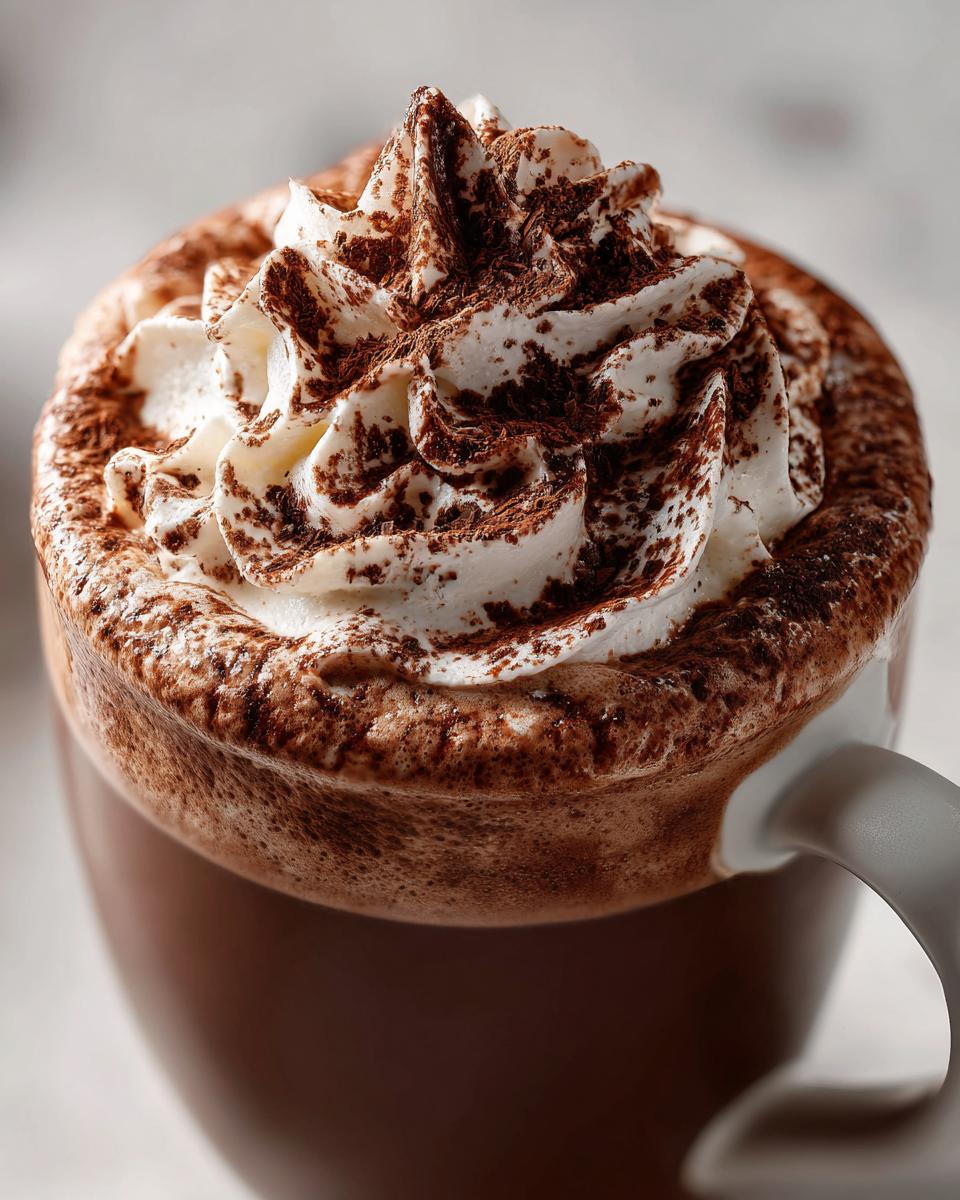
First things first, we tackle that incredible topping. In a mixing bowl, combine your heavy whipping cream, powdered sugar, and the unsweetened cocoa powder. Now, get your electric mixer out—you *can* do this by hand, but honestly, you’ll be tired before you reach the right consistency! Start slow so the cocoa doesn’t dust your counter, then crank it up to medium-high. You need to beat this mixture until those stiff peaks form. That means when you stop the mixer and lift the whisk, the chocolate mixture stands up perfectly straight and doesn’t flop over. This usually takes about 2 to 3 minutes with a hand mixer, maybe slightly longer if you’re whisking by arm power. Don’t stop too soon!
Preparing the Warm Milk Base
While you’re whipping, or right after, get your milk warming. Pour your cup of milk into a small saucepan or microwave-safe measuring cup. You want it hot enough to be satisfyingly warm in your hands—think steaming, but definitely not boiling over! Boiling milk changes the texture, and we want smooth richness here. If you’re using that little splash of vanilla extract, stir it into the warm milk now. This is exactly where you’d also check out how we make our velvety French sipping chocolate if you want something richer!
Assembling Your Decadent Chocolate Beverage
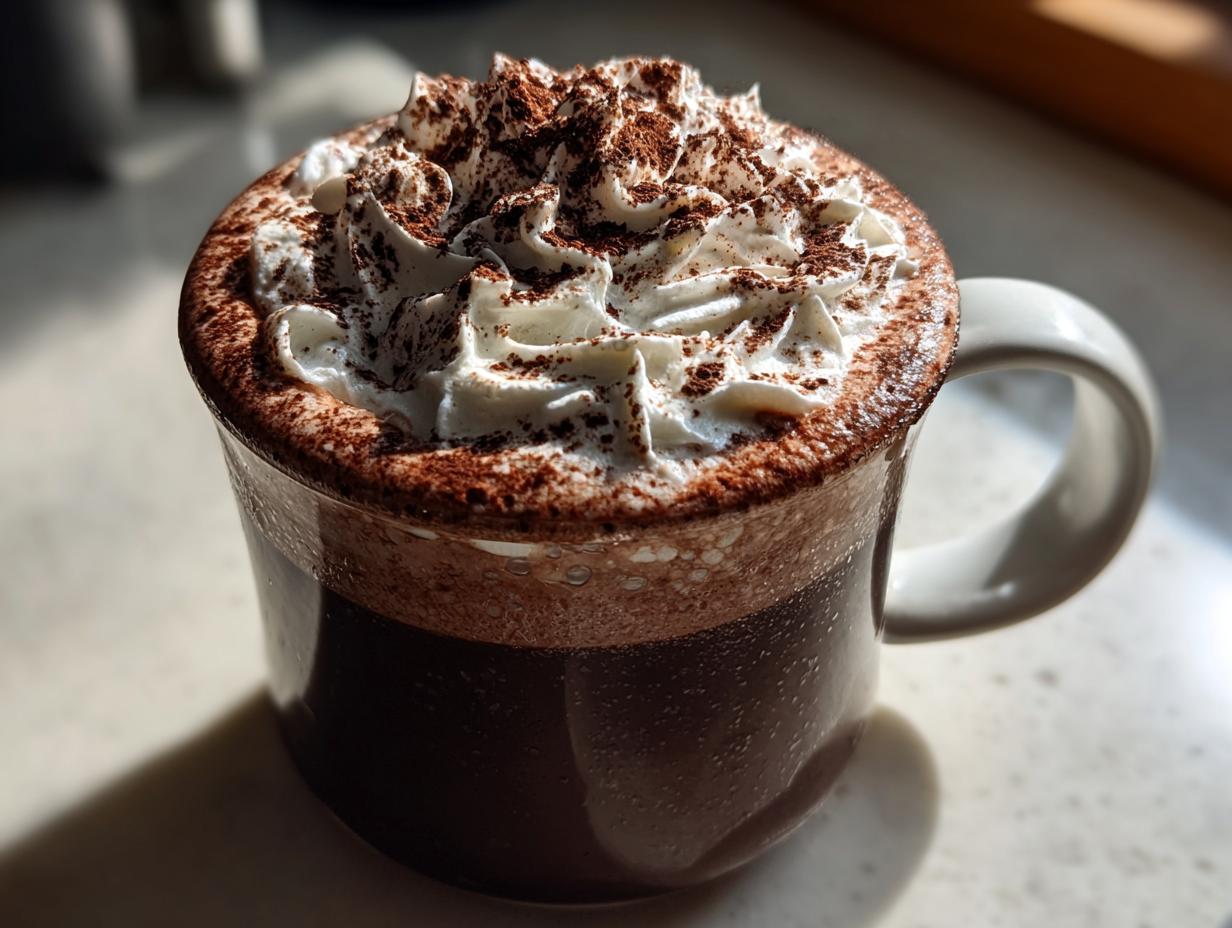
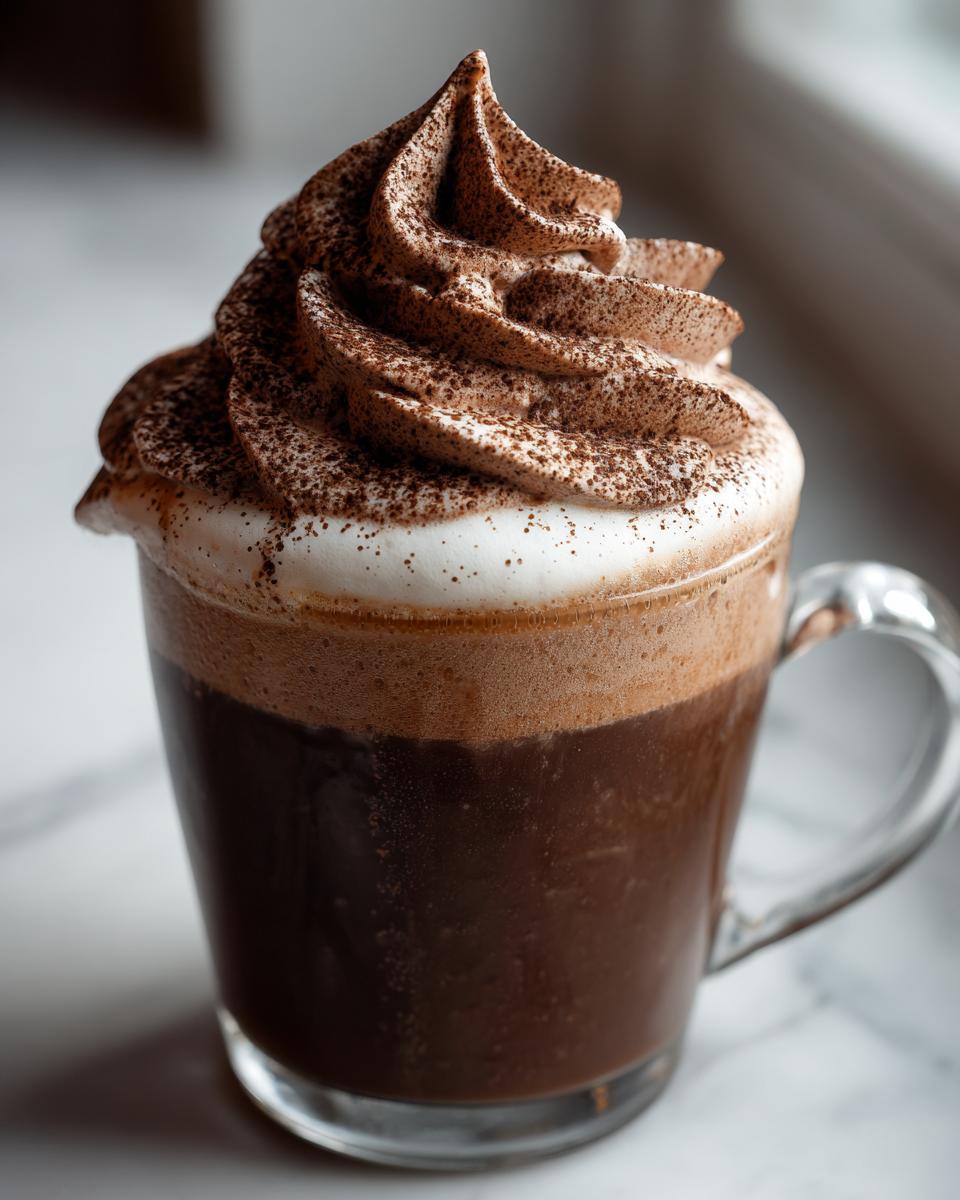
Time for the best part! Pour that beautiful warm milk into your favorite mug first. Don’t stir the topping into the milk; we want that lovely layered effect. Next, take a big spoonful—or a whole dollop!—of that fluffy chocolate topping and gently place it right on top of the warm milk. It should just sit there like a perfect chocolate cloud. Serve this decadent chocolate beverage immediately so your guests can enjoy the temperature contrast before the topping slowly melts down into the cocoa. It’s the perfect cozy winter drink experience!
Tips for the Best Whipped Hot Chocolate Experience
You’ve made the topping and warmed the milk—now, how do we elevate this from just a quick drink to a true, indulgent chocolate treat? It’s all in the presentation, really! Cooling your mug slightly before pouring in the warm milk helps maintain the integrity of that beautiful whipped topping just a little bit longer. We want that perfect floating cloud, remember?
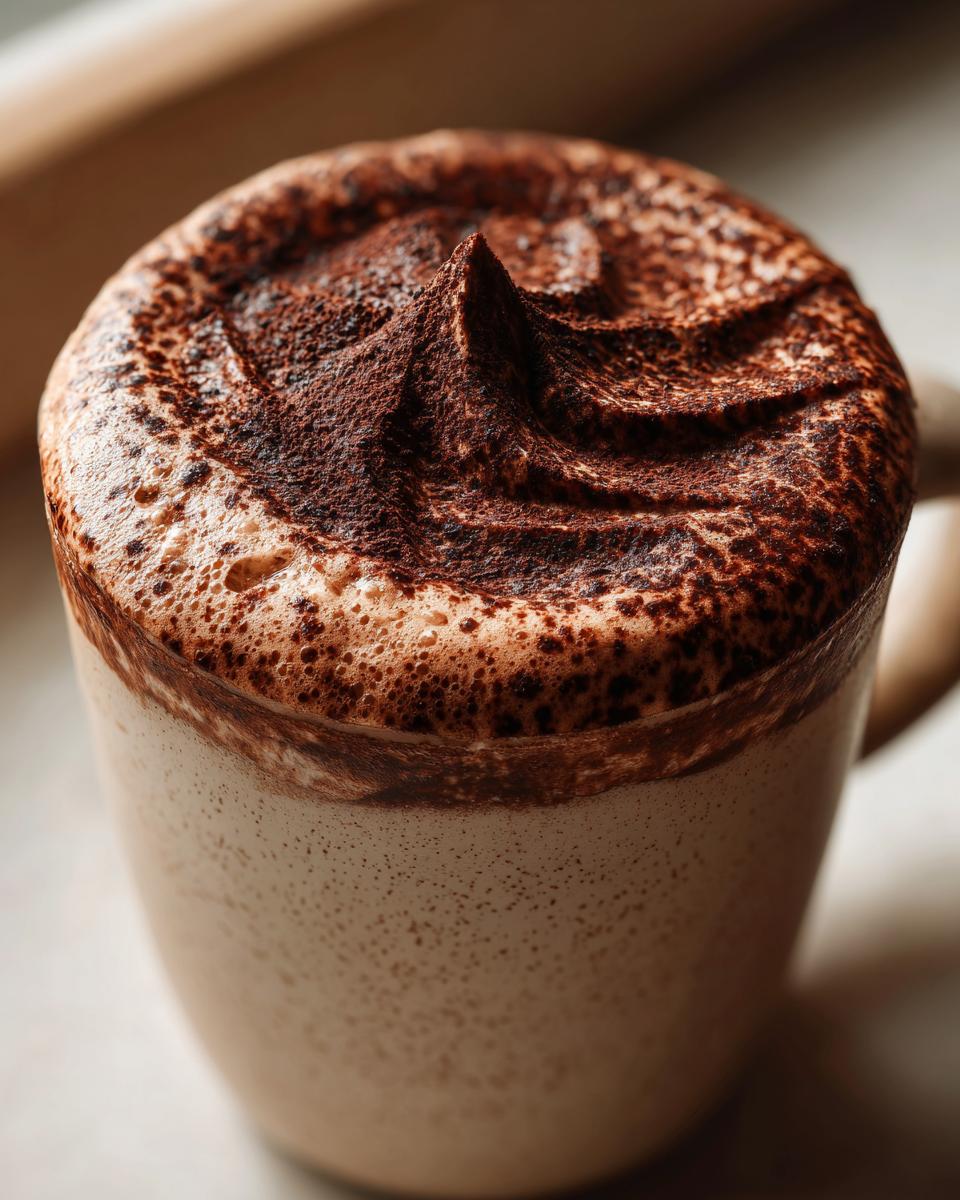
For the absolute Best Hot Chocolate Upgrade, you must finish it off with a final dusting. Before serving, grab a fine-mesh sieve and lightly dust the top of the whipped chocolate with extra cocoa powder or even some finely grated dark chocolate. It gives it that professional, cafe-style look we are aiming for. If you’re feeling extra festive, a tiny sprinkle of sea salt before that dusting really enhances the chocolate flavor, making it pop! If you love chocolate treats, you might have to check out our Hot Chocolate Brownies recipe next.
Also, if you happen to make extra topping (and you probably will, because it’s addictive!), you can keep it in the fridge. Just give it a quick, vigorous whisk for about 15 seconds before putting it on your next warm cup. You can read more about keeping this trend going over at Savory Experiments for extra inspiration!
Variations on Your Whipped Hot Chocolate
Even though this recipe is perfect as is, I always encourage cooks to play around once they master the base! That creamy whipped cocoa is such a versatile base for so many Holiday Hot Chocolate Ideas. It’s fun taking this simple indulgence and twisting it for different seasons or moods. Remember, Sarah Jane Thompson always says the kitchen is where you practice that little bit of culinary creativity!
Making a Whipped Hot Chocolate Iced Version
If you’re craving this dreamy texture when it’s summer or just too hot for a steaming mug, listen up: you can use this exact same topping! The only change you make is in the base. Instead of warming the milk, use cold milk—whole milk or even your favorite plant-based milk works great for an iced whipped hot chocolate! Pour the cold milk into the mug and top it with the whipped topping. It’s like drinking a cold, fluffy chocolate milkshake!
Flavor Twists for Your Creamy Whipped Cocoa
This is where you can really customize things without messing up the whip! If you want a hint of winter spice, try adding a tiny drop of peppermint extract right into the cream mixture when you are whipping it. A dash of cinnamon or even a pinch of espresso powder mixed into the cocoa powder makes for a lovely mocha kick. If you enjoyed the spices in our apple spice cake, a little allspice in this cocoa is phenomenal!
Serving Suggestions for This Warm Comfort Drink
This rich, creamy drink is an indulgent chocolate treat all on its own, but in my Midwest kitchen, we never served hot cocoa without something satisfying alongside it! Since the whipped hot chocolate is so light and airy, it pairs beautifully with something a little denser. Think about serving it alongside homemade cookies or a simple slice of pound cake.
My family always prefers pairing their mugs with our Easy No-Bake Avalanche Cookies. The crisp texture of the cookie is the perfect foil for the smooth, melting cocoa topping. It just makes the whole experience feel cozier, like a full dessert moment!
Storage and Reheating Instructions for Whipped Hot Chocolate Components
Now, because this whipped hot chocolate has two distinct parts, we have to store them separately, or things get messy fast! If you made extra warm milk base, just keep that in a sealed container in the fridge. It reheats beautifully later—just warm it up slowly back on the stove or in the microwave. Don’t try to microwave the topping, though; that’s a recipe for disaster!
The topping is the important part here. Keep your leftover fluffy chocolate topping in an airtight container in the fridge for up to two days. If it deflates a little bit, don’t panic! That just means the air is relaxing. When you are ready for another mug, just take it out and give it a quick, vigorous whisk again—just 15 to 20 seconds with a hand mixer is usually enough to bring back that beautiful stiffness. That’s how we keep this treat reliable!
Frequently Asked Questions About Whipped Hot Chocolate Recipe
I know sometimes questions pop up when you’re trying a new, fun recipe like this! Since we are talking about a hot drink that relies on a specific topping texture, I wanted to cover a few things I get asked about most often. We want your experience creating this warm comfort drink to be perfect!
Can I make the fluffy hot chocolate topping ahead of time?
Yes, you absolutely can! That’s one thing I love about this setup. You can whip up that fluffy hot chocolate topping the morning of or even the night before. Just make sure you store it in a very airtight container in the fridge. Like I mentioned before, it might deflate slightly overnight because the air is escaping, but don’t sweat it! Just give it a quick, hard whisk for 15 seconds before spooning it onto your hot milk. It totally snaps back to life!
What is the best way to make this a cafe style hot chocolate DIY?
To really nail that cafe style hot chocolate DIY look, presentation is everything! My favorite trick is using a nice, sturdy mug—not a giant travel tumbler, but a proper, comforting mug. Once you have the warm milk in, use a dry teaspoon to gently press down a small circle in the middle of your whipped topping, and then maybe dot a tiny bit of chocolate sauce or a few mini marshmallows right in that depressed circle. It looks so deliberate and fancy, but it only takes seconds. Or, drizzle some caramel sauce right over the top! Everyone will think you bought this!
Is this recipe suitable for making a large batch of whipped hot chocolate?
This recipe scales up really well, but you have to be smart about it! If you’re making it for a whole group, multiply the topping ingredients across the board (cream, sugar, cocoa). That is easy to whip in batches if you need to. However, measuring for the *milk* gets tricky if you are planning on keeping it warm. I always recommend preparing the large batch of whipped topping, storing it, and then just warming the milk individually or in small batches right before serving. That way, the milk is perfectly hot for that lovely contrast, and your topping stays as pillowy as possible. You don’t want lukewarm milk underneath your fluffy topping—that’s just sad!
If you’re looking for other ways to make big-batch cozy drinks, you might want to check out my tips on making potato soup in the slow cooker, which is another great recipe to serve alongside your cocoa!
For more inspiration on easy, elevated drinks, check out the ideas from Passion for Savings!
Share Your Homemade Whipped Cocoa Creations
Now that you’ve made your first mug—or maybe your third!—of this super simple whipped hot chocolate, I truly hope it brought a little moment of cozy luxury to your day. That’s what we chase here at Cookin’ Corner: simple, heartfelt dishes that make memories without requiring you to spend hours in the kitchen.
I always get so thrilled when I hear from folks who tried one of my recipes and brought back some of that classic, comforting feeling right into their own homes. Did you dust yours with extra cocoa? Did you try adding a tiny bit of peppermint? I want to see it!
Please, take a moment to leave a star rating right down below. That little rating helps other home cooks find this recipe and try making their own homemade whipped cocoa. And if you felt particularly inspired, snap a picture of your drink—maybe with your favorite blanket in the background—and share it with me! You can always find more connection and inspiration over on our About Page detailing our story. Happy sipping, friend!
Print3-Ingredient Ultra-Creamy Whipped Hot Chocolate

Make this easy whipped hot chocolate in minutes for a luxurious, cafe-style treat. The fluffy topping over warm milk creates the perfect cozy winter drink.
- Prep Time: 5 min
- Cook Time: 2 min
- Total Time: 7 min
- Yield: 1 serving 1x
- Category: Beverage
- Method: Mixing/Whipping
- Cuisine: American
- Diet: Vegetarian
Ingredients
- 1/2 cup heavy whipping cream
- 1/4 cup powdered sugar
- 1/4 cup unsweetened cocoa powder
- 1 cup milk (whole or preferred type)
- 1 teaspoon vanilla extract (optional)
Instructions
- Combine the heavy whipping cream, powdered sugar, and cocoa powder in a medium bowl.
- Use an electric mixer or a whisk to beat the mixture until stiff peaks form. This creates your fluffy hot chocolate topping.
- Gently warm your milk in a saucepan or microwave until hot, but not boiling. Stir in vanilla extract if you are using it.
- Pour the warm milk into your favorite mug.
- Spoon the whipped chocolate topping generously over the warm milk. Serve immediately for a decadent chocolate beverage.
Notes
- For an iced version, use cold milk instead of warm milk.
- You can substitute the powdered sugar with maple syrup for a different sweetness profile.
- Dust the top with extra cocoa powder or mini marshmallows for presentation.
Nutrition
- Serving Size: 1 mug
- Calories: 350
- Sugar: 25
- Sodium: 100
- Fat: 28
- Saturated Fat: 17
- Unsaturated Fat: 11
- Trans Fat: 0.5
- Carbohydrates: 28
- Fiber: 3
- Protein: 7
- Cholesterol: 95