
Some flavors just scream ‘home,’ don’t they? For me, that’s the soft, buttery warmth of a snickerdoodle cookie mixed with that cool, velvety hug of a perfect cheesecake. I know, I know, combining two classics sounds risky, but trust me when I say that the Snickerdoodle Cheesecake is the ultimate flavor mashup we’ve all been waiting for! Here at Cookin’ Corner, we take those old, reliable flavors and make sure they work perfectly every time. Sarah Jane Thompson puts her heart into testing every bake, so when you pull this creamy, cinnamon-spiced dream out of the oven, you know you’ve got a winner that tastes exactly like comfort.
- Why This Creamy Snickerdoodle Cheesecake is Your New Favorite Dessert
- Gathering Ingredients for Your Snickerdoodle Cheesecake
- Ingredient Notes and Substitutions for Your Snickerdoodle Cheesecake
- How to Prepare the Best Snickerdoodle Cheesecake Recipe
- Tips for Success Making Your Homemade Snickerdoodle Dessert
- Serving Suggestions for This Festive Baked Treat
- Storage and Reheating Instructions for Snickerdoodle Cheesecake
- Frequently Asked Questions About Snickerdoodle Cheesecake
- Share Your Ultimate Creamy Dessert Experience
Why This Creamy Snickerdoodle Cheesecake is Your New Favorite Dessert
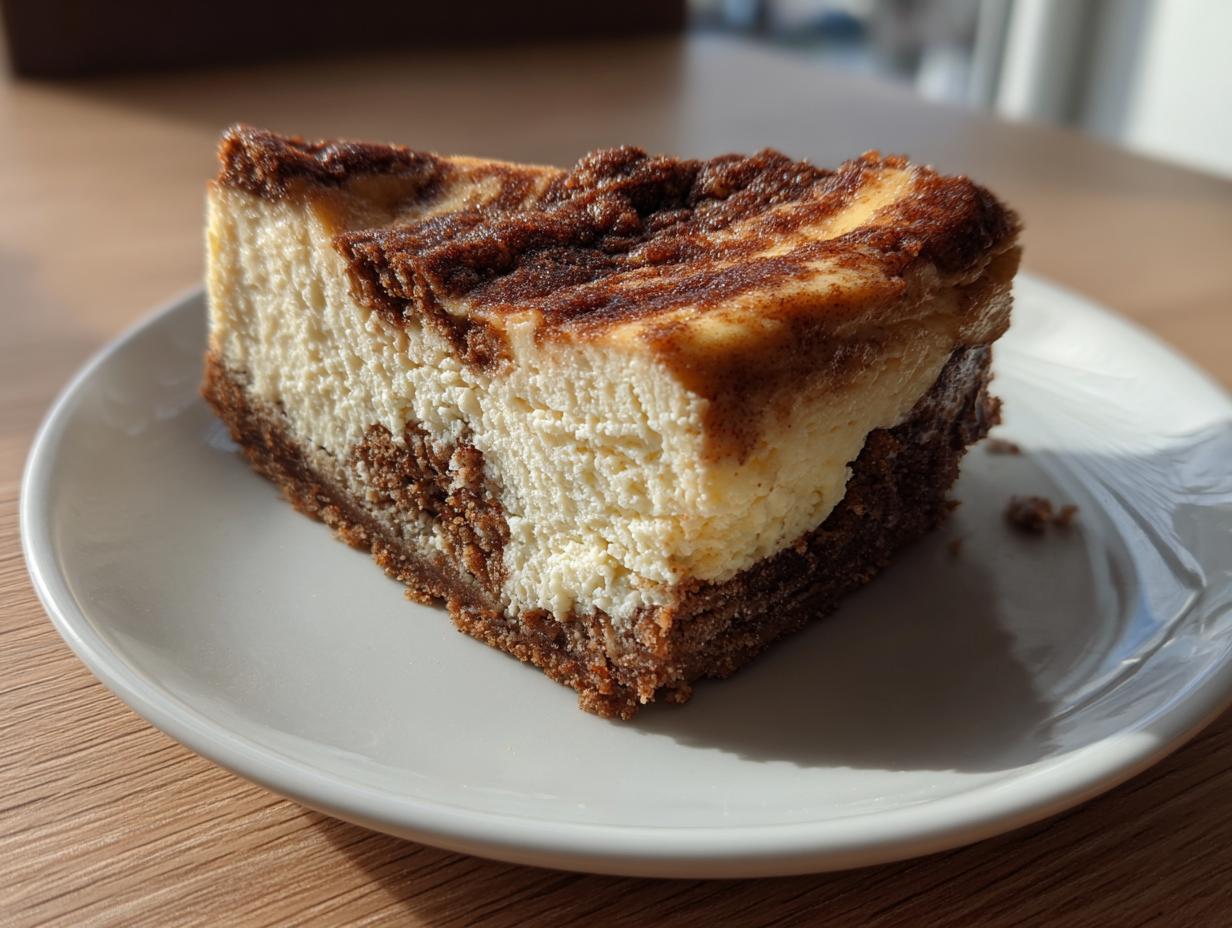
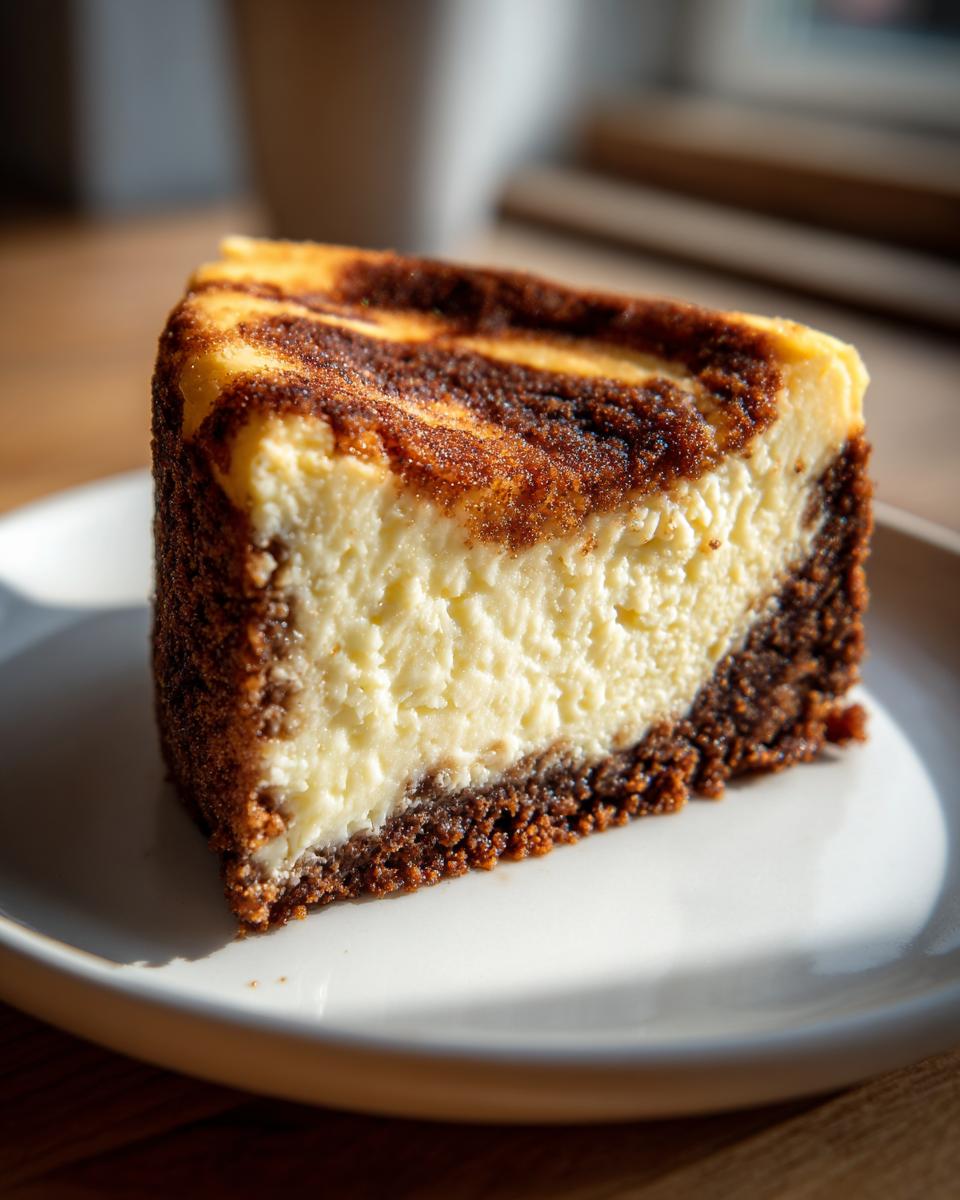
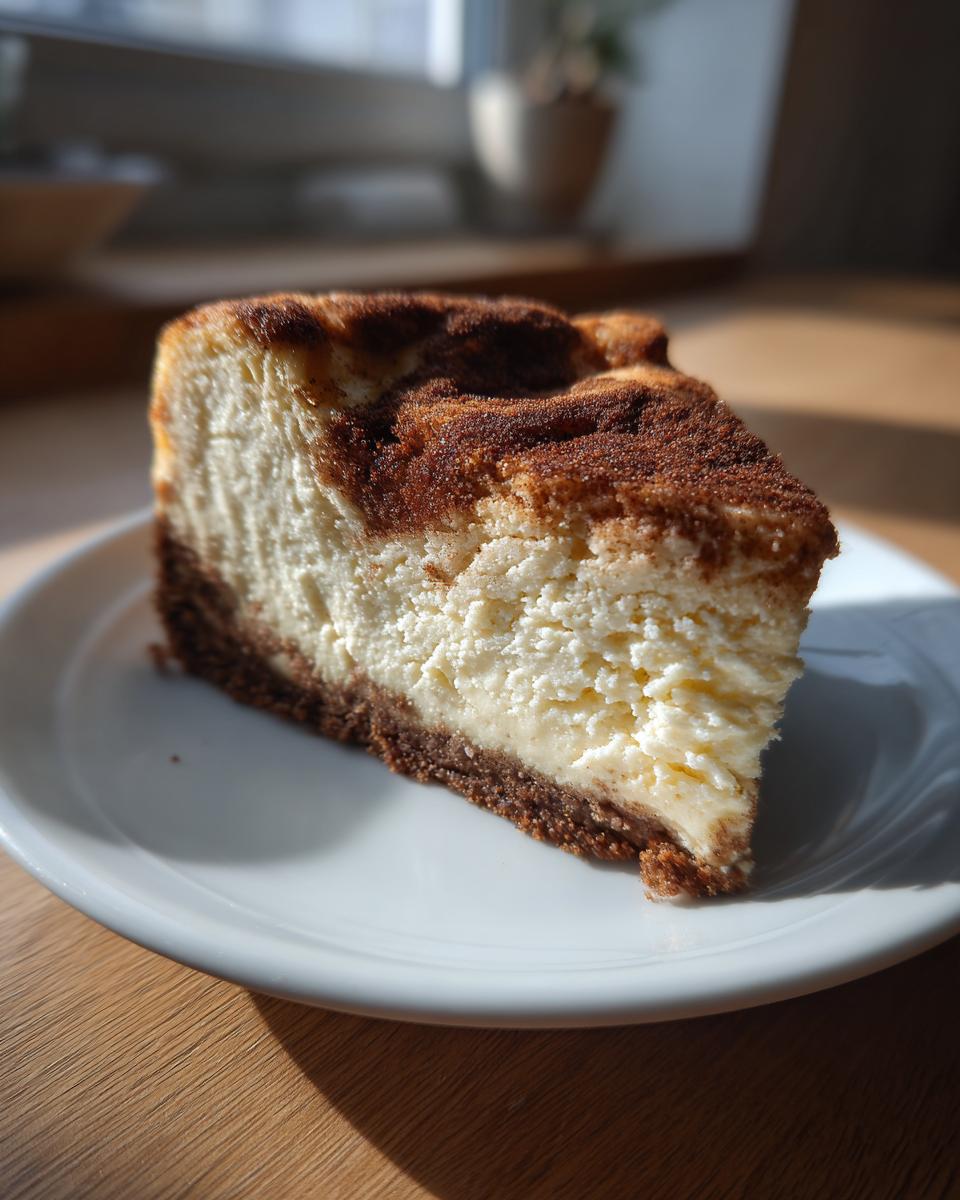
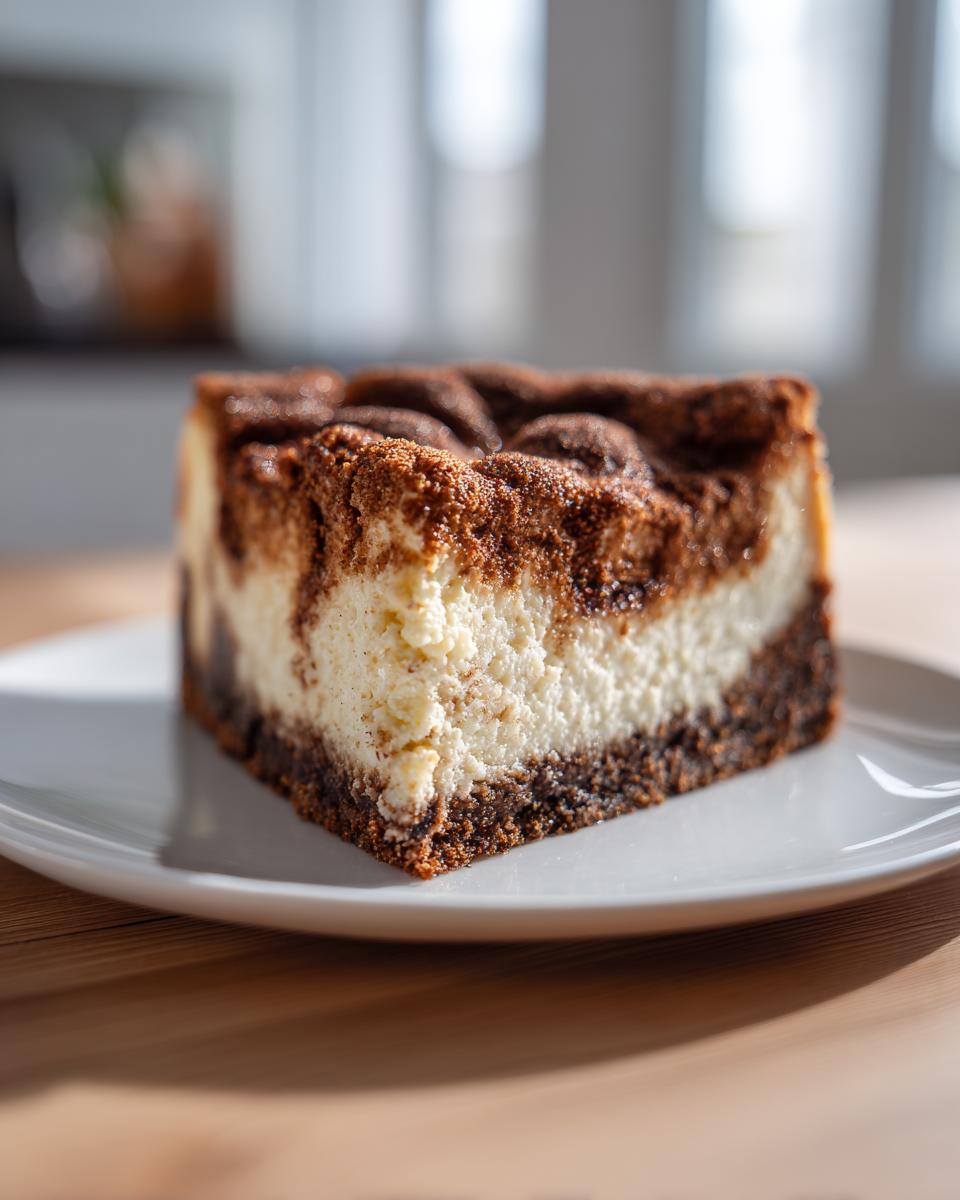
Seriously, ditch those dry, crumbly desserts you’ve tried before. This recipe delivers on texture in a big way. We’ve managed to mash up that warm, familiar spice of a snickerdoodle cookie with the luxurious decadence of a classic New York style cheesecake. The result? It’s the ultimate creamy dessert that just sings, especially when you take that first bite and the cinnamon hits just right.
What makes it so special? It’s all about getting those high-stakes elements perfect:
- The Crust: It’s buttery, crumbly, and baked until it’s just the right shade of golden brown. It holds up beautifully!
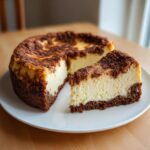
- The Flavor: We use cinnamon in three different spots—the crust, the filling, and the top swirl—so that spiced flavor is totally present, not just a background note.
- Zero Cracks: Yes, you read that right! We use techniques that keep this beauty smooth and unblemished, making it look amazing on your table.
If you love fall baking inspiration or need something new to serve besides pumpkin pie, this is it. It’s the showstopper of any dessert spread.
Achieving the Ultimate Creamy Cinnamon Cheesecake Texture
Texture is the name of the game with cheesecake, and I learned the hard way that rushing this part means cracks and graininess. For this creamy cinnamon cheesecake, you must treat your ingredients with respect! Make absolutely sure your cream cheese and eggs are at true room temperature. If they aren’t soft, you’ll end up with lumps, and nobody wants lumpy cheesecake, right?
Also, the water bath isn’t just for show—it’s essential! It introduces gentle, steamy heat, which cooks the edges without scorching the center. Once it’s out of the oven, resist the urge to pull it out immediately. The slow cooling inside the oven, followed by that long chill, sets the structure perfectly. That is the secret handshake to that unbelievably smooth, melt-in-your-mouth feel.
Perfect for Holiday Cheesecake Recipes and Fall Baking Inspiration
If you’re looking for inspiration for those upcoming festive gatherings, stop searching! This cheesecake is my go-to every single year. It travels well, it holds up beautifully on the buffet, and it smells incredible baking at home. While pumpkin rules in November, the cozy spice of cinnamon always feels perfectly suited for those early fall gatherings and, of course, Christmas parties.
When you’re planning your menu, slot this in alongside your other favorite holiday cheesecake recipes. It offers the familiarity of a cookie but the elegance of a baked cheesecake. It’s the warm hug your guests didn’t know they needed!
Gathering Ingredients for Your Snickerdoodle Cheesecake
Okay, now that we’ve talked about how amazing this is going to be, let’s get tactical. You can’t make kitchen magic without the right building blocks, right? I’ve broken this down by section because keeping everything organized before you start mixing is half the battle. Trust me, when you’re making a cheesecake, you want everything ready to go so you don’t panic-melt the butter too much!
These ingredients create that signature sweet, spiced flavor combination we love so much. Get your list ready!
For the Crumbly Cinnamon Crust
This is where we get that initial buttery, spiced base going. It’s crunchy, it’s flavorful, and it needs to be pressed in there nice and tight. We’re using graham crackers here, but I’ve got a note later on an even better swap if you have extra cookies laying around!
- 1 1/2 cups graham cracker crumbs (That’s about 10 full sheets, give or take, crushed up small!)
- 1/4 cup granulated sugar
- 1 teaspoon ground cinnamon
- 6 tablespoons unsalted butter, melted
For the Cheesecake Filling
This is the heart of the operation! The key here, like I mentioned, is temperature. Everything needs to play nice together, so please make sure your cream cheese and eggs are genuinely at room temperature before you even think about turning the mixer on high. We need that smooth finish!
- 3 (8 ounce) packages full-fat cream cheese, softened
- 1 1/2 cups granulated sugar
- 1/4 cup all-purpose flour (don’t skip this, it helps stabilize the filling!)
- 1 tablespoon vanilla extract
- 1 teaspoon ground cinnamon
- 1/4 teaspoon ground nutmeg
- 4 large eggs, room temperature
For the Cinnamon Sugar Swirl/Topping
This topping creates little bursts of intense cinnamon-sugar joy right on top of the smooth filling. It crumbles slightly during the baking process, giving you that wonderful texture contrast. Don’t mix this out until just before you’re ready to pour the batter!
- 1/2 cup packed light brown sugar
- 1 tablespoon ground cinnamon
- 1 tablespoon all-purpose flour
- 2 tablespoons unsalted butter, melted
Ingredient Notes and Substitutions for Your Snickerdoodle Cheesecake
Listen, recipes are fantastic guides, but every kitchen has its quirks. I want to make sure you have the insider knowledge to pivot if you need to, or just to understand *why* I ask for something specific. Cheesecake can be temperamental, so knowing how these ingredients work together really boosts your confidence when you’re mixing up this huge batch for your party. Don’t be scared of the ingredient list; it’s really just three simple parts coming together!
If you’re already a pro at holiday baking, you might want to check out my simpler traditional snickerdoodle recipe to see how we capture that core flavor before combining it with the tang of the cheese!
Achieving the Creamiest Cheesecake Filling
I can’t stress this enough: if you skip this step, you risk curdling the filling, and that’s a texture disaster! When I talk about room temperature cream cheese, I mean *truly* soft. Feel it—you should be able to press your finger into it easily without resistance. Cold cream cheese fights the mixer and breaks down unevenly, leaving you with tiny, stubborn white lumps even after five minutes of beating. That’s not creamy; that’s just bumpy!
The same goes for the eggs. Make sure they’re not sitting right out of the fridge. Eggs incorporate much smoother into room-temperature fat (the cream cheese) when they’re also closer to that temperature. This simple preparation means you spend less time mixing, which is crucial because we stop mixing the second those eggs disappear to keep air out!
Oh, and remember those notes I mentioned? One of the best swaps you can make is changing the crust! If you happen to have a batch of leftover snickerdoodle cookies that didn’t quite make the grade, crush those up instead of the graham crackers! Use about 2 cups of finely crushed store-bought snickerdoodle cookies for the crust instead of the graham crackers. It makes the whole thing taste even more intensely like the cookie inspiration!
How to Prepare the Best Snickerdoodle Cheesecake Recipe
Alright, this is where the real magic happens! Making a cheesecake that stays creamy and doesn’t crack feels like winning the lottery, but honestly, it comes down to following these steps precisely. We tackle the crust, then the filling, we bake it gently, and then—this is the hardest part—we let it cool down slowly. If you follow this sequence, you’ll end up with a perfect, sliceable, rich snickerdoodle cheesecake that looks like it came from a bakery. No sweat, you got this!
Preparing the Cinnamon Crust and Preheating
First things first, turn that oven up to 325°F (160°C). While it heats up, get your 9-inch springform pan ready. Cheesecake and water baths are best friends, so wrap the outside of that pan super tight in heavy-duty aluminum foil—I usually use two layers just to be safe! Now mix up your crust ingredients: the cracker crumbs, sugar, cinnamon, and that melted butter. Press that mixture firmly into the bottom of your foil-wrapped pan. Pop it in the oven for just 10 minutes to set up. Once that’s done, pull it out and let it cool down a bit while you tackle the filling.
Mixing the Cheesecake Filling and Cinnamon Sugar Swirl
Before you mix anything else, quickly whip together your swirl topping ingredients—the brown sugar, cinnamon, flour, and melted butter—until crumbly. Set that aside! Now for the filling: Use your electric mixer on the cream cheese until it’s perfectly smooth. Scrape the bowl down—always scrape! Next, beat in the sugar, flour, vanilla, cinnamon, and nutmeg until just combined. Remember what I said about overmixing? This is key! Add your room-temperature eggs in one at a time, and stop mixing the instant the yolk disappears. Seriously, no more! Pour this gorgeous batter right over your slightly cooled crust.
Remember that topping? Sprinkle that reserved cinnamon sugar crumble evenly all over the top of the batter now. It’s going to sink in slightly and create those gorgeous spiced pockets!
Baking the Snickerdoodle Cheesecake with a Water Bath
Time for the gentle approach! Place your foil-wrapped springform pan into a larger roasting pan. Now, carefully pour hot water into the outside roasting pan until it comes about halfway up the sides of the cheesecake pan. This water bath prevents the edges from cooking too fast! Bake this setup for 60 to 75 minutes. You want the edges to look firm, but if you nudge the pan gently, the very center 2-inch circle should still have a slight, tiny jiggle. That means it’s done!
The Essential Slow Cooling and Chilling Process
Don’t pull it out! This slow transition is what saves you from cracks and keeps that interior perfectly set. Turn the oven off, but leave the cheesecake inside. Prop the oven door open just a crack (I stick a wooden spoon in the door!) and let it hang out in there for a full hour. This gradual cooling is vital for a creamy texture. After the first hour, take it out, remove the foil, and let it come fully down to room temperature on a wire rack. Then, cover it loosely with plastic wrap and move it to the fridge for a minimum of six hours, but honestly, overnight is best. That long, cold rest is what transforms the batter into that amazing creamy cinnamon cheesecake you deserve!

Tips for Success Making Your Homemade Snickerdoodle Dessert
I know, I know, cheesecake sounds intimidating, right? But honestly, once you learn the tricks, it becomes one of the easiest and most rewarding desserts you can whip up! Since this is a mashup, we need to pay extra attention to keeping that filling smooth like velvet. My biggest piece of advice for any huge dessert like this is to follow the cooling steps to the letter. That slow cool-down is doing about 75% of the work to prevent those dreaded surface cracks.
If you get curdling while mixing—that means the filling looks grainy or separated—it’s almost always because your cream cheese or eggs were too cold. Don’t try to save it by beating longer; just gently warm the bowl slightly (maybe set it on the stove briefly *off* the heat, stirring gently) until it smooths out again before adding the eggs one by one, super slowly.
Another thing that trips people up is the foil wrapping for the water bath. If you’re worried about water seeping in—and nobody wants a soggy bottom to their snickerdoodle cheesecake—try putting a paper towel barrier right inside the foil wrapping, between the foil and the pan itself. It acts like a little sponge guard against any rogue splashes. That little hack saved me once when I bumped the roasting pan!
Finally, when you’re looking for that perfect cinnamon flavor, sometimes people oversalt their crust by mistake. Remember, we’re relying on the filling and the topping for most of the sweetness; the crust is just there for texture and a hint of spice. Keep that crust mix simple and press it without excessive force—too compact, and it gets hard instead of crumbly.
Serving Suggestions for This Festive Baked Treat
So, your beautiful, perfectly cooled, and creamy snickerdoodle cheesecake is ready to come out of the fridge! The actual baking part is over, but now we get to make it look as good as it tastes. Since this dessert is already packed with that cozy cinnamon-sugar flavor, you don’t need a million toppings fighting for attention. Simplicity really wins here.
For the absolute best experience—especially if you’re serving this up after a big holiday meal—I always recommend a simple pairing. A good cup of strong coffee or an espresso is fantastic because the bitterness cuts through the richness of the cheesecake so nicely. It’s just an excellent palate cleanser!
If you want a sauce, keep the spice theme going! My favorite thing to drizzle over a slice is a very light, homemade caramel sauce. You can find my easy recipe for easy homemade caramel sauce and candy right here, and honestly, a tiny drizzle mixed with that cinnamon swirl is just heaven.
If you want something lighter, skip the heavy sauces and stick to this: a dusting of powdered sugar right before serving, because it just looks so pretty against the darker cinnamon crumble on top. Another idea is a dollop of lightly sweetened whipped cream mixed with just a tiny pinch of extra ground nutmeg. It keeps it light, airy, and lets that snickerdoodle cheesecake flavor shine right through!
Storage and Reheating Instructions for Snickerdoodle Cheesecake
This is such a delicious cheesecake that you might actually have leftovers, which is a wonderful problem to have! Since this is a baked cheesecake, we need to treat the leftovers right to keep that creamy texture locked in.
The most important rule, which I learned the hard way when I tried to sneak a slice out after only four hours, is that you MUST let it chill completely. Once it’s fully chilled—and I mean set firm, usually after that minimum six hours or overnight rest—it’s ready for storage.
To store it, you need to keep moisture out, but also keep it from absorbing any weird fridge smells. Take the cheesecake (still in the springform pan or carefully removed to a serving plate) and cover it snugly with plastic wrap. If you’re worried about it sticking, put a layer of parchment paper between the cheesecake surface and the plastic wrap first. That way, when you pull the wrap off later, you won’t peel off any of that beautiful cinnamon topping!
In the fridge, this snickerdoodle cheesecake stays perfectly delicious for about four to five days. It really holds up better than most cakes, which is great if you’re making it ahead for a party. If you’re not planning to eat it within five days, you can totally freeze it! Wrap it even tighter—foil over plastic wrap works best for freezing—and it’ll keep nicely for about a month. It’s such an easy makeup dessert for when guests drop by unannounced!
Serving Cold vs. Bringing to Room Temperature
Now, about reheating—don’t! Seriously, reheating cheesecake is just asking for trouble; it tends to get watery or grainy when you try to warm it up. This dessert is meant to be served chilled or slightly mellowed.
If you served it straight from the fridge, it’s beautifully dense and sharp, which is how I prefer my creamy cinnamon cheesecake after a big meal. If the cold is too intense for you, or if you pulled it straight from the freezer, you just need a little patience. Take the fully thawed or chilled slice out onto a plate about 20 to 30 minutes before you plan to eat it.
That little bit of time on the counter is all you need! It lets the flavors bloom a little bit and softens the texture just enough so it melts in your mouth while still holding its shape perfectly. That little bit of rest is the best way to enjoy this amazing dessert mashup!
Frequently Asked Questions About Snickerdoodle Cheesecake
If that last slice is looking good, you might have a few burning questions about baking, chilling, or sharing this fantastic creation. It’s totally normal! When you’re dealing with a showstopper like this, you want to make sure everything goes off without a hitch. Here are a few things people always ask me after they get the recipe.
If you’re looking for more inspiration on simple baking, check out my guide to an easy, cheesy bake—sometimes you just need something straightforward!
Can I make a no bake snickerdoodle cheesecake alternative?
That’s a great question, especially if you’re short on oven time! Just so you know, the recipe I shared here is absolutely a baked version. The texture you get from baking it slowly with a water bath is what gives us that glorious, rich, creamy center that tastes like the best creamy cinnamon cheesecake imaginable.
If you truly need a no-bake option, you’ll need a different base—usually involving whipped cream cheese stabilized with gelatin or a lot of heavy whipping cream that hardens up in the fridge. They offer a lighter texture, but for that intense, rich snickerdoodle flavor we’re aiming for, baking is really the way to go here!
How far in advance can I prepare this cheesecake for a party?
This is excellent for planning ahead, which is a lifesaver when you’re hosting! You absolutely *can* make this ahead of time. In fact, I strongly recommend it. As I mentioned in the cooling instructions, this cheesecake needs a minimum of six hours to set up completely, but overnight chilling is truly the game-changer for flavor development and texture.
So, the best approach for any cheesecake recipe for parties is to bake it the day before your event. Keep it covered tightly in the fridge, and it will be flawless and ready to go first thing on party day. If you made it too far ahead, say three days out, it might start to absorb other fridge smells, so aim for 12 to 24 hours pre-party for the absolute best results!
Share Your Ultimate Creamy Dessert Experience
Wow, we made it! If you followed along and carefully followed those steps—especially the slow cooling—you are now the proud owner of one of the best, creamiest, cinnamon-spiced treats out there. That beautiful snickerdoodle cheesecake is waiting for you in the fridge!
Now comes the fun part! I absolutely love hearing from you all when you try one of these classics with a twist. Did the graham cracker crust turn out perfectly thick? Did you sneak a taste of the batter when you thought I wasn’t looking? (Don’t worry, I do it too.)
Please take a moment to rate this recipe down below! Your feedback helps other home cooks know that this recipe is dependable and worth the time. If you took a stunning picture of your slice—maybe with a little coffee on the side—snap that photo and tag us! I love seeing your kitchen successes.
And since this is such a crowd-pleaser, don’t keep this secret all to yourself! Share this post with friends who deserve a truly special, cozy dessert this season. If you want to send us a note with any specific questions or feedback about your baking journey, you can always reach out through my Contact Page. Happy baking, everyone!
PrintThe Best Creamy Baked Snickerdoodle Cheesecake with Crumbly Cinnamon Crust
You can make this rich, creamy Snickerdoodle Cheesecake that blends classic snickerdoodle cookie flavor with a smooth cheesecake base. It features a buttery cinnamon crust and a spiced filling, perfect for holiday gatherings or any cozy dessert occasion.
- Prep Time: 25 min
- Cook Time: 75 min
- Total Time: 9 hours 40 min
- Yield: 12 servings 1x
- Category: Dessert
- Method: Baking
- Cuisine: American
- Diet: Vegetarian
Ingredients
- For the Cinnamon Crust:
- 1 1/2 cups graham cracker crumbs (about 10 full sheets)
- 1/4 cup granulated sugar
- 1 teaspoon ground cinnamon
- 6 tablespoons unsalted butter, melted
- For the Cheesecake Filling:
- 3 (8 ounce) packages full-fat cream cheese, softened
- 1 1/2 cups granulated sugar
- 1/4 cup all-purpose flour
- 1 tablespoon vanilla extract
- 1 teaspoon ground cinnamon
- 1/4 teaspoon ground nutmeg
- 4 large eggs, room temperature
- For the Cinnamon Swirl/Topping:
- 1/2 cup packed light brown sugar
- 1 tablespoon ground cinnamon
- 1 tablespoon all-purpose flour
- 2 tablespoons unsalted butter, melted
Instructions
- Prepare the oven and pan: Preheat your oven to 325°F (160°C). Wrap the outside of a 9-inch springform pan tightly in heavy-duty aluminum foil to prepare for a water bath.
- Make the crust: In a medium bowl, combine the graham cracker crumbs, 1/4 cup granulated sugar, and 1 teaspoon cinnamon. Pour in the 6 tablespoons of melted butter and mix until the crumbs are evenly moistened. Press the mixture firmly and evenly into the bottom of the prepared springform pan. Bake the crust for 10 minutes. Remove from the oven and set aside to cool slightly.
- Prepare the cinnamon swirl mixture: In a small bowl, mix together the brown sugar, 1 tablespoon cinnamon, 1 tablespoon flour, and 2 tablespoons melted butter until crumbly. Set this topping aside.
- Make the cheesecake filling: In a large bowl, use an electric mixer to beat the softened cream cheese until it is completely smooth. Scrape down the sides of the bowl.
- Add the dry ingredients: Gradually beat in the 1 1/2 cups granulated sugar, flour, vanilla extract, 1 teaspoon cinnamon, and nutmeg until just combined. Do not overmix.
- Incorporate the eggs: Add the eggs one at a time, beating on low speed after each addition only until the yolk disappears into the batter. Stop mixing as soon as the last egg is incorporated to prevent cracks.
- Assemble and bake: Pour the cheesecake batter over the cooled crust. Sprinkle the reserved cinnamon swirl mixture evenly over the top of the batter.
- Create a water bath: Place the foil-wrapped springform pan inside a larger roasting pan. Carefully pour hot water into the roasting pan until the water reaches about halfway up the sides of the springform pan.
- Bake: Bake for 60 to 75 minutes. The edges should look set, but the center 2 inches should still have a slight jiggle when gently nudged.
- Cool slowly: Turn off the oven, crack the oven door open slightly, and let the cheesecake cool inside the oven for 1 hour. This slow cooling helps prevent cracking.
- Chill: Remove the cheesecake from the water bath and remove the foil. Let it cool completely on a wire rack. Once cool, cover loosely and refrigerate for at least 6 hours, or preferably overnight, before serving.
Notes
- For the creamiest texture, make sure your cream cheese and eggs are at true room temperature before you start mixing.
- If you prefer a snickerdoodle cookie crust instead of graham crackers, substitute 2 cups of finely crushed store-bought snickerdoodle cookies for the graham crackers.
- To prevent the foil from tearing when placing it in the water bath, use two layers of heavy-duty foil around the base of the springform pan.
Nutrition
- Serving Size: 1 slice
- Calories: 450
- Sugar: 38g
- Sodium: 280mg
- Fat: 28g
- Saturated Fat: 17g
- Unsaturated Fat: 11g
- Trans Fat: 0.5g
- Carbohydrates: 45g
- Fiber: 1g
- Protein: 7g
- Cholesterol: 110mg