
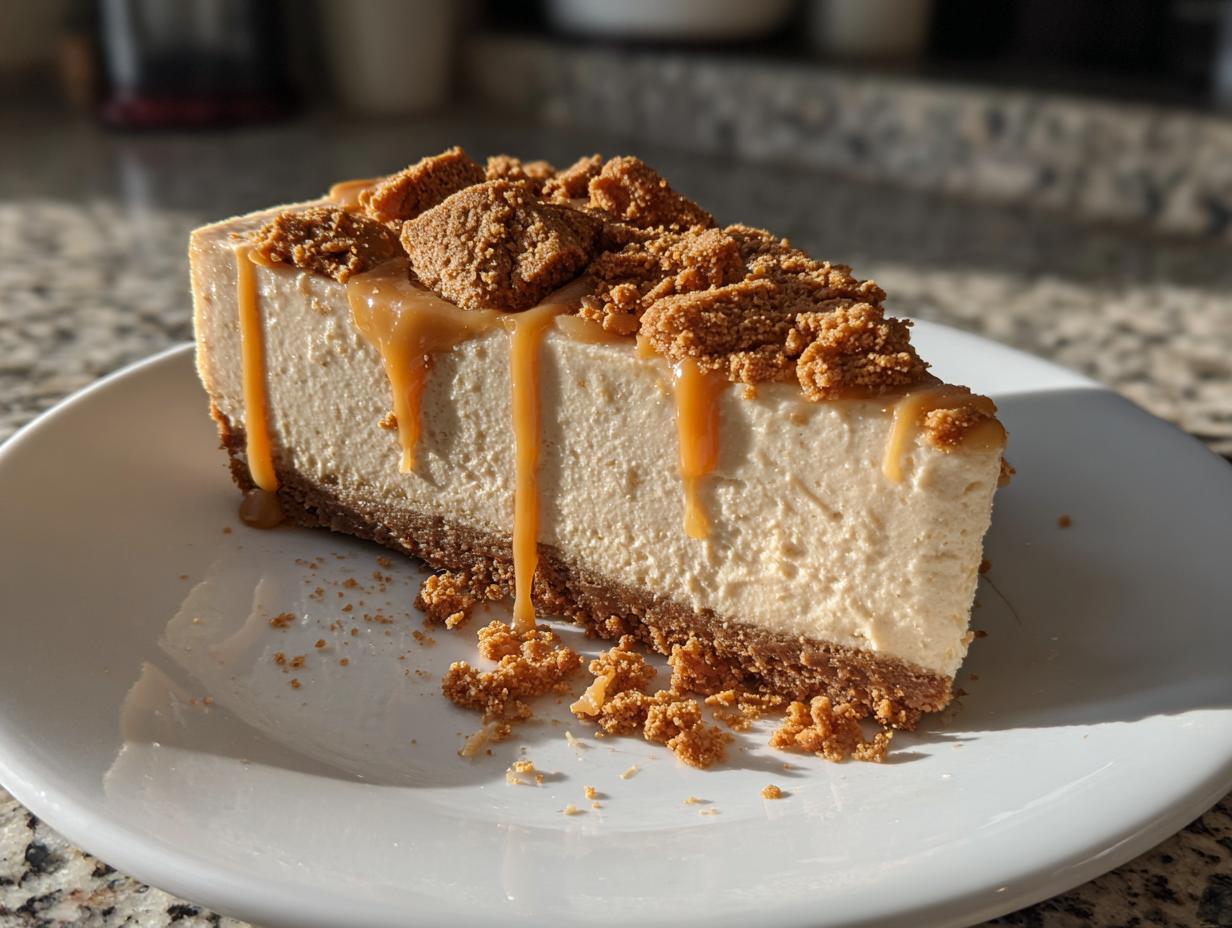
Oh, my goodness, if you’ve ever found yourself staring longingly into a jar of that creamy, spiced cookie butter, ready to just eat it with a spoon, this recipe is for you. We’re talking about the ultimate easy comfort food today: my No-Bake Creamy Biscoff Cheesecake!
There is just something so satisfying about a dessert that delivers absolute decadence without ever needing to turn the oven on. Trust me, when the summer heat is high or you just don’t want to fuss, this gorgeous biscoff cheesecake is the answer. This version, which I’ve tinkered with endlessly here at Cookin’ Corner, focuses purely on that rich, velvety texture everyone craves. It’s simple enough for a weeknight treat, but gorgeous enough for a holiday spread. It’s home baking at its best—easy, delicious, and totally trustworthy. You’ll want to save this one immediately, perhaps alongside my recipe for an easy no-bake ice cream pie!
- Why This No Bake Biscoff Cheesecake is Your New Favorite Easy Biscoff Dessert
- Gathering Ingredients for Your Creamy Lotus Biscoff Cheesecake
- Cookie Butter Cheesecake Instructions: Step-by-Step for the Best Biscoff Cheesecake
- Tips for Success Making Your Decadent Biscoff Dessert
- Make Ahead Cheesecake and Storage Instructions for Your Biscoff Cheesecake
- Serving Suggestions for This Irresistible Biscoff Dessert
- Frequently Asked Questions About No Oven Dessert Biscoff Cheesecake
- Nutritional Estimates for Your Biscoff Cheesecake Recipe
- Share Your Favorite Biscoff Cheesecake Creations
Why This No Bake Biscoff Cheesecake is Your New Favorite Easy Biscoff Dessert
If you’ve been searching for the perfect Easy Biscoff Dessert that requires zero oven time, stop right here. This No Bake Biscoff Cheesecake isn’t just about convenience; it’s about delivering a result that tastes like you spent hours fussing over it. I’ve refined this recipe so that even if you’re new to making cheesecakes, you get that rich, crowd-pleasing texture every single time. It’s dependable, which is what we home cooks need! For other easy-to-manage treats, you should check out my recipe for cake mix cookie bars!
Achieving That Velvety Cheesecake Filling Texture
The secret to that luxuriously smooth mouthfeel, the one that melts the second it hits your tongue, is all in the folding. We’re not over-mixing anything here! Once the stiff peaks of heavy cream are whipped up, you gently fold everything together. This careful motion keeps all that lovely air incorporated, ensuring you get that gorgeous, light yet firm Velvety Cheesecake Filling without deflating all your hard work. It’s a simple step made with care.
The Perfect Biscoff Crust Dessert Foundation
We adore the spicy crunch of the Biscoff cookies for the base. It’s the ideal partner for the smooth filling! Mixing the crumbs with melted butter creates a sturdy Biscoff Crust Dessert that holds everything together beautifully when chilled. If you want a little extra snap—and I sometimes do, especially if I’m making this for a party—you can pop that pressed crust into a 350°F oven for eight minutes before chilling. It adds a great toasted note!
Gathering Ingredients for Your Creamy Lotus Biscoff Cheesecake
Alright, let’s talk about what you need for this absolutely divine Creamy Lotus Biscoff Cheesecake. The best part about this recipe being so easy is that you’re using things you likely already have or can grab quickly at the store. You won’t need any specialty equipment or ingredients that send you running to four different shops!
Here’s the list we’ll be working from. Just remember to make sure your cream cheese is fully softened—that’s critical for a smooth mix, even though we aren’t baking! For more simple pantry recipes, check out my cinnamon roll muffins.
- 1 1/2 cups Biscoff cookie crumbs (about 25 cookies)
- 6 tablespoons unsalted butter, melted
- 16 ounces cream cheese, softened
- 1 cup powdered sugar
- 1 teaspoon vanilla extract
- 1 cup heavy whipping cream, cold
- 1 cup Biscoff cookie butter, slightly warmed
- 1/4 cup Biscoff cookie butter, for topping
- 1/4 cup Biscoff cookies, crushed, for garnish
Ingredient Notes and Substitutions for Your Biscoff Cheesecake
I have two non-negotiable tips for you before you start mixing. First, that main cup of Biscoff cookie butter needs to be warmed just a tiny bit—maybe 15 to 20 seconds in the microwave. It doesn’t need to be runny, just slightly warm so it folds into the cream cheese mixture without struggling and crushing the air bubbles we so carefully made!
Second, please, please make sure your cream cheese is truly softened. If it’s cold, you’ll end up with lumps, and we are aiming for pure velvet here. If you’re worried about the topping setting too hard, you can always thin that final drizzled cookie butter with a teaspoon of oil to keep it soft, even when chilled.
Cookie Butter Cheesecake Instructions: Step-by-Step for the Best Biscoff Cheesecake
Now for the fun part! These Cookie Butter Cheesecake Instructions are straightforward, but since this is a no-bake recipe, timing and gentle mixing are everything to guarantee we don’t end up with soup instead of a decadent dessert. We are creating structure through chilling, so patience is your secret weapon while assembling the biscoff cheesecake. After you master this skill, you might want to try my recipe for peanut butter cup cookies, too!
- We start with the crust: Mix your Biscoff cookie crumbs and melted butter until it looks like wet sand. Pack that firmly into the bottom of your 9-inch springform pan. Stick it in the freezer while you whip up the main event!
- Next, the cream cheese layer. Beat your softened cream cheese until it’s super smooth—no lumps allowed. Slowly beat in your powdered sugar and vanilla until it’s just incorporated. Don’t let it run wild!
- Now, whip that cold heavy cream in a separate bowl until you get stiff peaks. This is air power, folks!
- Pour that lovely whipped cream into the cream cheese mixture and fold it in very gently until it’s uniform.
- Then, sneak in that warmed Biscoff cookie butter and fold that in carefully too. Pour the whole creamy mixture right over your frozen crust.
- Cover it loosely and pop your baby in the fridge. I absolutely insist you chill this for at least 6 hours, but honestly, overnight is the magic mark for an unbelievably firm slice of pure joy.
Before you serve, drizzle that extra 1/4 cup of cookie butter on top and scatter those crushed cookies. If you want to see how others structure their layers, check out this beautiful similar recipe inspiration!

Technique Tips for the No Bake Biscoff Cheesecake Filling
When you fold that fluffy whipped cream into the cream cheese base, you need a gentle hand. Think slow, deliberate swoops, cutting down the center and bringing the bottom batter up over the top. We aren’t mixing; we are *marrying* the textures!
The warmed cookie butter must go in last, and again, use that gentle fold. If you beat it in aggressively, you’ll deflate the airy structure we created with the butter and cream. That air is what keeps this a light cheesecake and not a brick! It really makes the difference in achieving that classic, creamy texture.
Tips for Success Making Your Decadent Biscoff Dessert
Even though this is a No Oven Dessert, we still have little insider secrets that turn a good Decadent Biscoff Dessert into an absolutely show-stopping biscoff cheesecake. I learned these little tricks out of necessity, mostly because I didn’t want to wait forever for ingredients or have a sticky mess!
Remember how I mentioned warming the cookie butter slightly? Do that! Just 15 to 20 seconds in the microwave is all it takes to make it silky smooth and easy to fold in. It prevents you from having to stir vigorously, which keeps that filling light!
Also, if you’re like me and you want that crust to be utterly shatteringly crisp, go ahead and bake it for those 8 minutes at 350°F first. Then let it cool completely before adding the filling. It makes a small difference, but I love the extra crunch against the creamy texture. For other deep, rich flavors, you must try my ultimate fudgy brownies!
One last pro-tip for the extra fancy bakers: If you want that gorgeous swirl effect on top, don’t just drizzle. Take about two tablespoons of the main filling mixture you already made, mix it with two tablespoons of melted Biscoff spread, and dollop that on top before chilling. Swirl it with a toothpick!
Make Ahead Cheesecake and Storage Instructions for Your Biscoff Cheesecake
This is honestly one of my favorite things about this biscoff cheesecake: it’s the ultimate Make Ahead Cheesecake! I know how hectic life gets, especially around holidays or when you’re hosting. The great news is that this dessert actively *wants* you to make it early. In fact, it tastes better the next day!
You absolutely must chill it for a minimum of six hours, but I really encourage you to cover it loosely and let it set up overnight in the fridge. That extra time lets the cookie butter flavor really deepen and ensures you get those unbelievably clean slices you see in my photos.
When it comes to keeping leftovers—if you even have any!—just cover the pan tightly with plastic wrap or transfer slices to an airtight container. It stays wonderfully creamy in the refrigerator for up to four days. It saves me so much stress when I can finish the cleanup the day before the party. Speaking of making things ahead, you should check out the make-ahead magic in my recipe for the moist red velvet Bundt cake!
Serving Suggestions for This Irresistible Biscoff Dessert
When serving up a slice of this truly Irresistible Biscoff Dessert, you want to offer pairings that complement that rich, spiced cookie flavor without overpowering it. Because this cheesecake is so profoundly decadent, I find simpler sides work best.
Seriously, a lovely, piping hot cup of fresh coffee or a strong espresso cuts through the richness perfectly. If you need a little bright contrast, don’t reach for heavy sauces. Instead, try a very light, tart fruit element. A simple raspberry coulis—just pureed raspberries and a tiny bit of sugar—drizzled lightly on the plate adds a beautiful pop of color and acidity.
It’s amazing how the tartness elevates the creamy filling! For your next warm treat, you absolutely have to try my whipped hot chocolate recipe!
Frequently Asked Questions About No Oven Dessert Biscoff Cheesecake
It’s always great hearing what questions pop up when you’re getting ready to make a new dessert! Since this is a fantastic No Oven Dessert that relies on chilling for structure, people often ask about firmness and swaps. Don’t sweat it; we’ve got reliable answers here for all your Simple Cheesecake Recipes needs. If you want another bright flavor profile while you’re having cheesecake cravings, my lemon cake recipe is divine! You can find it here.
Can I use a graham cracker crust instead of a Biscoff Crust Dessert?
Oh, you certainly *can*, but you’re losing some of that essential spiced flavor we love! The Biscoff crust is what makes this dessert so iconic. If you must substitute, go ahead and use graham crackers mixed with butter, but maybe consider adding a half-teaspoon of cinnamon and a pinch of ground cloves to the crumbs. It helps mimic that warm spice profile the Biscoff cookies bring on their own. It won’t be the same, but it will still be tasty!
How long does the No Bake Biscoff Cheesecake need to set?
This is the most important structural question! Because we aren’t using eggs or baking to set the filling, time in the cold is crucial. You need a *minimum* of six hours in the refrigerator for it to firm up enough to slice cleanly. Honestly, though, I always push for overnight chilling. That extra time lets the cream cheese firm up completely against the cookie butter, giving you slices that look professional, just like the ones over at this recipe inspiration!
Nutritional Estimates for Your Biscoff Cheesecake Recipe
Now, I know some of you want the nitty-gritty details on what goes into a slice of this magnificent biscoff cheesecake. While I focus primarily on flavor and fun here at Cookin’ Corner, I believe in being upfront about what we are enjoying! Keep in mind these numbers are just estimates based on standard ingredient averages, so they might shift a little depending on the exact brands you use. For a deeper dive into cheesecakes (including a stunning salted caramel version!), check out my salted caramel cheesecake recipe!
For one standard slice (Yield: 10 servings), here are the estimates:
- Calories: 450
- Sugar: 35g
- Fat: 30g (Saturated Fat: 18g)
- Carbohydrates: 40g
- Protein: 5g
It’s a rich treat, made with the best ingredients, so enjoy every bite!
Share Your Favorite Biscoff Cheesecake Creations
Well, that’s it! We’ve made magic happen without ever turning on the oven. I truly hope this biscoff cheesecake becomes a staple in your home, just like it is here in mine. It wraps you up in that comforting, sweet blanket of cookie butter flavor, and you just can’t go wrong with something this easy!
Now that you’ve chilled it and had that first glorious bite, I desperately want to hear what you thought! Did you use the classic cookie topping, or did you get creative with chocolate shavings? Please don’t hesitate to jump down to the comments below and leave a rating and a little note about your experience. Every single comment helps me know which dependable recipes to keep bringing you!
And if you manage to snap a gorgeous picture of your final, velvety creation—maybe sitting next to a lovely cup of coffee—tag me on social media! Seeing your takes on these classic comfort dishes is the absolute highlight of my day. It connects me right back to those early days watching my grandmother in the kitchen. If you loved this easy no-bake treat, you might also want to try out my recipe for creamy snickerdoodle cheesecake next!
PrintNo-Bake Creamy Biscoff Cheesecake

Make this rich, velvety No-Bake Biscoff Cheesecake featuring a crunchy cookie crust and a smooth filling infused with Lotus Biscoff cookie butter. This easy dessert is perfect for making ahead.
- Prep Time: 20 min
- Cook Time: 0 min
- Total Time: 6 hr 20 min
- Yield: 10 servings 1x
- Category: Dessert
- Method: No-Bake
- Cuisine: American
- Diet: Vegetarian
Ingredients
- 1 1/2 cups Biscoff cookie crumbs (about 25 cookies)
- 6 tablespoons unsalted butter, melted
- 16 ounces cream cheese, softened
- 1 cup powdered sugar
- 1 teaspoon vanilla extract
- 1 cup heavy whipping cream, cold
- 1 cup Biscoff cookie butter, slightly warmed
- 1/4 cup Biscoff cookie butter, for topping
- 1/4 cup Biscoff cookies, crushed, for garnish
Instructions
- Prepare the crust: Mix the Biscoff cookie crumbs and melted butter in a bowl until fully combined. Press the mixture firmly into the bottom of a 9-inch springform pan. Place the crust in the freezer while you prepare the filling.
- Beat the cream cheese: In a large bowl, use an electric mixer to beat the softened cream cheese until it is smooth and creamy. Scrape down the sides of the bowl.
- Add dry ingredients: Gradually beat in the powdered sugar and vanilla extract until just combined. Do not overmix.
- Whip the cream: In a separate, chilled bowl, whip the cold heavy whipping cream until stiff peaks form. Gently fold the whipped cream into the cream cheese mixture until no streaks remain.
- Incorporate cookie butter: Gently fold the slightly warmed Biscoff cookie butter into the cheesecake mixture until it is evenly distributed, creating a velvety filling.
- Assemble the cheesecake: Pour the filling over the chilled crust and spread it evenly.
- Chill: Cover the pan loosely with plastic wrap and refrigerate for at least 6 hours, or preferably overnight, until the cheesecake is firm.
- Finish and serve: Before serving, drizzle the remaining 1/4 cup of Biscoff cookie butter over the top. Sprinkle with crushed Biscoff cookies for garnish. Release the springform side and slice.
Notes
- Warm the cookie butter slightly in the microwave for 15-20 seconds to make it easier to fold into the batter without deflating the whipped cream.
- For a firmer crust, you can bake the crust at 350°F for 8 minutes before chilling.
- If you want a Biscoff spread swirl on top, reserve 2 tablespoons of the filling mixture and swirl it with 2 tablespoons of melted Biscoff spread before chilling.
Nutrition
- Serving Size: 1 slice
- Calories: 450
- Sugar: 35g
- Sodium: 280mg
- Fat: 30g
- Saturated Fat: 18g
- Unsaturated Fat: 12g
- Trans Fat: 0.5g
- Carbohydrates: 40g
- Fiber: 1g
- Protein: 5g
- Cholesterol: 95mg