
There is just something about a perfect tropical dessert that instantly feels like sunshine on a plate, isn’t there? If you’ve ever dreamed of recreating that incredible sweet and slightly salty experience you find at Thai restaurants, well, you’re in the right place! I remember watching my grandmother—yes, even grandmas love a good tropical treat sometimes!—try to master the proper sticky texture. It took practice, but I’ve taken those treasured notes and made sure our recipe for authentic **mango sticky rice** is foolproof, even including a super handy rice cooker option. You truly can achieve that rich, creamy coconut sticky rice goodness right in your own kitchen.
Here at Cookin’ Corner, we take heritage recipes seriously. We want to give you results that work time after time, so you get that luscious flavor every single time without the guesswork. If you’re looking for the best Asian dessert that’s naturally vegan and gluten-free, stick with me. Feel free to check out our other wonderful dessert recipes once you master this one!
- Why This Authentic Thai Mango Sticky Rice Recipe Works For You
- Gathering Ingredients for Perfect Mango Sticky Rice
- Ingredient Notes and Substitutions for Mango Sticky Rice
- How to Make Mango Sticky Rice: Step-by-Step Guide
- Tips for Success When Making Mango Sticky Rice
- Variations on the Classic Mango Sticky Rice Dessert
- Storage and Reheating Instructions for Coconut Sticky Rice
- Frequently Asked Questions About Mango Sticky Rice
- Share Your Homemade Thai Mango Sticky Rice Creations
Why This Authentic Thai Mango Sticky Rice Recipe Works For You
I designed this so you don’t have to stress; this isn’t one of those recipes that requires secret techniques from Bangkok!
- You get that signature creamy coconut rice texture—no hard or dry grains, I promise!
- The perfect sweet and salty balance in the coconut sauce keeps you coming back for more.
- We make it super easy by including a straightforward rice cooker option for stress-free cooking.
- It’s naturally wonderful for everyone—this delicious **sweet sticky rice dessert** is both vegan and gluten-free, making it a safe bet for any gathering.
Gathering Ingredients for Perfect Mango Sticky Rice
Okay, the secret to this incredible **Thai Mango Sticky Rice Recipe**—aside from soaking the rice forever—is using the absolute right stuff. You can’t just grab any rice from your pantry, trust me on this one! When you shop for your components, think ripe, rich, and creamy. We need three main players here: the rice, the coconut sauce layers, and of course, the perfect mango.
If you’re looking for ways to incorporate more whole foods into your sweets, check out some healthy recipe ideas on my other pages! But for this classic dish, precision makes the difference between a good dessert and the best **homemade Thai dessert** experience.
Essential Components for Your Coconut Sticky Rice Recipe
Here is exactly what you need to gather up before you even think about rinsing that rice. Having all this ready upfront makes the assembly process so much smoother!
- The Rice: You absolutely must buy 1 cup of glutinous rice. This is often labeled as sticky rice or sweet rice. Seriously, do not substitute this with jasmine or basmati—it won’t work!
- The Coconut Milk: You’ll need about 1 cup of full-fat coconut milk for soaking *and* cooking the rice, plus an extra 2 tablespoons reserved just for that thick topping sauce later on. Don’t skimp on the fat content here; that’s where the richness lives!
- The Sweeteners & Seasoning: We need ¾ cup of granulated sugar for the main soaking milk, and then a bit of extra sugar (about 1 teaspoon) just for that small topping sauce. Salt is crucial—you need ¼ teaspoon for the main soak and just a tiny pinch for the topping. That salt is what balances all the sweetness!
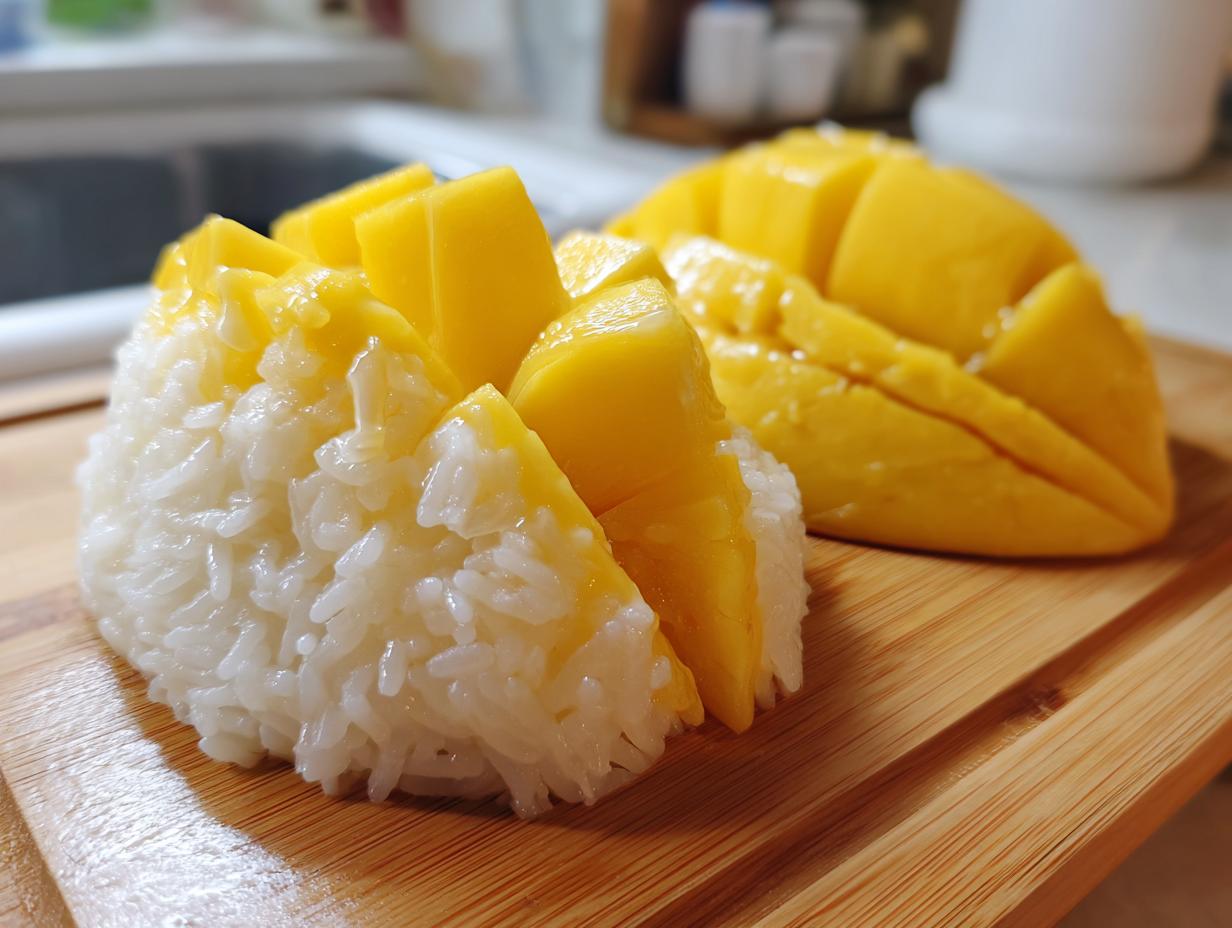
- The Star: Two ripe mangoes. You are hunting for varieties like Nam Dok Mai or the common Honey mangoes if you can find them. They must be sweet but still hold their shape when sliced.
- Optional Garnish: A final sprinkle of toasted sesame seeds or some crunchy toasted mung beans takes this tropical Asian dessert over the top!
Ingredient Notes and Substitutions for Mango Sticky Rice
Now, let’s talk about those ingredients I stressed in the last section—especially the rice! I get asked constantly: can I just use regular long-grain rice? And my answer is always a firm, loving, NO. You need true glutinous rice, often called sweet rice, because this is what allows the grains to become that perfect, chewy, clumped texture we expect in authentic **Khao Niew Mamuang**. Regular rice gets mushy, and that’s not what we want!
When you’re picking out those gorgeous mangoes, you want them fragrant and barely yielding to a gentle squeeze. If they feel squishy, they’re too far gone and will turn to mush when you slice them next to your creamy coconut rice. If they feel rock hard, they won’t be sweet enough.
A quick note for those watching sugar intake: I totally get it! This is naturally a sweet Thai dessert, but you can certainly scale back that sugar in the main coconut sauce slightly to make your own **low sugar mango sticky rice**. Just remember to keep that pinch of salt; it’s vital for flavor!
How to Make Mango Sticky Rice: Step-by-Step Guide
This is where the magic happens, and honestly, this process ensures you get that perfect texture we talked about. Making truly authentic **mango sticky rice** involves a few distinct phases, but none of them are tricky if you follow the timing. Once you nail the rice soak, the rest flows just like a lovely tropical stream. If you’re looking for ways to make this happen super fast, remember, soaking time is the longest part, but the hands-on cooking steps here are definitely among our quick, easy recipes!
I remember the first time I made this for a summer party—I felt like a total rockstar when everyone kept asking where I bought it! You absolutely can achieve that rich, creamy coconut sticky rice goodness right in your own kitchen. For the full authentic experience, I highly recommend diving into every detail, including using the immersion technique outlined at this recipe I found inspiring.
Preparing the Glutinous Rice for Creamy Coconut Rice Dessert
First, rinse that sticky rice until the water runs crystal clear—I mean it, rinse until it looks clean! Then, the crucial part: you gotta soak it. I usually combine the rice with one cup of full-fat coconut milk (yes, use the milk right away!) and a tiny pinch of salt, then I let it sit for at least four hours, but honestly, overnight is always my preference because that deep soak is key. When it’s time, if you’re using a rice cooker (which I totally recommend for ease!), drain off that soaking liquid. Add the soaked rice to the cooker along with one fresh cup of water and cook it on your standard white rice setting. If you’re using a steamer, line that basket with cheesecloth and steam it for about 25 to 30 minutes until it’s beautifully tender and sticky.
Creating the Sweet Coconut Sticky Rice Sauce
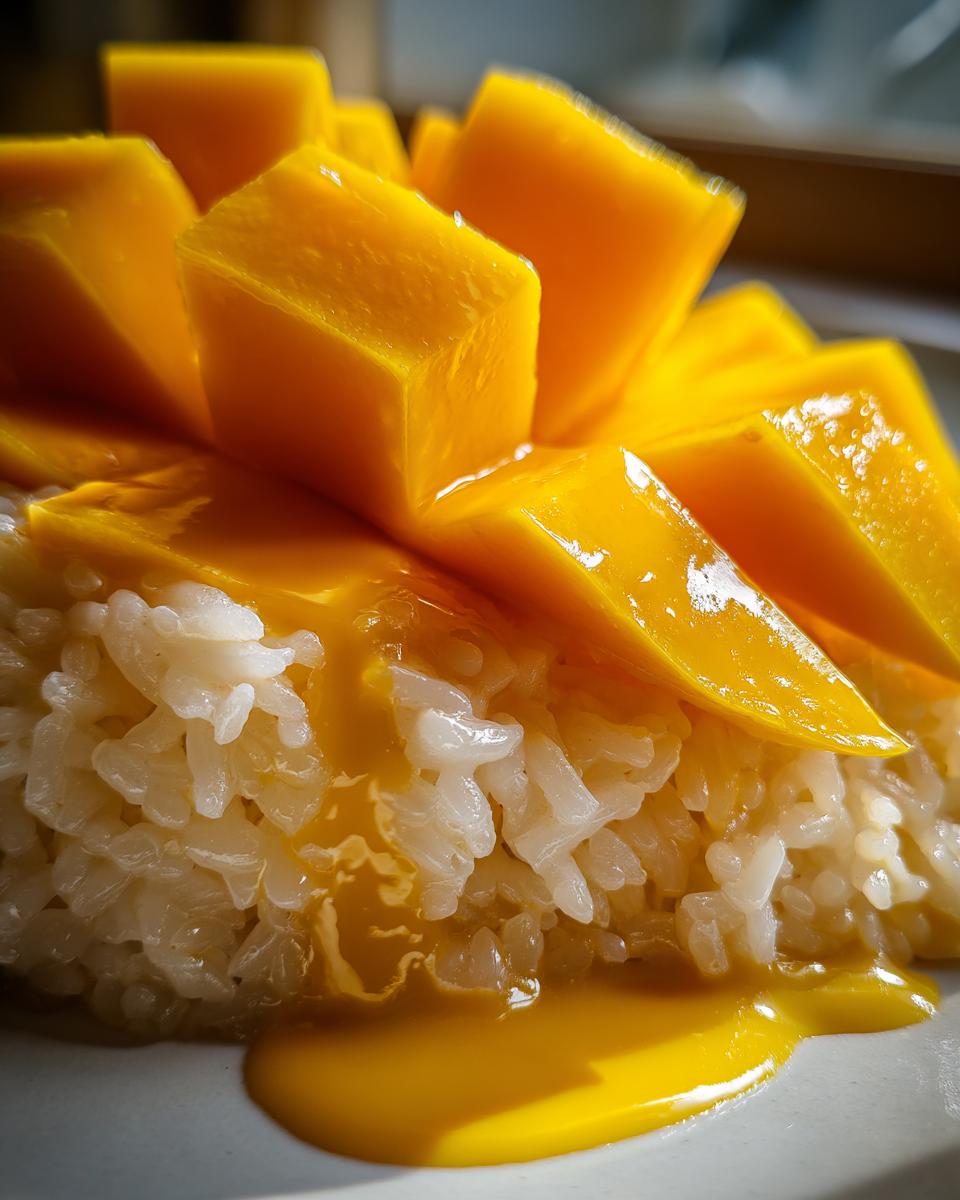
While your rice is cooking, whip up the main sauce. In a small pot, mix that remaining cup of coconut milk with ¾ cup of sugar and ¼ teaspoon of salt. You need to heat this over medium-low heat, stirring gently until you see every single grain of sugar dissolve. Listen to me closely: Do not boil this sauce! Boiling changes the texture of the coconut milk, and we want silky smooth richness. Once it’s dissolved, take it right off the heat! Separately, for the topping sauce that gives you that final pop, you’ll heat two tablespoons of extra coconut milk with one teaspoon of sugar and a pinch of salt until that sugar melts. This topping sauce should be noticeably thicker than the main sauce.
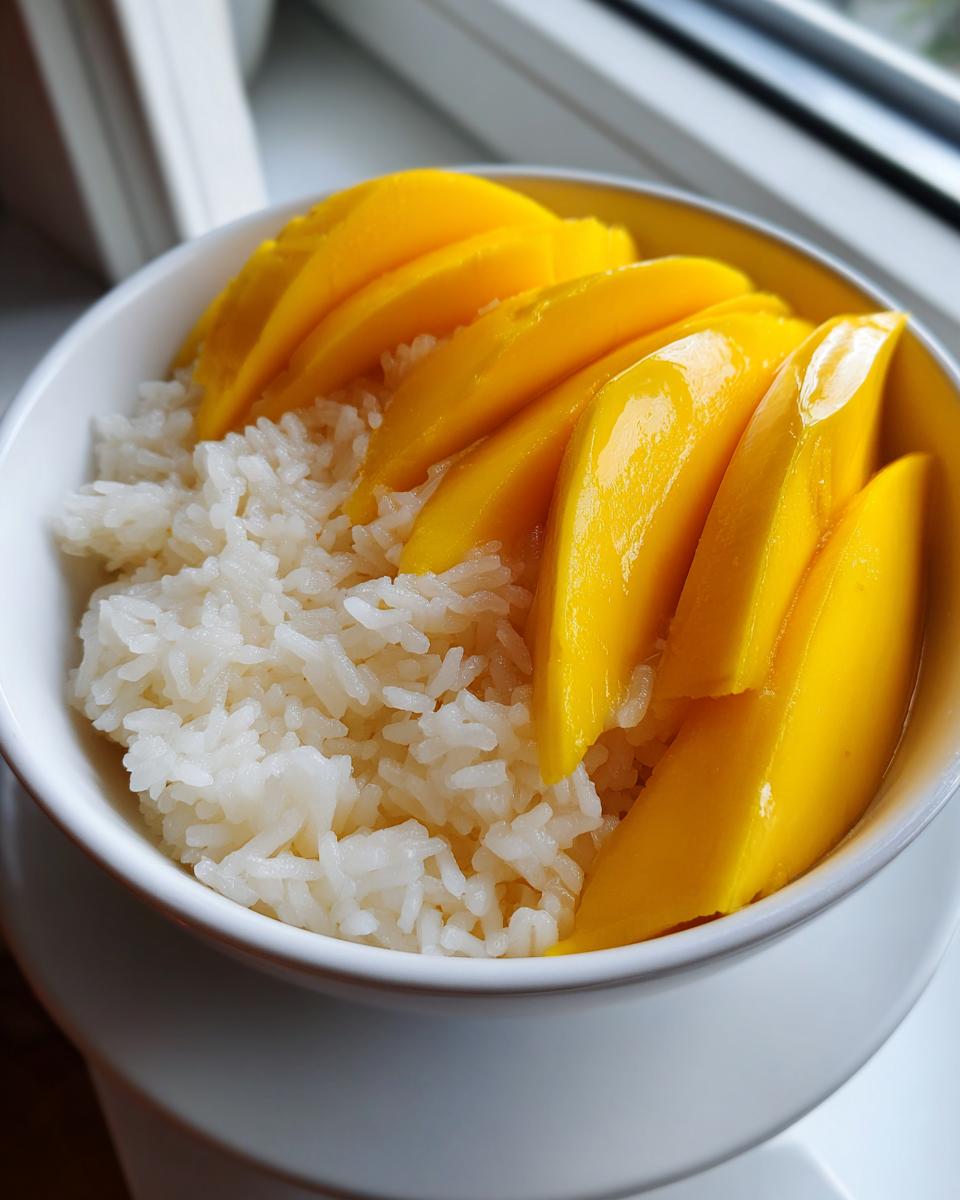
Assembling Your Luscious Mango Coconut Treat
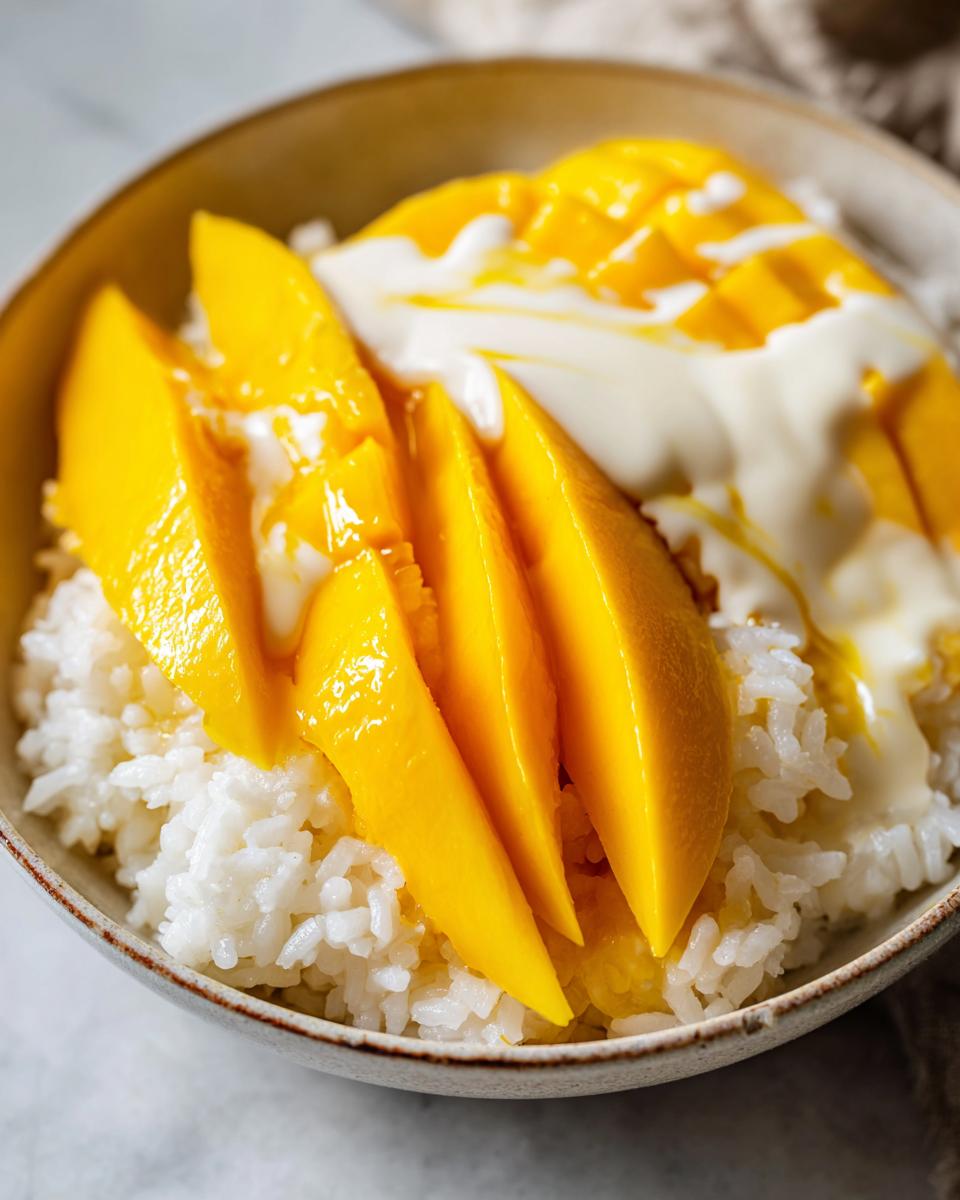
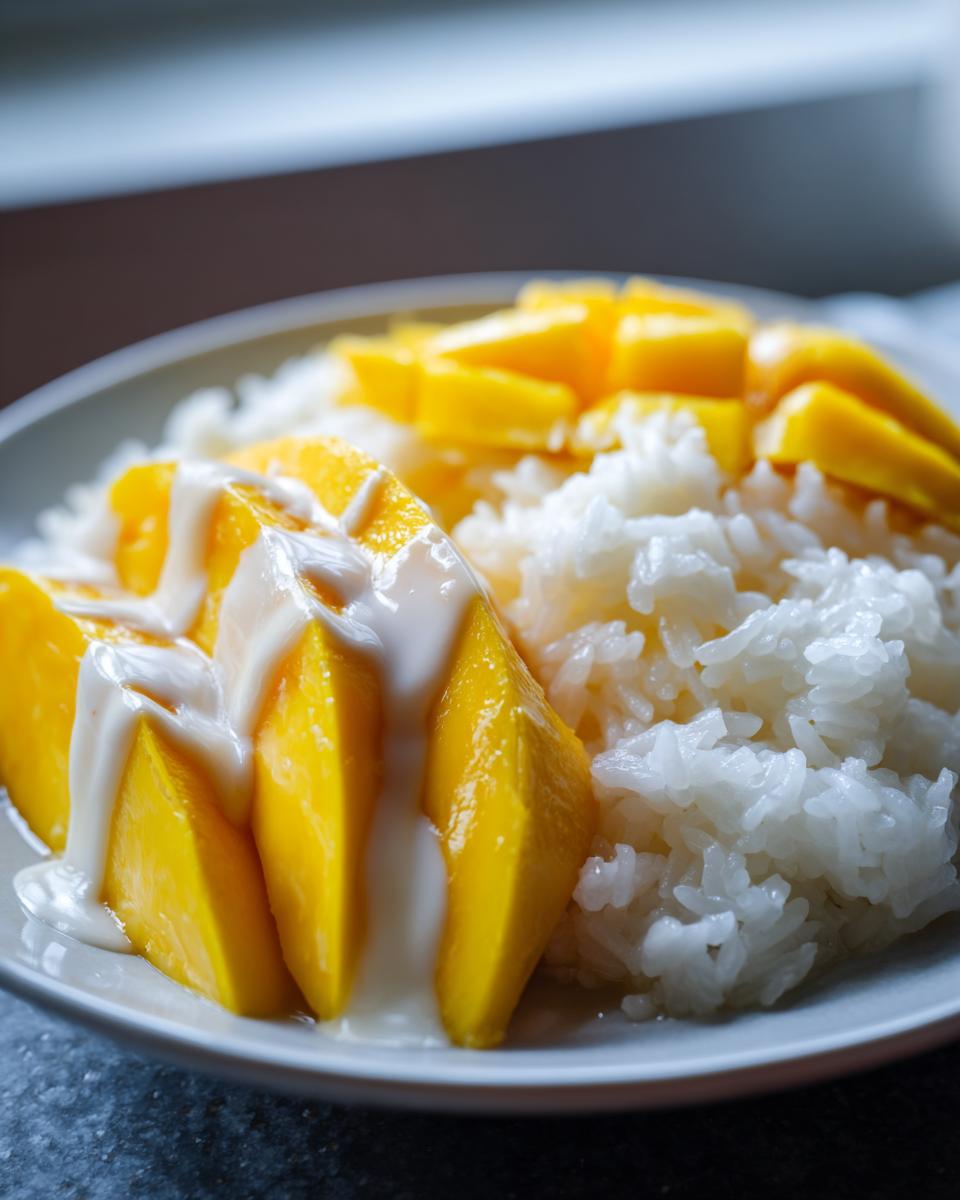
The second that rice comes out of the cooker or steamer, you must work fast! Transfer that hot rice immediately into a bowl. Pour about two-thirds of your main sweet coconut sauce right over the hot **sweet sticky rice dessert**. Stir it just enough so it starts incorporating, then cover that bowl tightly! Let it sit for a good 15 minutes. This resting time is non-negotiable; it lets the hot rice suck up all that glorious flavor. Once rested, slice up your beautiful mangoes. To plate this **luscious mango coconut treat**, spoon out that warm, flavored rice, arrange the mango alongside it, and drizzle the remaining first sauce over the rice. Don’t forget that tiny drizzle of the thicker topping sauce right on top. That final plating is what confirms you have made the perfect **mango sticky rice**!
Tips for Success When Making Mango Sticky Rice
I know this recipe seems simple, but getting that perfect sticky texture is all about a couple of small, but mighty, rules. First, you MUST use full-fat coconut milk. The light stuff just won’t give you that incredibly rich mouthfeel that defines authentic **mango sticky rice**. Also, pay attention to the sauce ratio! Don’t pour all that creamy coconut sticky rice sauce on at once; save at least a quarter of it for drizzling right before you serve.
The first time I tried this, I served it cold the next day, and it was just… okay. I realized the serving temperature matters! It’s traditional to serve this **tropical Asian dessert** with the rice still warm. That warmth lets the flavor pop! Since discovering that trick, my homemade version has gotten rave reviews, just like this wonderful recipe I admire.
Variations on the Classic Mango Sticky Rice Dessert
One of the best things about this amazing dessert is how naturally adaptable it is! If you were worried about this being too complicated or not fitting your dietary needs, you can rest easy. This specific **coconut sticky rice recipe** is already naturally compliant with a few popular diets, which is a huge win.
Since we only use coconut milk, sugar, rice, and fruit, this is already a fantastic **Vegan Mango Sticky Rice Dessert**. There are no eggs or dairy hidden here, so it’s safe for all my plant-based friends. Similarly, because we aren’t using flour or any wheat products, this is inherently a **Gluten Free Mango Sticky Rice** treat. You get the best of both worlds without having to hunt down specialty ingredients!
While I always preach sticking close to tradition—that salty-sweet-fruity balance is perfection—I understand wanting to tweak things occasionally. If you want to add a little aromatic warmth, you can put about half a teaspoon of real vanilla extract into your main coconut sauce mixture when you melt the sugar. It’s not super traditional, but it smells amazing! Another fun idea is swapping out the sesame seeds for shredded toasted coconut flakes on top.
If you’re looking for more sweet ideas that are easy to manage, definitely pop over and check out the rest of the dessert recipes collection. We are always finding ways to make classics accessible!
Storage and Reheating Instructions for Coconut Sticky Rice
So, what happens if you actually have leftovers of this delectable dessert? That’s the nice surprise—there are usually leftovers because I make a double batch! However, you need to know that when you chill this **coconut sticky rice recipe**, the texture will firm up quite a bit; that’s just the starch doing its thing.
Don’t throw it out! I stick to two methods for reviving it. If you have only a small portion, a quick 15-second zap in the microwave with just a tiny splash of water over the top helps bring back some moisture. For a larger portion of **sweet sticky rice dessert**, I prefer placing it in a small steamer basket for just a few minutes. That gentle steam really revives the chewiness beautifully.
Frequently Asked Questions About Mango Sticky Rice
I know when you try a new international dessert, questions always pop up! It’s important to get these details right so you don’t end up with a pan of plain rice instead of the decadent treat you deserve. I’ve gathered up the top things people ask me about nailing this famous **Thai mango sticky rice recipe**.
What is the difference between glutinous rice and regular rice for mango sticky rice?
Oh, this is the biggest one! Glutinous rice, which is also called sticky rice or sweet rice, is what you have to use. It’s naturally very high in amylopectin starch, which is the stuff that makes the grains stick together, become chewy, and absorb all that lovely coconut milk evenly. If you use regular long-grain rice (like Jasmine), it has more amylose, and it will just cook up fluffy and separate, not sticky! That’s why using the right rice is non-negotiable for this dessert.
Can I make this Sweet Thai Dessert Ideas recipe ahead of time?
You absolutely can prep parts of this **sweet Thai dessert idea** ahead of time, but here’s the key: don’t mix the rice and mango until you are ready to serve! You can cook the sticky rice and pour the main coconut sauce over it, letting it absorb completely. Store that mixture in the fridge. When you are ready to eat, you should gently steam the rice mix for a few minutes or microwave it with a tiny splash of water to warm it back up and soften the texture. Slice your mango fresh, then assemble!
What exactly is Khao Niew Mamuang?
That’s just the beautiful Thai name for it! Khao Niew Mamuang translates simply to sticky rice served with mango. It’s considered one of Thailand’s quintessential desserts because it uses sweet, seasonal fruit paired perfectly with a rich, comforting staple. It takes a little effort, but once you taste it, you’ll know why it’s so famous!
How long does the rice need to soak for the best results?
If you are serious about getting that super creamy, velvety texture that melts in your mouth, you need a long soak. I always advise soaking the rice for a minimum of four hours, but I feel the absolute best results come from the overnight soak. That extended time lets the rice absorb moisture evenly before it even hits the heat, leading to less chance of dry spots after cooking.
Share Your Homemade Thai Mango Sticky Rice Creations
Now that you have the secrets to making this luscious mango coconut treat at home, I absolutely want to see what you come up with! Cooking is a community effort, and I truly love seeing how this recipe brightens up your tables.
Did you find some amazing Nam Dok Mai mangoes? Did you use toasted sesame seeds or crunchier mung beans for garnish? Tell me all about it! Please leave a rating right below the recipe card and drop a comment telling me your favorite part of this whole process. Did you use the rice cooker trick? I always want the feedback!
And if you snap a picture of your perfect serving of **mango sticky rice**, please share it! Tag us on social media so I can see your gorgeous creations. Don’t forget, if you still have room after this fantastic **summer Thai treat**, make sure you browse through the rest of our contact and feedback section for more tried-and-true classics. Happy cooking, sweet friends!
PrintAuthentic Thai Mango Sticky Rice Recipe (Khao Niew Mamuang)
Make classic Thai Mango Sticky Rice at home. This recipe delivers creamy coconut sticky rice paired with sweet, ripe mangoes for a comforting tropical dessert.
- Prep Time: 20 min (plus soaking time)
- Cook Time: 30 min
- Total Time: 4 hours 50 min
- Yield: 4 servings 1x
- Category: Dessert
- Method: Steaming/Rice Cooker
- Cuisine: Thai
- Diet: Vegan
Ingredients
- 1 cup glutinous rice (sticky rice)
- 1 cup full-fat coconut milk (for soaking and cooking)
- ¾ cup granulated sugar
- ¼ teaspoon salt
- 2 ripe mangoes (Nam Dok Mai or Honey variety recommended)
- 2 tablespoons extra coconut milk (for topping sauce)
- 1 teaspoon sugar (for topping sauce)
- Pinch of salt (for topping sauce)
- Toasted sesame seeds or mung beans for garnish (optional)
Instructions
- Rinse the glutinous rice thoroughly under cold water until the water runs clear.
- Soak the rinsed rice in 1 cup of coconut milk mixed with a pinch of salt for at least 4 hours, or preferably overnight.
- If using a rice cooker: Drain the soaking liquid. Add the soaked rice to the rice cooker pot along with 1 cup of fresh water. Cook using the white rice setting.
- If steaming: Place the soaked rice in a steamer basket lined with cheesecloth and steam for 25 to 30 minutes until tender and sticky.
- While the rice cooks, prepare the sweet coconut sauce: In a small saucepan, combine ¾ cup sugar, ¼ teaspoon salt, and 1 cup of coconut milk. Heat over medium-low heat, stirring until the sugar dissolves completely. Do not boil. Remove from heat.
- Once the rice is cooked, immediately transfer the hot rice to a bowl. Pour about two-thirds of the prepared sweet coconut sauce over the hot rice. Stir gently until the liquid is absorbed. Cover the bowl and let it sit for 15 minutes to allow the rice to fully absorb the flavor.
- Prepare the topping sauce: In a very small saucepan, combine the 2 tablespoons of extra coconut milk, 1 teaspoon of sugar, and a pinch of salt. Heat briefly until the sugar dissolves. This sauce should be thicker than the main sauce.
- Peel and slice the ripe mangoes.
- To serve this **luscious mango coconut treat**, place a serving of the warm, sweet sticky rice on a plate. Arrange the sliced mango next to the rice. Drizzle the remaining main coconut sauce over the rice, and top with a spoonful of the thicker topping sauce. Garnish with toasted sesame seeds or mung beans.
Notes
- For the best texture, use true glutinous rice, often labeled as sweet rice. Do not substitute with regular long-grain rice.
- Select mangoes that are fully ripe but still firm enough to slice cleanly.
- If you prefer a **low sugar mango sticky rice**, slightly reduce the sugar in the main coconut sauce, but maintain the salt to balance the flavor.
- This recipe is naturally **gluten free** and **vegan dessert** friendly.
Nutrition
- Serving Size: 1 serving
- Calories: 450
- Sugar: 35g
- Sodium: 220mg
- Fat: 18g
- Saturated Fat: 16g
- Unsaturated Fat: 2g
- Trans Fat: 0g
- Carbohydrates: 70g
- Fiber: 3g
- Protein: 5g
- Cholesterol: 0mg