
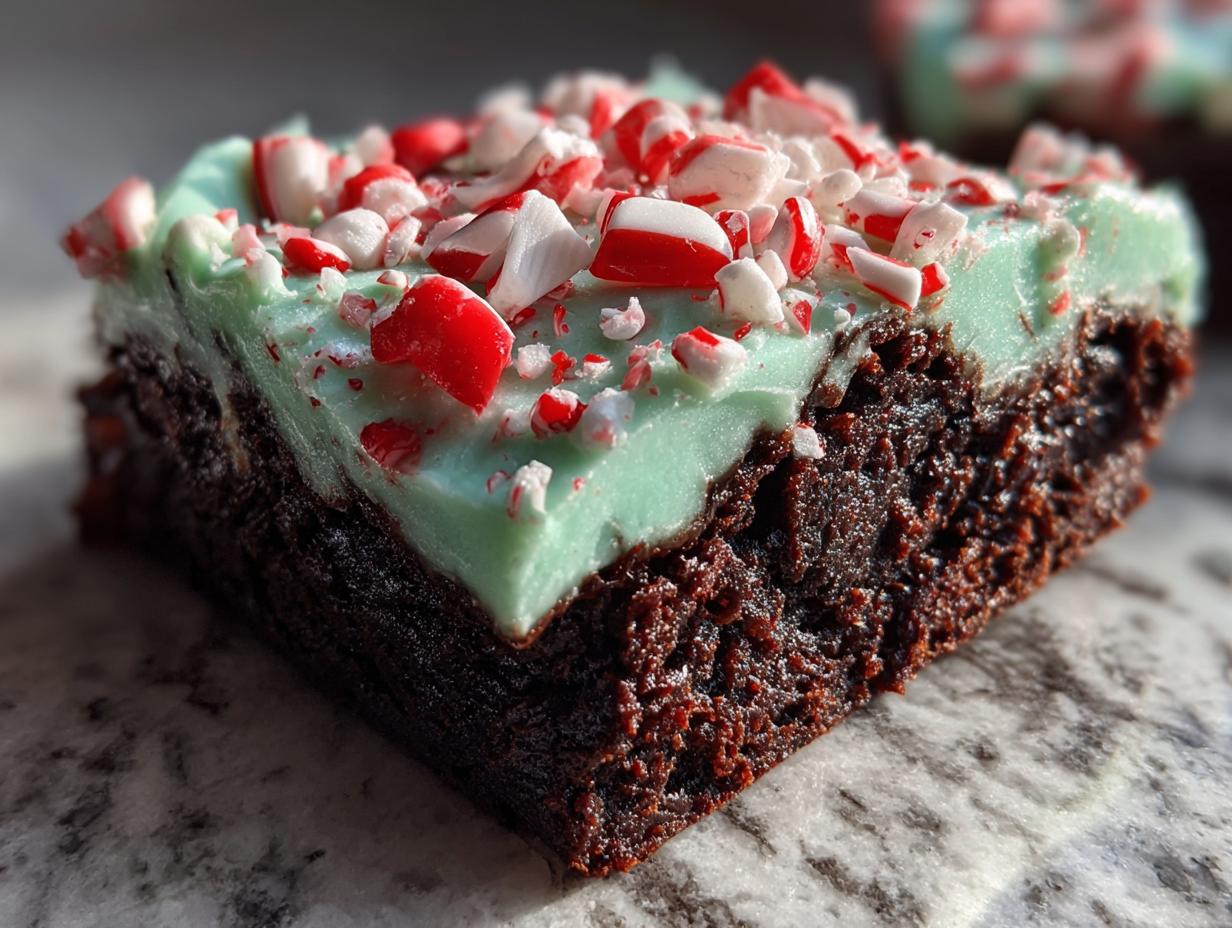
There’s nothing quite like the smell of rich chocolate mingling with cool peppermint wafting through the house in December. For me, that scent immediately brings me back to helping my Grandma count out sprinkles for Christmas cookies, even though those treats were never quite as decadent as what we’re making today! Baking during the holidays has to be special, but honestly, our schedules are too busy for fussiness. That’s why I’m so excited to share my recipe for the Ultimate Fudgy One-Bowl Peppermint Brownies.
Trust me on this; these aren’t just good; they’re the best peppermint brownies you’ll ever make. They deliver that dense, deeply fudgy texture we all crave, but the best part? It’s all done in one bowl, meaning cleanup is a breeze for your busy holiday baking schedule! We love easy-to-clean recipes around here; I even have a similar technique I use for my Buckeye Brownies when I’m short on time! Reliability is everything when baking for family gatherings, and this recipe just works perfectly every single time. If you need a showstopper that tastes homemade but costs you minimal effort, this is it. I really hope these become a tradition on your side of the kitchen counter!
- Why You Will Love These Easy Peppermint Brownies
- Gathering Ingredients for Ultimate Fudgy Peppermint Brownies
- How to Make Peppermint Brownies: A Simple One-Bowl Method
- Tips for Perfect Fudgy Chocolate Mint Brownies
- Storage and Make-Ahead for Your Peppermint Brownies Recipe
- Serving Suggestions for Festive Brownie Bars
- Frequently Asked Questions About Peppermint Brownies
- Nutritional Estimate for These Holiday Chocolate Mint Brownies
- Share Your Best Winter Brownies Creations
Why You Will Love These Easy Peppermint Brownies
I know you have a million things to do this time of year, so I kept this recipe super straightforward. But don’t let the “easy” fool you—these bars pack a huge festive punch! Here’s why they earn a spot on my annual baking list:
- Seriously Fudgy: We focus on fat and not overbaking, which gives you that glorious, melt-in-your-mouth texture you dream about in a brownie.
- One-Bowl Cleanup: Yes, that’s right! Mix everything right in one bowl. Less scrubbing means more time enjoying the holidays!
- Perfect Chocolate Mint Balance: It’s not toothpaste flavor; it’s deep, dark chocolate perfectly balanced with a refreshing hint of cool mint.
- Festive Brownie Bars Ready Faster: These bake up beautifully in a 9×13 pan, making them perfect for school swaps, office parties, or just packing up as homemade gifts.
Gathering Ingredients for Ultimate Fudgy Peppermint Brownies
Okay, since we are making these in one bowl, the prep work is honestly just about getting your ingredients measured out. This is where we secure that fudgy texture! Remember, for deep chocolate flavor—the kind that makes people go back for seconds—you need a really good, unsweetened cocoa powder. Don’t skimp here; it makes a huge difference! I always keep mine stored in an airtight jar.
Make sure your butter is melted, not just soft. That melted butter whisked with the sugar is a critical step for fudginess, so get that part right!
For the Fudgy Peppermint Brownies Base
- 1 cup (2 sticks) unsalted butter, melted
- 2 cups granulated sugar
- 4 large eggs
- 1 teaspoon vanilla extract
- 1 teaspoon peppermint extract
- 3/4 cup unsweetened cocoa powder (the good stuff!)
- 1 cup all-purpose flour
- 1/2 teaspoon salt
- 1 cup semi-sweet chocolate chips
- 1/2 cup crushed peppermint candies (for mixing right into the batter)
For the Peppermint Frosting and Topping
We whisk these up separately once the brownies are completely cool. You want that frosting nice and smooth before spreading it on.
- 1 cup powdered sugar
- 2 tablespoons milk (or just a little bit extra if needed!)
- 1/2 teaspoon peppermint extract (for flavoring the frosting)
- 1/4 cup crushed peppermint candies (for those crunchy final sprinkles)
If you want to try something different sometime, my recipe for chocolate mousse pie uses just a few simple pantry items too—it’s all about smart ingredient combinations!
How to Make Peppermint Brownies: A Simple One-Bowl Method
We are whipping these amazing peppermint brownies up fast! The beauty of this one-bowl approach is that we are aiming for that cracked top and fudgy inside because we aren’t using any mixer motor—just your arm and a whisk! The entire process from start to finish takes us about 45 minutes total, plus cooling time, which is unheard of for brownies this rich. Just watch out when you mix the dry ingredients in; that’s where we earn our fudgy stripes!
Mixing the Peppermint Brownies Batter
First things first, get your oven humming at 350°F (175°C). Line your 9×13 pan with parchment paper, leaving those edges hanging over like little handles—this saves your sanity later! Now, grab that whisk. Whisk the melted butter and sugar together until they look happy, then toss in your eggs one by one, mixing well after each one joins the party. Add your vanilla and the peppermint extract, and give it a quick stir.
Next, you whisk in the cocoa powder and salt until any lumps disappear. Here’s the important part: gently stir in the flour until it’s *just* combined. If you see little flour streaks, that’s perfect! Overmixing that flour is what makes a cakey brownie, and we want fudgy! Finally, fold in those chocolate chips and the half-cup of crushed peppermint candies with a spatula. If you’re loving the fudgy texture, you might also want to check out my tips for achieving that perfect crackle on my ultimate fudgy brownies!
Baking and Cooling Your Peppermint Brownies
Spread that gorgeous batter evenly into your prepared pan, making sure it’s smoothed out. Pop it into the preheated oven and start timing for 25 to 30 minutes. Remember my big brownie rule: we are looking for *moist crumbs* clinging to the toothpick when you check the center, not a totally clean one. A clean one means you’ve gone too far and your brownies will be dry.
Once they pass the test, pull them out and let them relax completely in the pan on a wire rack. Do not rush this cooling step! If you try to frost warm peppermint brownies, you’ll end up with minty chocolate soup, and nobody wants that!
Finishing with Peppermint Frosting
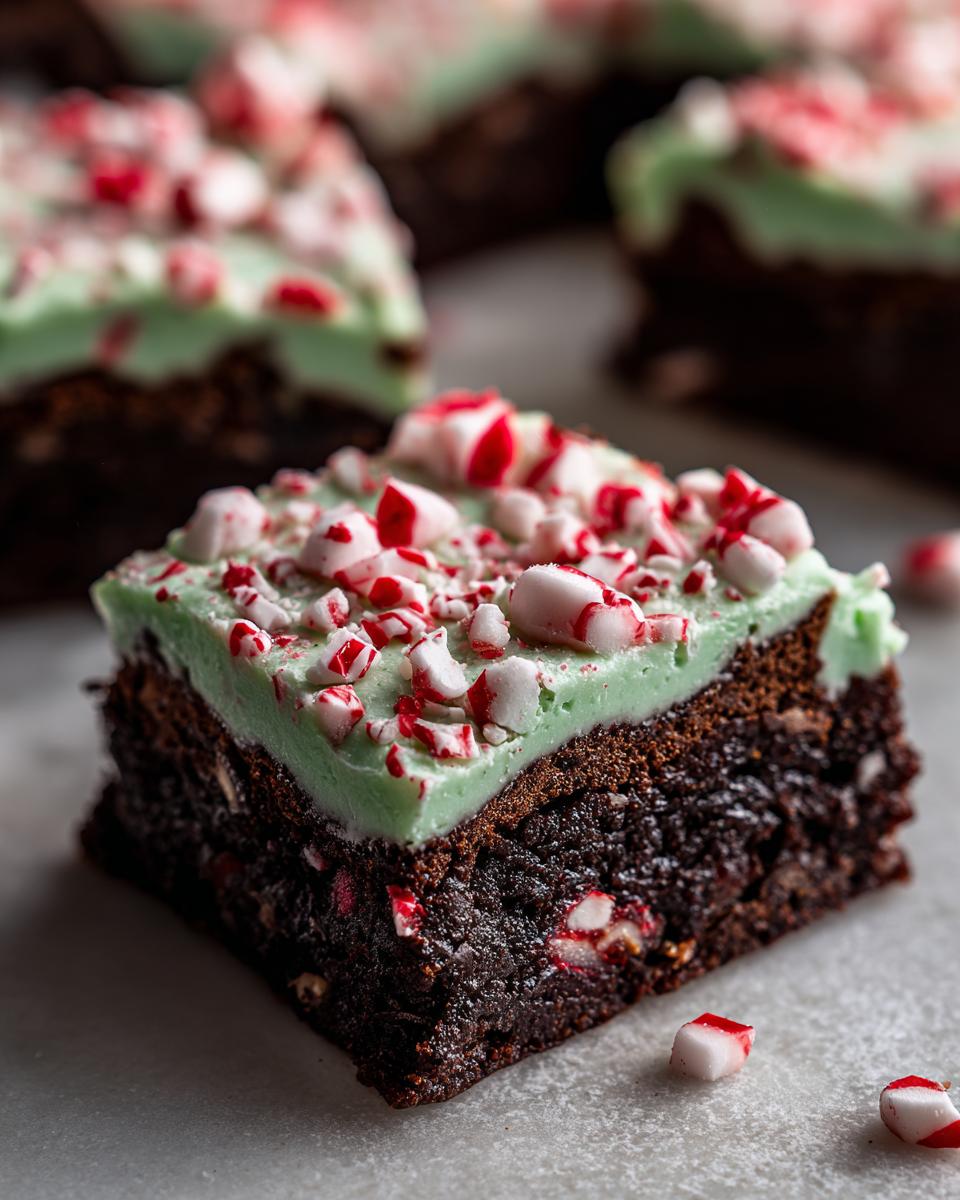
While they cool down, make the frosting. In a small bowl, simply whisk the powdered sugar, milk, and the remaining half-teaspoon of peppermint extract. If it seems too thick to spread, add milk just a drop at a time until you have a wonderfully smooth consistency—you want it easy to glide across the top. Once the base is totally cool, spread that frosting right over the top. Then, sprinkle on that last little bit of crushed peppermint candy for that stunning, crunchy finish that makes these look like decadent peppermint bark brownies!
Tips for Perfect Fudgy Chocolate Mint Brownies
Now that you know the steps, let’s talk about taking these from great to absolutely unforgettable. Because we’re aiming for that intensely fudgy texture when we make our peppermint brownies, temperature and timing are seriously your best friends. I rely on my years of testing these kinds of recipes to give you a few cheats so your bake turns out exactly how you pictured it—rich, glossy, and perfectly minty. Speaking of richness, make sure you are using good quality cocoa powder here; it’s what gives you that deep, satisfying chocolate punch that contrasts the bright mint.
Achieving Maximum Fudginess in Peppermint Brownies
If you want these to be fudgy instead of cakey, you have to ignore the urge to bake them until they look bone dry. Seriously, pull them out when the toothpick test still shows moist crumbs clinging to it. I mean it! If that toothpick comes out completely clean, you’ve lost that gooey center we are fighting for. Remember, they continue to cook a little bit on residual heat after you pull them from the oven.
If you are nervous about this, go ahead and pull them 2 minutes before you think they are done. That slight underbake will guarantee you get that wonderful dense crumb. If you love trying different swirl textures, you should check out my recipe for peanut butter swirl brownies sometime; getting that perfect texture takes a bit of practice in knowing when to stop mixing!
Flavor Boosts and Peppermint Bark Brownies Variations
The recipe already calls for crushed candies in the batter, which gives you little pops of mint flavor everywhere. But if you really want to elevate these and turn them into stunning decadent peppermint bark brownies for a stunning holiday display, you have to try the drizzle!
Right after you spread the peppermint frosting on the completely cool brownies, melt about 4 ounces of good white chocolate. You don’t need to mix anything into it—just melt it gently until it’s silky smooth. Then, use a fork or a small piping bag to drizzle thin streams of the melted white chocolate back and forth across the top of the mint frosting. Once that sets up a little, then you sprinkle your finishing crushed candies on top. It looks so professional, and the extra layer of sweet white chocolate against the dark chocolate base is just heavenly. It’s an easy extra step that tastes like you baked them all day!
Storage and Make-Ahead for Your Peppermint Brownies Recipe
These peppermint brownies are fantastic because, frankly, they travel beautifully! Unlike delicate cakes, these sturdy bars hold up so well in transit, which is a lifesaver when you’re taking something to a cookie swap or a neighbor’s party. I always stack the cooled, frosted squares between layers of parchment paper in an airtight container.
At room temperature, they stay perfectly soft and fudgy for about three or four days. If you need them to last longer—maybe you baked a double batch because you know they’ll disappear so fast—you can freeze them! Wrap the squares tightly in plastic wrap first, then tuck them into a freezer bag. They keep well for up to two months. When you’re ready for a treat, just let them thaw on the counter for an hour or so!
For storing other holiday treats, I’ve found similar success stacking my cookie butter cheesecake cups with wax paper between them. It’s all about creating those barriers!
Serving Suggestions for Festive Brownie Bars
Okay, you’ve got these gorgeous, rich peppermint brownies cooling, and now it’s time to decide how to serve them up! Because they are so intensely chocolatey and minty, they don’t need much help, but I always like to think about what pairs best with that cool crunch.
These festive brownie bars are simply divine served slightly chilled—it keeps that frosting firm! If you are serving them after a big dinner, a small espresso shot cuts through the richness perfectly. But for a cozy afternoon treat, nothing beats pairing one with a big mug of hot chocolate. You know I have the best recipe for easy homemade hot cocoa mix if you need something warm to dunk them into!
Frequently Asked Questions About Peppermint Brownies
I know you might have a couple of last-minute questions before you dive into baking these amazing holiday treats. We’ve all been there, worried about whether a substitute will ruin the magic. Here are a few things I get asked all the time about my peppermint brownies recipe!
Can I use mint extract instead of peppermint extract in these peppermint brownies?
You totally *can*, but you need to be careful with the amount! Peppermint extract is much stronger and provides that sharp, cool holiday bite we are looking for. Mint extract is generally milder and sweeter. If you substitute mint, you’ll probably need to double the amount used in the recipe, or honestly, you won’t taste it once it hits the dark chocolate! I always stick to true peppermint extract for these Christmas brownie recipes.
What is the best way to crush candy canes for the topping?
This is one of my favorite hands-on steps! Don’t just throw them in a food processor unless you want dust—we want texture! Take your candy canes (or any hard peppermint candy) and place them inside a sturdy zip-top bag. Press out most of the air and seal it tight. Then, take a rolling pin or the bottom of a heavy saucepan and gently tap and roll them until they are crushed into small, uneven pieces. This gives you those perfect little crunchy bits for the topping!
How do I ensure my brownies are fudgy, not cakey?
This is the million-dollar question for any brownie maker! It all comes down to two things: the ratio of fat (butter and eggs) to flour, and how you test for doneness. Make sure you whisk the melted butter and sugar really well before adding the eggs—that starts the structure. But the biggest secret is the toothpick test: you are looking for *moist crumbs* clinging to the stick. If the stick comes out completely clean, you’ve baked out the fudginess, and you’ll end up with a cakey texture. For my banana pudding cupcakes, I use a similar method to avoid too much rise, but here, less baking equals more delicious gooiness!
Nutritional Estimate for These Holiday Chocolate Mint Brownies
I’m always sharing my tips and tricks, but I also believe in being transparent about what goes into our bodies! Just keep in mind that this is a rough estimate based on the included ingredients; your sugar content might shift depending on how thick your frosting is. Since these are rich, decadent treats, they are best enjoyed in moderation, especially during the holiday hustle. We are looking at about 300 calories per square, with 35 grams of sugar, as a general guide for these peppermint brownies.
- Serving Size: 1 square
- Calories: 300
- Sugar: 35g
- Fat: 16g
- Protein: 4g
- Carbohydrates: 38g
These numbers are based on 16 squares cut from the 9×13 pan. Treat yourself, you deserve it!
Share Your Best Winter Brownies Creations
That’s it! You are now officially equipped to make these amazing, super-fudgy peppermint brownies. The mix comes together so fast, and honestly, the hardest part is waiting for them to cool so you can frost them! I always hope my readers have as much fun making these as I do, and I love seeing them pop up on your holiday tables or social media feeds.
Once you’ve tried this recipe, please come back and tell me how they turned out! Did you stick with my simple powdered sugar swirl, or did you go all out with the white chocolate drizzle for an extra-special treat? I encourage you to drop a comment below, rate the recipe with stars, and let me know if these are heading straight into your permanent binder of best winter brownies.
If you ended up falling in love with the peppermint bark look, you absolutely have to see how others have styled their Peppermint Bark Brownies. It gives me so much inspiration!
Baking is all about sharing joy, and I can’t wait to hear about the happy memories you create around these rich, minty squares. If you’re already thinking about your next bake, my soft and chewy oatmeal cookies are another family classic that people always ask me to make year after year. Happy baking, friends!
PrintUltimate Fudgy One-Bowl Peppermint Brownies

Make rich, fudgy peppermint brownies in a single bowl for easy preparation. These brownies feature a deep chocolate flavor with a refreshing mint finish, perfect for holiday baking.
- Prep Time: 15 min
- Cook Time: 30 min
- Total Time: 45 min
- Yield: 16 servings 1x
- Category: Dessert
- Method: Baking
- Cuisine: American
- Diet: Vegetarian
Ingredients
- 1 cup (2 sticks) unsalted butter, melted
- 2 cups granulated sugar
- 4 large eggs
- 1 teaspoon vanilla extract
- 1 teaspoon peppermint extract
- 3/4 cup unsweetened cocoa powder
- 1 cup all-purpose flour
- 1/2 teaspoon salt
- 1 cup semi-sweet chocolate chips
- 1/2 cup crushed peppermint candies (for batter)
- 1 cup powdered sugar (for frosting)
- 2 tablespoons milk (for frosting)
- 1/2 teaspoon peppermint extract (for frosting)
- 1/4 cup crushed peppermint candies (for topping)
Instructions
- Preheat your oven to 350°F (175°C). Line a 9×13 inch baking pan with parchment paper, leaving an overhang for easy removal.
- In a large bowl, whisk the melted butter and granulated sugar together until fully combined.
- Add the eggs one at a time, mixing well after each addition. Stir in the vanilla extract and 1 teaspoon of peppermint extract.
- Whisk in the cocoa powder and salt until no lumps remain.
- Add the flour and mix until just combined. Do not overmix the batter.
- Fold in the chocolate chips and the 1/2 cup of crushed peppermint candies.
- Spread the batter evenly into the prepared baking pan.
- Bake for 25 to 30 minutes, or until a toothpick inserted near the center comes out with moist crumbs attached, indicating a fudgy texture.
- Let the brownies cool completely in the pan on a wire rack.
- While cooling, prepare the frosting: In a small bowl, whisk together the powdered sugar, milk, and 1/2 teaspoon of peppermint extract until smooth and spreadable.
- Once the brownies are cool, spread the peppermint frosting evenly over the top.
- Sprinkle the remaining 1/4 cup of crushed peppermint candies over the frosting.
- Cut into squares and serve your decadent peppermint brownies.
Notes
- For an extra fudgy texture, slightly underbake by about 2 minutes.
- Use high-quality cocoa powder for the best chocolate flavor in these chocolate mint brownies.
- If you prefer a peppermint bark brownie, melt 4 ounces of white chocolate and drizzle it over the frosting before adding the crushed candies.
Nutrition
- Serving Size: 1 square
- Calories: 300
- Sugar: 35g
- Sodium: 100mg
- Fat: 16g
- Saturated Fat: 9g
- Unsaturated Fat: 7g
- Trans Fat: 0g
- Carbohydrates: 38g
- Fiber: 2g
- Protein: 4g
- Cholesterol: 50mg