
Oh, you are going to absolutely love this one! When life gets busy—and let’s be honest, when is it not busy?—turning on the oven feels like way too much effort. But sometimes you just need that decadent, creamy hit, right? That’s why nothing beats a good no-bake treat, especially when you bring in the magic of rich, spiced cookie butter. Trust me when I say these cookie butter cheesecake cups are the dreamy indulgence you’ve been waiting for. They come together faster than it takes to decide what to watch on TV!
Here at Cookin’ Corner, we stick to the tried-and-true recipes that Sarah Jane Thompson’s family perfected—the ones that rely on flavor and simplicity, not fancy equipment. These little dessert cups are foolproof, utterly gorgeous, and proof that you can have spectacular flavor without ever firing up the stove. If you need another quick, oven-free winner, you have to check out the recipe for my easy no-bake ice cream pie too! They truly are the ultimate quick cheesecake idea!
- Why These No-Bake Cookie Butter Cheesecake Cups Are a Must-Try
- Gathering Ingredients for Your Cookie Butter Cheesecake Cups
- Step-by-Step Guide to Making No Bake Cookie Butter Cheesecake Cups
- Expert Tips for Perfect Cookie Butter Cheesecake Cups
- Ingredient Notes and Substitutions for Your Cookie Butter Dessert
- Make Ahead Dessert and Storage for Cookie Butter Cheesecake Cups
- Serving Suggestions for These Individual Dessert Portions
- Frequently Asked Questions About Cookie Butter Cheesecake Cups
- Nutritional Estimates for Your Creamy Cookie Butter Treat
- Share Your Homemade Cookie Butter Cheesecake Cups Creations
Why These No-Bake Cookie Butter Cheesecake Cups Are a Must-Try
Honestly, who has time for a big, fussy baked cheesecake when you can have something this good with zero oven time? These Easy Dessert Cups deliver on every promise. They look like you spent hours fussing over them, but the reality is they are lightning fast to put together. Plus, they scratch that itch for that creamy, dreamy texture everyone craves.
- They are the ultimate Make Ahead Dessert! Assemble them the day before a party and forget about last-minute baking stress.
- We are talking rich, spiced flavor combined with that classic tangy cheesecake—it’s a match made in heaven.
- They are pre-portioned, making serving an absolute breeze.
Quick Assembly for Instant Gratification
My favorite part? Prep time is less than 20 minutes! Since these are pure No Oven Sweets, assembly is all you need to focus on. We crush cookies, mix the filling, and boom—done. Quick, simple, and totally satisfying for those moments you need a sweet fix *now*.
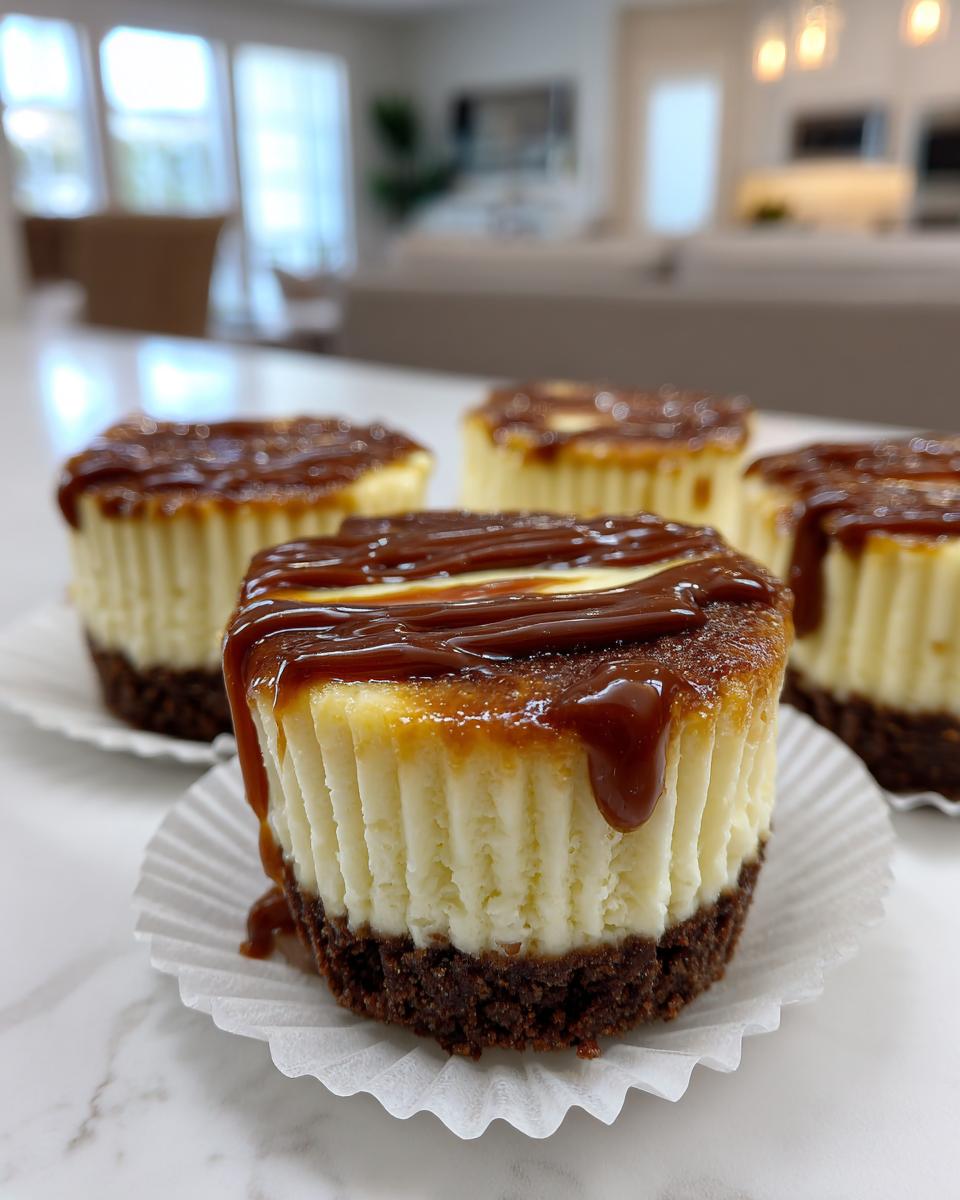
Perfect Individual Cheesecake Servings
Forget slicing and messy serving plates! These individual portions are simply stunning on a platter, making them go-to Party Dessert Ideas. Everyone gets their own perfect little package of creamy, crunchy joy. It feels a little bit fancy, even though they are so simple to make. If you loved my recipe for no-bake sugar cookie truffles, these cups offer that same satisfying grab-and-go luxury!
Gathering Ingredients for Your Cookie Butter Cheesecake Cups
Okay, let’s talk essentials! The beauty of these cookie butter cheesecake cups is that they use standard pantry items mixed with a star flavor—cookie butter! Make sure everything is mostly at room temperature (except the cream, of course!) for the smoothest process. Remember, great ingredients make great desserts, even no-bake ones.
Crust Components for the Cookie Butter Cheesecake Cups
- 1 1/2 cups crushed Biscoff or speculoos cookies
- 6 tablespoons unsalted butter, melted
The Creamy Filling Ingredients
- 16 ounces cream cheese, softened
- 1 cup powdered sugar
- 1 teaspoon vanilla extract
- 1/2 cup heavy whipping cream, cold
- 1/2 cup cookie butter (like Biscoff spread), plus extra for topping
Step-by-Step Guide to Making No Bake Cookie Butter Cheesecake Cups
This is where the magic happens, and I promise you, it’s so easy! We won’t be turning on an oven for these spectacular dessert cups. It’s all about quick mixing and patience while they chill. Ready to whip up these decadent beauties?
Preparing the Sweet Crumb Crust Dessert Base
First things first, we handle that crunchy base. Grab your crushed Biscoff cookies and mix them thoroughly with those 6 tablespoons of melted butter. You want the crumbs to look like wet sand—totally moistened but not swimming in butter. Once that’s done, take your muffin tin, especially if you’ve used paper liners, and press about one spoonful of that mixture right into the bottom of each cup. Press it down firmly so it holds together when you dig in later! Pop that tin into the fridge for a quick 15 minutes just to let that Sweet Crumb Crust Dessert set up nicely while you tackle the filling!
Mixing the Creamy Cookie Butter Treat Filling
Now for the creamy star! Don’t mix everything at once; we want air in here to get those perfect Creamy Cheesecake Bites. Beat your softened cream cheese with the powdered sugar and vanilla until it’s baby-smooth—no lumps allowed! In a totally separate, chilled bowl, whip that cold heavy cream until you get stiff peaks. That means if you lift the whisk, the peaks stand straight up! Gently fold that whipped cream into your cream cheese mixture. Do *not* stir aggressively, or you’ll deflate all that lovely air. Finally, softly fold in that half cup of cookie butter until you just see ribbons of it running through. That’s it for the filling!
Assembling and Chilling Your Cookie Butter Cheesecake Cups
With your crusts nice and firm from their chill session, it’s time to fill them up! Spoon that light, airy filling right over the crusts in all 12 cups. You can use a spoon or, if you want to get fancy, grab a piping bag for neat swirls. Once they are all filled, they need serious chilling time. These absolutely have to firm up completely to be considered true No Bake Cheesecake Cups. So, cover them gently and stick them in the refrigerator for a minimum of four hours. Seriously, don’t rush this part!
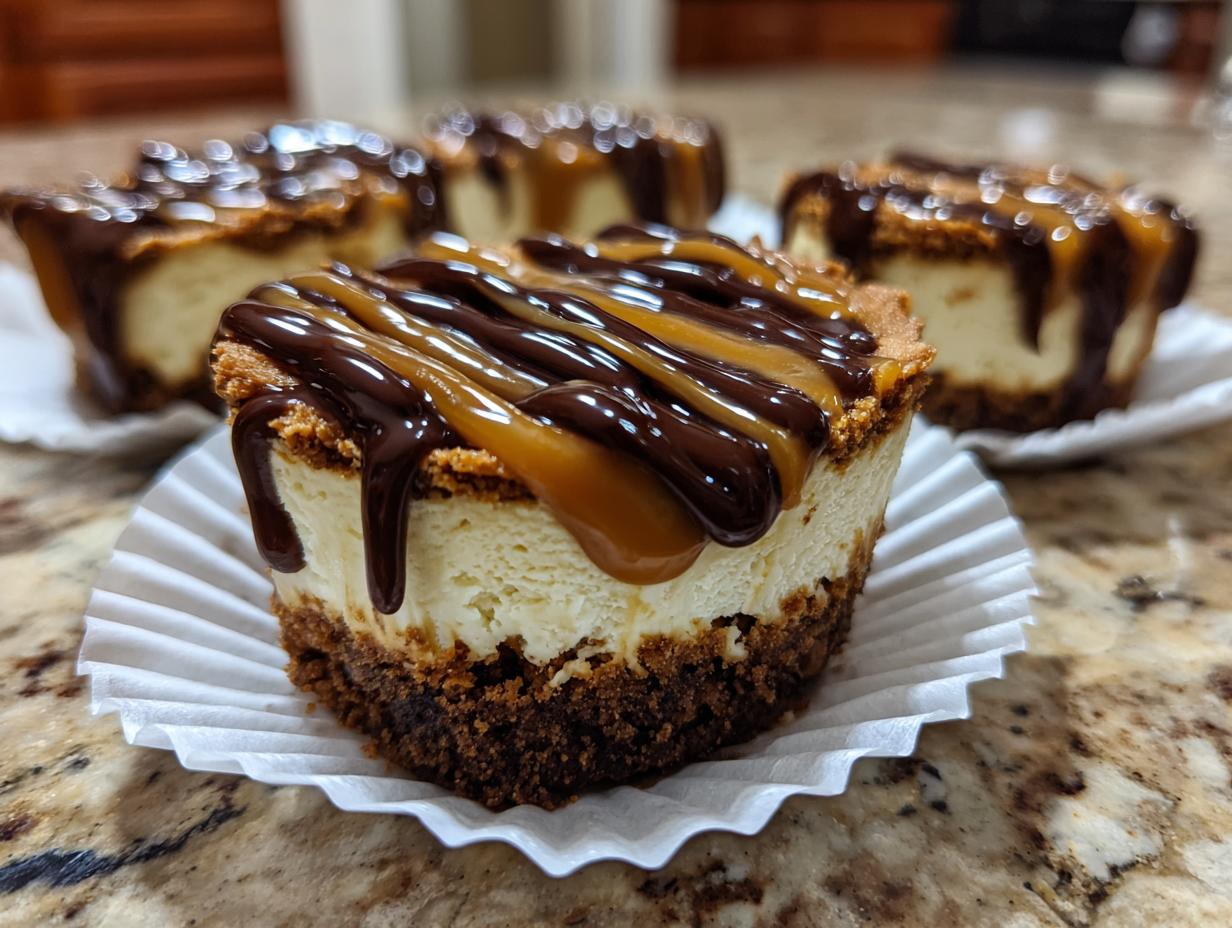
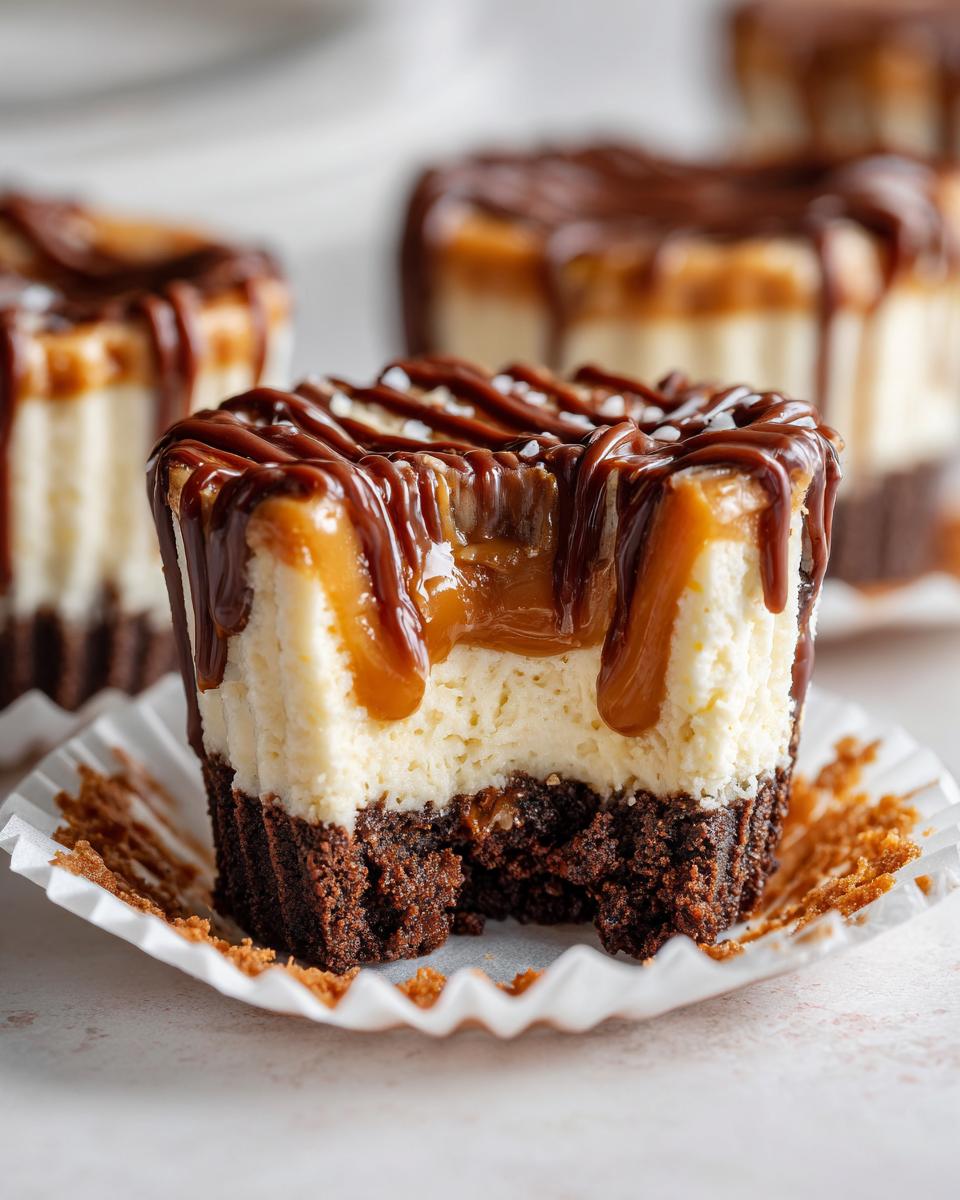
The Final Touch: Cookie Butter Drizzle
Once they are perfectly set, you have to make them look as good as they taste! Warm up a tablespoon or two more of that lovely cookie butter gently—just enough so it drizzles nicely, like thick honey. Take those chilled cups out and drizzle that warm, gooey topping over the top of each one. This final step really elevates them into Spectacular Dessert Cups. You won’t believe how simple this process was for something so decadent!
If you want to see a super fast cookie technique, check out how I make my Peanut Butter Cup Cookies—they are shockingly easy too!
Expert Tips for Perfect Cookie Butter Cheesecake Cups
Even though this is a no-bake recipe, there are absolutely secrets to getting that signature smooth, creamy texture that makes people ask if you baked them! Trust me, I learned the hard way that even simple recipes demand a little attention to detail. These tips ensure you get the best of that Creamy Cookie Butter Treat every single time.
Achieving Ultra-Soft Cream Cheese
This is my golden rule for anything involving cream cheese, baked or not! If your cream cheese is even slightly cold or stiff when you start mixing, you are guaranteed to end up with tiny, annoying lumps in the finished product. And nobody wants a lumpy cheesecake, right? You need that cream cheese to be fully softened—room temperature soft means you can easily press an indent into it with your finger. It should feel pliable, almost like thick pudding. If you plan ahead, just leave it out on the counter for an hour. If you’re in a rush, I often cut the blocks into small cubes to speed up the softening process.
Avoiding Overmixing the Filling
When we fold in that beautiful whipped heavy cream, we are adding air—fluffiness is key to these light Cookie Butter Cheesecake Cups! The second you add that whipped cream, you have to switch to the gentlest touch possible. Grab a spatula and fold it in carefully, aiming to combine it without squishing all those tiny air bubbles we just worked so hard to create. If you beat the cream cheese *and* the whipped cream together at high speed, you’ll deflate the whole thing! The goal is that light, dreamy texture, not a dense brick. For more inspiration on simple, delicious finishes, check out this amazing presentation!
Also, once you add your main portion of cookie butter, stop mixing once it’s *just* incorporated. That little bit of unevenness in the filling actually looks beautiful when you serve them.
If you’re looking for ways to use up extra dough, you should definitely look at my recipe for easy cake mix cookie bars—they’re another great no-fuss bake!
Ingredient Notes and Substitutions for Your Cookie Butter Dessert
I always get questions about swapping things out, especially since cookie butter—that amazing Biscoff flavor—can sometimes be tricky to find depending on where you shop! But don’t panic if you’re missing an ingredient or just want to mix things up a bit. Remember, we focus on dependable home cooking here, not strict dogma! These substitutions are tested and still give you that fantastic texture in your Biscoff Crunch Dessert.
Cookie Choices for the Crust
While the speculoos cookies are what give this dessert its signature spice profile, you absolutely have options for that crunchy base. The recipe notes mention that graham crackers work perfectly fine if you’re low on Biscoff cookies or just want a more classic flavor blend. You can use Biscoff cookies, graham crackers, or even other vanilla sandwich cookies—just crush them up the same way! Just ensure you use the same amount of melted butter to bind them. I’ve heard of folks using gingersnap cookies too, which really heightens the spice level!
Handling Cookie Butter Spread
This is a big one! Cookie butter acts totally different depending on whether it’s cold from the jar or warm. When we mix it into the main cheesecake filling (that half cup), keep it close to room temperature—but not hot! If it’s too cold, it won’t fold in smoothly, and you’ll get streaks of dense, cold butter in your light filling. For the topping drizzle, though, we want it warm! Heating it slightly just melts it down so it flows beautifully over the top, giving you that gorgeous, professional-looking finish. It’s amazing how that little bit of warmth makes such a difference in presentation.
If you want to try another fantastic spiced cookie recipe, you should look at my recipe for soft and chewy spiced cookies—they are amazing too!
Make Ahead Dessert and Storage for Cookie Butter Cheesecake Cups
This recipe is seriously my hero when I have to bring a treat to a gathering—it’s the definition of a perfect Make Ahead Dessert! Because we skip the baking, these cups actually taste incredibly fresh the next day because the cookie crust absorbs just a tiny bit of that creamy filling moisture. It’s seriously fantastic!
Refrigeration Guidelines
Remember how I said they need four hours minimum to set up? Keep them covered tightly in the refrigerator. They are stable and delicious for about three days once they are thoroughly chilled. If you need to make them even further ahead, I suggest chilling them completely first, then transferring them to an airtight bag or container. You can keep them in the fridge for up to three days. If you see something similar to this on someone else’s dessert table, you might check out this other individual dessert possibility!
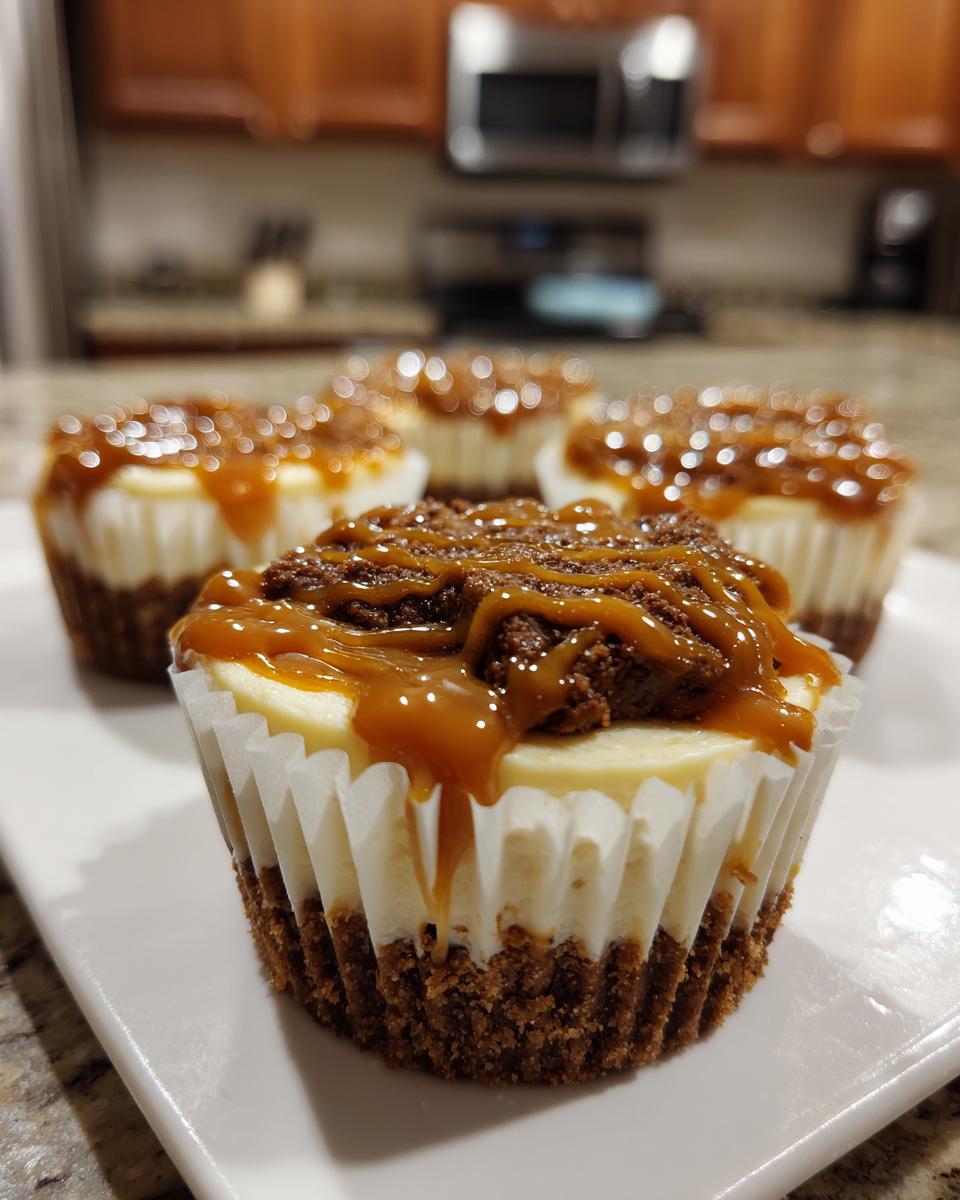
Serving Suggestions for These Individual Dessert Portions
Now that you have these perfect Decadent Dessert Cups chilling happily in the fridge, it’s time to think about how you’re going to present them! That drizzle of cookie butter we added is great, but sometimes you want to take something simple and make it look truly show-stopping. Since these are already perfectly portioned, dressing them up is just about adding a little flourish right before they hit the table.
Garnishes to Impress
You don’t need complicated piping skills to make these look amazing. In fact, the best garnishes are usually the simplest ones because they tie right back into the flavors already in the cup. A fantastic trick is saving a few of those Biscoff cookies before you crush them for the crust. Just keep a few whole or break them into pretty, irregular shards.
Right before serving, just push one of those cookie shards gently into the side of the cheesecake filling so it stands up a little bit. It gives it height and confirms that spiced crunch factor for whoever picks it up! Another option is to take maybe a teaspoon of those reserved crushed cookies and sprinkle them lightly over the top of the drizzle. I love how that looks—it catches the light beautifully and screams “crunchy cookie goodness.” It’s these little touches that make our Individual Dessert Portions feel like they came straight from a pastry chef’s kitchen!
If you’re feeling extra festive, a tiny dusting of cinnamon on top of the drizzle looks gorgeous, too. For another easy, creamy treat that looks impressive, you have to try my recipe for whipped hot chocolate—it’s pure magic in a mug!
Frequently Asked Questions About Cookie Butter Cheesecake Cups
I know you might have a few lingering questions about making these—after all, transforming cookie butter into a decadent dessert usually seems way more complicated than it is! We want to make sure your experience making these Biscoff Cheesecake Recipe stars is perfect. Here are some of the most common queries I get about these Quick Cheesecake Ideas.
Can I use a different brand of cookie butter?
Oh, absolutely! While Biscoff is the most famous brand out there, don’t worry if your grocery store carries a different store brand or generic speculoos spread. They all share that wonderful spiced flavor profile we love. The texture might vary *slightly*—some spreads are thicker than others—but you can use them exactly the same way in the filling. Remember, the goal is that creamy goodness, and most brands deliver!
Can I freeze these cookie butter cheesecake cups?
Yes, you certainly can! These are fantastic for meal prepping weeks ahead! If you plan on freezing them, I always recommend omitting that final drizzle of warmed cookie butter until you are ready to serve them. The drizzle can get a little weird in the freezer. Once fully set, place them in an airtight container—maybe with a layer of plastic wrap between layers so they don’t stick—and they should last beautifully for about a month. When you want to enjoy one, just move it to the refrigerator overnight to thaw slowly!
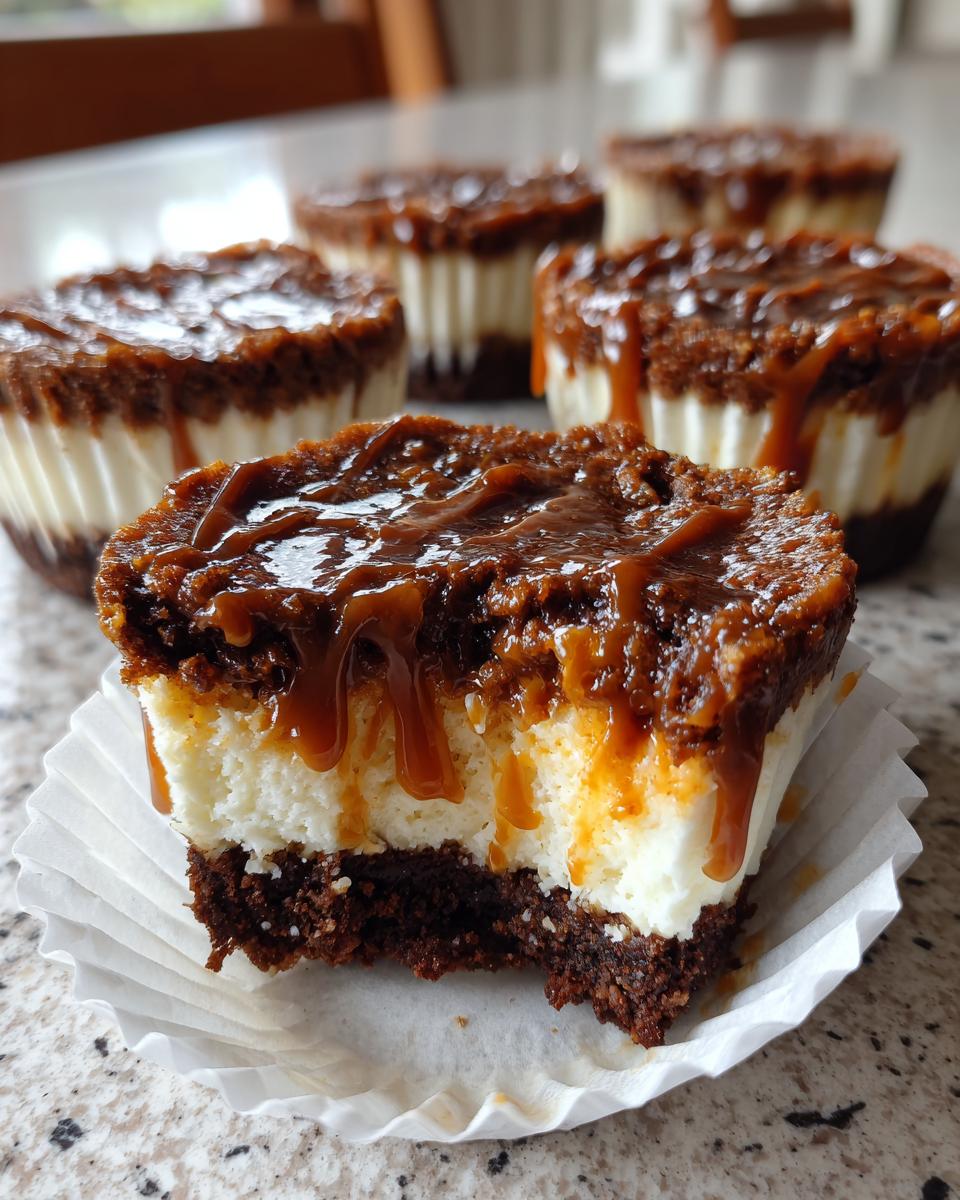
What is the best way to remove the paper liners?
Since these little guys chill out in the fridge for hours, the paper liners can sometimes stick a *little* bit stubbornly to the crust, especially around the bottom edges. When you are ready to serve, gently peel the paper liner down, almost folding it over itself, just enough to reveal the crust and the filling. It works much better than trying to wrestle the entire liner off all at once. Because we press the crust in firmly, the structural integrity is great, so you shouldn’t have any crumbling issues!
If you want to explore other cheesecake variations, you might love the unique cinnamon warmth in my snickerdoodle cheesecake recipe!
Nutritional Estimates for Your Creamy Cookie Butter Treat
Now, listen up, because while these cookie butter cheesecake cups are pure indulgence, I know some of you are curious about what you’re digging into! Since these are homemade and we aren’t using any fancy lab equipment here, these numbers are strictly estimates based on standard ingredients. Eat them because they are delicious, but keep in mind that these are definitely a treat, not a low-calorie snack!
We use rich cream cheese and plenty of cookie butter for that incredible flavor, so they pack a satisfying punch. If you want to see how my lighter, savory recipes balance things out, you should pop over and look at my recipe for creamy smothered chicken and rice casserole—that’s comfort food without the sugar rush!
Here is the nutritional rundown per single serving cup, based on the ingredients listed:
- Serving Size: 1 cup
- Calories: 350
- Sugar: 25g
- Sodium: 210mg
- Fat: 24g (With 14g Saturated Fat)
- Carbohydrates: 31g
- Protein: 5g
Because of that buttery crust and the decadent cheese filling, they aren’t the lowest in fat, but boy, are they worth every bit! Enjoy them responsibly!
Share Your Homemade Cookie Butter Cheesecake Cups Creations
Alright, now it’s your turn! I’ve shared all my secrets for getting the perfect texture in these cookie butter cheesecake cups, from the chilled crust to that beautiful cookie butter drizzle. But honestly, the best part of cooking for me is seeing my recipes come to life in your kitchens!
Once you try these quick, no-bake wonders, please let me know what you think! Did the cream cheese get perfectly smooth? Did you manage to wait the full four hours before digging in? Don’t be shy! Leave your rating below—you know, that five-star thingy—and drop a comment telling me how they went over at your last get-together. They are such great Individual Dessert Portions, people always ask for my recipe!
Show Off Your Spectacular Dessert Cups
And if you snapped a picture of your finished batch, I would absolutely love to see it! Tag us when you post them on Instagram or Facebook. Seeing those little cups—whether you kept them simple or went wild with toppings—is the real reward for all this recipe testing.
We are all about building a community here at Cookin’ Corner, and sharing your thoughts helps other bakers feel confident about trying these recipes next! If you ran into a snag or have a fantastic little hack you discovered while making our Easy Dessert Cups, spill the beans in the comments!
Need to Reach Out?
If you have a specific question that wasn’t covered in the FAQs, or if you just want to share a personal story about how much your family loved this very simple yet decadent treat, head over to my contact page. I read every single message, and I love hearing from you all!
Happy baking (or rather, *no-baking*)!
PrintEasy No-Bake Cookie Butter Cheesecake Cups
Create these simple, creamy cookie butter cheesecake cups featuring a crunchy cookie crust. This no-bake dessert is perfect for parties or quick indulgences and can be made ahead of time.
- Prep Time: 20 min
- Cook Time: 0 min
- Total Time: 4 hr 20 min
- Yield: 12 cups 1x
- Category: Dessert
- Method: No-Bake
- Cuisine: American
- Diet: Vegetarian
Ingredients
- 1 1/2 cups crushed Biscoff or speculoos cookies
- 6 tablespoons unsalted butter, melted
- 16 ounces cream cheese, softened
- 1 cup powdered sugar
- 1 teaspoon vanilla extract
- 1/2 cup heavy whipping cream, cold
- 1/2 cup cookie butter (like Biscoff spread), plus extra for topping
Instructions
- Combine the crushed cookies and melted butter in a bowl. Mix until the crumbs are evenly moistened.
- Press about 1 tablespoon of the crumb mixture firmly into the bottom of 12 standard muffin cups lined with paper liners or placed in a muffin tin. Chill the crusts for 15 minutes.
- In a large bowl, beat the softened cream cheese, powdered sugar, and vanilla extract until smooth and creamy.
- In a separate, chilled bowl, whip the cold heavy cream until stiff peaks form. Gently fold the whipped cream into the cream cheese mixture.
- Gently fold in 1/2 cup of the cookie butter into the cheesecake filling until just combined. Do not overmix.
- Spoon or pipe the cheesecake filling evenly over the chilled crusts in the muffin cups.
- Refrigerate the cups for at least 4 hours, or until firm.
- Before serving, warm a small amount of extra cookie butter slightly so it is drizzly. Top each cheesecake cup with a drizzle of the warm cookie butter.
Notes
- For the best texture, ensure your cream cheese is fully softened before mixing.
- You can use graham crackers instead of cookie butter cookies for the crust if desired.
- These individual dessert portions keep well in the refrigerator for up to 3 days.
Nutrition
- Serving Size: 1 cup
- Calories: 350
- Sugar: 25
- Sodium: 210
- Fat: 24
- Saturated Fat: 14
- Unsaturated Fat: 10
- Trans Fat: 0
- Carbohydrates: 31
- Fiber: 1
- Protein: 5
- Cholesterol: 65