
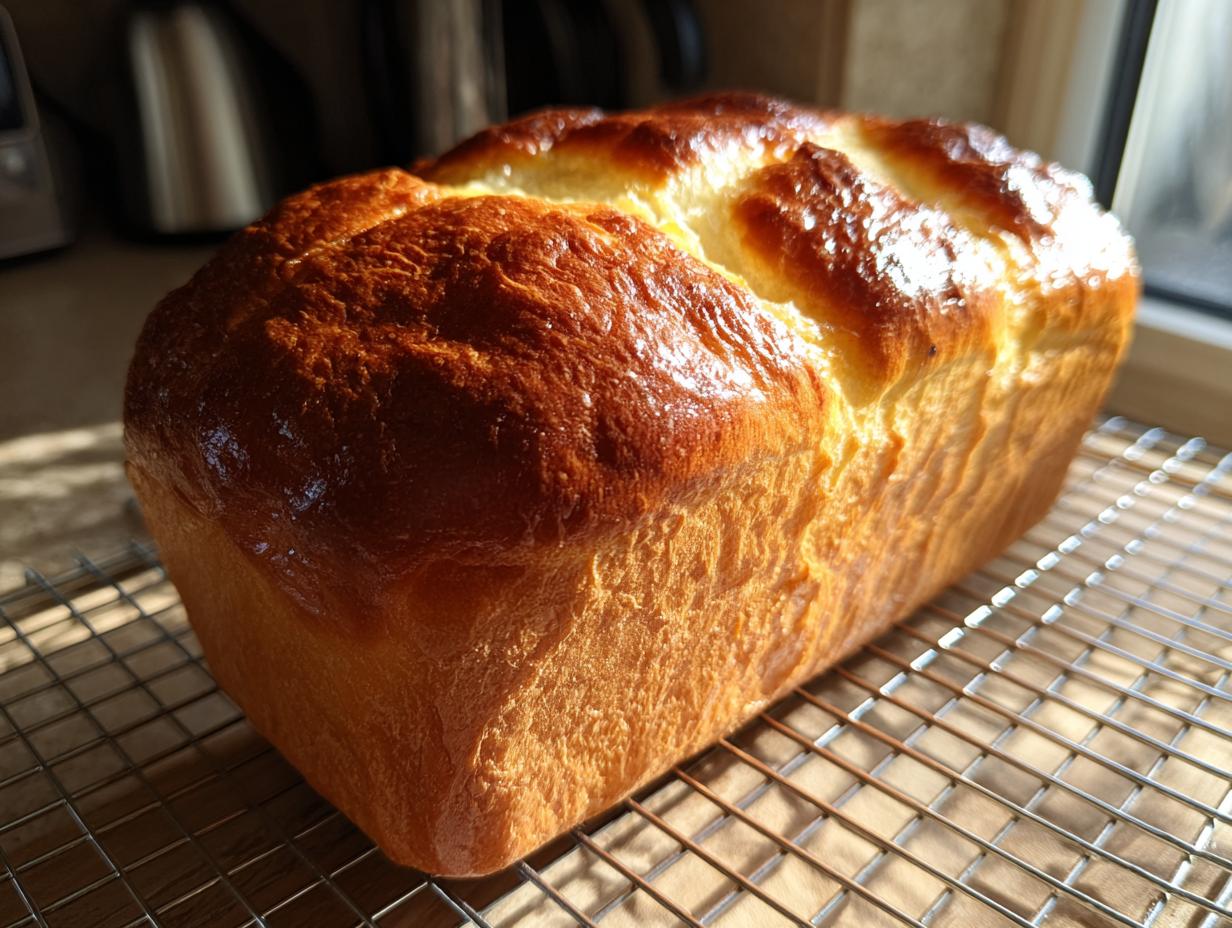
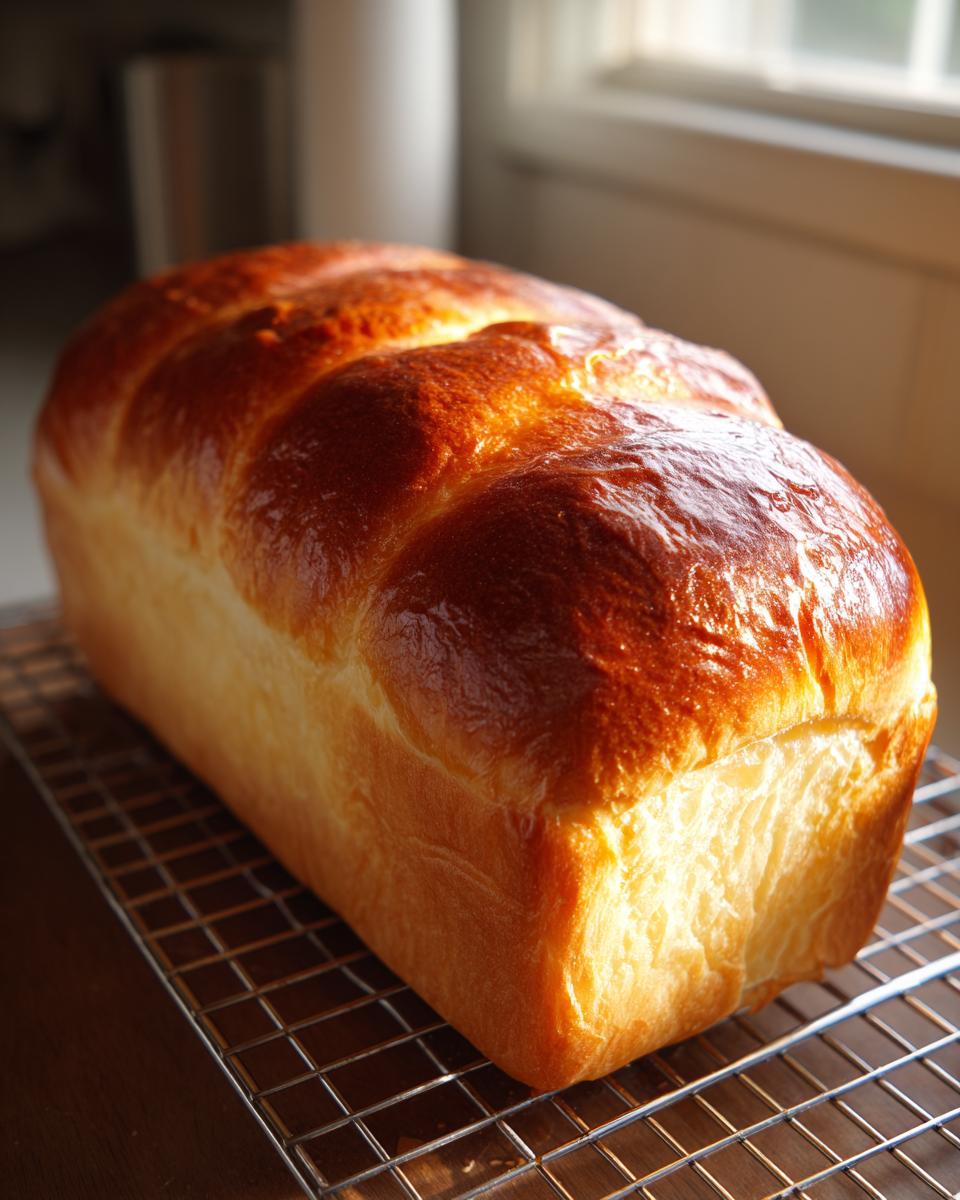
If you’ve ever walked into a Japanese bakery and inhaled that heavenly, impossibly soft aroma, you know the kind of bread I’m talking about. Getting that breathtakingly cloud-like texture at home always seemed like a secret only the pros knew, right? Well, I’m here to tell you that magic is real, and it comes down to one incredible technique. We’re unlocking the secret to making the most stunning Japanese Milk Bread you’ve ever tasted using the Tangzhong method. Trust me, once you master this, that fresh loaf smell will be a regular event in your kitchen, just like it is in mine!
- Why This Japanese Milk Bread Recipe Delivers Cloud-Like Texture
- Gathering Ingredients for Your Soft Homemade Bread
- Step by Step Milk Bread Instructions: Mastering the Dough
- Proofing and Shaping Your Japanese Milk Bread Loaf
- Baking Tips for Perfect Hokkaido Milk Bread
- Achieving Long Lasting Softness: Cooling and Storing Japanese Milk Bread
- Serving Suggestions for This Enriched Milk Bread
- Frequently Asked Questions About Easy Milk Bread Baking
- Sharing Your Experience Making This Japanese Milk Bread Recipe
- Estimated Nutritional Data for Japanese Milk Bread
Why This Japanese Milk Bread Recipe Delivers Cloud-Like Texture
Now, I know what you’re thinking: ‘Why is everyone obsessed with this bread?’ Standard bread recipes? They can’t touch this. This Japanese Milk Bread Recipe turns basic flour and water into something extraordinary because it is so rich and relies on that amazing technique we talked about. This dough isn’t just enriched with milk and butter—though trust me, those ingredients help the flavor—it’s perfected by the Tangzhong.
This process is what separates a good homemade loaf from something you’d pay top dollar for at a fancy bakery downtown. It traps moisture deep inside the starches, meaning your loaf stays incredibly soft for days! If you’ve struggled with dense loaves before, this is the key. It reminds me a bit of how we get that perfect texture in our homemade English muffins, where technique really reigns supreme.
The Science Behind the Tangzhong Bread Tutorial
It sounds fancy, but it’s really just cooking part of your flour with your liquid on the stovetop first. When you heat the flour and milk, you’re gelatinizing the starch. That means those starch molecules can absorb and hold onto so much more water than they could before! This extra hydration is exactly what gives you that signature *pillowy soft bread* texture. It’s a brilliant way to make sure every bite of your *Shokupan* is airy, not dry.
Gathering Ingredients for Your Soft Homemade Bread
Okay, time to pull out your favorite mixing bowl! While this bread relies on that special Tangzhong starter, the rest of the ingredients for your Soft Homemade Bread are pretty straightforward pantry staples. We do need precision here, though, because this is where we build the structure for that amazing softness. Make sure everything is measured out before you even think about turning on the stove for that paste!
- For the Tangzhong: You need 1/4 cup (60ml) Whole Milk and 2 tablespoons All-Purpose Flour.
- For the Main Dough: Measure out 1 1/2 cups (180g) All-Purpose Flour, 1/4 cup (50g) Granulated Sugar, 1 teaspoon Instant Dry Yeast, and 1/2 teaspoon Salt.
- Finally, don’t forget 1 large Egg, which needs to be lightly beaten, and 1/4 cup (60ml) Whole Milk for the main dough, plus 3 tablespoons of Unsalted Butter, softened, and 1 tablespoon of Heavy Cream just for brushing the top later.
Ingredient Notes and Substitutions for Japanese Milk Bread
Let’s talk specifics before you start grabbing things off the shelf. When it comes to the yeast, please use Instant Dry Yeast. Because we mix it right in with the sugar and flour initially, it activates beautifully without needing to proof separately first. Also, the heavy cream brush? That’s what gives you that gorgeous, deep golden color on the crust. You could use regular milk, but the cream really boosts the browning!
Step by Step Milk Bread Instructions: Mastering the Dough
Alright, now for the fun—and slightly hands-on—part! The dough for this Fluffy Bread Loaf requires patience, especially when it comes to the Tangzhong we prepared earlier. My biggest piece of advice right off the bat has to be this: that Tangzhong paste MUST be cool. If you add warm paste to your dough, you’ll kill the yeast before it even gets started. I usually mix everything else while it cools down on the counter.
Once it’s cool, we bring it all together. This recipe really shines when you use a stand mixer because this dough is quite wet and sticky at first, and it needs time to develop strength. We are aiming for that beautiful, airy final product, which means doing the work now. This process is very similar to how we build depth in our soft fluffy dinner rolls, focusing on developing the gluten structure slowly.
Preparing the Tangzhong and Mixing the Dough
Remember the Tangzhong? Go grab that cool paste. In your mixer bowl, toss in all your dry ingredients—flour, sugar, yeast, salt—and give it a quick mix so everything is acquainted. Next, dump in the cooled paste, the lightly beaten egg, and the remaining milk. Mix this on low speed until you basically have a messy, sticky blob. Don’t panic! It’ll look awful and unmanageable for about two minutes. It really doesn’t look like bread dough yet, and that’s totally normal. Just let the machine bring it together into something resembling a *Sweet Asian Bread* mass.
Kneading for That Bakery Style Soft Loaf Texture
Here’s where we invest the time. Once the dough comes together, we start the kneading. You’re going to knead it for about 5 minutes before you even think about adding the butter. Why? Because we need the initial gluten network established first. Then, add that softened butter, a tablespoon at a time. Seriously, one piece melts in, then you add the next one. This enriched dough takes time—plan for another 10 to 15 minutes of kneading after the butter is fully incorporated! You know it’s ready when you can stretch a small piece wafer-thin without tearing—that famous windowpane test—the ultimate marker for a perfect enriched milk bread. If you want to see how other bakers handle a similar kneading commitment, check out this reference here.
Proofing and Shaping Your Japanese Milk Bread Loaf
Now that you’ve worked so hard developing that beautiful, soft dough, we have to treat it gently during the rises. We need a warm, draft-free spot—no cold kitchen windows! The first rise is where the yeast gets busy and doubles the dough size, taking about an hour to 90 minutes. Don’t rush this; that air development is key to our fluffy results.
Once it’s doubled, punch it down lightly—just to knock the excess gas out. Turn it onto a surface that barely has any flour because this dough is still quite tacky. We divide it into three equal pieces. Roll each piece into a neat little ball and let them rest for ten minutes, covered. This lets the gluten chill out before the final shaping.
For the classic look, you roll those balls into skinny logs and pinch the ends together tight. Lay those three logs seam-side *down* into your greased loaf pan. Cover it loosely and let it puff up again. For the second rise, we want it to look eager—it should look like it’s about to spill joyfully over the rim, maybe an inch high. Preheat the oven while that final proof is happening!
Baking Tips for Perfect Hokkaido Milk Bread
The moment of truth! We are baking for that deep golden color that screams ‘bakery quality.’ Get your oven set right to 350°F (175°C) while that loaf is finishing its second rise. Remember we brushed it with heavy cream? That fat helps create that incredible, rich crust.
Bake it for about 30 to 35 minutes total. But here’s the real secret for doneness: don’t just rely on the clock. You want the internal temperature to hit 200°F (93°C). If you pull it out before that, the crumb might still be damp inside. Sometimes, even when the top looks perfect, the heat hasn’t quite sunk in yet.
Now, if you notice halfway through baking that the top is turning a little too dark—don’t panic and don’t turn the oven down! Just loosely float a piece of aluminum foil over the top like a little tent. This shields the color while letting the heat continue to cook the interior through. It’s a classic trick I learned from my grandmother for every sweet bake. If you want to compare notes on the process, this recipe has some great visual guides that helped me learn!
Achieving Long Lasting Softness: Cooling and Storing Japanese Milk Bread
You just pulled this gorgeous loaf out of the oven, and I know you want to slice into it right now! But hold up! The most important step to ensure this bread stays soft for days—truly *Long Lasting Soft Bread*—happens right now. You absolutely must get it out of the pan immediately. If it sits in that hot metal pan, the steam gets trapped, and that beautiful structure we worked so hard to create will start to collapse and get gummy on the bottom.
Tip it out onto a wire cooling rack. Let it cool completely—and I mean completely—before wrapping anything around it. If you wrap warm bread, you trap steam, and that steam turns back into condensation, making the crust soggy. It’s tough waiting, but trust me, the reward comes when you finally slice into that tender crumb later.
Once totally cool, treat it like my mini banana bread loaves—wrap it tightly! Use good quality plastic wrap or slide the entire wrapped loaf into an airtight container. This keeps the outside from drying out while protecting that moist interior we built with the Tangzhong. It honestly stays fantastic for three or four days!
Serving Suggestions for This Enriched Milk Bread
Now that you have this light, tender loaf, what do you even do with it? Honestly, you can use this Enriched Milk Bread anywhere you’d use a great white loaf, but it truly excels when you lean into that cloud texture. It makes the most amazing, non-soggy grilled cheese sandwiches—the bread stays soft even as the cheese melts! And have you ever tried using it for French toast? It soaks up the custard perfectly without falling apart, soaking up all that flavor, kind of like our favorite fluffy oatmeal pancakes do.
My favorite way, though? Thick slices, toasted just until golden brown, slathered with really good salted butter. The bread is subtly sweet, so it’s perfect for breakfast, but it’s not so sweet that you can’t eat it with dinner. It’s just one versatile loaf, truly.
Frequently Asked Questions About Easy Milk Bread Baking
I get so many notes from people making this loaf for the first time! It’s so rewarding to hear how much you love pulling a Fluffy Bread Loaf out of your own oven. If you’re wondering about small changes or troubleshooting your bake, chances are someone else has asked the same thing. Here are a few of the most common ones I hear from folks trying this Easy Milk Bread Baking process!
Can I use the Yudane Method Instead of Tangzhong for Japanese Milk Bread?
Oh yes, you absolutely can! The Yudane method uses nearly boiling water to achieve that starch gelatinization instead of heating it on the stove like the Tangzhong version. It works fantastic, and some people even prefer it because it’s a bit quicker. The Tangzhong method used here—cooking the flour paste on the stove—tends to make the final bread just a smidge richer tasting, but honestly, either way delivers that incredible, moist texture that defines Japanese Milk Bread.
How to Get the Best Results with This Beginner Bread Baking Guide
If there’s one thing you take away from this entire Beginner Bread Baking Guide, let it be this: Don’t cut the kneading time short! Seriously. This is an enriched dough, and you absolutely need to get to that windowpane stage. Also, keep an eye on your warmth; if your kitchen is cold, your dough won’t rise well at all. Warm spots are your best friend here!
Why is my dough so sticky even after mixing?
That’s the beautiful, sticky essence of an ultra-soft, enriched dough! Don’t be tempted to dump in more flour to make it manageable—that’s how you lose the softness. If your dough is just a bit too messy to handle once the butter is incorporated, just oil your hands lightly and use a bench scraper to move it, or just let the mixer run the full time. Remember, the butter needs time to absorb and strengthen the matrix. It will eventually clean the sides of the bowl once it’s perfectly kneaded. You can see great examples of this sticky stage development at this link.
How long should this Super Soft and Fluffy Japanese Milk Bread stay soft?
Because of that Tangzhong magic, this isn’t like a regular loaf that gets stale by morning! If you store it wrapped up tight—I love using plastic wrap and then placing it into a zip-top bag—it stays remarkably soft for three, sometimes four whole days. It’s truly the Long Lasting Soft Bread champion in my house. After day four, it’s perfect toasted!
I hope these tips help make your journey to baking your own delicious loaf smooth sailing. Remember, baking should be fun, not stressful! Just follow the steps carefully, and you’ll have that perfect, pillowy texture. When you have your finished loaf cooling, drop me a comment below, or if you loved the result, consider saving this recipe so you can find it next time you’re craving that bakery magic!
Sharing Your Experience Making This Japanese Milk Bread Recipe
Seeing your beautiful, cloud-like loaves is the best part of my day! I really hope this Japanese Milk Bread Recipe brought that bakery magic right into your kitchen. If you made this, would you do me a small favor and give it a 5-star rating right below the recipe card? That helps other home bakers find this guide to the perfect soft bread!
Let me know in the comments if you have any questions or if you tried any of my suggestions—I love hearing what worked for you. And if you think this will be an instant family favorite, don’t forget to hit that save button so you can whip up another amazing fluffy bread loaf next weekend!
Estimated Nutritional Data for Japanese Milk Bread
Look, I’m a baker, not a nutritionist, so I just use the defaults provided by the recipe software, okay? These numbers are just estimates based on the ingredients listed—your specific brand of flour or sugar could make them shift a little bit. This bread is rich because of the butter and cream, but wow, is it worth those extra little bits!
- Serving Size: 1 slice
- Calories: 180
- Fat: 5g
- Carbohydrates: 28g
- Sugar: 6g
- Protein: 5g
Just remember that this is for one slice, and let’s be honest, when you cut into a fresh loaf of Shokupan, nobody is cutting just one thin slice!
PrintFoolproof Japanese Milk Bread (Shokupan) with Tangzhong
Bake unbelievably soft, cloud-like Japanese Milk Bread at home using the Tangzhong method. This recipe delivers bakery-style fluffiness and a tender crumb that stays fresh longer, perfect for sandwiches or toast.
- Prep Time: 45 min
- Cook Time: 35 min
- Total Time: 165 min
- Yield: 1 loaf 1x
- Category: Baking
- Method: Baking
- Cuisine: Japanese
- Diet: Vegetarian
Ingredients
- 1/4 cup (60ml) Whole Milk (for Tangzhong)
- 2 tablespoons All-Purpose Flour (for Tangzhong)
- 1 1/2 cups (180g) All-Purpose Flour (for Dough)
- 1/4 cup (50g) Granulated Sugar
- 1 teaspoon Instant Dry Yeast
- 1/2 teaspoon Salt
- 1 large Egg, lightly beaten
- 1/4 cup (60ml) Whole Milk (for Dough)
- 3 tablespoons Unsalted Butter, softened
- 1 tablespoon Heavy Cream (for brushing)
Instructions
- Prepare the Tangzhong: Whisk the 1/4 cup milk and 2 tablespoons of flour together in a small saucepan until smooth. Heat over medium-low heat, stirring constantly, until the mixture thickens significantly, resembling a thick paste (about 170°F or 77°C). This should take 3 to 5 minutes. Remove from heat and transfer to a small bowl. Cover the surface directly with plastic wrap and let it cool completely to room temperature.
- Mix Dry Ingredients: In the bowl of a stand mixer fitted with the dough hook, combine the 1 1/2 cups flour, sugar, yeast, and salt. Mix on low speed for 30 seconds to combine.
- Combine Dough Ingredients: Add the cooled Tangzhong, the lightly beaten egg, and the 1/4 cup milk to the dry ingredients. Mix on low speed until a shaggy dough forms, about 2 minutes.
- Knead: Increase the speed to medium-low and knead for 5 minutes. Add the softened butter, one tablespoon at a time, waiting until each piece is incorporated before adding the next. Continue kneading for another 10 to 15 minutes until the dough is smooth, elastic, and passes the windowpane test. The dough will be very soft.
- First Rise: Place the dough in a lightly oiled bowl, turning to coat. Cover the bowl with plastic wrap or a damp cloth. Let the dough rise in a warm place until doubled in size, about 60 to 90 minutes.
- Shape the Loaf: Gently punch down the risen dough. Turn it out onto a lightly floured surface. Divide the dough into three equal pieces. Roll each piece into a tight ball. Let the balls rest for 10 minutes, covered.
- Final Shaping: Roll each rested ball into a small log shape. Pinch the ends together. Place the three logs side-by-side in a greased 8×4 inch loaf pan, seam-side down.
- Second Rise: Cover the loaf pan loosely with plastic wrap or a damp towel. Let it rise in a warm spot until the dough has nearly doubled and crests about 1 inch over the rim of the pan, about 45 to 60 minutes. Preheat your oven to 350°F (175°C) during the last 15 minutes of the rise.
- Bake: Brush the top of the dough lightly with heavy cream for a golden crust. Bake for 30 to 35 minutes, or until the top is deep golden brown and the internal temperature reaches 200°F (93°C). If the top browns too quickly, loosely tent it with foil.
- Cool: Immediately remove the bread from the pan and cool completely on a wire rack before slicing. This step is important for setting the soft texture.
Notes
- A stand mixer is highly recommended for the extended kneading time required for this enriched dough.
- The Tangzhong method is the secret to achieving that signature pillowy soft texture that lasts for days.
- For the softest crust, you can brush the baked loaf with melted butter immediately after removing it from the oven.
Nutrition
- Serving Size: 1 slice
- Calories: 180
- Sugar: 6
- Sodium: 150
- Fat: 5
- Saturated Fat: 3
- Unsaturated Fat: 2
- Trans Fat: 0
- Carbohydrates: 28
- Fiber: 1
- Protein: 5
- Cholesterol: 25