
There is something deeply comforting about tasting a flavor from your childhood, isn’t there? For me, it’s always been that perfect combination of crunchy, chewy, and chocolatey—that iconic candy bar profile. Here at Cookin’ Corner, we believe the best food connects us straight back to memory lane, and that’s why I had to share my ultimate **copycat twix recipe**. Forget those crinkly wrappers; these **homemade twix candy bars** are layers of buttery magic, and trust me when I say they are absolutely better than store bought. Making these **twix cookie bars** by hand means you control the goodness, and that care is what makes the treat last long after the last bite.
- Why This Homemade Twix Recipe is Better Than Store Bought
- Gathering Ingredients for the Twix Cookie Bar Recipe
- Step-by-Step Instructions for Homemade Twix Candy Bars
- Tips for the Best Homemade Twix Recipe
- Variations on the Classic Twix Bar
- Storage and Reheating for Your Caramel Chocolate Dessert Bars
- Frequently Asked Questions About Making Twix
- Estimated Nutrition for This Twix Cookie Bar Recipe
- Share Your Twix Creations
Why This Homemade Twix Recipe is Better Than Store Bought
When you take the time to whip up your own treats, you just taste the difference. I’ve seen people try shortcuts, but when it comes to achieving that quintessential twix cookie bar recipe perfection, nothing beats doing it the right way. It’s about taking control of what goes into your food, which builds up the trust you need when baking for family.
- Ingredient Quality: We use real butter in everything! That’s what gives the shortbread its incredible richness.
- Texture Customization: You decide if you want a snap or a chew. We’re aiming for that perfect balance every single time.
- Nostalgia Factor: There’s nothing like the satisfaction of nailing a favorite candy bar flavor right in your own **chocolate caramel dessert bars**.
Achieving the Perfect Buttery Shortbread Caramel Layers
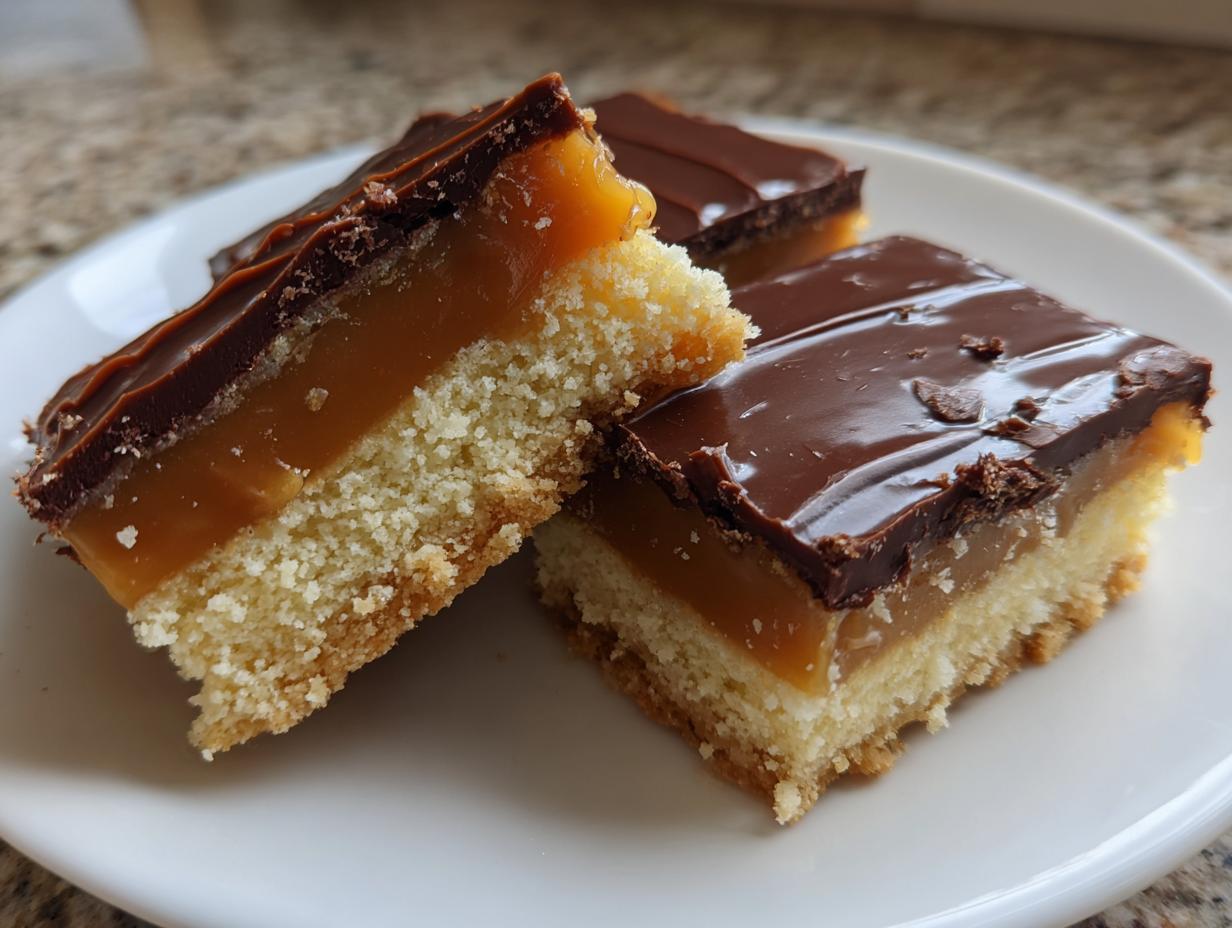
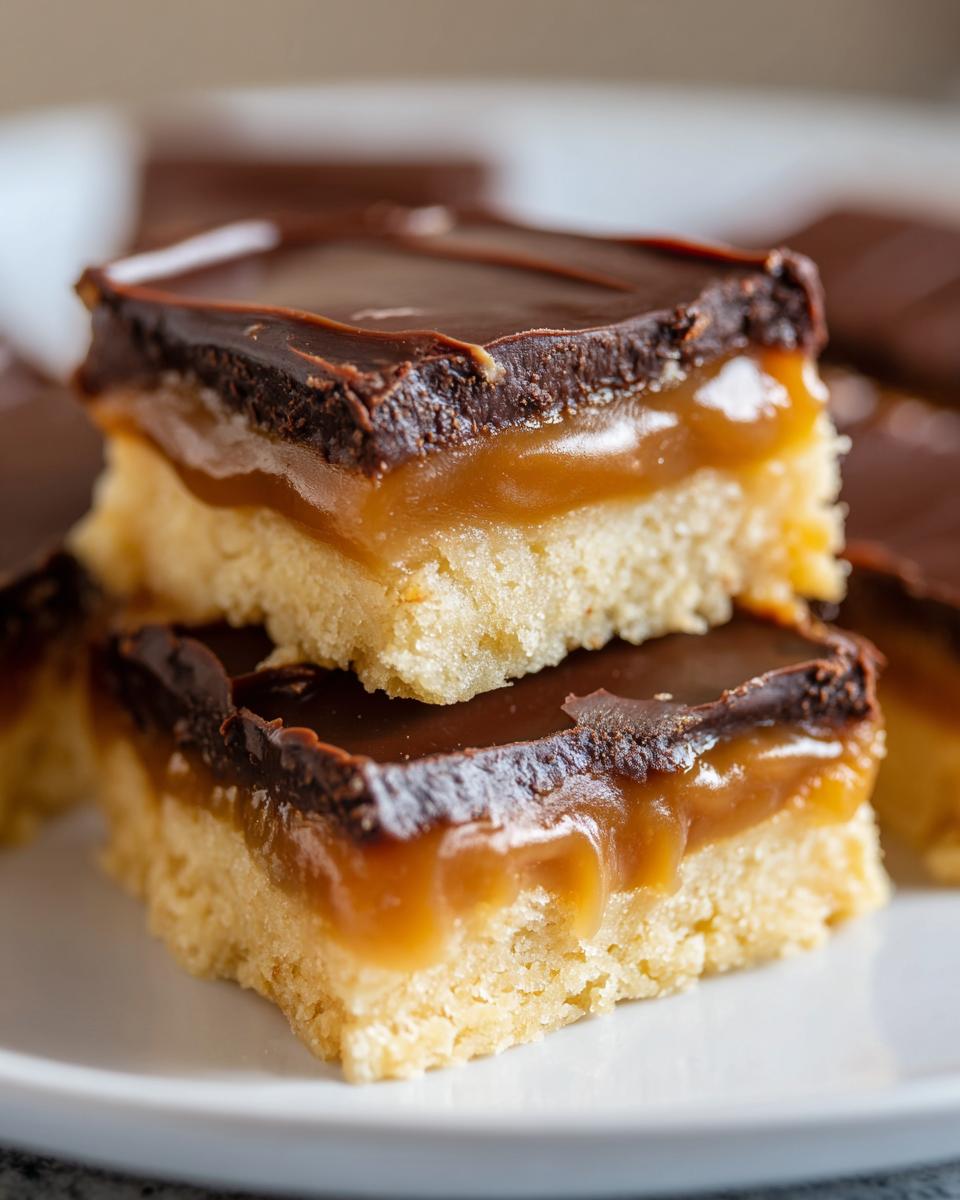
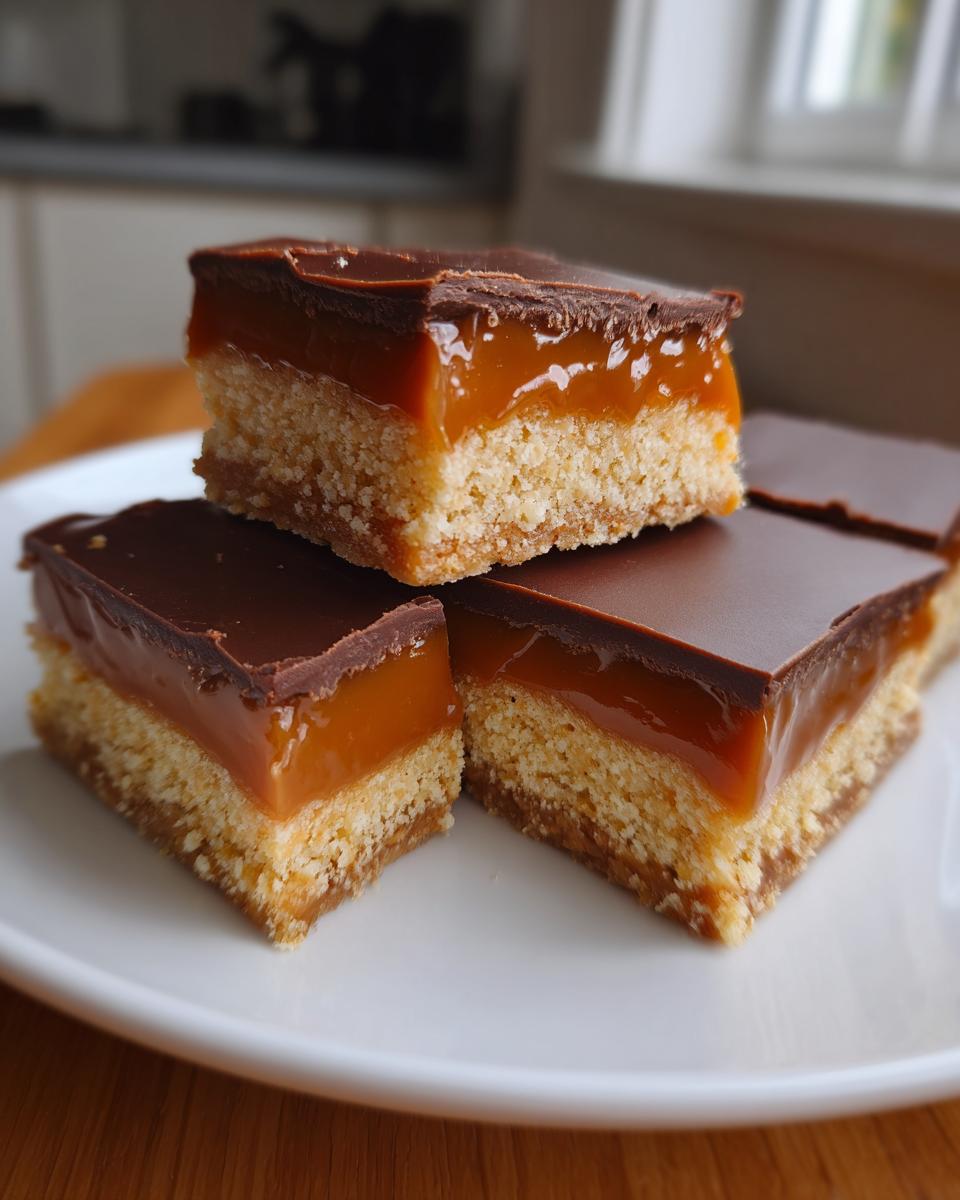
This bar truly shines because of its three distinct personalities working together. The base needs to be firm enough to hold up all that topping, but tender enough that it doesn’t feel like a cracker. That’s our shortbread. Then comes the caramel—oh, the caramel!
Store-bought caramel often sets up too hard once it cools, right? Not here. We cook ours just long enough to be wonderfully gooey yet stable, which is the absolute secret to these buttery shortbread caramel layers. When you bite into this, you get the crisp, the pull, and then the immediate melt of the chocolate shell. It’s the best experience you can have with caramel chocolate dessert bars, and I promise you won’t look back at the candy aisle the same way again.
If you want to get ahead, you can make a big batch of homemade caramel sauce first—it’s fantastic on ice cream too! Check out my guide to easy homemade caramel sauce and candy if you’re feeling ambitious.
Gathering Ingredients for the Twix Cookie Bar Recipe
Okay, it’s time to shop! For a **copycat twix recipe** this good, we can’t just grab random things off the shelf. We need clear measurements. Seriously, the quality of your shortbread and caramel depends on getting these basics right for your **twix cookie bar recipe**. I’ve broken down exactly what you need into three handy lists so you don’t miss anything on your trip to the store. It’s worth it to use that real butter, trust me on that!
Shortbread Base Ingredients
- 1 cup (2 sticks) unsalted butter, softened (Make sure it’s really soft!)
- 1/2 cup granulated sugar
- 1 teaspoon vanilla extract
- 2 cups all-purpose flour
- 1/4 teaspoon salt
Gooey Caramel Filling Ingredients
These ingredients are what make this **simple layered cookie bar recipe** pull apart just right. The combination of the milk and the sugars makes that beautiful, thick pull.
- 1 (14 ounce) can sweetened condensed milk
- 1/2 cup (1 stick) unsalted butter
- 1 cup packed light brown sugar
- 1/2 cup light corn syrup
- 1 teaspoon vanilla extract
- 1/4 teaspoon salt
Chocolate Coating for Your Twix
This layer has to be flawless so it melts beautifully over the top of that chilled caramel. This is where we get that signature snap!
- 1 1/2 cups semi-sweet chocolate chips
- 1 tablespoon coconut oil (This is optional, but it makes your chocolate topping super smooth for dipping and keeps it from cracking too easily when you cut it.)
Step-by-Step Instructions for Homemade Twix Candy Bars
Alright, let’s get these layers built! Making your own **homemade twix candy bars** is totally straightforward, but you need to tackle it in three distinct stages: the base, the goo, and the chocolate hug. We are using a standard 9×13 inch pan for this, and using parchment paper with an overhang on the sides is your absolute best friend for getting these things out later. Don’t skip that step!
We’re going to preheat the oven to 350°F (175°C) right now so it’s ready when the crust is. Remember, every second counts when we’re working with shortbread and caramel!
Baking the Buttery Shortbread Caramel Crust
First up is that incredible shortbread foundation. Once you’ve mixed up your dough—remember, just until it comes together, we don’t want tough bars!—press it firmly and super evenly into the bottom of your prepared pan. You want that surface totally flat!
Pop that into the oven and bake it for about 15 to 18 minutes. You’re looking for the edges to just start kissing that beautiful light golden color. Once they look set, pull the whole pan out. It needs to cool just a tiny bit while we tackle that gooey caramel filling. It just needs five minutes, but that time prevents the caramel from immediately dissolving the crust.
Creating the Gooey Caramel Layer for Your Twix
This is where the magic happens, and you really need to pay attention to this part. In a saucepan, combine all your caramel ingredients. Heat it over medium heat, but you must stir constantly until everything melts together smoothly. Once it’s bubbling, turn the heat down low and keep stirring it for about 5 to 7 minutes.
Trust me, the short cook time is key here to keep it chewy! When it thickens just slightly, take it off the heat, stir in your vanilla and salt, and pour it right over that warm shortbread layer. Smooth it out beautifully. Now, pop that whole pan back into the oven for one more short session—just 10 minutes to set things up. After that, it’s mandatory chilling time: at least 1 full hour in the fridge so that caramel firms up hard. You can get some quick inspiration for other homemade Twix bars recipe ideas while you wait!
Finishing the Shortbread Caramel Chocolate Bars
Once the bars feel solid when you gently touch the caramel, we move to the final layer. Melt your chocolate chips with that tablespoon of coconut oil—that oil gives the chocolate a shine and a better flow, making it easier to cover everything. Do this in 30-second zaps in the microwave, stirring well each time until it’s silky smooth.
Pour that melted chocolate over the chilled caramel layer and smooth it out perfectly to cover every inch. Back into the fridge it goes! This final chill is non-negotiable; you need at least two hours until that chocolate is totally set and hard. When it’s ready, grab those parchment overhangs and lift the entire slab out. Then, slice it carefully into your perfect **bite sized candy copycats**. Don’t forget to check out more amazing dessert recipes once you’re done!
Tips for the Best Homemade Twix Recipe
You’ve done the hard work, and now you want to show off those perfect, clean lines when you serve up your twix cookie bar recipe, right? Getting that professional finish on homemade candy bars can feel tricky, especially when you have gooey caramel involved, but these little tricks I picked up over the years have saved so many batches for me!
First things first: the cut. This is the single most important tip for making your homemade twix candy bars look bakery-worthy. Never try to slice the cold bars with a dry, room-temperature knife. You’ll tear the chocolate and drag that caramel all over the place. Instead, grab a big, sharp chef’s knife, heat it up under hot running water, and then dry it completely with a towel before making a single cut.
You only get one good cut per heat-up, so wipe that knife clean and dry between every slice! It melts through the chocolate coating cleanly and slices through that chilled caramel like butter. It makes such a difference when presenting these beautiful **shortbread caramel chocolate bars**.
Another big point for making the best homemade twix recipe is fiddling with that caramel texture. Remember how I said we only cook it for 5 to 7 minutes? That keeps it wonderfully soft and chewy, just like the original. If you really, really love a slightly firmer, toffee-like texture—though I prefer mine soft—you can let it cook an extra minute or two on low heat. You have to watch it closely, though, as it goes from perfect chew to hard candy fast!
Also, make sure those bars are *ice cold* before they meet the chocolate. If the caramel underneath is even slightly warm or soft, the melted chocolate will just slide right off when you pour it on. Chilling time is your friend here! Feel free to check out my other go-to dessert recipes when you’re done assembling these beauties!
Variations on the Classic Twix Bar
Once you master the full **shortbread caramel chocolate bars** recipe, you might feel like showing off a bit, or maybe you just need a faster fix. That’s okay! Baking is supposed to be fun, and there are so many ways to play with this classic foundation. We built this recipe around the best, deepest flavors, but you are the boss of what goes on top!
If you’re feeling like throwing together some **gourmet twix cookies**, the easiest upgrade is the finishing chocolate. The recipe calls for semi-sweet chips, which gives you that lovely, slight tartness to balance the super sweet caramel. But why stop there? Switch that out for high-quality milk chocolate if you want sweeter results, or go dark if you prefer a richer, almost bitter contrast. They all work magnificently, but they give you slightly different experiences!
Another little trick I love, especially when making these around the holidays, is grabbing some flaky sea salt. Right after you pour the hot caramel over the shortbread but *before* it chills, sprinkle just a tiny whisper of flaky salt over the top. When you drizzle the chocolate over that, the salt crystals catch the light, and you get this incredible sweet-and-salty pop in every bite of your homemade **twix**. It just elevates the whole thing from a simple treat to something truly special. If you enjoy experimenting with layers, you might also love my recipe for red velvet brownies, which is all about layering flavors!
Making 3 Ingredient Twix Treats Alternatives
I totally get it—sometimes you need that twix flavor *right now* and don’t have an hour to bake a crust. When I’m desperate, I turn to the shortcut version. You skip making the shortbread entirely! Instead, you need about 30-40 vanilla wafer cookies or even those crispy butter crackers.
You just line your pan with those cookies, pour the hot caramel right over them (same cooking instructions apply!), chill them, heat your chocolate, and pour that over. It’s honestly astonishing how close the flavor is, though you lose that delicate shortbread texture. It’s a great trick when you need fast, **bite sized candy copycats** just loaded with chocolate and caramel!
If you want to try a version that skips baking entirely, I hear people having success using things like shortbread fingers as the base instead of baking the dough from scratch. For recipes that focus completely on speed, you might want to look up a pure 3 ingredient twix treats recipe online, but remember, a little baking goes a long way for the best flavor!
Storage and Reheating for Your Caramel Chocolate Dessert Bars
Now that you’ve made these magnificent twix bars, the very last thing you want is to watch them go stale! Because we made our caramel layer with real dairy and cooked it to that perfect chewy consistency, keeping these bars fresh requires a little refrigeration. Seriously, they need to stay cool.
I always store my finished **caramel chocolate dessert bars** in an airtight container. You can stack them up, but you have to put parchment paper or wax paper squares between the layers. If you don’t, that sticky caramel layer stuck to the chocolate coating on the bar above it, and you’ll end up with one giant, messy, glorious clump instead of individual bars!
They last really well in the fridge—I’ve kept batches good for about two weeks, though honestly, they rarely last that long in this house. The cold temperature keeps the chocolate firm and the caramel nice and chewy.
What about serving temperature? This is a fun debate here in the kitchen! If you like your chocolate to have a distinct snap when you bite in, serve them straight from the fridge. That cold temperature makes the chocolate shell solid. But if you prefer that caramel to be really soft, almost liquidy, let them sit out on the counter for about 15 to 20 minutes before serving. That slight warmth softens the outer layer just enough. They are fantastic either way, but you never need to reheat these! They are built to be eaten cool or at room temperature.
Frequently Asked Questions About Making Twix
I know when you’re tackling a multi-layered treat like this **twix cookie bar recipe**, questions pop up! It’s totally normal, especially if you’re used to simpler baking. I’ve gathered the questions I get most often from folks trying to recreate these amazing **caramel chocolate dessert bars** in their own kitchens. Hopefully, this clears up anything that’s making you hesitate!
Can I make No Bake Twix Bites using this recipe structure?
That’s a smart way to think about saving time, and I wish I could say yes straight up! The truth is, the shortbread base in this recipe needs that initial bake time to develop its structure and that lovely, slightly crisp/tender texture. It won’t set up correctly just by chilling.
However, if you are absolutely determined to avoid the oven, you can absolutely turn this into a no-bake concept! Instead of making the dough, just crush up about 2 cups of vanilla wafer cookies or graham crackers and mix them really well with about 1/2 cup of melted butter until it resembles wet sand. Press that mixture firmly into your pan, chill it really well until it’s rock solid, and then proceed with cooking the caramel and pouring the chocolate on top. They become wonderful **no bake twix bites**, though the flavor profile shifts slightly away from the classic shortbread.
What is the best way to get clean cuts on my simple layered cookie bar recipe?
This is probably the number one question I get for any layered bar! It all comes down to two non-negotiable steps: chilling and heat. You must let the bars chill until the chocolate layer is fully set—I mean hard—and has been refrigerated for that minimum of two hours. If you try cutting it before then, you are just asking for a sticky, caramelized mess.
Once they are nicely chilled, grab your sharpest knife and use the hot water trick we talked about earlier. Dip that knife in steaming hot water for a few seconds, wipe it completely dry so no water drips onto the chocolate, and then press straight down to slice. That heat melts just the tiniest barrier between the blade and the layers, sliding right through the chocolate and caramel without any dragging. Wipe, dip, dry, slice—repeat! That’s how you get those beautiful edges on your **simple layered cookie bar recipe** every time.
Are these **holiday candy recipes** suitable for gifting?
Oh, they are absolutely perfect for gifting! These **twix** bars feel so much more special and homemade than anything you’d find in a candy aisle; they really fall into the category of lovely, **decadent dessert recipes** perfect for sharing.
But because of that amazing, soft caramel layer, you have to pack them smartly. Always store them in an airtight container, and make sure you use parchment paper or wax paper squares between every single layer of bars. This prevents them from fusing together overnight in the box! Keep them cool—the fridge is best if they’re going to sit for more than a day, especially if your home is warm. They travel well when they are nice and firm from the cold!
If you enjoyed learning about these **holiday candy recipes**, you can find more tried-and-true bakes perfect for Christmas or Easter in my general collection of dessert recipes!
Estimated Nutrition for This Twix Cookie Bar Recipe
Okay, now for the part where we get real about why these **twix** treats are better than what you buy wrapped in plastic—it’s because we know exactly what went into them! We made 24 of these beautiful **caramel chocolate dessert bars**, and these numbers reflect one generous slice.
Please remember, these are just my best estimates based on standard pantry items. If you use extra-dark chocolate or higher-fat butter brands, those values can definitely shift a little. Think of this as a good guide so you know what you’re enjoying!
Here is the estimated breakdown per serving (1 out of 24 bars) of our totally irresistible **shortbread caramel chocolate bars**:
- Calories: 250
- Sugar: 25g (Yes, it’s a treat, but look at all that homemade love!)
- Total Fat: 15g
- Saturated Fat: 9g
- Carbohydrates: 28g
- Protein: 3g
- Sodium: 85mg
- Cholesterol: 35mg
It’s a truly decadent way to finish a meal, but that’s the joy of knowing you made it yourself! When you use quality ingredients in your **simple layered cookie bar recipe**, even the estimated nutrition feels a little bit better than the alternative, doesn’t it?
Share Your Twix Creations
Well, now you have all the secrets to making what I truly believe is the finest twix bar you’ll ever eat outside of a candy factory ribbon-cutting ceremony! We’ve gone through every layer—the sturdy shortbread, the pull-apart caramel, and that rich chocolate shell. This entire process reminds us that sometimes, the most beloved **decadent dessert recipes** are the ones we make with our own two hands.
I truly hope you are just as excited as I am for you to try this **copycat twix recipe**! When you bake these **chocolate caramel dessert bars**, please come back here and let me know how they turned out for you. Did the caramel set up just right? Did everyone devour them in under an hour?
Drop a rating right below the recipe card—five stars if these **homemade twix candy bars** brought you back to childhood, obviously! And if you snapped a photo of your perfect layers, share it on social media and tag us. I love seeing your kitchen versions of our Cookin’ Corner classics. Your feedback helps others feel confident trying these recipes, too, so don’t be shy!
Thank you for letting me share this piece of my heart with you. Happy baking, and enjoy every bite of your incredible TWIX creation! If you’re already thinking about what to bake next, don’t forget to explore my other favorite dessert recipes!
PrintHomemade Twix Cookie Bars: Better Than Store Bought
Make your own decadent Twix bars at home with this recipe. These bars feature a buttery shortbread base, gooey caramel, and a rich chocolate coating, tasting better than the commercial candy bar.
- Prep Time: 25 min
- Cook Time: 40 min
- Total Time: 65 min
- Yield: 24 bars 1x
- Category: Dessert
- Method: Baking
- Cuisine: American
- Diet: Vegetarian
Ingredients
- 1 cup (2 sticks) unsalted butter, softened
- 1/2 cup granulated sugar
- 1 teaspoon vanilla extract
- 2 cups all-purpose flour
- 1/4 teaspoon salt
- 1 (14 ounce) can sweetened condensed milk
- 1/2 cup (1 stick) unsalted butter
- 1 cup packed light brown sugar
- 1/2 cup light corn syrup
- 1 teaspoon vanilla extract
- 1/4 teaspoon salt
- 1 1/2 cups semi-sweet chocolate chips
- 1 tablespoon coconut oil (optional, for smoother coating)
Instructions
- Preheat your oven to 350°F (175°C). Line a 9×13 inch baking pan with parchment paper, leaving an overhang on the sides for easy removal.
- Prepare the shortbread base: In a large bowl, cream together the 1 cup softened butter and 1/2 cup granulated sugar until light and fluffy. Mix in 1 teaspoon vanilla extract.
- Gradually add the flour and 1/4 teaspoon salt to the butter mixture. Mix until just combined and a crumbly dough forms. Press the dough evenly into the bottom of the prepared pan.
- Bake the shortbread crust for 15 to 18 minutes, or until the edges are lightly golden. Remove from the oven and let it cool slightly while you prepare the caramel.
- Prepare the caramel layer: In a medium saucepan, combine the sweetened condensed milk, 1/2 cup butter, brown sugar, and corn syrup. Heat over medium heat, stirring constantly, until the butter melts and the mixture comes to a boil.
- Reduce the heat to low and continue to cook, stirring often, for about 5 to 7 minutes, until the caramel thickens slightly. Remove from heat and stir in 1 teaspoon vanilla extract and 1/4 teaspoon salt.
- Pour the hot caramel evenly over the warm shortbread crust. Return the pan to the oven and bake for another 10 minutes.
- Remove from the oven and let the bars cool completely to room temperature, then chill in the refrigerator for at least 1 hour to allow the caramel to set firmly.
- Prepare the chocolate topping: Place the chocolate chips and coconut oil (if using) in a microwave-safe bowl. Microwave in 30-second intervals, stirring well after each interval, until the chocolate is smooth and completely melted.
- Pour the melted chocolate over the chilled caramel layer. Spread evenly to cover the entire surface.
- Return the pan to the refrigerator and chill for at least 2 hours, or until the chocolate is fully set.
- Use the parchment paper overhang to lift the slab out of the pan. Cut the chilled slab into rectangular bars to create your homemade Twix candy bars.
Notes
- For a cleaner cut, use a large, sharp knife dipped in hot water and wiped dry between slices.
- If you prefer a chewier caramel, cook it for a shorter time; for a firmer caramel, cook it slightly longer.
- You can substitute milk chocolate chips for semi-sweet if you prefer a sweeter coating for your caramel chocolate dessert bars.
Nutrition
- Serving Size: 1 bar
- Calories: 250
- Sugar: 25
- Sodium: 85
- Fat: 15
- Saturated Fat: 9
- Unsaturated Fat: 6
- Trans Fat: 0
- Carbohydrates: 28
- Fiber: 1
- Protein: 3
- Cholesterol: 35