
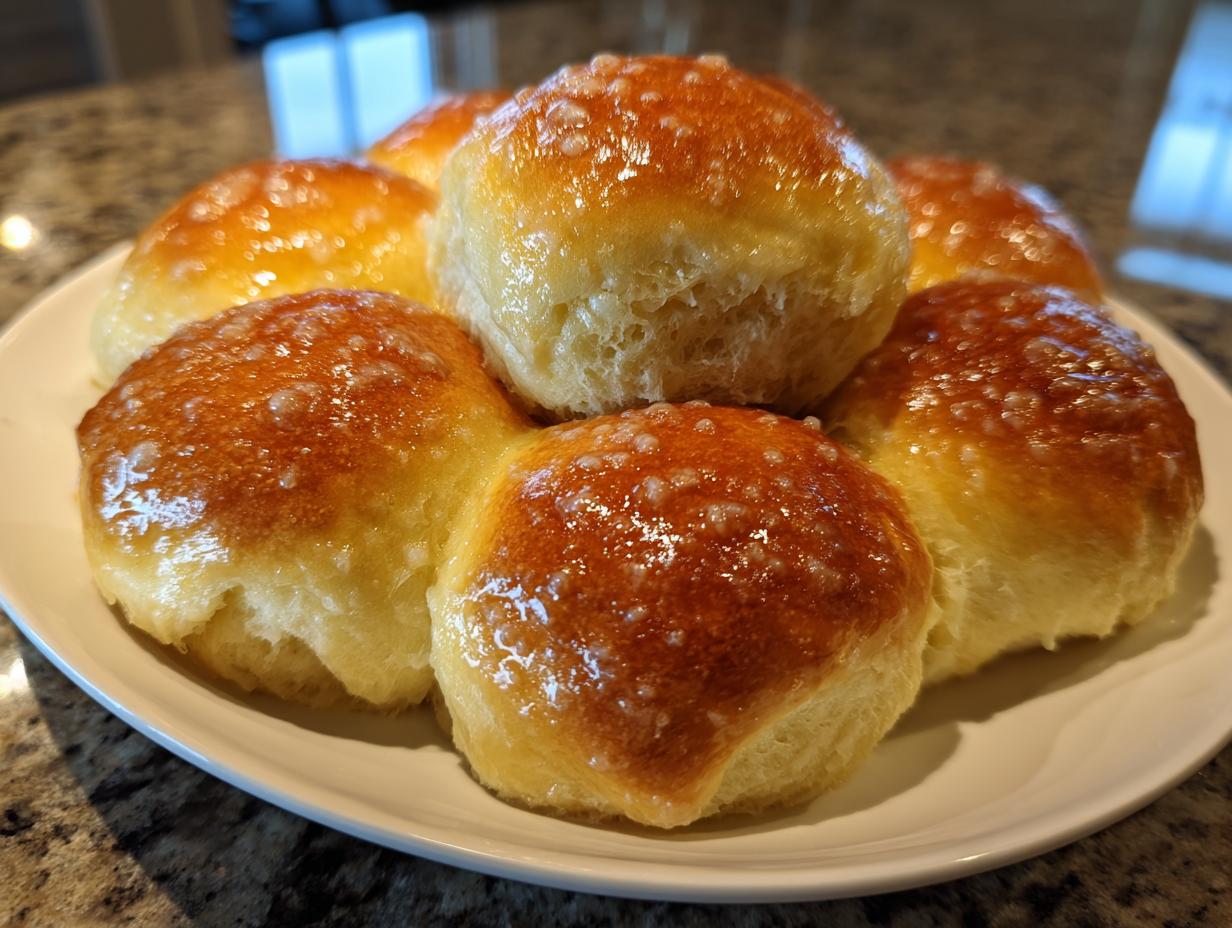
Oh my goodness, can we talk about comfort food for a second? There is truly nothing that beats the smell of fresh yeast bread filling your entire house. Forget those cardboard-tasting store-bought buns; we’re making the ultimate soft & fluffy dinner rolls here! My goal with this recipe was absolute reliability, so I worked this yeast dough until it was perfect every single time. I promise you, these melt-in-your-mouth beauties are ready from start to finish in under two hours, and you have the option to slather them in that amazing garlic butter glaze everyone raves about.
There is nothing quite like warm, homemade rolls sitting fresh on the dinner table, and this recipe holds up to being the absolute best bread side dish you can offer. Trust me, you’re going to want to bookmark this one for holidays and even just those Tuesday nights when you crave something truly special.
- Why These Soft Dinner Rolls Recipe Are the Best Bread Side Dish
- Ingredients for Fluffy Homemade Rolls
- Step-by-Step Instructions for Baking Perfect Dinner Rolls
- Tips for Success When Making Your Rolls
- Ingredient Notes and Substitutions for Savory Rolls Baking
- Make Ahead Rolls Recipe and Storage Instructions
- Variations: Customizing Your Homemade Buns
- Frequently Asked Questions About Soft Dinner Rolls Recipe
- Estimated Nutritional Data for Warm Rolls Recipe
- Share Your Experience Baking These Classic Dinner Rolls
Why These Soft Dinner Rolls Recipe Are the Best Bread Side Dish
I get why people look for quick recipes, but these Soft Dinner Rolls Recipe prove you don’t have to sacrifice quality for speed! We’re talking about rolls that genuinely earn the title of Melt in Your Mouth Rolls. They come out looking like Pillowy Bread Recipe perfection without any fuss—I am all about dependable results here at Cookin’ Corner.
- They are incredibly Easy Dinner Rolls to make, even if you’re nervous working with yeast for the first time.
- The texture is unparalleled; these Buttery Yeast Rolls are so tender they practically dissolve on your tongue.
- The optional glaze takes these straight into Texas Roadhouse Rolls Copycat territory, but with more buttery goodness!
- This reliable recipe is perfect for your next big family meal or just making a Tuesday feel special. If you want to see the heart behind why our recipes work, you can always check out our story here on the About Page.
Ingredients for Fluffy Homemade Rolls
Alright, let’s get down to brass tacks! When you’re aiming for those unbelievable, pillowy bread results, you absolutely must respect your ingredients. When I tested this out, I noticed that tiny details like the temperature of the milk made all the difference in getting a real rise fast. We are keeping things super neat here so you build the best flavor foundation possible, showing you exactly why this recipe is so dependable. Make sure your egg has a moment to sit out so it’s room temperature—it mixes in so much smoother this way!
For the Dough
- 1 cup warm milk (We need 105°F to 115°F exactly—too hot and you kill the yeast!)
- 2 1/4 teaspoons active dry yeast
- 1/4 cup granulated sugar
- 1 large egg, room temperature
- 1/4 cup unsalted butter, melted
- 1 teaspoon salt
- 3 1/2 cups all-purpose flour, plus more for dusting when you start kneading
For the Optional Garlic Butter Glaze
If you want these to taste like restaurant-quality Garlic Butter Dinner Rolls, you can’t skip this step! It’s what makes them extra special.
- 1/4 cup (4 tablespoons) unsalted butter, melted
- 1 teaspoon garlic powder (Use good quality; it makes a difference!)
- 1 tablespoon fresh parsley, chopped (This just gives it that lovely, fresh green look on top)
Step-by-Step Instructions for Baking Perfect Dinner Rolls
Okay, this is where the magic happens! Baking yeast bread can seem intimidating, but honestly, these rolls are so straightforward, and you’ll feel like a total pro when they come out golden. Remember, we’re aiming for that Quick Homemade Bread feeling without sacrificing that truly soft texture. Don’t rush those rise times; that’s the secret to making these melt in your mouth!
Activating the Yeast and Mixing the Dough for Buttery Yeast Rolls
First things first: we wake up the yeast, which is key for light and fluffy results. In your big bowl, mix that warm milk and yeast together. You absolutely must check the temp—it needs to be somewhere between 105°F and 115°F. If it’s cooler, the yeast just naps; if it’s too hot, poof! Say goodbye to your rise. Let it sit for about five minutes until it gets foamy, like the top of a nice cappuccino. Once it’s bubbly, whisk in the sugar, your room temperature egg, the first bit of melted butter, and the salt. That’s the foundation for our Buttery Yeast Rolls!
Kneading and First Rise of the Rolls
Now, start adding that flour gradually. Once it starts looking like actual dough, turn it out onto your lightly floured counter. You need to knead this for a solid 6 to 8 minutes. Don’t be shy! You’re working the gluten, which gives us that wonderful structure we want in our rolls. When the dough feels smooth and elastic—it shouldn’t stick aggressively to your hands anymore—plop it into an oiled bowl. Cover it up and let it chill out in a warm spot for 60 to 90 minutes. We are waiting for it to double in size. That’s the first big milestone!
Shaping and Second Proofing for Pillowy Bread Recipe
Once it’s doubled, gently punch the air out—I know, it feels dramatic, but you gotta deflate it! Then, divide that beautiful dough into 12 equal pieces. You can use a scale if you want to be super precise, but just eyeballing it works fine. Roll each piece firmly into a smooth ball. Line them up nicely in your greased 9×13 pan, leaving just a little kiss of space between each one because they are going to grow! Cover them again, and this is the easy part: let them puff up for another 30 to 45 minutes. They should look visibly puffy before they hit the heat.
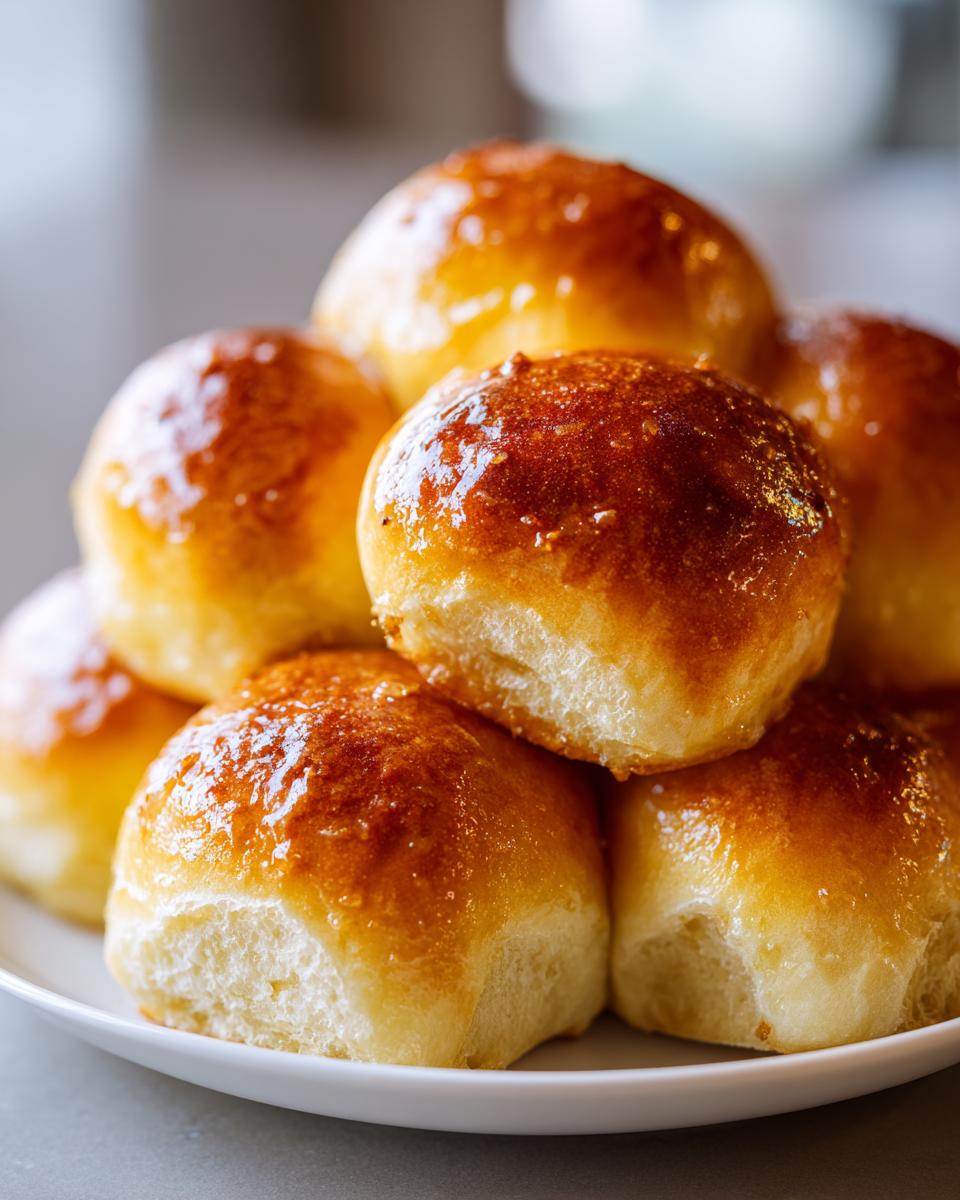
Baking and Applying the Garlic Butter Dinner Rolls Glaze
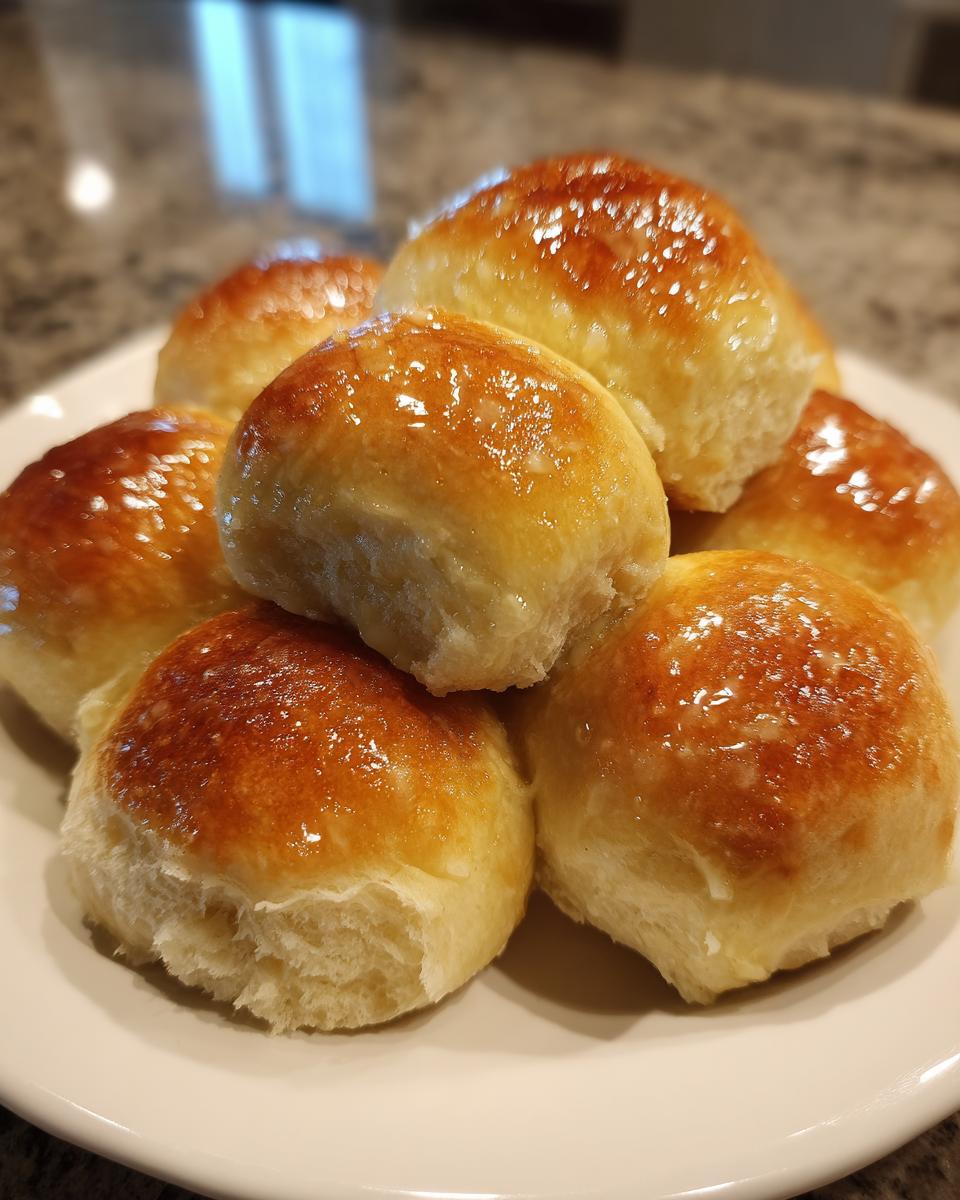
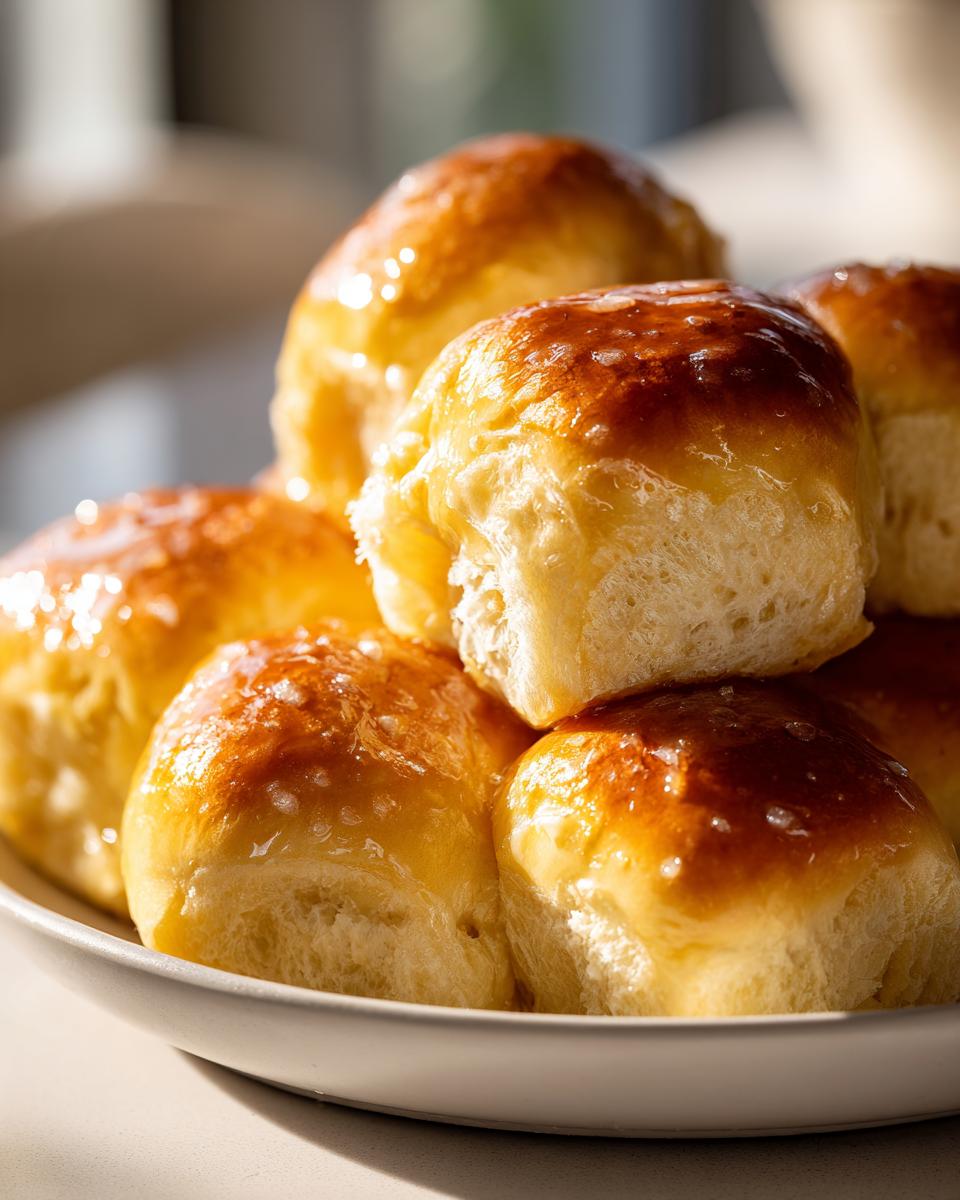
Time to bake! Preheat your oven to 375°F (190°C). Pop those puffy babies in for about 15 to 18 minutes. You want them golden brown on top—that’s your cue! The second they come out of the oven, you need to brush on that optional glaze right away. Mix that extra melted butter with your garlic powder and parsley while the rolls are still screaming hot. Brushing the garlic butter Dinner Rolls glaze on immediately makes sure it sinks in and gives you those incredible, moist, “Melt in Your Mouth Rolls” texture we crave. Seriously, eat one right now!
Tips for Success When Making Your Rolls
Baking these tender rolls is simple, but a few little kitchen secrets make them absolutely foolproof. Seriously, if you follow just these three things, you’ll nail that pillowy texture every time. Don’t worry about having fancy equipment; I rarely break out the mixer for this yeasty Bread Recipe!
First, pay attention to your ingredients’ temperature. That egg *needs* to be room temperature! A cold egg shocks the dough and leads to a dense crumb, which is the absolute opposite of what we want in these soft rolls.
Second, when kneading, go by feel, not just timing. Stop when the dough is smooth and passes the windowpane test—it should stretch thin before tearing. Don’t be tempted to add too much flour to combat sticking; that just dries out your final product. Remember, these are supposed to be light and airy! If you still feel stuck, I always reference this great guide on soft rolls for extra help, like the one you can find here.
Finally, don’t rush that second rise! Those 30 to 45 minutes of puffing after shaping are what give you that fantastic pillow shape when they bake up. Give your dough the time it asks for!
Ingredient Notes and Substitutions for Savory Rolls Baking
Let’s dive deeper into the ingredients because, for yeast breads, the quality and preparation of what you put in really dictate how incredible your final rolls turn out. My biggest piece of advice for anyone nervous about **yeasty bread recipes** is understanding your starters—the yeast and the milk!
That warm milk temperature is non-negotiable, folks. If the milk is too cold, your active dry yeast won’t wake up, and you end up with dense, heavy bread that refuses to proof. If it’s scalding hot, you literally kill the yeast cells. Aiming for that 105°F to 115°F range is how you guarantee a vigorous, puffy final rise. It’s the first step to making **Classic Dinner Rolls**!
Now, what if you’re dairy-free or just ran out of milk? You can definitely use water instead of milk, but you’ll lose some of that rich, soft texture that makes these **Buttery Yeast Rolls** so divine. If you use water, consider adding an extra tablespoon of melted butter to compensate for richness, though it won’t be *quite* the same melt-in-your-mouth feel.
And don’t forget the sugar! People sometimes wonder why we feed the yeast sugar if the rolls are savory. Well, the sugar is primarily food for the yeast; it supercharges them during that first rise. A little bit of sugar also helps keep the final texture soft, preventing the bread from tasting too plain and ensuring these **Savory Rolls Baking** turn out perfectly sweetened, even though they aren’t technically sweet rolls!
Make Ahead Rolls Recipe and Storage Instructions
I absolutely love that these **Make Ahead Rolls Recipe** work so perfectly for big events like Thanksgiving or Christmas because you can totally keep them organized ahead of time! This is such a lifesaver when you’re juggling a massive holiday dinner menu.
If you want to prep the dough completely but bake them the next day, here’s the trick: finish steps 1 through 6 (mixing, kneading, and shaping into balls), but put them in your greased 9×13 pan, cover them tight with plastic wrap, and stick the whole thing in the fridge. They can hang out happily down there for up to 12 hours. Don’t let them sit longer than that, or they might get a little sad.
When it’s time to bake, pull them out of the fridge and let them sit on the counter, still covered, for about an hour while they warm up slightly and do that second rise—they look puffy! If you’re in a major rush for these **Holiday Dinner Rolls**, you can bake them straight from the fridge, but you’ll need to add about 5 extra minutes to the total bake time.
Once they are baked and brushed with butter, store any leftovers in an airtight container on the counter. To wake up that amazing softness, just pop them in a 350°F oven for about 5 minutes, or give them 10-15 seconds in the microwave. Instant fresh-baked goodness!
Variations: Customizing Your Homemade Buns
One of the best things about making your own **Homemade Buns** is that you get to play around with them! While this basic recipe creates those amazing, soft rolls you dream about—especially if you use that garlic butter finish to hit that **Texas Roadhouse Rolls Copycat** vibe—we can totally jazz them up for different meals.
If you aren’t feeling the heavy garlic, switching up the finish is super easy. Instead of making the full optional glaze, just melt that 1/4 cup of butter and brush it on immediately after they come out of the oven. You still get amazing moisture and the flavor of **Buttery Yeast Rolls**, but it’s much lighter and less savory, which is great if you’re serving them with a sweeter main course.
For a totally different twist within the dough itself, try adding some herbs during Step 3, right when you add the flour. A teaspoon of dried rosemary or maybe some dried thyme chopped up fine really complements the subtle sweetness from the yeast. Wow! Imagine pulling apart a warm roll and smelling fresh rosemary—it makes them feel super rustic and fancy, all while keeping that melt-in-your-mouth texture we worked so hard to achieve.
If you’re looking for a slightly sweeter profile, more like the sweet rolls my neighbor sometimes makes, you can easily increase the sugar in the main dough by another 2 tablespoons. Just make sure if you do that, you let the yeast have an extra five minutes to eat up the extra food! These little tweaks mean this one reliable recipe can cover your whole year, from savory steaks to lighter summer salads. Don’t forget to check out some other great fluffy roll ideas over here for inspiration!
Remember, always check our Terms of Use when following recipes that might change based on personal preference!
Frequently Asked Questions About Soft Dinner Rolls Recipe
I totally get it! Yeast baking always brings up a few questions, but don’t you worry one bit. These questions cover the most common things folks ask when trying to achieve those perfect **Soft Dinner Rolls Recipe** results. We want guaranteed success! If you have any other sneaky questions that pop up while you’re baking, please don’t hesitate to reach out and contact us.
Can I use instant yeast instead of active dry?
Yes, you sure can use instant yeast instead of active dry yeast! That’s life in the home kitchen, right? If you swap it out, you can skip that initial blooming step (Step 1) where you mix the yeast and warm milk. Just mix the instant yeast right in along with the flour in Step 3. It usually means your dough proofs a little faster, too. It’s one of the easiest ways to make these a **Quick Homemade Bread** fix!
Why didn’t my rolls rise?
Ugh, that is the worst feeling! Nine times out of ten, your rolls didn’t rise because the water or milk was too hot and killed the yeast, or too cold and it just couldn’t activate. If your milk was in that 105°F to 115°F sweet spot, then my next guess is that you didn’t let your dough proof long enough during the first rise. Yeast needs time to build up all those wonderful air bubbles that make these **Fluffy Homemade Rolls**.
Can I make these without a stand mixer?
Heck yes! I honestly prefer using my hands for the kneading part sometimes—it helps me feel the dough better. You absolutely do not need a stand mixer to make these. You’ll need a sturdy wooden spoon and some elbow grease for mixing the dough, and then you’ll knead it aggressively by hand for those full 6 to 8 minutes on the counter. It’s fantastic exercise and makes for incredible **Pillowy Bread Recipe** results!
How do I get the Parker House Rolls Recipe shape?
That is such a fun variation! The classic **Parker House Rolls Recipe** uses a specific fold. After you have your 12 dough balls (Step 6), instead of rolling a perfect ball, you flatten each piece into a small oval. Then you brush the top lightly with melted butter, fold it in half like a taco, and then press the open edges together gently. They bake up beautifully folded over! If you want to get fancy, try adding a smear of melted butter right before the final proofing for extra flavor in your **Warm Rolls Recipe**.
Estimated Nutritional Data for Warm Rolls Recipe
Okay, let’s talk about the facts and figures, because while we cook with love here, knowing what’s in our food is just good sense! Please know that these numbers are just estimates because I am a home cook, not a testing lab! The final count on your plate will change depending on what brand of butter you use, how much glaze you slather on (and trust me, I usually use more), and if you decide to skip the glaze entirely for a lighter side dish.
This data is based on one delicious, soft roll using the full recipe, including that wonderful optional garlic butter glaze we brushed on top:
- Calories: About 180 per roll
- Fat: 7 grams (This includes that buttery goodness!)
- Carbohydrates: 26 grams
- Protein: 4 grams
- Sugar: Only 4 grams in the dough itself!
If you skip the optional glaze, you’ll shave off a couple of grams of fat and calories, but honestly, why would you do that? These **Warm Rolls Recipe** numbers still look fantastic for a homemade bread side dish. It just proves you can have comfort food that’s still reasonable! We believe in transparency here at Cookin’ Corner, which is why you can always review our full commitment to privacy and data usage right here on our Privacy Policy page.
Share Your Experience Baking These Classic Dinner Rolls
Now it’s your turn! Remember how I said food is the language of love? Well, when you bake these soft rolls, you’re sending a message of pure comfort straight from your kitchen to whoever is sitting at your table. I truly hope you and your family enjoy making and devouring these buttery, pillowy treats!
Once you’ve pulled them hot out of the oven—and I *really* hope you made that garlic butter glaze—I would absolutely love to hear about it! Drop a rating below using the five stars—it helps me know that this recipe is working beautifully for you, just like it does for mine. And please, leave a comment! Tell me if you tried the herb variation, or if you managed to save any leftovers (brave soul!).
If you snap a picture of your perfect golden-brown rolls, tag us! Seeing your creations and knowing we helped bring a little bit of that nostalgic, warm-from-the-oven happiness to your table is why I do all this. Happy baking, and enjoy every single last bite of these beautiful, classic dinner rolls!
PrintThe Ultimate Soft & Fluffy Dinner Rolls with Optional Garlic Butter Glaze

Bake soft, buttery yeast dinner rolls that melt in your mouth. This recipe yields pillowy bread perfect as a side dish for any meal or holiday gathering.
- Prep Time: 20 min
- Cook Time: 18 min
- Total Time: 1 hour 58 min
- Yield: 12 rolls 1x
- Category: Side Dish
- Method: Baking
- Cuisine: American
- Diet: Vegetarian
Ingredients
- 1 cup warm milk (105°F to 115°F)
- 2 1/4 teaspoons active dry yeast
- 1/4 cup granulated sugar
- 1 large egg, room temperature
- 1/4 cup unsalted butter, melted
- 1 teaspoon salt
- 3 1/2 cups all-purpose flour, plus more for dusting
- 1/4 cup (4 tablespoons) unsalted butter, melted (for brushing)
- 1 teaspoon garlic powder (optional for glaze)
- 1 tablespoon fresh parsley, chopped (optional for glaze)
Instructions
- In a large bowl, combine the warm milk and yeast. Let stand for 5 minutes until foamy.
- Add the sugar, egg, 1/4 cup melted butter, and salt to the yeast mixture. Whisk until combined.
- Gradually add the flour, mixing until a soft dough forms.
- Turn the dough out onto a lightly floured surface. Knead for 6 to 8 minutes until the dough is smooth and elastic.
- Place the dough in a lightly oiled bowl, turning once to coat. Cover the bowl with plastic wrap or a clean towel. Let the dough rise in a warm place for 60 to 90 minutes, or until doubled in size.
- Gently punch down the risen dough. Divide the dough into 12 equal pieces. Roll each piece into a smooth ball.
- Arrange the dough balls in a greased 9×13 inch baking pan, leaving a small space between each roll.
- Cover the pan loosely and let the rolls rise again in a warm place for 30 to 45 minutes, or until puffy.
- Preheat your oven to 375°F (190°C).
- Bake the rolls for 15 to 18 minutes, or until golden brown on top.
- While the rolls are hot, prepare the glaze: In a small bowl, combine the remaining 1/4 cup melted butter, garlic powder, and parsley, if using.
- Brush the melted garlic butter mixture evenly over the tops of the warm rolls immediately after removing them from the oven.
- Serve the soft dinner rolls warm.
Notes
- For a quicker rise, place the dough in an oven that has been turned off after warming it slightly.
- If you prefer a sweeter roll, increase the sugar in the dough to 1/3 cup.
- You can make these ahead; cover the unbaked rolls and refrigerate for up to 12 hours before baking. Add 5 minutes to the bake time if baking directly from the refrigerator.
Nutrition
- Serving Size: 1 roll
- Calories: 180
- Sugar: 4
- Sodium: 250
- Fat: 7
- Saturated Fat: 4
- Unsaturated Fat: 3
- Trans Fat: 0
- Carbohydrates: 26
- Fiber: 1
- Protein: 4
- Cholesterol: 25