
Oh my goodness, if there is one thing that screams comfort and pure indulgence, it’s homemade caramel. Seriously, that rich, buttery smell when sugar starts turning amber? It’s the best kind of kitchen magic! I totally get it if you’ve always seen candy making as this super technical, scary thing that requires a chemistry degree. But trust me, that’s why we’re here! This guide is your beginner’s ticket to making two amazing things from scratch: that gorgeous, slow-drizzling caramel sauce and those absolutely perfect, soft and chewy caramel squares. Sarah Jane started Cookin’ Corner because the classics deserve to work every single time, and these recipes are road-tested until they were foolproof. Get ready to ditch the store-bought stuff! You can read more about our commitment to reliable home cooking right here on our story page.
- Why This Homemade Caramel Guide Works for You
- Essential Ingredients for Perfect Caramel
- How to Make Easy Salted Caramel Sauce (Liquid Caramel Guide)
- Mastering Chewy Caramel Squares (Soft Caramels Homemade)
- Tips for Success with Your From Scratch Caramel
- Serving Suggestions for Your Rich Dessert Toppings
- Storage and Reheating Instructions for Homemade Caramel
- Frequently Asked Questions About Making Caramel
- Share Your Buttery Caramel Treats Creations
Why This Homemade Caramel Guide Works for You
I know you want to make delicious things without feeling stressed! That’s the whole point of this section. We’re keeping things super simple so you can tackle this with total confidence. You get two amazing recipes in one place, which is such a win.
- You don’t need expensive gear; we even show you a way to handle the sauce without fussing over a candy thermometer.
- We focus on those foundational techniques so your caramel comes out perfectly buttery every time.
Quick Overview of Our Caramel Recipes
So, what are we making? You’ll nail two fantastic things:
- Silky liquid caramel guide perfect for making those rich dessert toppings.
- Perfectly textured soft caramels homemade that are just begging to be wrapped up with wax paper.
Essential Ingredients for Perfect Caramel
Okay, now for the fun part: gathering your supplies! The beauty of this classic caramel is that it uses basic pantry staples, but the quality really makes a difference. We want that deep, rich flavor, not grainy sugar, so pay attention to these items!
Here’s what you need to pull together both recipes:
- The Base: 1 cup Granulated Sugar and 1/2 cup Light Corn Syrup. Yes, the corn syrup is important; it’s our secret weapon against crystals forming, which makes for shiny, gorgeous caramel instead of grainy sugar clumps.
- The Richness: 1/2 cup Heavy Cream and 1/4 cup Unsalted Butter. You must use heavy cream—skim milk or half-and-half just won’t give the texture the right body when it cools down.
- The Finishers: 1 teaspoon Vanilla Extract and the Sea Salt (we use 1/2 teaspoon for the sauce and 1/4 teaspoon for the candy).
Ingredient Notes and Substitutions for Your Caramel
Let’s talk about swapping things around, although I highly recommend sticking to the list when you’re feeling out the recipe for the first time! If you absolutely cannot find corn syrup, you can try substituting it with honey or maple syrup, but be warned: your cooking time might change wildly. Corn syrup is fantastic because it stabilizes the sugar. If you skip it entirely, you have to stir the sugar much more gently as it melts to keep it from seizing up on you. Don’t sweat it if you need to use salted butter in a pinch for the candies, but if so, cut back on that extra salt topping we add at the end!
How to Make Easy Salted Caramel Sauce (Liquid Caramel Guide)
Let’s start with the sauce because honestly, once you have this caramel drizzle sauce, you won’t know how you lived without it! Seriously, this stuff is a magic wand for boring desserts. You combine your sugar and corn syrup in a nice, heavy saucepan over medium heat. You stir gently until that sugar dissolves—it needs to be completely smooth before you stop touching it. This is where the patience comes in!
Once it’s dissolved, you absolutely must stop stirring. Let the mixture boil until it turns this gorgeous shade of deep amber. I watch it like a hawk! If you see it getting too dark, pull it off the heat immediately, or you’ll end up with burnt sugar instead of sweet goodness. If you want to dive deep into the science of wet vs. dry melting, check out this neat article on making perfect caramel sauce.
Now, for the fun, slightly dramatic part: taking it off the heat to add the good stuff!
Stovetop Caramel Instructions for Sauce Consistency
When the sugar is the color of dark honey, pull the pan right off the burner. Now, whisk in that cold butter until it melts completely smooth. Then, here’s the big moment: slowly, slowly pour in the heavy cream while whisking like crazy. It is going to bubble up and steam like a tiny volcano, so stand back a little! It’s totally normal, just whisk constantly until it calms down and looks smooth again on low heat. Stir in your vanilla and salt, pour it into a jar, and congratulations—you have incredible rich dessert toppings!
No Thermometer Tip Alert: For a super-quick, almost no thermometer caramel sauce method, you can actually build this in the microwave! Just toss the sugar, syrup, and cream into a big glass bowl and microwave it for one-minute bursts, stirring in between, until it hits that light brown color. Then whisk in the butter and salt off the heat. It’s fast, and it works like a charm for beginners!
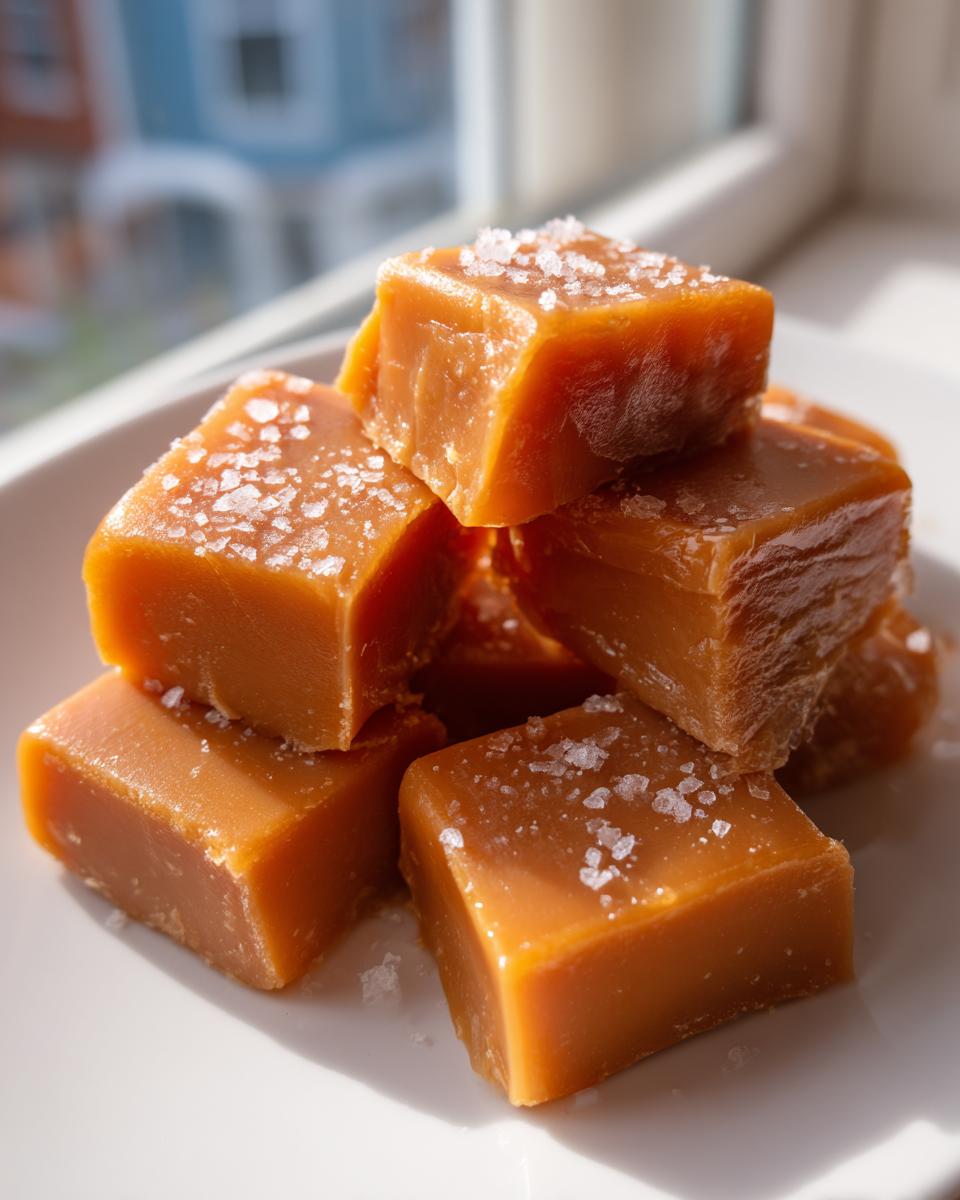
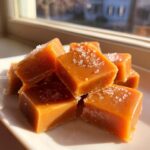
Mastering Chewy Caramel Squares (Soft Caramels Homemade)
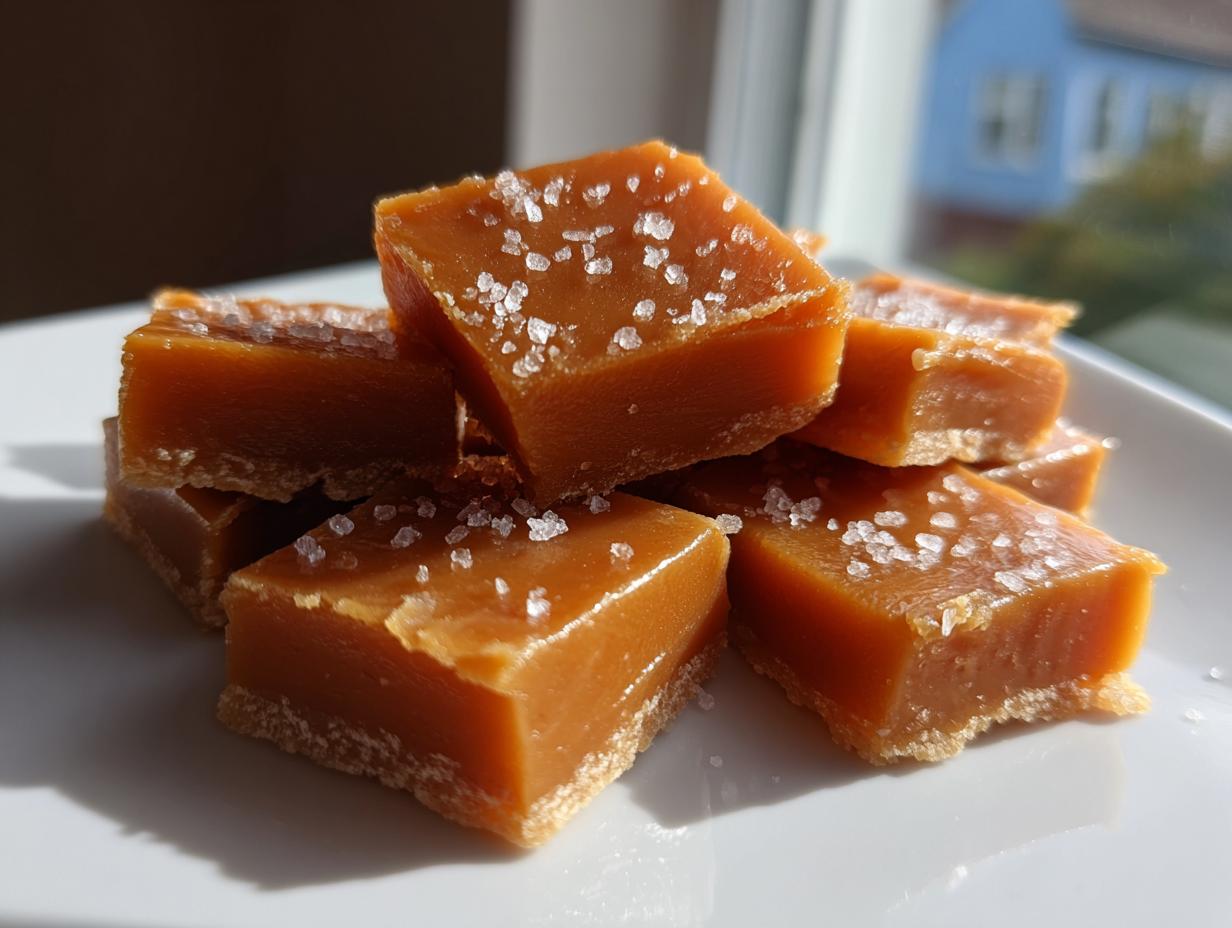
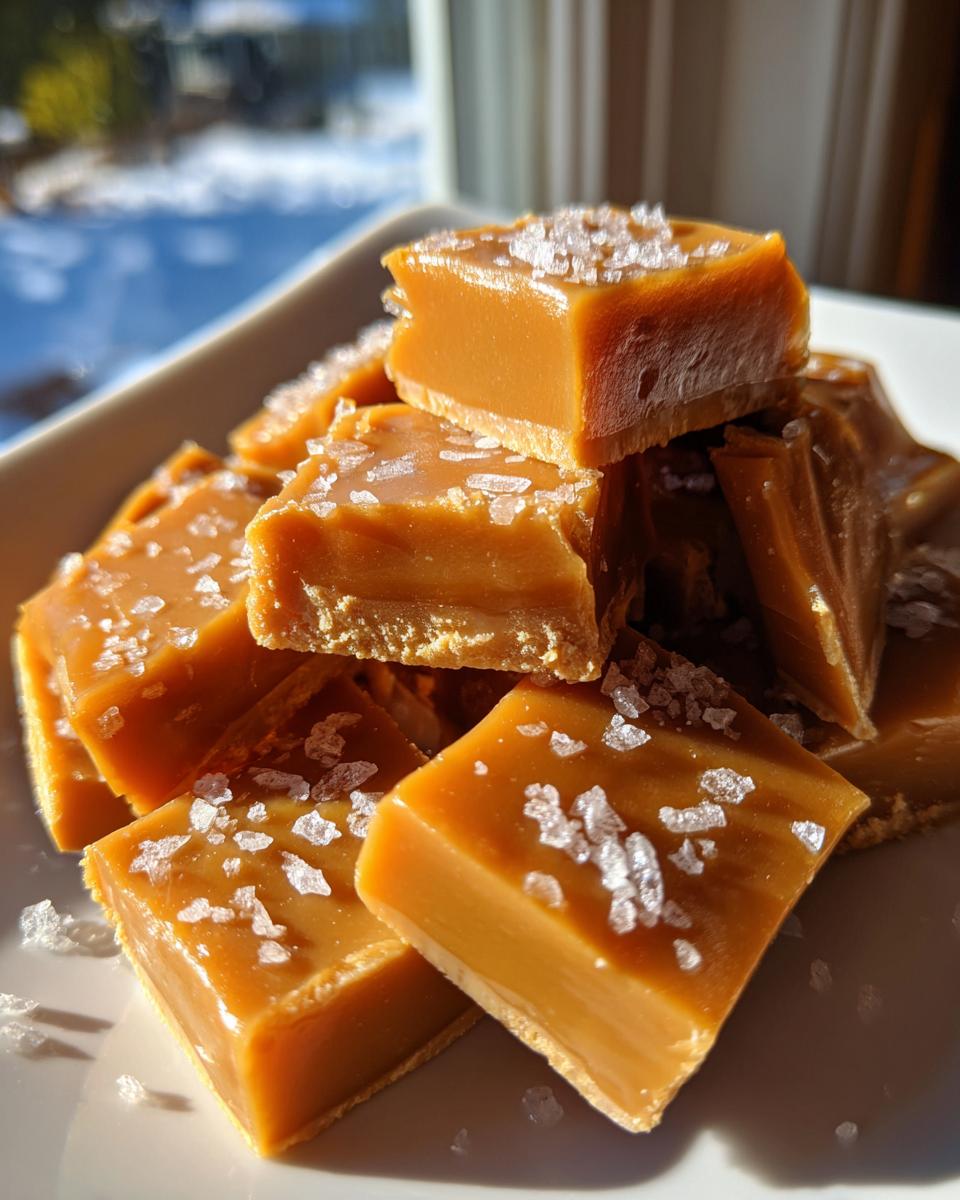
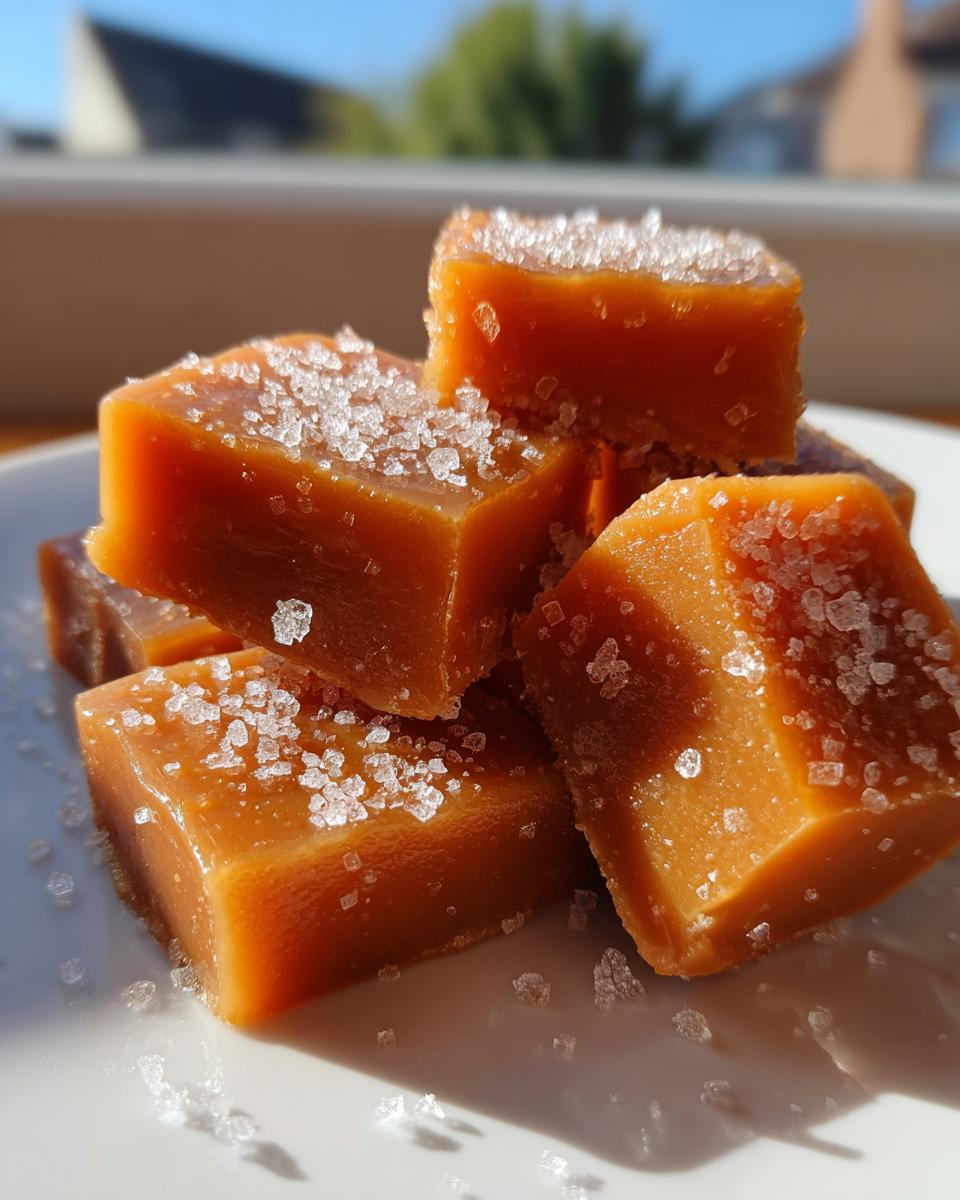
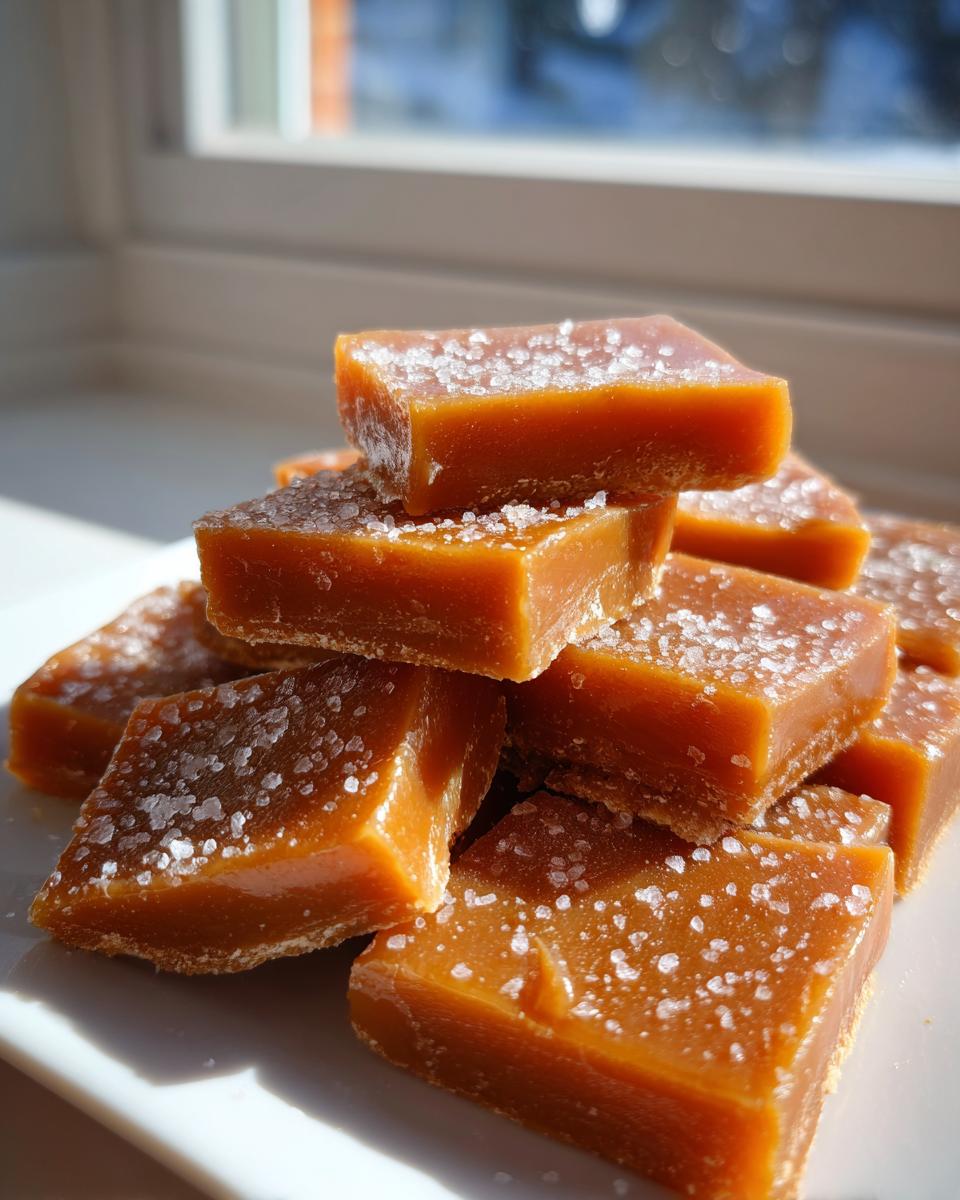
Alright, now we switch gears completely for those truly satisfying, melt-in-your-mouth chewy caramel squares! While the sauce is wonderful for drizzling, nothing beats biting into a perfect piece of homemade candy. The most important change here is the heat. For the sauce, we used color as our guide, but for these soft caramels homemade, we really need that specific temperature: 245°F. That temperature hits what we call the ‘firm ball stage,’ and that is what gives you that soft, pliable bite—the absolute best for any buttery caramel treats!
If you’re nervous about hitting that temperature, trust me, I’ve been there! You just have to keep that heat steady once the cream and butter are in, stirring slowly and constantly. It feels like forever, but it’s what locks in that glorious texture. If you want to see another fantastic take on caramel candy recipe methods, you can peek at this great guide over here!
Tips for Cutting and Wrapping Your Caramel Candy Recipe
Once you pour that gorgeous, cooked mixture into your parchment-lined 8×8 pan, the hard work is mostly done! Now, we need patience, which is always the secret ingredient in candy making, right? You have to let these cool down completely. Resist the urge to touch them for at least four hours, or maybe even let them chill on the counter overnight. If you try to cut them warm, you’ll end up with a sticky, gooey mess all over your knife.
When they are totally firm, lift the whole slab out using the parchment paper edges. Use a sharp, oiled knife to cut them into small squares. Remember, these are rich! Cut them into bite-sized pieces. For the grand finale, wrap each one—you can use wax paper or cellophane squares. Wrapping keeps them from sticking to each other, making them perfect for tossing into bags as little holiday caramel gifts!
Tips for Success with Your From Scratch Caramel
Making caramel is all about control! Since we are dealing with boiling sugar, things can sometimes go a little sideways if you aren’t prepared for the quirks. Don’t panic if it doesn’t look perfect the first time; that’s just part of learning to trust your instincts in the kitchen.
Here are the things I always watch out for to ensure a batch of sugary gold, whether I’m aiming for sauce or candy:
- Sugar Seizing Up? This usually happens if a single crystal of dry sugar falls into the liquid as it boils, causing the whole batch to crystallize and go grainy. If this happens, don’t toss it! Take your pot off the heat and whisk in a tablespoon or two of hot water very quickly, then return it to low heat. Keep whisking gently until those lumps dissolve. It takes patience, but you can usually save it!
- Caramels Are Too Soft? If your candies don’t set up, it means they didn’t reach that crucial 245°F. Next time, let the mixture cook just a bit longer after adding the cream, stirring constantly, until it hits that magic temperature.
- Caramels Are Too Hard? If they taste like rocks, you cooked them past 248°F. You can usually soften them slightly by letting them sit in a very humid spot or gently warming them near the stovetop, but honestly, use those hard ones as crunchy toppings for ice cream!
- The Salt Factor: When you are aiming for those amazing sweet and salty treats, the salt is everything. I always recommend using quality sea salt or flaky salt for the final sprinkle on top of the candies or whisking into the sauce. The subtle mineral note really cuts through the sweetness beautifully.
Serving Suggestions for Your Rich Dessert Toppings
Now that you have this absolutely decadent caramel—liquid gold for your kitchen!—what in the world do you do with it all? Don’t just stand there eating it with a spoon (though I totally support that move!). The sauce is amazing warmed up just slightly and drizzled over vanilla bean ice cream. It’s also fantastic stirred into a strong cup of coffee for an instant homemade latte!
And those chewy caramel squares? They are perfect wrapped up, but they also make fantastic additions to things like homemade turtle cookies or just crumbled over a slice of apple crisp. Honestly, if you’re looking for more places to use that amazing sweet and salty flavor profile, check out these pairing ideas over here. These recipes are built to impress!
Storage and Reheating Instructions for Homemade Caramel
Okay, you made it! You have jars of gorgeous, thick sauce and a pan full of perfect caramel squares. Now we need to make sure they stay pristine until you eat them all in one sitting—which, let’s be honest, is the goal!
The rules are hilariously different for the sauce versus the candy. It all comes down to texture and moisture!
Sauce Storage: Keep It Cool and Creamy
If you have leftover caramel drizzle sauce (which is unlikely, I know!), you have to treat it like dairy. Pop that jar straight into the refrigerator. Because we used heavy cream, it needs that cold. When it’s cold, it will firm up quite a lot—don’t panic! You want to use that sauce soon, ideally within two or three weeks, just to keep that fresh homemade taste at its peak.
Reheating Tip: When you pull that cold jar out, it’s going to look like fudge! That’s fine. For a pourable texture, just scoop what you need into a small microwave-safe bowl and zap it for about 15 to 20 seconds. Stir it up, and boom, it’s back to that luscious, pourable consistency, ready to top whatever dessert you’re trying to salvage!
Candy Storage: Room Temp Royalty
For your chewy caramel squares homemade, the fridge is actually the enemy! Cold temperatures can sometimes make them either too stiff or, weirdly, a little sweaty when they come back out. Keep your wrapped caramel candy recipe squares wrapped individually and place them in a truly airtight container at cool room temperature.
They will keep beautifully on the counter in a pantry or cool cabinet for a good month, sometimes longer because of all that sugar! As long as they aren’t getting warm near the stove or in direct sunlight, they stay perfect. That’s the beauty of a good, buttery from scratch caramel—it lasts!
Frequently Asked Questions About Making Caramel
I hear so many questions when people try this for the first time, and honestly, they are all totally valid! Making candy—even a simple caramel—can feel fiddly. I promise, once you know the tricks, you’ll wonder why you waited so long to dive into these homemade candy recipes.
Here are the things folks ask me most often:
Can I make this easy salted caramel recipe without a thermometer?
Yes, absolutely! That’s one of the best parts about our caramel sauce recipe—it works beautifully with just your eyes. For the sauce, you are looking for that deep, dark amber color, the color of rich, dark honey. Pull it off the heat the second it hits that color, and you are golden! If you are making the soft caramels homemade, avoiding the thermometer is trickier because texture is temperature-dependent. If you must skip it, cook the mixture for about 10 minutes after it returns to a boil post-cream addition, stirring constantly, and look for a slightly thicker, almost bubbling-maple-syrup appearance.
Why did my caramel crystallize on me?
Ugh, the dreaded crystallization! This is 99% of the time caused by one tiny, stubborn sugar crystal splashing onto the side of the pan, dissolving, and then falling back into the liquid. That one crystal acts like a seed, and suddenly your smooth liquid turns crunchy. My biggest tip? Once the sugar dissolves, stop stirring, and use a pastry brush dipped in water to wash down any sugar grains sticking to the sides of your saucepan.
What’s the difference between wet and dry caramel methods?
This gets a little technical but it matters! The recipe we used here is technically the ‘wet’ method because we start by dissolving the sugar in the corn syrup (a liquid). The ‘dry’ method means you heat only the granulated sugar by itself until it melts onto a bare pan. The wet method is way more forgiving for us home cooks and makes achieving that deep caramel color much easier without burning!
Can I use butter substitutes like margarine in my caramel candy recipe?
Oh, honey, please don’t! You’ll get softer results that might not hold their shape well, and you lose that deep, authentic buttery flavor that makes these buttery caramel treats so special. Stick to real unsalted butter for the best texture and taste!
Share Your Buttery Caramel Treats Creations
Now look at you! You went from being slightly nervous about boiling sugar to having homemade, glorious caramel squares or pots of luscious sauce sitting on your counter. That’s huge! I want to hear all about it, truly I do.
When you’ve tried either the caramel sauce recipe or the chewy candy, please come back and leave a star rating right below this! It helps other folks who are just dipping their toes into candy making feel brave enough to try it. Tell me honestly: did you get that perfect amber color on your first try? Did you sprinkle enough sea salt? I live for those little details in the comments!
And if you took a gorgeous picture of your finished product—maybe you’re drizzling that rich dessert topping over some brownies or neatly wrapping up the shiny chewy caramel squares—please tag us! We love seeing your beautiful buttery caramel treats pop up on social media. It just makes my day to know that a recipe from our kitchen is making memories in yours.
If you ran into a snag or have a question that popped up while you were working, please don’t hesitate to reach out directly by visiting our contact page. We’re here to help you keep that sweet, salty magic going!
PrintEasy Homemade Salted Caramel Sauce and Soft Chewy Caramels
Learn to make rich, buttery caramel sauce perfect for drizzling and soft, chewy caramel candies from scratch. These recipes use simple ingredients and are great for beginners.
- Prep Time: 10 min
- Cook Time: 20 min
- Total Time: 30 min
- Yield: About 1.5 cups sauce or 36 caramels 1x
- Category: Dessert
- Method: Stovetop
- Cuisine: American
- Diet: Vegetarian
Ingredients
- 1 cup Granulated Sugar
- 1/2 cup Light Corn Syrup
- 1/2 cup Heavy Cream
- 1/4 cup Unsalted Butter
- 1 teaspoon Vanilla Extract
- 1/2 teaspoon Sea Salt (for sauce)
- 1/4 teaspoon Sea Salt (for candy, plus extra for topping)
Instructions
- Prepare your pan: Line an 8×8 inch baking pan with parchment paper for the caramels, or prepare a heat-safe bowl if using the microwave method for sauce.
- Combine ingredients: In a medium, heavy-bottomed saucepan, combine the sugar and corn syrup. Stir them together over medium heat until the sugar dissolves.
- Cook the sugar: Stop stirring once the sugar dissolves. Allow the mixture to boil until it reaches a deep amber color (about 320°F if using a thermometer, or until it looks like the color of dark honey). Watch carefully to prevent burning.
- Add butter and cream (Stovetop Sauce): Remove the pan from the heat. Carefully whisk in the butter until melted. Slowly pour in the heavy cream while whisking constantly. The mixture will bubble vigorously.
- Finish the sauce: Return the pan to low heat and stir until smooth. Remove from heat, stir in the vanilla extract and sea salt. Pour the sauce into a jar. This is your rich dessert topping.
- For Soft Caramels (Stovetop Method): After adding the cream and butter, continue cooking the mixture over medium-low heat, stirring constantly, until it reaches 245°F (firm ball stage).
- Finish the caramels: Remove from heat, stir in the butter, vanilla, and salt. Pour the mixture into the prepared 8×8 pan. Sprinkle the top with extra sea salt.
- Set the caramels: Let the caramels cool completely at room temperature for several hours until firm. Cut into squares and wrap individually.
Notes
- For an easy salted caramel sauce using the microwave, combine sugar, corn syrup, and cream in a microwave-safe bowl. Microwave in 1-minute intervals, stirring between each, until the mixture reaches a light brown color. Whisk in butter and salt off the heat.
- If you are making soft caramels, do not skip the parchment paper; it prevents sticking.
- This homemade caramel recipe is excellent for holiday caramel gifts.
Nutrition
- Serving Size: 2 Tbsp sauce
- Calories: 180
- Sugar: 30g
- Sodium: 120mg
- Fat: 7g
- Saturated Fat: 4g
- Unsaturated Fat: 3g
- Trans Fat: 0g
- Carbohydrates: 30g
- Fiber: 0g
- Protein: 0g
- Cholesterol: 20mg