
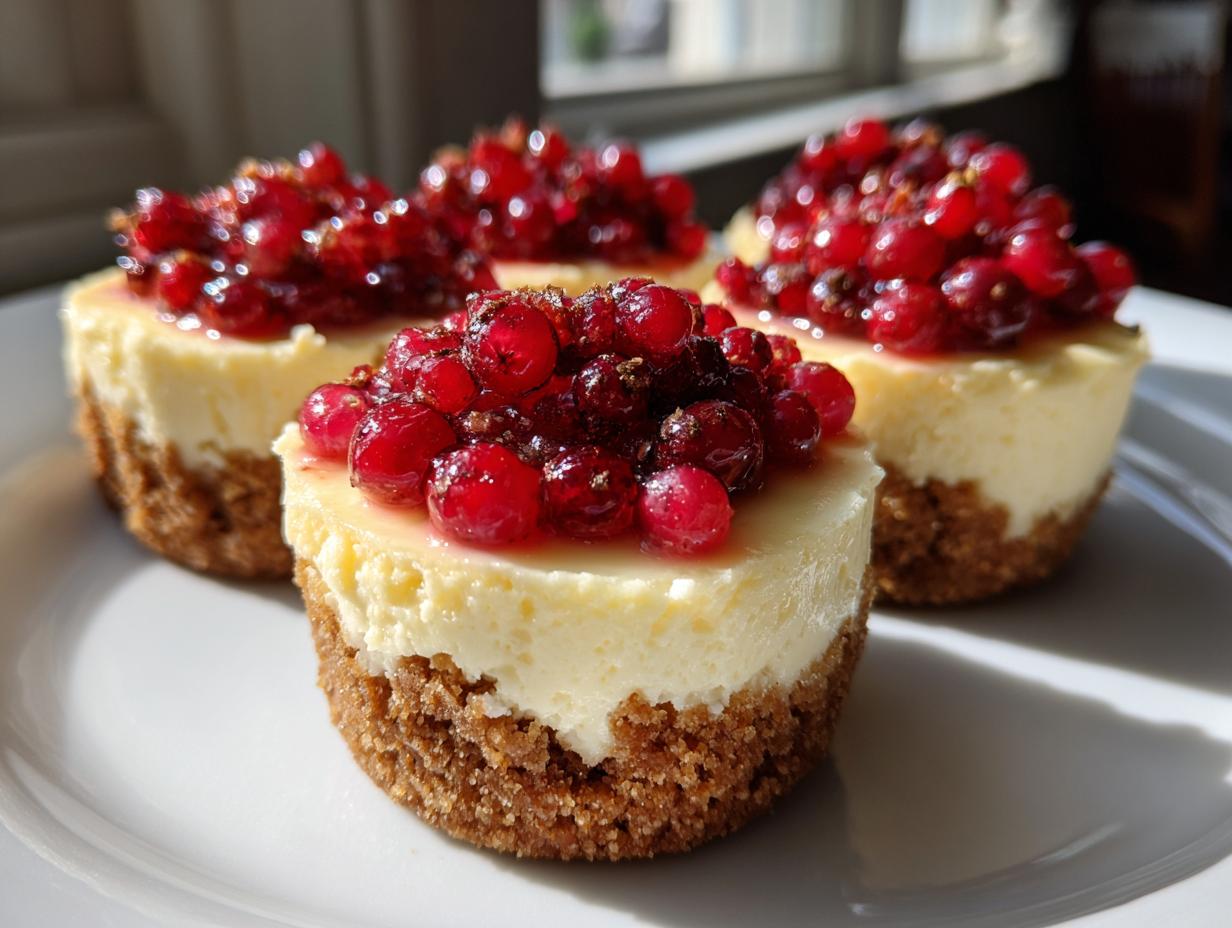
There is just something magical about a dessert perfectly portioned just for you, isn’t there? Forget slicing big cakes! When I set out to create reliable recipes here at Cookin’ Corner, I wanted treats that spell simple happiness. That’s why these Easy No-Bake Mini Cheesecake Cups are my absolute favorite lately. Believe me when I say you’re getting the creamiest, dreamiest mini cheesecake experience without ever touching your oven. Zero baking means less fuss and more time enjoying that buttery graham cracker crust and rich, fluffy filling. If you love cheesecake but want an easy alternative to my chocolate chip cheesecake recipe, this is it! This recipe proves you can have decadence quickly.
- Why This is the Best mini cheesecake recipe You Will Make
- Gathering Ingredients for Your No Bake mini cheesecake Cups
- Step-by-Step Instructions for easy mini cheesecakes
- Tips for Perfect Creamy Cheesecake Bites Every Time
- Variations on Your Favorite mini cheesecake
- Serving Suggestions for these party dessert recipes
- Storage and Make Ahead Desserts with mini cheesecake
- Frequently Asked Questions about No Bake mini cheesecakes
- Nutritional Estimate for Your mini cheesecake Cups
Why This is the Best mini cheesecake recipe You Will Make
When I develop a recipe for the Corner, I need it to pass the test of real life—meaning it has to be totally dependable, especially for party dessert recipes. These cups deliver every single time. You don’t have to worry about cracks or water baths, which is the main hassle with baked versions!
Here’s why these easy mini cheesecakes are my go-to:
- No Oven Needed: That’s right, zero heat required! Perfect for summer when you don’t want to heat up the kitchen.
- Perfect Portions: They are designed as individual cheesecake desserts, making serving a breeze. No slicing, no fuss!
- Supreme Creaminess: We use heavy cream folded in at the end. Trust me, that step is what guarantees those creamy cheesecake bites everyone raves about. If you loved my no-bake cheesecake bites, you’ll adore this cup version!
It’s the best quick cheesecake dessert when you need something impressive this afternoon. For another super simple, oven-free treat, you have to check out my easy no-bake Oreo pie!
Gathering Ingredients for Your No Bake mini cheesecake Cups
Okay, getting ready for these graham cracker crust mini cheesecake cups is half the fun! Since this is a no-bake, precision is still key, especially with the cream cheese. Make sure everything for the filling is at true room temperature—it helps prevent lumps, which is crucial for that creamy finish we want! Remember, this recipe relies on beautiful, simple components to shine.
For the Graham Cracker Crust
- 1 1/2 cups graham cracker crumbs
- 1/4 cup granulated sugar (for crust)
- 6 tablespoons unsalted butter, melted
For the Creamy Cheesecake Filling
Expert Tip: Absolutely make sure your cream cheese is completely soft! If it’s cold, you’ll end up with little lumps that just won’t disappear, even with a mixer.
- 16 ounces cream cheese, softened
- 1/2 cup powdered sugar
- 1 teaspoon vanilla extract
- 1/4 cup heavy whipping cream
Optional mini cheesecake Toppings
- Fresh berries
- Chocolate sauce
If you want more ways to incorporate cream cheese into your baking, check out my recipe for cream cheese chocolate chip cookies!
Step-by-Step Instructions for easy mini cheesecakes
We are moving fast now! Since there’s no oven involved, the hardest part is waiting for these to chill. But trust me, the short wait for these individual cheesecake desserts is worth it for that perfect, melt-in-your-mouth texture.
Preparing and Chilling the Graham Cracker Crust
First things first, let’s set up our stations. Grab your standard 12-cup muffin tin and line every single cup with a paper liner. This is our little trick for easy removal later, so don’t skip this step!
In a bowl, mix your graham cracker crumbs and that 1/4 cup of plain sugar until they look friendly. Now pour in the melted butter and stir it all up until every crumb looks nicely moistened. Divide this mixture among your paper liners and press it down firmly at the bottom. You want a good, solid base for your mini cheesecake! Pop this tin into the freezer while we whip up the filling.
Creating the Smooth No Bake mini cheesecake Filling
Time for the star of the show! In your mixer, beat that softened cream cheese until it’s silky smooth—scrape down the sides really well so you don’t miss any hidden clumps. Then add your powdered sugar and vanilla and mix until it’s just combined and looking beautiful.
Now for the real magic: whip your heavy cream until you get soft peaks. This adds that fluffy lift! Here’s the critical part for getting those perfect creamy cheesecake bites: gently fold that whipped cream into the cream cheese mixture. Fold, don’t beat! Overmixing will knock all the air out, and we need that air for the best texture!
Assembling and Setting the Individual cheesecake desserts
Take your crusts out of the freezer. I like to use a piping bag to keep things tidy, but a spoon works just fine too! Distribute that lovely filling evenly over the crusts. Give the tops a little swipe with an offset spatula if you want them polished and smooth.
Back into the fridge they go! You need at least four full hours for these to set up properly. Honestly, though, these are one of those wonderful make ahead desserts—if you can leave them overnight, the texture firms up beautifully. Before serving, just peel those paper liners off and add your favorite topping. If you want to see other simple recipes, check out my guide on cheesecake bites!
Tips for Perfect Creamy Cheesecake Bites Every Time
Even though these are no-bake, home cooks still need a few insider secrets to ensure they get those gorgeous, sturdy creamy cheesecake bites that impress everyone at a party. My goal here is always to banish any potential kitchen mishaps before they even happen. We want rock-solid perfection with zero fuss in the end!
Achieving the Ideal Graham Cracker Crust mini cheesecake Texture
The recipe calls for chilling the crust, which works great, but if you’re worried about a soft crust or if you are making these in a humid climate, listen up. You can give your crust an extra layer of security! Try pressing the crumb mixture firmly into the cups and then popping them in a 350°F oven for about five minutes. Just five minutes! Let them cool completely—I mean stone cold—before filling them. This toasts them just enough to lock in that buttery flavor and keep them from getting soggy underneath that rich filling.
Handling Cream Cheese for the Smoothest Filling
I can’t stress this enough: the cream cheese *must* be truly soft. If you try to mix cold cream cheese, you’ll end up constantly scraping the bowl, and you’ll still get lumps. That ruins the creamy experience we are aiming for! Take it out at least an hour before you start, or if you’re short on time, microwave the wrapped brick for about 15 seconds maximum, just until it yields easily to gentle pressure. Soft cream cheese blends seamlessly with the powdered sugar, giving you that flawless texture that makes these mini cheesecake cups so addictive.
If you want to explore more decadent cream cheese treats, you might enjoy my rich cream cheese chocolate chip cookie recipe!
Variations on Your Favorite mini cheesecake
While this classic graham cracker crust version is my absolute favorite—it’s the standard bearer for mini cheesecake, after all—I love experimenting! Since these are no-bake, we aren’t locked into baking temperatures, which means we can swap out the crust and adjust the filling flavors easily. It’s fun to offer your guests a few different options when you’re serving up these cute, individual cheesecake desserts.
Crust Swaps for your mini cheesecake
Don’t feel boxed in by the graham cracker crumbs! You can get creative with the base and still keep that beautiful, sturdy structure required for these little guys. I usually try two other options when I make a big batch for a gathering.
- Vanilla Wafers: Just crush them up fine and treat them exactly like the graham crackers. They give a sweeter, almost butter-cookie flavor that pairs amazingly with the creamy filling.
- Oreo Base: If you want to go for a chocolate kick, use crushed Oreo cookies (filling and all!). It makes for a dramatic presentation, especially if you top it with a plain berry sauce. This is a big hit whenever I make them! You can see how intense chocolate can get when you look at my red velvet cheesecake showstopper, though these are much simpler!
Flavor Twists for quick cheesecake dessert
The filling is so versatile because we don’t bake it. We are essentially making a sweet, stabilized cream cheese mousse! This makes adding extracts or zests super simple for a fun, quick cheesecake dessert.
My biggest suggestion is adding a little acid or depth. Try beating in the zest of one whole lemon right along with the vanilla extract and powdered sugar. That bright citrus cuts through the richness perfectly! Or, if you’re looking for an afternoon pick-me-up flavor, mix a teaspoon of instant espresso powder right into the cream cheese before you add the sugar. Wow, those are incredible!
For a super cozy twist, especially in the fall, you should definitely look into swapping out the vanilla and adding a teaspoon of cookie butter spread. It makes for a lovely caramel note! I have a whole post dedicated to those kinds of flavors in my cookie butter cheesecake cups if you need inspiration!
Serving Suggestions for these party dessert recipes
One of the biggest joys of working with mini cheesecake cups is how incredible they look when you set them out! Because they’re naturally portioned, they instantly elevate any spread, making them perfect for big events, casual game nights, or bridal showers. They really shine when you use them to break up a table full of cookies and brownies.
Presentation is everything, right? Since we used paper liners, peeling them off before serving lets the crisp, sturdy crust peek out, which looks so much nicer than serving them still wrapped up. For a big gathering, I always arrange them on a tiered serving platter. It really shows off all those lovely little tops!
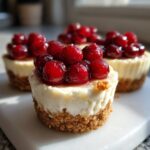
Don’t forget to feature those optional toppings! A simple, vibrant topping is all you need. A few fresh raspberries and a single mint leaf perched on top of each one instantly makes them look like they came from a fancy bakery. If you are leaning toward chocolate sauce, try drizzling a thin zigzag pattern across the top of half the batch, and maybe use fresh strawberries on the other half. That way, everyone gets a chance to try a different flavor profile!

If you’re looking for savory appetizers to balance out all this sweetness at your next get-together, you absolutely must try my recipe for easy cranberry brie bites. They are always cleared off the platter first!
Storage and Make Ahead Desserts with mini cheesecake
One of the absolute best things about these no bake mini cheesecakes is that they are built to be a “make ahead desserts” superstar! I love knowing I can whip up dessert for a party on Thursday and still have that perfect, fresh texture on Saturday afternoon without breaking a sweat.
Since we aren’t dealing with eggs or baking, the main storage concern is keeping the crust crisp and the filling firm. You want to make sure you get that perfect flavor profile when serving them!
Here’s how I keep my batch fresh:
- Cool Completely First: You absolutely must ensure the filling is totally firm before you seal them up. I follow the overnight chilling rule whenever possible, but a minimum of 4 hours is required before trying to cover them.
- Airtight is Key: Place your finished bite sized cheesecake cups in a large, rigid container—like a sturdy plastic storage box with a tight lid. Do not stack them unless you put a layer of parchment paper between rows to prevent toppings or the filling from sticking to the container above.
- Keep Them Covered: Once they are in the container, seal it tight! The main enemy in the fridge is absorbing other smells, and we don’t want your lovely cheesecake taking on the scent of last night’s onions!
Following these steps, your individual cheesecake desserts will stay delicious and creamy in the refrigerator for up to three full days. If you’re looking for more ideas on dishes you can prepare in advance for events, you should browse my full section on make ahead desserts. It’s a lifesaver when hosting!
Frequently Asked Questions about No Bake mini cheesecakes
When you’re making no bake mini cheesecakes, sometimes little questions pop up that can throw you off your game—especially when you’re aiming for that perfect texture. Don’t sweat it! I’ve gathered the most common things folks ask me about these bite sized cheesecake treats. Chances are, if you’re wondering it, someone else is too!
Why did my no bake mini cheesecake filling not set?
Oh, that’s frustrating, but it almost always comes down to one of two things! First, you might have under-whipped your heavy cream. If you only get soft, floppy peaks instead of those nice, defined soft peaks before folding it in, the filling won’t firm up quite enough. Second, and this is the big one: impatience during chilling! Even if you think they look firm after three hours, they really need that full four hours, or ideally, overnight. These individual cheesecake desserts rely on the cold to stabilize the filling, so don’t rush that fridge time!
Can I make these single serving cheesecake desserts ahead of time?
Yes, you absolutely can, and I highly recommend it! These are what I call vacation desserts because they actually taste better the next day. Making them ahead is one of the major benefits of having make ahead desserts ready to go. As I mentioned in the storage section, they hold up wonderfully in an airtight container in the fridge for about three days. The crust stays nicely intact, and the filling stays unbelievably creamy!
What is the difference between this and a New York style mini cheesecake?
That’s a great question, especially since you see New York style mini cheesecake recipes everywhere! The main difference is heat. New York style is baked, which gives it that dense, slightly heavier, almost custardy texture we all know and love. Because ours is a no oven cheesecake recipe, we rely on the cold and the addition of whipped cream to create an incredibly light, fluffy, and instantly creamy texture. You get all the tang and richness, but with way less effort!
If you decide you want to try baking sometime, you can check out my guide on no-bake peanut butter pie—even though it’s no-bake, it shares some of the filling principles we use here to keep things stable!
Nutritional Estimate for Your mini cheesecake Cups
Now, look, I try not to worry too much about numbers when it comes to enjoying a good dessert, because honestly, life is too short! But I know so many of you appreciate knowing the estimates, especially when planning parties or just trying to keep track of things. So, I ran all our ingredients through the lab (okay, my trusty online calculator!) to give you a general idea of what’s in these delicious little bite sized cheesecake cups.
Please remember this is just an estimate based on standard pantry brands. If you load yours up with extra chocolate sauce, those numbers are going to climb a bit!
Here is the basic breakdown per single serving cheesecake, assuming you get 12 perfect servings:
- Serving Size: 1 cup
- Calories: ~280
- Total Fat: ~20g
- Carbohydrates: ~22g
- Protein: ~5g
It’s a delightful treat, perfect for those times when you just need a little something sweet without committing to a massive slice of cake. Enjoy!
PrintEasy No-Bake Mini Cheesecake Cups
Make these creamy, easy no-bake mini cheesecakes with a graham cracker crust. They are perfect single serving desserts for parties or quick sweet cravings.
- Prep Time: 20 min
- Cook Time: 0 min
- Total Time: 4 hr 20 min
- Yield: 12 servings 1x
- Category: Dessert
- Method: No Bake
- Cuisine: American
- Diet: Vegetarian
Ingredients
- 1 1/2 cups graham cracker crumbs
- 1/4 cup granulated sugar (for crust)
- 6 tablespoons unsalted butter, melted
- 16 ounces cream cheese, softened
- 1/2 cup powdered sugar
- 1 teaspoon vanilla extract
- 1/4 cup heavy whipping cream
- Optional Topping: Fresh berries or chocolate sauce
Instructions
- Prepare the crust: In a bowl, mix graham cracker crumbs and 1/4 cup granulated sugar. Pour in melted butter and mix until the crumbs are evenly moistened.
- Press the crust mixture firmly into the bottom of 12 standard muffin cups lined with paper liners. Place the cups in the freezer while you prepare the filling.
- Make the filling: In a large bowl, beat the softened cream cheese with an electric mixer until smooth. Scrape down the sides of the bowl.
- Add the powdered sugar and vanilla extract to the cream cheese. Beat until fully combined and smooth.
- In a separate small bowl, whip the heavy whipping cream until soft peaks form. Gently fold the whipped cream into the cream cheese mixture until just combined. Do not overmix.
- Spoon or pipe the cheesecake filling evenly over the chilled crusts in the muffin cups. Smooth the tops with a small offset spatula.
- Chill the mini cheesecakes in the refrigerator for at least 4 hours, or until firm. For best results, chill overnight.
- Before serving, remove the paper liners. Top each mini cheesecake cup with your choice of fresh berries or a drizzle of chocolate sauce.
Notes
- For a firmer crust, bake the crusts for 5 minutes at 350°F before chilling, then let them cool completely.
- If you do not have paper liners, you can use a silicone muffin pan for easy removal.
- Make ahead desserts like these keep well in the refrigerator for up to 3 days.
Nutrition
- Serving Size: 1 cup
- Calories: 280
- Sugar: 18
- Sodium: 190
- Fat: 20
- Saturated Fat: 12
- Unsaturated Fat: 8
- Trans Fat: 0
- Carbohydrates: 22
- Fiber: 1
- Protein: 5
- Cholesterol: 60