
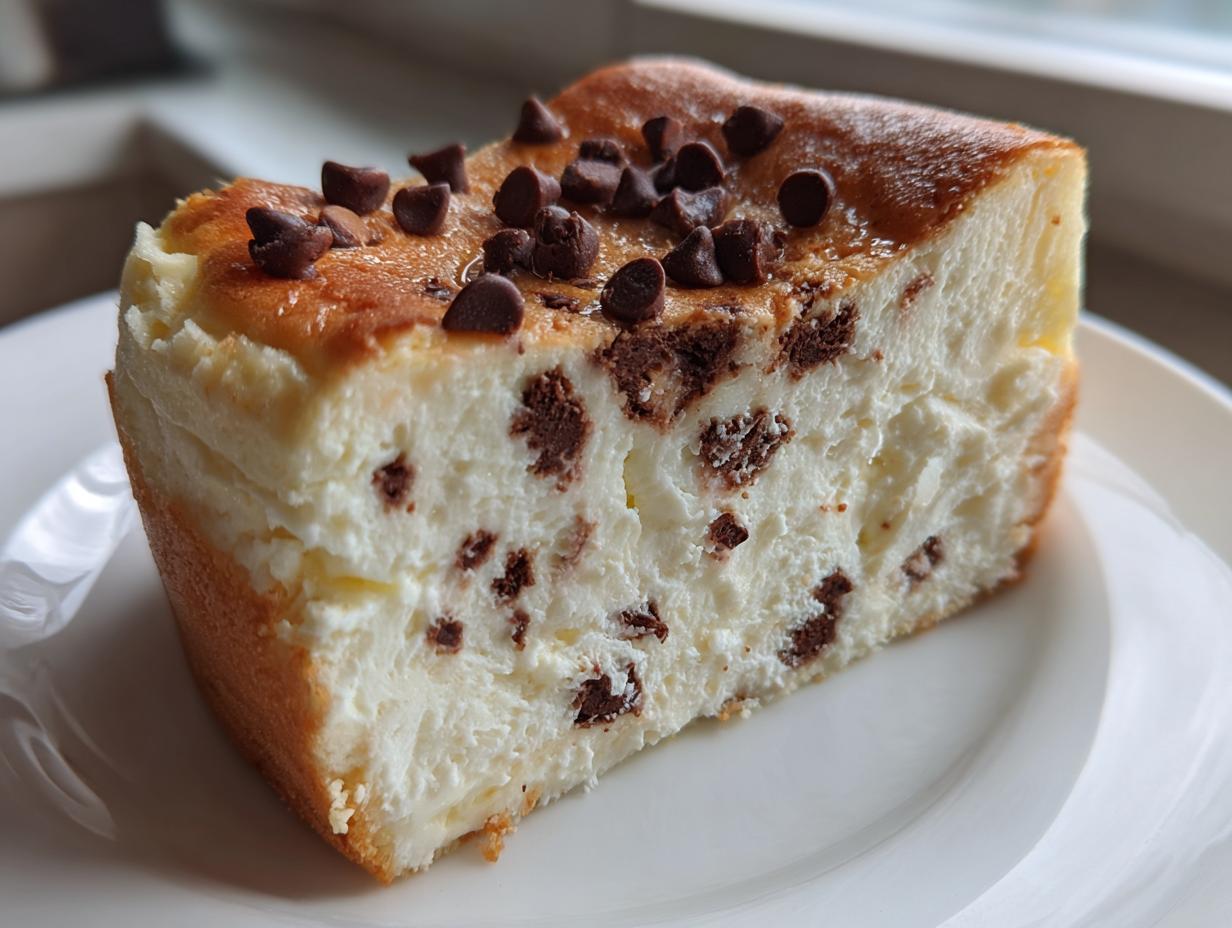
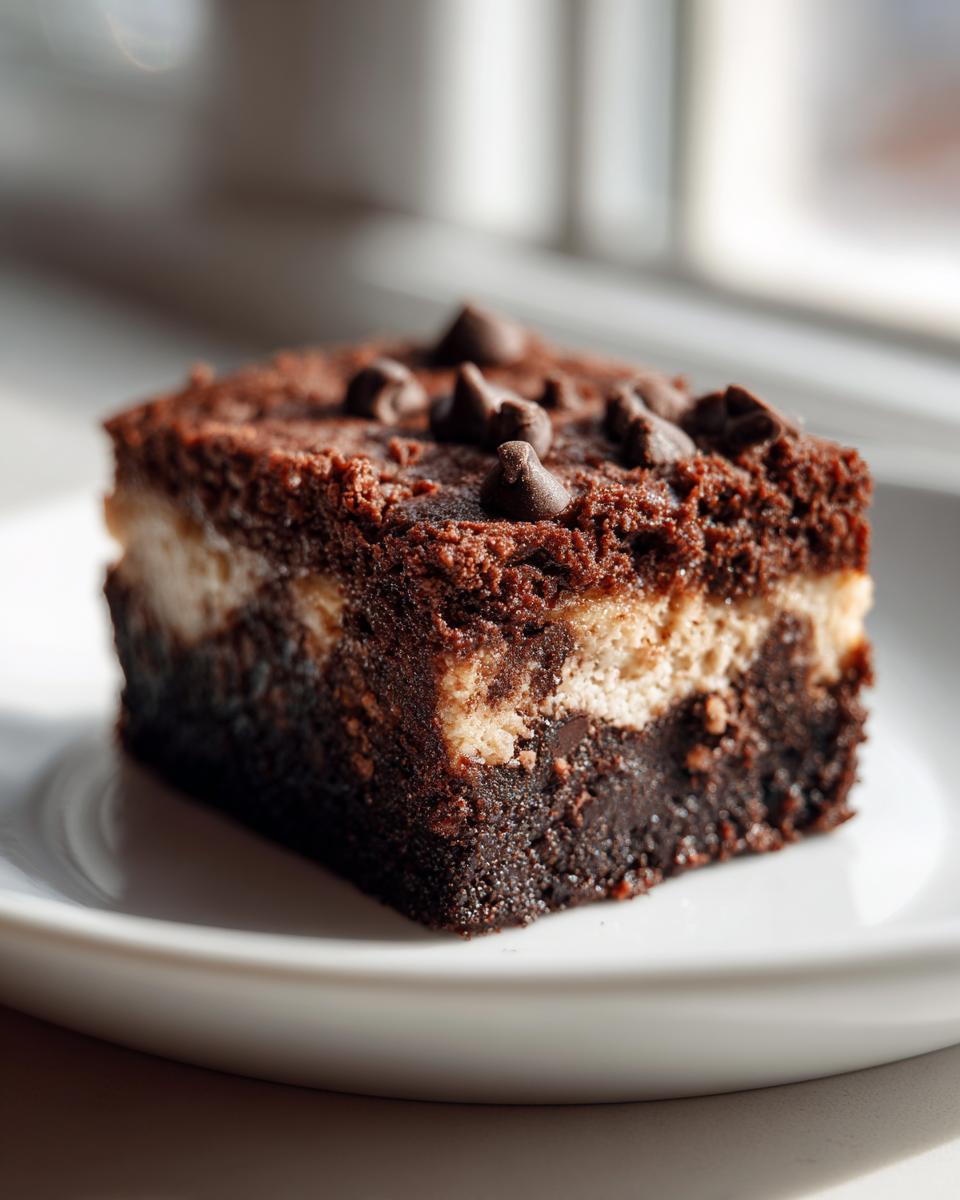
Oh, goodness, is there anything more comforting than a slice of perfect, cool, velvety cheesecake? I think not! Here at Cookin’ Corner, we believe desserts should be rich, memorable, and just a little bit over-the-top sometimes. That’s why I’m so thrilled to share what I truly believe is the Best Chocolate Chip Cheesecake Recipe out there. This isn’t some fancy restaurant version that demands twelve hours of fuss; this is my tried-and-true method, blending my grandmother’s insistence on pure technique with my own craving for gooey chocolate.
We’re aiming for a Creamy Chocolate Chip Cheesecake that is perfectly sliceable—no sad, runny middles here! We take the heart of that classic, tender cheesecake and just load it up with wonderful chocolate chips. It’s the ultimate dessert mashup, designed to be a total crowd pleaser dessert, whether you’re serving it for the holidays or just because it’s Tuesday. Trust me, this indulgent sweet treat is the one you’ll want to keep in heavy rotation.
- Why This Creamy Chocolate Chip Cheesecake Recipe Works (Crowd Pleaser Dessert)
- Gathering Ingredients for Your Ultimate Chocolate Chip Cheesecake
- How to Prepare Your Sliceable Chocolate Chip Cheesecake
- Ingredient Notes and Substitutions for Your Chocolate Chip Cheesecake Recipe
- Making Chocolate Chip Cheesecake Bars: An Easier Approach
- Tips for Success with Homemade Cheesecake
- Storage and Reheating Instructions for Your Decadent Dessert
- Serving Suggestions for this Chocolate Chip Cheesecake
- Frequently Asked Questions About Chocolate Chip Cheesecake
Why This Creamy Chocolate Chip Cheesecake Recipe Works (Crowd Pleaser Dessert)
You might look at this recipe and think, “Oh no, another cheesecake that’s going to crack!” But hold your apron string! The absolute secret to getting that unbelievably creamy baked cheesecake texture, which is smooth all the way through and perfectly sliceable, is the water bath. I know, I know, it sounds fussy, but wrapping that pan tight and nestling it into hot water regulates the heat so gently.
That gentle heat means no drastic temperature changes, which is what causes those awful cracks we all dread. It guarantees a silky, rich and creamy dessert every time you bake it. Plus, the addition of those chocolate chips transforms it from just a nice dessert into a true crowd pleaser dessert that disappears instantly!
Quick Look at the Chocolate Chip Cheesecake Details
For those of you who need the quick facts before diving in, here’s the timeline for this amazing bake:
- Prep Time: 25 minutes
- Cook Time: About 75 minutes
- Total Active Time: Under 2 hours
- Yield: This makes 12 generous servings!
We’ll talk more about the technique later, but this dessert is surprisingly straightforward once you know the water bath trick. If you’re looking for other foolproof methods to get that bakery-style texture, you might want to check out my guide to a no-fail New York Cheesecake, too!
Gathering Ingredients for Your Ultimate Chocolate Chip Cheesecake
Okay, baking this chocolate chip cheesecake successfully starts long before the mixer even comes out! Like any good baker, I always lay out my ingredients first. This ensures everything is at the right temperature—especially that cream cheese—which is vital for a smooth, lump-free filling. We’re building this masterpiece in two distinct parts: the base and the decadent filling.
If you’re looking for similar flavor profiles in another format, you absolutely have to check out my recipe for easy turtle cheesecake; it uses that same principle of layering deep, wonderful flavors!
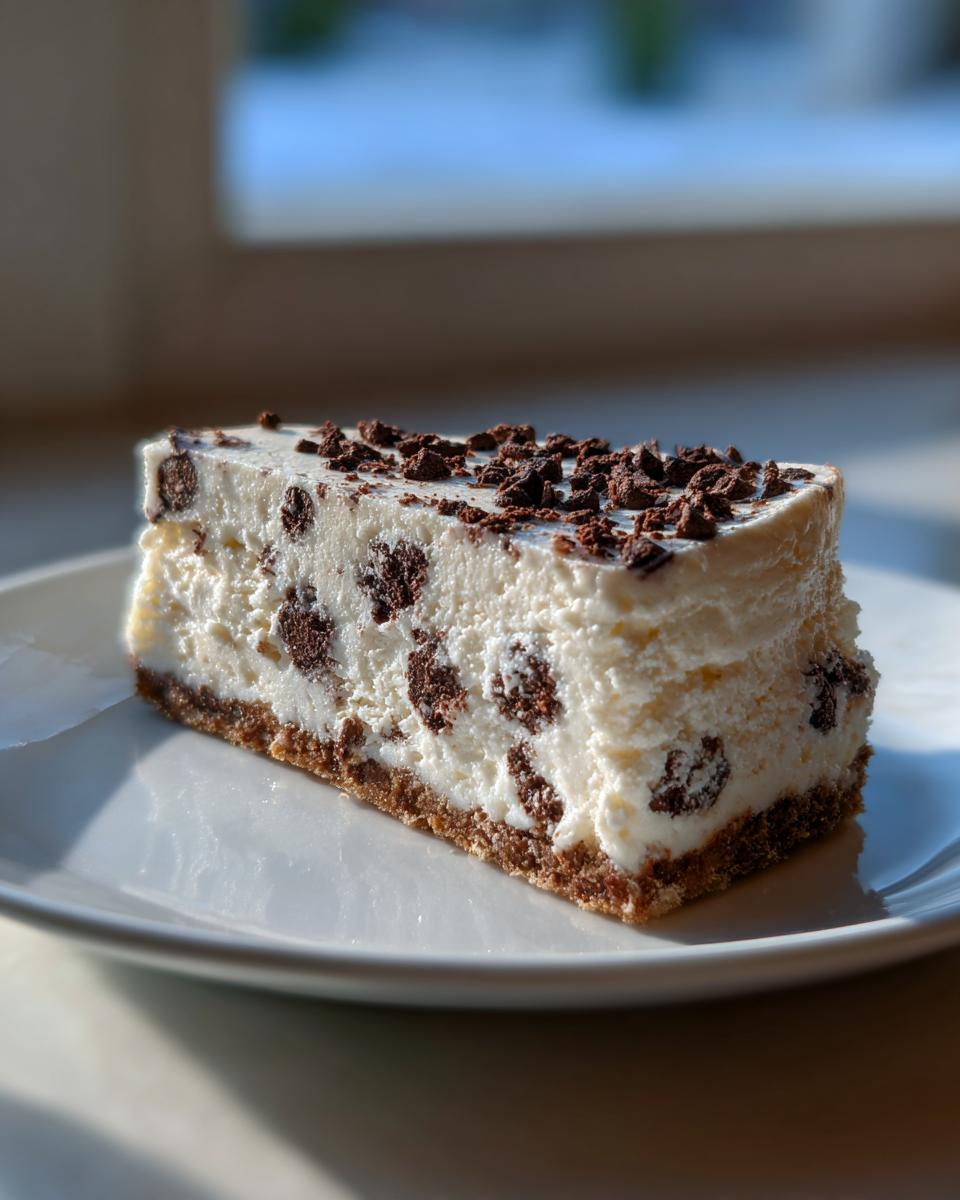
For the Graham Cracker Crust Dessert
This crust is simple, buttery, and stands up beautifully to the heavy filling. Remember, you need to press this down firmly! We want a solid base so your final slice holds together perfectly.
- 1 1/2 cups graham cracker crumbs
- 1/4 cup granulated sugar (for crust)
- 6 tablespoons unsalted butter, melted
For the Rich and Creamy Dessert Filling
This is where the magic happens, my friends. Please, please, please make sure your cream cheese is fully softened—I mean squishy soft! If you try to rush it, you’ll end up with little cream cheese pebbles in your beautiful, rich and creamy dessert. That’s a cardinal sin in cheesecake baking!
- 3 (8 ounce) packages cream cheese, softened
- 1 1/2 cups granulated sugar (for filling)
- 1 teaspoon vanilla extract
- 1/4 cup sour cream
- 3 large eggs
- 1 1/2 cups semi-sweet chocolate chips (Keep this in mind—we don’t dump them all in at once!)
How to Prepare Your Sliceable Chocolate Chip Cheesecake
Alright, it’s time to put the teamwork of our ingredients to the test! Just stick with me through these steps, especially the cooling part, and you’ll have the most gorgeous, sliceable cheesecake you’ve ever made. Remember what I always preach: gentle mixing is the key to avoiding cracks in your beautiful chocolate chip cheesecake.
Step 1: Crust Preparation and Pre-Bake
First things first, we need that oven ready! Go ahead and set your oven to 325 degrees Fahrenheit. Before we do anything else, wrap that 9-inch springform pan really, really well in heavy-duty aluminum foil. I usually do three tight layers around the bottom and sides. This is what keeps the water from that bath we’re using later from seeping in—trust me, you don’t want a soggy bottom!
Now for the crust: just toss those graham cracker crumbs, the crust sugar, and the melted butter into a bowl. Mix until it looks like wet sand, then press it firmly into the bottom of your foil-wrapped pan. Make sure you press it down tight! Then, pop that in the oven for a quick 10 minutes while you whip up that filling. Let it cool down a bit while you work.
Step 2: Mixing the Creamy Baked Cheesecake Batter
Grab that super soft cream cheese and beat it with the filling sugar until it’s purely smooth—no lumps allowed! Then, mix in the vanilla and the sour cream. Now, here is the most important part for a creamy baked cheesecake: the eggs. Add them in one by one. You only mix until the yellow disappears after each egg. Please don’t power through this step! Overmixing whips air into the batter, and when that air escapes while baking, that’s when your beautiful cake deflates or cracks. Be gentle!
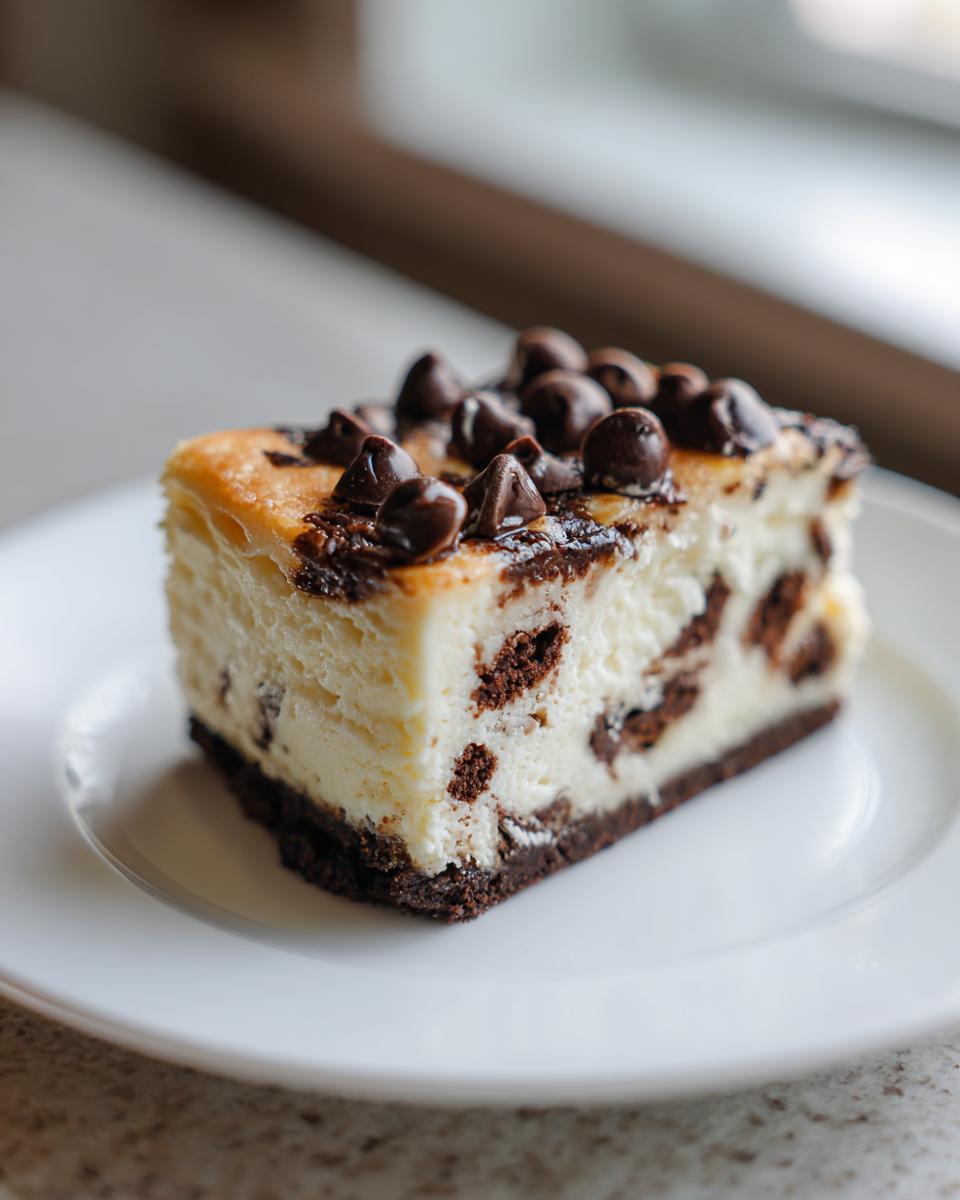
Once those eggs are just incorporated, gently fold in one cup of your semi-sweet chocolate chips. Pour all that lovely batter over your cooled crust. Then, take those final half-cup of chips and sprinkle them over the top for that final chocolate hit.
Step 3: Baking the Chocolate Chip Cheesecake in a Water Bath
This technique is non-negotiable if you want success! Take your foil-wrapped springform pan and set it inside a larger roasting pan. Now, carefully pour hot water—hot from the tap is fine, no need to boil it—into that big roasting pan. You want the water to come about halfway up the sides of your springform pan. This creates steam and cooks everything evenly.
Slide the whole setup—the roaster with the cheesecake inside—into that preheated oven. Bake it for about 60 to 75 minutes. You’ll know it’s done when the edges look set, but if you gently nudge the counter, the very center still has a slight wobble, like thick Jell-O. If it’s totally solid, it might be overdone!
Step 4: Cooling and Chilling for Perfect Texture
Don’t even think about taking it out yet! The shock of cold air is the number one reason for cracks. We must cool it down slowly. Turn the oven off, prop the door open just a crack—I usually wedge a wooden spoon in there—and just let the cheesecake hang out inside for a full hour. This gradual cool-down is essential for a sliceable cheesecake.
After that hour, you can take it out of the water bath and let it cool completely on a wire rack. Once it’s room temperature, cover it up tight and put it in the fridge. This needs a serious chill time: minimum of 6 hours, but overnight is always best for flavor development and that perfect, firm slice.
When you’re ready to see the results of your patience, check out these chocolate chip cheesecake cookies—a fun twist on the flavor!
Ingredient Notes and Substitutions for Your Chocolate Chip Cheesecake Recipe
You know, sometimes we don’t have exactly what the recipe calls for, and that’s perfectly fine! Baking should be flexible, even when we’re dealing with something as serious as a perfect chocolate chip cheesecake. I always get questions about the quality of the ingredients, so let’s clear up a couple of points right now to ensure you get that rich texture we are aiming for.
The biggest non-negotiable here is the cream cheese. You must use full-fat, brick-style cream cheese. Those tubs of whipped, spreadable stuff? They have too much water, and that will absolutely ruin your texture and lead you down the road to a cracked, soupy mess. You need that full fat content for stability!
And what about the chocolate itself? I used semi-sweet chips in the main recipe, but honestly, you can mix and match! Using mini chips means you get more chocolate distribution in every bite, which I love. Regular chips are a bit chunkier, offering those lovely pockets of melted chocolate. Just make sure they are good quality chips because they are a star flavor here!
Crust Variations: Graham Cracker vs. Oreo Crust Cheesecake
If you’re feeling extra chocolatey, you don’t have to stick to the graham cracker crumbs for the base. We all know an Oreo Crust Cheesecake is famous for a reason! It adds an extra layer of crunch and a hint of dark chocolate that plays so nicely with the sweet filling.
If you want to swap, just follow the math: two cups of finely crushed Oreo cookies—and you can leave the filling in, don’t worry about scooping it out!—will replace the graham cracker crumbs exactly. It’s a fantastic way to pivot this recipe if you already have Oreos hanging around. If you’re interested in another delicious graham cracker usage, you should look at my tips for the cookie butter cheesecake cups!
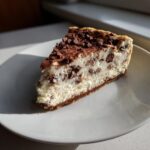
Making Chocolate Chip Cheesecake Bars: An Easier Approach
Now, I know some of you are scrolling this thinking, “That looks incredible, Sarah Jane, but honestly, I don’t want to mess with springform pans and water baths today.” And I totally get it! Sometimes you just need an easy cheesecake recipe that’s simple to serve, especially when you’re taking something to a potluck or needing a dessert that moves easily. That’s where the magic of turning this into Chocolate Chip Cheesecake Bars comes in handy!
The beauty of this recipe is how easily it scales down or flattens out. Instead of wrapping that 9-inch round pan for the water bath, you’ll prepare a standard 9×13 inch pan. You can use the exact same crust ratio, but you’ll press it firmly right into the bottom of the ungreased (or lightly greased!) 9×13 pan. No fussy foil needed!
Because the batter is spread thinner in a rectangular pan, it cooks much faster. You’re likely looking at cutting that baking time down significantly, maybe closer to 40 or 50 minutes total. Keep an eye on the edges to make sure they look set! If you want to see a great example of how these bars turn out, I always bookmark this one when I need bars specifically—check out Hannah’s version for visual confirmation!
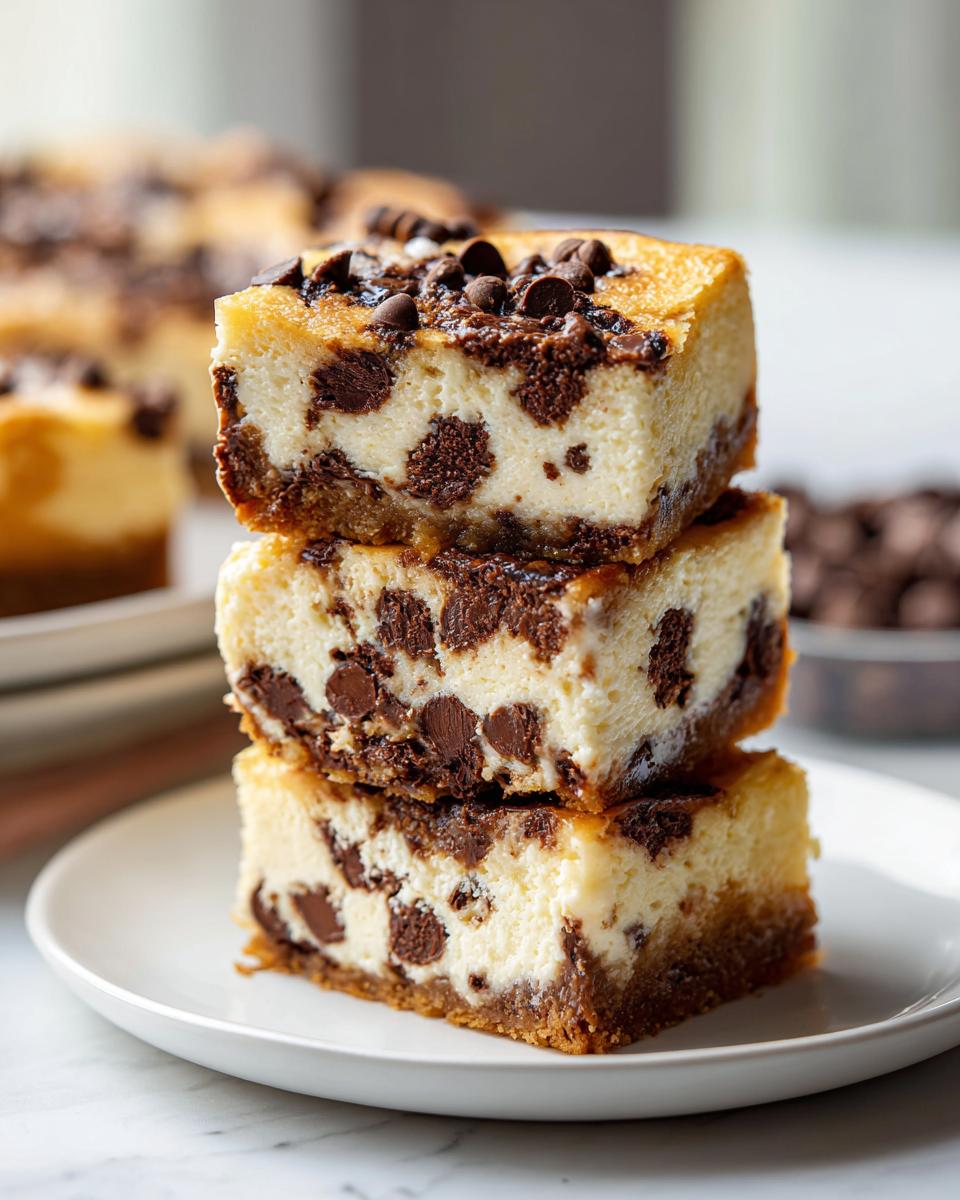
This method gives you all that thick, creamy cheesecake filling and those chocolate chip pockets, but now it’s perfectly portioned and super sturdy for stacking on a platter. It lets you enjoy that full flavor profile without the pressure of getting a perfect round shape. If you prefer to keep things simple but still want that amazing texture, I highly suggest you try this adaptation. It’s fantastic!
For another dessert that nails that wonderful balance of fruit and cream, you might want to peek at my peach cobbler cheesecake recipe next time you want a change!
Tips for Success with Homemade Cheesecake
Baking a wonderful, rich, creamy dessert like this takes a little bit of patience, and I’ve learned a few trade secrets over the years to make sure you get that picture-perfect presentation every single time. Since we put so much care into getting that filling smooth and baking it gently, the absolute last thing we want is to pull it out of the pan and have it slump or tear. These final steps are all about managing the release and the presentation so your hard work shines through!
Remember, this is all about honoring the technique. If you want to see how I apply these same reliable methods to another type of treat, you absolutely must look at my recipe for cookie butter cheesecake cups—the cooling and chilling rules are basically the same!
Achieving a Perfect, Clean Slice
This is the trick everyone asks about! You’ve chilled it overnight, you’ve unwrapped it from the springform pan, and now you are nervous about the knife dragging through that beautiful, firm filling and smashing the edges. Stop right there! We need a super hot, extremely clean edge for slicing.
Here is what you do: grab a nice, tall glass of very hot water—the hotter the better. Dip a long, thin sharp knife into that hot water for about 10 seconds. Wipe the knife blade completely dry on a clean dish towel. Now, slice into the cheesecake where you want your first cut. Push straight down, don’t use a sawing motion, and lift straight up. You will see the most gorgeous, clean line!
Before you make the next cut, quickly dip that knife back into the hot water, wipe it dry again, and repeat. You need to clean and heat that knife between every single cut. I promise you, take the extra 20 seconds to do this simple heating step, and your cheesecake slices will look like they were cut by a professional baker! It truly makes all the difference in showing off that incredible texture.
Storage and Reheating Instructions for Your Decadent Dessert
Now that you’ve successfully made this decadent dessert, the next very important step is making sure it stays gorgeous until serving time. Cheesecake, particularly one this rich, doesn’t really appreciate being left out on the counter. It’s a dairy-heavy dessert, so temperature control is everything for both safety and texture integrity!
For short-term storage—say, if you are serving it the day after you bake it—you want to keep it chilled. Once it has cooled completely and set overnight in the fridge, cover the pan (if you haven’t released the sides yet) or cover the entire cake tightly with plastic wrap. You want to minimize its exposure to air, which is what can cause the top to dry out or pick up any funky fridge odors.
It keeps beautifully in the refrigerator for up to four or five days. Honestly, sometimes I think the flavor is even better on day two because those chocolate chips have had a chance to settle into the creamy filling! If you’re looking for information on other chilled desserts that hold up well, my recipe for French Silk Pie is another winner that needs that long chill time.
As for reheating? Please don’t even try! Cheesecake is meant to be served cold or, at most, slightly cool—think room temperature after sitting out for about 30 minutes. Putting baked cheesecake in the oven will just turn it soupy and melt the chocolate chips into an oily mess. Just keep it chilled until you’re ready to slice the next portion. You’ve done the hard work baking it; now let the fridge do the easy work of keeping it perfect!
Serving Suggestions for this Chocolate Chip Cheesecake
Okay, your stunning, sliceable, creamy creation is chilling perfectly in the fridge, and it’s time to think about how you’re going to present this absolute showstopper! Remember, this cheesecake is already incredibly rich and indulgent all on its own, so you don’t need to go crazy with toppings. Simplicity often lets the texture and the chocolate chips truly shine through.
I always lean toward keeping things straightforward since my goal is always to deliver an easy no-bake recipe feel, even when we bake! Anything too heavy on top can just weigh down that beautiful, delicate top layer we worked so hard to keep crack-free.
Here are my absolute favorite, simple ways to dress up a slice of this dessert:
- A Very Light Dusting: Grab a small sieve and sift the tiniest bit of unsweetened cocoa powder right over the top just before serving. It gives it a professional look and bumps up the chocolate flavor ever so slightly without adding sweetness.
- Fresh Berries for Contrast: A few vibrant raspberries or perfectly ripe sliced strawberries on the side of the plate are perfect. That little burst of tartness cuts right through the richness of the cream cheese filling.
- A Gentle Drizzle: If you absolutely must add a sauce, use a high-quality dark chocolate sauce—not too much! Just a thin drizzle from a spoon across the plate or over the slice adds elegance. Avoid caramel unless you are serving it to serious sweet-tooth enthusiasts; it can be too much richness alongside the chips.
Honestly, though, if you’ve nailed the bake and the chill, serving it completely plain is my top suggestion. Let that creamy, chocolate chip-studded texture speak for itself. It’s a true showstopper right out of the fridge!
Frequently Asked Questions About Chocolate Chip Cheesecake
I totally get it. Sometimes, after following a detailed recipe, you’ve still got lingering questions swirling around, especially when the recipe involves something as temperamental as cheesecake! Baking should feel accessible, not scary. Here are a few things folks ask me all the time about making an incredible, foolproof chocolate chip cheesecake.
If there is one thing I’ve learned in the kitchen, it’s that even the best recipes sometimes need a tweak for your specific oven or kitchen altitude. Feel free to peek at my recipe for an easy no-bake Oreo pie if you ever want to skip the oven entirely next time!
Can I make this chocolate chip cheesecake without a water bath?
Listen, I strongly—and I mean *strongly*—advise against skipping the water bath when making a creamy baked cheesecake. The water bath (which we wrapped so carefully in foil!) creates a moist, humid environment in the oven. This prevents the outside edges from setting too fast while the inside center is still liquid. That difference in setting speed is what causes cracks, uneven doneness, and sometimes a sunken middle.
If you absolutely, positively cannot do a water bath, here is my compromise: Put your foil-wrapped cheesecake pan inside your roasting pan, but instead of filling it with water, just place an empty, shallow pan filled halfway with hot water on the very bottom rack *underneath* the cheesecake. It won’t be as effective as total submersion, but it will add some much-needed steam. Just watch it closely, because you might see some cracking if you skip the steam entirely!
What is the secret to a truly creamy baked cheesecake?
It boils down to two big things, and frankly, one of them is patience! First, your ingredients absolutely *must* be at room temperature. If the cream cheese is cold, you will never get an even mixture, and you’ll end up mixing longer trying to get those lumps out. That leads straight to the second secret: minimal mixing after the eggs go in. You want just enough mixing to incorporate the eggs one at a time. Stop when you see the last ribbon of yellow disappear!
Overbeating at that stage incorporates too much air. When that air tries to escape during baking, it creates bubbles, and those bubbles lead to a coarse texture instead of that silky smooth finish we’re looking for in this rich and creamy dessert. Remember, we want it smooth, not fluffy!
What is the best chocolate chip size to use?
For this Chinese chip cheesecake recipe, I love the blend we use! We fold in 1 cup of standard semi-sweet chips (they give you those classic bursts of chocolate), and then sprinkle the remaining 1/2 cup of *mini* chips on top. The mini chips spread out a bit more and create a lovely, slightly textured crust on the very top layer.
But honestly, if you only have one size, just stick with semi-sweet or milk chocolate chips and use them uniformly throughout. Dark chocolate lovers—you can absolutely use high-quality dark chocolate chips to make this an even more ultimate chocolate dessert!
PrintCreamy Chocolate Chip Cheesecake: The Ultimate Dessert Mashup
Make this rich and creamy chocolate chip cheesecake for a decadent dessert that is perfect for any gathering. This recipe uses a simple graham cracker crust and delivers a sliceable, indulgent sweet treat.
- Prep Time: 25 min
- Cook Time: 75 min
- Total Time: 100 min
- Yield: 12 servings 1x
- Category: Dessert
- Method: Baking
- Cuisine: American
- Diet: Vegetarian
Ingredients
- 1 1/2 cups graham cracker crumbs
- 1/4 cup granulated sugar (for crust)
- 6 tablespoons unsalted butter, melted
- 3 (8 ounce) packages cream cheese, softened
- 1 1/2 cups granulated sugar (for filling)
- 1 teaspoon vanilla extract
- 1/4 cup sour cream
- 3 large eggs
- 1 1/2 cups semi-sweet chocolate chips
Instructions
- Preheat your oven to 325 degrees Fahrenheit. Wrap the outside of a 9-inch springform pan tightly with heavy-duty aluminum foil.
- Prepare the crust: Mix graham cracker crumbs, 1/4 cup sugar, and melted butter in a bowl until combined. Press the mixture firmly into the bottom of the prepared springform pan. Bake for 10 minutes. Let the crust cool while you prepare the filling.
- Prepare the filling: Beat the softened cream cheese with 1 1/2 cups sugar in a large bowl until smooth. Mix in the vanilla extract and sour cream. Beat in the eggs one at a time, mixing just until combined after each addition. Do not overmix the batter.
- Gently fold in 1 cup of the chocolate chips into the cheesecake batter. Pour the batter over the cooled crust. Sprinkle the remaining 1/2 cup of chocolate chips over the top of the batter.
- Bake the cheesecake in a water bath: Place the foil-wrapped springform pan into a larger roasting pan. Carefully pour hot water into the roasting pan until it reaches halfway up the sides of the springform pan.
- Bake for 60 to 75 minutes, or until the edges are set but the center still jiggles slightly when gently nudged.
- Turn off the oven, crack the oven door open slightly, and let the cheesecake cool inside the oven for 1 hour. This prevents cracking.
- Remove the cheesecake from the water bath and let it cool completely on a wire rack. Once cool, cover and refrigerate for at least 6 hours, or preferably overnight, before slicing.
Notes
- For a cleaner slice, run a thin knife dipped in hot water around the edge of the cheesecake before releasing the springform side.
- If you prefer an Oreo crust, substitute 2 cups of finely crushed Oreo cookies for the graham crackers.
- This rich and creamy dessert is excellent served chilled.
Nutrition
- Serving Size: 1 slice
- Calories: 450
- Sugar: 35g
- Sodium: 250mg
- Fat: 30g
- Saturated Fat: 18g
- Unsaturated Fat: 12g
- Trans Fat: 0.5g
- Carbohydrates: 40g
- Fiber: 1g
- Protein: 8g
- Cholesterol: 95mg