
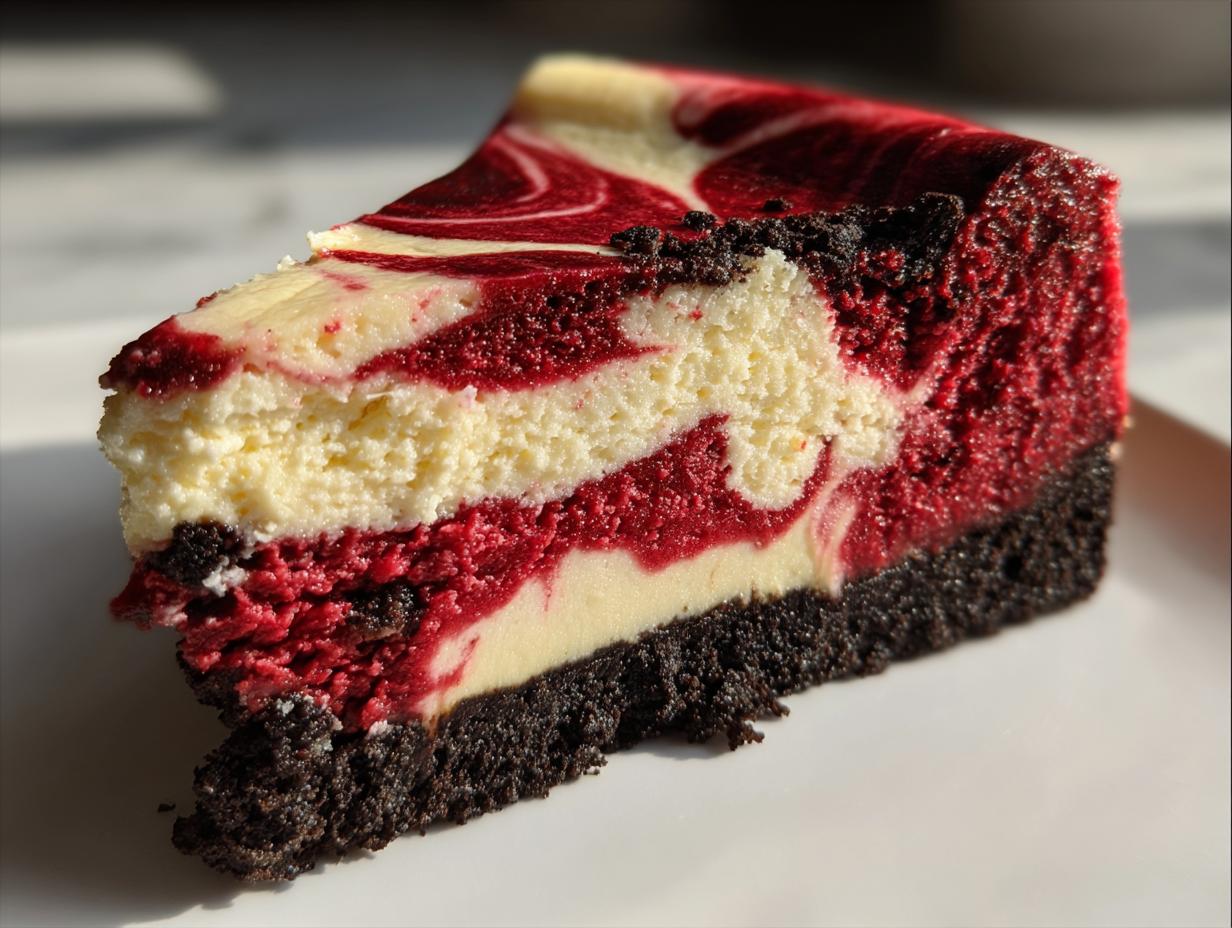
If you want a dessert that makes people stop talking the second you bring it out, you need something truly spectacular. I’m not talking about just a good cake; I’m talking about a showstopper. That’s exactly what we have here with the Showstopper Red Velvet Cheesecake with Creamy Swirl & Oreo Crust. This isn’t just a recipe; it’s an experience. It delivers the ultimate rich flavor and that ultra-creamy texture everyone dreams about.
If you remember the beautiful, reliable holiday classics my grandmother used to bake back in our Midwest kitchen, this decadent bake is made with that same level of love, just taken up a notch! Trust me when I say this red velvet cheesecake is going to become a cherished memory maker for your own family gatherings. If you love the red velvet flavor profile, you absolutely have to check out my guide for a moist, fluffy red velvet cake from scratch while you’re here!
- Why This Showstopper Red Velvet Cheesecake Recipe Works (E-E-A-T)
- Gathering Ingredients for Your Red Velvet Cheesecake with Oreo Crust
- The Step-by-Step Tutorial for Bakery Quality Red Velvet Cheesecake
- Tips for an Easy Red Velvet Cheesecake Success
- Variations on Your Rich Decadent Cheesecake
- Serving Suggestions for Your Impressive Party Dessert
- Storage and Reheating Instructions for Red Velvet Cheesecake
- Frequently Asked Questions About Making Red Velvet Cheesecake
- Estimated Nutritional Data for Red Velvet Cheesecake
- Share Your Showstopper Cheesecake Creations
- Estimated Nutritional Data for Red Velvet Cheesecake
- Share Your Showstopper Cheesecake Creations
Why This Showstopper Red Velvet Cheesecake Recipe Works (E-E-A-T)
Listen, I know making a showstopper can feel scary, but that’s why I spent so much time perfecting this recipe until it was absolutely foolproof for a home baker. My goal wasn’t just tasty; it was achieving that bakery quality cheesecake recipe consistency every single time. The magic really lies in two places: the ratios are spot on, and we use that gentle water bath technique.
The water bath is non-negotiable in my kitchen for this bake! It gently steams the cheesecake, which is the secret to that velvety smooth cheesecake filling, preventing those terrible cracks we all fear. I tested batch after batch, adding or subtracting liquids and sugars until the balance was perfect. When you follow these steps—especially using room temperature dairy—you’re getting my absolute best shot at a stunning, creamy result that truly impresses every single guest. If you love creamy bakes, wait until you try my Snickerdoodle Cheesecake!
Gathering Ingredients for Your Red Velvet Cheesecake with Oreo Crust
Okay, now that we know the science behind why this bake works so darn well, let’s get serious about the prep! For this red velvet cheesecake with Oreo crust, preparation is half the battle. I’ve broken down the components so nothing gets missed. You’ll notice that for the cheesecake portion, those dairy items—the cream cheese and sour cream—need to be truly soft and room temperature. This is key for that smooth blend we talked about, otherwise, you get lumps, and we absolutely cannot have lumps in a showstopper!
When you gather these items, double-check your measurements, especially for the flour and sugar distribution between the two batters. If you’re looking for other amazing recipe bases, I highly recommend checking out my Salted Caramel Cheesecake with a Biscoff Crust for your next baking adventure!
For the Oreo Crust
- 1 1/2 cups crushed Oreo cookies
- 1/4 cup granulated sugar
- 6 tablespoons unsalted butter, melted
For the Velvety Cheesecake Filling
- 16 ounces (two 8-ounce packages) cream cheese, softened
- 1 1/2 cups granulated sugar (for cheesecake filling)
- 1/4 cup all-purpose flour
- 1 teaspoon vanilla extract
- 1/4 teaspoon salt
- 4 large eggs, room temperature
- 1/2 cup sour cream, room temperature
For the Rich Red Velvet Batter
- 1/4 cup vegetable oil
- 1 tablespoon white vinegar
- 1 teaspoon red food coloring (gel preferred for the deep color!)
- 1 tablespoon unsweetened cocoa powder
- 1 teaspoon baking soda
- 1 teaspoon distilled white vinegar (for red velvet batter)
- 1 teaspoon vanilla extract (for red velvet batter)
- 1/2 cup all-purpose flour (for red velvet batter)
- 1 large egg (for red velvet batter)
- 1/2 cup buttermilk
- 1/2 cup granulated sugar (for red velvet batter)
- 1/2 teaspoon salt (for red velvet batter)
For the Cream Cheese Frosting Topping
- 1/2 cup cream cheese, softened (for topping)
- 1 cup powdered sugar
- 1/4 cup unsalted butter, softened (for topping)
- 1 teaspoon vanilla extract (for topping)
- 1-2 tablespoons milk (for topping)
The Step-by-Step Tutorial for Bakery Quality Red Velvet Cheesecake
Alright, let’s get baking! This is where that ultra-creamy texture comes to life. We are moving slow and steady to nail this showstopper cheesecake dessert. Remember, this is a time commitment, but the flavor payoff for this creamy red velvet cheesecake recipe is legendary, truly! If you’re ready for another next-level bake, you absolutely have to see my incredible Creme Brulee Cheesecake.
Preparing and Pre-Baking the Red Velvet Cheesecake with Oreo Crust
First thing’s first: Preheat that oven to 350 degrees F. We need to handle that delicious crust. Grab your crushed Oreos, the sugar, and that melted butter. Mix it all up until it looks like wet sand—that’s how you know it’s perfect. Press it down firmly into the bottom of that 9-inch springform pan we talked about. Pop it in the oven for just 10 minutes to set. Seriously, don’t skip that baking time! Once it’s done, pull it out and let that Oreo crust cool down completely. I mean it, completely cool before we add any filling.
Mixing the Cheesecake and Red Velvet Components
Time for the main event! For the cheesecake layer (Step 2), beat that softened cream cheese with the 1 1/2 cups of sugar until it’s completely smooth—no lumps allowed here if we want that velvety smooth cheesecake filling! Gently mix in the flour, vanilla, and salt. Now, add those room-temperature eggs in one at a time, mixing just until they disappear. Stir in the sour cream last. Set this pale, gorgeous batter aside.
In a separate bowl, whisk together all the red velvet components from Step 3—the cocoa, baking soda, buttermilk, sugar, and that beautiful gel food coloring. Mix only until everything is just combined. Keep mixing minimal for both batters; we want everything blended, but not overworked!
Creating the Stunning Swirl and Water Bath Technique
This is the artistry part! We are layering. Pour about half of the plain cheesecake batter over your cooled crust. Then, gently dollop spoonfuls of the red velvet batter over the top. Follow this by dotting the remaining cheesecake batter on top of the red velvet spots. Now, grab a thin knife or a skewer and gently run it through the layers just once or twice to create that marbled look. If you mix too much, the colors will turn brown, and we want that vibrant contrast!

For Step 5, this is crucial for our bakery quality cheesecake recipe: wrap the outside bottom of your springform pan tightly with heavy-duty foil. Place it inside a larger roasting pan. Carefully pour hot water into the big pan until it comes halfway up the sides of the springform. Bake for 60 to 75 minutes. You want the edges set, but the center should look like it still has a slight wiggle—that jiggle means it’s creamy inside! That water bath is what saves you from cracks, trust me.
Cooling, Chilling, and Finishing the Red Velvet Cheesecake
Don’t rush the cooling! Turn off the oven, crack the door open a bit, and just leave the cheesecake inside for a full hour. This slow cool prevents sudden temperature shock! After that hour, take it out, remove the foil, and let it finish cooling on the rack. Once it’s room temperature, cover it and pop it in the fridge for at least 6 hours, but honestly, overnight is what gives you the best texture for this easy red velvet cheesecake.
Finally, for the topping in Step 7, beat the topping ingredients until they are fluffy. Once your cheesecake is thoroughly chilled, spread that luscious cream cheese frosting right over the top (Step 8). Slice it thick and get ready for compliments!
Tips for an Easy Red Velvet Cheesecake Success
If you want that incredibly ultra creamy texture, you have to respect the ingredients! This is what separates a good bake from a great one, even when aiming for an easy red velvet cheesecake. The absolute biggest tip I can give you is checking those temperatures. If your cream cheese or eggs are even slightly cold, you risk lumps, and that ruins the beautiful smooth texture we worked so hard for.
Also, when it comes to color, skip the liquid food coloring drops! They add water content which changes the bake, and you often get pale results. Spend the extra few minutes tracking down the concentrated gel coloring; it gives you that deep, vibrant red velvet pop without messing up the creamy filling consistency. It’s a small swap that makes a huge visual difference! For more baking tips, check out my classic lemon cake recipe guide.
Variations on Your Rich Decadent Cheesecake
While I think our main recipe for the Showstopper Red Velvet Cheesecake with Creamy Swirl & Oreo Crust stands alone as the champion, I totally get it—bakers love to tinker! Don’t worry about messing up the magic; we can add easy twists to make this a truly custom, layered red velvet dessert.
The beauty of a cheesecake this rich is that it handles little additions really well. For instance, if you love that intense mix of chocolate and red velvet, try this quick change. You can take about 2/3 cup of semi-sweet chocolate chips and fold them right into the cheesecake batter (Step 2) *before* you start dolloping or swirling. They’ll melt slightly during the bake and create these lovely little pockets of melted chocolate throughout the creamy layer.
If Oreos aren’t your favorite cookie base—though they are divine here—swapping them out is simple. For a different crunch, try crushing up shortbread cookies or vanilla wafers using the same butter ratio for the crust. It pulls the flavor in a slightly different, more buttery direction.
Now, I know some folks avoid baking, or maybe you need a lighter dessert for a summer bash. While this specific recipe is baked, if you’re looking for something quicker that still gets you that red velvet flavor, you can adapt the concept for a no bake red velvet cheesecake alternative. You’d skip the entire water bath and bake sequence. Instead, make the Oreo crust, and then mix the cream cheese filling ingredients with gelatin to set them up in the fridge until firm, layering your red velvet element in between. It’s faster, but I promise you, the baked version has a superior, dense richness that makes it completely worth the oven time! If you have leftover red velvet flavors lingering, you’ve got to try my recipe for red velvet cake mix cookies next!
Serving Suggestions for Your Impressive Party Dessert
You’ve done the work! You’ve managed the water bath, the swirl is perfect, and that cream cheese frosting is gleaming. Now comes the fun part: how to present this showstopper? This red velvet cheesecake isn’t just a dessert; it’s the absolute centerpiece of any gathering, making it one of the best impressive party desserts you can ever bring to the table.
Because this cake is so incredibly rich and decadent, you don’t need to clutter the plate with too many heavy sides. Think about contrast—something bright or sharp to cut through that luxurious creaminess. My favorite thing to do is a super simple visual trick. Right before serving, I grab a fine-mesh sieve and dust the *entire* top lightly with unsweetened cocoa powder. It gives it this gorgeous, deep matte finish that really makes the red tones pop!
If you are serving this after a heavy meal, a slightly tart contrast is divine. A small drizzle of tart raspberry sauce is heavenly alongside a slice. The tang of the berries works beautifully with the subtle chocolate notes in the red velvet. If you’re serving it for brunch or mid-afternoon, strong, black coffee or an espresso shot is non-negotiable for me—it grounds the sweetness perfectly.
And if you ever need another incredibly easy, visually stunning dessert that doesn’t require the oven, you should really bookmark my recipe for the Easy No-Bake Ice Cream Pie. But for now, enjoy slicing this beauty!
Storage and Reheating Instructions for Red Velvet Cheesecake
You’ve made a masterpiece, and the absolute last thing we want is to ruin that perfectly velvety smooth cheesecake filling by storing it incorrectly!
Since this red velvet cheesecake is topped with a generous layer of cream cheese frosting, it absolutely must be stored in the refrigerator. Do not leave this out on the counter, no matter how much you want to sample one more tiny piece before bed! The texture relies on being nice and cold, and the dairy products in the topping and filling need that chill for safety and structure.
Here is my straightforward method for keeping leftovers perfect—and trust me, leftovers of this decadent treat are always the best part of baking!
- Cover it tight: Once the frosting is firm, gently cover the entire springform pan or serving platter with plastic wrap. Make sure the plastic isn’t pressing down directly onto the frosting if you can avoid it, or use toothpicks scattered around the edge to create a tent.
- Chill time: This magnificent bake will keep well in the refrigerator for about 4 to 5 days. The flavor honestly deepens beautifully over the first day or two, so don’t feel like you have to devour it all on party day!
- Forget the microwave: This is important, friends. Do not attempt to reheat your red velvet cheesecake. Cheesecake is meant to be served chilled or just slightly warmer than fridge temperature. Zapping it in the microwave turns the texture grainy and ruins that essential creaminess you worked the water bath so hard to achieve. Serve slices cold, straight from the fridge, for the best experience!
If you’re looking for another great recipe to make ahead of time for holiday stress relief, my easy pumpkin pie recipe stores beautifully in the fridge too!
Frequently Asked Questions About Making Red Velvet Cheesecake
I know asking questions is part of the journey when taking on a big bake like this, and I’m always happy to walk you through the little bumps in the road. It’s all part of learning how to create that perfect from scratch red velvet cheesecake!
Why did my cheesecake crack even though I used a water bath?
Oh, the infamous crack! If you used the water bath and it still cracked, the two main culprits are usually over-baking or removing it from the oven too fast. Remember, the center should still have a definite jiggle when you think it’s done. The second mistake folks make is taking it straight out of the oven into the cold kitchen air. Always use my trick: turn the oven off, crack the door, and let it hang out inside for a full hour. That slow cooling process is the key to keeping that velvety smooth cheesecake filling intact and gorgeous.
How can I get a deeper, richer red velvet color?
This is where gel coloring beats out the little bottles of liquid coloring every time! If you are using standard drops, you end up pouring in what feels like a whole bottle just to get a pale pink. For that deep, signature color that makes this one of your best showstopper cheesecake desserts, use quality gel food coloring. Start with a teaspoon, stir it gently into the red velvet batter, and check the saturation. You can always add more gel, but you can’t take it out if it gets too dark!
Is it worth making the Oreo crust from scratch?
Absolutely, yes! The flavor payoff for that red velvet cheesecake with Oreo crust is worth the minimal extra effort. Grinding up whole Oreos (yes, even the cream filling!) gives you a richer, darker base than just using plain cookie crumbs. Plus, you control the texture. Remember to mix it well with the melted butter so it packs down firmly; you don’t want it crumbling apart when you slice it later.
Can I skip the red velvet batter and just make a plain cheesecake?
You certainly *can* make a plain cheesecake, but then you’re missing out on what makes this recipe special—the swirl! If you want to skip the red velvet flavor but love the look of the layered red velvet dessert, try swapping the red velvet batter ingredients for a simple, decadent chocolate batter instead. Just whisk together some melted dark chocolate, a bit of sugar, egg, and cocoa powder, and swirl that into your cheesecake layer. It’s a delicious twist!
My filling is slightly grainy. What did I do wrong?
Nine times out of ten, graininess comes from cold dairy. If your cream cheese, sour cream, or even your eggs aren’t fully softened to room temperature, the fat molecules don’t emulsify properly into the sugar, and you end up with tiny, hard bits of cheese in your otherwise creamy red velvet cheesecake recipe. Make sure you let those ingredients sit out for at least an hour before you start mixing. It’s the simplest secret to a fantastic texture!
If you’re looking for other recipes where ingredients need to be blended just right, you should check out my recipe for homemade chocolate pudding – temperature matters there too!
Estimated Nutritional Data for Red Velvet Cheesecake
I always say that when you are making a truly decadent dessert like this, you probably aren’t checking the labels unless you absolutely have to! But for those of you who plan ahead, here is a general snapshot of the estimated nutritional data based on 1/12th of the cake, including the cream cheese frosting. Remember, this is a rich treat, designed for holidays and special moments, not an everyday snack!
Keep in mind that these figures are estimates based on standard ingredient amounts, and your exact counts might vary depending on the brands of Oreos or cream cheese you decide to use.
- Serving Size: 1 slice
- Calories: 550
- Sugar: 45g
- Sodium: 350mg
- Fat: 35g
- Saturated Fat: 20g
- Unsaturated Fat: 15g
- Trans Fat: 0.5g
- Carbohydrates: 55g
- Fiber: 1g
- Protein: 8g
- Cholesterol: 150mg
Share Your Showstopper Cheesecake Creations
Honestly, seeing your finished bakes is the best part of my day! When you take the time to create something as stunning as this Showstopper Red Velvet Cheesecake, I want to see it! It keeps that connection flowing between my kitchen and yours, just like those traditions back home.
Once you’ve chilled yours overnight and added that beautiful frosting, snap a picture! Whether the swirl turned out exactly as you planned or you have a quirky, unique marble design, I want to cheer you on. Tag me on social media or use the recipe page to leave a rating!
Please, if this recipe delivered that creamy texture and wowed your guests, give it a solid 5-star rating right here on the site. That helps other home cooks find this reliable guide to making the ultimate impressive party dessert. Happy baking, and I hope this red velvet cheesecake becomes a holiday staple for you, just like the classics are for me! If you enjoyed mastering this layered bake, I have a fun one next: check out my Chocolate Chip Cheesecake Cookies!
PrintShowstopper Red Velvet Cheesecake with Creamy Swirl & Oreo Crust
You can make this rich, creamy Red Velvet Cheesecake that looks as amazing as it tastes. This recipe guides you through creating a stunning dessert perfect for holidays or special gatherings, featuring a decadent Oreo crust and a velvety smooth filling.
- Prep Time: 30 min
- Cook Time: 75 min
- Total Time: 9 hours 45 min
- Yield: 12 servings 1x
- Category: Dessert
- Method: Baking
- Cuisine: American
- Diet: Vegetarian
Ingredients
- 1 1/2 cups crushed Oreo cookies
- 1/4 cup granulated sugar
- 6 tablespoons unsalted butter, melted
- 2 (8 ounce) packages cream cheese, softened
- 1 (8 ounce) package cream cheese, softened (for swirl)
- 1 1/2 cups granulated sugar (for cheesecake filling)
- 1/4 cup all-purpose flour
- 1 teaspoon vanilla extract
- 1/4 teaspoon salt
- 4 large eggs, room temperature
- 1/2 cup sour cream, room temperature
- 1/4 cup vegetable oil
- 1 tablespoon white vinegar
- 1 teaspoon red food coloring (gel preferred)
- 1 tablespoon unsweetened cocoa powder
- 1 teaspoon baking soda
- 1 teaspoon distilled white vinegar (for red velvet batter)
- 1 teaspoon vanilla extract (for red velvet batter)
- 1/2 cup all-purpose flour (for red velvet batter)
- 1 large egg (for red velvet batter)
- 1/2 cup buttermilk
- 1/2 cup granulated sugar (for red velvet batter)
- 1/2 teaspoon salt (for red velvet batter)
- 1/2 cup cream cheese, softened (for topping)
- 1 cup powdered sugar (for topping)
- 1/4 cup unsalted butter, softened (for topping)
- 1 teaspoon vanilla extract (for topping)
- 1–2 tablespoons milk (for topping)
Instructions
- Prepare the Oreo Crust: Preheat your oven to 350 degrees F. Mix the crushed Oreos, 1/4 cup sugar, and melted butter. Press this mixture firmly into the bottom of a 9-inch springform pan. Bake for 10 minutes. Cool the crust completely.
- Prepare the Cheesecake Layer: In a large bowl, beat the 16 ounces of softened cream cheese and 1 1/2 cups sugar until smooth. Mix in the flour, vanilla extract, and salt. Beat in the eggs one at a time, mixing just until combined after each addition. Stir in the sour cream. Set aside.
- Prepare the Red Velvet Batter: In a separate bowl, whisk together the cocoa powder, baking soda, 1 teaspoon vinegar, 1 teaspoon vanilla, 1/2 cup flour, 1/2 cup sugar, 1/2 teaspoon salt, buttermilk, and the 1 large egg. Mix until just combined.
- Create the Swirl: Pour half of the cheesecake batter over the cooled crust. Gently dollop spoonfuls of the red velvet batter over the cheesecake layer. Take the remaining cheesecake batter and dollop it over the red velvet. Use a knife or skewer to gently swirl the layers together to create a marbled effect. Do not overmix.
- Bake the Cheesecake: Wrap the outside bottom of the springform pan tightly with heavy-duty aluminum foil. Place the pan in a larger roasting pan. Carefully pour hot water into the roasting pan until it reaches halfway up the sides of the springform pan (this is a water bath). Bake for 60 to 75 minutes, or until the edges are set but the center still has a slight jiggle.
- Cool and Chill: Turn off the oven, crack the door open slightly, and let the cheesecake cool inside the oven for 1 hour. Remove the cheesecake from the water bath and foil. Let it cool completely on a wire rack. Once cool, cover and refrigerate for at least 6 hours, or preferably overnight.
- Make the Cream Cheese Frosting: Beat the 1/2 cup cream cheese, butter, powdered sugar, and vanilla until smooth. Add milk one tablespoon at a time until you reach a spreadable consistency.
- Finish and Serve: Spread the cream cheese frosting over the chilled cheesecake. Slice and serve this impressive party dessert.
Notes
- For the creamiest texture, make sure your cream cheese and eggs are at true room temperature before you start mixing.
- Use gel food coloring for the deepest, most vibrant red velvet color without adding excess liquid.
- If you want a true showstopper presentation, consider topping the finished cheesecake with a light dusting of red velvet cake crumbs or a simple white chocolate drizzle.
Nutrition
- Serving Size: 1 slice
- Calories: 550
- Sugar: 45g
- Sodium: 350mg
- Fat: 35g
- Saturated Fat: 20g
- Unsaturated Fat: 15g
- Trans Fat: 0.5g
- Carbohydrates: 55g
- Fiber: 1g
- Protein: 8g
- Cholesterol: 150mg