
There is nothing quite like the smell of fresh, hearth-baked bread filling your kitchen. It’s that rustic, deep aroma that just screams *home*. If you’ve been eyeing those beautiful, bubbly loaves but felt intimidated by the idea of buying a nearly dead starter online, I’m here to tell you to just breathe! My grandmother always taught me that the best results come from the simplest ingredients, handled with patience and care. That’s absolutely true for making your very own sourdough starter from absolutely nothing but flour and water. Trust me, if I can do this—and I share these simple American kitchen secrets, much like sharing my tips for easy beer bread because I believe anyone can—you can too. This guide is the most reliable, day-by-day walkthrough for creating your own healthy, robust, sourdough starter from scratch, perfectly suited for the absolute beginner.
- Why You Need a Homemade Sourdough Starter From Scratch
- Gathering Supplies for Your Sourdough Starter Creation
- The 7-Day Day by Day Sourdough Starter Schedule
- How to Feed Sourdough Starter Ratios and Timing
- Sourdough Starter Troubleshooting for Beginners
- Making Your Sourdough Starter Ready for Baking
- Storage and Reviving Your Sourdough Starter Care Tips
- Estimating Nutrition for Your Flour and Water Starter
- Next Steps: Baking with Your New Sourdough Starter
Why You Need a Homemade Sourdough Starter From Scratch
I know you can buy starter kits or dried flakes, but honestly, they just don’t have the same soul as one you nurture yourself. When you make your own homemade wild yeast culture, you’re building something truly alive right on your counter. Plus, it’s so much easier on the budget!
It’s a rite of passage for anyone serious about artisan bread making at home. Sure, it takes a little time, but the payoff—the control, the flavor—is worth every single stir. You’re literally capturing the natural yeasts around you!
Benefits of Starting Your Sourdough Starter Today
- You control 100% of the ingredients. No guesswork about what’s been added to keep it dormant.
- It’s incredibly cost-effective. Seriously, it’s just flour and water!
- The flavor you develop is uniquely *yours*. That signature tang? You earn that!
- You learn the **sourdough basics for beginners** right away, which builds serious kitchen confidence for when you try making crusty homemade French bread.
Gathering Supplies for Your Sourdough Starter Creation
Okay, before we even think about mixing things, you need your setup ready to go! Starting a sourdough starter isn’t hard, but you have to be precise in the beginning, and that means having the right tools on hand. This whole process relies on building a healthy, vibrant system, and we need to treat our little yeast colony right from Day One. It’s all about giving those wild yeasts the best possible environment to thrive. Don’t worry, you don’t need fancy gadgets, but a couple of things are non-negotiable.
Essential Tools for Your Sourdough Starter Care Tips
- A clean glass jar, about quart-sized. Glass is great because you can see those lovely bubbles forming!
- A digital kitchen scale. Seriously, toss the measuring cups for this project. Accuracy matters so much for our feeding ratios!
- A silicone spatula. This makes scraping down the thick slurry during mixing so much easier.
- A loose lid, maybe just a piece of cloth secured with a rubber band. Your starter needs to breathe a little bit!
Ingredient Notes: Flour and Water for Your Flour and Water Starter
This is where we build that flavor foundation! For the first few days, you absolutely want to start with whole grain flour—either whole wheat or rye flour is perfect. These contain more nutrients to kickstart the process. After Day 2 or 3, we’ll switch over to good quality, unbleached all-purpose flour for maintenance.
For the water, this might sound dramatic, but please try to use filtered or unchlorinated water. Chlorine is harsh, and it can actually hurt the delicate wild yeast and bacteria we are trying to encourage along. It’s one of those little tricks that really elevates your sourdough starter from ‘okay’ to spectacular! If you need more ideas on setting up your kitchen right, check out my thoughts on getting ready to bake fluffy Southern biscuits.
The 7-Day Day by Day Sourdough Starter Schedule
This is it, the adventure begins! Making your own sourdough starter is truly like watching magic happen in a jar, but you have to commit to the routine. Consistency is the absolute secret sauce here. You must feed it at the same time every day, even if you don’t see much happening right away. We’re aiming for a 1:1:1 ratio by weight—meaning equal parts starter, flour, and water—which is the powerhouse ratio for growing a really strong, active sourdough starter. I know you’re eager to bake those delicious soft sourdough pancakes, but patience for this first week means better bread later on!
Days 1 & 2: Beginning Your Sourdough Starter From Scratch
Day 1 is our initial mix. Grab that glass jar and mix together 50 grams of your whole wheat or rye flour with 50 grams of room-temperature water. Stir it until it looks like a thick paste and there are no dry flour patches hiding anywhere. Loosely cover it and just leave it alone on the counter. The sweet spot for temperature is usually between 70–75°F.
On Day 2, you might see some tiny, hopeful bubbles, or maybe nothing at all—both are totally normal! Today is very important: you have to discard half of what’s in the jar. This keeps your culture from getting too big and too acidic too quickly. To the remaining starter, add 50 grams of your all-purpose flour and another 50 grams of water. Mix well, cover loosely, and wait 24 hours!
Days 3 & 4: Navigating the Initial Slump in Your Homemade Wild Yeast Culture
Here’s where most people give up, so don’t you dare! Days 3 and 4 are notorious for the ‘starter slump.’ You might see some frantic bubbling on Day 3, and then suddenly, Day 4 looks completely dead. Don’t panic! This is just competition happening in there where different bacteria are fighting for dominance. We keep the schedule rock solid. Discard half, and feed the remainder with 50g AP flour and 50g water.
If it smells a little sharp, kind of like vinegar or maybe even cheesy, that’s okay. It just means the bacteria are working hard! As long as you are sticking to that discard/feed routine, you are building the structure for a robust homemade wild yeast culture. If you’re finding the kitchen temperature tricky, check out this guide on sourdough in cooler weather for an extra tip on controlling fermentation (it’s similar to learning about controlling fermentation in baking sourdough 101).
Days 5, 6, & 7: Building an Active Sourdough Starter
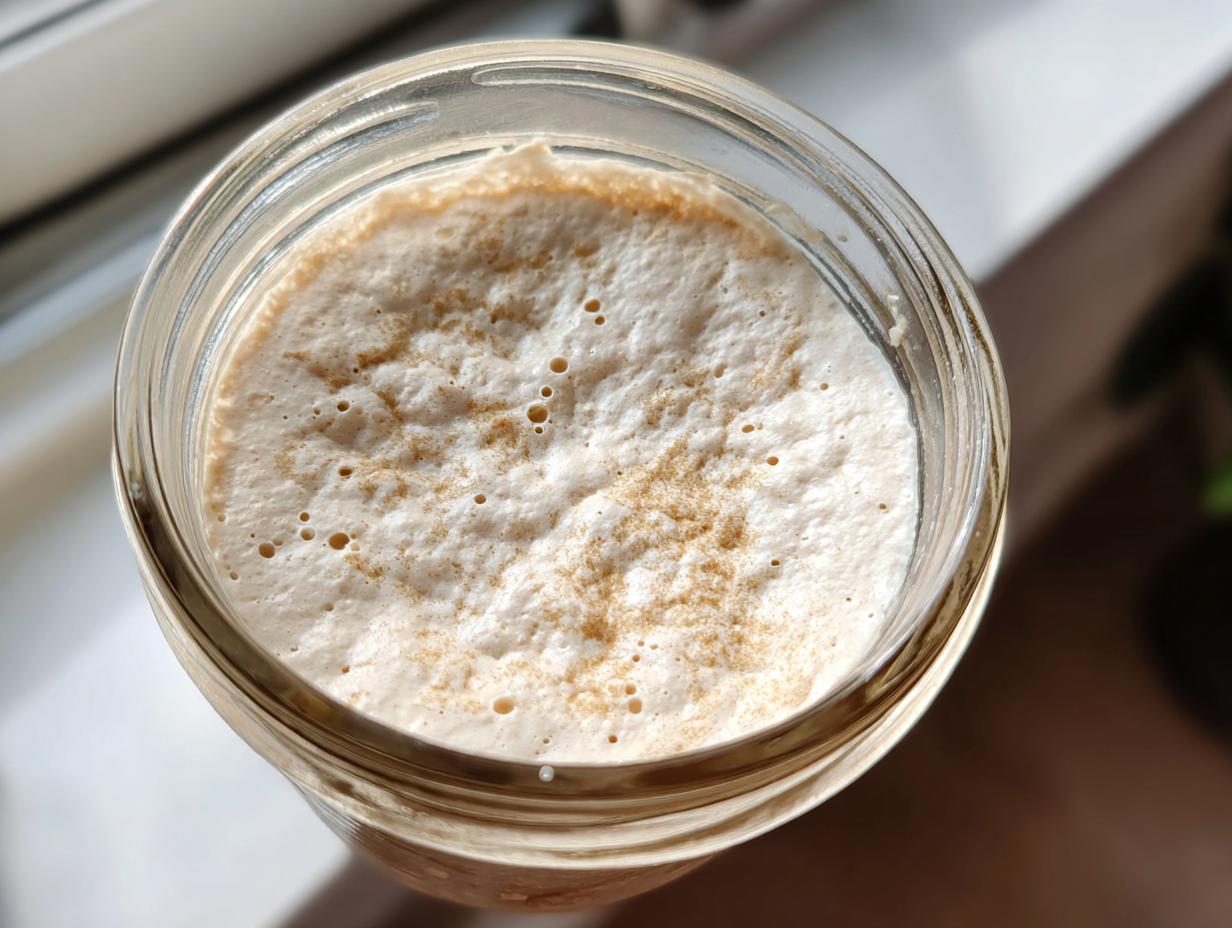
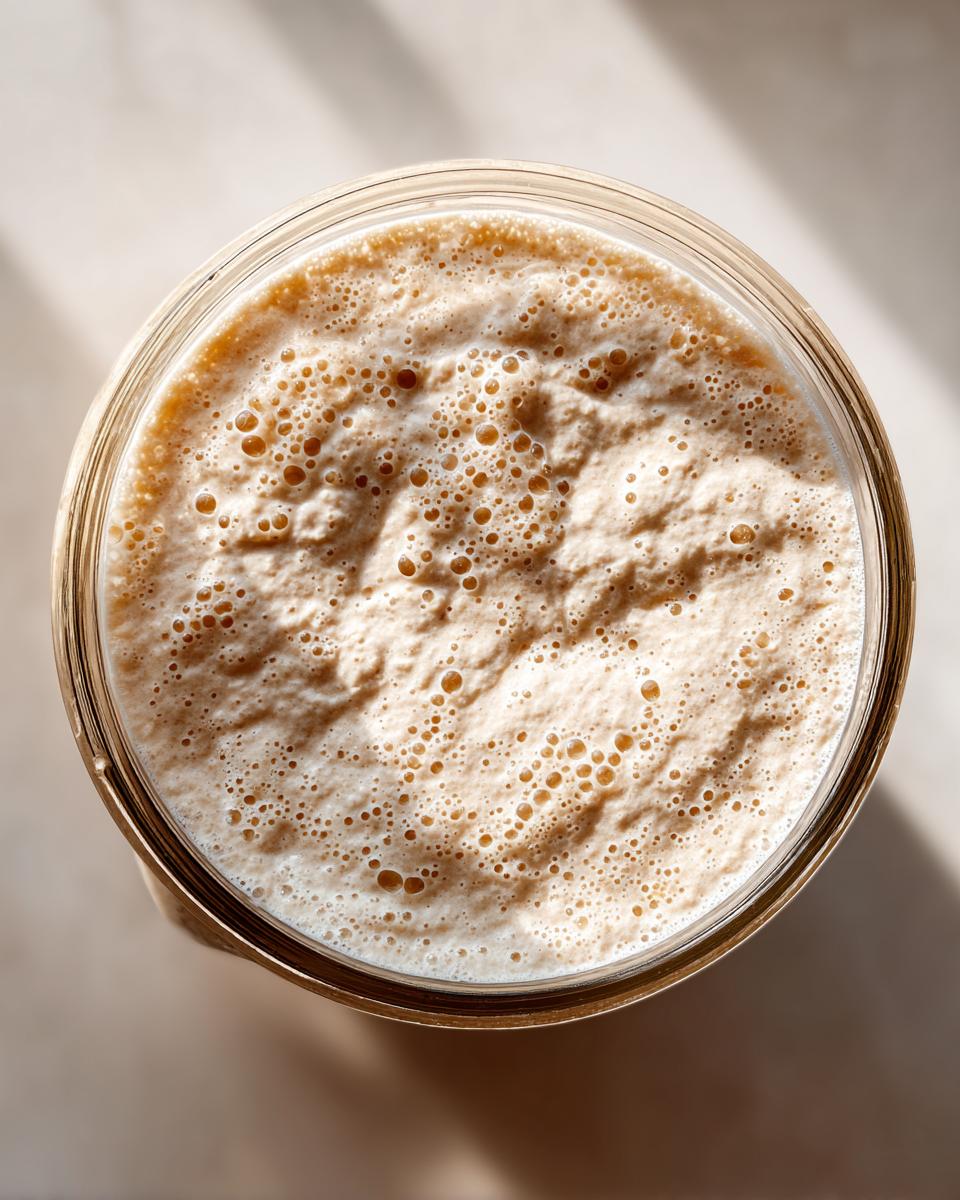
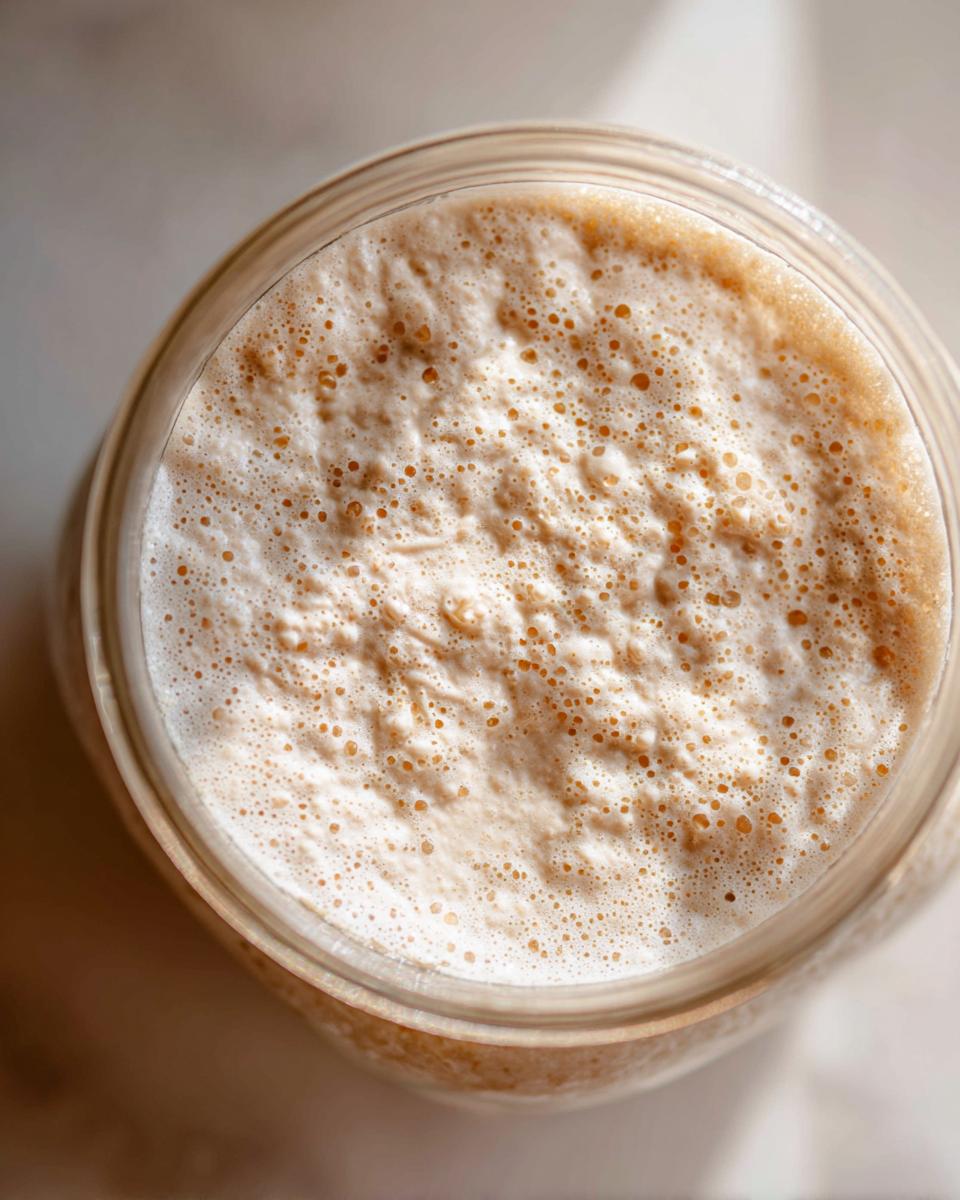
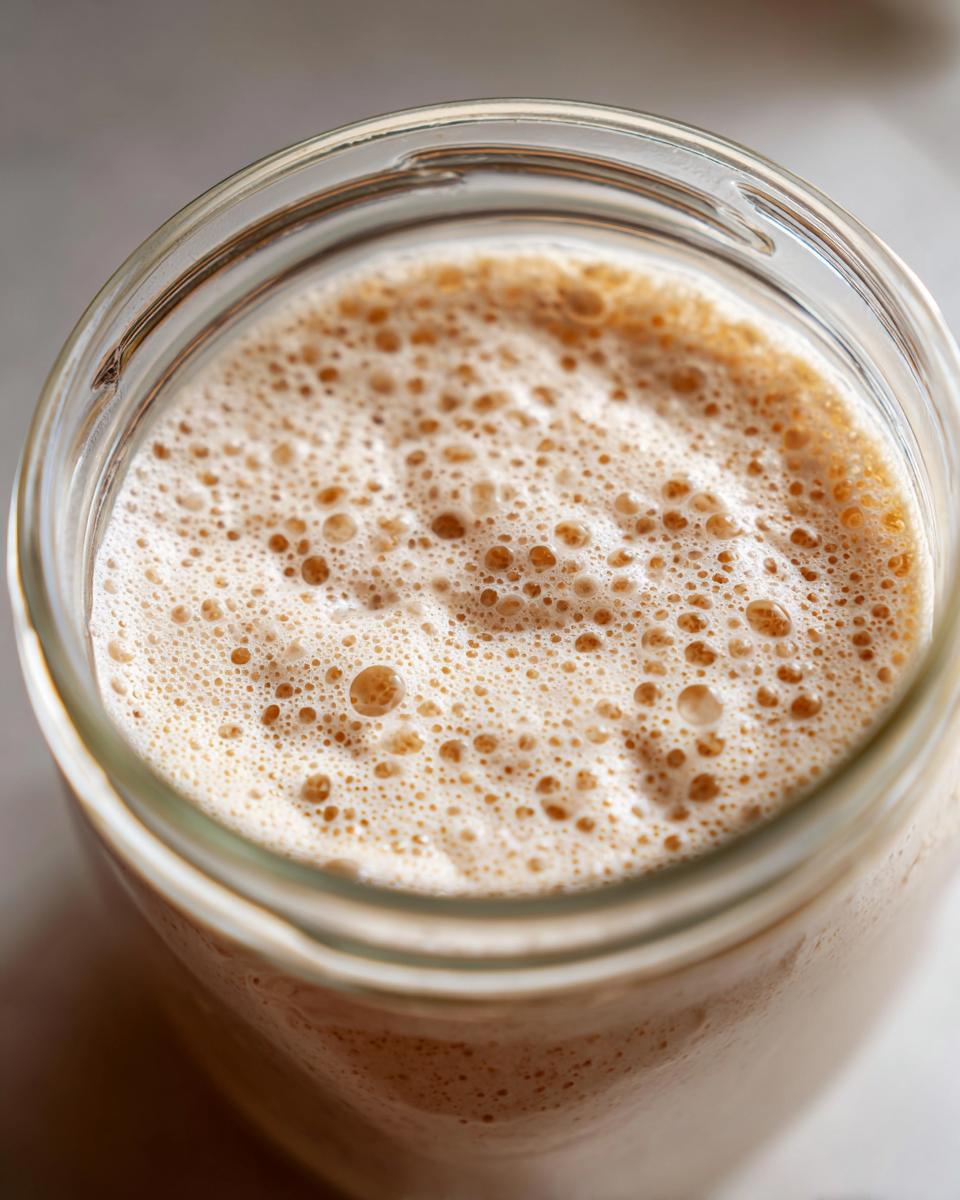
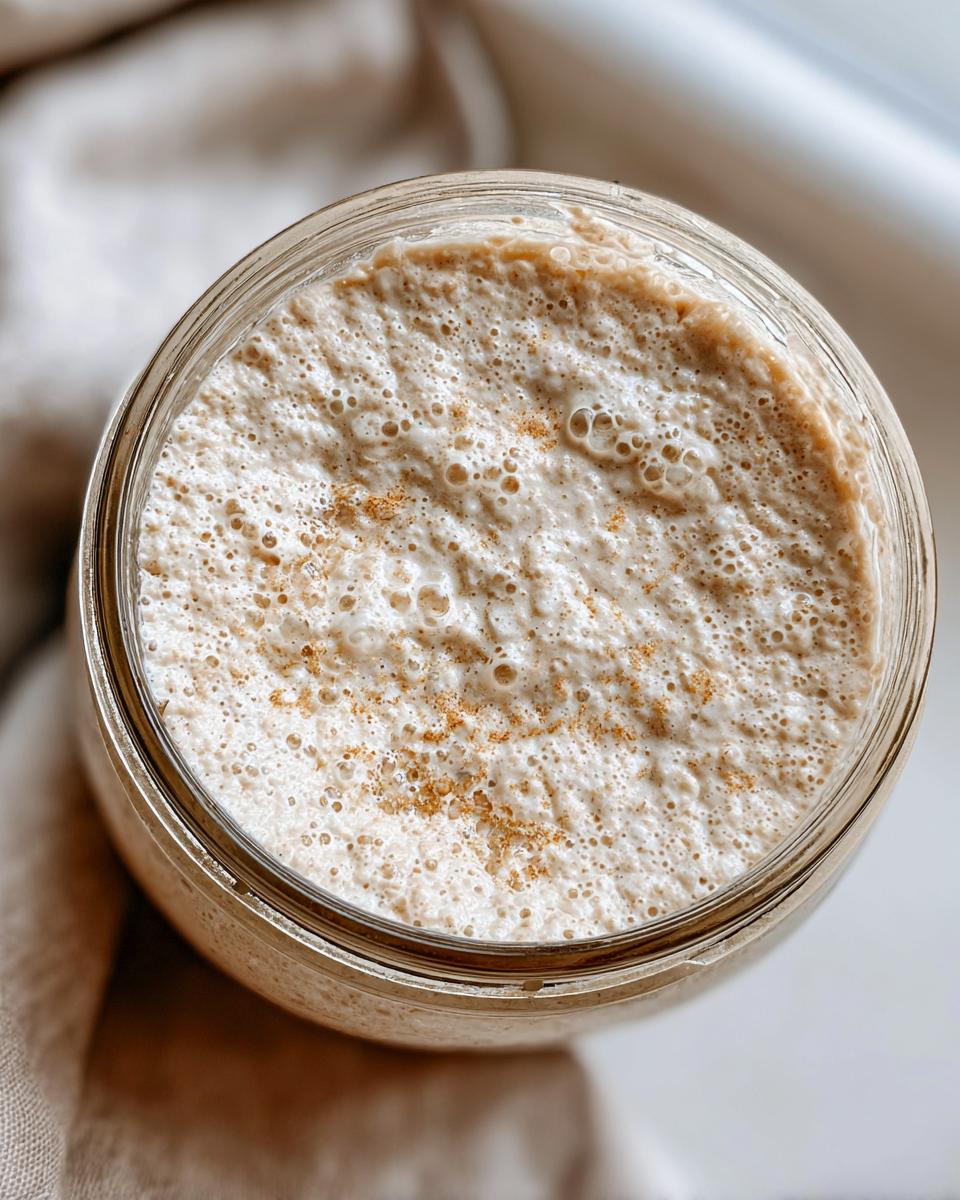
By Day 5, you should start seeing more reliable activity! The starter should climb noticeably after feeding, maybe even looking a little bubbly on top. If you’re seeing it reliably double in size within about 6 to 8 hours after feeding, congratulations—you are getting close to having an active sourdough starter!
For Days 6 and 7, keep this up. If you plan on baking your first loaf right after Day 7, you’ll want to switch to feeding it twice a day, every 12 hours, to establish that double-in-size strength. Once it consistently doubles and passes the float test (yes, we’ll cover that soon!), it’s officially ready to go make you some amazing bread!
How to Feed Sourdough Starter Ratios and Timing
Now that you’ve successfully wrangled your little culture into an active sourdough starter, the key is learning **how to feed sourdough starter** so it stays happy without you having to bake three loaves of bread a day! It all comes down to ratios. You might hear bakers talk about 1:1:1 or 1:2:2. What does that mean? It’s the ratio of starter you keep, to the flour you add, to the water you add. A 1:1:1 ratio (equal parts of everything) is fast and aggressive, which is great if you are trying to build it up quickly, like we did in those first seven days. It gives you that strong culture fast!
If you feed it 1:2:2 (keeping only a small amount of starter, but adding more flour and water), you’re spreading those original yeasts thinner. This slows down the feeding cycle and lets the starter develop deeper, more complex sour flavors. It’s crucial for long-term sourdough starter care tips! If you’re looking for other recipes that pack a flavor punch, I highly recommend checking out my recipe for easy super moist gingerbread cake—it needs that hint of tang too!
The Importance of Weight for Sourdough Starter Care Tips
I have to harp on this one more time: use your scale! Measuring flour by volume is just asking for trouble because flour compacts differently every time you scoop. For perfect results every single time in your sourdough starter care tips, stick to weight. For example, a standard, convenient feeding might be: 50 grams of your mature starter, paired with 50 grams of flour, and 50 grams of fresh water. Easy peasy, right? That 1:1:1 ratio is your bread-and-butter for predictability, which is what we want when learning sourdough basics for beginners.
Switching to Maintenance: Refrigerator vs. Countertop Sourdough Starter
This choice depends entirely on how often you bake. If you’re baking every day or two, keep your happy sourdough starter on the counter and feed it once or twice daily using the 1:1:1 ratio. If you are like me during busy weeks and only bake on the weekends, the fridge is your best friend. When storing it cold, you can get away with feeding it just once a week! When you pull it out to bake, though, you must wake it up with 2 or 3 consecutive feedings at room temperature first. It’s a simple process, but you can get lots of extra guidance on making your starter reliable by diving into this easy homemade guide for beginners.
Sourdough Starter Troubleshooting for Beginners
Even with the best guidance, sometimes your little jar of wild yeast acts a bit strange. Don’t sweat it! In my kitchen, we treat mistakes as learning opportunities. Seriously, troubleshooting your sourdough starter is just part of the process. We all run into phases where the culture seems sluggish or maybe a little too boozy. The important thing is knowing how to correct it so you can get back to baking those dreamy loaves.
When you see weird stuff happening, it usually just means the environmental balance is off—maybe it’s too cold, or maybe you skipped a feeding. If you’re looking for other simple fixes for kitchen mishaps, I’ve got tons of easy guides, like how to whip up these easy cranberry brie bites.
What If My Sourdough Starter Smells Like Nail Polish Remover?
Oh, that acetone smell! You might lovingly call it ‘hooch,’ but it means your starter is hungry and has produced more alcohol (acetic acid) than it can deal with. It’s basically screaming for food! Don’t worry, it happens to the best of us. The fix is twofold: first, feed it immediately. Second, consider bumping up your feeding ratio temporarily to something like 1 part starter to 2 parts flour and 2 parts water (1:2:2). This feeds the yeast more generously, helping dilute that sharp acidity right away!
Recognizing a Truly Active Sourdough Starter
So, how do you know you’ve moved past the awkward teenage phase and have a truly active sourdough starter ready for action? Beyond just looking bubbly, you need a test! The best one is the float test. Right when your starter hits its peak—when it’s domed nicely on top and packed full of bubbles throughout—drop a small spoonful into a glass of room-temperature water. If it floats, it has enough trapped gas to lift your bread dough, and you are good to go! If it sinks, give it another 30 minutes or another small feeding and try again. This is the final check before you jump into making sourdough starter at home from scratch.
Making Your Sourdough Starter Ready for Baking
You’ve got a happy, bubbly culture chilling in the fridge, but now you want to make that dreamy, crusty loaf of **no yeast bread recipe** magic, right? You can’t just pull it out of the cold and throw it into your dough! That sleepy starter needs a wake-up call first. This activation period is what we call the ‘refresh’ feeding cycle, and it’s non-negotiable if you want your loaf to rise properly.
If your starter has been chilling in the fridge for a week or more, plan on feeding it two or three full times at room temperature before you actually use it in your dough recipe. The goal is to ensure it’s super vigorous and doubling consistently within four hours of being fed. Only once it has reached its peak, looking puffy and smelling sweet, is it truly ready to leaven your **artisan bread making at home** projects. Think of it like letting your oven preheat—it ensures perfect results!
If you want to try something fun while you wait for your starter to wake up, hop on over and try my recipe for the best classic apple crumble!
Storage and Reviving Your Sourdough Starter Care Tips
Your starter is finally a happy, reliable beast, and you don’t want to bake every single day, so let’s talk about long-term life! If you’re only baking once a week or less, the refrigerator is your best friend. This slows down fermentation so much that you only need to worry about it once every seven days. This is essential for anyone trying to figure out **how to maintain sourdough starter** without sacrificing their whole afternoon.
To store it, just feed it a regular amount—say, 50g starter, 50g flour, 50g water—and let it sit on the counter for maybe an hour or two until you see the first tiny hint of activity. Then, pop the lid on securely and slide it into the coldest part of your fridge. That’s it! It’s completely dormant and happy there until you need it again.
The revival process is super simple, but don’t rush it! You want to wake it up gently. When you know you plan to bake in about two or three days, take it out of the cold. Give it fresh food (a feeding) right away. Then, feed it again the next morning, and possibly again that evening, until you see it consistently doubling its size again within 4-6 hours. That’s when you know it’s happy and ready to bake your moist lemon olive oil cake—or, you know, bread!
If you ever forget it for a week or two and it looks sad, gray, and has a thick layer of dark liquid on top (that’s the hooch!), don’t toss it! Just pour off most of that liquid, give it a very generous feeding (maybe a 1:3:3 ratio instead of 1:1:1), and let it ride on the counter until it bubbles up again. I love seeing how resilient this little life form is. For even more reassurance in your journey, you can always check out this great guide on making your sourdough starter from scratch when you need a visual reminder!
Estimating Nutrition for Your Flour and Water Starter
Now, I know you’re here to bake incredible food, and usually, we worry about nutrition labels, but let’s be real for a second. This **flour and water starter** isn’t meant to be eaten by the spoonful! It’s the engine for your bread, not the main course itself. When we talk about nutrition here, we are really just estimating what’s in the culture *before* we use it for baking something amazing like my sweet Alabama pecan bread. Remember, once you bake with it, the nutrition changes completely because of the fermentation process!
This data below is a rough estimate based on a standard feeding where we calculate the leftovers after discarding, using the 1:2:2 maintenance ratio as a general baseline for a standard serving of the *discard*—since that’s what people usually end up wanting to use for things like crackers or pancakes.
Just think of this as helpful context. What matters most is that you’re using simple, whole ingredients, which is the real secret to a **healthy homemade starter**!
- Serving Size: 1/4 cup culture (Approx. 50g of starter)
- Calories: 120
- Carbohydrates: 25g
- Protein: 4g
- Fat: 0.3g
- Sugar: 0.5g
- Sodium: 1mg
Next Steps: Baking with Your New Sourdough Starter
You’ve done the hard work! You’ve coaxed wild microbes into creating a vibrant, bubbling **sourdough starter** that reliably doubles after feeding. That means all that dedication to the **day by day sourdough starter** schedule has paid off! Now what? Well, now we bake! Seriously, once you have this amazing, thriving culture ready to go, you’ve unlocked the door to the world of **artisan bread making at home**. Forget those **no yeast bread recipe** disappointments; you’ve got nature’s best leavening agent right there on your counter!
The next big step is choosing your first loaf. I know it’s tempting to jump straight into a complicated, multi-day sourdough boule, but please, ease into it gently. Start with something simple that requires less shaping tension, like a beginner’s loaf or even just a batch of those fluffy easy one-pot creamy sausage pasta where you use discard instead of yeast. Just kidding on the pasta part—mostly! But seriously, look for a recipe specifically labeled for beginners. They help you understand how to incorporate your newly *active sourdough starter* into the dough mass without overwhelming you with folds and proofing times.
Remember what we talked about: always feed your starter the day before you plan to mix your dough. That way, you’re using it at its absolute peak strength, ensuring the best possible rise and tang in your first loaf. You’ve got this!
PrintHow to Make a Sourdough Starter From Scratch: A Beginner’s 7-Day Guide
Create your own healthy, active sourdough starter from scratch using just flour and water. This beginner sourdough guide walks you through the day-by-day process for making homemade wild yeast culture for artisan bread making at home.
- Prep Time: 5 min
- Cook Time: 0 min
- Total Time: 7 days (active time is minimal)
- Yield: One active starter culture
- Category: Baking Basics
- Method: Wild Fermentation
- Cuisine: American
- Diet: Vegetarian
Ingredients
- 100g Whole Wheat Flour or Rye Flour (for initial days)
- 100g Unbleached All-Purpose Flour (for later feedings)
- 100g Unchlorinated Water (room temperature)
Instructions
- Day 1: Mix 50g whole wheat or rye flour with 50g room temperature water in a clean jar. Stir well until no dry spots remain. Cover loosely and leave at room temperature (ideally 70-75°F or 21-24°C) for 24 hours.
- Day 2: You may see small bubbles or nothing at all. Discard half of the mixture. Add 50g of all-purpose flour and 50g of water to the remaining starter. Mix thoroughly, cover loosely, and wait 24 hours.
- Day 3: You should see some activity, perhaps a few bubbles or a slight sour smell. Discard half. Feed with 50g all-purpose flour and 50g water. Wait 24 hours.
- Day 4: Activity might slow down; this is normal. Discard half. Feed with 50g all-purpose flour and 50g water. Wait 24 hours.
- Day 5: You should see more consistent bubbling. Discard half. Feed with 50g all-purpose flour and 50g water. Wait 24 hours.
- Day 6: The starter should be showing reliable signs of life, doubling in size within 6-8 hours after feeding. Discard half. Feed with 50g all-purpose flour and 50g water. Wait 24 hours.
- Day 7 (and beyond): Your sourdough starter is active when it consistently doubles in volume within 4-8 hours after feeding. Switch to a twice-daily feeding schedule if you plan to bake soon. Discard half, then feed with 50g flour and 50g water, twice a day, 12 hours apart.
Notes
- Use filtered or bottled water if your tap water is heavily chlorinated, as chlorine can inhibit yeast growth.
- Maintain a consistent room temperature for best results; cooler temperatures slow down fermentation, warmer temperatures speed it up.
- When your starter reliably doubles after feeding, it is ready for baking. This is your active sourdough starter.
- To maintain your starter long-term, store it in the refrigerator after it peaks, and feed it once per week.
Nutrition
- Serving Size: 1/4 cup culture
- Calories: 120
- Sugar: 0.5g
- Sodium: 1mg
- Fat: 0.3g
- Saturated Fat: 0.1g
- Unsaturated Fat: 0.2g
- Trans Fat: 0g
- Carbohydrates: 25g
- Fiber: 1.5g
- Protein: 4g
- Cholesterol: 0mg