

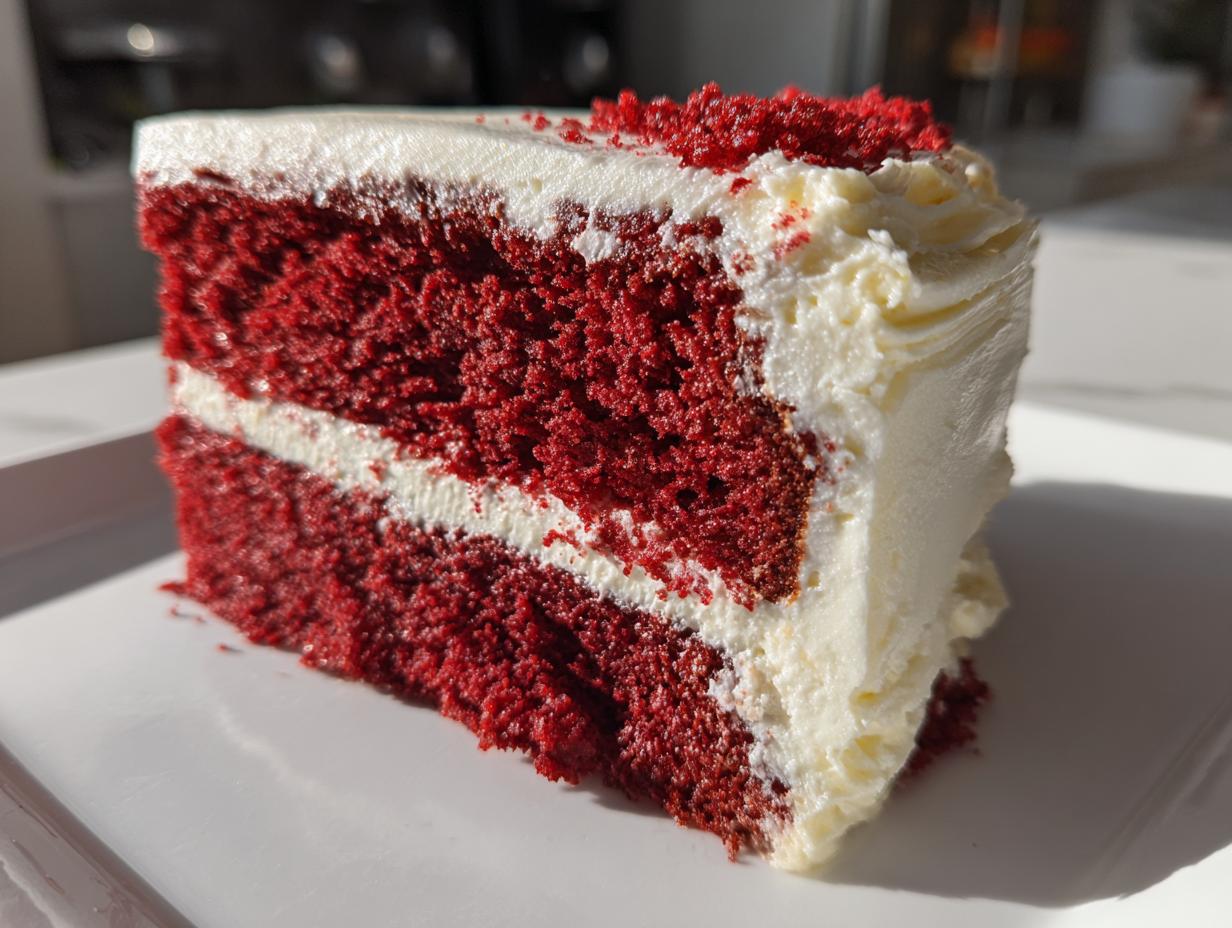
There’s just something about the flavors of proper Southern baking that pulls you right back to childhood, isn’t there? That feeling of anticipation waiting for that deep, gorgeous red color to come out of the oven. For me, that feeling is tied right up in my **red velvet cake** recipe. This isn’t just any cake; this is The Best Authentic Southern Red Velvet Cake From Scratch, and I promise you, it delivers the softest, fluffiest texture you could ever dream of. I learned the true secrets to this dessert watching my grandmother’s practiced hands in our Midwest kitchen. She always knew how to make things taste like home, and this recipe carries so much of that love. When you make this red velvet cake, you aren’t just baking; you’re creating a truly memorable dessert. If you’re ever looking for other light and airy classics, be sure to check out my guide for an angel food cake, too! You’ll want to check out the inspiration behind some similar amazing bakes here.
- Why This Southern Red Velvet Cake Recipe Works Every Time
- Ingredients for the Best Authentic Southern Red Velvet Cake
- How to Prepare Your Moist Red Velvet Cake
- Crafting the Best Cream Cheese Frosting for Your Red Velvet Cake
- Assembling Your Fluffy Layer Cake
- Ingredient Notes and Buttermilk Cake Recipe Substitutions
- Storage and Handling for Your Red Velvet Cake
- Frequently Asked Questions About This Red Velvet Cake Recipe
- Estimated Nutritional Data for This Classic Dessert Recipe
Why This Southern Red Velvet Cake Recipe Works Every Time
So many recipes promise perfection but end up tasting like basic chocolate cake dropped into food dye. Not ours! This authentic Southern red velvet cake delivers that gorgeous color paired with an unbelievably moist and fluffy texture. The magic really is in the science. We rely on the classic reaction between the buttermilk and the vinegar—it wakes up the baking soda perfectly, giving us the lift we need.
You can read about how others nail the texture here at this link, but honestly, the devil is in the details when it comes to consistency.
Achieving That Velvety Cake Texture
My biggest game-changer was switching mostly to vegetable oil instead of relying heavily on butter. Butter tastes lovely, of course, but oil keeps things beautifully moist for days! To keep that soft, velvety cake texture we crave, you must be gentle when adding the flour mixture. We mix just until it comes together. Overmixing is what wakes up the gluten and turns this luscious layer cake dense and chewy—trust me, we want tender!
Tips for a Vibrant Red Cake Tutorial
If you want that deep, iconic red, you absolutely need to pay attention to the coloring. Liquid food coloring just doesn’t always cut it, especially with acidic ingredients like buttermilk present. For this vibrant red cake tutorial, I insist on using a good quality gel food coloring if you can find it. It concentrates the color pigment so you use less, which means you don’t throw off the delicate balance of our wet and dry ingredients.
Ingredients for the Best Authentic Southern Red Velvet Cake
Getting the right ingredients ready is half the battle won! Seriously, don’t start mixing until everything is measured out and sitting on your counter. It saves so much stress when you need to pour something in quickly. Since this is a classic dessert, precision matters, especially with the leavening agents. I always keep my recipe list open right by the flour!
If you are looking for other wonderful cakes that kick off with good ingredients, you absolutely must try my buttermilk cake recipe sometime!
Cake Batter Components
We need to keep the wet and dry separate until the very end. Remember, we are using oil here—the key to that amazing lasting moisture that makes this cake special:
- 1 1/2 cups vegetable oil (no heavy substitutes allowed!)
- 1 1/2 cups granulated sugar
- 2 large eggs, room temperature is best
- 1 teaspoon vanilla extract
- 1 tablespoon red food coloring (I prefer gel if you have it, for the saturation)
- 1 teaspoon white vinegar
- 1 cup buttermilk, full fat is ideal
- 2 1/2 cups all-purpose flour, lightly spooned and leveled
- 1 teaspoon baking soda
- 1 teaspoon salt
- 1 tablespoon unsweetened cocoa powder (just a hint for depth, not flavor!)
Ingredients for the Best Cream Cheese Frosting
This is the part that makes everyone line up for seconds! Make sure you take your butter and cream cheese out at least an hour before you plan to whip this up. If they are hard, your frosting stands no chance of being smooth.
- 1 cup cream cheese, softened completely
- 1/2 cup unsalted butter, softened completely
- 4 cups powdered sugar, sifted well (sifting stops lumps, trust me!)
- 1 teaspoon vanilla extract
How to Prepare Your Moist Red Velvet Cake
Alright, let’s get baking! We want this red velvet cake to be legendary, so we need to follow this order exactly. First things first: get that oven fired up to 350 degrees Fahrenheit (that’s 175 Celsius). Grab your two 9-inch cake pans and grease them up real well—I use that homemade cake goop sparingly, or just a good old butter and flour dusting. We want these layers sliding out clean later!
If you need a fantastic fruity contrast to this rich cake later, check out my recipe for a moist lemon pound cake!
Mixing the Red Velvet Cake Batter
We start with the wet stuff in a big bowl. Whisk that vegetable oil and sugar together until they look happy—they should be well acquainted. Then beat in your eggs one by one. Now, in separate little bowls, mix up your buttermilk/vinegar/color, and your flour/cocoa/soda/salt. See how we keep things tidy? You’ll alternate adding the dry mix and the buttermilk mix into the main bowl. Always start and end with the dry ingredients. But here’s the big secret for that fluffy layer cake result: only mix until it’s *just* combined. Seriously, stop the mixer the second you don’t see any white streaks. Overmixing equals doom!
You can see how other bakers handle their batter right here: check out these tips.
Baking and Cooling the Layers
Now, divide that beautiful batter evenly between your prepared pans. Pop them into that waiting oven for about 30 to 35 minutes. You know they are done when a wooden pick stuck right into the center comes out clean. Don’t check too early, or they might cave in! Let them cool in the pan for just 10 minutes—any longer and they might stick for dear life. Then, gently flip them onto a wire rack to cool completely. And I mean *completely*! If those layers are even slightly warm when you try to frost them, your gorgeous cream cheese frosting will turn into a hot, soupy mess. Patience pays off here!
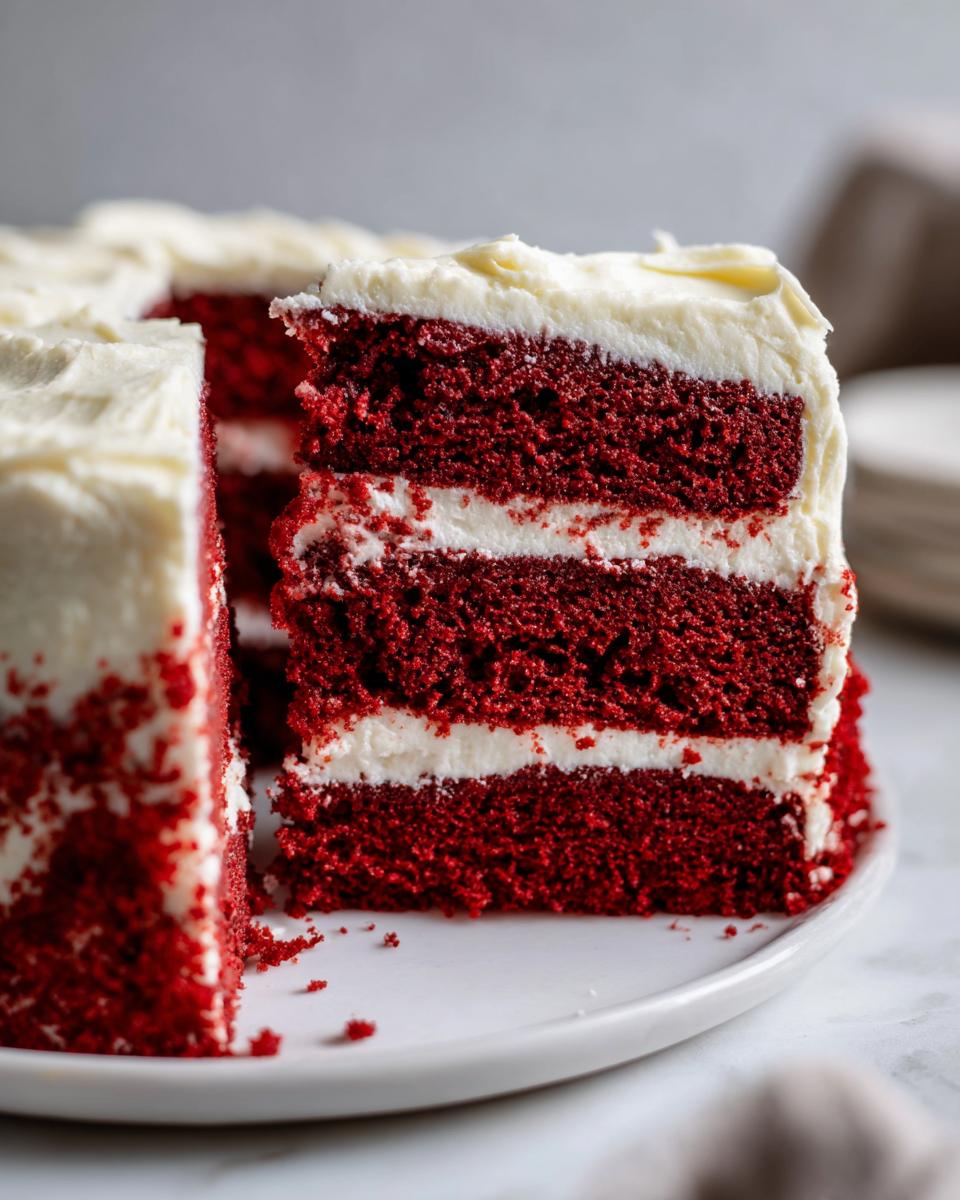
Crafting the Best Cream Cheese Frosting for Your Red Velvet Cake
Oh, the frosting! This is where the red velvet cake truly earns its reputation as a classic dessert recipe. You simply can’t skip making this cream cheese frosting from scratch. Boxed stuff just feels wrong when you’ve gone to all this effort to make a beautiful, homemade red velvet cake!
Forget those overly sweet, stiff frostings you might see elsewhere. We are aiming for rich, tangy, and perfectly fluffy. You can see how they handle their frosting game in the South over at this link, but my version keeps it simple and delicious.
If you love cream cheese baked goods, I also have an incredible cream cheese pound cake recipe that needs this exact frosting, too!
Tips for Smooth, No-Lump Frosting
This is the secret to making sure your frosting looks professionally made and tastes divine. The biggest mistake people make is trying to rush the temperature. Your butter *and* your cream cheese must be truly softened—think room temperature soft, where you can easily press a finger into them without resistance. But—and this is key—they absolutely cannot be melted or greasy!
Once your fats are perfect, sift that powdered sugar! I know it seems tedious, but those little clumps of sugar will ruin an otherwise perfect batch. Beat the cream cheese and butter together until they are completely smooth *before* adding the sugar slowly. Once it’s all mixed in, finish it off with a splash of vanilla to bring out those rich flavors. Beat it on medium-high for a minute or two until it looks wonderfully light and fluffy. If you follow those temperature and sifting rules, you will never have a lumpy frosting again!
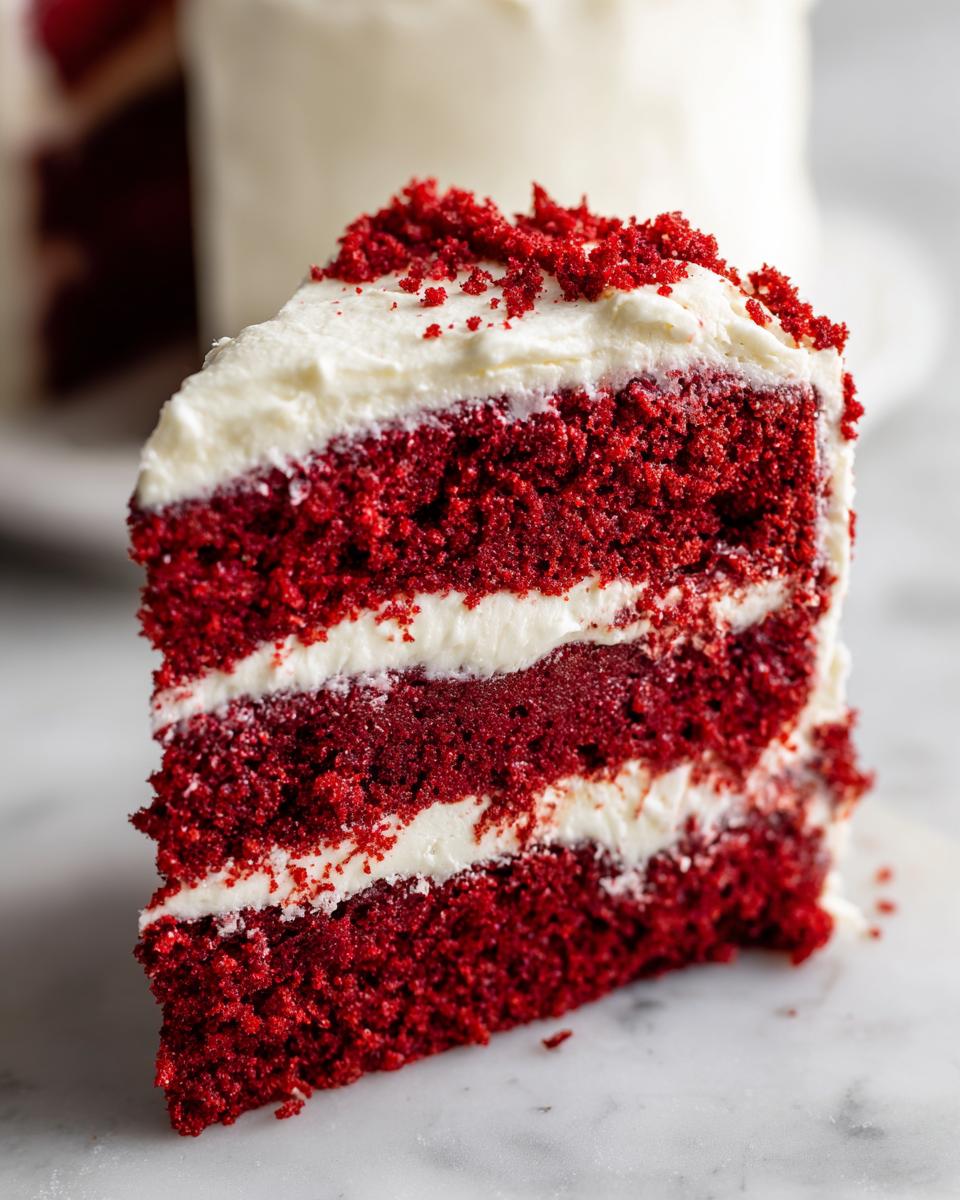
Assembling Your Fluffy Layer Cake
Finally, we get to the fun part! Your kitchen probably smells incredible right now, and those cake layers should be completely cooled down. If you rush this stage, you risk damaging the beautiful, fluffy layer cake we worked so hard to achieve. We want clean lines, not messy smears!
Before you start stacking, you might notice your cake layers have a small dome on top. Grandmothers always said you need to slice that off carefully with a long, serrated knife to make them perfectly flat. This ensures your final cake stands straight and tall—it’s crucial for a professional-looking result, even when it’s just for family!
If you’re interested in some really easy, no-fuss recipes for when you’re short on time, you should definitely peek at my no-bake avalanche cookies!
For a cleaner assembly, I highly recommend doing a crumb coat. This is optional, but if you want that truly flawless finish on your final layer cake, it saves headaches! Take about a quarter of your cream cheese frosting and spread a very thin layer all over the entire stacked cake—top and sides. This layer traps all those tiny red crumbs so they don’t ruin your final, beautiful frosting layer. Pop the whole thing in the fridge for about 20 minutes to let that crumb coat set up hard.
Once that thin coat is firm, pull it out and apply the rest of your luscious cream cheese frosting. Use an offset spatula to smooth the sides and top until it looks exactly how you pictured it looking on your dessert table. Any extra frosting can go straight into my mouth, but I usually save a little extra to pipe small dollops around the base for flair!
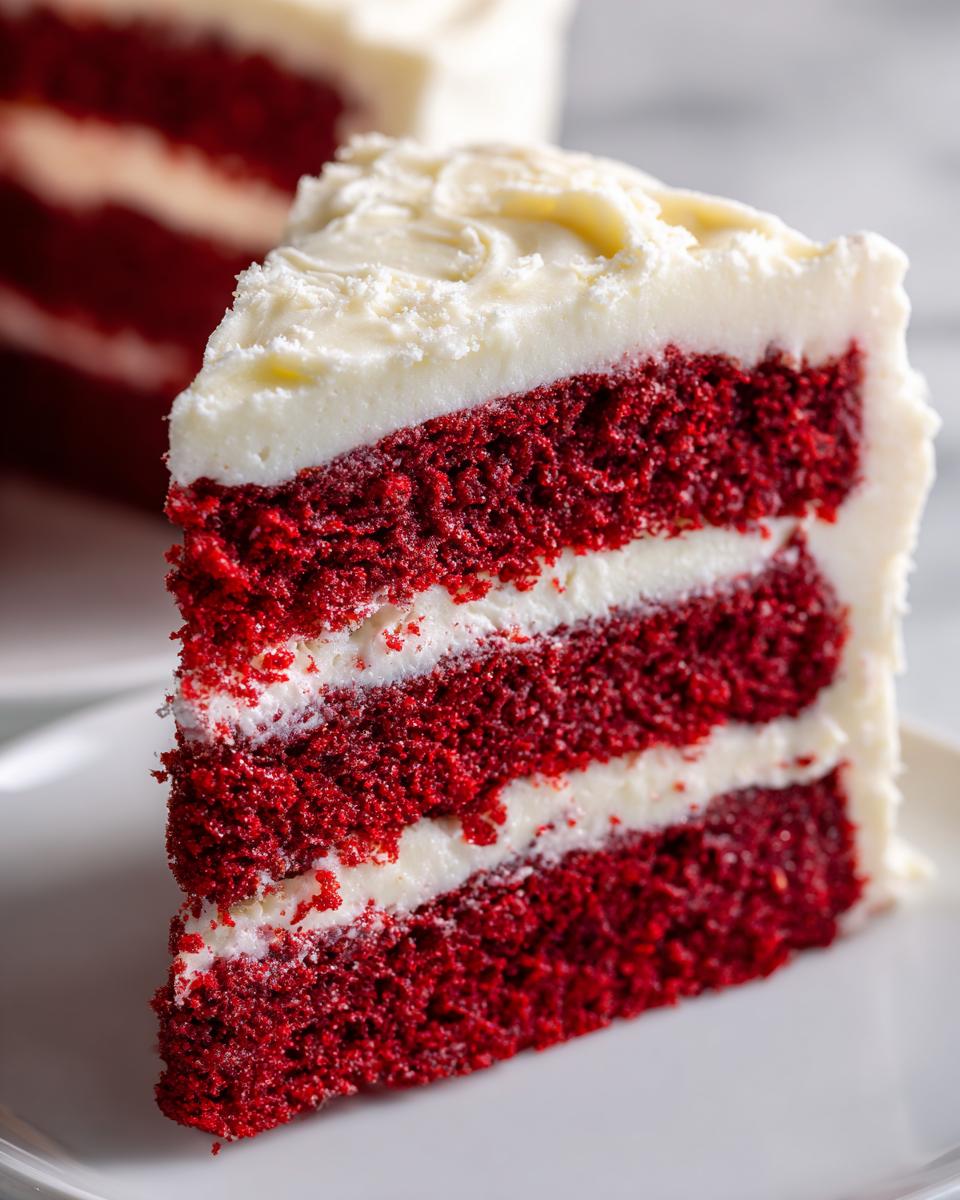
Ingredient Notes and Buttermilk Cake Recipe Substitutions
I know sometimes you just can’t run to the store for that one specific item, and that’s okay! We are sticking to the authentic Southern red velvet cake style here, which means we really can’t compromise the buttermilk, but if you must substitute it, I have the perfect trick. This recipe relies on that acidic tang to interact with the baking soda to give us that signature lift alongside the vinegar.
If you are aiming for the best result, try making your own buttermilk! Or, if that isn’t an option, I’ll guide you on making a quick substitute right now so you can get back to baking your red velvet cake.
For more foundational baking tips, especially when dealing with unique ingredients like potato flours, check out my guide on how to make Irish Potato Farls.
Don’t forget to look at how another great baker handles simple swaps for their moist cakes here if you have any doubts!
Buttermilk Substitute Panic? Not Today!
If you are staring into your fridge and realize you’re out of buttermilk, don’t panic and run to the store just yet. We can easily whip up our own substitute right here in minutes. You’ll need whole milk—it has to be whole milk, not skim or low-fat—to mimic the richness of true buttermilk.
Here’s the breakdown:
- Take 1 cup of whole milk.
- Stir in 1 tablespoon of white vinegar or fresh lemon juice.
- Let that mixture sit on your counter for about 5 minutes.
It will look a little curdled, and that’s exactly what you want! That slight separation mimics the real thing and ensures that awesome reaction we need in the batter. Use this homemade version exactly as you would the store-bought kind. This is such a lifesaver when you are so close to finishing up your beautiful red cake!
Oil Versus Butter: Why Oil Wins for Red Velvet
Now, let’s talk fat. Most classic pound cakes rely heavily on butter, which gives a wonderful flavor but tends to make cakes firmer once cooled. Remember how we talked about wanting a moist red velvet cake that practically melts? That’s why this recipe uses vegetable oil for the bulk of the fat. Oil is liquid at room temperature, meaning it coats the flour particles better and locks in moisture much more efficiently than solid fats do.
We still use a little softened butter in the frosting because its flavor is irreplaceable there, but for the cake layers themselves, oil keeps everything soft and tender, even the next day. It’s the primary reason this cake stays so fluffy long after it leaves the pan!
Storage and Handling for Your Red Velvet Cake
You’ve just made a masterpiece! Now comes the crucial part: keeping that moist red velvet cake looking and tasting fresh until you serve it—or until you can sneak a slice tomorrow. Because we used that dreamy, homemade cream cheese frosting, we have to be smart about storage, otherwise, things can get a little… sweaty.
If you aren’t planning on eating the whole thing right away (good luck!), you have a couple of choices depending on how long you need to keep it.
Keeping it Fresh for a Day or Two
For short-term enjoyment—say, you’re serving it at a party the next afternoon—you can keep the cake covered loosely at room temperature. I use a large cake dome if I have one, or I just place a large, upside-down bowl over the structure. Since we used real dairy in that delicious frosting, make absolutely sure your kitchen isn’t too warm. If your house runs hot, put it in the fridge, even for just 24 hours.
If you happen to be a fantastic planner and want to know how to keep other baked goods fresh for longer, check out my tips on that moist Hawaiian banana bread recipe—the same moisture principles often apply!
Refrigeration Necessities
If you need the cake to last longer than about 36 hours, or if your house feels like an oven, refrigeration is your friend. Just be warned: the cold environment will firm up the cake layers a bit, and the frosting will get quite hard. That’s totally normal for cream cheese frosting!
Here’s the trick to serving a refrigerated cake: pull it out about one to two hours before you plan to slice it. Let it sit on the counter, covered loosely, to come back up to room temperature. This gives the frosting time to soften just enough to be luxurious again, and it brings back that melt-in-your-mouth softness to the cake crumb. Always store it covered, whether chilled or on the counter, to protect it from drying out or picking up any funny smells.
Freezing for Special Occasions
Yes, you can freeze this beauty! This cake travels and stores surprisingly well if you do it right. The key is to freeze it *before* you frost the outside, though you can freeze layers that are already crumb-coated. Wrap each individual layer tightly in plastic wrap first, and then wrap it again securely in aluminum foil. Label it with the date!
It’s good in the freezer for up to three months. When you’re ready to thaw, just move the wrapped cake layers to the fridge overnight, and then let them sit on the counter to come to room temperature before you assemble and frost them. It works like a charm every time!
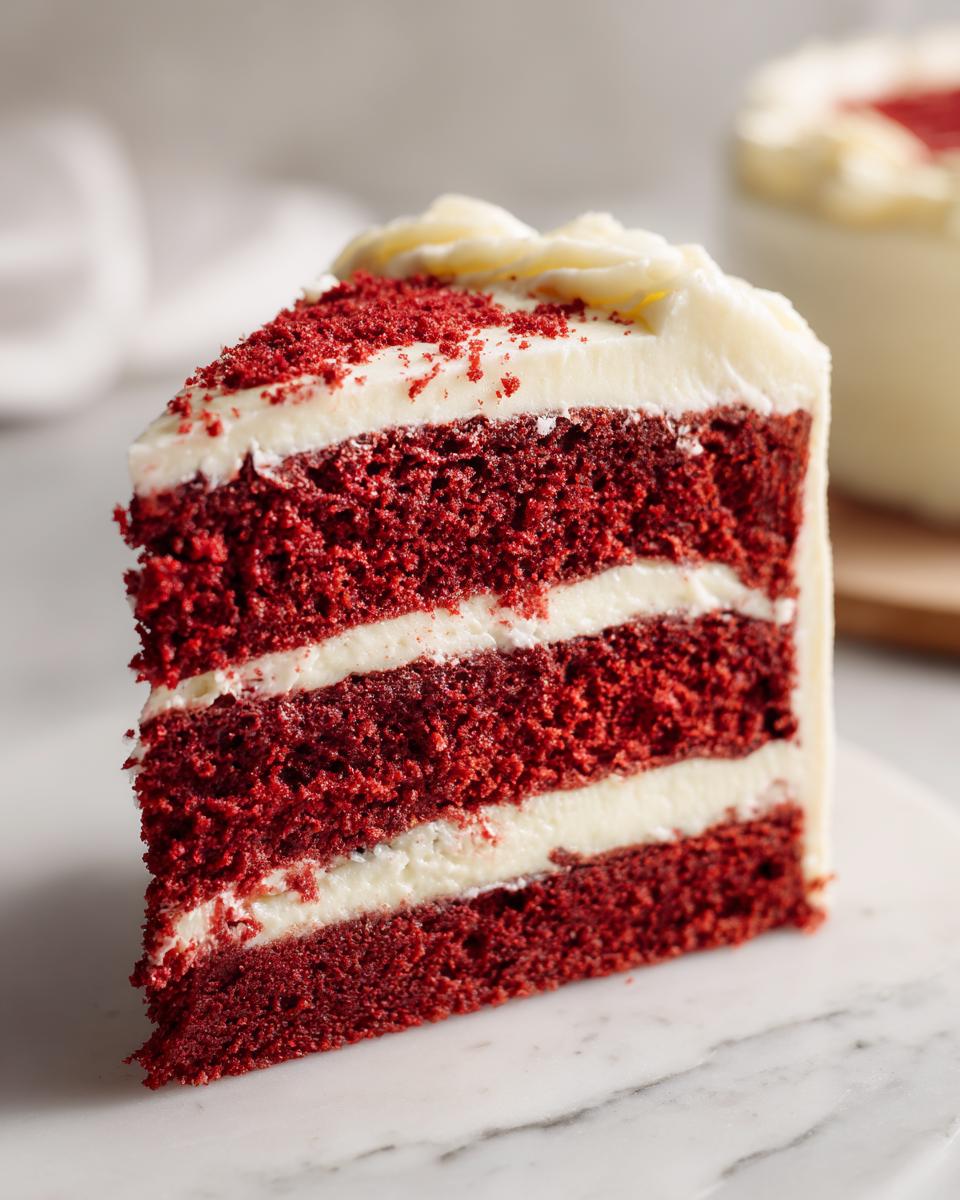
Frequently Asked Questions About This Red Velvet Cake Recipe
It’s totally normal to have questions when you’re tackling a classic like this! I get asked the same things constantly. Here are a few common hurdles people worry about when baking this homemade red velvet cake, but don’t you worry, we’ve got this!
If you’re looking for something savory to balance out all that delicious cake, check out my easy recipe for cowboy caviar!
Can I make this a No-Fail Red Velvet?
Absolutely! The reason some cakes end up dense or dry is usually due to overmixing the flour or using ingredients that aren’t the right temperature. This recipe is designed to be very forgiving *if* you listen to me on two things: use the oil for moisture, and stop mixing the batter as soon as the flour streaks disappear. If you follow the alternating wet/dry method and don’t beat the batter into submission, you’ll get that beautiful, light crumb every time. It’s truly a no-fail red velvet when you treat the batter gently!
What makes this a true Southern Red Velvet Cake?
That’s a great question, and it gets right to the heart of tradition! A true Southern recipe isn’t just about color. It’s defined by the chemistry we use. We rely on the reaction between buttermilk and vinegar (plus the baking soda) to create a tender texture—that’s what gives it the slight tang and soft structure you don’t get from a standard chocolate recipe. Also, a true Southern version uses only about a tablespoon of cocoa powder. It’s meant to be a *velvety* cake, not a deeply chocolate one. That little bit of cocoa just balances the sweetness and sets the stage for the frosting!
Can I use this recipe for Valentine’s Day Cake Ideas?
Oh, this cake was practically *made* for Valentine’s Day, or any celebration where you want to wow someone! It’s the ultimate centerpiece for your Valentine’s Day cake ideas. For presentation, you could layer it with a pinkish hue to the cream cheese frosting, or just leave it stark white against that deep red body—it looks stunning either way. It’s easily one of the most impressive holiday baking desserts you can make that still comes together relatively quickly!
Estimated Nutritional Data for This Classic Dessert Recipe
Just so you know what you’re getting into when you whip up this beautiful layer cake, I wanted to share the general nutritional breakdown. Now, remember, this is an estimate based on standard measurements for a slice of this classic dessert recipe. Since everyone’s frosting application technique is a little different (and I usually use a lot more frosting than anyone else!), your actual numbers might vary a bit. Everything tastes better when you don’t count calories, anyway, right?
This calculation assumes 12 generous slices of the cake with a healthy spread of my favorite cream cheese frosting on top! If you’re interested in how to make a rich, savory gravy that’s easier than the drippings method, you should check out my guide for easy chicken gravy.
Approximate Nutrition Per Serving (1 Slice)
The heart of this data is based on what we know about the oil, sugar, and cream cheese:
- Calories: About 450 per slice
- Fat Total: A solid 24g (That’s where the flavor lives!)
- Saturated Fat: Roughly 10g
- Carbohydrates: Coming in around 60g
- Sugar: Around 55g (It is a dessert, after all!)
- Protein: About 4g
- Sodium: Approximately 350mg
We keep the fiber low, as you can see, but that doesn’t mean this cake isn’t packed with pure joy! Don’t stress too much about the numbers; just focus on how wonderfully soft and delicious that bite of ruby-red cake is.
PrintThe Best Authentic Southern Red Velvet Cake from Scratch with Classic Cream Cheese Frosting
Bake a truly moist and soft Southern Red Velvet Cake from scratch. This classic recipe uses buttermilk and vinegar for the perfect texture, topped with a rich, homemade cream cheese frosting. This is a dependable dessert for any celebration.
- Prep Time: 25 min
- Cook Time: 35 min
- Total Time: 60 min
- Yield: 12 servings 1x
- Category: Dessert
- Method: Baking
- Cuisine: American
- Diet: Vegetarian
Ingredients
- 1 1/2 cups vegetable oil
- 1 1/2 cups granulated sugar
- 2 large eggs
- 1 teaspoon vanilla extract
- 1 tablespoon red food coloring (liquid or gel)
- 1 teaspoon white vinegar
- 1 cup buttermilk
- 2 1/2 cups all-purpose flour
- 1 teaspoon baking soda
- 1 teaspoon salt
- 1 tablespoon unsweetened cocoa powder
- 1 cup cream cheese, softened
- 1/2 cup unsalted butter, softened
- 4 cups powdered sugar, sifted
- 1 teaspoon vanilla extract
Instructions
- Preheat your oven to 350 degrees F (175 degrees C). Grease and flour two 9-inch round cake pans.
- In a large bowl, whisk together the vegetable oil and granulated sugar until combined. Beat in the eggs one at a time, mixing well after each addition. Stir in the vanilla extract.
- In a separate small bowl, mix the red food coloring, white vinegar, and buttermilk. Set this aside.
- In a medium bowl, whisk together the flour, baking soda, salt, and cocoa powder.
- Gradually add the dry ingredients to the wet ingredients, mixing on low speed until just combined.
- Slowly pour the buttermilk mixture into the batter, mixing only until the batter is smooth. Do not overmix.
- Divide the batter evenly between the prepared cake pans.
- Bake for 30 to 35 minutes, or until a wooden pick inserted into the center comes out clean.
- Let the cakes cool in the pans for 10 minutes before inverting them onto a wire rack to cool completely.
- Prepare the cream cheese frosting: In a large bowl, beat the softened cream cheese and butter together until smooth.
- Gradually add the powdered sugar, beating until the frosting is light and fluffy. Mix in the vanilla extract.
- Once the cakes are completely cool, frost the layers and stack them.
Notes
- For the most vibrant red cake color, use a high-quality gel food coloring instead of liquid coloring.
- Authentic Southern Red Velvet Cake relies on the reaction between buttermilk and vinegar with the baking soda for its tender crumb.
- If you do not have buttermilk, mix 1 cup of whole milk with 1 tablespoon of white vinegar or lemon juice and let it sit for 5 minutes before using.
Nutrition
- Serving Size: 1 slice
- Calories: 450
- Sugar: 55g
- Sodium: 350mg
- Fat: 24g
- Saturated Fat: 10g
- Unsaturated Fat: 14g
- Trans Fat: 0g
- Carbohydrates: 60g
- Fiber: 1g
- Protein: 4g
- Cholesterol: 50mg