
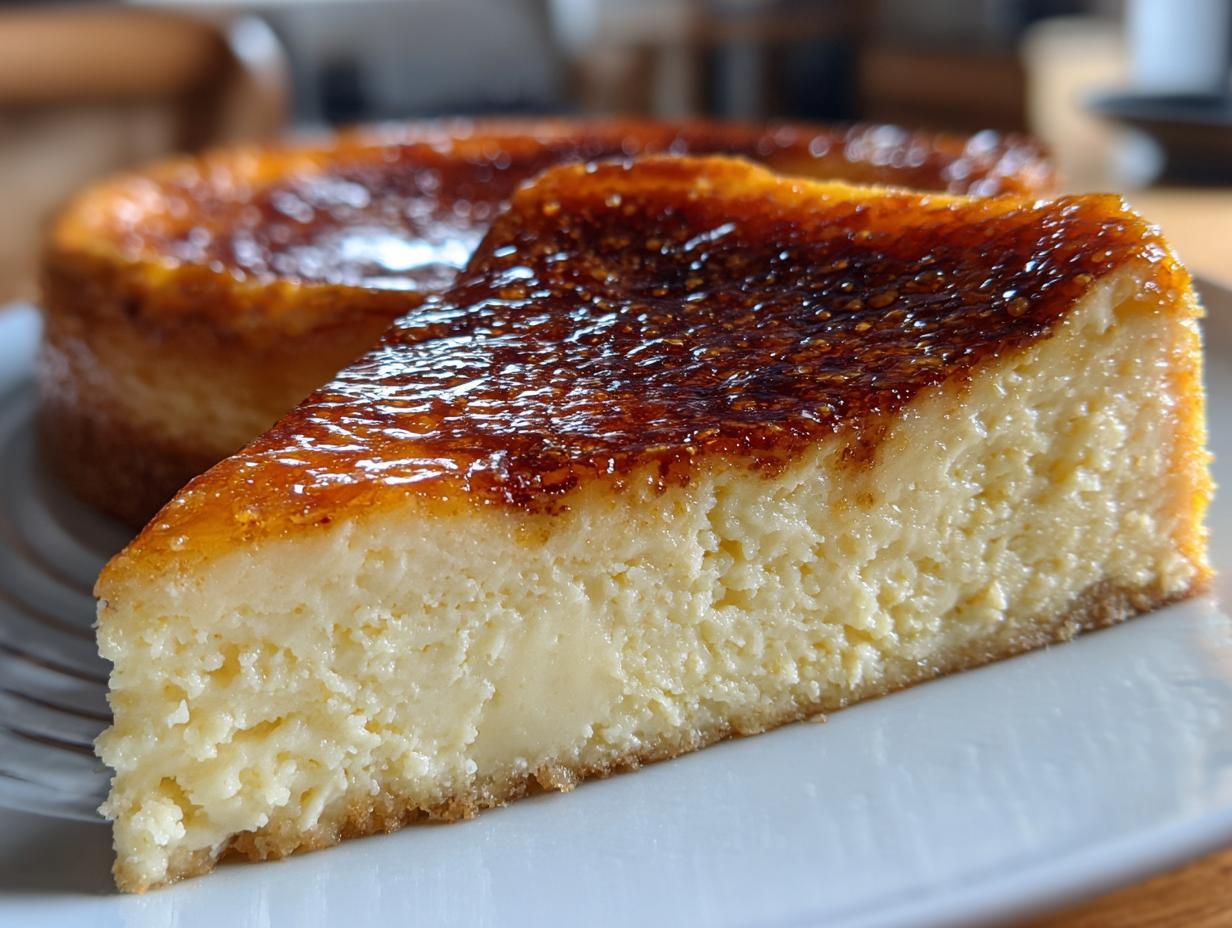
Some desserts just call out to be grand gestures, don’t they? When I think about the ultimate dessert fusion recipes, nothing beats the sheer decadence of the creme brulee cheesecake. Seriously, it takes that smooth, pure creaminess and marries it perfectly with that glorious, crunchy, burnt-sugar top. That’s why this recipe is so special to us here at Cookin’ Corner. My founder, Sarah Jane, built this entire kitchen mission on reliable, heart-felt classics, and this showstopper is no exception. Trust me, we’ve tested every step to make this the most indulgent dessert recipe you’ll try all year.
- Why This is the Best Creme Brulee Cheesecake Recipe
- Gathering Ingredients for Your Creme Brulee Cheesecake
- How to Make Creme Brulee Cheesecake: Step-by-Step
- Mastering the Caramelized Sugar Crust Dessert Topping
- Tips for the Easiest Creme Brulee Cheesecake
- Variations: From Mini Creme Brulee Cheesecakes to Bars
- Serving Suggestions for Your Decadent Cheesecake Dessert Mashup
- Storage and Reheating Instructions for Leftover Creme Brulee Cheesecake
- Frequently Asked Questions About This Dessert Fusion Recipe
Why This is the Best Creme Brulee Cheesecake Recipe
When you’re looking for a truly gourmet cheesecake idea, you need something that delivers on texture, and that’s where this creme brulee cheesecake recipe shines. It’s the ultimate cheesecake dessert mashup because it never compromises. You aren’t sacrificing that velvety texture for the fun crackle, and vice-versa. We’ve refined this combination until it just screams perfection.
- The filling is ridiculously rich because we use high-quality cream cheese and the secret addition of heavy cream!
- The crust is simple, buttery, and holds up perfectly without getting soggy—no fussy graham cracker process here.
- It’s designed to be a foolproof showstopper dessert idea for any gathering you host.
Achieving That Signature Crackly Topping
The whole point of a crème brûlée element is that satisfying *crack* when you tap it with a spoon, right? That only happens if your cheesecake is rock solid cold. Don’t even think about sprinkling that sugar on if the cheesecake is even slightly warm or room temperature. You have to chill yours for a minimum of six hours, honestly overnight is best. That deep chill keeps the sugar crisp when the torch hits it, resulting in that beautiful, hard, amber crust you’re dreaming of!
Gathering Ingredients for Your Creme Brulee Cheesecake
Before we get into the technique, we have to talk about what we’re putting into the bowl. Since this recipe is all about that luxurious, rich and creamy desserts vibe, the quality of your ingredients really does matter. We are aiming for a top-tier creamy baked cheesecake recipe here, remember? That means zero shortcuts on the dairy!
Here is what you’ll need lined up ready to go for your showstopper creme brulee cheesecake. I always use a small dish for each section so I don’t accidentally grab the wrong sugar!
For the Crust:
- 1 1/2 cups graham cracker crumbs (or digestive biscuits, crushed fine!)
- 1/3 cup granulated sugar
- 6 tablespoons unsalted butter, melted
For the Filling:
- 16 ounces cream cheese, make sure this is fully softened!
- 3/4 cup granulated sugar
- 3 large eggs
- 1 teaspoon vanilla extract
- 1 cup cold heavy cream
For the Topping:
- 1/2 cup granulated sugar (this is the special topping sugar)
Ingredient Notes and Substitutions for Creme Brulee Cheesecake
Listen, for the crust, you can absolutely use those lovely digestive biscuits if you prefer that slightly richer flavor over graham crackers. Either way, you want them ground down almost to a powder—we’re sealing the bottom, not making gravel!
The crucial bit for that amazing vanilla flavor in the filling of your creme brulee cheesecake? If you have a vanilla bean lying around, scrap the seeds from one pod and use those instead of the extract. It gives the cheesecake an elegant flecked appearance that screams gourmet cheesecake ideas. That’s my little secret for taking this creme brulee cheesecake from great to absolutely unforgettable. Don’t change the sugar for the topping; it must be plain white granulated sugar because that’s what torches perfectly!
How to Make Creme Brulee Cheesecake: Step-by-Step
Alright, let’s dive into the actual baking! This is where the magic happens, and I’m going to walk you through how to make a creme brulee cheesecake that’s guaranteed to wow everyone. Remember, patience is your best friend while we work on this how to make creme brulee cheesecake process.
Preparing the Crust and Filling
First up, that crust needs to go into your 9-inch springform pan after you’ve wrapped it up like a precious gift for the water bath—heavy-duty foil, three layers wrapping the outside bottom! Once the crust is set and cooled, let’s tackle that filling.
This is super important: always beat your softened cream cheese until it is absolutely, positively smooth before you even think about adding sugar. I mean velvety smooth! Once it’s happy, add the sugar, then the eggs one at a time. Seriously, mix only until the yolk disappears before adding the next one. Overmixing the eggs is what introduces air and causes cracks later on, and we want smooth, not airy!
The Crucial Water Bath Technique for Creamy Baked Cheesecake Recipe
Okay, this is the non-negotiable step if you want one of those luscious, rich and creamy desserts texture. You need a water bath, sometimes called a *bain-marie*. Place your foil-wrapped springform pan into a nice big roasting pan. Then, carefully pour *hot* water into the roasting pan until it comes about halfway up the sides of your cheesecake pan.
The steam from this hot water jacket keeps the oven interior humid and gentle. It cooks the custard slowly and evenly, making sure your caramelized sugar crust dessert comes out silky, not tough.
Cooling and Chilling: Secrets to a Crack-Free Creme Brulee Cheesecake
Don’t rush this part, please! Once the baking time is up and the edges look set but the middle still wobbles a tiny bit, turn off the oven. I mean it—turn it off completely! Prop the oven door open just a crack—a wooden spoon works great for this—and let your beautiful creme brulee cheesecake sit in that cooling environment for a full hour. This slow temperature decrease is the #1 secret for preventing that awful cracking around the top.
After the hour in the warm oven, take it out, let it finish cooling on the counter, and then it’s time for the fridge marathon. You need a minimum of six hours, but honestly, if you try to slice this before it’s chilled overnight, you’ll just have a sticky mess. Let that creme brulee cheesecake firm up completely!
Mastering the Caramelized Sugar Crust Dessert Topping
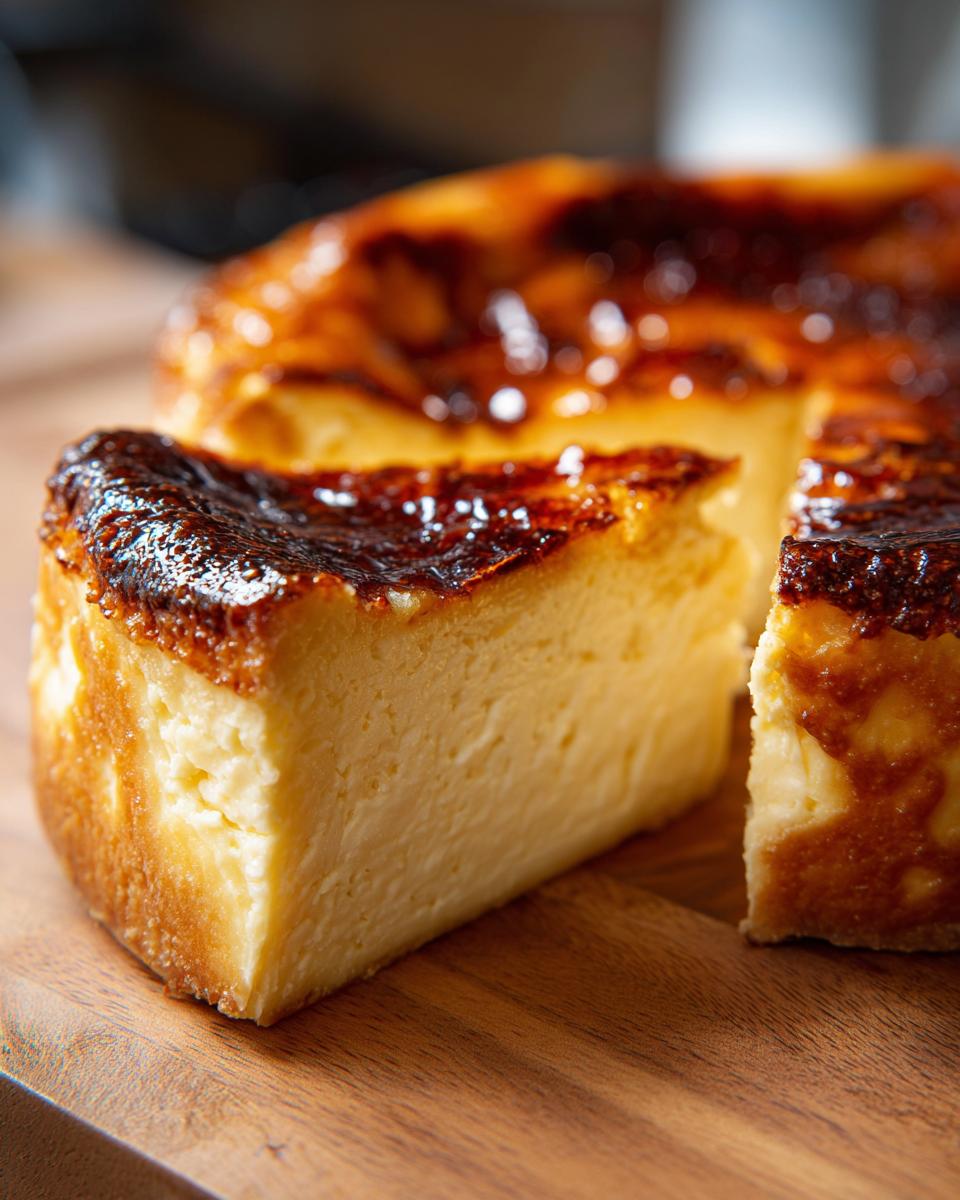
This is the grand finale, folks! If you follow all those chilling steps, your cheesecake should be perfectly smooth and firm—the ideal canvas for our final flourish. We are talking about the iconic caramelized sugar crust dessert topping, and it requires precision! Make sure your cheesecake is straight from the fridge when you start this part.
Take that 1/2 cup of white granulated sugar and sprinkle it evenly over the top. Don’t clump it up; you want a thin, consistent layer, otherwise, you’ll get patches that burn while others stay sugary. Now, grab your kitchen torch. Hold the flame about two inches above the sugar and move it constantly in small circles. Watch the magic happen! The sugar will bubble, melt, and turn a beautiful, deep amber color. That sound of the sugar hardening as it cools? Pure heaven!
Now, what if you don’t have a torch? Don’t panic! Sarah Jane says you can use your broiler in a pinch. Just stick that cheesecake under a *preheated* broiler (remember, high heat!), but you have to stand right there and watch it like a hawk. It only takes a minute or two, and it can go from perfect to burnt chocolate chip in three seconds flat! Either way, once that top layer is glossy and hard, your gorgeous cheesecake with torch topping is ready to serve!
Tips for the Easiest Creme Brulee Cheesecake
When I first started making these big, showstopping desserts that blend two incredible things together, I thought it was going to be impossible to classify as an easy creme brulee cheesecake. But Sarah Jane taught me that “easy” doesn’t mean fewer steps; it means setting yourself up for success! This isn’t hard, it just needs organization.
First tip: Room temperature ingredients are your absolute best friends for the filling. That cream cheese needs to be soft—like, truly soft—because if it’s cold, you’ll end up with those awful little cream cheese balls floating in your batter, and nobody wants that crumb!
My other big time-saver tip, especially if you’re busy, is making the crust the day before. Mix it up, press it into the pan, wrap it tightly, and stick it in the fridge. You can whip up the filling the next day and get it baking. It saves you about 20 minutes when you’re already working on the fussy filling parts.
Sarah Jane always says that the key to making any dessert fusion recipes less intimidating is focusing on one element at a time. Don’t look at the entire recipe for the creme brulee cheesecake; just focus on the crust first. Once that’s done, you can feel a win! Then you move to the filling. Don’t worry about the torch until the very last minute. Breaking down those big gourmet cheesecake ideas into smaller, doable tasks makes this luxurious treat feel totally manageable!
Variations: From Mini Creme Brulee Cheesecakes to Bars
I know a full 9-inch cheesecake sounds amazing, and hey, it’s definitely the most impressive showstopper, but sometimes you need something smaller, or maybe something easier to serve at a big party. That’s why people love experimenting with variations of the classic creme brulee cheesecake, like making them into bars or using molds for little individual treats.
We’ve made both the mini creme brulee cheesecakes and the bars, and honestly, they are just as delicious, just fuss-free in different ways!
Making Mini Creme Brulee Cheesecakes
If you want individual portions that look super proportional and cute, run the batter into a lined muffin tin. You can use standard liners or the little silicone cups. When you do this, the small size means they bake way faster than the big guy. Instead of 50 to 65 minutes, start checking them around the 20-minute mark. You want them lightly golden on top and jiggly in the middle, just like the big one.
The best part about the minis? You can torch each little one separately right before serving! It’s far less intimidating than torching a huge surface area all at once. You just get that perfect single-serving crunch every time. Plus, they’re perfect for testing out different crust options!
Creating Creme Brulee Cheesecake Bars
For those times when you need something sturdy you can slice and serve in squares—maybe for a potluck or a bake sale—the bar version of our creme brulee cheesecake is fantastic. You’ll want to bake this in a 9×13 inch pan, but you must line that pan really well with parchment paper, making sure the paper hangs over the sides like little handles.
Baking time definitely changes here too, since the layer of cheesecake filling is much thinner. It usually takes about 35 to 40 minutes total. Once chilled, you lift the whole square out using those parchment handles, slice it up, and then you torch the top of each square individually. It’s a brilliant way to get that same decadent flavor profile without having to deal with a tricky springform pan release!
Serving Suggestions for Your Decadent Cheesecake Dessert Mashup
So, you’ve navigated the water bath, endured the chill time, and achieved that crisp, crackly crown. Now what? You’ve got this gorgeous, rich creme brulee cheesecake sitting there, practically begging for the perfect partner. Because this dessert is so unbelievably rich and luxurious, you don’t want to weigh it down with heavy sides. We’re looking for contrast here, something bright and clean to cut through all that creamy goodness!
Sarah Jane always insists that if you’ve made something this intense, your additions should be simple elegance. Forget thick sauces that compete with that caramelized sugar crust dessert! We want compliments, not arguments on the plate!
- A Light Fruit Drizzle: A thin sauce made from raspberries or tart cherries works wonders. The slight acidity is the perfect counterpoint to the vanilla and butter flavor profiles in the cheesecake. I love quickly simmering some frozen berries with just a splash of water and a tiny bit of sugar until they break down, then running it through a fine-mesh sieve. It makes a gorgeous, ruby-red drizzle over the slice.
- Fresh Berries Only: If you don’t want to make a sauce, just serve a small pile of pristine, fresh raspberries or sliced strawberries right next to the slice. Their natural water content and tartness refresh your palate instantly.
- The Coffee Pairing: This is my favorite go-to, especially after a big dinner. This cheesecake is an ultimate treat, and it pairs beautifully with a strong, simple cup of coffee. A straight espresso or an Americano doesn’t compete with the flavor; it washes the richness away so you can go back for another bite of that creamy baked cheesecake recipe!
Keep the sides simple, let that torch-topped delight be the star, and you’ll have people raving about your masterpiece of dessert fusion recipes!

Storage and Reheating Instructions for Leftover Creme Brulee Cheesecake
This is a big, indulgent dessert, and honestly, if you’re lucky enough to have any slices left over, figuring out how to store that gorgeous caramel crust can be tricky. We’ve made plenty of creme brulee cheesecake in this kitchen, and I’ve learned one thing the hard way: do NOT torch the entire cake if you plan on saving it!
If you torch the whole thing and then put it away, that sugar crust absorbs moisture in the fridge. When you go to eat the leftovers the next day, the top will be soggy, sticky, and sad. We worked so hard for that perfect crackle, and we aren’t sacrificing it for laziness!
Here is the only way to properly store your leftover creme brulee cheesecake:
- Wrap the Untorched Cake: If you didn’t torch the top yet, wrap the entire chilled cheesecake tightly in plastic wrap, and then maybe wrap that in foil. Keep it in the fridge. It’ll last a good 3 to 4 days easily, staying beautifully creamy.
- Storing Slices (Torched or Not): If you did torch the top, or if you’re just saving a single slice, wrap that piece individually. Don’t stack pieces with plastic wrap touching the sugar top if it’s already caramelized.
The secret to enjoying leftovers of this best creme brulee cheesecake is simple: Only apply the new sugar layer to the slices you are about to eat. Slice the chilled, untopped cheesecake. Then, take just the slice you want, sprinkle a fresh, even layer of granulated sugar on top, and torch it right there on the plate. You get that fresh, hard, magical crunch every single time! It makes those leftovers feel like a brand-new, fresh-from-the-kitchen experience. You’ll never go back to eating a day-old torched crust again, trust me; this method keeps your creme brulee cheesecake just as decadent the second time around.
Frequently Asked Questions About This Dessert Fusion Recipe
I know these big, decadent recipes can bring up a few questions! When you’re mixing two classics together, like in this amazing cheesecake dessert mashup, the details really matter so you get that perfect result. We want you to feel confident walking into the kitchen!
Can I skip the water bath?
Oh, I wish I could tell you yes, but for a truly creamy baked cheesecake recipe like this caramelized sugar crust dessert, you really shouldn’t skip the water bath. It’s the only way we guarantee that velvety smooth texture—it mimics the gentle heat of a professional oven, preventing the cheesecake from setting too fast and cracking. If you bake it dry, it will likely dry out on the edges before the center is done, and we definitely don’t want a tough texture!
How long does the cheesecake have to chill?
This is probably the most common question I get! You *have* to chill it for at least six hours, but I’m strong-arming you into chilling it overnight—promise me you’ll do it! Cheesecake needs time to fully firm up after it cools slowly out of the oven. If you cut it early, it will slump, and you won’t get those clean slices you want for serving this decadent cheesecake tutorial creation. Plus, a super cold surface is non-negotiable for the crunchy topping!
What should I do if I don’t have a kitchen torch?
Don’t let a missing torch stop you from making this! The broiler method works, but you have to be actively watching it. Preheat your broiler to high. Place the fully chilled, sugared cheesecake on the highest rack possible (closest to the heat source) and watch it like a hawk. It might only take 60 to 90 seconds! Pull it out the second you see the sugar turn amber. You’ll still get that lovely caramelized sugar crust dessert finish!
Can I use low-fat cream cheese?
Please, stick to full-fat, brick-style cream cheese for this recipe! This creme brulee cheesecake recipe relies on that high fat content for its structure and that rich, decadent cheesecake tutorial flavor. Low-fat or whipped versions contain too much water, and that water will absolutely ruin the texture; it’ll be watery and won’t set right, which makes for a sad result for your gourmet cheesecake ideas.
Can I make the creme brulee cheesecake topping ahead of time?
No, absolutely not! This is the one thing you cannot prep early. That beautiful, hard, crackly sugar shell is only achieved when you sprinkle the sugar on the *coldest* surface possible and hit it with direct, high heat (the torch). If you torch the whole thing and then refrigerate it for even a few hours, it will start absorbing moisture from the air and the cheesecake itself. You want that satisfying shatter; make sure you only top the individual slices you are serving right before they go out to the table!
PrintClassic Crème Brûlée Cheesecake: A Showstopper Dessert
Make this rich and creamy baked cheesecake that combines the smooth texture of cheesecake with the signature crackly, caramelized sugar topping of a classic crème brûlée. This recipe is a decadent dessert fusion perfect for special occasions.
- Prep Time: 30 min
- Cook Time: 65 min
- Total Time: 7 hours 35 min
- Yield: 10 servings 1x
- Category: Dessert
- Method: Baking
- Cuisine: American Fusion
- Diet: Vegetarian
Ingredients
- 1 1/2 cups graham cracker crumbs
- 1/3 cup granulated sugar (for crust)
- 6 tablespoons unsalted butter, melted
- 16 ounces cream cheese, softened
- 3/4 cup granulated sugar (for filling)
- 3 large eggs
- 1 teaspoon vanilla extract
- 1 cup cold heavy cream
- 1/2 cup granulated sugar (for topping)
Instructions
- Preheat your oven to 325°F (160°C). Wrap the outside of a 9-inch springform pan tightly with heavy-duty aluminum foil to prevent water seepage.
- Prepare the crust: Combine graham cracker crumbs, 1/3 cup sugar, and melted butter. Press the mixture firmly into the bottom of the prepared springform pan. Bake for 10 minutes. Let cool slightly.
- Prepare the cheesecake filling: In a large bowl, beat the softened cream cheese until smooth. Gradually add 3/4 cup sugar and beat until combined. Beat in the eggs one at a time, mixing just until incorporated after each addition. Mix in the vanilla extract.
- Pour the cheesecake batter over the cooled crust.
- Bake the cheesecake in a water bath: Place the foil-wrapped springform pan inside a larger roasting pan. Carefully pour hot water into the roasting pan until it reaches halfway up the sides of the springform pan.
- Bake for 50 to 65 minutes, or until the edges are set but the center still jiggles slightly.
- Turn off the oven, crack the door open slightly, and let the cheesecake cool in the oven for 1 hour. This slow cooling helps prevent cracks.
- Remove the cheesecake from the water bath and foil. Cool completely on a wire rack, then chill in the refrigerator for at least 6 hours, or preferably overnight.
- Prepare the topping: Just before serving, sprinkle an even layer of 1/2 cup granulated sugar over the chilled cheesecake top.
- Caramelize the sugar: Use a kitchen torch to melt and brown the sugar until it forms a hard, amber-colored, crackly crust. Serve immediately.
Notes
- If you do not have a kitchen torch, you can place the sugared cheesecake under a preheated broiler for 1 to 2 minutes, watching constantly to prevent burning.
- For a vanilla bean flavor, use the seeds from one vanilla bean in the filling instead of just extract.
- This recipe works well for making individual mini creme brulee cheesecakes in a muffin tin using liners.
Nutrition
- Serving Size: 1 slice
- Calories: 450
- Sugar: 35g
- Sodium: 250mg
- Fat: 30g
- Saturated Fat: 18g
- Unsaturated Fat: 12g
- Trans Fat: 0.5g
- Carbohydrates: 40g
- Fiber: 1g
- Protein: 8g
- Cholesterol: 120mg