
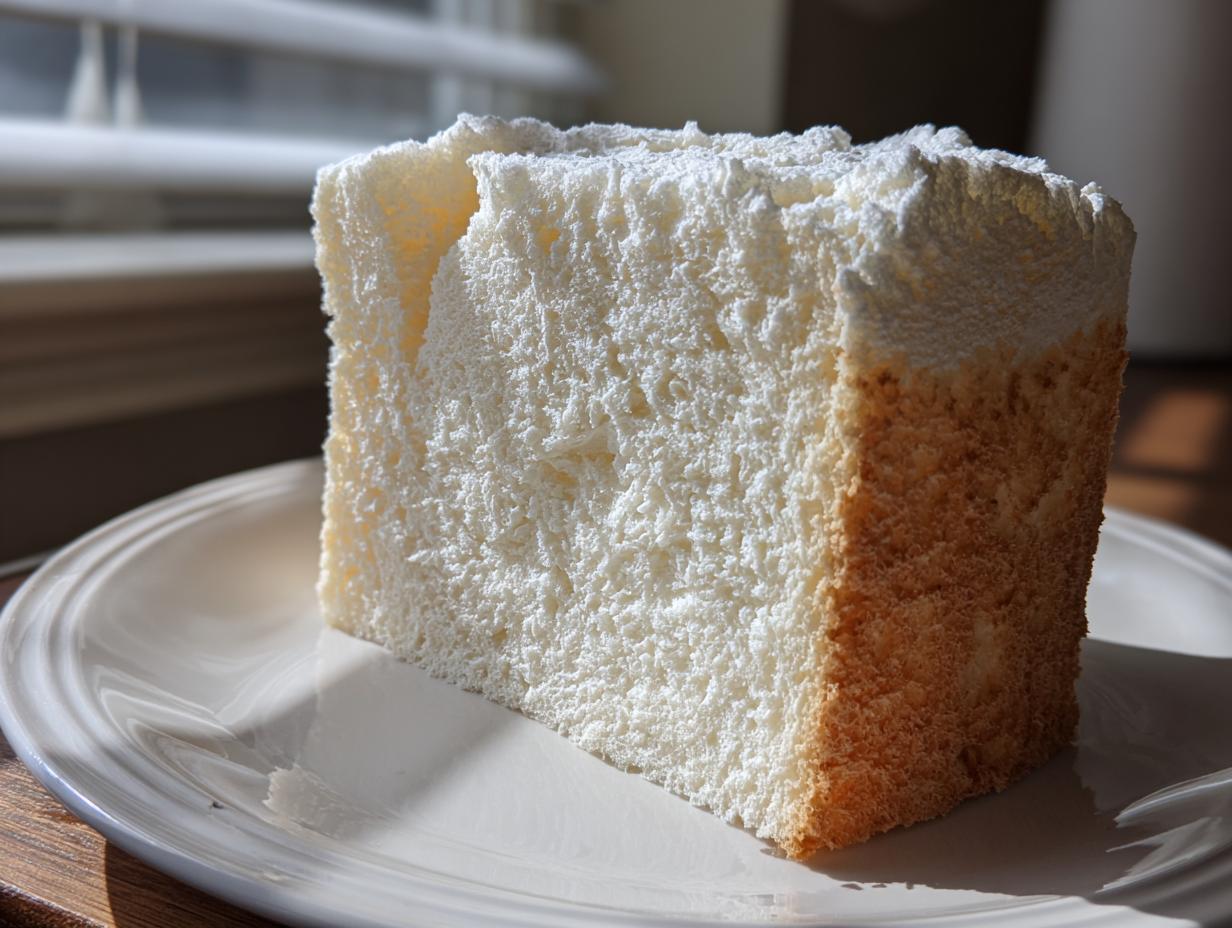
Have you ever held a piece of cake so light it felt like you were biting into a cloud? That’s the magic we’re capturing today! Baking the **Best Homemade Angel Food Cake** isn’t nearly as scary as people think; it’s actually one of the most rewarding, wonderfully airy, and totally fat-free desserts you can ever make from scratch. I remember standing on a stool watching my grandmother whip egg whites into towering peaks. She always said that if you respected the air you whipped in, the cake would reward you by tasting like true heaven. Trust me, this classic recipe delivers that melt-in-your-mouth texture every single time. For more of our favorite classic desserts, check out our full collection right here at Cookin’ Corner.
- Why This Classic Angel Food Cake Recipe Works Every Time
- Ingredients for the Best Homemade Angel Food Cake
- Step-by-Step Instructions for Perfect Angel Food Cake
- Angel Food Cake Tips and Tricks for Success
- Delicious Angel Food Cake Variations
- Storage and Reheating Instructions for Angel Food Cake
- Frequently Asked Questions About Angel Food Cake
- Estimated Nutritional Snapshot for Angel Food Cake
- Share Your Angel Food Cake Creations
Why This Classic Angel Food Cake Recipe Works Every Time
Lots of recipes promise the world, but they end up leaving you with something dense and chewy. Not this one! This is where you see the difference between a good cake and a truly glorious **Light and Airy Cake Recipe**. We rely on time-tested methods, not additives, to get that incredible height and texture associated with a perfect **Fluffy White Cake**. It’s amazing how something so beautiful can be entirely fat-free, too! That’s the secret power of meticulously whipped egg whites.
If you need something quick but still elegant for a last-minute gathering, you can see why this recipe is among our most trusted easy, quick recipes. It uses just a handful of basic ingredients but demands a little bit of patience with the technique, which is always worth it.
- It delivers unmatched height and an incredibly light texture.
- It is naturally fat-free—a brilliant light option!
- The technique, once mastered, becomes second nature.
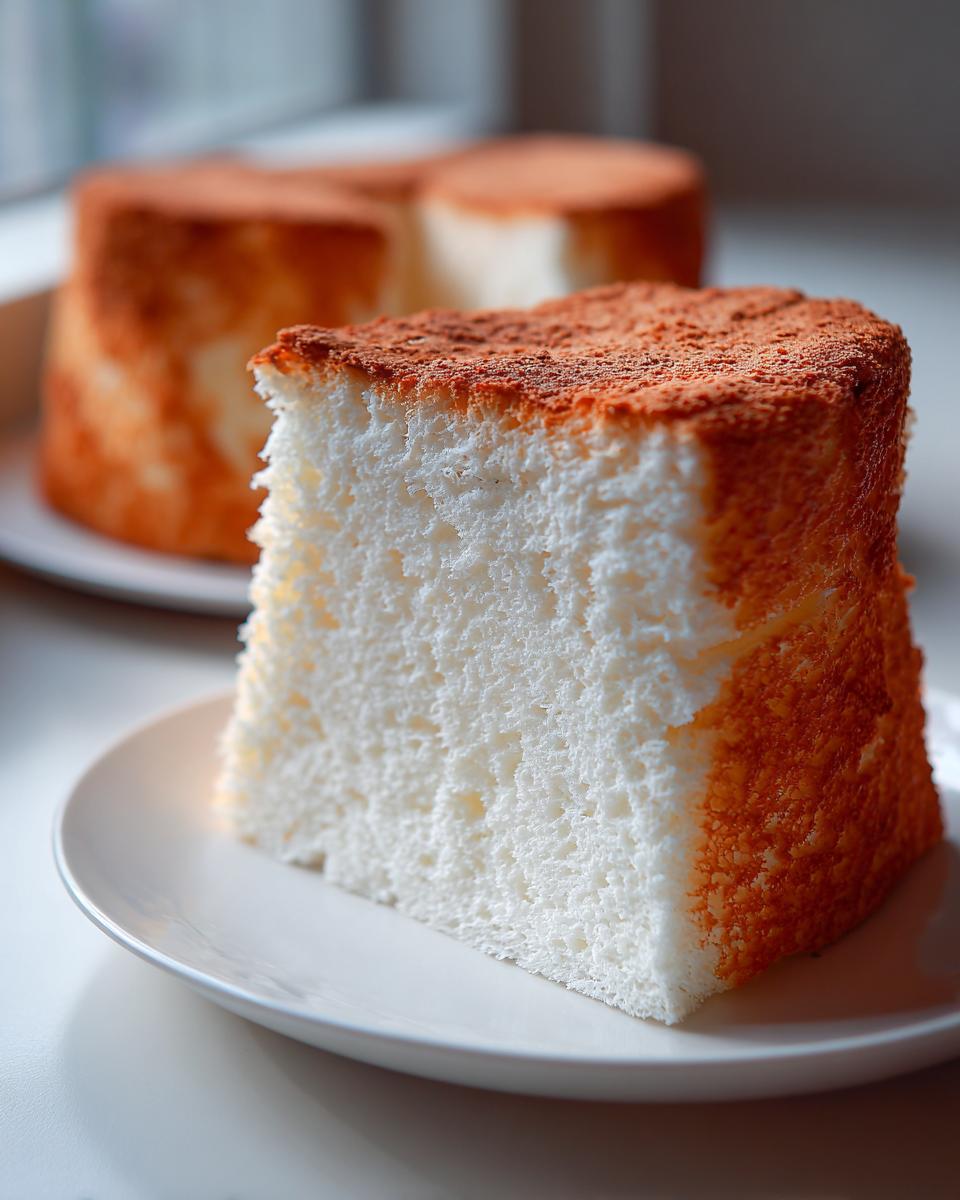
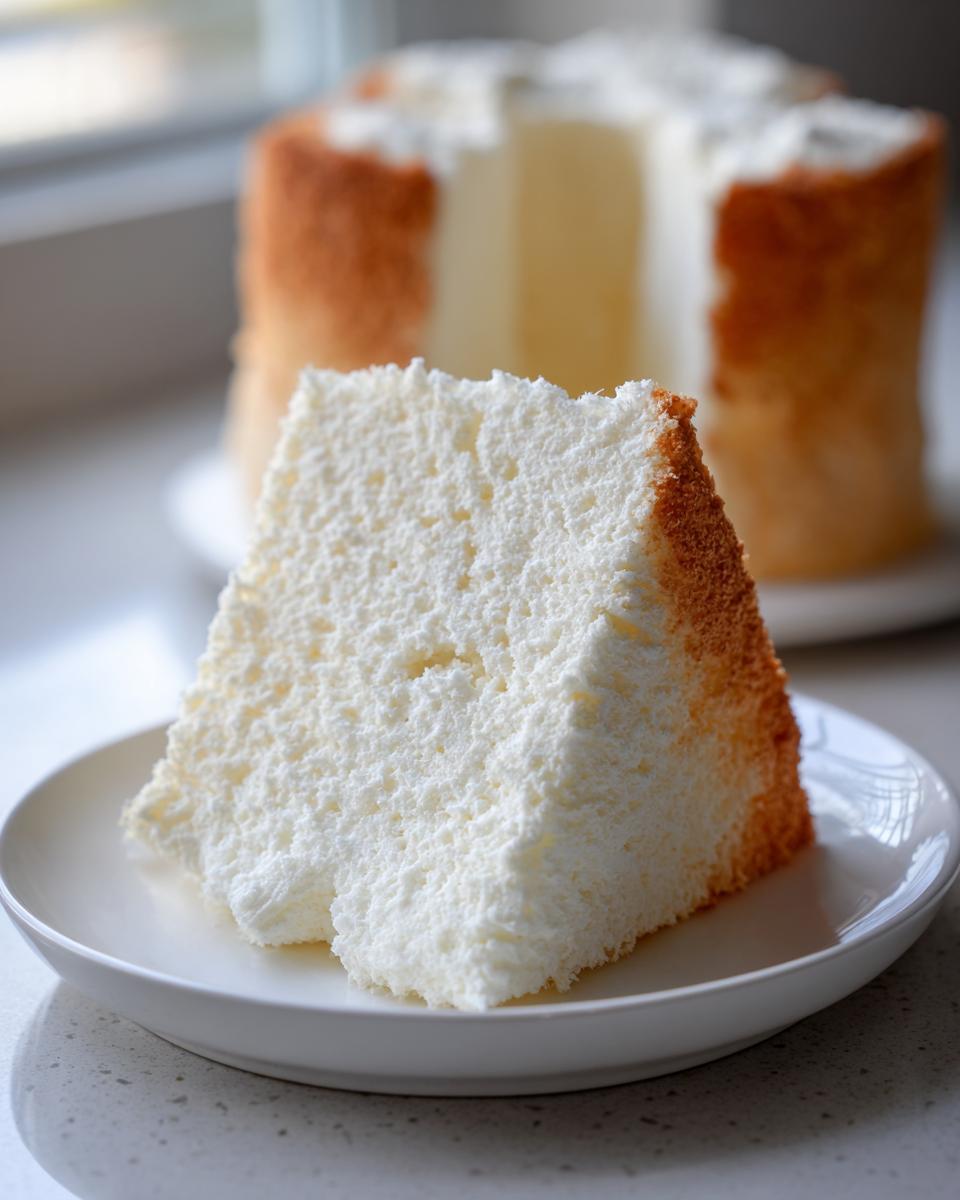
Achieving That Heavenly Cloud Cake Texture
The texture is all about physics, really! The egg whites create the entire structure of the **Angel Food Cake**. They trap the air when whipped, and that air needs something to hold onto while baking. That’s why we never, ever grease the tube pan. The batter needs those clingy sides to climb up and maintain that stunning height. When you follow the folding gently steps, you are locking in that airy suspension until it sets in the oven.
Ingredients for the Best Homemade Angel Food Cake
When you decide to bake this **Angel Food Cake From Scratch**, you’ll notice it calls for very few things, but each one needs to be measured perfectly because there’s no fat or yolks to mask any measurement errors! This recipe is all about precision and beautiful egg whites. Remember to check out our tips on best desserts using egg whites if you ever end up with extra. Here is exactly what you’ll need for this classic, fluffy white cake:
- 1 ½ cups egg whites (about 12 large eggs), room temperature
- 1 ½ teaspoons cream of tartar
- 1 teaspoon vanilla extract
- ½ teaspoon almond extract
- 1 ½ cups superfine granulated sugar, divided
- 1 cup sifted cake flour
- ¼ teaspoon salt
Step-by-Step Instructions for Perfect Angel Food Cake
Alright, here is where the real magic happens! Making an **Angel Food Cake** is all about rhythm and being incredibly gentle. First things first, preheat that oven to 350°F (175°C) and make absolutely sure your 10-inch tube pan is totally clean and ungreased—I mean it, no grease whatsoever! If you’re wondering about my biggest secret for volume, it’s room temperature egg whites. Cold whites just won’t get as lofty. My grandmother always made sure her whites sat out for at least an hour before she started whipping. Now, let’s get to work on these airy layers. You can find some fun ideas for serving this delicate cake in our guide to easy celebration cakes once it’s cooled!
Whipping the Egg Whites to Stiff Peaks for Your Angel Food Cake
This step sets the stage for that wonderfully **Fluffy White Cake** texture we’re aiming for. Get your mixer going on the egg whites and the cream of tartar until you see soft peaks—you know, the fluffy little waves that flop over slightly. Now, here’s where you slow down: start raining in that superfine sugar very, very gradually, maybe a tablespoon at a time. As you keep beating on high, watch for the transformation! You’re aiming for stiff, glossy peaks that stand up tall and proud. Seriously, when you lift the whisk attachment, those peaks should be able to hold their shape without bending. If you feel confident, gently turn the bowl upside down over your head—just kidding! But they need to be that firm.

Gently Folding in Dry Ingredients for Light Angel Food Cake
Once those whites are perfect, we have to introduce the flour mixture without knocking out all that lovely air we just whipped in. This is crucial for your **Light and Airy Cake Recipe**! Sift about one-third of your dry mixture (flour, salt, remaining sugar) right over the top of the whites. Using a big spatula, fold it in using smooth, deliberate strokes—think gentle under-and-over motions, not vigorous stirring. Stop stirring just when you can barely see the flour streaks. Repeat this two more times with the remaining flour. Don’t forget that final ½ cup of sugar sprinkled over the top right at the end; fold that in carefully too. The goal is integration, not agitation!
Baking and Cooling Your Angel Food Cake Upside Down
Spoon that airy batter right into that ungreased tube pan and smooth the top, maybe running a knife through it just once to pop any massive air bubbles. Bake it high and slow for about 35 to 40 minutes. You’ll know it’s done when the top gently springs back if you tap it lightly. But listen close, this part is non-negotiable for your **Angel Food Cake**: right when it comes out of the oven, you must immediately invert the pan! If your pan doesn’t have little feet, balance the center tube over the neck of a sturdy bottle. Cooling it upside down—for a good hour and a half—is what keeps the cake from collapsing under its own weight. If you skip it, you’ll end up with a flat, sad cake, and trust me, that is heartbreaking.

Angel Food Cake Tips and Tricks for Success
When you’re making something this delicate, having a few insider secrets really helps! We’ve collected the best **Angel Food Cake Tips and Tricks** that make the difference between a good cake and that stunning **Heavenly Cloud Cake** texture we love so much. Remember what I said about room temperature egg whites? That’s Tip Number One! Cold whites just won’t create the necessary volume for a truly successful cake.
My other big piece of advice involves the pan. You absolutely cannot grease that tube pan. Seriously, rub it out of your mind! The batter needs to grip the metal sides as it rises upward and then cools down. If it’s slick, it just slides down and collapses. We want that cling! Plus, make sure you sift that cake flour twice—once before measuring and again right before you fold it in. This extra step lightens the flour significantly and keeps your finished **Angel Food Cake** wonderfully delicate. For more wonderful dessert ideas, take a look over at our dessert recipe collection.
Delicious Angel Food Cake Variations
Once you master the basic **Angel Food Cake**, it’s so tempting to play around with the flavor profile! This cake is just begging to be dressed up for any season. It’s definitely one of my favorite **Summer Dessert Recipes** because it’s so light and cooling. You can easily add in some finely grated lemon or orange zest right along with your vanilla and almond extracts for a bright, citrusy twist. That’s a simple way to create a whole new experience without changing the foundational whipping technique.
It also makes a fantastic base for layered desserts, especially as we move into warmer weather and look for pretty **Spring Baking Ideas**! You simply slice it and layer it up.
If you want to try some other fruit-flavored classics, you should really see my recipe for vintage maraschino cherry cake—it offers a totally different, richer vibe!
Serving Your Angel Food Cake with Berries
The most classic way to serve this fluffy creation, in my opinion, involves fresh fruit. A simple mound of mixed, slightly macerated berries is perfect. We call this **Angel Food Cake with Berries**, and it requires zero extra baking effort. Just a little bit of whipped cream or a thin glaze on top, and you have a showstopper. It keeps the focus entirely on that wonderfully airy texture.
Storage and Reheating Instructions for Angel Food Cake
Keeping this delicate **Heavenly Cloud Cake** perfect requires a little care since it lacks the preserving power of fat. Honestly, the best way is to eat it right away, but if you need to wait, slice it only when you’re ready to serve!
Store extra slices loosely covered at room temperature for up to three days. Don’t seal it tight in plastic; that traps moisture and makes it sticky. If you absolutely must freeze it, wrap tightly in plastic wrap, then foil, and thaw overnight in the fridge. You don’t really ‘reheat’ angel food cake—just let it come to room temperature to enjoy that beautiful airy texture again!
Frequently Asked Questions About Angel Food Cake
I get so many questions about this recipe—which tells me you all are ready to tackle the ultimate **light and airy cake recipe**! It’s completely normal to have a few worries when dealing mostly with egg whites, but I promise, once you try it, you’ll see how straightforward this **Easy Angel Food Cake Recipe** really is. Here are some of the things folks ask me most often in my inbox.
Can I make this Angel Food Cake recipe ahead of time?
You sure can! While this cake is best eaten the day it’s made because of its delicate texture, it holds up well for about two to three days stored loosely covered at room temperature. Don’t try to bake a full **Angel Food Cake** more than a day in advance, as it starts to lose that amazing cloud-like quality. If you plan on glazing it heavily, wait until just before serving to apply the topping.
What is the difference between Angel Food Cake and Sponge Cake?
This is a great question that zeroes right in on why this is such a wonderful **Fat Free Dessert**! The main difference comes down to fat. Angel Food Cake uses absolutely zero fat—no butter, no oil, no egg yolks—relying entirely on those perfectly whipped egg whites for structure. A traditional sponge cake, though also light, usually contains some melted butter or oil for richness, which changes the final texture slightly. Ours is pure air!
Why did my Homemade Angel Food Cake sink after cooling?
Oh, that’s the classic heartbreak moment! If your **Homemade Angel Food Cake** collapsed, it almost always comes down to one of two things that we talked about in the main instructions. Either you didn’t whip your egg whites quite stiff enough before folding, so the structure couldn’t support itself, or—and this is the big one—you didn’t cool it completely upside down. Leaving it inverted allows gravity to stretch the fragile structure back into shape while it sets. If you take it out too soon, poof! Flat cake.
Estimated Nutritional Snapshot for Angel Food Cake
Just because this **Angel Food Cake** tastes like pure indulgence doesn’t mean you have to feel guilty! Remember, this is a naturally low-calorie, truly **Fat Free Dessert** because we skip all the butter and yolks. I always say that knowing the rough breakdown helps when planning a party menu. Please keep in mind that these numbers are just estimates based on the recipe amounts provided using standard ingredients. For a deeper look at lighter options, you can always browse our healthy recipes section!
- Serving Size: 1 slice
- Calories: 150
- Fat: 0g
- Carbohydrates: 32g
- Protein: 4g
Share Your Angel Food Cake Creations
Well, that’s it! You’ve just created a masterpiece—a wonderfully light, truly **Classic Angel Food Cake** that proves you absolutely don’t need fat to make a dessert memorable. I worked so hard perfecting this recipe, and seeing it come out of your oven is the best part of my day!
If you made this recipe and felt like you genuinely bit into a piece of heaven, please leave a rating on the recipe card below! Your feedback truly helps other bakers feel confident trying this tricky-sounding but ultimately simple cake. I love seeing how you serve yours, too. Snap a picture of your fluffy creation—maybe frosted with a simple glaze or piled high with fresh strawberries—and tag us on social media! We always feature our favorites.
If you ever need help or just want to share a baking story, don’t hesitate to reach out to us via the Contact page. Happy baking, friends!
PrintThe Best Homemade Angel Food Cake: Light, Airy, and Fat-Free
You can create a truly light and airy Angel Food Cake from scratch. This classic recipe relies on perfectly whipped egg whites for its signature fluffy texture, making it a delicious, fat-free dessert perfect for any celebration.
- Prep Time: 25 min
- Cook Time: 40 min
- Total Time: 2 hours 5 minutes
- Yield: 10 servings 1x
- Category: Dessert
- Method: Baking
- Cuisine: American
- Diet: Low Fat
Ingredients
- 1 ½ cups egg whites (about 12 large eggs), room temperature
- 1 ½ teaspoons cream of tartar
- 1 teaspoon vanilla extract
- ½ teaspoon almond extract
- 1 ½ cups superfine granulated sugar, divided
- 1 cup sifted cake flour
- ¼ teaspoon salt
Instructions
- Preheat your oven to 350°F (175°C). Do not grease your 10-inch tube pan (the one with the removable bottom).
- In a large, clean bowl, combine the egg whites and cream of tartar. Beat with an electric mixer on medium speed until soft peaks form.
- Add the vanilla and almond extracts. Gradually increase the speed to high and beat until stiff, glossy peaks form. You should be able to turn the bowl upside down without the whites moving.
- In a separate bowl, whisk together 1 cup of the superfine sugar, the sifted cake flour, and salt.
- Gently fold the flour mixture into the egg whites in three additions. Sprinkle one-third of the flour mixture over the whites, fold gently until just combined, then repeat with the remaining flour mixtures. Do not overmix; you want to keep the air in the batter.
- Take the remaining ½ cup of superfine sugar and sprinkle it over the batter. Fold it in very carefully until it disappears into the mixture.
- Gently spoon the batter into the ungreased tube pan. Run a knife through the batter to release any large air pockets.
- Bake for 35 to 40 minutes, or until the top springs back lightly when touched.
- Immediately invert the pan onto the neck of a bottle or use the pan’s feet if it has them. Cool completely upside down, about 1.5 hours. This cooling process prevents the cake from collapsing.
- Once cool, run a thin knife around the edges of the pan to release the cake. Invert onto a serving plate. Slice with a serrated knife.
Notes
- Use room temperature egg whites; they whip up to a greater volume than cold whites.
- Sift your cake flour before measuring and again before adding it to the egg whites to keep the cake light.
- Do not grease the pan. The batter needs to cling to the sides of the pan as it bakes and cools to achieve maximum height.
- Serve this Heavenly Cloud Cake with fresh berries or a light dusting of powdered sugar.
Nutrition
- Serving Size: 1 slice
- Calories: 150
- Sugar: 28g
- Sodium: 75mg
- Fat: 0g
- Saturated Fat: 0g
- Unsaturated Fat: 0g
- Trans Fat: 0g
- Carbohydrates: 32g
- Fiber: 0g
- Protein: 4g
- Cholesterol: 0mg