
Oh, the smell of the holidays! For me, nothing screams ‘home’ quite like that warm, sweet scent of peanut butter baking, instantly pulling me back to my grandmother’s Midwest kitchen. We always had a plate of these out, no matter the occasion, but they truly shine at Christmas. That’s why I’ve spent years perfecting this BEST Classic Soft & Chewy Peanut Butter Blossoms Recipe. Forget those dry, crumbly ones you sometimes get; we are aiming for that perfect, melt-in-your-mouth bite every single time.
This isn’t just a recipe; it’s tradition preserved. Making these Peanut Butter Blossom Cookies from scratch is my way of pouring a little bit of that early love and memory right onto your cookie sheet. If you want the absolute best texture—soft, tender, and oh-so-chewy—you’ve come to the right corner of the internet. Trust me, these are keepers that will become part of your family’s story, too. Ready to make some magic? Make sure you check out my recipe for soft gingerbread cookies while you’re heating up that oven!
- Why This is the Best Peanut Butter Blossom Recipe You Will Ever Make
- Ingredients for Classic Peanut Butter Blossoms
- Step-by-Step Instructions for Homemade Peanut Butter Blossoms
- Tips for Perfect Traditional Holiday Baking with your peanut butter blossom
- Variations for Chewy Peanut Butter Kiss Cookies
- Storage & Make-Ahead Tips for peanut butter blossom Cookies
- Serving Suggestions for Festive Peanut Butter Treats
- Frequently Asked Questions about the peanut butter blossom
- Estimated Nutritional Data for This Recipe
Why This is the Best Peanut Butter Blossom Recipe You Will Ever Make
I can promise you this is the best recipe because I obsessed over texture until it was perfect. We aren’t messing around with cookies that crackle and crumble the second you look at them! These Soft Peanut Butter Cookies are specifically formulated to be deeply flavorful with that classic, comforting peanut butter taste, while staying wonderfully chewy. They genuinely are melt in your mouth cookies, but they hold up just beautifully enough to receive that chocolate kiss sinkhole perfectly.
The real secret weapon here, and why I love sharing this, is that this dough is ready to go the minute you mix it. No waiting around! I know how frantic holiday baking can get, so we skipped the chilling step entirely. That’s right—this is a true no chill cookie dough recipe, meaning you can have trays of these cooling before your neighbors even start pulling out their mixers.
Achieving the Perfect Soft Peanut Butter Blossom Cookies Texture
It all comes down to the ingredients meeting at the right time. We use both brown and white sugar, which helps keep moisture locked in. The absolute key, though, is how you combine them with the butter and peanut butter first to build air—that’s your foundation for softness. And please, for my sake, don’t leave them in the oven too long! They should still look a little pale and puffy when you pull them out. Trust me, they finish setting up once you press that sugar cookie recipe’s cousin, the kiss, right in the middle.
Ingredients for Classic Peanut Butter Blossoms
When you’re making something as classic as this, precision matters, even if I always preach about kitchen intuition! This list is exactly what I use every time for the best results. I’ve laid it out in the order you’ll use them, which helps keep the process smooth. You can find my favorite recipe for chewy lemon cookies if you need another batch ready for the holidays!
Remember, your base cookie dough needs to be rich and slightly fatty to stay soft, which is why we use a full cup of butter alongside that peanut butter. Don’t skimp on good quality chocolate kisses, either—they are the star of the show!
- 1 cup unsalted butter, softened (make sure it’s nice and pliable!)
- 1 cup creamy peanut butter (I stick to the Jif/Skippy style for texture, not the natural runny stuff here)
- ¾ cup granulated sugar
- ¾ cup packed brown sugar (packed tight, that molasses is our friend!)
- 2 large eggs (room temperature is always best for mixing)
- 1 teaspoon vanilla extract
- 2 ¼ cups all-purpose flour
- 1 teaspoon baking soda
- ½ teaspoon baking powder
- ½ teaspoon salt
- About 1 cup extra granulated sugar for rolling (this gives that perfect crackled coating)
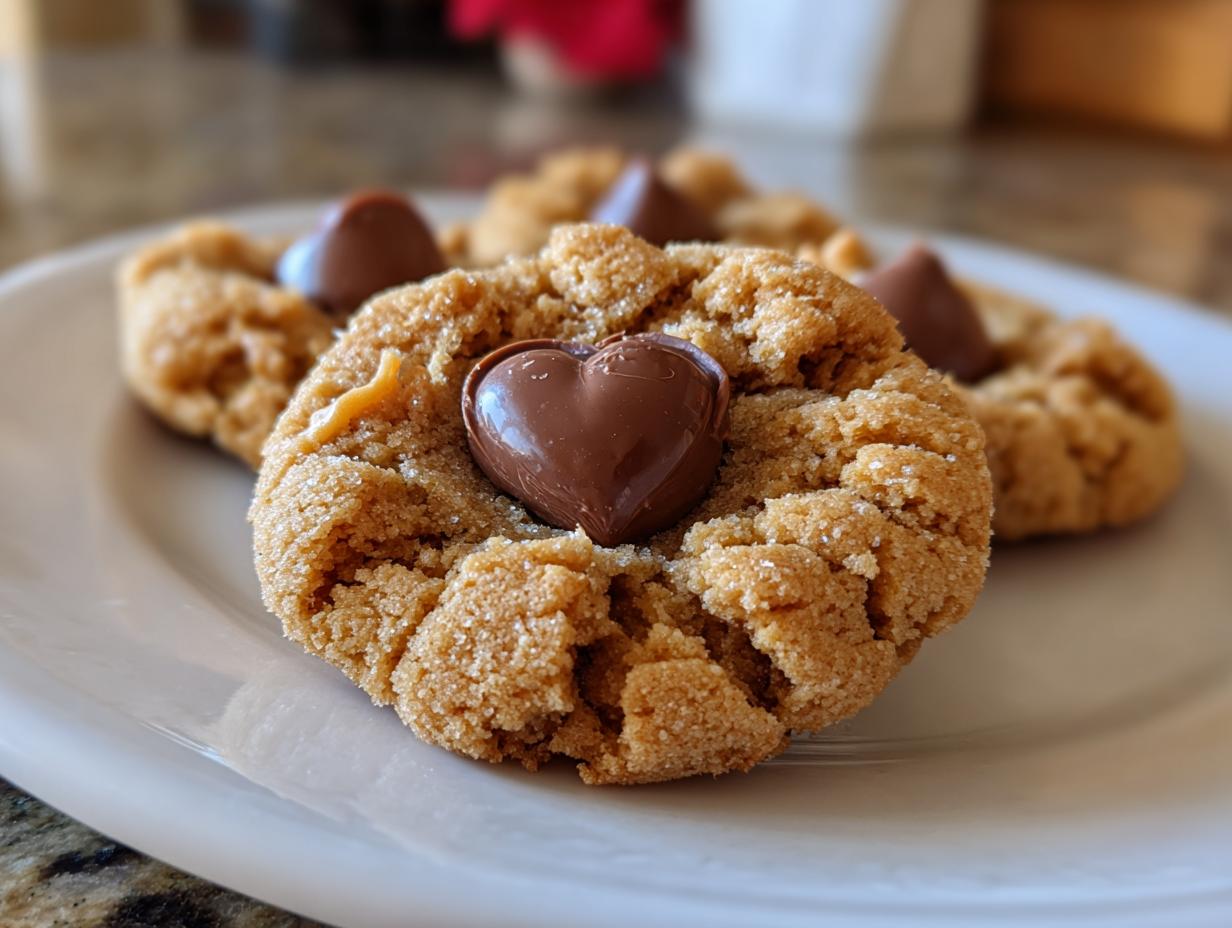
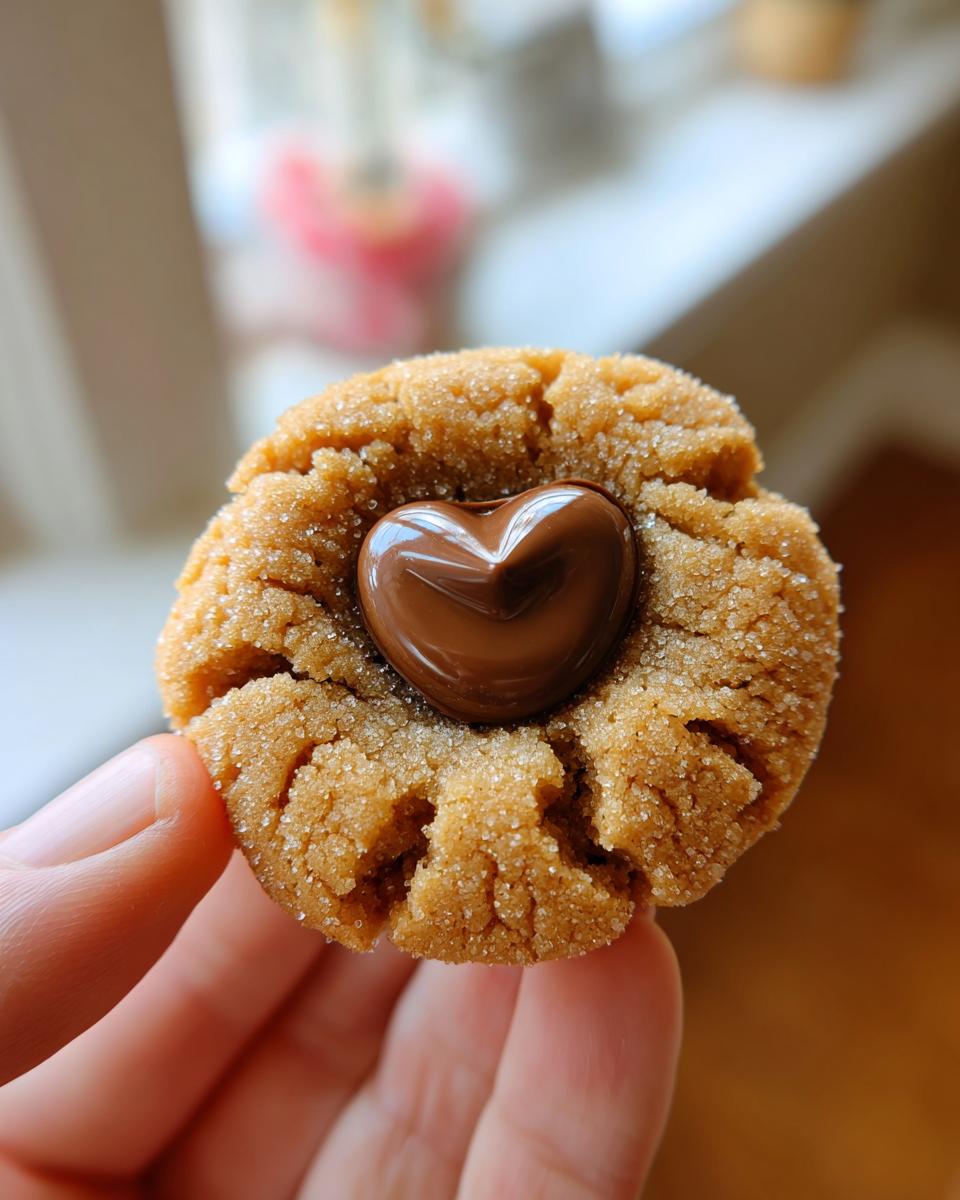
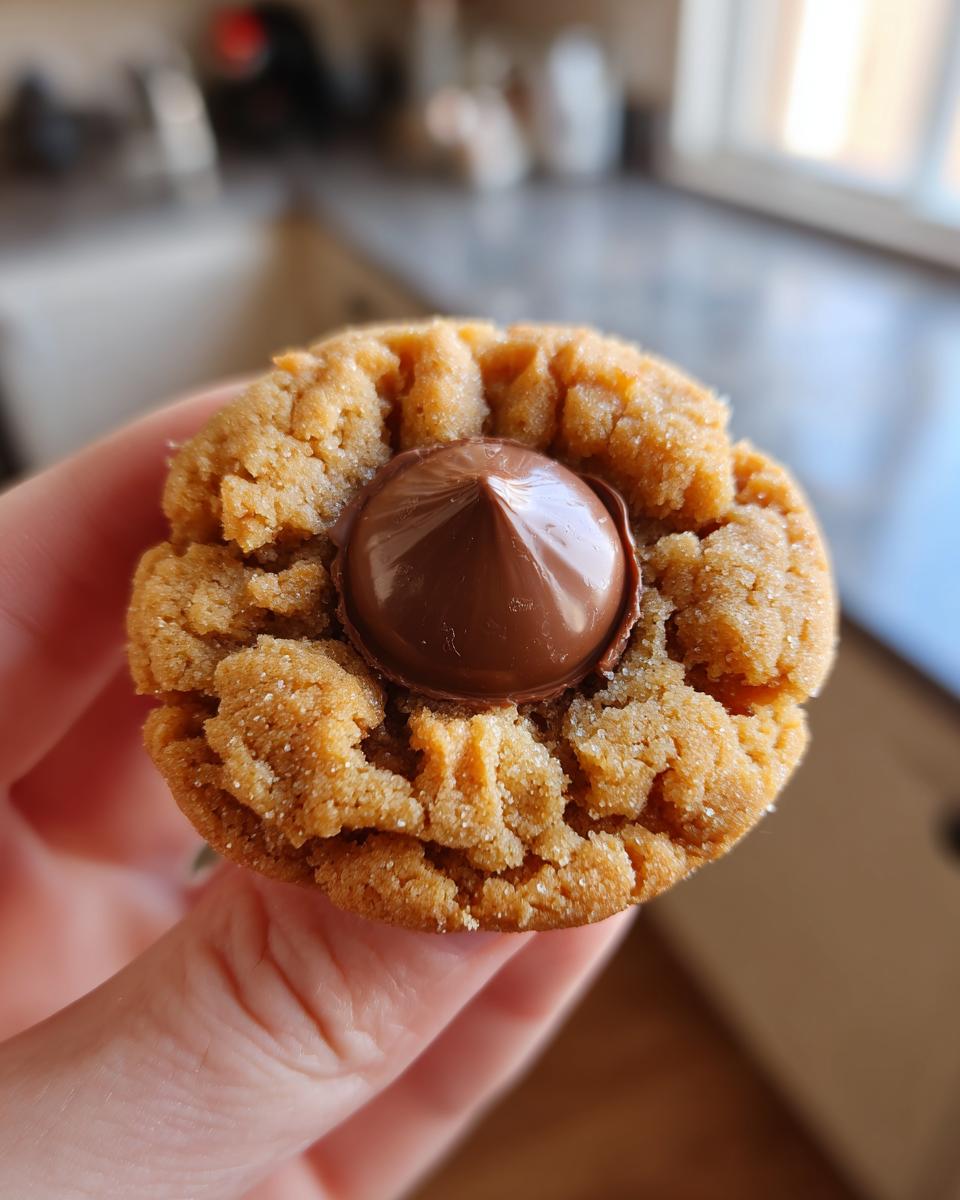
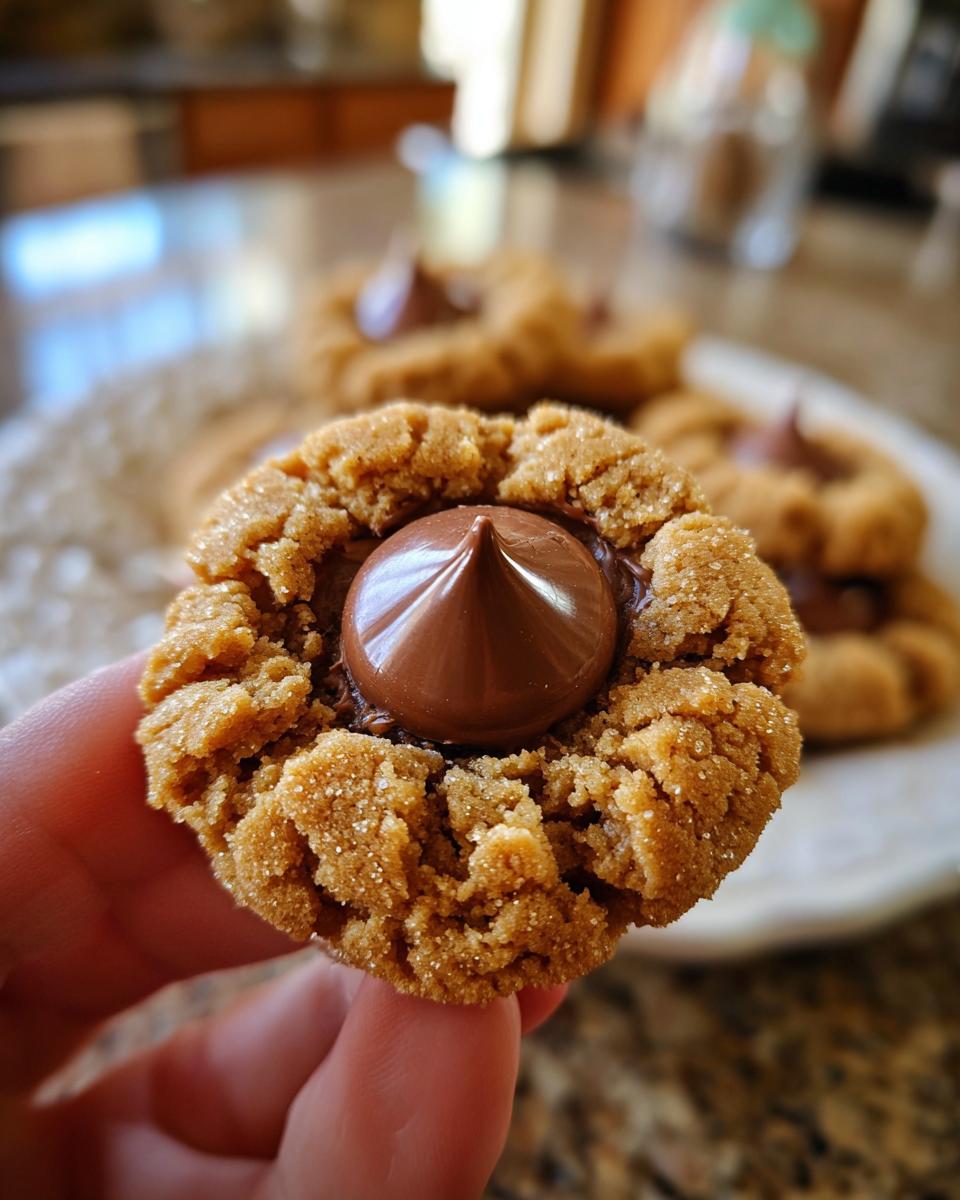
- 1 bag (12 ounces) Hershey’s Kisses, unwrapped (they must be unwrapped ahead of time—trust me on this kitchen chaos tip!)
Having all your ingredients sitting out and ready before you even turn on the mixer makes the whole process feel less like work and more like fun. It’s just good kitchen practice!
Step-by-Step Instructions for Homemade Peanut Butter Blossoms
Alright, the ingredients are ready, the mixer is calling, and you can almost smell that amazing peanut butter aroma already! Making these Homemade Peanut Butter Blossoms is shockingly fast if you follow these steps. Remember, we are moving quickly, but gently. If you ever need a good palate cleanser after all that rich peanut butter, check out my recipe for snickerdoodles—they’re always a hit!
Mixing the Peanut Butter Blossom Dough Base
First things first, get that oven hot—375 degrees is where we want to be, and line those sheets with parchment paper so you don’t have to scrape anything later. Now, grab your largest bowl. We need to cream the butter, both sugars, and that creamy peanut butter until it looks light and fluffy. Get some air in there! Once that looks perfect, add the eggs one at a time, mixing well after each one goes in, followed by the vanilla. In a separate bowl, whisk the dry things—flour, soda, powder, and salt.
When you add the dry bowl to the wet, use low speed and stop mixing the second you don’t see any more streaks of flour kicking up. Overmixing makes tough cookies, and we are aiming for tender here!
Rolling and Baking Your Peanut Butter Blossom Cookies
Pour your extra sugar into a shallow pie plate. Roll your dough into neat 1-inch balls—you should get about three dozen. This is crucial: roll that ball completely, like a snowglobe, until no peanut butter dough shows through the sugar coating. Place them about two inches apart on your prepared sheets.
Bake them for 8 to 10 minutes. You are looking for them to look puffy and set, but honestly, they should look slightly underdone in the very center. I know it feels wrong, but trust me! As soon as they come out, that glorious peanut butter smell fills my kitchen, and that’s my cue to rush.
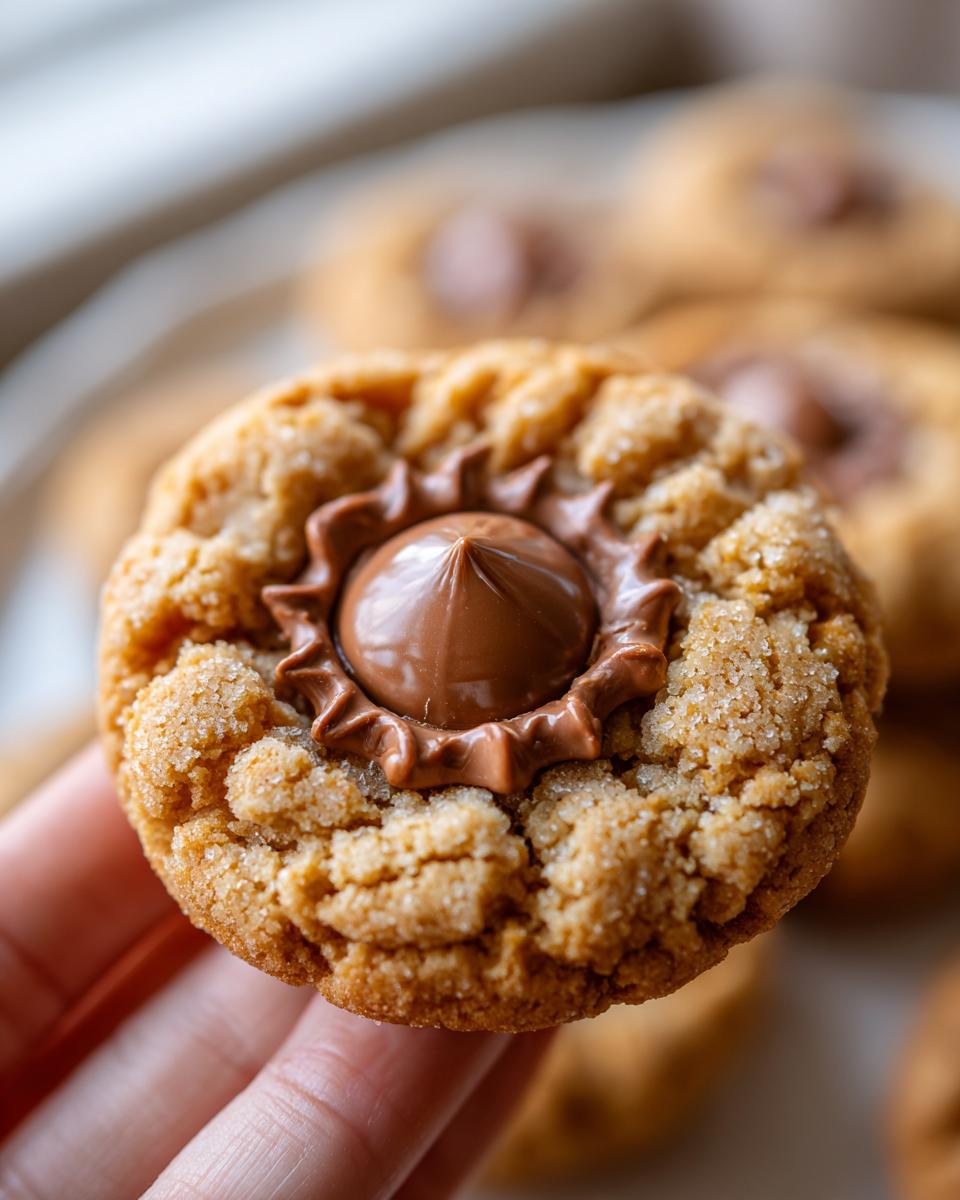
The Essential Hershey Kiss Finish for Every peanut butter blossom
This step can’t wait! As soon as those warm cookies hit the counter, gently press one unwrapped Hershey’s Kiss right into the middle of each one. The residual heat softens the chocolate just enough so it sinks in easily but doesn’t melt into a puddle. That little crater of molten milk chocolate sitting on the crackly peanut butter cookie surface? That’s the magic. Let them sit on the hot pan for five minutes before carefully moving them to a cooling rack. If you look at recipes from places like Beyond the Butter, you’ll see they all stress this timing!
Tips for Perfect Traditional Holiday Baking with your peanut butter blossom
We want these Classic Peanut Butter Blossoms to look picture-perfect for your holiday cookie platters, and I’ve picked up a few tricks over the years to make sure they behave. The main issue people run into during Traditional Holiday Baking is either too much spread or the chocolate melting into nothingness. Both are fixable issues, don’t you worry!
If your cookies are spreading out flat before they set, that usually means your butter was too soft or you skipped rolling them thoroughly in that extra granulated sugar. That sugar coating acts like a little barrier, helping them hold shape. For an extra insurance policy against spread, you can chill the dough for just 15 minutes—though as you know, this recipe is designed to skip that step!
Troubleshooting Common peanut butter blossom Issues
If your chocolate kiss seems to vanish, the oven was simply too hot, or you waited too long after taking the cookies out. The kiss needs that fresh, radiating heat to soften just the bottom layer. If your chocolate just melts everywhere, try cooling the Hershey Kisses in the fridge beforehand! Also, when you press down, use a gentle push, not a hard smash toward the bottom. For more tips on keeping things soft, I always refer back to my soft sugar cookie guide; the principles are similar!
If you notice cracking on the surface of the cookie *before* you add the kiss, that’s usually a sign of overmixing the flour or not enough fat, but honestly, a little crackle adds to the charm of the classic look, especially checking out recipes like the one from Modern Honey.
Variations for Chewy Peanut Butter Kiss Cookies
Now, while I absolutely stand by the original recipe for the softest texture, I totally get wanting to jazz things up a bit, especially if you’re making a big batch for a potluck! You don’t need to overhaul the whole thing to make these Chewy Peanut Butter Kiss Cookies interesting.
My favorite simple tweak is in that rolling sugar step. If you want a bit more warmth, try mixing just a half teaspoon of ground cinnamon right into the cup of granulated sugar you use for rolling. It adds this lovely, unexpected depth that pairs beautifully with the chocolate. Also, if you only have chunky peanut butter on hand, go ahead and use it! It just gives you a slightly rougher, nuttier texture, which is great for those who like more bite.
For those of you navigating dietary needs, adapting them to be gluten-free is actually surprisingly easy since the structure isn’t as delicate as a shortbread. You can usually swap in a good quality 1-to-1 GF blend without fuss. If you’re looking for other cozy baked goods, you MUST try my cranberry orange scones next time!
Storage & Make-Ahead Tips for peanut butter blossom Cookies
Holiday baking is all about planning ahead, and these peanut butter blossom cookies are perfect for prepping early! Because we focused so much on keeping them soft and chewy, refrigeration is actually our enemy here. Cold air tends to dry out anything buttery, so forget putting them in the fridge unless your kitchen is incredibly hot.
The best way to keep them fresh is simply in an airtight container right on the counter. Honestly, they are so good they rarely last more than three days around my house! If you need to make them further ahead than that, freezing them is a great option. You can freeze them either before baking (roll the balls, coat them in sugar, and freeze them on a sheet before transferring to a bag—remember not to stick the chocolate Kisses on first!).
If you freeze them baked, just place parchment paper between the layers so they don’t stick together like magnets. Thaw them on the counter, and if the Kiss looks a little loose, just gently press it down again. If you’re looking for other great make-ahead holiday treats, you should check out my recipe for slow cooker apple butter!
For more tips on making sure your holiday batches shine, take a peek at what the folks over at Baking You Happier suggest for their Christmas batches!
Serving Suggestions for Festive Peanut Butter Treats
These rich, satisfying Festive Peanut Butter Treats really shine when you pair them with something simple. Honestly, nothing beats a tall, ice-cold glass of milk for dunking—the chocolate and peanut butter just sing together, and the milk cuts through the richness perfectly.
If you’re serving these later in the evening, a strong, dark roast coffee is absolutely divine on the side. It complements that bittersweet chocolate edge beautifully. If you need another delicious dessert for that holiday spread that balances the richness, you shouldn’t miss trying my recipe for velvety French hot chocolate! It’s just the right kind of warm hug to follow up one of these wonderful peanut butter blossom cookies.
Frequently Asked Questions about the peanut butter blossom
When you’re making a classic like this, you always end up with a few little questions popping up! I tried to cover all the things I usually hear people worrying about when they bake these beautiful cookies for the first time. Don’t stress; these are easy fixes, and I’ve got you covered from my kitchen to yours.
If you’re looking for something savory to balance out all that sugar, you absolutely must try my recipe for easy chicken gravy sometime!
Do I need to chill the peanut butter blossom dough?
Nope! This is one of the best parts about this recipe. I designed it specifically to be a quick hitter for weeknight baking or when you’re in a holiday hurry. You mix the dough, roll it right away, and bake it. Chilling isn’t necessary for structure or spreading because we use the right balance of sugar and fat, and we coat those balls heavily in sugar before they ever see the oven!
What size should the peanut butter blossom cookies be?
I recommend rolling them into neat 1-inch balls. That size is perfect because it gives you enough surface area so that the edges bake up nicely while the center stays super soft. It also ensures they are big enough to perfectly cradle one whole Hershey’s Kiss without crowding your baking sheet.
Why are my cookies cracking too much?
A little bit of cracking is totally normal and how you know it’s a true traditional cookie! But if you have huge fissures, it usually means you overmixed the flour, which develops too much gluten, or perhaps your peanut butter was too stiff before creaming. Make sure that butter and peanut butter mixture is actually fluffy before adding the eggs!
Can I use crunchy peanut butter instead?
You certainly can, but be prepared for a different experience! Crunchy peanut butter will give you more texture, especially in the bite. I prefer creamy because I want that melt-in-your-mouth factor, but if you love those crunchy bits, go for it!
Estimated Nutritional Data for This Recipe
Now, I know for me, when I’m baking up a holiday storm, I try not to dwell too much on the numbers until everything is packed away! But for those of you who like to keep track, I’ve put together the estimated nutritional breakdown for these wonderful peanut butter blossom cookies. Remember, these figures are just my best guess based on the standard ingredients I use—if you substitute a low-fat peanut butter or a specialty sugar, the numbers will shift a little.
This information definitely confirms these are a decadent treat meant for sharing and enjoying during the celebrations. If you’re looking for something lighter or perhaps need an appetizer idea, I highly recommend giving my easy Cowboy Caviar recipe a try later in the week!
Here is the general estimate per cookie (based on a yield of 3 dozen):
- Serving Size: 1 cookie
- Calories: 180
- Fat: 10g
- Saturated Fat: 4g
- Carbohydrates: 22g
- Sugar: 15g
- Protein: 4g
- Cholesterol: 20mg
See? Not bad for such a rich, classic holiday cookie! They are totally worth every single bite, especially knowing they are made with fresh, quality ingredients right from your own kitchen.
PrintThe BEST Classic Soft & Chewy Peanut Butter Blossoms Recipe
Make the ultimate holiday cookie with this recipe for soft and chewy Peanut Butter Blossoms, topped with a classic milk chocolate Hershey Kiss. This is a tried-and-true recipe for traditional American home baking.
- Prep Time: 15 min
- Cook Time: 10 min
- Total Time: 25 min
- Yield: About 3 dozen cookies 1x
- Category: Dessert
- Method: Baking
- Cuisine: American
- Diet: Vegetarian
Ingredients
- 1 cup unsalted butter, softened
- 1 cup creamy peanut butter
- ¾ cup granulated sugar
- ¾ cup packed brown sugar
- 2 large eggs
- 1 teaspoon vanilla extract
- 2 ¼ cups all-purpose flour
- 1 teaspoon baking soda
- ½ teaspoon baking powder
- ½ teaspoon salt
- About 1 cup granulated sugar for rolling
- 1 bag (12 ounces) Hershey’s Kisses, unwrapped
Instructions
- Preheat your oven to 375 degrees Fahrenheit. Line baking sheets with parchment paper.
- In a large bowl, cream together the softened butter, peanut butter, granulated sugar, and brown sugar until the mixture is light and fluffy. You can use a stand mixer or a hand mixer for this step.
- Beat in the eggs one at a time, mixing well after each addition. Stir in the vanilla extract.
- In a separate medium bowl, whisk together the flour, baking soda, baking powder, and salt.
- Gradually add the dry ingredients to the wet ingredients, mixing on low speed until just combined. Do not overmix the dough.
- Place about 1 cup of extra granulated sugar in a shallow dish.
- Roll the cookie dough into 1-inch balls. Roll each ball thoroughly in the extra granulated sugar until completely coated.
- Place the sugared dough balls about 2 inches apart on the prepared baking sheets.
- Bake for 8 to 10 minutes. The cookies will look slightly puffed and set, but they should still look soft.
- Remove the baking sheets from the oven. Immediately press one unwrapped Hershey’s Kiss gently into the center of each warm cookie. The residual heat will soften the chocolate slightly.
- Let the cookies cool on the baking sheet for 5 minutes before transferring them to a wire rack to cool completely.
Notes
- For the softest, chewiest Peanut Butter Blossom Cookies, do not overbake. They should look slightly underdone when you remove them from the oven.
- If you prefer a slightly firmer cookie, you can chill the dough for 30 minutes before rolling, though this recipe is designed for no chill cookie dough.
- Use creamy peanut butter for the best texture in these Classic Peanut Butter Blossoms.
Nutrition
- Serving Size: 1 cookie
- Calories: 180
- Sugar: 15
- Sodium: 110
- Fat: 10
- Saturated Fat: 4
- Unsaturated Fat: 6
- Trans Fat: 0
- Carbohydrates: 22
- Fiber: 1
- Protein: 4
- Cholesterol: 20