
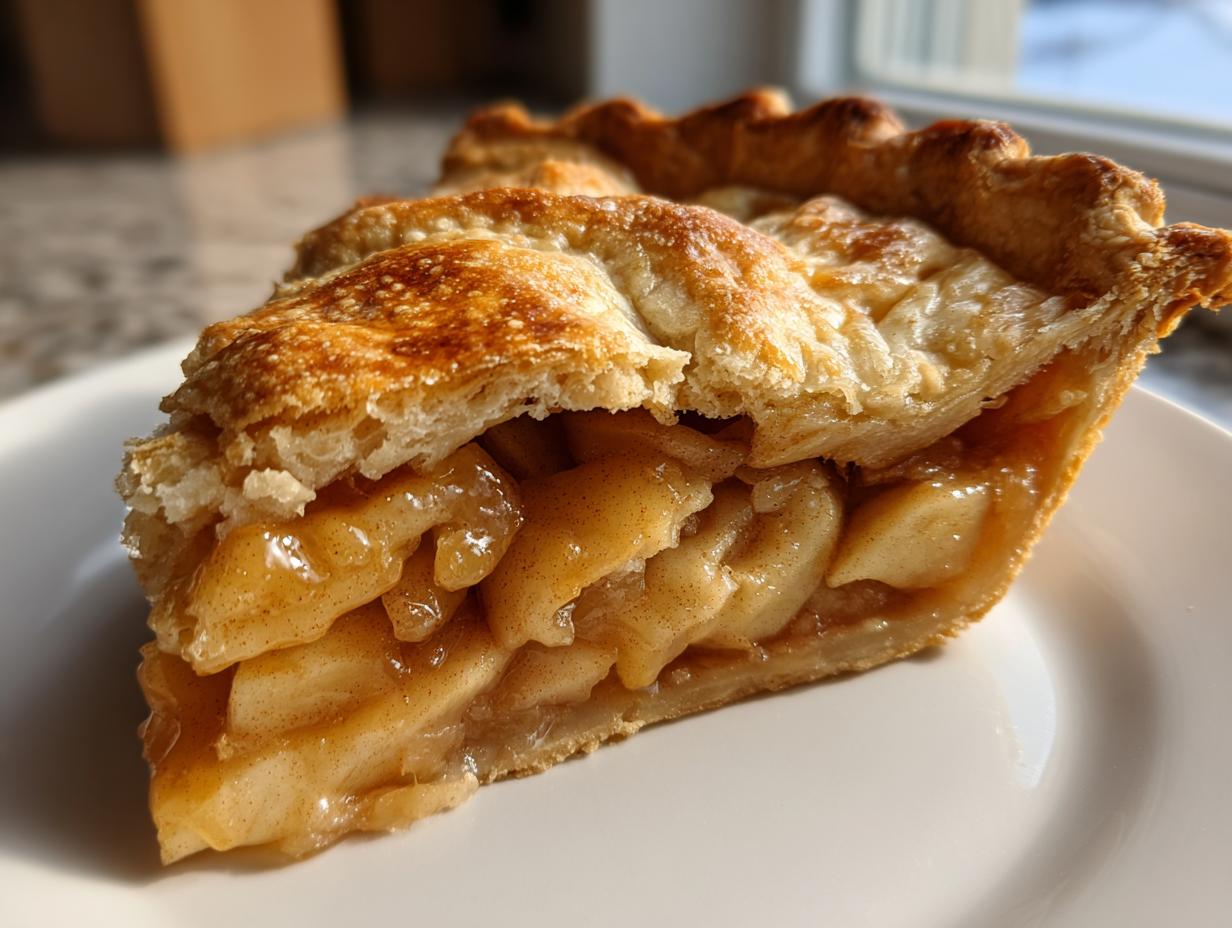
There is nothing on this earth quite like the smell of a truly perfect homemade apple pie baking away. That aroma—cinnamon, warm butter, and sweet baked fruit—that’s the scent of home, isn’t it? For me, Sarah Jane, that smell connects directly back to my grandmother’s kitchen. She always said baking wasn’t about perfection, it was about reliably bringing love to the table. That belief is why my favorite recipe here at Cookin’ Corner is this one. We’ve taken the time-tested framework of an old fashioned apple pie and smoothed out all the tricky bits so you can achieve that incredible, flaky crust every single time. If you want to learn more about ensuring your filling sets up perfectly on the stovetop first, check out this quick tip on apple pie filling preparation. This is tradition made accessible for your kitchen today.
- Why This Is the Best Homemade Apple Pie Recipe You Will Make
- Ingredients for Your Classic Apple Pie
- How to Prepare Your Homemade Apple Pie from Scratch Baking
- Tips for Success When Making Homemade Apple Pie
- Ingredient Notes and Substitutions for Homemade Apple Pie
- Storage and Reheating Instructions for Your Homemade Apple Pie
- Serving Suggestions for Your Perfect Apple Slices Pie
- Frequently Asked Questions About Homemade Apple Pie
- Nutritional Estimates for This Traditional Dessert Recipe
Why This Is the Best Homemade Apple Pie Recipe You Will Make
Honestly, nothing beats biting into a slice of pie where the crust shatters perfectly right before you hit that warm, spiced center. This isn’t just another recipe; this is the blueprint for classic apple pie perfection that even new bakers can nail. We skip the shortening and stick strictly to butter—that’s where the flavor lives! For anyone doubting their own skills, this best homemade apple pie flaky crust recipe will change your mind about baking from scratch.
Here’s why you’ll want to save this to your favorites board:
- You get that famous, rich, buttery pie crust homemade texture, guaranteed.
- It hits every mark for ultimate comfort food desserts.
- The filling is balanced—no more mushy apples or fillings that run all over the plate.
- It’s the quintessential traditional apple pie everyone dreams about.
Achieving the Perfect Buttery Pie Crust Homemade
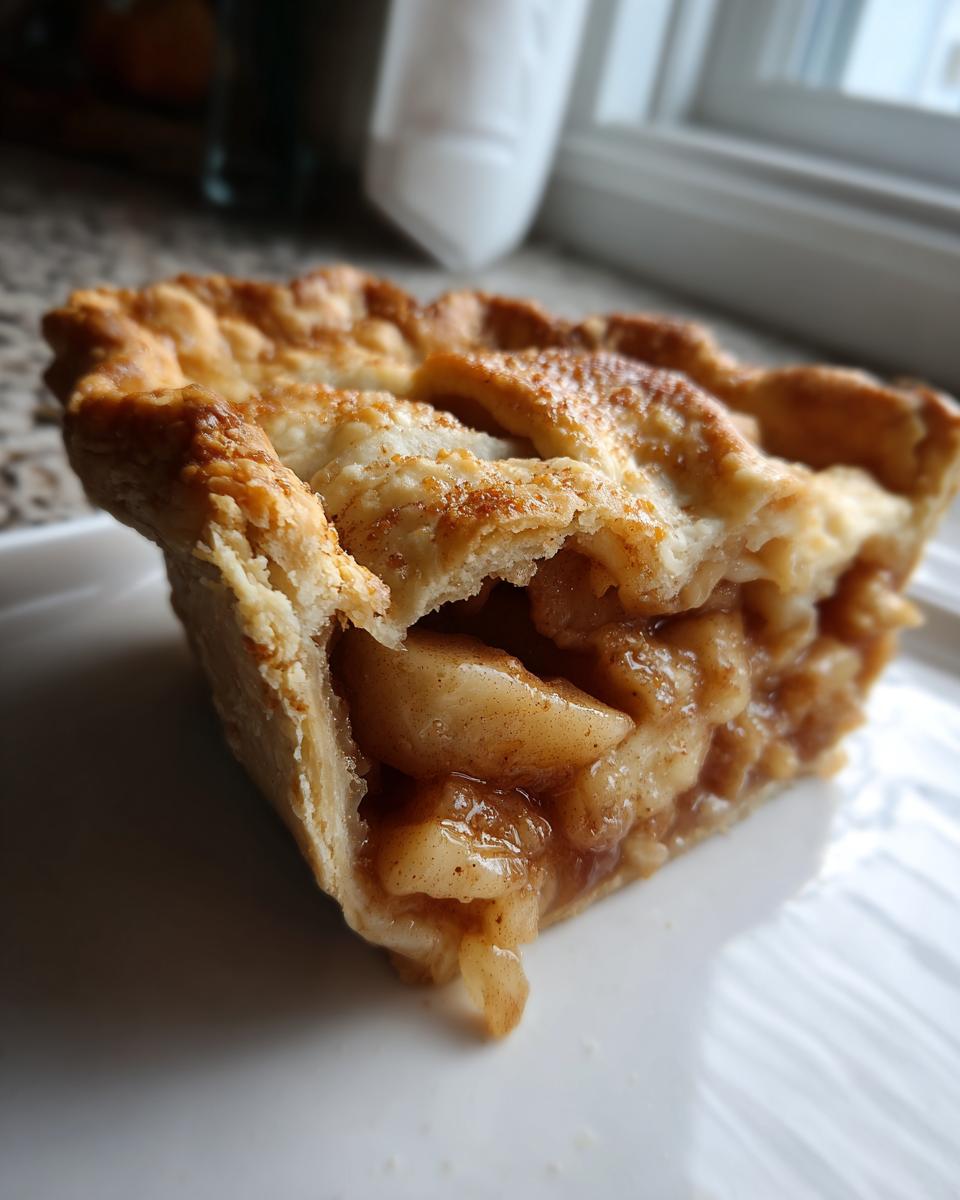
The entire structure of a great double crust pie hangs on the butter being cold—and I mean ice bath cold! That’s the secret my mom taught me for getting those distinct, flaky layers when baking from scratch. Think of those tiny, frozen butter pockets melting during baking; those pockets create steam, and steam creates the fluffiest crust you can imagine.
The Secret to the Best Apple Pie Filling
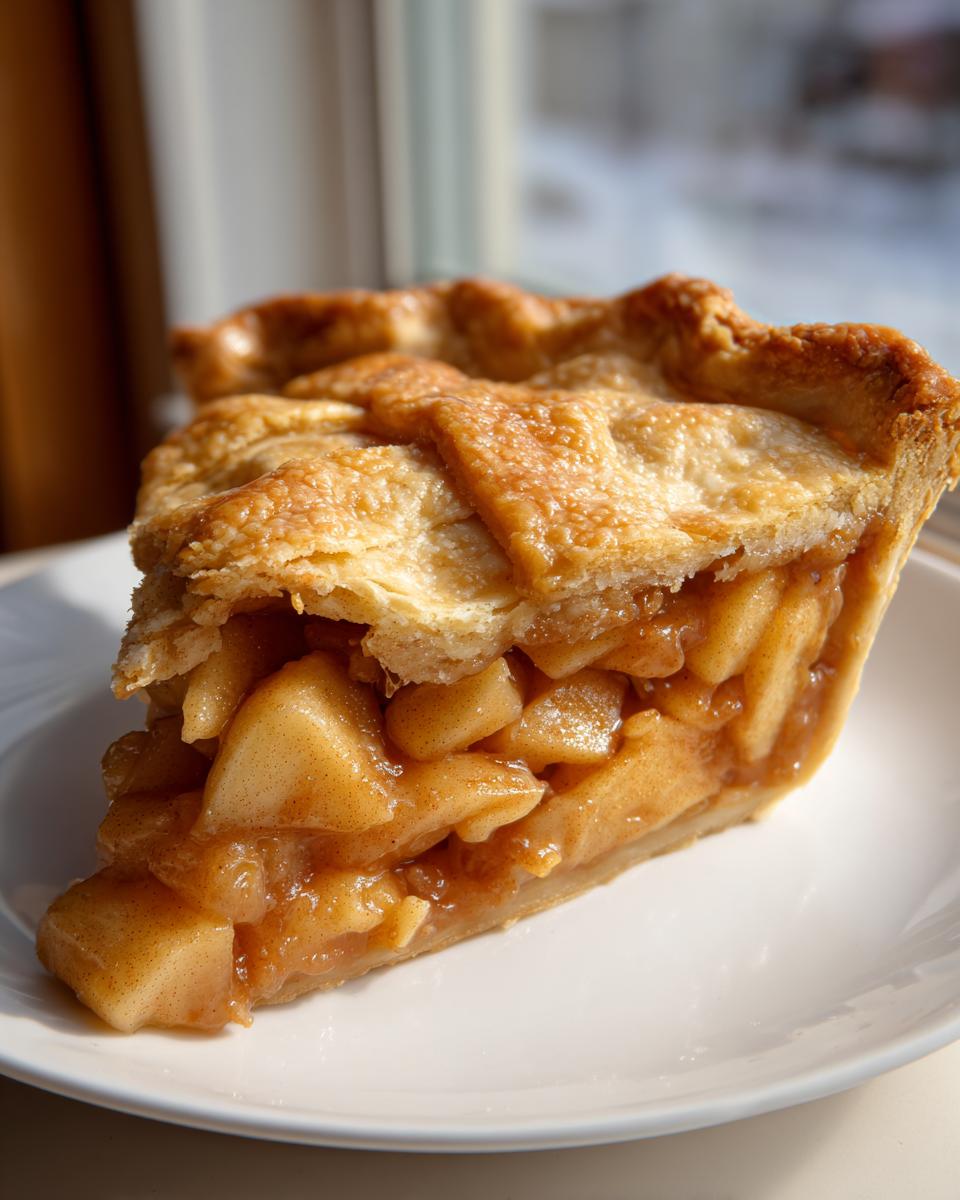
I use a blend of Granny Smith for that necessary tartness and Honeycrisp for sweetness, and trust me, it makes all the difference! We toss them just enough with sugar and spices so every piece is enveloped in that rich cinnamon spiced apples flavor without becoming waterlogged. It just sings.
Ingredients for Your Classic Apple Pie
When we talk about making a truly classic apple pie, the ingredients list shouldn’t scare you; it should excite you because it’s all basic stuff you probably have right now! Precision matters here, especially with the butter, but don’t stress. I’ve broken it down so you know exactly what goes into the crust and what goes into that gorgeous, spiced filling. If you are curious about how homemade pies pair with other goodies like apple bread pudding, you’ll find some inspiration elsewhere!
For the Flaky Double Crust Homemade Apple Pie
This is where the magic starts. Remember, every single bit of fat needs to be as cold as possible. I mean, practically frozen! If the butter melts before it hits the heat, you lose the flake, and we can’t have that on our Buttery Pie Crust Homemade.
- 2 1/2 cups all-purpose flour
- 1 teaspoon salt
- 1 cup (2 sticks) unsalted butter, very cold and cubed
- 1/2 cup ice water, plus more if needed
For the Cinnamon Spiced Apples Filling
We need apples that hold their shape but still give that lovely, tart counterpoint to the sugar. This mix is what makes this pie shine as one of the best traditional dessert recipes.
- 6 large Granny Smith apples, peeled, cored, and sliced 1/4-inch thick
- 6 large Honeycrisp apples, peeled, cored, and sliced 1/4-inch thick
- 3/4 cup granulated sugar
- 1/4 cup packed light brown sugar
- 2 tablespoons all-purpose flour (this thickens the juices beautifully!)
- 1 teaspoon ground cinnamon
- 1/4 teaspoon ground nutmeg
- 1 tablespoon lemon juice
- 1 large egg, beaten with 1 teaspoon water (for that golden egg wash)
- 1 tablespoon coarse sugar for sprinkling (optional, but adds great crunch!)
How to Prepare Your Homemade Apple Pie from Scratch Baking
Okay, let’s move on to the actual making! This whole process screams from scratch baking, but I promise it’s manageable. We tackle the dough first because it needs time to chill out and get happy. Once the dough is tucked away, the filling comes together in minutes. Just be ready for your kitchen to start smelling like pure autumn magic! If you need some inspiration for the main course that comes before the pie, check out my recipe for the world’s best homemade classic lasagna recipe.
Making the Buttery Pie Crust Homemade Dough
Grab your pastry blender—or just use your hands, but work fast! Cut that cold butter into the flour and salt mixture until you have crumbs, making sure you still see some pea-sized chunks of butter; those are the flakiness insurance policies you need. Now, slowly drizzle in the ice water, maybe a tablespoon at a time. Stop mixing the *second* it looks like it might hold together when you squeeze it. Seriously, don’t overwork it! Divide that shaggy mess into two disks, wrap them tight, and stick them in the fridge for at least an hour. That chill time is what makes it a truly flaky pie crust.
Assembling the Best Apple Pie Filling
While the dough is chilling, mix up your apples. Put those gorgeous slices into a big bowl and sprinkle over all that sugar, flour, cinnamon, and nutmeg. Use your hands to gently toss everything together until those perfect apple slices pie ingredients are evenly coated. You want to coat them, not smash them! Keep the lemon juice right in there to keep things bright. Set this bowl aside; it’s just waiting for its crust.
Assembling and Baking Your Traditional Apple Pie
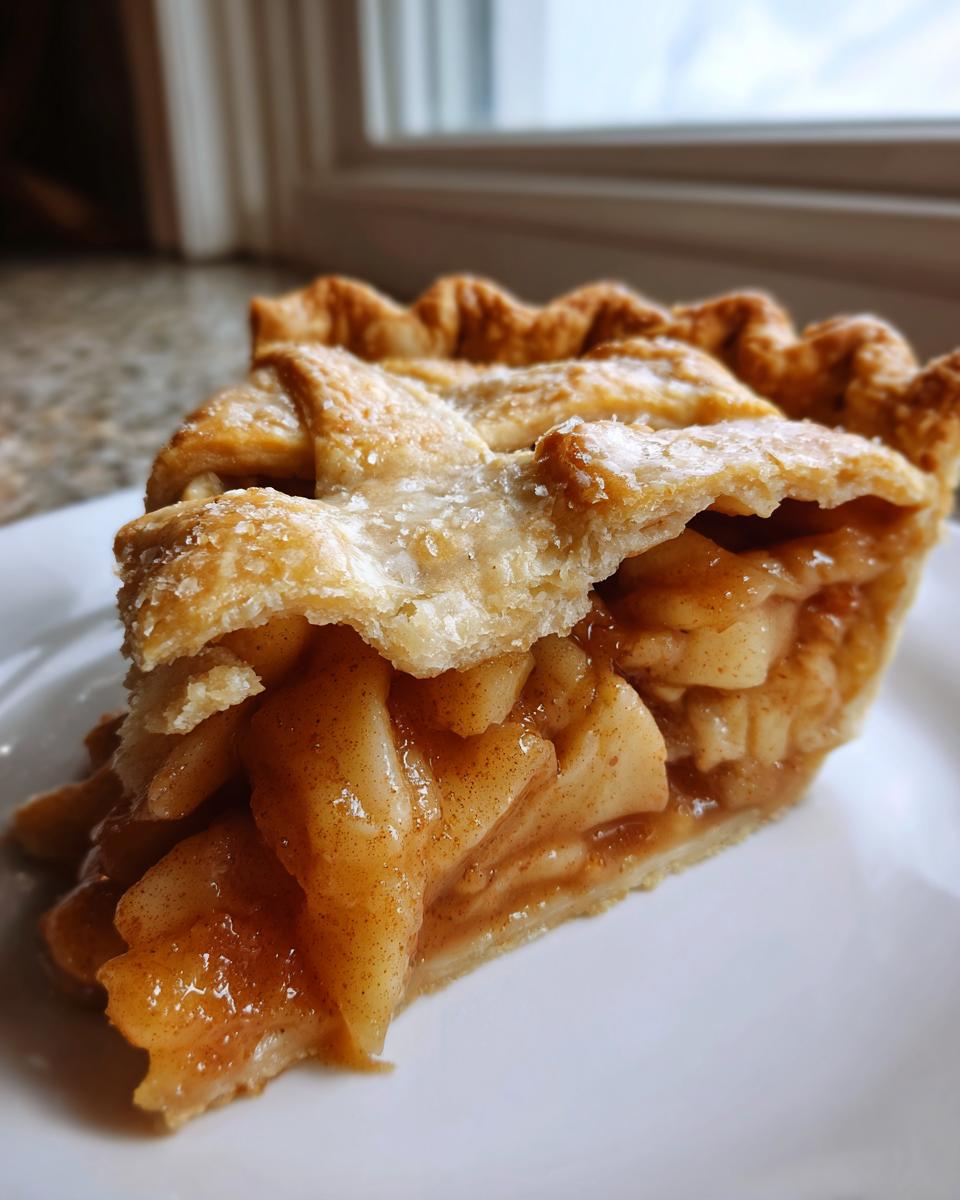
Now for the fun part! Roll out one disk into a big circle and ease it into your pie plate. Load it up with your spiced apples, mounding them high in the middle since they’ll cook down. Roll the second piece and lay it over top. You can cut slits, or go fancy with a lattice—whatever you prefer for your traditional apple pie top! Crimp those edges tight, brush with the egg wash, and sprinkle on that coarse sugar for shine. Preheat your oven to a hot 425°F. Bake it hard for 15 minutes, this sets the bottom crust, then drop the heat down to 375°F for another 40 to 50 minutes until it’s gloriously golden brown. You have to let it cool for three hours though—patience is key for the filling to set up for beautiful, clean slices!
Tips for Success When Making Homemade Apple Pie
Look, I’ve made enough pies to fill a county fair, and I’ve definitely had some runny messes! The biggest thing I learned that really locks everything down for a perfect slice is making sure your apples aren’t just chilling—they’re macerating. That means letting them sit in the sugar and spices for about 30 minutes before they go into the crust. Why? Because this draws out excess liquid upfront, preventing a soupy filling later on.
And for that dreaded soggy bottom, here’s my trick: when you assemble the pie, put a thin layer of breadcrumbs (or even crushed cornflakes!) on the raw bottom crust before adding the apples. They wick away any extra moisture that tries to seep through. It sounds wild, but trust me, this helps turn out a beautiful, crisp base for your easy apple pie every time. This trick is a lifesaver for any Fall baking ideas enthusiast! If you’re diving into more easy from scratch baking projects, maybe you should try my recipe for easy homemade pretzel dogs next week.
Ingredient Notes and Substitutions for Homemade Apple Pie
It’s so tempting to just grab whatever apples are on sale, but for this Classic Apple Pie, the apple blend is non-negotiable for me! Mixing tart Granny Smiths with sweeter Honeycrisp gives you that complex flavor that keeps people coming back for seconds. The tartness cuts through the sugar, and the Honeycrisp holds its shape just beautifully. If you only have one kind, go for Granny Smith, but know you might need to bump the brown sugar up just a touch.
Now, about substitutions—I know life happens! If you absolutely cannot use all butter for the crust, you can swap out a quarter of it with vegetable shortening. It won’t be quite as flavorful, but the shortening helps create a really tender texture. However, please, please don’t use margarine in this recipe; it changes the chemistry completely, and you’ll lose that amazing flavor profile we are chasing.
If you’ve let your apples sit out for a bit too long, or maybe you used slightly less-than-ideal apples, your filling might look a little too loose before it goes into the oven. Don’t panic! This is where that extra tablespoon of flour in the filling comes in handy. If your bowl looks soupy, just whisk in one more teaspoon of flour until it coats the apples nicely. If you want to see other reliable recipes that use similar techniques, take a peek at my main apple pie recipe hub for more inspiration!
Storage and Reheating Instructions for Your Homemade Apple Pie
Alright, you’ve pulled that beauty out of the oven, and now comes the hardest part: waiting! Cooling time isn’t just a suggestion; it’s absolutely critical if you want those gorgeous, clean slices we talked about. If you rush this step, that gorgeous, thick filling in your homemade apple pie turns into a waterfall. We need those juices to set up into a lovely, spoonable sauce.
Leave your Traditional Dessert Recipes standout on a wire rack at room temperature for a *minimum* of three full hours. If you only need to serve a small bit tonight, just cut a slice from the very edge—don’t dive into the middle until it’s had its rest!
Once cooled completely, you can absolutely leave your classic apple pie right on the counter, covered loosely with foil or plastic wrap, for up to two days. Keeping it at room temperature actually helps the crust maintain its flaky texture better than the fridge does. But if you’re storing leftovers past that, pop it into the fridge; just expect the crust to soften up a bit.
Now, reheating a slice is an art form! If you just microwave it, you win a soggy crust, and nobody wants that tragedy. For the best experience—bringing back that fresh-from-the-oven crispness—use a standard oven or a toaster oven. Place your slice directly on the rack (or on a small baking sheet) at about 350°F for about 10 to 12 minutes. That gentle dry heat crisps up the crust again without turning the apples into mush. Seriously, taking that extra bit of time to reheat properly makes all the difference! Since you’re already mastering slow cooling and reheating, maybe check out my recipe for a great make-ahead dessert like banana bread next time you are baking.
Serving Suggestions for Your Perfect Apple Slices Pie
The work is done! You’ve created this beautiful, deeply satisfying homemade apple pie, complete with those perfect, tender apple slices pie. Now, the question is, how do we serve this masterpiece? We absolutely must honor tradition, but sometimes a little something extra takes it straight over the top.
The classic pairing, the non-negotiable champion of all pie toppings, is a big, beautiful scoop of high-quality vanilla bean ice cream. That contrast between the warm, spiced apple and the cold, melting cream? That is the definition of simple American happiness. If you want something lighter, a dollop of freshly whipped cream, sweetened just slightly, works wonderfully to cut through the richness of that buttery pie crust homemade.
But if you’re feeling a little ambitious with your comfort food desserts repertoire, let me give you the grown-up option I sometimes sneak onto my own slice. Thinly slice a fresh caramel—the good, chewy kind—and let it melt slightly over the top of the hot pie before adding the ice cream. It leans into that sweet, autumnal profile beautifully.
If you’ve loved making this pie and are looking for another easy, comforting fruit dessert that doesn’t require perfectly crimped edges, you simply have to try my recipe for caramel apple dump cake. It delivers maximum flavor with minimum fuss!
Frequently Asked Questions About Homemade Apple Pie
I know when you tackle something as iconic as a homemade apple pie, you’ve got questions swirling around! That’s totally normal, especially when you are committed to from scratch baking for the first time. Most folks worry about two main things: the crust and the filling staying put. These are the reliable answers I’ve gathered over years of baking this recipe for friends and family.
Can I use pre-made pie dough for this homemade apple pie recipe?
Oh, I get it! Sometimes you are short on time. While I use this recipe to show you just how foolproof a truly buttery pie crust homemade can be, yes, you absolutely *can* use store-bought dough if you’re in a real pinch. Keep in mind, though, that the glorious flakiness that makes my version famous comes from those specific steps with the frozen butter and ice water. Using store-bought is convenient, but it won’t give you that same shatter when you slice into it. This recipe is designed to make the easy apple pie experience the crust-making part!
Why is my homemade apple pie filling runny?
This is the number one heartbreak, isn’t it? You pull out a gorgeous pie, slice into it, and it just spills all over the plate. Nine times out of ten, this happens because the pie hasn’t cooled long enough. Don’t try to slice into it while it’s warm! Remember I said wait at least three hours? That time allows the starch from the flour we added—our thickener—to fully activate and set up that gorgeous liquid into a thick sauce. If you’ve let it cool the full time and it’s *still* runny, double-check that you used the full 2 tablespoons of flour in the filling next time. That little bit of extra flour handles any surprises from watery apples.
If you are looking for other simple recipes that turn out consistently delicious, you should really try my recipe for easy 5-ingredient haystack cookies. They are zero-fuss and always a hit!
Nutritional Estimates for This Traditional Dessert Recipe
Now, let’s talk about the details that some folks need to know before diving into a big slice of pure comfort. Since this is a slice of pure, buttery, sugar-filled American tradition, it definitely falls into the category of an indulgent treat! Please keep in mind that these numbers are just estimates based on standard measurements for that gorgeous crust and sweet filling. If you swap the butter for a substitute or use extra sugar, the numbers will shift a bit, of course.
But for a generous slice of what is easily the **best homemade apple pie filling** sandwiched between that flaky crust, here is what you’re generally looking at:
- Serving Size: 1 slice
- Calories: 450
- Fat: 24g (That’s the good, flaky pie crust talking!)
- Saturated Fat: 15g
- Trans Fat: 0g (We only use real butter, baby!)
- Carbohydrates: 60g
- Sugar: 35g
- Protein: 5g
- Fiber: 4g
- Sodium: 250mg
- Cholesterol: 60mg
It’s worth every single calorie when you consider this is a family heirloom recipe that tastes like joy. If you need something a little less rich for your next gathering, you might want to check out my recipe for an easy hoagie dip as a flavorful, lighter appetizer!
PrintClassic Homemade Apple Pie with Foolproof Flaky All-Butter Crust

This recipe delivers the ultimate comfort dessert: a classic homemade apple pie featuring a perfectly flaky, buttery crust and a sweet, cinnamon-spiced apple filling. It is simple enough for beginners but yields results that taste like tradition.
- Prep Time: 45 min
- Cook Time: 65 min
- Total Time: 110 min
- Yield: 8 servings 1x
- Category: Dessert
- Method: Baking
- Cuisine: American
- Diet: Vegetarian
Ingredients
- 2 1/2 cups all-purpose flour
- 1 teaspoon salt
- 1 cup (2 sticks) unsalted butter, very cold and cubed
- 1/2 cup ice water, plus more if needed
- 6 large Granny Smith apples, peeled, cored, and sliced 1/4-inch thick
- 6 large Honeycrisp apples, peeled, cored, and sliced 1/4-inch thick
- 3/4 cup granulated sugar
- 1/4 cup packed light brown sugar
- 2 tablespoons all-purpose flour
- 1 teaspoon ground cinnamon
- 1/4 teaspoon ground nutmeg
- 1 tablespoon lemon juice
- 1 large egg, beaten with 1 teaspoon water (for egg wash)
- 1 tablespoon coarse sugar for sprinkling
Instructions
- Prepare the Flaky Pie Crust: In a large bowl, whisk together the 2 1/2 cups flour and 1 teaspoon salt. Cut in the cold, cubed butter using a pastry blender or your fingers until the mixture resembles coarse crumbs with some pea-sized pieces of butter remaining.
- Gradually add the ice water, one tablespoon at a time, mixing gently until the dough just comes together. Do not overmix. Divide the dough in half, flatten each half into a disk, wrap in plastic wrap, and chill for at least 1 hour.
- Prepare the Apple Filling: In a very large bowl, combine the sliced apples, granulated sugar, brown sugar, 2 tablespoons flour, cinnamon, nutmeg, and lemon juice. Toss gently until the apples are evenly coated. Set aside while you roll out the bottom crust.
- Assemble the Bottom Crust: On a lightly floured surface, roll out one disk of dough into a 12-inch circle. Carefully transfer the dough to a 9-inch pie plate. Trim the edges, leaving a 1-inch overhang. Place the pie plate in the refrigerator.
- Assemble the Top Crust: Roll out the second disk of dough into an 11-inch circle. Cut vents in the center or cut into strips for a lattice top.
- Fill the Pie: Pour the apple mixture into the chilled bottom crust, mounding the apples slightly in the center. Dot the top of the apples with a few small pieces of reserved cold butter, if desired.
- Top the Pie: Place the top crust over the filling. Trim the edges, leaving a 1-inch overhang. Crimp the top and bottom edges together to seal. Brush the top crust evenly with the egg wash and sprinkle with coarse sugar.
- Bake the Pie: Preheat your oven to 425 degrees Fahrenheit. Place the pie on a baking sheet to catch any drips. Bake for 15 minutes at 425°F. Then, reduce the oven temperature to 375 degrees Fahrenheit and continue baking for 40 to 50 minutes more, or until the crust is golden brown and the filling is bubbly. If the edges brown too quickly, cover them loosely with foil strips.
- Cool: Let the **best apple pie filling** cool on a wire rack for at least 3 hours before slicing. This allows the juices to set.
Notes
- For the flakiest crust, keep all your butter and water as cold as possible. Do not let the butter melt while mixing.
- Use a mix of tart and sweet apples, like Granny Smith and Honeycrisp, for the best flavor balance in your **cinnamon spiced apples**.
- If you prefer a thicker filling, increase the flour in the filling mixture to 3 tablespoons.
Nutrition
- Serving Size: 1 slice
- Calories: 450
- Sugar: 35g
- Sodium: 250mg
- Fat: 24g
- Saturated Fat: 15g
- Unsaturated Fat: 9g
- Trans Fat: 0g
- Carbohydrates: 60g
- Fiber: 4g
- Protein: 5g
- Cholesterol: 60mg