
There is absolutely nothing like the snap, crackle, and pop of a truly fresh, crunchy pickle straight from the jar. Forget those sad, soggy store-bought versions! If you’re craving that clean, tangy bite but don’t want to deal with the drama of water baths and sealing equipment, you are in the absolute perfect spot. This recipe for refrigerator pickles is my go-to secret. We’re talking five minutes of active work, zero boiling, and pickles ready to eat tomorrow! As Sarah Jane Thompson always says in our kitchen, preserving traditions means making them work for modern life. This no cook pickling method is fast, reliable, and rooted in the simple, honest techniques that my grandmother used for all her homemade condiments.
Trust me, once you try these quick pickles, you won’t go back. We’re taking humble cucumbers and transforming them into amazing fresh pickled vegetables perfect for any sandwich or snack. If you love intense pickle flavor, make sure you check out the recipe for our Ultimate Crispy Fried Pickles next!
- Why You Will Love These Quick Refrigerator Pickles
- Essential Ingredients for Perfect Refrigerator Pickles
- The 5-Minute No Cook Pickling Method for Refrigerator Pickles
- Tips for Achieving the Crispiest Refrigerator Pickles
- Ingredient Notes and Substitutions for Refrigerator Pickles
- Storage and Shelf Life of Your Homemade Refrigerator Pickles
- Serving Suggestions for Tangy Pickled Snacks
- Frequently Asked Questions About Refrigerator Pickles
- From Our Kitchen to Yours: Enjoying Your Refrigerator Pickles
Why You Will Love These Quick Refrigerator Pickles
I am so excited for you to try these! Seriously, dump the canner, we are keeping this simple. These aren’t just pickles; they are the quickest, most satisfying snack you’ll make all week. They hit every single mark:
- Lightning Fast Prep: We are talking five minutes of active time. I usually have everything packed into the jars before my coffee even cools down.
- The Ultimate Crunch Factor: Remember how I talked about crispness? These deliver that snap every single time, which is usually the hardest part of making easy homemade pickles.
- No Cook Pickling Magic: Zero boiling the brine! We just warm it enough for the salt to dissolve. This means less time over a hot stove and more time waiting impatiently by the fridge.
- Simple Brine: The entire flavor profile centers around apple cider vinegar and fresh herbs. No fancy ingredients needed whatsoever.
Essential Ingredients for Perfect Refrigerator Pickles
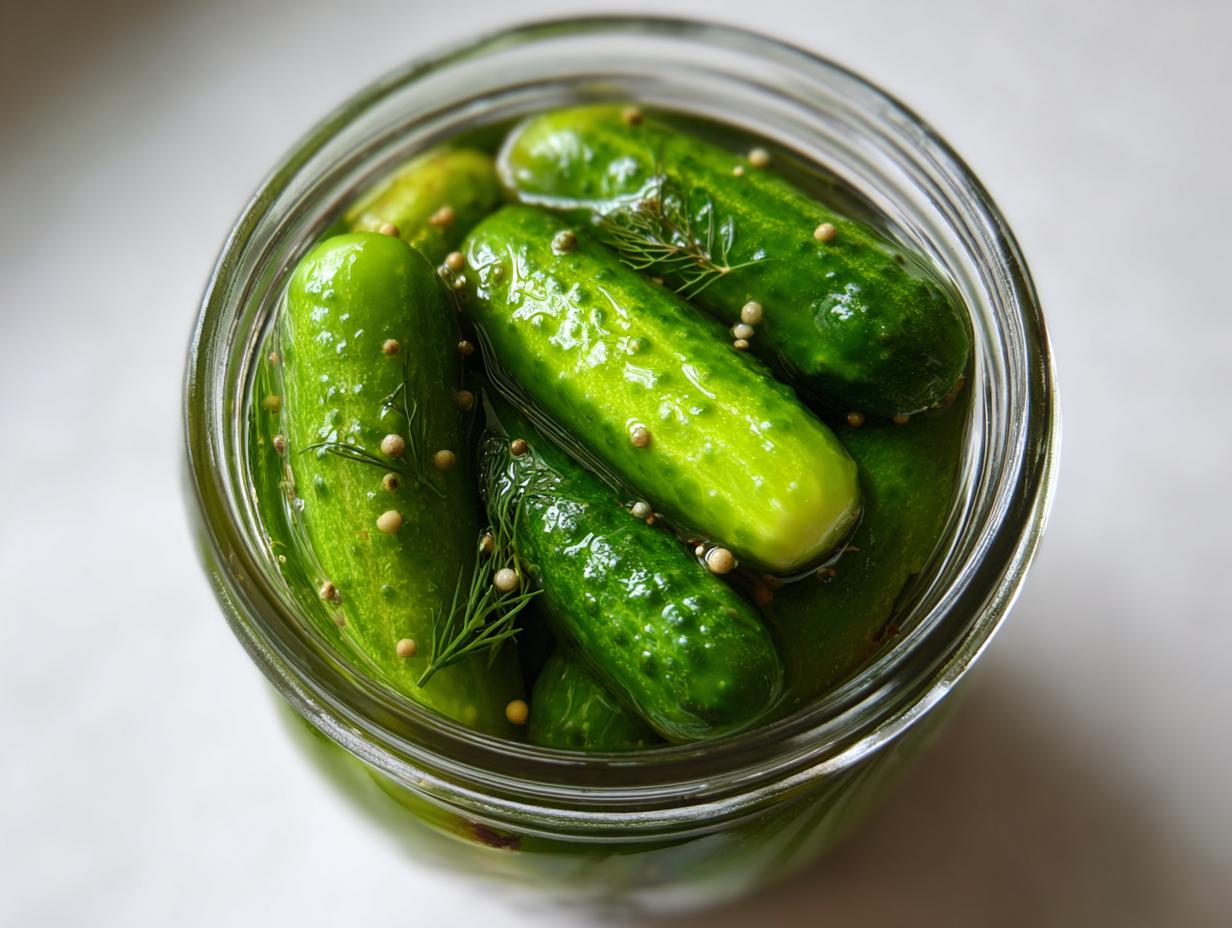
Okay, let’s talk about what you need. Because this is a no cook pickling method, the quality and condition of your cucumbers matter a whole bunch! You can’t fake freshness here. For the best results—the ones that give you that amazing crunch readers keep raving about—you absolutely must use pickling cucumbers. Kirby cukes are my favorite; they are dense and stay firm in that tangy vinegar pickled cucumbers brine.
Here is the lineup for about two quarts of the best refrigerator pickles you’ll ever eat. Don’t skip the aromatics; that’s where the dill flavor really shines through:
- Cucumbers: You need about 2 pounds of firm pickling cucumbers, sliced into spears or rounds—whichever you like for your sandwich toppings!
- Fresh Dill: I insist on fresh dill sprigs if you can find them. If not, 2 tablespoons of dried dill seed works just fine.
- Garlic: Plan on 4 cloves, and I mean smashed. Smashing them releases all their pungent flavor right into the brine.
- Spices: You’ll need 1 teaspoon of black peppercorns and 1/2 teaspoon of mustard seeds for that classic background spice.
- The Brine Base: This is where the structure happens. We use 2 cups of water, 1 cup of apple cider vinegar—that gives it a slightly fruitier, less harsh tang than plain white vinegar—and 1 tablespoon of kosher salt.
- A Touch of Sweetness: Just 1 teaspoon of regular granulated sugar balances out the acidity.
I find that using kosher salt gives the best flavor consistency, but if you only have table salt, you might want to knock that down slightly. This precise mix is what makes these pickles so reliably delicious.
The 5-Minute No Cook Pickling Method for Refrigerator Pickles
This is where the magic happens, and honestly, it’s hilarious how quickly this comes together. Remember, the key to refrigerator pickles being successful AND fast is that we aren’t actually cooking them; we are relying on the brine to work its chemistry while chilling. This whole process takes less time than waiting for water to boil for pasta. I always grab my jars first, make sure they are squeaky clean—you don’t need to sterilize them like traditional canning, just clean!
Prepare Jars and Flavorings for Your Refrigerator Pickles
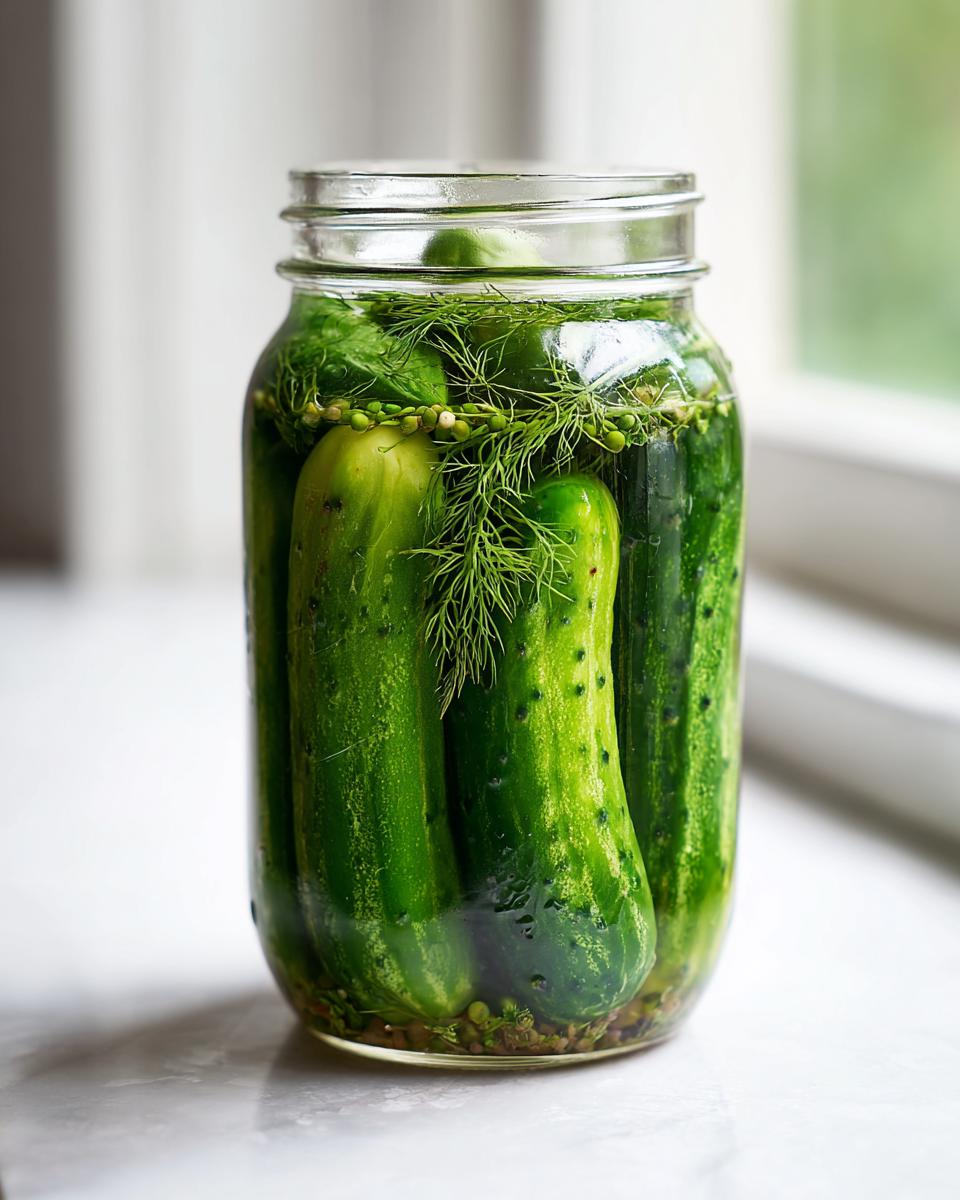
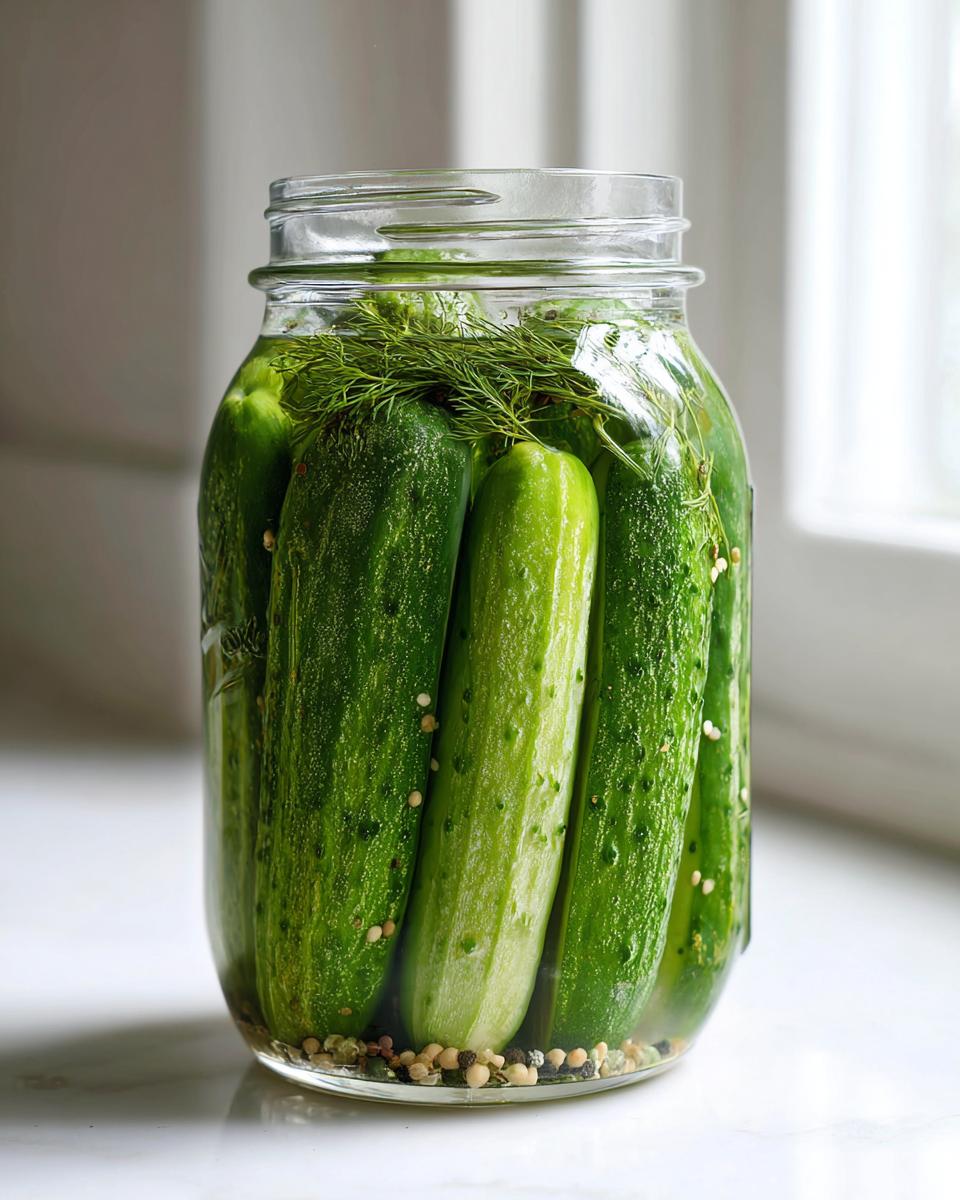
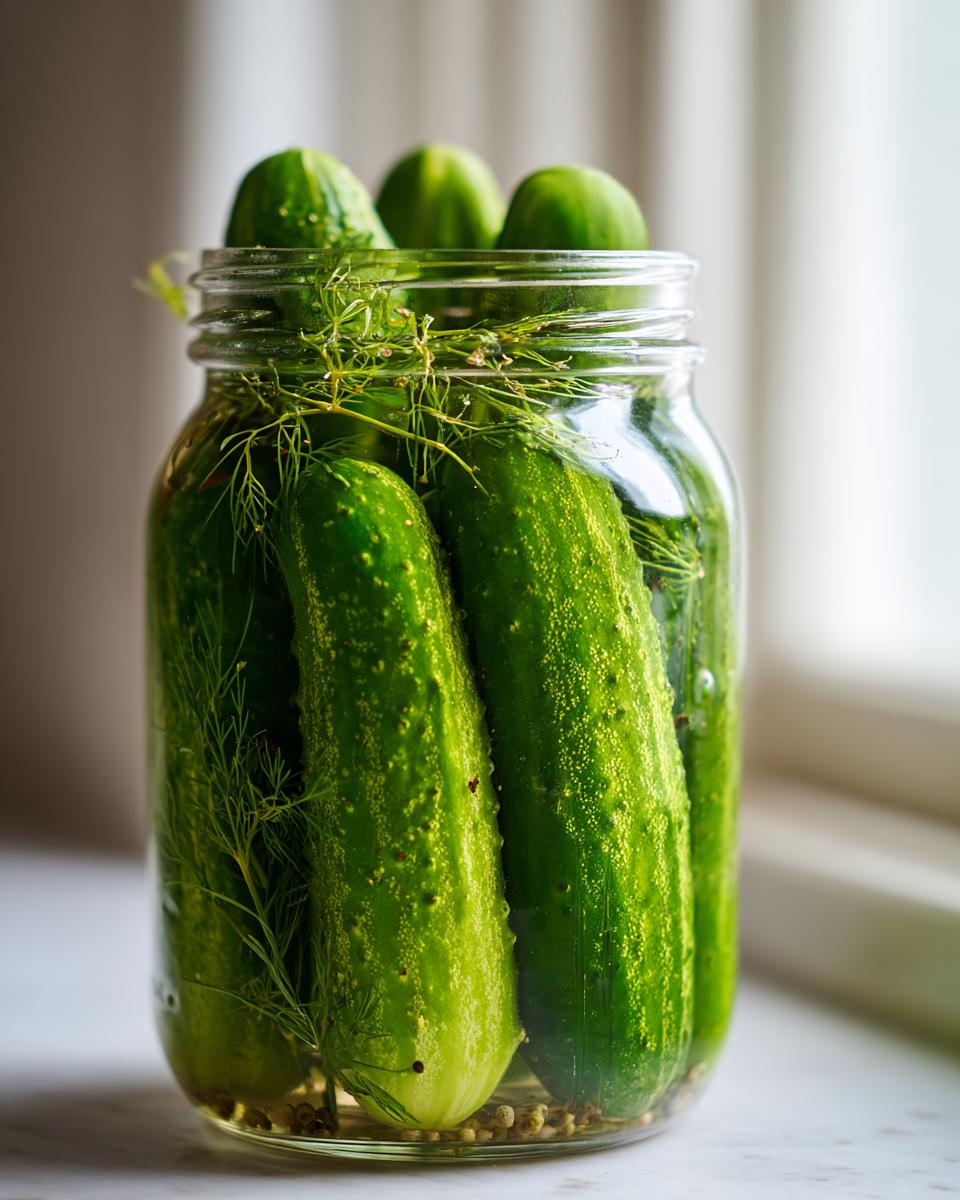
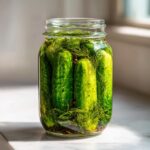
Start by getting your jars ready. I usually make two quart jars or four pint jars at a time. Now, divide up all those beautiful aromatics—the dill, the smashed garlic cloves (I love seeing that garlic float around!), the peppercorns, and mustard seeds. Make sure you split them evenly between the jars. Then, pack those sliced cucumbers in super tightly. If you can fit more, pack it in! You want as little air space as possible.
Making the Quick Pickle Brine
Time for that essential quick pickle brine! Toss your water, apple cider vinegar, salt, and sugar into a small saucepan. Now, listen to me: you just want to heat this gently. Stir it constantly until you see the salt and sugar disappear completely. That’s it! Do not let it boil! Boiling this brine changes the vinegar’s character and we are trying to achieve that perfectly sharp, fresh tang. Once dissolved, take it right off the heat.
Assembly and Sealing
Carefully pour that still-warm brine over your packed cucumbers until they are totally covered. Now, this is a step everyone forgets: gently tap the jars hard on the counter a few times or stick the handle of a wooden spoon down the sides. This shakes out any trapped air bubbles. Wipe your rims completely clean—you want a perfect seal—and put the lids on snugly, but not wrenched tight. Let the jars sit on the counter for about 30 minutes to cool down a bit before putting them in the fridge. I know, waiting is torture, but you need to let the initial heat escape before chilling. For the absolute best flavor and that famous crunch, leave them alone for a full 24 hours.
Tips for Achieving the Crispiest Refrigerator Pickles
If you are following this Crispy Pickles Recipe, I know that crunch is the number one thing on your mind! Honestly, this is where most home cooks fail with easy homemade pickles, but don’t you worry, I stole my Grandma’s best secrets for keeping them snappy.
First thing’s first: the cucumber itself! You must use super fresh, small pickling cucumbers, like Kirbys or any variety labeled specifically for pickling. If you grab those big, watery slicing cucumbers off the vine, they are just going to turn into mush, no matter how good your brine is. You need that dense flesh!
Second, and this is a big one, if you slice them, cut them thicker. Thin rounds soften way faster than spears or thick chips. I recommend cutting off the blossom end of the cucumber—that little bit opposite the stem—and tossing those pieces away first. That end has enzymes that actually encourage softening. Seriously, cutting off that tiny bit makes a difference!
My final trick for this whole refrigerator vegetable pickling adventure is temperature. Keep your jars tightly sealed once they are chilling in the fridge, and try not to leave them out on the counter when you grab a snack. Cold slows down the softening process. Follow those three tips, and you will have the crispiest pickles around.
Ingredient Notes and Substitutions for Refrigerator Pickles
I love that this recipe is so flexible! While I sing the praises of apple cider vinegar for its lovely, mellow tang that pairs wonderfully with dill, you absolutely can switch it up. If you only have plain old distilled white vinegar on hand, go for it! Just know that those homemade condiments will have a sharper, more traditional vinegar bite. That’s totally fine if you like things strong!
Another fun thing you can play with right here in the brine is sugar. If you’re craving something a little less tangy and more dessert-like—maybe you want something perfect for your burgers—you can easily shift this into a Bread and Butter Pickles Refrigerator style. Just swap out some of that granulated sugar for brown sugar. I usually bump the sugar up to about 1/4 cup if I’m going sweet, and I look for a dark brown sugar for that deeper molasses flavor.
Remember, since this is no cook pickling, the balance has to be right when you mix it, because we aren’t boiling everything down like in traditional canning methods!
Storage and Shelf Life of Your Homemade Refrigerator Pickles
Okay, now that you’ve waited that agonizing 24 hours, we need to talk about keeping these beauties fresh. Because we skipped the water bath and the high-heat canning process, these are truly fresh pickled vegetables that need to stay cold. That means they go straight into the fridge as soon as they cool down on the counter!
The good news is the high vinegar content keeps them wonderfully preserved. You can enjoy these simple jarred pickles confidently for up to three weeks if you keep them sealed and submerged in the brine. If they start looking cloudy or you notice any funky smells, then it’s time to toss them, but honestly, they usually disappear long before that happens around my house!
Serving Suggestions for Tangy Pickled Snacks
Now that you have jars full of perfect, crunchy homemade goodness—congratulations! These aren’t just for snacking, although I definitely eat them straight out of the jar when I’m impatient after the 24-hour mark. Seriously, try them as sandwich toppings; they elevate even the plainest turkey club! They are incredible thinly sliced on burgers or chopped up small and folded into chicken salad. My favorite way to use these tangy pickled snacks is just serving them alongside a big scoop of potato salad on a summer afternoon. They make great meal prep vegetables too, ready to grab when you need a healthy, zingy side dish!

Frequently Asked Questions About Refrigerator Pickles
You’ve got the recipe down, but maybe you’re wondering about tweaking the flavor or how long you can actually hoard these amazing creations! That’s totally normal. I get asked these questions all the time about my refrigerator pickles. Here are the quick answers so you can get back to checking on your jars.
Can I make these refrigerator pickles sweeter, like Bread and Butter Pickles?
Oh, absolutely, yes! If you want to make these work as Bread and Butter Pickles Refrigerator style, it’s super easy. The brine we used is designed to be tangy, but you shift the balance by increasing the sugar. My trick is to keep the vinegar quantity the same, but I bump that granulated sugar up to about a quarter of a cup total in the brine mix. If you use brown sugar instead, you get a deeper, richer sweetness that is fantastic. It changes the whole profile from sharp dill to something much tangier and sweet.
How long until these Quick Pickles are ready to eat?
This is the hardest part, waiting for the flavor to develop! While you technically *could* eat them after about 12 hours just to taste the cucumber soaking in the brine, they truly shine after a full 24 hours. That’s when the spices really bloom and the vinegar has time to penetrate the cucumber structure, giving you that perfect flavor profile of quick pickles. Think of the first 24 hours as the minimum requirement for perfection, but don’t be afraid to make a big batch so you have some leftover for that Chicken Salad!
What is the difference between these and canned pickles?
The huge difference is that we skipped the high-heat canning process—that’s what makes them “no cook pickling.” Canned pickles are processed in a hot water bath which kills bacteria and allows them to be shelf-stable for years. Because we skip that heat, these homemade condiments are not safe for pantry storage. They *must* live in the refrigerator from day one. The upside? Because they aren’t cooked, they stay incredibly crisp! You get that satisfying crunch that shelf-stable jars just can’t match. If you’re looking for a great way to use up your dill pickles fridge favorites, chopping them up for a salad is divine.
From Our Kitchen to Yours: Enjoying Your Refrigerator Pickles
That’s it! You’ve done it! You have taken humble kitchen staples and turned them into bright, tangy, wonderfully crunchy refrigerator pickles in less time than it takes to run to the grocery store. I hope you feel that little spark of satisfaction that I feel every time I walk past my fridge and see those jars glowing on the shelf, ready for whatever dinner needs a little zing.
This is exactly what Cookin’ Corner is all about—taking those classic flavors we all grew up loving and making them incredibly accessible here in your own home. It’s about that connection to heritage, right? If you’ve made a batch of these quick pickles, please snap a picture and tag me! I absolutely love seeing how these recipes come to life in your kitchens. Knowing that Sarah Jane’s focus on simple, dependable home cooking is working for you truly makes my day.
If you’re looking for another easy, comforting dish to make now that you have your homemade sandwich toppings ready to go, you have to try my recipe for the Easy Homemade Reuben Bake. It’s pure comfort food and pairs perfectly with a crisp pickle on the side. Happy pickling, friends!
Print5-Minute No-Cook Refrigerator Dill Pickles (Crispy & Ready Fast)
Make crisp, tangy refrigerator dill pickles in just five minutes of prep time. This no-cook method uses apple cider vinegar and fresh dill for quick pickles ready in 24 hours, perfect for sandwiches or snacks.
- Prep Time: 15 min
- Cook Time: 5 min
- Total Time: 20 min
- Yield: About 2 quarts 1x
- Category: Condiment
- Method: No Cook Pickling
- Cuisine: American
- Diet: Vegetarian
Ingredients
- 2 pounds pickling cucumbers (Kirby or similar), sliced into spears or rounds
- 1/4 cup fresh dill sprigs or 2 tablespoons dried dill seed
- 4 cloves garlic, smashed
- 1 teaspoon black peppercorns
- 1/2 teaspoon mustard seeds
- 2 cups water
- 1 cup apple cider vinegar
- 1 tablespoon kosher salt
- 1 teaspoon granulated sugar
Instructions
- Prepare your jars: Wash two quart-sized or four pint-sized glass jars and lids thoroughly. Set aside.
- Pack the flavorings: Divide the dill, smashed garlic cloves, peppercorns, and mustard seeds evenly between the prepared jars.
- Pack the cucumbers: Tightly pack the cucumber slices or spears into the jars over the spices. Leave about 1/2 inch of headspace at the top.
- Make the brine: In a saucepan, combine the water, apple cider vinegar, kosher salt, and sugar. Heat over medium heat, stirring until the salt and sugar fully dissolve. Do not boil the brine.
- Pour the brine: Carefully pour the warm brine over the cucumbers in the jars, ensuring the cucumbers are completely submerged. Leave 1/2 inch of headspace.
- Remove air bubbles: Gently tap the jars on the counter or slide a thin, non-metal utensil down the sides to release trapped air bubbles. Add more brine if needed to maintain headspace.
- Seal and chill: Wipe the rims clean, seal the jars with the lids, and let them cool on the counter for about 30 minutes. Transfer the jars to the refrigerator.
- Wait for flavor: Allow the pickles to chill for at least 24 hours before eating for best flavor and crispness. These refrigerator pickles last up to three weeks in the fridge.
Notes
- For maximum crispiness, use very fresh, firm cucumbers. Do not use slicing cucumbers, as they tend to soften faster.
- If you prefer a sweeter profile, substitute 1/4 cup of the sugar for brown sugar to make a variation of bread and butter pickles.
- If you do not have apple cider vinegar, you can substitute it with distilled white vinegar, though the flavor will be sharper.
Nutrition
- Serving Size: 4 spears
- Calories: 15
- Sugar: 2
- Sodium: 290
- Fat: 0
- Saturated Fat: 0
- Unsaturated Fat: 0
- Trans Fat: 0
- Carbohydrates: 4
- Fiber: 0
- Protein: 0
- Cholesterol: 0