
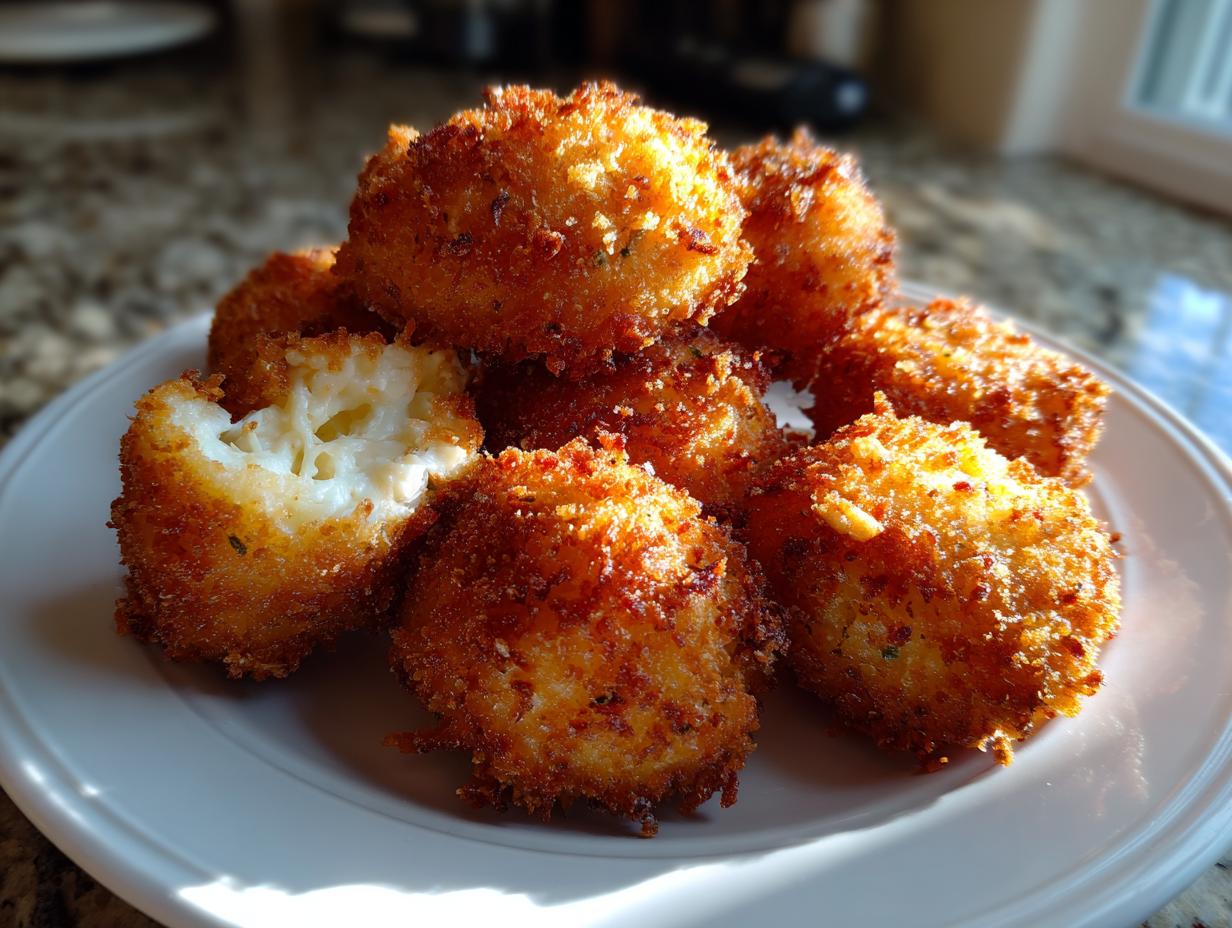
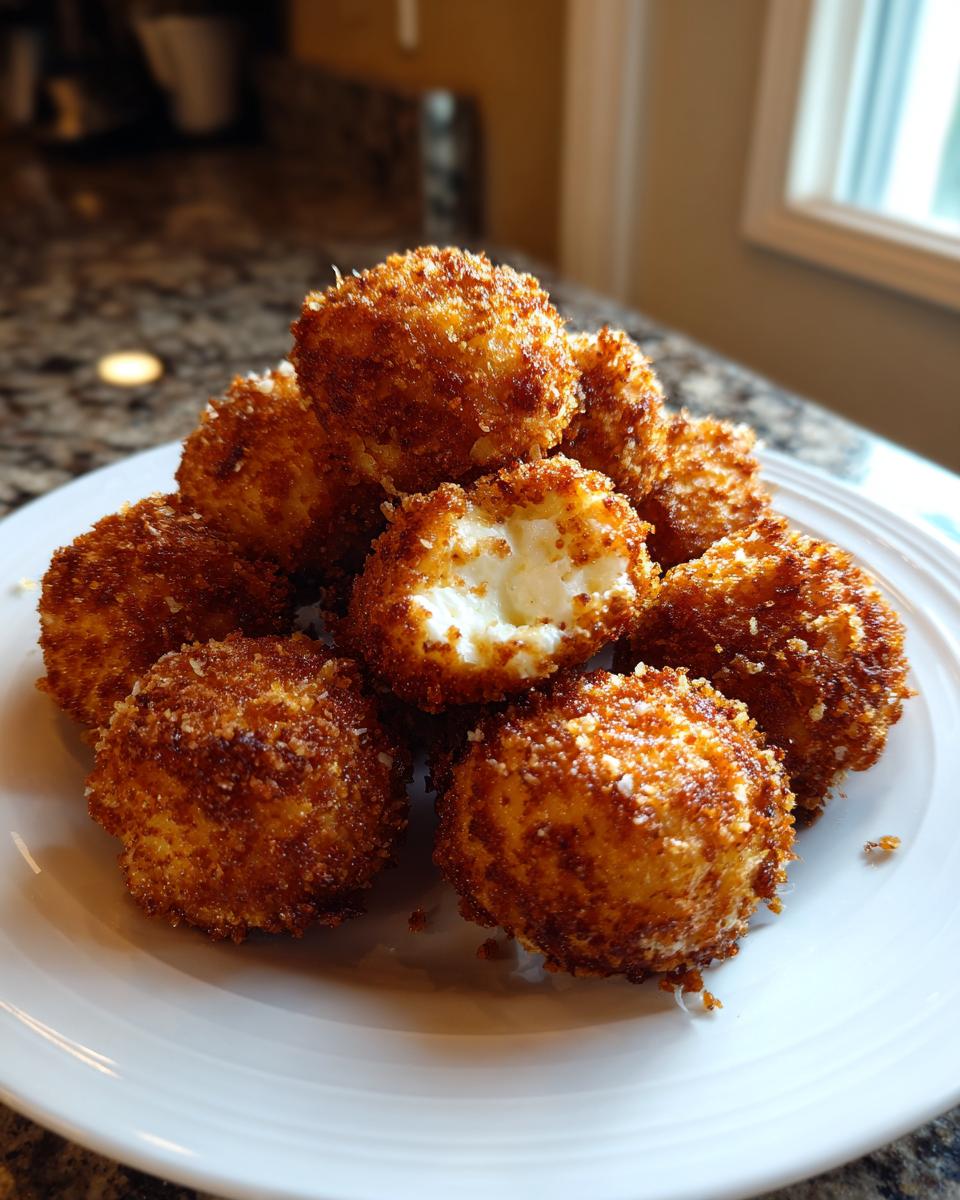
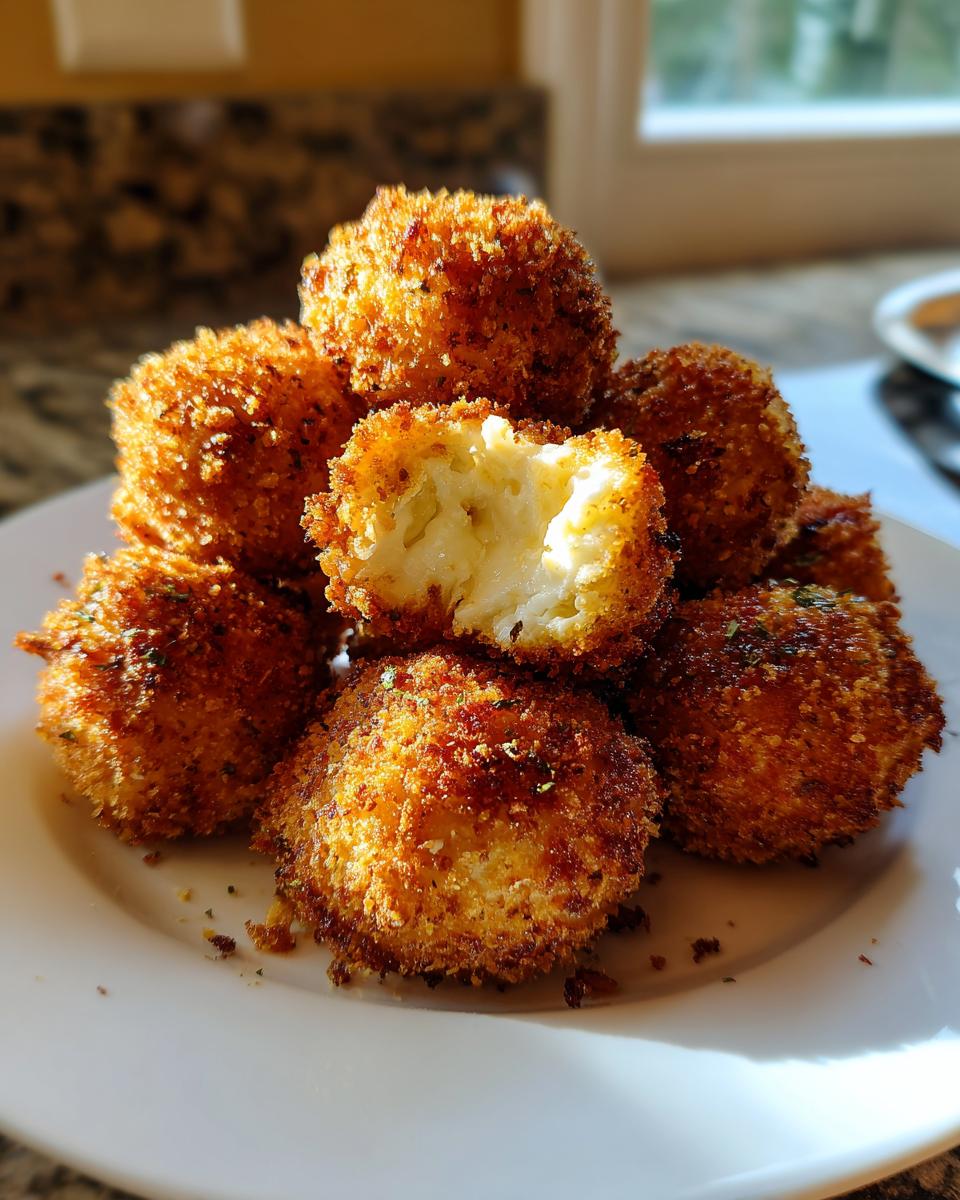
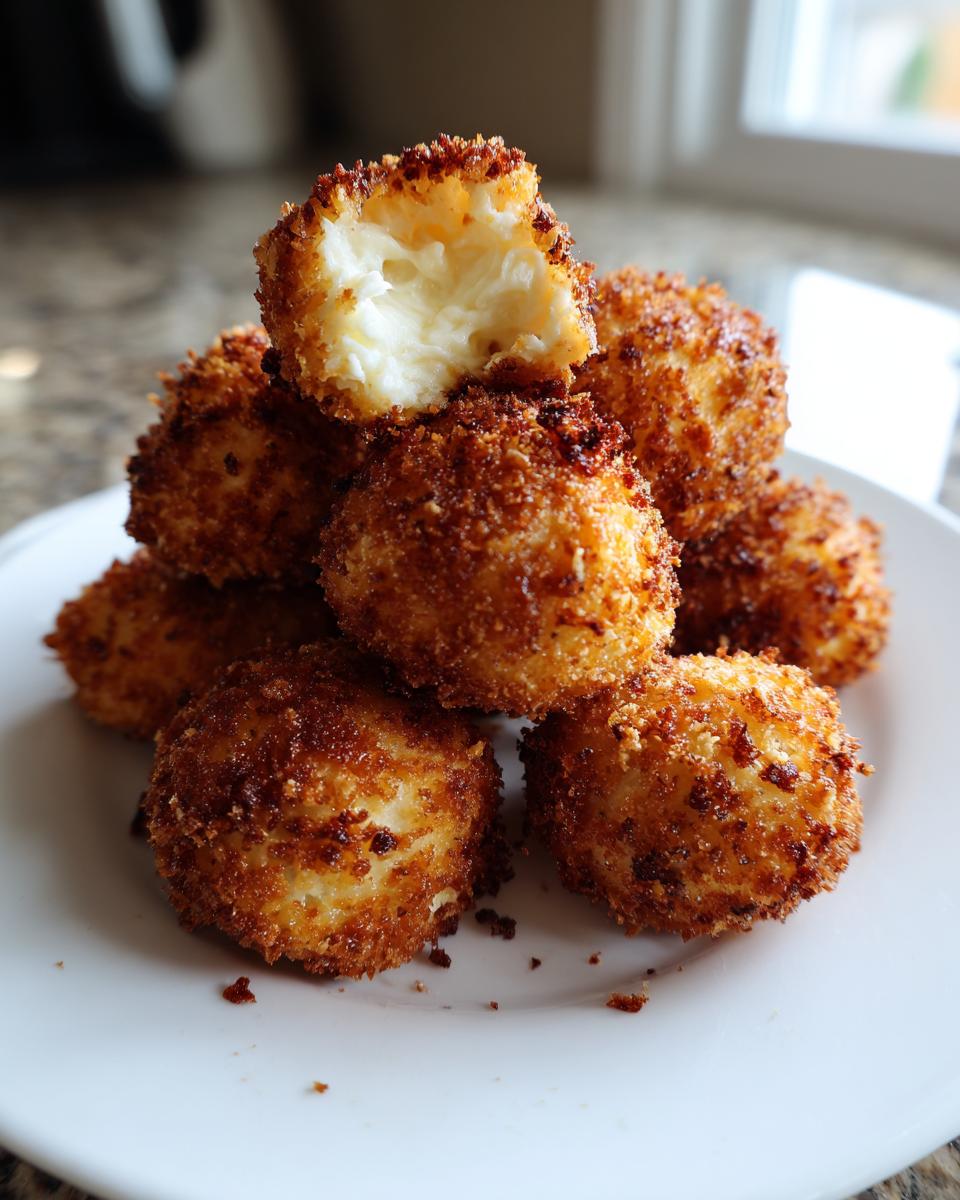
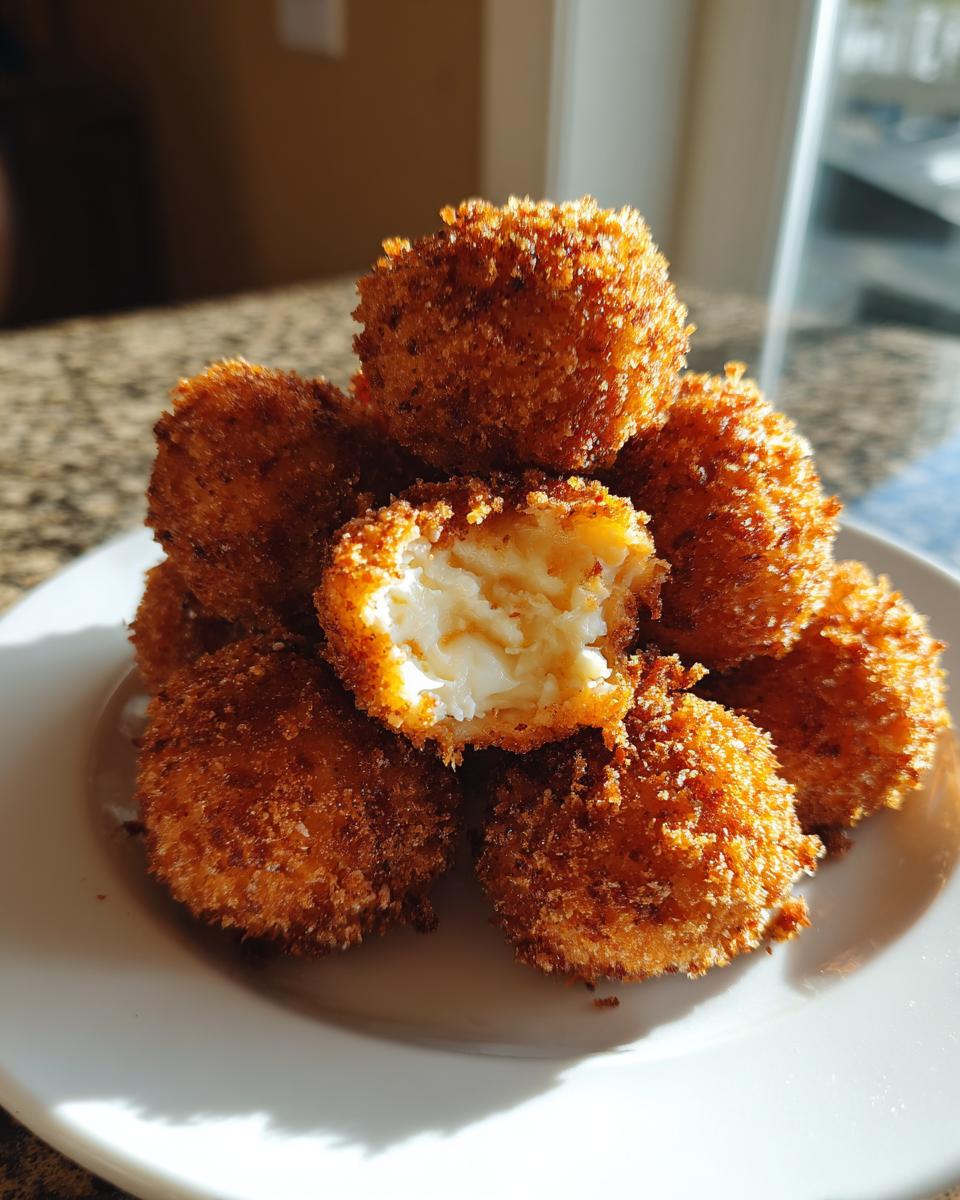
If you’ve ever watched a little too much reality TV, you know that some restaurant appetizers just stick with you! Everyone talks about that incredible crunch they get at SUR, which is why I spent ages perfecting this copycat recipe for Crunchy Fried goat cheese balls. Trust me, the magic here is all about contrasts: that unbelievably crispy, golden-brown exterior giving way to the warm, tangy, creamy goat cheese inside. It took a few messy attempts—oops!—but I finally landed on a foolproof method that brings that gourmet finger food experience right into your cozy kitchen. We’ve taken the guesswork out of the frying, so you can serve these showstoppers without stress.
This isn’t just some quick snack; this is achieving restaurant quality! They are famous for a reason, and my version ensures that those beautiful little orbs hold their shape. If you were looking for an easy appetizer that packs a huge flavor punch, you absolutely found it here.
- Why You Will Make These Fried Goat Cheese Balls Again and Again
- Gathering Ingredients for Your Goat Cheese Balls Recipe
- Step-by-Step Instructions for Crunchy Fried Goat Cheese Balls
- Alternative Cooking Methods: Baked Goat Cheese Recipe and Air Fryer Goat Cheese Balls
- Making Ahead Appetizers: Tips for Preparing Goat Cheese Balls Early
- Variations: Cranberry Pecan Cheese Balls and Other Savory Bites
- Serving Suggestions for Your Gourmet Finger Food
- Frequently Asked Questions About Making Goat Cheese Balls
- Nutritional Estimates for Fried Goat Cheese Balls
Why You Will Make These Fried Goat Cheese Balls Again and Again
Honestly, I keep coming back to this recipe because it just hits every mark for an impressive, easy snack. It feels fancy but it’s shockingly fast. You’ll want to save this recipe for every gathering you host!
- Quick Prep Time for Easy Entertaining Snacks: We’re talking about getting these amazing goat cheese balls ready in under 30 minutes total! That speed makes them my go-to choice when company drops by unexpectedly. They are simply the best easy appetizer for last-minute party appetizers.
- The Perfect Sweet and Savory Appetizer Balance: That creamy tang inside against the crunchy Panko? It’s incredible on its own, but drenching them in hot honey turns this into the ideal sweet and savory appetizer. It’s just divine!
Gathering Ingredients for Your Goat Cheese Balls Recipe
Okay, gather your crew, because the ingredient list is super short, which is exactly how I like my kitchen magic to happen! Getting these things together is the easy part. Remember, for the best texture, you really need specific items—we aren’t making substitutes here!
You’ll need exactly 16 ounces of goat cheese, and honestly, this is crucial: it absolutely must be softened. If it’s too cold, you’ll be wrestling with it when you try to roll the balls. Don’t skip the softening step!
For that gorgeous, super crunchy coating, we use a standard three-part breading station, so make sure you have:
- 1 cup of all-purpose flour.
- 2 large eggs, and yes, they have to be beaten until they’re uniform.
- 2 cups of Panko bread crumbs. Panko is non-negotiable for that fantastic crunch, way better than regular crumbs!
Don’t forget the seasoning for the flour—we’re adding 1 tablespoon of garlic powder and 1 teaspoon of salt right into that first dredge. It seasons the cheese right from the outside in. And finally, the dirty work: you’ll need about 3 cups of oil for the deep frying. If you want to look ahead for serving, grab some hot honey; it elevates these savory bites like nothing else!
Step-by-Step Instructions for Crunchy Fried Goat Cheese Balls
Alright, this is where the fun starts! Remember how we prepped those perfect, creamy centers? Now we turn them into those famous crispy spheres. If you skip the next few steps, you might end up with cheese soup instead of actual goat cheese balls, so pay close attention to the coating process.
Look, frying can be intimidating, but the secret to success is having everything ready to go and keeping your oil temperature steady. We’re going for golden perfection in under two minutes! If you want to practice your overall deep-frying skills before tackling cheese, try making my crispy homemade potato chips first!
Preparing the Creamy Center and Crunchy Coating Recipe
First thing, make sure that softened goat cheese is mixed well—if you decided to add herbs or anything savory in the first step, now is when you make sure it’s totally incorporated. Take a small scoop and roll it gently between your palms into about a 1-inch ball. Don’t overwork it; you want them uniform but not squished.
Next, let’s set up that classic three-stage breading station. You need three shallow dishes or wide bowls lined up in order:
- Dish one gets your flour mixed with the garlic powder and salt.
- Dish two gets those beaten eggs, just lightly whisked up.
- Dish three gets your precious Panko bread crumbs.
Now, work one ball at a time. Dip it fully into the flour first—and this is important, give it a good shake to lose the excess powder. Then, a quick dip in the egg, let the soggy drip fall off, and finally, roll it aggressively into the Panko. Press the crumbs onto the cheese ball gently so they actually stick. Once coated, lay them out on a parchment-lined baking sheet. You MUST chill these coated beauties for at least 30 minutes. This step locks everything in place so they don’t explode when they hit the hot grease!
Frying Technique for Golden Fried Cheese Bites
Time to heat the oil! You need a good pot or Dutch oven with about three cups of neutral oil. You are aiming right for 350°F (175°C). Seriously, get a thermometer. Too cool and the coating sucks up oil; too hot and the outside burns while the cheese melts completely.
When the oil is ready, carefully lower just 3 or 4 balls in at a time. I learned the hard way that overcrowding the pot drops the temperature instantly! They only need about 1 to 2 minutes to get that perfect golden brown crust. Keep an eye on them, gently tossing them so they cook evenly. Once they look crisp and beautiful, scoop them out immediately with a slotted spoon and pop them onto paper towels to drain. Serve these wonderful fried cheese bites while they are piping hot!
Alternative Cooking Methods: Baked Goat Cheese Recipe and Air Fryer Goat Cheese Balls
Now, I know deep frying isn’t for everyone, and you might want something a little lighter for your party spread, or maybe your apartment building says “no deep fryers allowed.” No sweat! We can absolutely adapt these little flavor bombs for the oven or the air fryer. You still get that lovely golden crunch, just with a bit less fuss and oil. It’s fantastic that we can get a great crispy texture using either method, even if the texture isn’t identical to the deep-fried version.
If you’re looking for an excellent baked goat cheese recipe, or want to streamline cleanup with the air fryer, here are the quick adjustments you need to make after you’ve breaded those little treasures and kept them chilled.
For the oven—which is perfect if you’re making a huge batch for a holiday party—you need to preheat that bad boy to 400°F (200°C). Line a tray with parchment paper, and give those coated balls a light spray of cooking oil; this really helps that Panko brown up! Pop them in and let them bake for about 10 to 12 minutes. You need to flip them halfway through just to make sure you get color on all sides.
If you’re reaching for your air fryer—my current favorite gadget for easy weeknight snacks—set the temperature to 380°F (195°C). The cooking time shrinks dramatically here. We’re only talking 6 to 8 minutes total for perfect air fryer goat cheese balls. Just remember to pull the basket out and give it a good shake halfway through, just like you would for fries, to keep everything crisp and consistent.
Making Ahead Appetizers: Tips for Preparing Goat Cheese Balls Early
Who doesn’t love an appetizer that lets you relax when guests finally walk in the door? That’s why I love recipes that are fantastic for making ahead, and these delicious goat cheese balls are totally cooperative! We already discussed the must-do chilling step, but we can take that even further.
The absolute best time to prep these is the day before you plan on serving them. After you’ve rolled those creamy centers and coated them completely in the crunchy Panko mixture, don’t fry them yet! Just lay out that baking sheet again, cover the tray tightly with plastic wrap, and slide them into the refrigerator. They can hang out happily for a full 24 hours back there until party time.
If you’ve got a really busy day coming up, you can even freeze them once they are coated. I’ve done this, and honestly, it works like a charm for party planning—they are instant make ahead appetizers! Just place the tray in the freezer until they are rock solid—this usually takes an hour or two. Once frozen solid, transfer them into a heavy-duty freezer bag. When you need them, you can just drop them straight from the freezer into the hot oil. You’ll just need to add about 1 to 2 minutes extra to the frying time, since they are starting frozen solid. They come out crispy every time! If you make the cranberry pecan variety—like the ones over at this site—the same rules apply for prepping early!
Variations: Cranberry Pecan Cheese Balls and Other Savory Bites
While this recipe is all about getting that amazing, crispy fried shell, remember that the core ingredient—the goat cheese—is a blank canvas! If you are making these for a holiday gathering where something a little sweeter and less greasy is preferred, you absolutely have to look into the no-fry versions. The cranberry pecan cheese balls are Pinterest gold for a reason, and you can adapt the preparation easily.
For those non-fried versions, instead of dredging them in flour and Panko, you simply roll the softened goat cheese log (or small balls) directly into a mixture of finely chopped pecans, dried cranberries, and maybe a tiny pinch of cinnamon. That’s it! Instant elegance. Those usually don’t even need cooking; they just need a good chill time to firm up.
But if you want to stick with frying or air-frying these goat cheese balls and just want to change up the flavor profile, don’t feel stuck with just garlic powder in the flour dredge. Think about what you serve them with! If you know you’re drizzling them with spicy honey, maybe switch up the seasonings layered right in the cheese base. I’ve folded in finely minced chives and a touch of black pepper for really bright, fresh savory bites.
Another fun idea is to skip the breading entirely sometimes and try rolling them in toasted, finely crushed walnuts or even toasted sesame seeds for a completely different crunch. This keeps them lighter but still provides texture. It’s all about balancing that soft, tangy center with something robust on the outside, whether you fry it, bake it, or just coat it!
Serving Suggestions for Your Gourmet Finger Food
Okay, you’ve got these incredible, hot, crispy fried goat cheese balls cooling on the rack—now comes the fun part: making them look as mouthwatering as they taste! Presentation really matters when you’re serving gourmet finger food. Since these are so rich and tangy, they pair best with something bright or sweet to cut through that decadent creaminess.
The absolute must-have side for these is a drizzle of hot honey! Trust me, that sweet heat combo is what takes these over the top. I love putting a small bowl of it right next to the platter so guests can control the spice level. You can find some fantastic options out there, or try making your own—check out this idea for pairing it with cranberry flavor over at Little Spice Jar if you want a twist!
What about serving them next to? Since these little fritters are already so substantial and savory, you don’t need a ton of heavy dips, but you do need a great vehicle for scooping up any stray crumbs or extra honey.
- Sturdy, thin crackers work perfectly—nothing too heavily flavored that competes with the cheese.
- Sliced baguette rounds, perhaps toasted lightly, are an elegant choice for a creamy cheese appetizer.
- A small side of fig jam or a high-quality balsamic glaze can offer another layer of sweet and sour contrast if you skip the hot honey entirely!
Serve these immediately after frying while they’re still warm. Nobody wants a room-temperature, greasy cheese ball! Just pile them high, get that honey ready, and watch your guests swarm the platter. They are simple, but they feel incredibly special.
Frequently Asked Questions About Making Goat Cheese Balls
I get so many questions about these delicious little bites! Frying cheese can feel a little scary the first time through, but once you know the tricks, these crunchy delights are totally straightforward. We want perfect, gooey centers every time, not melted cheese puddles all over your fryer basket, right? Here are the questions I get asked the most about making these perfect goat cheese balls at home.
Can I skip chilling the coated goat cheese balls?
Oh, please don’t! If you skip chilling, I can’t promise you won’t have a disaster on your hands. Chilling is non-negotiable for successful frying. When you coat those cheese balls in the flour, egg, and Panko, the coating needs time to fuse and really settle onto the cold cheese. When they hit the hot oil, that cold coating acts like a temporary shield. If you skip chilling, the heat transfers too fast, and the coating slides right off the warm cheese, leaving you with a big, greasy mess instead of a perfectly crisp crunchy coating recipe!
What is the best oil for frying these appetizer bites?
For deep frying anything, especially something that is coating a fatty center like this, you need a neutral oil with a nice high smoke point. Seriously, don’t try to get fancy here! My absolute favorites are canola oil or plain vegetable oil. They stay stable at the 350°F (175°C) temperature we need, and since we are only frying for about 90 seconds, you don’t want any oil flavor fighting against the subtle tang of the goat cheese. Just make sure you have enough to cover the cheese balls completely!
Also, if you are worried about the mess, remember what we talked about earlier! If you are looking for a lighter option, try the air fryer method which uses far less oil than traditional frying, making clean-up a total dream!
Nutritional Estimates for Fried Goat Cheese Balls
Okay, let’s talk numbers for a second. I know that when you’re whipping up decadent appetizers like these, you aren’t exactly counting macros, but I always try to give a baseline idea of what you’re getting into! Remember, homemade is always best, but it means the numbers can shift dramatically based on whether you deep-fry them or opt for the lighter air fryer method, or if you decide to coat them in those sweet cranberry pecan cheese balls instead of frying them in oil.
These estimates below are calculated based on serving 3 of the fried goat cheese balls, cooked in oil, compared to a standard serving. Think of this as a general guide, not a sacred vow!
- Serving Size: About 3 balls
- Calories: Roughly 280
- Total Fat: Around 24 grams (Yep, that frying adds up, my friends!)
- Protein: About 8 grams—thanks, goat cheese!
- Carbohydrates: Right around 10 grams
If you were to use the air fryer notes I gave you earlier, those numbers, especially the fat content, would drop considerably—which is great if you want to serve these more often! But for this classic SUR copycat recipe, crunchy and rich is the name of the game. Enjoy them guilt-free knowing you made them right at home with love!
PrintCrunchy Fried Goat Cheese Balls (SUR Restaurant Copycat)

Make the famous Crunchy Fried Goat Cheese Balls, a popular appetizer often associated with SUR Restaurant. These bites feature creamy goat cheese coated in a crispy shell. We also include simple instructions for baking or air frying if you prefer a lighter option.
- Prep Time: 20 min
- Cook Time: 10 min
- Total Time: 30 min
- Yield: About 20 servings 1x
- Category: Appetizer
- Method: Frying
- Cuisine: American
- Diet: Vegetarian
Ingredients
- 16 oz goat cheese, softened
- 1 cup all-purpose flour
- 1 tablespoon garlic powder
- 1 teaspoon salt
- 2 large eggs, beaten
- 2 cups panko bread crumbs
- Oil for deep frying (about 3 cups)
- Optional: Hot honey for serving
Instructions
- Combine the softened goat cheese in a bowl. If using herbs or spices, mix them in now.
- Set up a standard breading station with three shallow dishes: one with flour, one with the beaten eggs, and one with the panko bread crumbs.
- Roll the goat cheese into small, uniform balls, about 1 inch in diameter.
- Dredge each cheese ball first in the flour, shaking off excess.
- Dip the floured ball into the egg mixture, letting excess drip off.
- Roll the ball thoroughly in the panko bread crumbs, pressing gently to ensure a complete, even coating. Place coated balls on a parchment-lined tray.
- Chill the coated goat cheese balls for at least 30 minutes to help the coating set.
- Heat the frying oil in a deep pot or Dutch oven to 350°F (175°C). Use a thermometer to monitor the temperature.
- Carefully lower 3 to 4 cheese balls into the hot oil, ensuring you do not overcrowd the pot.
- Fry for 1 to 2 minutes, turning occasionally, until the coating is golden brown and crisp. The cheese inside will soften but should not fully melt out.
- Remove the fried goat cheese balls with a slotted spoon and place them on a paper towel-lined plate to drain excess oil.
- Serve immediately, perhaps with a drizzle of hot honey for a sweet and savory appetizer experience.
Notes
- For a baked version: Place coated balls on a baking sheet, spray lightly with cooking spray, and bake at 400°F (200°C) for 10-12 minutes, flipping halfway, until golden.
- For an air fryer version: Cook at 380°F (195°C) for 6-8 minutes, shaking the basket halfway through.
- You can prepare the balls and bread them a day ahead. Store them covered in the refrigerator until ready to cook.
Nutrition
- Serving Size: 3 balls
- Calories: 280
- Sugar: 1
- Sodium: 350
- Fat: 24
- Saturated Fat: 14
- Unsaturated Fat: 10
- Trans Fat: 0
- Carbohydrates: 10
- Fiber: 1
- Protein: 8
- Cholesterol: 45