
Sometimes, the deepest flavors come from the simplest techniques, and nothing proves that more than turning regular butter into pure gold. That nutty, warm, slightly toffee scent is the magic ingredient that separates a good cookie from something truly unforgettable. I’m Sarah Jane Thompson, and here at Cookin’ Corner, we believe in using those time-tested American kitchen tricks to elevate your baking. Forget everything you thought you knew about the classic chocolate chip cookie; this recipe for brown butter chocolate chip cookies delivers the ultimate chewy texture and that deep, nutty flavor that makes people ask for the recipe immediately. If you love a thick cookie that stays soft inside, you’ll want to see my tips for making bakery style cookies at home! Trust me, once you brown the butter, you’ll never go back.
- Why These brown butter chocolate chip cookies Are the Best (Get That Caramelized Flavor)
- Essential Ingredients for Ultimate brown butter chocolate chip cookies
- How to Brown Butter for brown butter chocolate chip cookies
- Step-by-Step Instructions for Making brown butter chocolate chip cookies
- Tips for Bakery Style Cookies at Home
- Storing and Reheating Your brown butter chocolate chip cookies
- Troubleshooting Common Cookie Issues
- Frequently Asked Questions About Browned Butter Baking
- Share Your Homemade Gourmet Cookies
Why These brown butter chocolate chip cookies Are the Best (Get That Caramelized Flavor)
Honestly, folks, browning the butter is non-negotiable if you want the absolute best experience. It’s such an easy step, but wow, does it change everything! When you cook that butter down until the milk solids toast, you unlock this incredible depth. You move past just sweetness and land right in Nutty Flavor Town. That’s why these become true nutty chocolate chip cookies!
That rich, almost toffee-like hint is what makes these caramelized butter cookies superior to anything made with just softened butter. It integrates so much more deeply into the dough than vanilla or spices even can. It’s the secret sauce for an elevated chocolate chip cookies experience, plain and simple. If you love the depth in my fudgy brownies, you’ll adore this flavor profile.
Achieving the Perfect Texture: Chewy Center, Crisp Edge
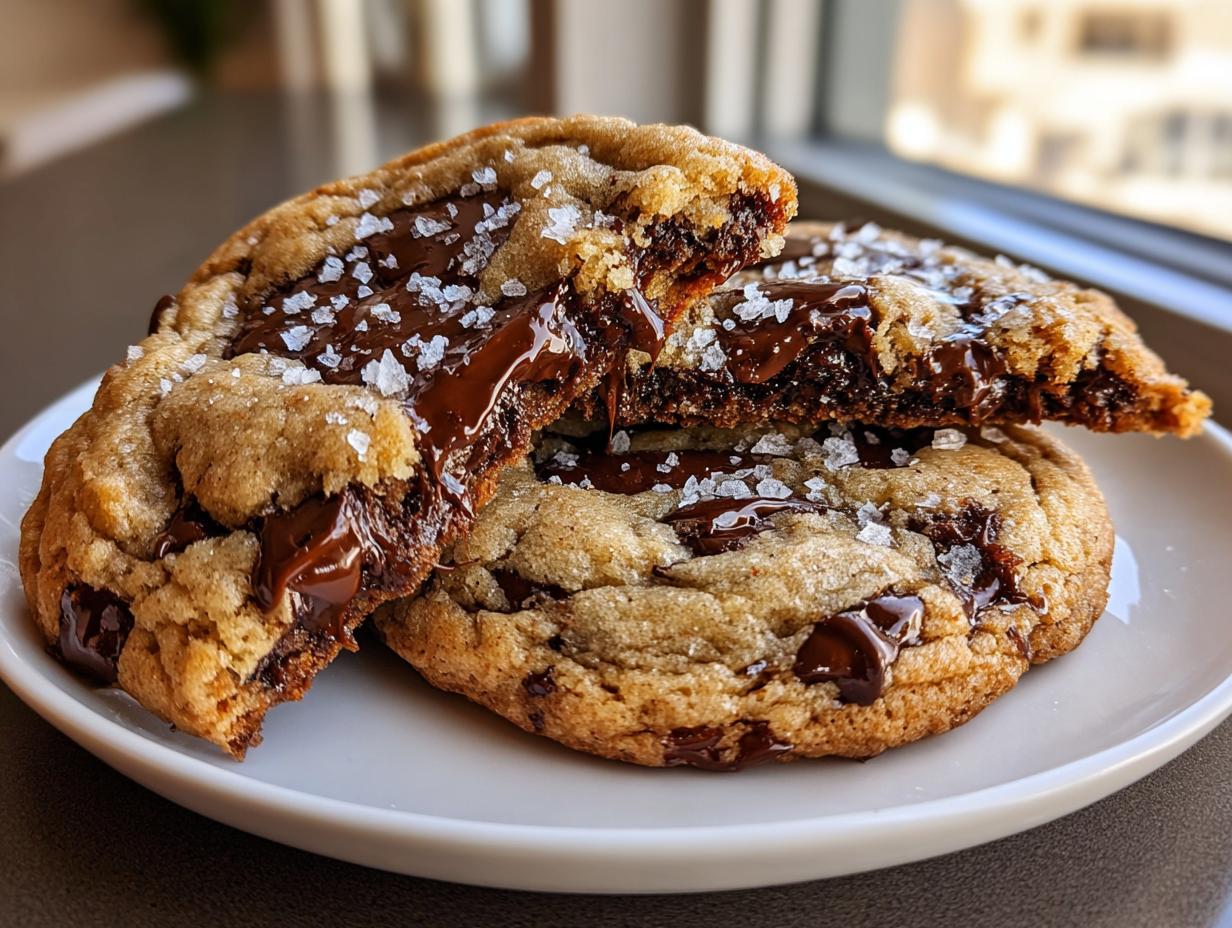
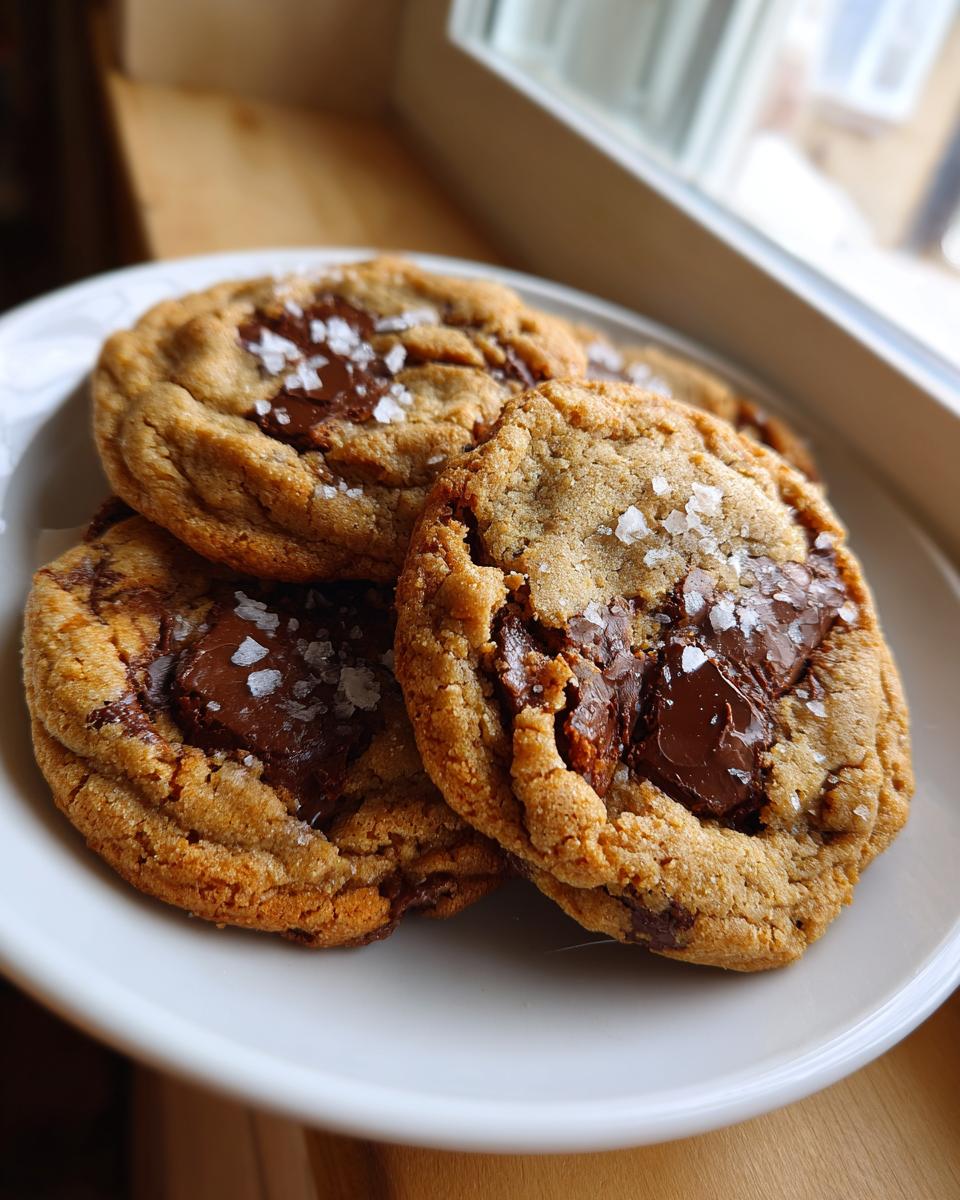
Flavor isn’t everything, though, is it? We bake cookies for that perfect bite! This recipe is specifically designed to give you those amazing gooey center cookies—the kind that look slightly underbaked when they come out. But we balance that soft middle with edges that go beautifully golden brown. The combination of the brown butter and the precision in our egg ratio guarantees thick and chewy cookies every single time. No sad, flat cookies here!
Essential Ingredients for Ultimate brown butter chocolate chip cookies
See? This is where the trust starts. I give you the exact list, and I promise if you follow this, you’ll end up with the best chocolate chip cookie recipe right in your own kitchen. We need quality ingredients for these luxurious brown butter cookies, but nothing crazy! Everything here is easy to find.
- 1 cup (226g) unsalted butter — This is important, we need the unsalted kind!
- 1 cup (200g) light brown sugar, packed — Make sure you pack it into the measuring cup, please!
- 1/4 cup (50g) granulated sugar — Just the regular stuff.
- 1 large egg, room temperature
- 1 large egg yolk, room temperature — That extra yolk is key for chewiness!
- 1 tablespoon pure vanilla extract
- 1 3/4 cups (220g) all-purpose flour
- 3/4 teaspoon baking soda
- 3/4 teaspoon kosher salt
- 1 1/2 cups (255g) semi-sweet chocolate chips or chopped chocolate — Your choice here, but I prefer chopped bars!
- Flaky sea salt, for sprinkling — Don’t skip this finish!
Ingredient Notes and Substitutions for brown butter cookies
I learned the hard way over the years that the details matter, especially when we are making these brown butter chocolate chip cookies so special. My grandmother always said, measure with your heart, but when it comes to baking, measure with your scale!
First, about the butter: We HAVE to use unsalted butter here. Since we are browning it, we control exactly how much salt ends up in the cookie. If you only have salted butter on hand, you can cheat, but make sure you cut back the added kosher salt in the dry ingredients down to just 1/4 teaspoon. Otherwise, wow, they’ll be too salty!
Next, room temperature eggs are a must. If you toss a cold egg into your gorgeous, slightly cooled brown butter mixture, it can cause the fats to seize up and look curdled. Seriously, take the eggs out 30 minutes before you start. That ensures we get a smooth, beautiful emulsification when we whisk them in. It makes all the difference for that final cookie recipe with deep flavor.
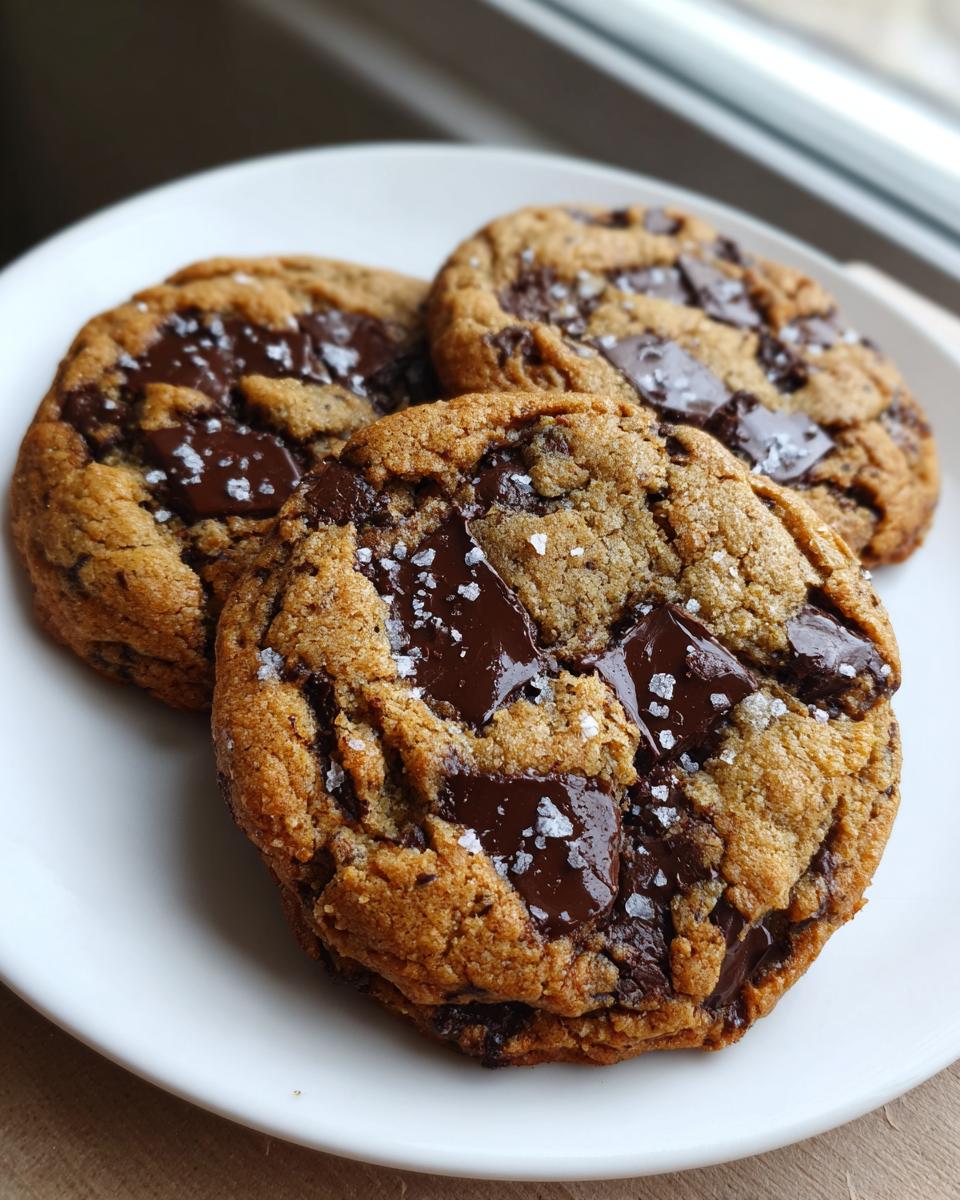
For the chocolate? Chips work great, but if you want that true artisanal look, chop up a good quality bar of chocolate. The chunks melt differently than chips, giving you those beautiful puddles of chocolate throughout the cookie. Grab your favorites, maybe check out my peanut butter cup cookies recipe for inspiration on chocolate combos!
How to Brown Butter for brown butter chocolate chip cookies
Alright, darling, this part feels a little scary the first time you do it, I remember mine feeling like a science experiment gone wrong! But I promise, learning exactly how to brown butter for cookies is the single most impactful thing you can learn in baking. It takes five minutes, and it turns your humble stick of butter into liquid gold. This is where that deep, caramelized flavor truly begins for our brown butter chocolate chip cookies.
You need a light-colored saucepan for this, folks. You want to see the change happening! Start by plopping that full cup of unsalted butter right into the pan over medium heat. Let it melt completely, which it will do right away.
Now, here’s where you need to pay attention—I mean, *really* pay attention. Once it’s melted, it’s going to start bubbling up and foaming like crazy. That’s just the water cooking out. Keep swirling the pan gently. Seriously, swirl it like you’re trying to show off to your neighbors. After the foam subsides, you’ll start hearing this soft crackling or popping sound. That’s the moisture gone, and the milk solids hitting the bottom of the pan.
Watch those little brown bits forming on the bottom—those are the flavor makers! As soon as you smell that rich, nutty aroma—like toffee or toasted hazelnuts—you have to pull it off the heat *immediately*. If you wait even ten seconds too long, you go from nutty and sweet to black and burnt, and trust me, that is a sad, sad end to a good batch of butter.
My little trick from Grandma? I always listen for the crackle to turn into a steady, gentle sizzle. That’s my five-second countdown alarm. Once it sizzles quietly, I pour it instantly into a heatproof bowl, making sure to scrape every last little brown crumb from the bottom of the pan into the bowl. Don’t leave any flavor behind!
Let that beautiful stuff cool for about 15 minutes before you move on to the next step. We need it cooled so it doesn’t scramble those room-temperature eggs we carefully warmed up!
Step-by-Step Instructions for Making brown butter chocolate chip cookies
Alright, we’ve got our magic brown butter cooling down. Now it’s time to bring this whole magnificent batch of brown butter chocolate chip cookies together. Remember how I talked about the texture? This is where we lock in that thick, chewy result! Don’t rush the steps, and everything will come together perfectly.
First up, you take that cooled brown butter—remember, it should be liquid but not hot—and put it into your big mixing bowl. Whisk in both sugars, the light brown and the granulated, until they look beautifully combined. Then, work in your room temperature egg, that extra yolk, and the vanilla extract until the whole thing gets lovely and glossy. This is what we call emulsifying, and it makes for a smooth base!
In a separate, smaller bowl, just give your flour, baking soda, and kosher salt a quick whisk together. We don’t want pockets of baking soda hiding in our dough, right? Now, add the dry stuff to the wet stuff gradually. I usually do about a third of the dry mix, stir gently until mostly combined, then the next third, and finish it off. Keep the mixer on low or just use a spatula. Stop mixing the second you don’t see any more white streaks of flour. Overmixing is the enemy of chewy! If you want to see how I handle texture in other treats, check out these ultimate chewy cookie bars.
Finally, fold in all those gorgeous chocolate chips or your chopped chocolate chunks. Make sure they are evenly distributed. Now, here’s the big secret for making these the ultimate chocolate chip cookies.
The Importance of Chilling Dough for Deep Flavor
Do not, I repeat, do not skip the chilling step. I know, I know, you want warm cookies right now! But chilling the dough for at least two hours, or even better, overnight, is essential for two reasons. First, it lets the flour fully hydrate, which stops the cookies from spreading thin in the oven. Second, and this is the major win for our flavor goal, it allows those nutty notes from the brown butter to totally permeate every particle of the dough. It deepens the flavor profile so much that people will swear you bought these from a professional bakery. This resting time is key for true deep flavor.
Baking and Finishing brown butter chocolate chip cookies
When you’re ready, preheat your oven to 375 degrees F (190 degrees C). Line your baking sheets—I only use parchment paper for easy cleanup, otherwise those little sticky brown bits stick to the pan! Scoop two tablespoons of dough for each cookie, placing them about two inches apart. They will relax a bit, so give them room to breathe.
Bake these babies for 10 to 13 minutes. The visual signs here are what turn them into those perfect gooey center cookies. Look for the edges to be set and a beautiful golden brown—that means they are crisping up nicely. But the middle? The center should still look soft, maybe even a little underdone. If you wait until the middle looks baked through, you’ll end up with crunchy cookies when they cool.
Pull them out right at that exact moment! Now, for my favorite part of making these brown butter chocolate chip cookies: while they are piping hot on the sheet, sprinkle the top of each one lightly with flaky sea salt. That salt cuts through the richness perfectly. Let them sit right on that hot baking sheet for a good five minutes before you dare slide them onto a wire rack to finish cooling. That rest time sets the bottom so they don’t fall apart when you move them!
Tips for Bakery Style Cookies at Home
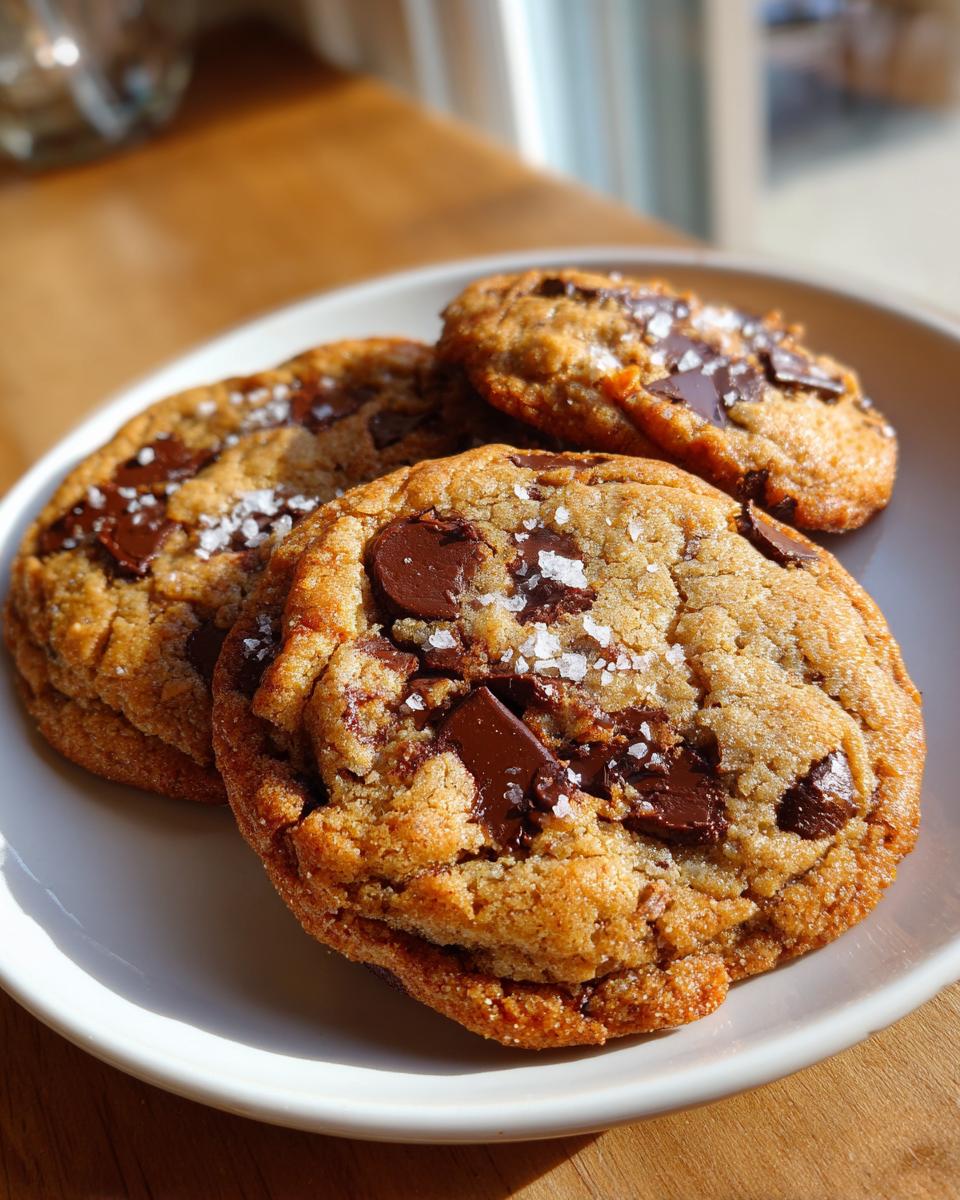
If you’re aiming for cookies that look like they just came out of a glass display case, you can absolutely achieve that bakery style cookies at home look! It’s not about having fancy equipment; it’s all about consistency in how you handle the dough before and during the bake. I’ve noticed a few little things over the years that really elevate the final product from “homemade” to “gourmet.”
First, let’s talk scoop size. For those thick, impressive cookies, consistency is king. I highly recommend using an actual ice cream scoop or a portion scoop—the one I use for these brown butter chocolate chip cookies is a standard 2-tablespoon size. If you just eyeball it, half your cookies will be done before the other half even starts browning! Being precise with your cookie dough balls ensures they all bake evenly.
Second, oven temperature. Ovens lie to us all the time! I keep an inexpensive oven thermometer hanging inside my oven door. Seriously, if your oven says 375°F, but the thermometer reads 350°F, your cookies will spread out because they aren’t setting fast enough. Getting that temperature dialed in is crucial for that thick, chewy look we want. Those cookies from the fancy bake shop have perfectly calibrated ovens, and we can replicate that trust here.
Also, I always make sure to wiggle my baking sheet halfway through the baking time—around the 7-minute mark. Gently pull the sheet out and give it a quick half-turn. That prevents one side from getting too dark if your oven has hot spots. It’s a tiny step, but it keeps your ultimate chocolate chip cookies uniform and gorgeous. For more tips on creamy, rich desserts, you might enjoy my snickerdoodle cheesecake recipe!
Storing and Reheating Your brown butter chocolate chip cookies
Okay, so you’ve made the absolute best brown butter chocolate chip cookies the world has ever known, and now you have a cooling rack overflowing with them. What if you somehow manage to save some for tomorrow? Because these cookies are so unbelievably good, they might not last the night, but we can dream!
The secret to keeping cookies fresh is keeping the air out. Never store them in a paper bag or anything porous, because that sucks all the moisture right out. You need a truly airtight container. If you stack them, put a piece of parchment paper or wax paper between the layers. This stops them from sticking together, especially since these have those lovely gooey centers we worked so hard to create!
Stored properly at room temperature, these will stay fantastic for about four or five days. They might lose a tiny bit of that just-baked crispness around the edges, but the centers should remain chewy. If you want to freeze them—and you absolutely should, because saving dough is always smart—scoop them into balls, place them on a cookie sheet, and freeze them solid. Then, transfer the frozen balls to a freezer bag. When the craving hits, you just bake them straight from frozen! Add an extra minute or two to the baking time.
Now, let’s talk about reheating because I wholeheartedly believe these are best served warm. If you’ve got a day-old cookie, don’t reach for the microwave right away. A quick 30 seconds in the microwave works in a pinch to melt that chocolate again, but if you want to restore that bakery magic, pop it in a 300-degree oven for maybe three or four minutes. That gentle heat re-crisps the edges and melts the chocolate just enough. It’s like baking them all over again! For fun flavor variations later on, check out my caramel ritz cracker Christmas cookies recipe for inspiration!
Troubleshooting Common Cookie Issues
Even the best recipes sometimes meet a little resistance in the kitchen, and that’s okay! Remember, I learned these things the hard way so you don’t have to scrub burnt bits off your white saucepan. When you’re dealing with something as precise as melting and browning butter for these brown butter chocolate chip cookies, you might run into a few hiccups. Don’t panic! Most issues are super simple fixes.
The number one problem I see people run into is cookies that spread way too thin into little puddles on the pan. This usually happens because of two things, and neither of them has to do with the sugar content. First, if you skip the chilling step we talked about—seriously, don’t!—the dough is too warm and the fat melts too fast in the oven, causing a puddle.
The second reason for spreading is rushing the butter process. If you measure the butter immediately after melting it, without letting it cool down for those critical 15 minutes, that heat transfers right into the sugars and eggs, making the whole batter too loose. You need that cool-down time so the fat can solidify just a little bit again before baking. If your cookies spread thin, make sure that butter is really cooled down next time and stick to the overnight chill for development of the deep flavor.
What if your cookies taste good but they just don’t have that intense, toasty flavor? That means you didn’t brown the butter enough! I know it’s scary, but you need to see those dark specks form at the bottom of the pan before you pour it out. If it just looks like clear, melted butter, you’re missing out on the whole caramelization process. You need to keep cooking until that nutty smell kicks in—that’s the signal! If you’re looking for more insights into soft baking, you can always peek at my applesauce cookies soft chewy spice recipe for technique ideas.
Frequently Asked Questions About Browned Butter Baking
It’s natural for questions to pop up when we decide to try something new, especially when we’re aiming to make something truly special like these brown butter chocolate chip cookies. I get emails all the time asking for little tweaks, and honestly, that’s how we build community and get better at baking together! These little questions are what turn an ordinary recipe into your personal, reliable, elevated chocolate chip cookies masterpiece.
Can I substitute salted butter when making brown butter cookies?
Yes, you certainly can, but you have to be smart about it! When you brown butter, you are concentrating all the flavors, and that includes the salt. Since the recipe already calls for 3/4 teaspoon of kosher salt in the dry ingredients, if you use salted butter, you should completely omit that added kosher salt. If you skip that, the final cookie should turn out just fine, retaining that wonderful cookie recipe with deep flavor without tasting aggressively salty. Just remember to use the full amount of butter required!
What is the best chocolate to use for this recipe?
This is partly personal preference, but I have a couple of tips for achieving that ultimate gooey texture! The recipe suggests semi-sweet chips or chopped chocolate. If you use chips, they are formulated to keep their shape slightly, giving you defined pockets of chocolate. If you use a good quality bar—say, 60% to 70% cacao—and chop it roughly, you get those glorious, melty puddles that spread across the cookie. For a richer, more sophisticated taste, try using a mix of semi-sweet and a little bit of chopped dark chocolate!
I also have one more quick tip for you! If you want a true gourmet finish, try tossing a few extra chocolate chunks onto the cookies *right* after they come out of the oven. That way, when they cool, you have wonderfully crisp edges, a soft middle, and beautiful, shiny chocolate peaks on top. You can find more inspiration for decadent treats over at my red velvet cake mix cookies post!
Share Your Homemade Gourmet Cookies
Baking is meant to be shared, isn’t it? That’s the whole idea behind Cookin’ Corner—turning humble ingredients into moments worth remembering around the table. I truly hope that making these brown butter chocolate chip cookies brings that same joy and that amazing, nutty aroma to your kitchen that it brings to mine.
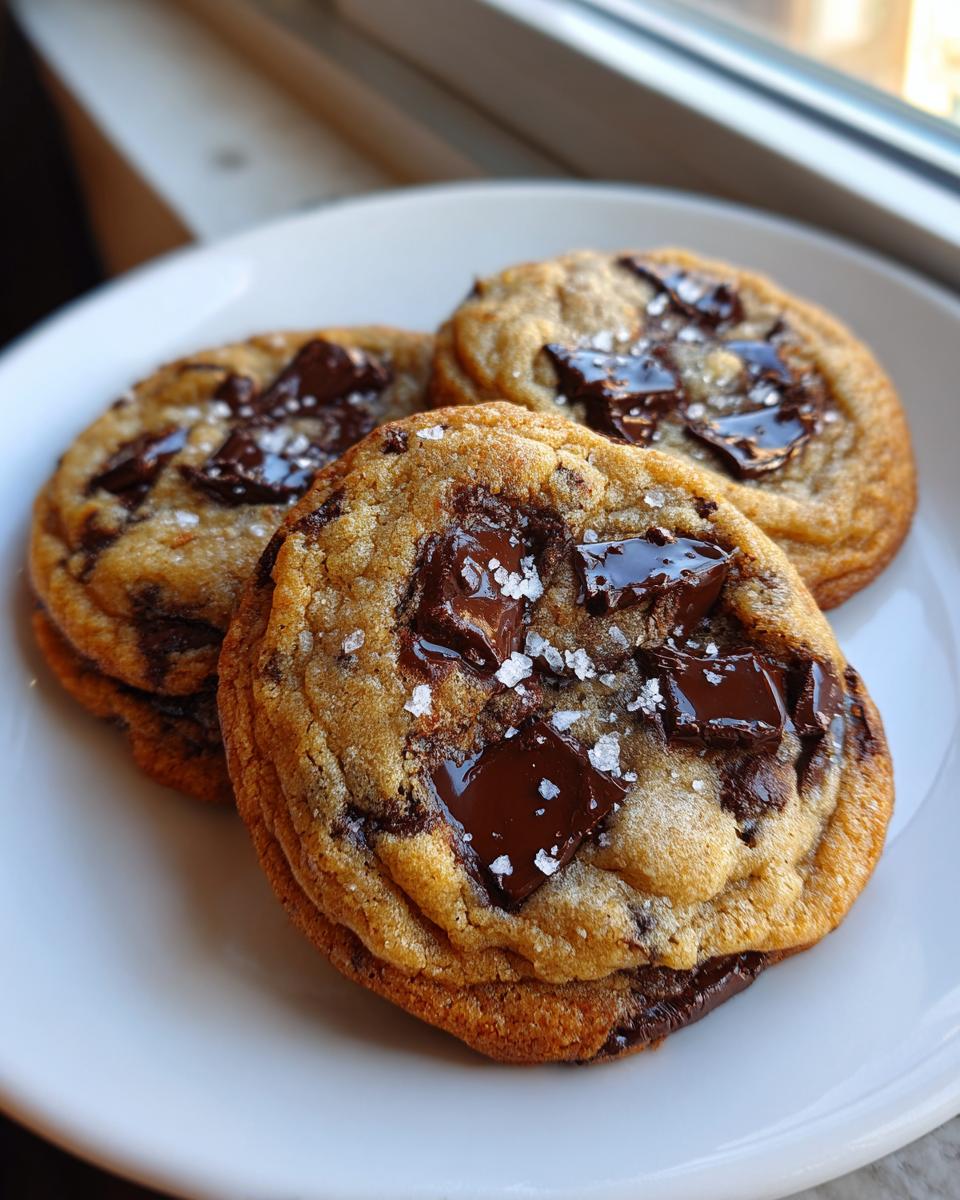
When you pull that first batch out, perfectly golden with those flaky salt crystals twinkling on top, I want to hear about it! Did your family know the secret right away, or did they just marvel at how incredibly deep the flavor was?
If you loved these cookies and they became an instant go-to for your family, please come back and leave a rating. Seeing those stars pop up tells me I’ve successfully passed along another piece of my grandmother’s kitchen wisdom to you. It helps other home cooks trust that this recipe is the real deal for homemade gourmet cookies.
And don’t be shy—snap a photo and share it on social media! Tagging us lets me see your gorgeous results. Seeing your thick, chewy masterpieces helps me keep creating recipes that honor that classic American kitchen heritage. I’ve got a recipe for homemade chocolate pudding coming up next week that I think you’ll love just as much!
Thank you so much for baking with me today. Happy stirring!
PrintThe Ultimate Chewy Brown Butter Chocolate Chip Cookies
Make the best chocolate chip cookies you have ever tasted by incorporating the deep, nutty flavor of browned butter. This recipe yields thick, chewy cookies with soft centers and crisp edges.
- Prep Time: 20 min
- Cook Time: 13 min
- Total Time: 2 hours 33 min
- Yield: 18 cookies 1x
- Category: Dessert
- Method: Baking
- Cuisine: American
- Diet: Vegetarian
Ingredients
- 1 cup (226g) unsalted butter
- 1 cup (200g) light brown sugar, packed
- 1/4 cup (50g) granulated sugar
- 1 large egg, room temperature
- 1 large egg yolk, room temperature
- 1 tablespoon pure vanilla extract
- 1 3/4 cups (220g) all-purpose flour
- 3/4 teaspoon baking soda
- 3/4 teaspoon kosher salt
- 1 1/2 cups (255g) semi-sweet chocolate chips or chopped chocolate
- Flaky sea salt, for sprinkling
Instructions
- Place the butter in a light-colored saucepan over medium heat. Melt the butter completely, then continue cooking, swirling the pan often. The butter will foam, then subside. Watch closely as brown bits form at the bottom and the aroma becomes nutty. This takes about 5 to 8 minutes.
- Immediately pour the browned butter into a heatproof bowl, scraping in all the brown bits. Let the butter cool for 15 minutes. You should have about 1/2 cup of liquid brown butter.
- In a large bowl, whisk together the cooled brown butter, light brown sugar, and granulated sugar until fully combined.
- Whisk in the egg, egg yolk, and vanilla extract until the mixture is smooth and glossy.
- In a separate bowl, whisk together the flour, baking soda, and kosher salt.
- Gradually add the dry ingredients to the wet ingredients, mixing on low speed or by hand until just combined. Do not overmix.
- Fold in the chocolate chips.
- Cover the dough and chill in the refrigerator for at least 2 hours, or preferably overnight, for the best flavor and texture.
- When ready to bake, preheat your oven to 375 degrees F (190 degrees C). Line baking sheets with parchment paper.
- Scoop the dough into balls, about 2 tablespoons each. Place them 2 inches apart on the prepared sheets.
- Bake for 10 to 13 minutes, or until the edges are golden brown but the centers still look slightly soft.
- Remove from the oven and immediately sprinkle the tops with flaky sea salt. Let the cookies cool on the baking sheet for 5 minutes before transferring them to a wire rack to cool completely.
Notes
- Browning the butter is key to achieving that deep, caramelized butter cookies flavor. Do not rush this step.
- Chilling the dough is necessary for thick and chewy cookies; it prevents spreading.
- For bakery style cookies at home, press the dough balls down slightly before baking.
Nutrition
- Serving Size: 1 cookie
- Calories: 240
- Sugar: 18g
- Sodium: 150mg
- Fat: 14g
- Saturated Fat: 8g
- Unsaturated Fat: 6g
- Trans Fat: 0g
- Carbohydrates: 28g
- Fiber: 1g
- Protein: 3g
- Cholesterol: 45mg