
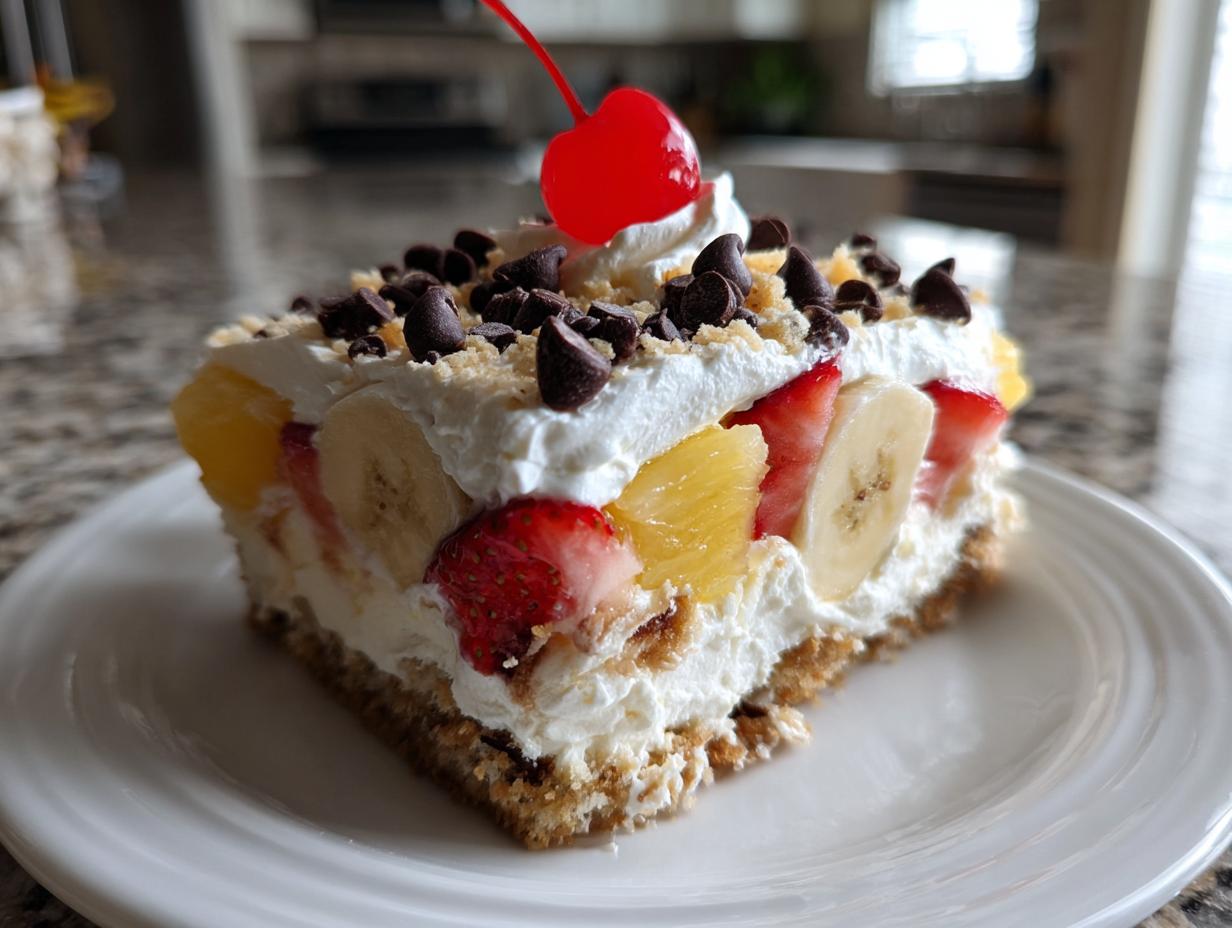
Oh, summer! When the sun is blazing and you just don’t want to turn on the oven, but your sweet tooth is calling for something truly special. That’s when I turn to the undisputed king of easy, chilled desserts: the **banana split cake**. Seriously, this recipe is pure magic! It takes everything we adore about that classic ice cream sundae—the creamy filling, the fresh fruit, the crunchy bits—and turns it into a scoopable, sliceable dream, all without breaking a sweat. Here at Cookin’ Corner, Sarah Jane built this site on reliable, nostalgic American classics, and this cake embodies that spirit perfectly. It’s quick, it’s creamy, and it screams summer fun. Trust me, once you make this, it’ll be in your regular rotation!
- Why This No Bake Banana Split Cake is Your New Summer Favorite
- Gathering Ingredients for Your Layered Banana Split Dessert
- Step-by-Step Guide to Making the Perfect Banana Split Cake
- Tips for a Perfect Creamy Banana Dessert
- Storage and Make Ahead Summer Desserts Guidance
- Variations on the Classic Banana Split Cake
- Serving Suggestions for Your Easy Banana Split Dessert
- Frequently Asked Questions About Banana Split Cake
- Nutritional Estimate for a Slice of Banana Split Cake
- Share Your Thoughts on This Potluck Perfect Banana Cake
Why This No Bake Banana Split Cake is Your New Summer Favorite
I absolutely love this dessert because it asks nothing of my oven, which is crucial when it’s 90 degrees outside! This recipe delivers that incredible, iconic flavor profile we all remember from the parlor—that’s why we call it the ultimate **Summer Banana Split Cake**. You get that perfect creamy texture because of the cream cheese and whipped topping base, and honestly, it’s the best **Easy Banana Split Dessert** you can whip up when company drops by unexpectedly. It’s potluck perfect, too! You just mix, layer, and chill. If you’re looking for something comforting after a long day out in the sun, skip the hot kitchen and go straight for this chilled treat. It’s just so satisfying! If you enjoy minimal effort for maximum reward, you should really check out my recipe for easy 5-ingredient haystack cookies, too!
Gathering Ingredients for Your Layered Banana Split Dessert
Okay, the fun part is making sure you have everything prepped before you start. For this **Layered Banana Split Dessert**, organization is everything since there’s no baking time to stall you! What I always do is set out my cream cheese to soften early and make sure my whipped topping has fully thawed in the fridge. That little bit of prep saves so much hassle when you’re actually assembling. This dessert is famous because it uses simple, familiar American ingredients, but the texture hinges on getting those details right, like making sure the pineapple is stripped of extra liquid. If you’re already digging out the cream cheese, you might want to try my cream cheese chocolate chip cookies next week!
Here is exactly what you need to pull this glorious, no-oven treat together:
- 1 1/2 cups graham cracker crumbs
- 1/2 cup unsalted butter, melted
- 1/4 cup granulated sugar (for the crust)
- 8 ounces cream cheese, softened just right
- 1 cup powdered sugar
- 1 teaspoon vanilla extract
- 1 (8 ounce) container frozen whipped topping, thawed, with half saved for topping
- 3 ripe bananas, sliced up—not too green!
- 1 (8 ounce) can crushed pineapple, drained well—this is super important!
- 1 cup fresh strawberries, sliced thin
- 1/2 cup miniature chocolate chips
- 1/4 cup chopped nuts (if you are feeling extra fancy)
- Maraschino cherries, of course, for that final flourish on top!
Step-by-Step Guide to Making the Perfect Banana Split Cake
Alright, let’s get down to business! This is where we transform those gorgeous ingredients into the dreamy, **banana split cake** you’ve been imagining. Remember, since there’s no oven involved, the rhythm and timing of your layering are what make this dessert shine. Follow these steps exactly, and you’ll end up with a beautifully set, sliceable masterpiece. If you’re looking for inspiration on setting up your chilling time perfectly, check out this no-bake banana split cake recipe linked here! If you want to see some other great layered desserts, check out the instructions for my chocolate eclair cake!
Preparing the Graham Cracker Crust
First things first: the base! Grab your graham cracker crumbs, melted butter, and that little bit of sugar, and mix them up until everything is soaked through—it should feel like wet sand. Press that mixture down firmly into the bottom of your 9×13 dish. I mean *firmly*! Use the bottom of a nice heavy measuring cup to really pack it in there. Don’t skip chilling it for about 15 minutes while you tackle the filling; that little bit of cold time helps it set up nicely so it doesn’t crumble when we slice it later.
Creating the Creamy Filling for the banana split cake
Now for the heart of our **banana split cake**! Take your softened cream cheese and beat it until it’s perfectly smooth—no lumps allowed, sister! Then, slowly beat in your powdered sugar and vanilla until everything is incorporated. Here’s the delicate part: take half of your thawed whipped topping and gently *fold* it in. I mean gently! We are trying to keep all those lovely air bubbles in there so this layer stays light and fluffy, not dense and heavy.
Layering the Fruit and Toppings
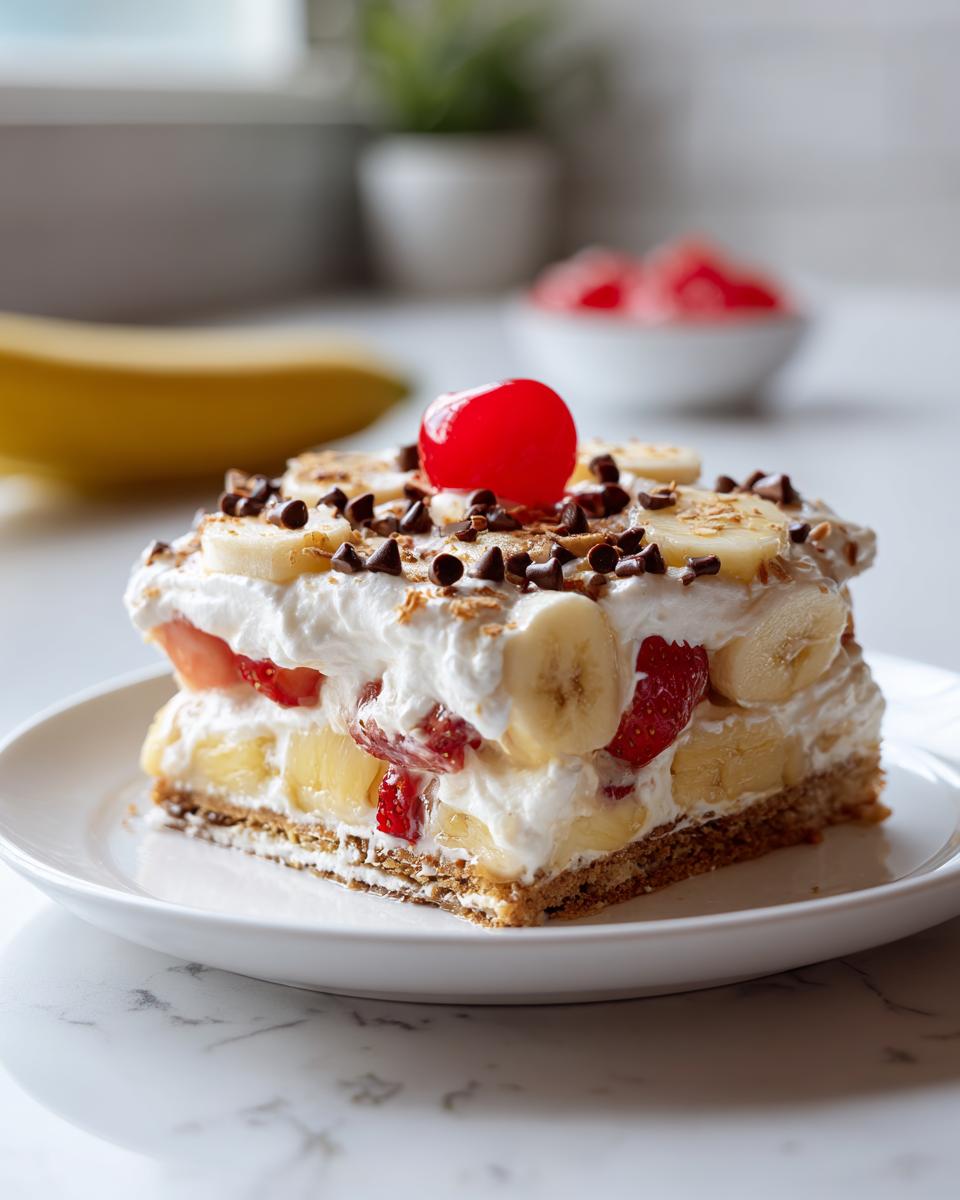
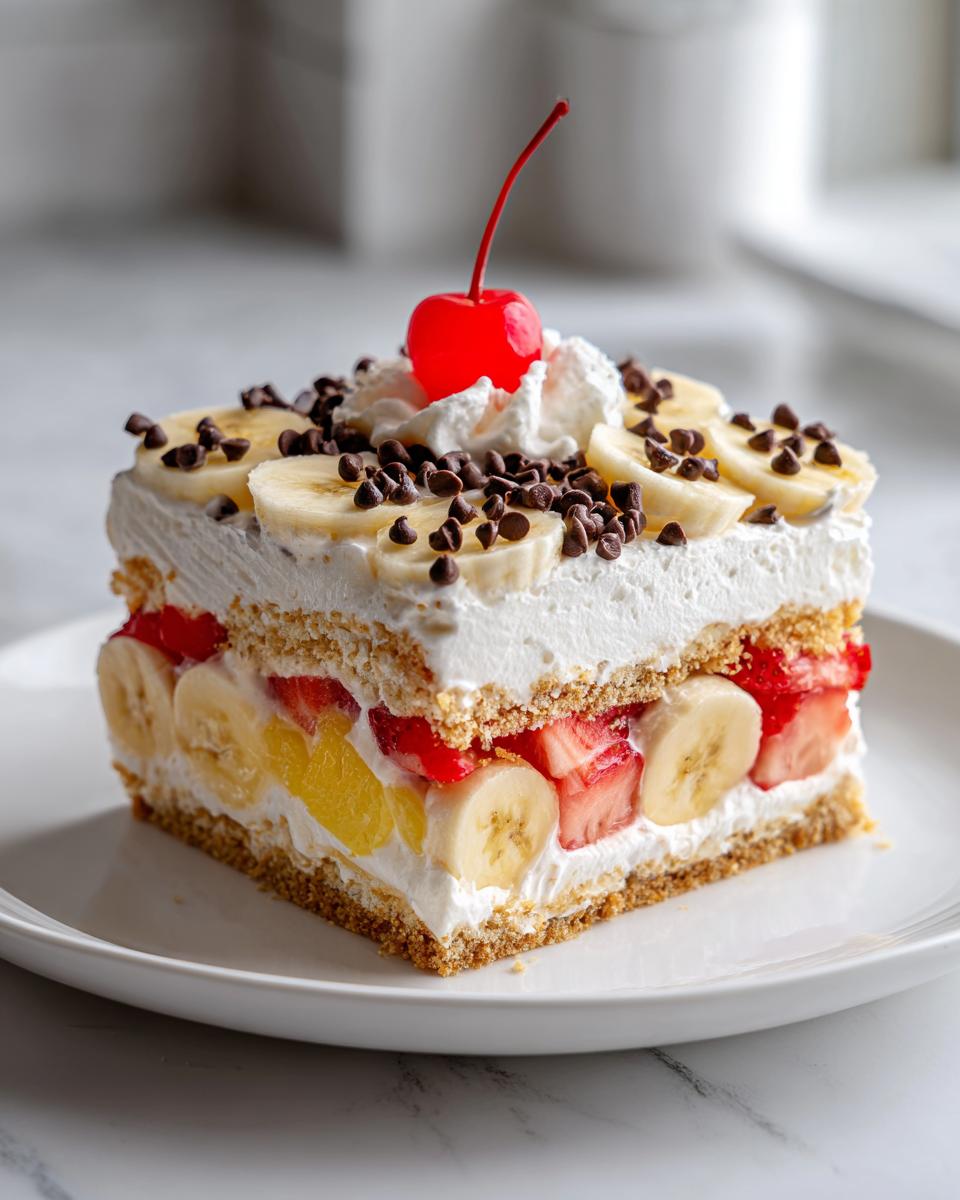
Time for the fun assembly! Once that crust is chilly, spread that beautiful cream cheese mixture evenly over the top. Next, start arranging your sliced bananas layer over the cream cheese. Now, for the pineapple—make absolutely sure you’ve drained every drop of liquid, or your whole **Layered Banana Split Dessert** will turn soupy. Sprinkle that dry pineapple over the bananas, followed by your fresh strawberry slices. Finally, take the remaining whipped topping and gently spread it across the top. Sprinkle those miniature chocolate chips and optional nuts right on top of the whipped cream. That looks like a winner!
The Essential Chill Time for the banana split cake
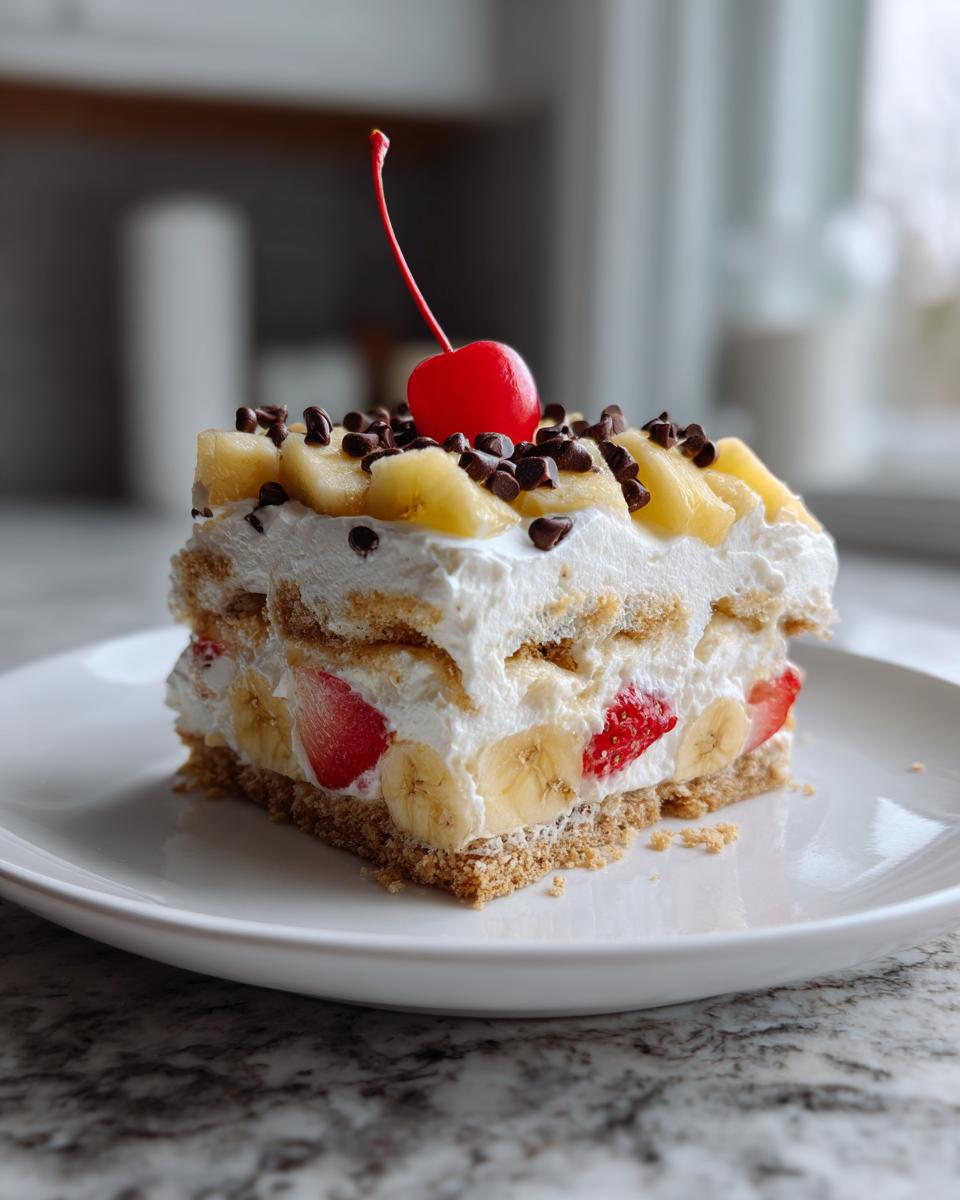
This step is non-negotiable, so put your patience hat on! You *must* chill this **banana split cake** for a minimum of four hours. Seriously, four hours is the absolute requirement, but if you can cover it and leave it in the fridge overnight, you’ll thank me later. That long rest allows the crust to absorb just enough moisture to hold, and it lets the creamy filling firm up so you can get those clean, beautiful slices. It’s worth the wait, I promise!

Tips for a Perfect Creamy Banana Dessert
To make sure this **Creamy Banana Dessert** tastes exactly right and doesn’t end up weeping all over your picnic blanket, you have to pay attention to a few little secrets from the notes section. First, let’s talk about that pineapple. If you think draining it once is enough, you’d be wrong! I always press that crushed pineapple between a few layers of paper towels after putting it in the colander. Excess liquid is the enemy of a firm, **No Bake Banana Split Cake**.
Also, I know some folks try to make this even firmer by swapping half the whipped topping with softened vanilla ice cream for an extra cold hit. If you do that, just know you have to increase that chilling time significantly—we’re talking closer to six or seven hours for it to set up properly so it doesn’t turn into soup when you slice it. Honestly, sticking to the whipped topping keeps it reliable for potlucks. If you’re making other desserts for a gathering, you must try my classic apple crumble recipe; it’s always a huge hit!
If you want to see what another fantastic source suggests for keeping this creamy delight firm, you can check out Carla’s tips over here: banana split cake recipe. Sometimes a fresh pair of eyes helps confirm the best techniques!
Storage and Make Ahead Summer Desserts Guidance
One of the best things about this **No Bake Banana Split Cake** is that it’s designed to be one of your favorite **Make Ahead Summer Desserts**. You can, and should, prepare this beauty the day before you plan to serve it. I find that chilling it for a full 12 hours makes the structure absolutely perfect for slicing—it just gets better overnight!
When storing it, always cover the dish tightly with plastic wrap or foil. Since it’s packed with fresh fruit and cream, it needs to stay happily in the refrigerator for up to three days. Now, about reheating? Don’t even think about it! This dessert relies on being perfectly chilled. If you bring it out to room temperature for too long, that beautiful whipped topping will start weeping. If you need quick appetizers for your party prep, give my easy cranberry brie bites recipe a try while this cake chills!
Variations on the Classic Banana Split Cake
While my heart belongs to the classic graham cracker crust, I always encourage folks to play around once they nail the original recipe! This **banana split cake** is so forgiving, which is why it’s such a great canvas. If you want a slightly sweeter, more flavorful base, swap those crumbs for crushed vanilla wafer cookies instead. You’ll mix those just like the graham crumbs, maybe cut the sugar down slightly, and press it in the same way.
For the topping, while the chocolate chips and cherries are iconic, don’t be afraid to elevate it! A thin drizzle of real hot fudge sauce—warmed just until pourable—right before serving adds a decadent touch. And if you aren’t a fan of peanuts, try toasting some pecans or walnuts for a richer crunch. These small adjustments keep the spirit of the classic dessert alive while letting you personalize it a little. If you like customizing desserts, you have to try my recipe for snickerdoodle blondies—they are so fun to play with!
Serving Suggestions for Your Easy Banana Split Dessert
Since this **banana split cake** truly has everything built right in—crust, fruit, cream—it seriously stands alone beautifully. You don’t need a dozen sides! We usually serve it right out of the 9×13 dish after the big dinner. If you want a beverage pairing, a nice hot cup of coffee or even a simple iced tea helps cut through that wonderful richness. When I garnish it, though, I like to make it look professional! I carefully place those bright red maraschino cherries so they are evenly spaced, and sometimes I drizzle the very top with a tiny bit of melted chocolate. It makes this **Easy Banana Split Dessert** look like it took hours, which is the best kind of kitchen magic, right?
If you need something warm to balance the chill, try making a batch of my homemade hot cocoa recipe on the side for the kids!
Frequently Asked Questions About Banana Split Cake
I know you are going to love making this dessert, but sometimes questions pop up when you’re working through a recipe, especially when it’s a layered, no-bake wonder like this! Don’t worry, I’ve answered some of the things people ask me most often about getting this **banana split cake** just right. It’s all about knowing those little tricks to keep everything fresh and firm. For more great banana recipes, you can always check out my favorite banana bread recipe!
What is the best way to prevent the bananas from browning in the banana split cake?
Oh, that browning is the worst! The secret is speed and a little lemon juice. You need to slice your bananas right before you are ready to layer them. Once they are sliced, give them just a light, quick toss in about a teaspoon of fresh lemon juice. It won’t taste sour! This stops the oxidation just long enough for you to spread them and get them covered by the pineapple layer.
Can I substitute the graham cracker crust in this easy banana split dessert?
Absolutely, this **easy banana split dessert** is flexible! If you are out of graham crackers, crushed vanilla wafers or even shortbread cookies work like a charm. When using cookies, you might want to slightly reduce the added sugar since they are often sweeter than plain graham crackers. Make sure to stick to the same amount of melted butter, though, to keep that crust holding together!
Nutritional Estimate for a Slice of Banana Split Cake
I always get asked about the nutrition in these rich, creamy desserts, and while I focus more on making memories than counting every calorie, it’s good to have a general idea, right? Since this **banana split cake** uses cream cheese, fruit, and a buttery crust, it definitely lands on the indulgent side—but totally worth it when you’re enjoying a beautiful summer evening!
The numbers below are just an estimate, using standard ingredient measurements and brands. Keep in mind that if you use extra chocolate chips or skip draining the pineapple really well, those numbers can shift quickly! This is just a rough guide, naturally.
- Serving Size: 1 slice
- Calories: 310
- Sugar: 28g
- Sodium: 180mg
- Fat: 18g
- Saturated Fat: 10g
- Unsaturated Fat: 8g
- Trans Fat: 0g
- Carbohydrates: 35g
- Fiber: 1g
- Protein: 4g
- Cholesterol: 45mg
If you’re looking for a slightly lighter, fruit-forward treat that’s still easy, you might want to check out how I make my easy one-bowl banana zucchini bread sometime this week!
Share Your Thoughts on This Potluck Perfect Banana Cake
Well, that’s it! You’ve made the best **banana split cake** this side of the ice cream parlor, and now it’s time to enjoy it. But don’t just disappear with your slice! Here at Cookin’ Corner, we are all about sharing that joy and making memories around the table, so I really want to hear from you.
Did you make this for a summer cookout? Was it the star of your next potluck? I’m dying to know how it turned out for you! Please take a moment to leave a rating for this **Potluck Perfect Banana Cake** down in the comments below. Tell me if you added any of the fun optional toppings or if you stuck to my grandmother’s classic approach (kind of!).
If you snapped a picture of your beautifully layered dessert before digging in, share it with us on social media and tag Cookin’ Corner! Seeing your beautiful bakes truly makes my day and reminds me why we keep these wonderful American classics alive. If you’re looking for another fantastic recipe for gatherings, my best buttermilk biscuits are always a huge hit!
And if you want to see how another cook put this recipe together, take a peek by clicking over to this no-bake banana split cake link. Happy scooping, everyone!
PrintNo-Bake Banana Split Cake: Easy Layered Summer Dessert

Make this creamy, no-bake banana split cake for your next gathering. It captures all the classic ice cream parlor flavors using a simple graham cracker crust, fresh fruit, and whipped topping. This easy, chilled dessert requires no oven.
- Prep Time: 25 min
- Cook Time: 0 min
- Total Time: 4 hr 25 min
- Yield: 12 servings 1x
- Category: Dessert
- Method: No Bake
- Cuisine: American
- Diet: Vegetarian
Ingredients
- 1 1/2 cups graham cracker crumbs
- 1/2 cup unsalted butter, melted
- 1/4 cup granulated sugar
- 8 ounces cream cheese, softened
- 1 cup powdered sugar
- 1 teaspoon vanilla extract
- 1 (8 ounce) container frozen whipped topping, thawed, divided
- 3 ripe bananas, sliced
- 1 (8 ounce) can crushed pineapple, drained well
- 1 cup fresh strawberries, sliced
- 1/2 cup miniature chocolate chips
- 1/4 cup chopped nuts (optional)
- Maraschino cherries for topping
Instructions
- Prepare the crust: Mix graham cracker crumbs, melted butter, and granulated sugar in a medium bowl until combined. Press the mixture firmly into the bottom of a 9×13 inch baking dish. Chill the crust for 15 minutes while you prepare the filling.
- Make the cream cheese layer: In a large bowl, beat the softened cream cheese until smooth. Gradually beat in the powdered sugar and vanilla extract until fully incorporated. Gently fold in half of the thawed whipped topping until just combined.
- Assemble the layers: Spread the cream cheese mixture evenly over the chilled crust. Arrange the sliced bananas over the cream cheese layer.
- Add fruit layers: Sprinkle the drained crushed pineapple evenly over the bananas. Top the pineapple with the sliced strawberries.
- Add topping: Gently spread the remaining half of the whipped topping over the strawberries. Sprinkle the miniature chocolate chips and chopped nuts (if using) over the whipped topping.
- Chill: Cover the dish and refrigerate for at least 4 hours, or preferably overnight, to allow the cake to set completely.
- Serve: Before serving this easy banana split dessert, garnish the top with maraschino cherries. Slice and serve cold.
Notes
- Drain the crushed pineapple very well; excess liquid will make the filling watery.
- For a firmer texture, you can substitute half of the whipped topping with an equal amount of softened vanilla ice cream, but this will require longer chilling time.
- This is a great make ahead summer dessert; it tastes best when chilled for 8 hours or more.
Nutrition
- Serving Size: 1 slice
- Calories: 310
- Sugar: 28g
- Sodium: 180mg
- Fat: 18g
- Saturated Fat: 10g
- Unsaturated Fat: 8g
- Trans Fat: 0g
- Carbohydrates: 35g
- Fiber: 1g
- Protein: 4g
- Cholesterol: 45mg