
Some of the best things in our kitchen life, the ones that taste just like childhood, are often the simplest. We don’t always need fancy frosting or hours of oven time to bring comfort and joy to the table. That’s why I treasure recipes like this one—they are pure, nostalgic, and built on solid, time-tested foundations. This recipe for the Easiest 3-Ingredient No-Bake Peanut Butter Cheerio Bars has become a staple here at Cookin’ Corner. It’s based on years of perfecting the art of the quick, homemade snack using just cereal, peanut butter, and honey. Trust me when I say these are the ultimate cheerio bars; reliable, chewy, and ready before you even decide what to watch on TV tonight. This recipe is a staple that proves simple care yields the most satisfying results. If you love this kind of simple, satisfying treat, you absolutely have to try my recipe for soft, chewy classic peanut butter cookies, too!
- Why These Are the Best Cheerio Bars You Will Ever Make
- Gathering Ingredients for Your No Bake Cheerio Bars
- Step-by-Step Guide to Perfect Peanut Butter Cereal Bars
- Tips for Success Making Your Honey Peanut Butter Bars
- Variations for Your Homemade Cereal Snacks
- Storage and Keeping Cheerio Bars Fresh
- Frequently Asked Questions About No Bake Cheerio Bars
- Nutritional Estimates for These Quick Breakfast Bars
- Share Your Experience with These Simple Dessert Bars
Why These Are the Best Cheerio Bars You Will Ever Make
Honestly, when you’re whipping up a snack in the kitchen, you want things to be easy. That’s why these No Bake Cheerio Bars stand head and shoulders above the rest. They skip the oven entirely, so there’s no waiting around or worrying about burning! Plus, the texture is just perfect—they hold together beautifully without being too hard or sticky.
It’s the magic ratio of peanut butter and honey that yields the most satisfyingly chewy cereal bars. They are truly fantastic for anyone who needs reliable, fuss-free treats ready in minutes.
Unbeatable Simplicity: The 3 Ingredient Dessert
You read that right—only three things stand between you and a plate full of these treats! Because we keep the ingredient list so tight, this easily qualifies as a truly easy 3 ingredient dessert. No complicated measuring or hunting down specialty spices here; just the essentials.
Perfect for Lunchbox Fillers and Quick Breakfast Bars
I make these constantly because they are such brilliant lunchbox fillers. They pack well, they don’t get messy, and they give the kids a nice boost of energy. If you’re rushing out the door in the morning, these also double wonderfully as quick breakfast bars. No baking means they are ready to grab and go whenever time is short!
Gathering Ingredients for Your No Bake Cheerio Bars
The beauty of these Peanut Butter Cereal Bars comes from starting with quality staples. Because we aren’t using any fancy binders, the main players shine through! Make sure you have exactly what I list here. If you’re planning ahead, you might also love my recipe for peanut butter protein balls!
- 3 cups original Cheerios cereal – nope, no Honey Nut substitutions unless you adjust the honey!
- 1 cup creamy peanut butter – please use creamy; we need that smooth melt.
- 1 cup honey – this is our main sweetener and binder!
Step-by-Step Guide to Perfect Peanut Butter Cereal Bars
Okay, now for the fun part—putting these incredible Cheerios Snack Recipe together! Since these are an awesome peanut butter fudge easy no-bake recipe style treat, we are moving fast, but we still need a few solid foundational steps. Don’t worry; if you can stir a bowl, you can master these. It’s all about getting that sticky binding mixture just right!
Preparing Your Pan and Melting the Binder for Cheerio Bars
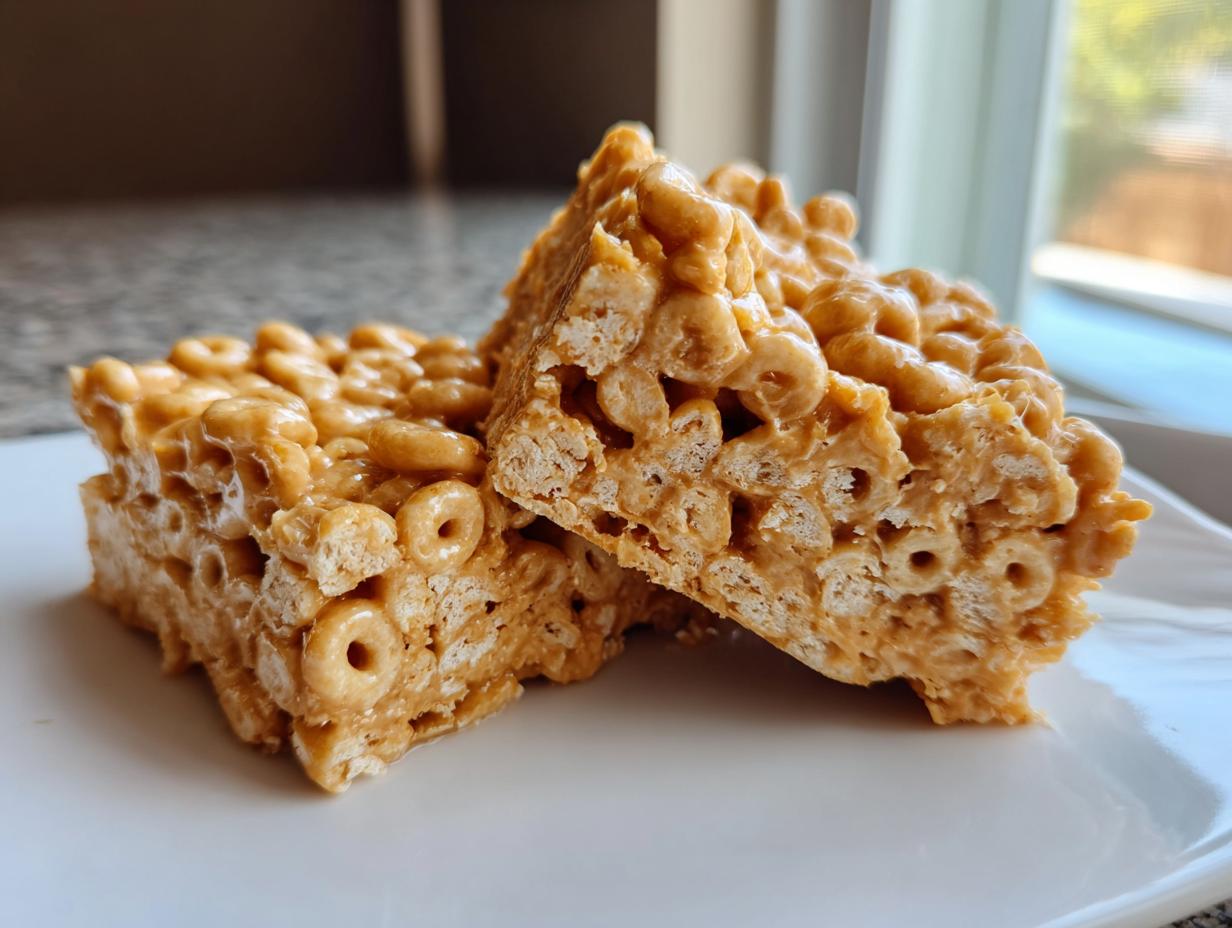
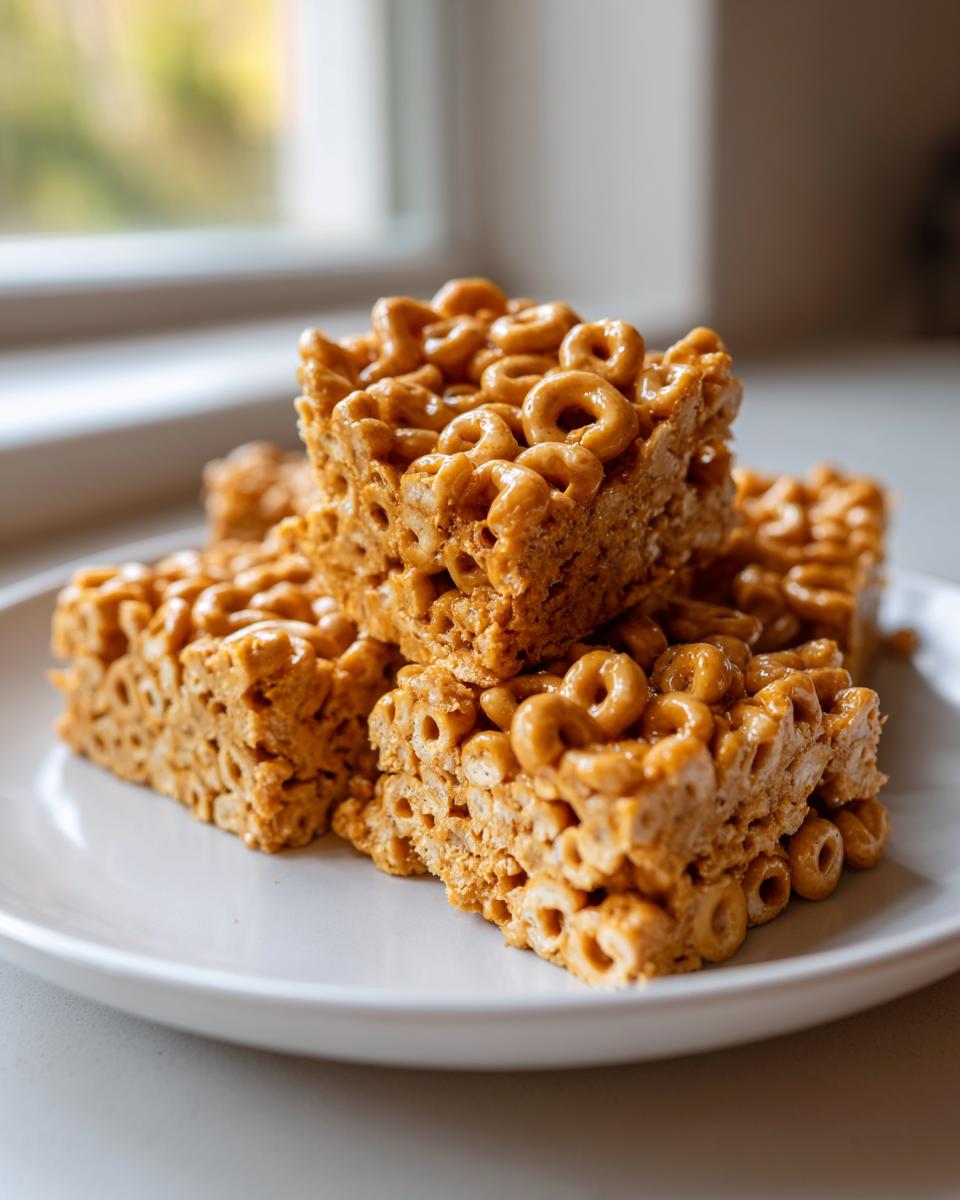
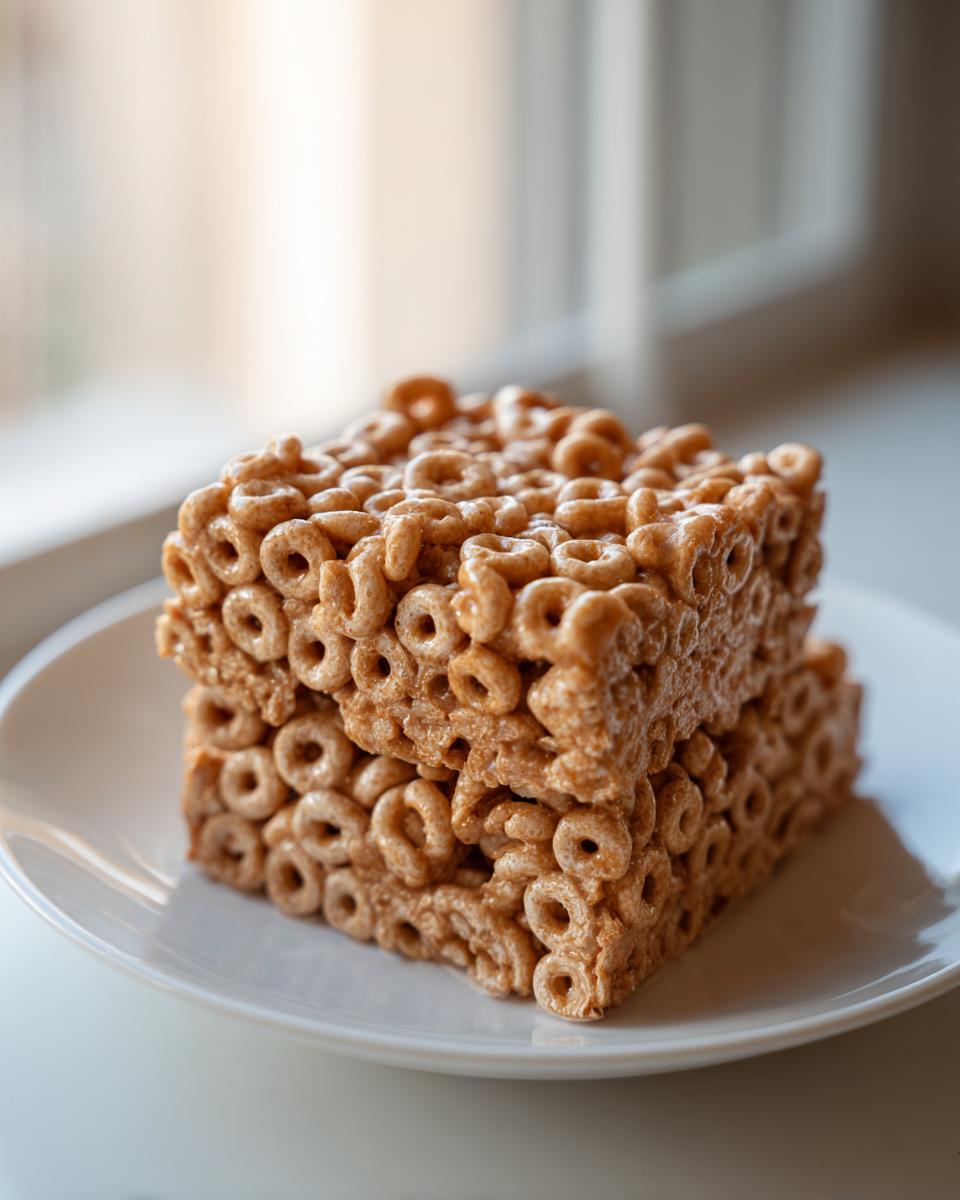
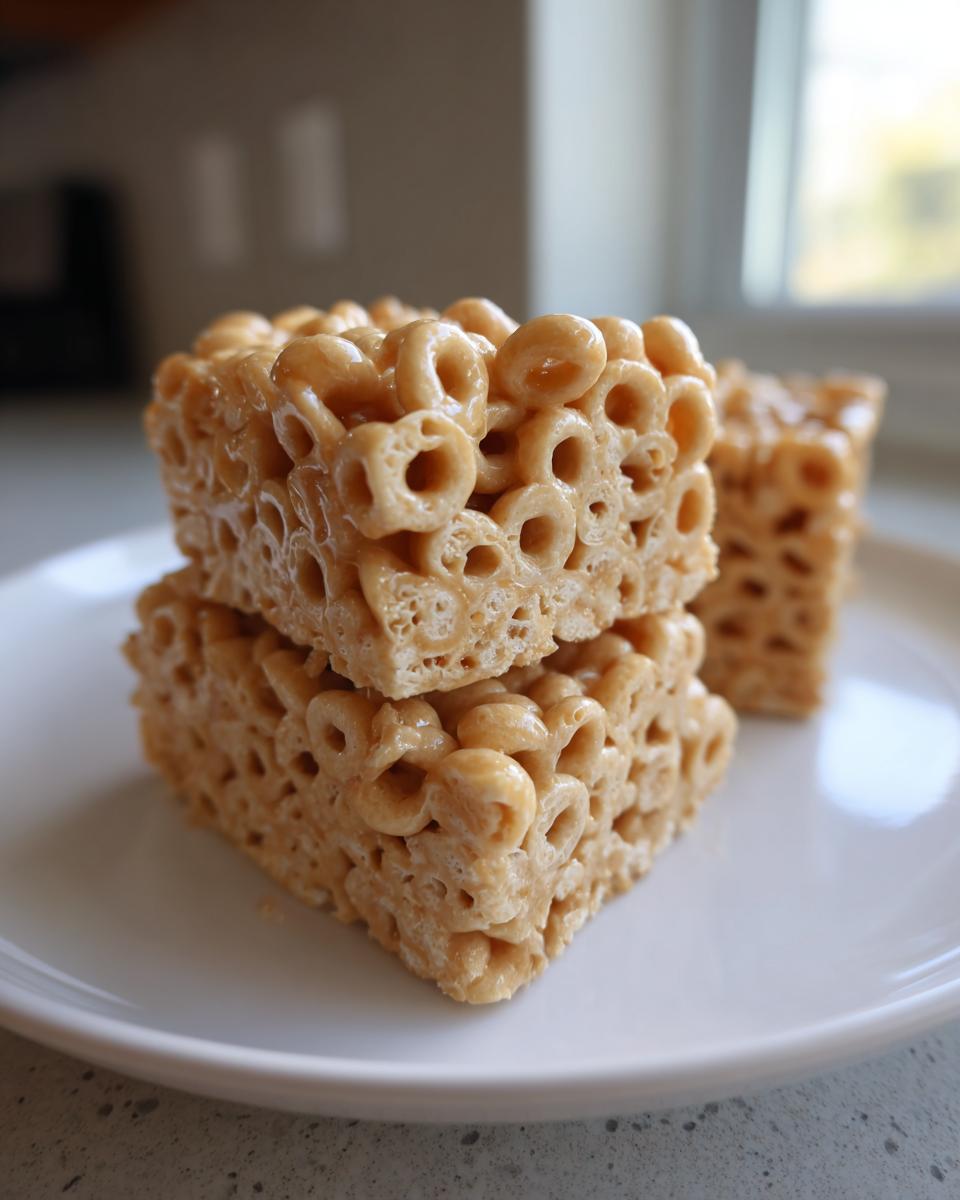
First thing first, let’s get your pan ready. Grab an 8×8 inch baking dish and line it completely with parchment paper. Make sure you leave some paper hanging over the sides—that overhang is going to be your handle later when we pull the bars out! Once that’s done, take your creamy peanut butter and the cup of honey and put them into a large, microwave-safe bowl. I usually zap mine for about 45 seconds, but you’re aiming for it to be smooth and super stirrable, so maybe a minute total if your peanut butter is cold. Once it’s hot, stir that honey and peanut butter mixture really well until it’s totally uniform. No streaks of separate honey allowed!
Mixing and Pressing Your Cheerio Bars
Now, quickly dump in your 3 cups of Cheerios! You have to stir fast here because once that honey mixture starts cooling, it gets stiff fast. Make sure every single piece of cereal gets coated in that glorious peanut butter goodness. When everything looks coated, scrape that whole mixture into your prepared pan. Here is a crucial trick: really pack it in there! Use the back of a rubber spatula or the bottom of a flat drinking glass to press the mixture down as firmly as you can over the entire surface. The harder you press, the less crumbly your final Peanut Butter Cereal Bars will be.
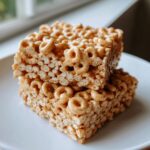
Setting and Cutting These Easy Cereal Treats
This is the hardest part: waiting! You need to pop that pan into the refrigerator for at least one full hour. They have to chill completely to set up properly. You’ll know they are ready when you press lightly on the top and they feel firm. Then, just grab those handy parchment overhangs, lift the whole block out onto a cutting board, and slice them into squares or whatever shape you love. These easy cereal treats are best enjoyed after a good, long chill. Enjoy!
Tips for Success Making Your Honey Peanut Butter Bars
Even though these are just three ingredients, I have learned a few little secrets over the years that make all the difference, and I want to pass them on so you get perfect Honey Peanut Butter Bars every time! Remember, I always test things out until they are right, so these little pointers really build up that E-E-A-T factor for you.
If you decide to use Honey Nut Cheerios instead of the plain kind—which I know is tempting!—you should cut back on the honey slightly. The Honey Nut version already has that extra sugary coating, so we don’t want these to turn into bricks! Also, if your mixture seems too stiff to stir after you pull it from the microwave, don’t panic! Just pop it back in for another 15 seconds. It should flow easily enough to coat every single piece of cereal. For the richest flavor, I highly recommend using natural creamy peanut butter if you have it on hand. For more quick and flavorful recipes, check out my guide for an easy 5-minute creamy peanut sauce recipe!
Variations for Your Homemade Cereal Snacks
Now that you have the absolute easiest version of these bars down—the simple, three-ingredient powerhouse—you might start thinking, “How can I dress these up a little?” And I love that thinking! While the basic recipe is pure perfection for a quick fix, adding little extras can turn these Cheerios Snack Recipe staples into something totally special for the weekend or a small party. We don’t want to complicate things too much, but a little flair never hurt anyone!
If you’re looking to use that jar of peanut butter sitting in the pantry for something extra delightful, I highly recommend checking out my recipe for peanut butter pretzel bark recipe (easy no-bake) for another great snack idea.
Adding Texture and Flavor to Cheerio Bars
When I make a batch just for us at home, I almost always toss in about half a cup of something extra right before I mix it all with the warm honey binder. This is where you can really personalize your Chewy Cereal Bars!
- Mini Chocolate Chips: This is my kids’ absolute favorite! Stir in about a half cup of the teeny tiny chips. They melt just slightly against the warm mixture and then set up to be little pockets of chocolate goodness.
- Nuts for Crunch: If you don’t have any nut allergies in the house, tossing in a half cup of roughly chopped peanuts or pecans gives these a wonderful, satisfying crunch that plays so nicely off the chewiness.
- Dried Fruit Surprise: Raisins work well, of course, but I love dried cranberries, too! They add a little tartness that cuts through the sweetness of the honey beautifully. Just make sure they are chopped small so they mix in evenly.
And hey, once you press these into the pan, don’t feel like you have to stop there! A drizzle of melted dark chocolate over the top, allowed to set in the fridge, takes these from a simple snack to a Simple Dessert Bar in about five minutes flat!

Storage and Keeping Cheerio Bars Fresh
Because these are No Bake Cheerio Bars, they don’t have the same super long shelf life as baked cookies, but keeping them fresh is simple! Since they rely on that soft honey-peanut butter mixture, we want to keep them protected from air, which is what makes them go hard or crumbly. If you’re making a big batch (which you absolutely should be!), storage is key to maintaining that perfect chewy texture.
The best way to keep these fresh is in an airtight container. If you’re using a standard baking dish, just press a layer of plastic wrap directly onto the top of the bars before putting the lid on, or transfer the cut squares into a solid container with a tight lid.
You have two main storage options, and honestly, I use both depending on how fast we’re going to eat them. At room temperature, sealed up tight, these usually stay fantastic for about 3 to 4 days. They firm up just a touch, but they remain perfectly chewy! If you need them around longer—maybe you packed them for a trip or you’re saving the rest for next week—the refrigerator is the answer. Pop them in there, and they will last up to two weeks, though I usually prefer them slightly softened before eating, so I let them warm up on the counter for about 15 minutes first.
If you’re interested in other recipes that rely on quick chilling or pickling techniques to stay fresh, you might enjoy my guide on easy refrigerator pickles recipe for a totally different but equally satisfying shelf-stable treat!
Frequently Asked Questions About No Bake Cheerio Bars
When you’re working with no bake sweets, sometimes things don’t go exactly to plan! I always get questions about binding and texture issues, especially since these are such popular easy chicken pot pie casserole recipes are not the only things where technique matters! If you were hoping to make these into great toddler approved snacks, you’ll want to double-check a couple of things before you start mixing.
Can I make these Toddler Approved Snacks without peanut butter?
Oh, that’s a great question, and yes, you absolutely can! Peanut allergies are serious, and we need options for everyone around the table. If you need to skip the peanut butter, you can substitute it with an equal amount of creamy sunflower seed butter—that’s my top recommendation! Tahini works too, but it has a much stronger, earthier flavor, so it changes the profile quite a bit. Just know that sunflower seed butter can sometimes be a little stiffer than peanut butter, so you might need to microwave your mixture for an extra 10-15 seconds to get that perfect stirring consistency for coating all those Cheerios.
Why did my Cheerio Bars not set properly?
This is usually down to one of three things, and they all relate back to that honey-peanut butter binder. First, did you let the mixture get hot enough? You need to make sure the honey and peanut butter are truly melted and smooth before you add the cereal; if it’s lukewarm, it won’t hold everything together as it cools. Second, did you press them down firmly enough in the pan? You really need to pack those Cheerios in tight! And lastly, patience is key! If you cut them before they’ve chilled for a full hour, they will totally fall apart. Give them the time they need in the fridge to become those perfect, firm chewy cereal bars!
Nutritional Estimates for These Quick Breakfast Bars
Now, I always want you to enjoy these delicious treats without worrying too much, but because they use humble ingredients like honey and peanut butter, you might be surprised they aren’t totally off the charts nutritionally! Since these Cheerio Bars are so delightfully straightforward, calculating the estimates is pretty easy. Just remember that these numbers are based on the recipe yielding 16 squares using the three core ingredients—no added chocolate chips or anything else!
If you are looking for more great recipes that fit nicely into a balanced eating plan, you should check out my whole collection of healthy recipes for inspiration!
Here is what you can generally expect per serving (one bar):
- Calories: Around 185
- Fat: About 10 grams (most of that good fat from the peanut butter!)
- Carbohydrates: Roughly 22 grams
- Protein: About 6 grams
See? Because we skip all that processed sugar you find in store-bought goodies, these Quick Breakfast Bars are a really fantastic option for an energy boost that keeps you satisfied!
Share Your Experience with These Simple Dessert Bars
That’s it! You’ve made your very first batch of my incredibly simple, totally satisfying, no-bake Peanut Butter Cheerio Bars. Aren’t they dreamy? Now, here at Cookin’ Corner, we rely on real home cooks like you to tell us how these recipes turn out in your own kitchens. I truly want to know if you tried adding mini chocolate chips or if you stuck to the pure three-ingredient magic!
Did these make for great lunchbox fillers? Were they a hit for a quick afternoon snack? Don’t be shy! Please take a moment and leave us a rating right down below—five stars if you loved them—and drop any questions or fun variations you came up with in the comments. Your feedback helps me keep refining these classics for everyone!
If you ever have a question or a picture you want to send my way that isn’t suitable for the comments, you can always reach out on my contact page. Happy snacking, and thank you for bringing this little piece of home cooking into your kitchen today!
PrintEasiest 3-Ingredient No-Bake Peanut Butter Cheerio Bars
Make these simple, no-bake peanut butter Cheerio bars using only three ingredients. They are perfect for quick snacks, lunchbox fillers, or an easy, chewy dessert.
- Prep Time: 10 min
- Cook Time: 0 min
- Total Time: 70 min
- Yield: 16 bars 1x
- Category: Snack
- Method: No-Bake
- Cuisine: American
- Diet: Vegetarian
Ingredients
- 3 cups original Cheerios cereal
- 1 cup creamy peanut butter
- 1 cup honey
Instructions
- Line an 8×8 inch baking pan with parchment paper, leaving an overhang on the sides for easy removal.
- In a large microwave-safe bowl, combine the peanut butter and honey. Microwave on high for 30 to 60 seconds, or until the mixture is smooth and easily stirrable. Stir well to combine completely.
- Add the Cheerios cereal to the peanut butter mixture. Stir quickly until the cereal is fully coated with the binder.
- Press the mixture evenly into the prepared baking pan. Use a spatula or the back of a measuring cup to pack it down firmly.
- Refrigerate the bars for at least 1 hour, or until completely set.
- Use the parchment paper overhang to lift the bars from the pan. Cut into squares or rectangles before serving.
Notes
- For a slightly different flavor, you can use Honey Nut Cheerios, but reduce the amount of honey slightly.
- If you prefer a richer flavor, use natural creamy peanut butter.
- If the mixture is too stiff to stir, microwave it for another 15 seconds.
Nutrition
- Serving Size: 1 bar
- Calories: 185
- Sugar: 9
- Sodium: 85
- Fat: 10
- Saturated Fat: 2
- Unsaturated Fat: 8
- Trans Fat: 0
- Carbohydrates: 22
- Fiber: 2
- Protein: 6
- Cholesterol: 0