
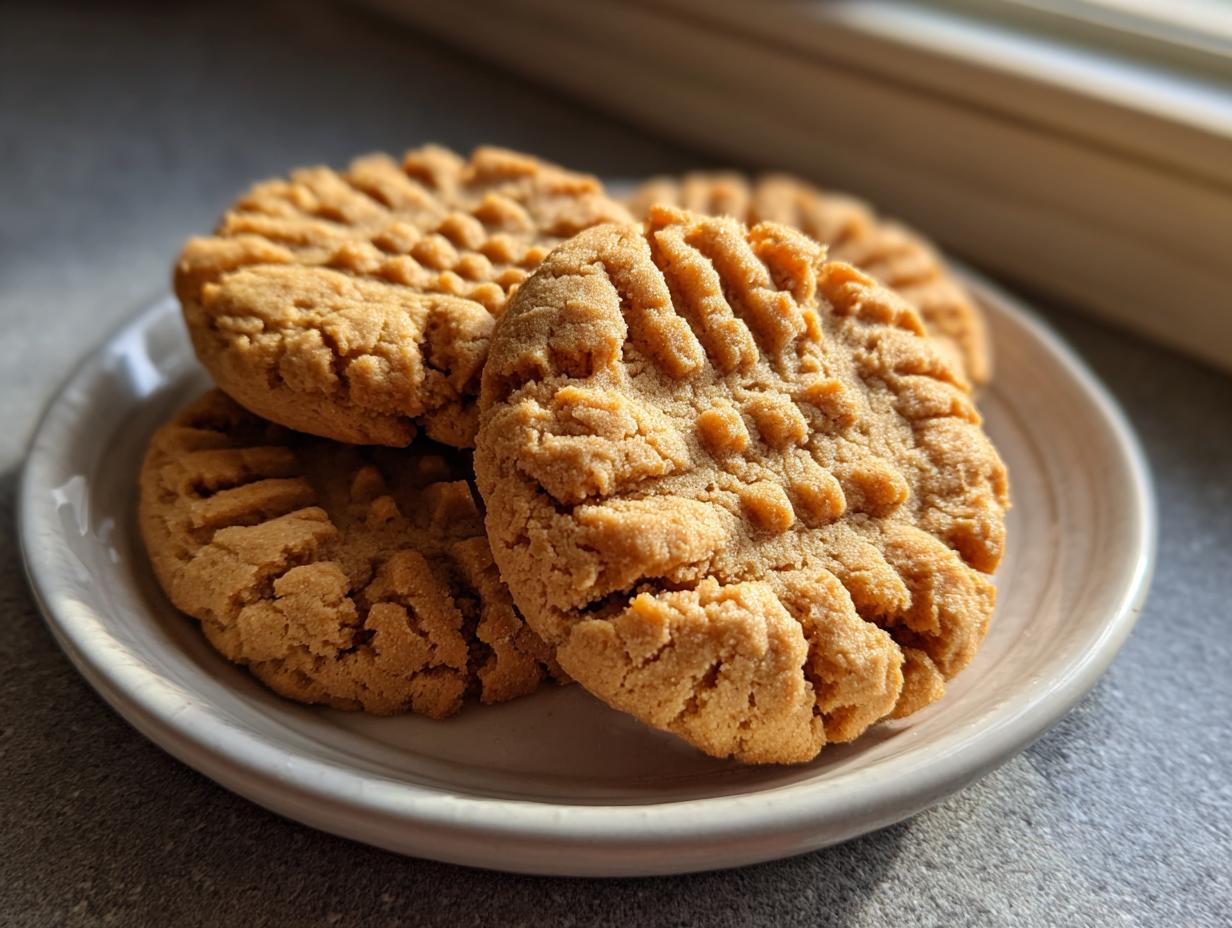
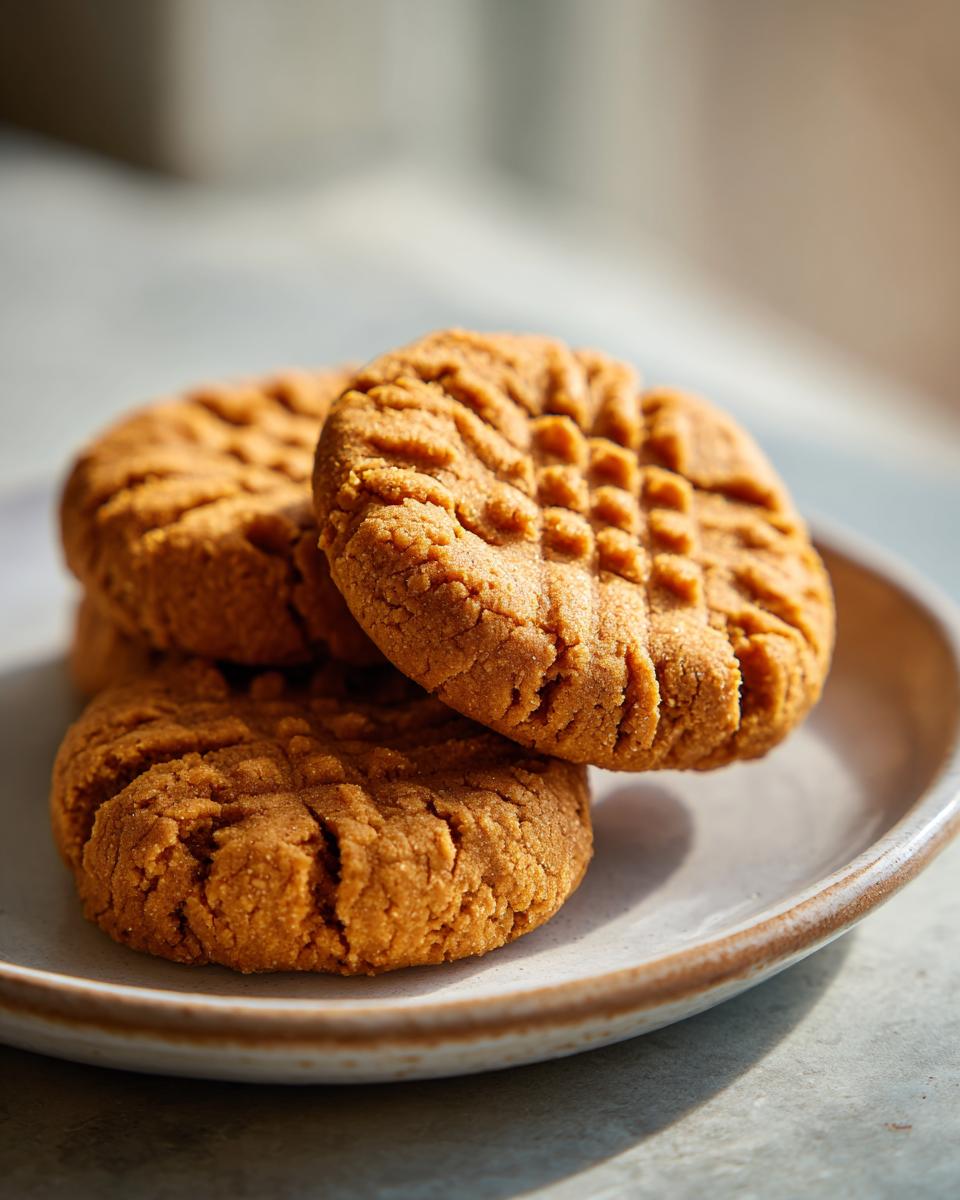
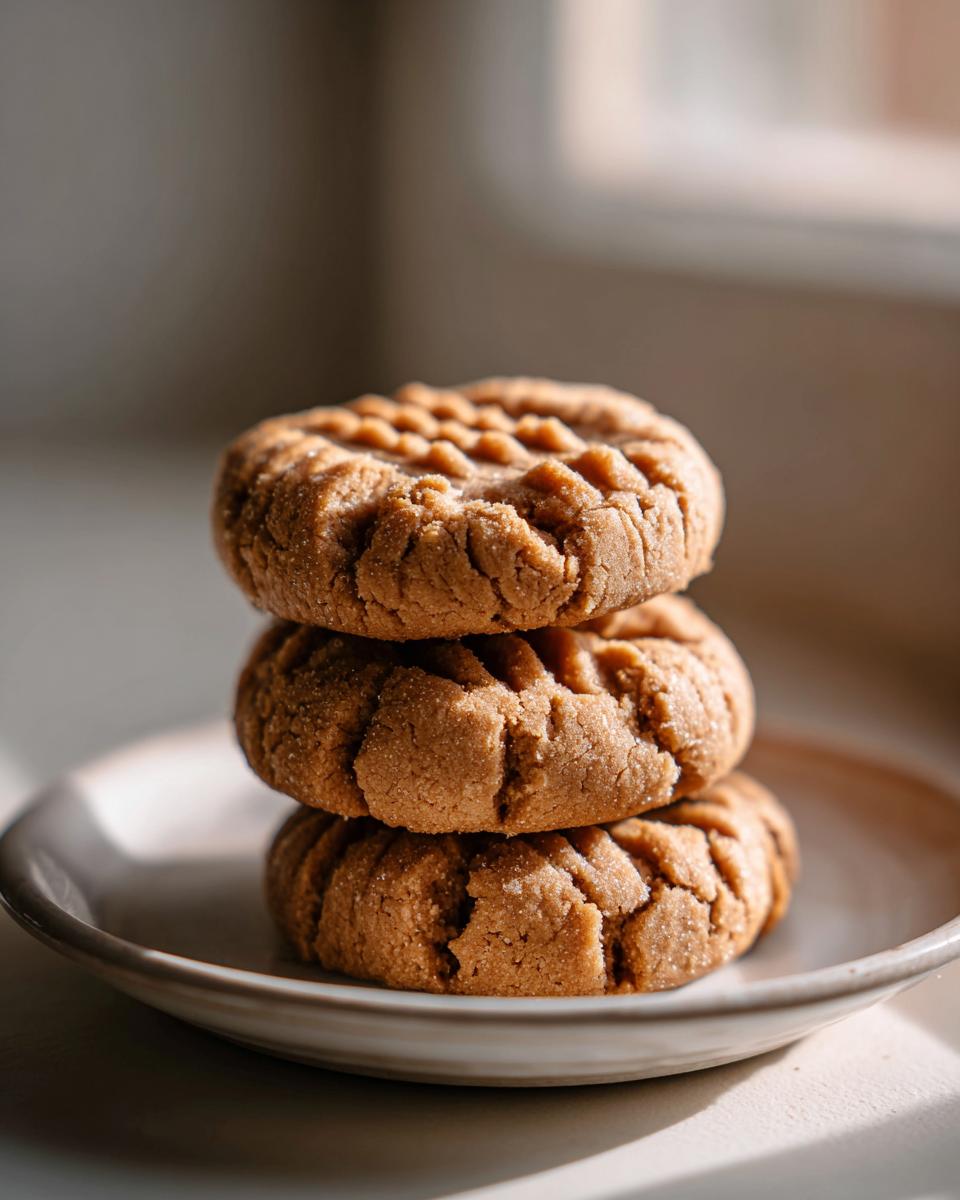
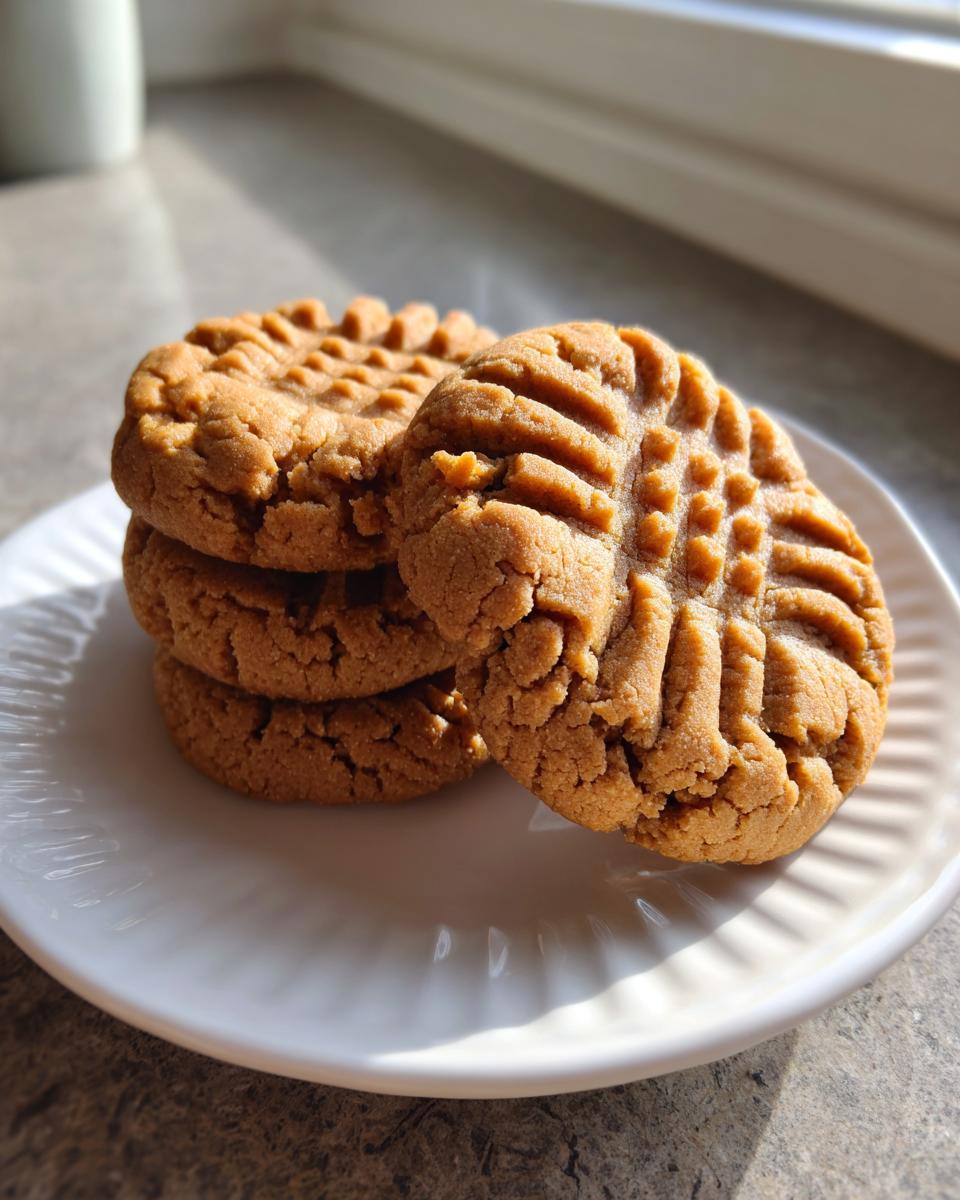
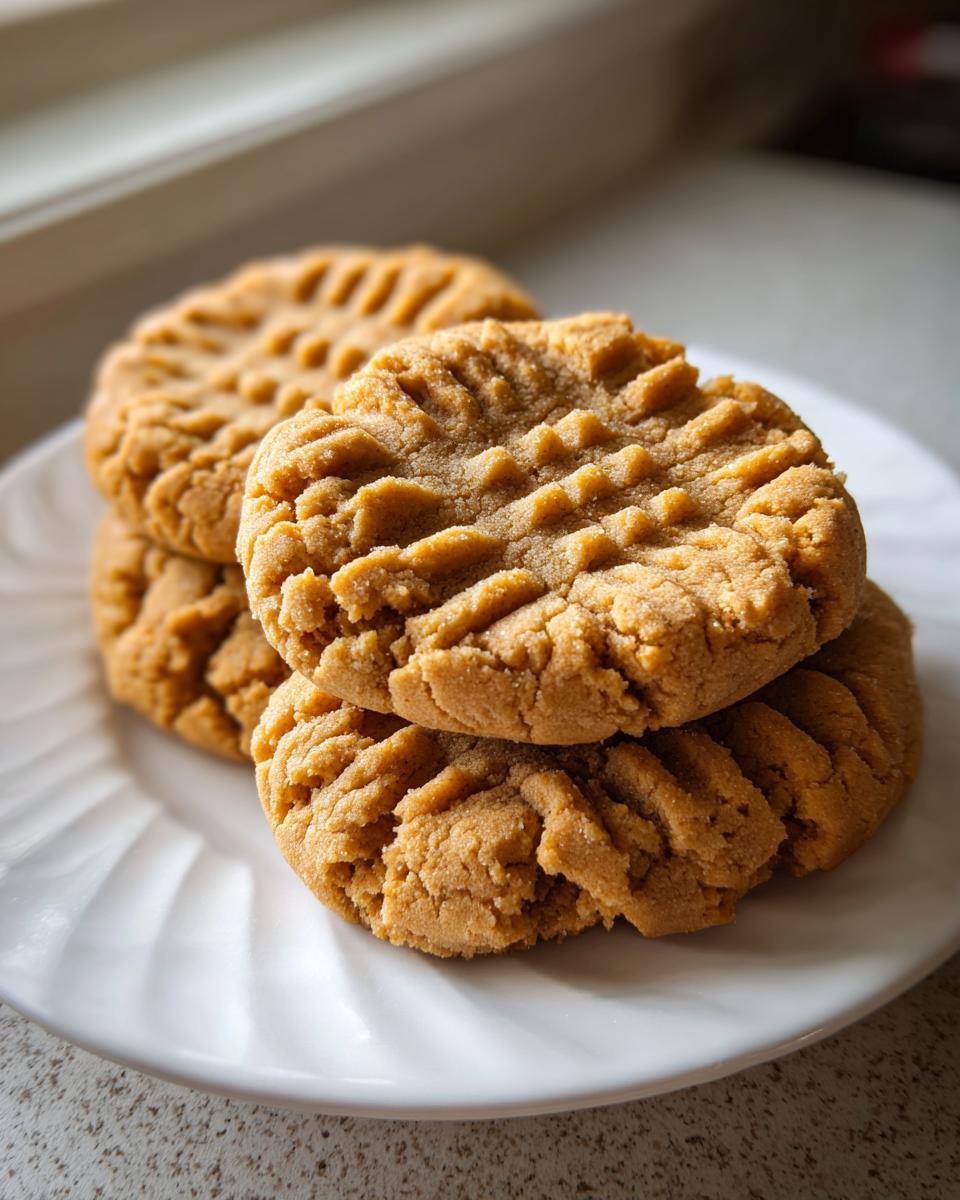
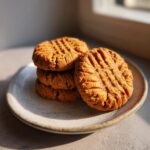
There’s that unmistakable smell, right? That warm, slightly salty, deeply comforting aroma that just screams *home*? For me, that smell always means one thing: my absolute favorite Classic Peanut Butter Cookies. These aren’t the thin, crispy ones that snap when you break them in half. Oh no, these are the gold standard: soft centers, perfectly chewy edges, and the classic crisscross fork pattern we all know and love.
If you’re like me, you want that homemade goodness without spending half your afternoon in the kitchen. Trust me, this recipe delivers that old-fashioned taste, and you can have them cooling on the rack in under 30 minutes total! That’s the Cookin’ Corner promise—reliable, heritage recipes that work every single time. I learned this from my grandmother, who always said the best American home cooking relies on simple ingredients treated with a little bit of love and patience.
- Why These Are the Best Soft and Chewy peanut butter cookies
- Simple Ingredients for Classic peanut butter cookies
- How to Make Soft Peanut Butter Cookies: Step-by-Step Instructions
- Tips for Perfect Classic Peanut Butter Cookies Every Time
- Variations on Your Favorite peanut butter cookies Recipe
- Serving Suggestions for Homemade Treats
- Storage and Reheating Instructions for peanut butter cookies
- Frequently Asked Questions About peanut butter cookies
- Estimated Nutritional Information for peanut butter cookies
Why These Are the Best Soft and Chewy peanut butter cookies
When I tell people these are the Best Peanut Butter Cookies, I mean it! They hit that sweet spot between soft and chewy every single time, which, let’s be honest, is the only texture that truly matters. You don’t need fancy techniques or overnight chilling. We can have these beauties cooling in just 27 minutes total time, which is music to my ears when a cookie craving hits!
These are fantastic if you’ve got little helpers around; they are perfect for Kid Friendly Baking because rolling the dough balls and making the crisscross mark is just so much fun for them. I keep my recipe for my extra-quick creamy peanut sauce handy for savory days, but some days only cookies will do!
- So genuinely soft—they practically melt.
- They keep that wonderful chewiness for days, provided you store them right.
- Ready from start to finish in under 30 minutes.
- Uses ingredients you already have in your pantry.
Achieving Perfect Contrasting Textures Cookies
The real secret to these Contrasting Textures Cookies lies right there in the sugar. We use both granulated sugar and dark brown sugar in equal parts. The white sugar helps them set up just enough around the edges so they don’t turn into sad, flat puddles spreading all over your sheet. But that brown sugar? That molasses goodness is what keeps the centers super soft and delightfully chewy once they cool down. It’s chemistry, honey, but it tastes like grandma’s kitchen!
Simple Ingredients for Classic peanut butter cookies
One of the joys of these Simple Cookie Recipes is that they rely on good, honest pantry standards. You don’t need to run out to the specialty store or order anything weird. If you have butter softener in your fridge, you’re halfway there! Having these ingredients ready means you can stop reading about cookies and start baking them almost immediately.
Here is what you’ll need for a batch of about two dozen truly spectacular homemade treats:
- 1 cup (2 sticks) unsalted butter, softened
- 1 cup creamy peanut butter
- 1 cup granulated sugar
- 1 cup packed light brown sugar
- 2 large eggs
- 1 teaspoon vanilla extract
- 1 3/4 cups all-purpose flour
- 1 teaspoon baking soda
- 1/2 teaspoon baking powder
- 1/2 teaspoon salt
Ingredient Notes and Substitutions for Your peanut butter cookies
Now, before you start grabbing things off the shelf, let me give you a few pointers on why these specific items matter for making the best Classic Peanut Butter Cookies.
First, the peanut butter! Please, please use creamy. Crunchy peanut butter throws off the texture balance we worked so hard to achieve for that soft, chewy center. It disrupts the fat and sugar matrix, and you’ll end up with cookies that spread too much!
Second, the sugar. I used light brown sugar here for a softer set, but if you want a richer, almost molasses-forward flavor, feel free to swap it out for the dark brown sugar—it’s totally interchangeable for texture, but the flavor deepens! The best part about this specific combination is that this dough is perfect for No Chill Cookie Dough bakers. Mix it up, roll it, bake it. That’s it!
How to Make Soft Peanut Butter Cookies: Step-by-Step Instructions
Alright, let’s get down to business! This is where the magic happens. Don’t be intimidated if you’re new to Baking Recipes for Beginners; these peanut butter cookies are foolproof because the dough practically tells you what it needs. First things first, crank that oven up to 350°F (175°C). Make sure you’ve got parchment paper on your baking sheets, too—it saves cleanup time and helps keep the bottoms from getting too dark.
The recipe calls for rolling the dough into small 1-inch balls and placing them about two inches apart. Don’t skip that spacing! They do spread a bit because they are so soft and chewy. Then comes the fun part that makes them instantly recognizable: take a fork and gently press down to make that classic crisscross pattern. This isn’t just for looks, folks; it helps the dense dough bake evenly all the way through.
Mixing the Dough for Chewy Peanut Butter Cookies
When you’re mixing up the wet ingredients—that butter, peanut butter, and both sugars—you need to beat them until they look pale and fluffy. That process traps a ton of air, and air is what keeps our cookies delightfully soft instead of rock hard!
I learned the hard way once when I was rushing. I just plopped the flour in too fast and only stirred it maybe three times. Oops! What came out? Cookies that were dense hockey pucks. You have to mix gradually when you add those flour, baking soda, baking powder, and salt ingredients. Just mix on low speed until you see *just* no more streaks of dry flour floating around. Stop mixing right there! Seriously, overmixing develops gluten, and gluten is the enemy of the soft, Chewy Peanut Butter Cookies we’re aiming for.
Baking and Cooling Your Old Fashioned Peanut Butter Cookies
Once they’re forked and on the tray, they need 10 to 12 minutes in that 350°F oven. Watch them closely! You’re looking for the edges to look set and just barely golden brown. The center might still look a tiny bit gooey or soft when you pull them out of the oven. Don’t panic! That’s exactly what you want if you’re aiming for truly Old Fashioned Peanut Butter Cookies that aren’t dry.
Here’s the final, most important step for structure: leave them alone on that hot baking sheet for a solid 5 minutes after they come out. This allows them to firm up just enough so they don’t crumble when you move them. Then, the cooling rack so they don’t keep cooking on that hot metal. Patience pays off!
Tips for Perfect Classic Peanut Butter Cookies Every Time
You’ve got the dough mixed, the fork is ready, but sometimes, even with the best Classic Peanut Butter Cookie Recipe, things just go a little sideways. That’s okay! Baking is an art, and sometimes it takes a little troubleshooting to get exactly the result you want. This is how I make sure I end up with the chewy, perfect cookies I dreamed of when I started mixing.
Remember, this recipe is generally great right out of the bowl, but if the dough feels exceptionally soft—maybe your kitchen is warm or your peanut butter was super processed—a quick chill never hurt anyone. We are aiming for the Best Peanut Butter Cookies experience, and sometimes that means adapting for the weather!
Troubleshooting Common peanut butter cookies Issues
The two biggest complaints I hear about homemade peanut butter cookies are usually about texture control. Either they spread too much, looking more like thin peanut butter pancakes, or they come out a bit too hard.
If your cookies are spreading too thin, even after that lovely crisscross press, it almost always means the fat content is too dominant or too warm. If you notice your dough looking a little greasy right before you roll it, stick the dough balls in the fridge for just 15 minutes before baking. That little chill gives the butter a chance to firm up so they hold their shape better in the oven. It’s a lifesaver when you are making Easy Homemade Cookies on a humid day!
Now, for the opposite problem: dry cookies. If you bake them until they look totally firm and golden brown all the way through, you’ve gone one step too far for that perfect soft texture we want! If you pull them out and the centers look slightly soft—like they are barely set—don’t worry for a second. They finish baking on that hot sheet pan for those five minutes we talked about. If you overbake them by even just two minutes, you’re turning a chewy cookie into a crispy one. Always err on the side of being slightly underbaked when dealing with these Soft Peanut Butter Cookies.
Variations on Your Favorite peanut butter cookies Recipe
I love this base recipe because it’s so sturdy and reliable, making it perfect for tweaking! While this specific recipe makes about two dozen delightfully soft and chewy cookies using classic flour, I know folks sometimes need something different fast. You might see recipes online for the super simple 3 Ingredient Cookies (usually just PB, sugar, and egg), but honestly, those are totally different—harder and more crumbly. If you need that specific texture, you need a different formula!
If you’re looking for a lighter texture, you can definitely jazz up this dough before you roll it into balls. These little additions are fantastic for satisfying those different cravings for Peanut Butter Dessert Ideas.
Add-In Ideas
The wet dough handles mix-ins really well without needing extra chilling time, which is great for a quick baking session:
- Chocolate Chips: Stir in about 3/4 cup of semi-sweet chocolate chips right at the end when you mix the dry ingredients in. They bake up gooey and delicious!
- Flaky Sea Salt Finish: Right after you press the crisscross pattern onto the dough balls, sprinkle just a teeny tiny pinch of flaky sea salt on top of each one. It really brings out that salty-sweet flavor profile.
- Oats for Chewiness: If you want a slightly heartier texture while still keeping them soft, swap out 1/2 cup of the all-purpose flour for 1/2 cup of quick-cooking oats. Makes them wonderfully rustic!
If you are dealing with dietary restrictions and need something strictly Flourless Peanut Butter Cookies, you’ll need a dedicated recipe for that, usually just relying on three eggs and peanut butter. For this version, though, stick to the adaptations above for the best soft and chewy results!
Serving Suggestions for Homemade Treats
The moment these Old Fashioned Peanut Butter Cookies come off the rack, you know you need the perfect companion. They are seriously the definition of Comfort Food Baking. That rich, nutty flavor goes with just about everything, but I have my absolute favorites for turning a simple cookie into a real moment.
First up, the classic pairing for any cookie, really: a tall, ice-cold glass of whole milk. You just can’t beat dunking that soft edge into the milk for just a second—it slightly softens it even more. It’s simple childhood perfection, isn’t it?
Pairings That Highlight the Peanut Butter
If you’re an afternoon or late-night baker like me, coffee is usually calling my name. These cookies stand up beautifully to a strong brew. The slight bitterness of black coffee or dark roast cuts through the sweetness of the cookie perfectly. It’s a wonderful way to transition from a savory dinner to a sweet end to the day.
For something truly decadent that leans into the Peanut Butter Dessert category, try serving them alongside a scoop of vanilla bean ice cream. The contrast between the slightly warm, chewy cookie and the cold, melting ice cream is just divine. Sometimes, I’ll even warm the cookie for about 10 seconds in the microwave if I’m serving it à la mode—it just brings the peanut butter flavor right out!
Honestly, you don’t need to do much to these cookies to make them special, but a great pairing elevates the whole experience from a quick snack to a truly satisfying treat.
Storage and Reheating Instructions for peanut butter cookies
Nobody wants a batch of beautiful, moist chocolate cake recipe best easy-style soft cookies turning hard overnight, right? Since the goal here is to keep these Classic Peanut Butter Cookies soft and chewy, storage is super important. The good news is that because of the high fat content from the butter and peanut butter, they actually stay pretty fresh longer than a standard sugar cookie!
The number one rule is this: airtight containers only. Once they are completely cooled—and I mean truly room temperature, otherwise you get condensation which turns them sticky—stack them up in a sturdy container with a tight lid. They’re great on the counter for about three days if your container seals well.
Keeping Your batch Soft for Days
To really lock in that softness, especially if you’re stacking them high, I always place a small piece of wax paper or parchment paper between the layers. This stops them from sticking together, which is crucial because these cookies are so delightfully soft! If they do start to dry out slightly by day four, don’t panic. They aren’t ruined; they just need a little revival.
For a quick refresh, microwave one or two cookies on a paper towel for about 10 to 15 seconds. Just watch them! They come out warm, gooey, and taste freshly baked all over again. This makes them perfect for those last-minute snack attacks.
Freezing for Future Comfort Food Baking
If you’re making a big batch, which you totally should, they freeze like a dream! This is my go-to for that easy Comfort Food Baking when you don’t want to turn the oven on later. You can freeze them either baked or unbaked. For the baked cookies, stack them with parchment paper in between layers inside a freezer-safe bag or container. They hold up perfectly for up to three months!
If you freeze the dough balls, just make sure they are well-chilled first, then pop them in a bag. When you need them, just slide them straight from the freezer onto the prepared baking sheet and add about three or four extra minutes to the baking time. Boom! Fresh cookies whenever you need a sweet fix.
Frequently Asked Questions About peanut butter cookies
So many people have questions when they make these cookies for the first time, and honestly, that’s how we learn to be better bakers! I’ve gathered up the most common things I hear about achieving that perfect texture in these Soft Peanut Butter Cookies. Don’t ever feel silly asking—we’re all learning together here!
Can I use crunchy peanut butter instead of creamy?
Oh, honey, you *can*, but I strongly advise against it if you’re after truly Classic Peanut Butter Cookies that are super soft. Crunchy peanut butter has a lower fat ratio in the creamy part, and those little nut nuggets mess up the beautiful matrix we create when creaming the butter and sugars. It tends to make the dough less cohesive, and the cookies end up spreading more than they should. Stick to creamy for the best texture!
How do I keep these cookies from spreading too flat?
This is the number one issue people have with Chewy Peanut Butter Cookies! Usually, spreading happens for two reasons: your butter was too warm, or your recipe relies too heavily on granulated sugar. If your dough feels greasy before you even roll it, pop those dough balls in the fridge for 15 minutes before baking. That short chill time lets the butter stiffen up just enough so they hold their shape beautifully when they hit that hot oven. And always, always make that crisscross pattern—it physically restrains the dough from spreading too thinly!
I need them flourless, like the 3-ingredient version. Can I adapt this?
That’s a great question, especially if you’re looking for 3 Ingredient Cookies! This recipe, however, is built around the structure that flour provides, combined with the leavening agents like baking soda and powder. If you need something strictly Flourless Peanut Butter Cookies, you need a totally different formula, usually involving just peanut butter, egg, and sugar. Trying to remove the flour from this specific recipe will likely result in a very soft, loose puddle that won’t form properly.
Why do the instructions say the centers should look slightly soft?
This is the core trick to getting that melt-in-your-mouth experience! We are aiming for Soft Peanut Butter Cookies, not crunchy ones. These cookies are technically done baking when the edges look golden and set, but the center still looks a little pale and just barely holding shape. Since they rest on that hot baking sheet for five minutes once they come out, carry-over cooking finishes setting the center perfectly. When they cool completely, you’ll have that ideal soft and chewy consistency. If you bake them until they look fully solid in the oven, you’ll end up with crisp ones!
Estimated Nutritional Information for peanut butter cookies
I always feel a little guilty talking about nutrition right after we’ve been enjoying warm, gooey Homemade Treats, but knowledge is power, right? I want you to know exactly what’s in these delicious little bites, but please remember that this information is totally an estimate.
Since we’re using standard pantry ingredients like butter and peanut butter, those fats are going to be the biggest contributors to the totals. This calculation is based strictly on the recipe yielding 24 cookies, serving size being one cookie. If you eat three at once, well, you’ll need to multiply everything by three! Don’t say I didn’t warn you!
Here’s the breakdown for one delightful, Classic Peanut Butter Cookie:
- Serving Size: 1 cookie
- Calories: 180
- Fat: 10g
- Carbohydrates: 21g
- Protein: 4g
- Sugar: 12g
- Cholesterol: 25mg
- Sodium: 110mg
Knowing this helps when planning out a snack or dessert, but honestly, when you need that taste of home—that perfect soft and chewy peanut butter goodness—calories don’t seem to count as much! Just grab your glass of milk and enjoy!
PrintSoft and Chewy Classic Peanut Butter Cookies
Bake these old-fashioned peanut butter cookies for a soft, chewy treat. This easy recipe uses simple pantry ingredients and delivers that comforting flavor everyone loves.
- Prep Time: 15 min
- Cook Time: 12 min
- Total Time: 27 min
- Yield: 24 cookies 1x
- Category: Dessert
- Method: Baking
- Cuisine: American
- Diet: Vegetarian
Ingredients
- 1 cup (2 sticks) unsalted butter, softened
- 1 cup creamy peanut butter
- 1 cup granulated sugar
- 1 cup packed light brown sugar
- 2 large eggs
- 1 teaspoon vanilla extract
- 1 3/4 cups all-purpose flour
- 1 teaspoon baking soda
- 1/2 teaspoon baking powder
- 1/2 teaspoon salt
Instructions
- Preheat your oven to 350°F (175°C). Line baking sheets with parchment paper.
- In a large bowl, cream together the softened butter, peanut butter, granulated sugar, and brown sugar until the mixture is light and fluffy.
- Beat in the eggs one at a time, then stir in the vanilla extract.
- In a separate medium bowl, whisk together the flour, baking soda, baking powder, and salt.
- Gradually add the dry ingredients to the wet ingredients, mixing on low speed until just combined. Do not overmix the dough.
- Roll the dough into 1-inch balls and place them 2 inches apart on the prepared baking sheets.
- Use a fork to press down on each ball to create a crisscross pattern. This helps the cookies bake evenly.
- Bake for 10 to 12 minutes, or until the edges are set and lightly golden. The centers will look slightly soft.
- Let the cookies cool on the baking sheet for 5 minutes before transferring them to a wire rack to cool completely.
Notes
- For the softest cookies, slightly underbake them; they firm up as they cool.
- If you prefer a richer flavor, use dark brown sugar instead of light brown sugar.
- This dough does not require chilling, making this a quick dessert recipe.
Nutrition
- Serving Size: 1 cookie
- Calories: 180
- Sugar: 12g
- Sodium: 110mg
- Fat: 10g
- Saturated Fat: 4g
- Unsaturated Fat: 6g
- Trans Fat: 0g
- Carbohydrates: 21g
- Fiber: 1g
- Protein: 4g
- Cholesterol: 25mg