
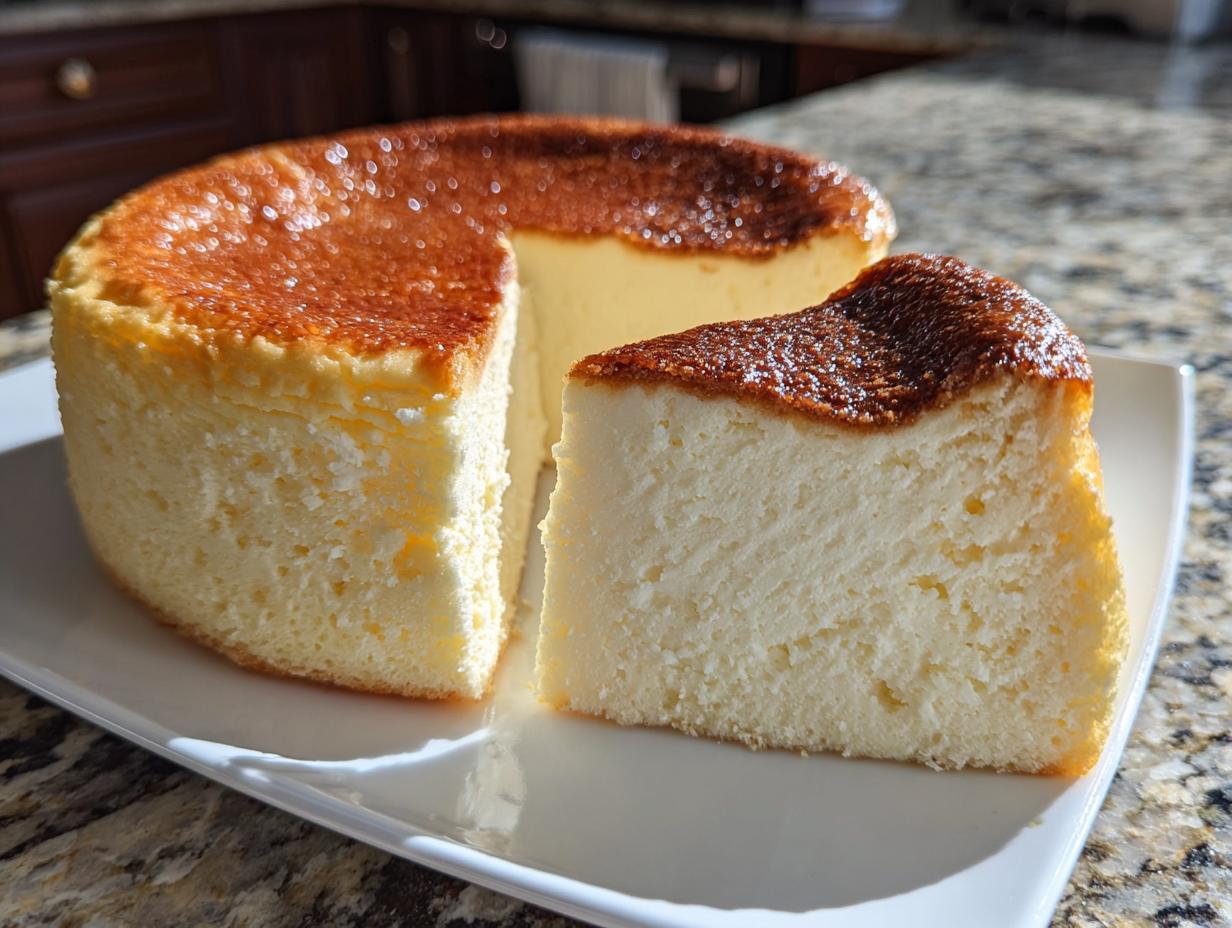
Oh, haven’t you dreamed about it? That perfect slice of dessert, thick as concrete but smoother than silk, that can only come from a true bakery in the city. I’m talking about the new york cheesecake that sets the standard for everything else. Here at Cookin’ Corner, Sarah Jane Thompson and I have spent ages testing batch after batch to nail down this recipe. Forget everything you thought you knew about brittle tops or runny centers!
This is our ultimate ‘No-Fail’ secret weapon. We focus on two things: achieving that gorgeous density and using the water bath technique religiously. It’s how we guarantee a velvety smooth result every single time we bake this American classic. It’s all about tradition, care, and making sure you get a rich dessert that actually lives up to the hype. If you love timeless desserts, you should certainly check out my recipe for zesty lemon cake while you’re here!
- Why This Is Your Best New York Cheesecake Recipe
- Gathering Ingredients for Your Classic New York Cheesecake
- Step-by-Step Instructions for Your Homemade New York Style Cheesecake
- Baking Secrets for Cheesecake Perfection
- Ingredient Notes and Substitutions for your new york cheesecake
- Serving Suggestions for this Rich Dessert Recipes
- Storage and Reheating Instructions for Classic New York Cheesecake
- Frequently Asked Questions about Making a Tall Cheesecake
- Estimated Nutrition Facts for this Tangy Cream Cheese Dessert
- Share Your Ultimate Cheesecake Delight
Why This Is Your Best New York Cheesecake Recipe
When you make something this iconic, you can’t cut corners. My goal, and Sarah Jane’s mission, was to develop the Best New York Cheesecake Recipe out there—the one you save forever and hand down to your kids. We spent nearly a year just perfecting the filling alone! Trust me, the steps we outline here are why this cake stands head and shoulders above the rest. You are going to get results that are genuinely professional.
Here is what makes this recipe a total winner in my book:
- It delivers that signature, satisfyingly dense cheesecake recipe texture that screams authentic New York.
- The filling is impossibly creamy baked cheesecake smooth, thanks to paying attention to temperature.
- We guarantee that beautiful, flat top because we use the water bath method (no more sad cracks!).
- It captures that perfect, slightly tangy cream cheese dessert flavor we all crave.
We took inspiration from the experts out there, like the great tips found over at tall and creamy creation guides, but we made sure our base recipe was the easiest tutorial around. If you love this spiced flavor profile, you absolutely must try my snickerdoodle cheesecake next!
Gathering Ingredients for Your Classic New York Cheesecake
Okay, the absolute most important thing about making a truly new york cheesecake that rivals the pros? It’s the ingredients, especially their temperature! If your cream cheese is cold, you’re guaranteed lumps, and we simply cannot have that when aiming for that famous ‘Velvety Smooth Cheesecake’ texture.
Before you even think about turning on the mixer, get your cream cheese, sour cream, and those four large eggs sitting out on the counter for at least an hour. Seriously, they need to be relaxed and room temperature. This is my number one tip for an easy tutorial!
You’ll find the complete list below, but having everything measured out and ready to go—we call that *mise en place*, but I just call it being prepared—will make the actual mixing go super fast. Remember, we want the best results, which means following the guidance from the recipes that really shine, like the one found here at this ultimate delight!
For the Graham Cracker Crust Cheesecake Base
This crust needs to hold up to all that heavy filling, so we press it in firmly! Don’t skimp on that melted butter, either.
- 1 1/2 cups graham cracker crumbs
- 1/4 cup granulated sugar
- 6 tablespoons unsalted butter, melted (don’t use less!)
For the Rich and Dense Cheesecake Filling
This is where the magic happens. Look at those cream cheese amounts—that’s what gives you the famous density! Make sure that cream cheese and sour cream are completely soft. If you’re feeling fancy later, you can try the technique from my creme brulee version, but for the classic, stick to the recipe!
- 4 (8-ounce) packages full-fat cream cheese, softened to room temperature
- 1 1/2 cups granulated sugar
- 1/4 cup all-purpose flour (this helps stabilize it!)
- 1 teaspoon vanilla extract
- 1/4 teaspoon salt
- 1 cup sour cream, room temperature
- 4 large eggs, room temperature
Step-by-Step Instructions for Your Homemade New York Style Cheesecake
Alright, deep breaths! This is where we put all that careful ingredient prep to work. Making a perfect new york cheesecake isn’t just about what you mix, it’s about *how* you treat the batter during the bake. We treat this batter gently because we want that dense, luxurious texture, not air pockets! If you’re looking for a fun cookie detour after this, you have to check out my chocolate chip cheesecake cookies for a real treat!
The water bath, or Cheesecake with Water Bath, is non-negotiable here. It’s the barrier between a perfect bake and a dry, cracked disaster. Follow these steps closely, and I promise you’ll have the most flawless final product. We are aiming for that show-stopping texture you see in bakeries, like the ones celebrated in guides such as the one found over at tall and creamy cheesecake sources.
Preparing the Crust and Pan for the new york cheesecake
First things first: that graham cracker base needs to chill out. Get your crust pressed firmly into your 9-inch springform pan. I use the flat bottom of a measuring cup to really pack it down tight. Then, pop it in the fridge for a good 30 minutes. It needs to firm up so it doesn’t crumble when we pour the heavy filling on top.
Now, the foil wrapping—this is crucial! Take heavy-duty aluminum foil and wrap the entire outside of the springform pan, bottom and sides, really securely. You want multiple layers. This creates a dam so that when it sits in the hot water bath, zero steam or moisture gets into the crust or, worse, the filling. Don’t skip this; trust me, wet foil means a soggy bottom!
Mixing the Creamy Baked Cheesecake Filling
Remember those room-temperature ingredients? Now they pay off! Start your mixer on low and beat that cream cheese until it is absolutely, perfectly velvety smooth—no tiny lumps allowed. Then, slowly beat in those sugars, the flour, salt, and vanilla. Scrape everything down often.
Next up is the sour cream. Mix that in until it’s just smooth. The final additions are the eggs. Add them one at a time. You only mix until you see the yolk disappear! Pop, pop, pop—one egg, mix gently until gone, then the next. Stop the second the last yolk vanishes. This is the #1 secret for that Dense Cheesecake Recipe; less air means a creamier, less crack-prone cake.
Baking the new york cheesecake using a water bath
Preheat your oven to 350°F (175°C). Place your foil-wrapped pan inside a larger roasting pan. Pour the filling over your chilled crust. Now, carefully pour hot water into the roasting pan until it comes about halfway up the side of your springform pan. That’s your beautiful water bath! Slide it gently into the oven and bake for 60 to 75 minutes.
You’ll know it’s ready when the edges look set but the very center, about two inches across, still has a slight, gentle wobble, like set gelatin. Then, here’s the second big secret for a Perfectly Baked Cheesecake: turn the oven OFF. Prop the door open just a tiny bit with a wooden spoon and leave the cheesecake inside to cool down slowly for a full hour. This gradual temperature change is what prevents thermal shock!
Chilling the Ultimate Cheesecake Delight
Once it’s cooled down slowly inside the oven, take it out of the water bath, remove the foil, and let it cool completely on the counter. But don’t even think about slicing it yet! For the best texture and sliceability, this New York Cheesecake needs time to mature. Cover it loosely and let it hang out in the fridge for a minimum of 6 hours—but honestly, overnight is how you get that intense flavor and firm structure.
Baking Secrets for Cheesecake Perfection
I promised you a no-fail recipe, and that means sharing the insider knowledge! Getting that ultimate creamy texture for your new york cheesecake is all about respecting the ingredients and the process. These extra little tricks are the Baking Secrets for Cheesecake that really take it from ‘homemade’ to ‘bakery quality.’ If you want your results to look just like the stunning versions found over at this classic resource, pay attention!
First, let’s talk about the mixer speed again. I know I warned you about overmixing, but this is worth repeating: keep that electric mixer on low! High speeds whip air right into the batter. Air is the enemy here because it creates little pockets, and when those pockets heat up and cool down, they escape, leaving behind a surface crack. Think gentle incorporation, not vigorous whipping.
My second favorite trick involves the sour cream. I always slightly warm mine up, just until it loses that refrigerator chill. Room temperature cream cheese is a must, but room temperature sour cream blends in so much more seamlessly with the other fats in the mixture. This helps distribute the tanginess evenly without needing extra mixing power.
Finally, the slow cool-down. Propping that oven door open for an hour is non-negotiable. But once you remove the cake to cool on the counter, don’t rush it into the fridge! Let it sit on the counter until it feels just barely warm to the touch—maybe an hour or so—before you cover it and chill it overnight. This final gentle transition eases the cake into its cold state, minimizing any possible shrinking or cracking. It’s patience that earns you that perfect slice!
If you wanted to try adding a swirl of flavor next time, maybe look at my recipe for salted caramel cheesecake, but for this classic, keep it pure!
Ingredient Notes and Substitutions for your new york cheesecake
Let’s talk specifics about what goes into this new york cheesecake because substitutions here can really derail that beautiful texture we worked so hard for! The most critical item is the cream cheese. You absolutely must use full-fat, brick-style cream cheese. No low-fat, no whipped varieties—trust me, those lighter versions have too much water content and will wreck your density. This is a rich dessert, and it needs rich ingredients!
The sour cream is essential, too. It’s what gives our dessert that signature slight tang that balances all that wonderful richness. It needs to be full-fat sour cream, too; use the low-fat version and it sometimes separates during baking. If you wanted to try a different base, maybe a cookie crust instead of graham crackers, that’s fine, but keep the butter ratio the same for structural integrity.
If you ever need inspiration on what to do with leftover cream cheese, I have this amazing recipe for a cream cheese pound cake that is just divine. But for this classic bake, stick to the full-fat requirement!
Serving Suggestions for this Rich Dessert Recipes
Now that you’ve wrestled the perfect, dense, and creamy new york cheesecake out of the oven and given it the proper overnight chill, it’s time to dress up our star player! The beauty of this classic dessert is that it truly stands alone. It doesn’t need tons of fussy decoration. In fact, piling on too much stuff can actually hide that perfect, velvety texture you worked so hard to achieve.
When I serve this, I think about simple, bright flavors that cut through the richness of the cream cheese. Think of it like giving the cheesecake a little hat, not a whole costume party!
If you are looking for an easy side or something to pair with it after the main meal, I always turn to simple fruit. Perhaps you are making a weeknight meal and need a quick dessert? You might love my classic apple pie recipe, but for the cheesecake, keep it light!
Here are my absolute favorite, tried-and-true ways to top off this Ultimate Cheesecake Delight:
- The Purest Approach: Honestly, sometimes all it needs is a very light, even dusting of high-quality powdered sugar using a fine-mesh sieve. It looks elegant and lets the tangy flavor shine through.
- Fresh Berries are Your Friend: A simple scattering of macerated fresh strawberries or raspberries is divine. Just toss the berries with a teaspoon of sugar and let them sit for 15 minutes before topping the slices. The pop of tartness is incredible!
- A Simple Coulis: If you want something a bit saucier, whip up a quick homemade fruit sauce. A raspberry or cherry coulis is perfect because it introduces moisture and brightness without being overly sweet like a caramel might be.
- Just a Whisper of Chocolate: For the chocolate lovers, skip the heavy ganache. Instead, take a vegetable peeler and make some thin curls of dark chocolate to sprinkle right on top. It’s textural and sophisticated.
Whatever you choose, make sure the cheesecake is completely cold when you top it! Enjoy your masterpiece!
Storage and Reheating Instructions for Classic New York Cheesecake
When you finally manage to save a slice of your perfectly baked new york cheesecake—and let’s be honest, that’s a feat in itself—you want to make sure you store it right so it stays just as creamy the next day. Preserving that velvety texture is key to maintaining the quality of this Classic New York Cheesecake.
The good news is that cheesecake actually gets even better after a good, long rest in the fridge. Time lets those rich flavors settle in and enhances the density. If you need a break from heavy desserts, I actually have an amazing no-bake ice cream pie recipe that’s great for summer!
But for this classic baked version, here is exactly how I keep leftovers fresh, building trust by making sure you get the best experience even on day two.
Storing Your Leftovers
First, make sure the cheesecake is completely cooled to room temperature after it comes out of the final chill—if you wrap it up while it’s slightly cold, you risk condensation, and condensation leads to moisture issues. Once it’s fully cold, gently run a thin knife around the edge if you haven’t already sliced it, just to ensure it doesn’t stick to the pan sides.
Cover the entire springform pan, or the cut pieces, very tightly with plastic wrap. Make sure you don’t press the wrap directly onto the surface unless you’ve already sliced it; if you have a whole top, just tent it lightly. Then, refrigerate it. Stored this way, your creamy baked cheesecake will stay wonderfully fresh for about 5 to 7 days. That’s why it’s such a great holiday dessert—you can make it way ahead of time!
The Reheating Question
Now, some baked goods love a gentle warm-up, but cheesecakes? Not so much. Reheating a rich dessert recipe like this really risks drying out the texture or, worse, causing it to weep moisture. I almost never reheat my cheesecake, and I strongly advise against putting a slice in the microwave; it just turns into a warm, slightly spongy mess.
If you absolutely hate the coldness right out of the fridge, the best thing you can do is take the slice out onto a plate about 30 to 45 minutes before you plan to eat it. Let it sit on the counter at room temperature. This slight warming allows the fats to soften just enough so that you get that melt-in-your-mouth, velvety smooth experience without risking that baked-good texture change. It’s patience that earns you that perfect slice!
Just enjoy it cool—that’s the new york cheesecake way!
Frequently Asked Questions about Making a Tall Cheesecake
I knew you’d have questions! Making a truly iconic Tall Cheesecake requires a little commitment, and that’s okay. When you’re aiming for that perfect, heavyweight texture, sometimes the process seems tricky, but trust me, once you understand *why* we do something, it becomes an Easy Cheesecake Tutorial! These are the things that people ask me about the most when they are attempting their new york cheesecake for the first time.
If you’re really looking for the ultimate no-stress guide, you should definitely bookmark my general no-crack cheesecake recipe for future reference, but here are the answers to the big three worries:
Why does my new york cheesecake still crack even with a water bath?
Oh, that is the absolute worst feeling! If you’ve done the water bath but still got a crack, there are usually two sneaky culprits. The first, and most common, is overmixing the eggs. Remember how I harp on adding them one by one and stopping right away? If you beat too much air in, that air tries to escape quickly as it cools, and *crack*—you get fissures on the top. The second reason is cooling too fast, even after the water bath trick. If you pull it straight from the oven and place it on a cold counter, that temperature shock will cause the whole thing to contract unevenly.
Can I skip the water bath for this Classic New York Cheesecake?
If you skip the water bath for this specific Classic New York Cheesecake, you are absolutely gambling with your bake, and honestly, it’s a pretty big gamble! I strongly advise against it for this style. That water bath—the bain-marie—creates a humid, gentle cooking environment around the entire pan. That gentle heat is what allows the fats and proteins in the filling to set slowly and evenly. Skipping it almost guarantees your edges will bake too fast, resulting in a dry ring around the outside while the middle cooks unevenly. You won’t get the signature Dense Cheesecake Recipe texture without that steam barrier, point blank.
If you are interested in other kinds of classic desserts, you might want to see the secrets I use over at Juicy Table for other bakes!
How do I know when my dense cheesecake recipe is fully baked?
This is where you have to trust your eyes and your touch more than the timer alone. We bake until the timer says 75 minutes, sure, but don’t walk away! For this Dense Cheesecake Recipe, you want the outer 2 inches of the cheesecake filling to look completely set—no wobbling there. However, the very center, maybe the size of a silver dollar, should still have a slight, gentle jiggle to it when you very carefully nudge the whole roasting pan.
If it doesn’t move at all, it’s overdone, and it might crack on cooling. If the whole thing sloshes, give it another 5-10 minutes. Remember: we are aiming for a set edge and a wobbly island center. That slight movement means the residual heat is going to finish setting it perfectly during the slow cool-down period inside the oven!
Estimated Nutrition Facts for this Tangy Cream Cheese Dessert
Now, I know when we’re baking something this utterly indulgent and rich like our new york cheesecake, we aren’t really looking at the nutritional label, right? We’re looking at pure, unadulterated happiness! But because this is one of those incredible, rich dessert recipes that people ask about constantly, I grabbed the calculated figures so you have a general idea of what’s in that glorious slice.
This information is based on the recipe using only the listed ingredients and dividing the whole cake into 12 equal servings. I always find that knowing the general breakdown helps me decide when I can have a second slice—usually after deciding I deserve it!
Before you go trying to perfectly match these numbers, remember this is just an estimate derived from the ingredients we used. Things like the brand of crackers or the size of your eggs can shift things slightly. Think of this as a helpful guide rather than a strict mandate, especially if you are making substitutions!
If you happen to be baking for folks who need lighter options, you might want to bookmark my peanut butter cup cookies recipe which has some lighter variations listed!
Here are the approximate numbers for one rich slice of that Tangy Cream Cheese Dessert:
- Serving Size: 1 slice
- Calories: 450
- Sugar: 35g
- Sodium: 300mg
- Fat: 30g (18g Saturated Fat)
- Carbohydrates: 40g
- Protein: 8g
Just a quick note on those numbers: The fat content reflects the necessary full-fat cream cheese and butter required to achieve that dense, classic texture. You just can’t cut those corners for a true Classic New York Cheesecake!
Share Your Ultimate Cheesecake Delight
Well, friends, we’ve reached the very best part of this whole baking journey! We’ve mixed, we’ve wrapped our pans in foil, we’ve nurtured that beauty in the water bath, and now you have the most incredible, dense, and rich new york cheesecake cooling down in your fridge. I am telling you, if you followed every single step—especially that slow cooling part!—you have created a true showstopper.
Now that you’ve mastered this No Fail Cheesecake Recipe, I need to hear from you! This is where Cookin’ Corner really comes alive, when I see all of your amazing bakes popping up online.
Tell Me About Your Success!
Did you manage that perfect, wobble-free center on the first try? Was the graham cracker crust firm enough to hold up against all that creamy goodness? I want all the details! Go ahead and drop a star rating right down in the comments section below and let me know how you found the process to be. Was it less scary than you thought it would be?
If you snap a picture of your finished, magnificent creation—maybe you topped it with fresh raspberries or just kept it pure—please tag me on social media! Seeing your bakes, from beginners tackling their first Classic New York Cheesecake to seasoned bakers achieving perfection, is genuinely what keeps my passion for American classics going strong.
Need Anything Else?
If something felt confusing, or if you hit a snag somewhere along the way, don’t hesitate to ask! We are all learning together here, and I check in often to help clear up any last-minute questions. You can always reach out to us directly if you need something privately through the contact page.
Thank you so much for trusting this recipe. Go grab that chilled slice, pour a strong coffee, and enjoy this absolute peak of rich dessert recipes. You earned it!
PrintThe Ultimate ‘No-Fail’ Classic New York Cheesecake

Achieve that rich, dense, and perfectly creamy texture of a traditional New York Style Cheesecake. This recipe uses a water bath to guarantee a smooth, no-crack finish every time you bake this timeless dessert.
- Prep Time: 30 min
- Cook Time: 75 min
- Total Time: 9 hours 45 min
- Yield: 12 servings 1x
- Category: Dessert
- Method: Baking
- Cuisine: American
- Diet: Vegetarian
Ingredients
- 1 1/2 cups graham cracker crumbs
- 1/4 cup granulated sugar (for crust)
- 6 tablespoons unsalted butter, melted
- 4 (8-ounce) packages full-fat cream cheese, softened to room temperature
- 1 1/2 cups granulated sugar (for filling)
- 1/4 cup all-purpose flour
- 1 teaspoon vanilla extract
- 1/4 teaspoon salt
- 1 cup sour cream, room temperature
- 4 large eggs, room temperature
Instructions
- Prepare the crust: Mix graham cracker crumbs, 1/4 cup sugar, and melted butter. Press the mixture firmly into the bottom of a 9-inch springform pan. Chill the crust for 30 minutes.
- Preheat your oven to 350°F (175°C). Wrap the outside of the springform pan tightly with heavy-duty aluminum foil to prevent water from entering during the water bath.
- Prepare the water bath: Place the foil-wrapped springform pan inside a larger roasting pan.
- Make the filling: In a large bowl, beat the softened cream cheese with an electric mixer until completely smooth. Scrape down the sides.
- Gradually beat in the 1 1/2 cups of sugar, flour, vanilla extract, and salt until just combined. Do not overmix.
- Beat in the sour cream until smooth. Add the eggs one at a time, mixing only until each egg is incorporated. Stop mixing as soon as the last egg disappears into the batter. Overmixing adds air, which causes cracks.
- Pour the filling over the chilled crust in the springform pan.
- Carefully pour hot water into the roasting pan until the water reaches about halfway up the sides of the springform pan. This is your water bath (bain-marie).
- Bake for 60 to 75 minutes. The edges should look set, but the center 2 inches should still jiggle slightly when the pan is gently nudged.
- Turn off the oven. Prop the oven door open slightly (about 2 inches) using a wooden spoon. Let the cheesecake cool slowly in the oven for 1 hour. This slow cooling prevents cracking.
- Remove the cheesecake from the water bath and the roasting pan. Let it cool completely on a wire rack at room temperature.
- Once cool, cover the pan loosely with plastic wrap and refrigerate for at least 6 hours, or preferably overnight, before serving.
Notes
- Use room temperature ingredients for the filling; this prevents lumps and ensures a velvety smooth texture.
- The water bath is the secret to achieving a perfectly creamy, dense cheesecake that does not crack.
- Do not open the oven door during the initial baking time.
Nutrition
- Serving Size: 1 slice
- Calories: 450
- Sugar: 35g
- Sodium: 300mg
- Fat: 30g
- Saturated Fat: 18g
- Unsaturated Fat: 12g
- Trans Fat: 0.5g
- Carbohydrates: 40g
- Fiber: 1g
- Protein: 8g
- Cholesterol: 120mg