
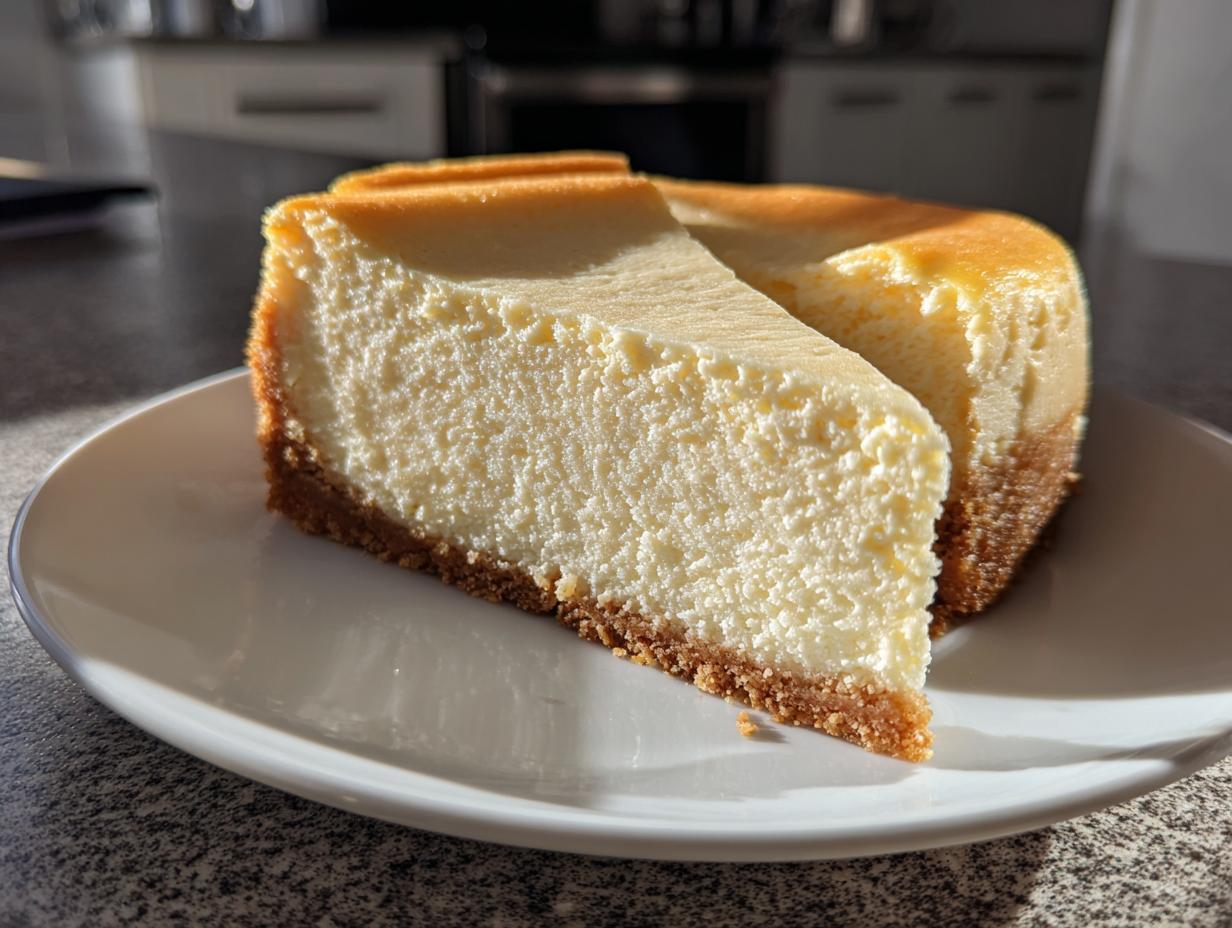
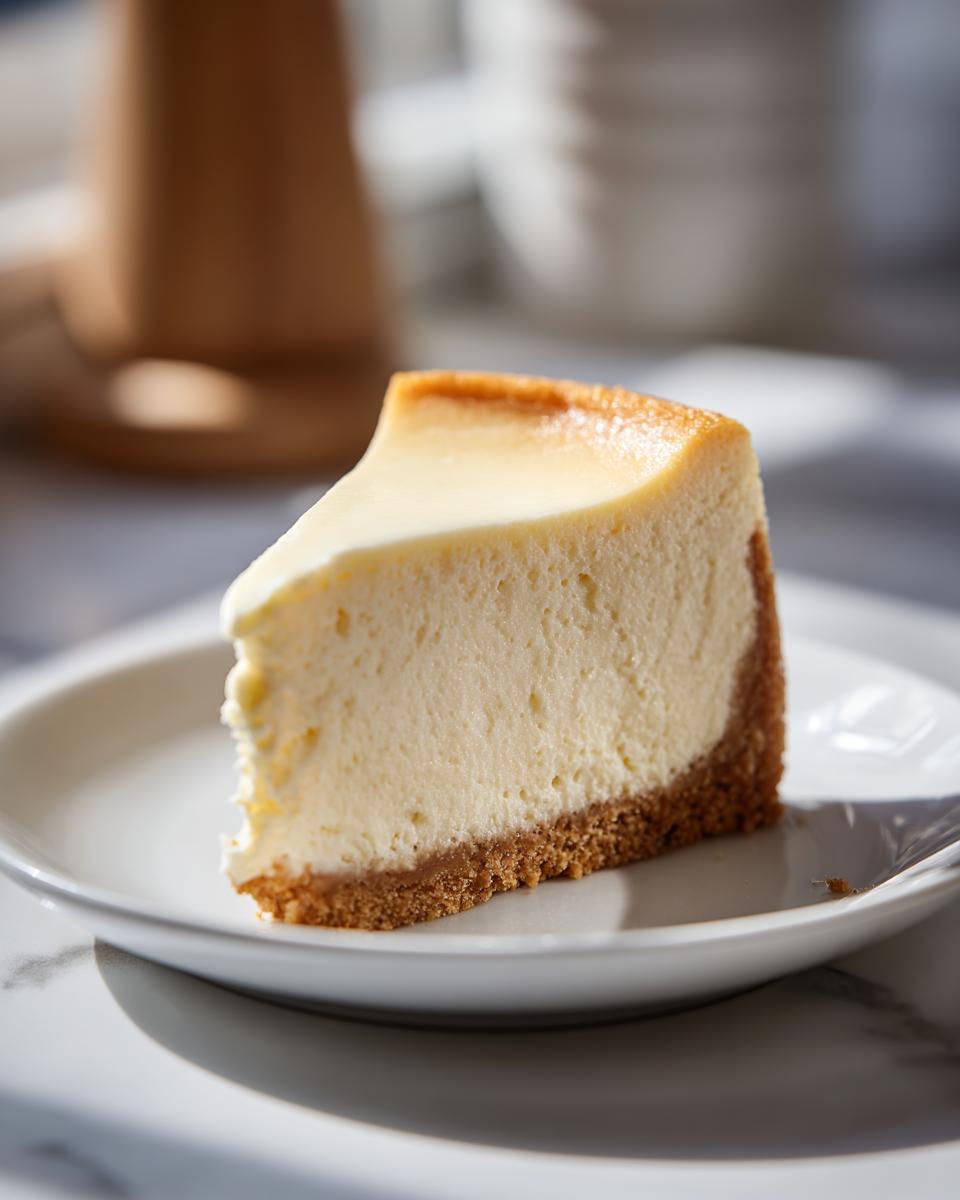
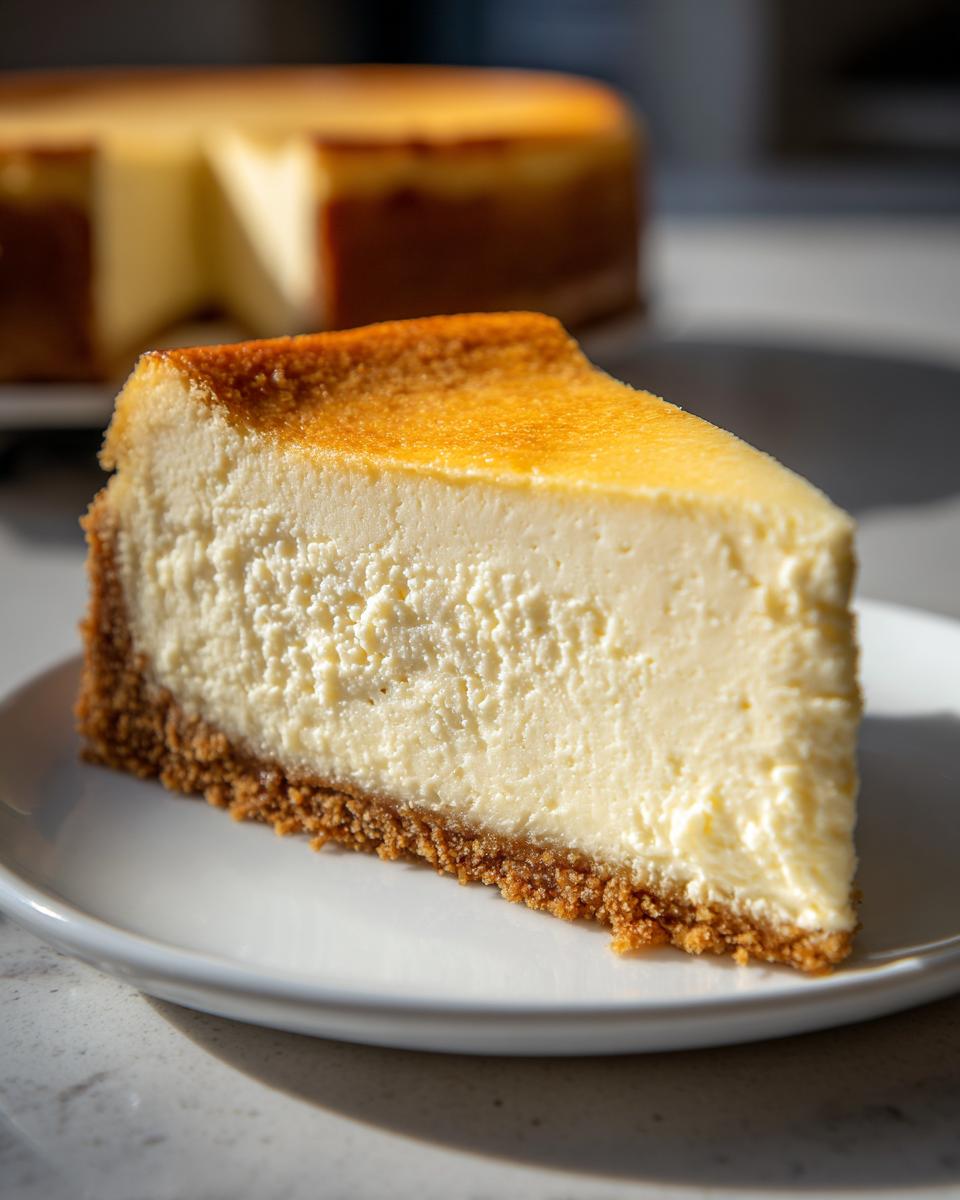
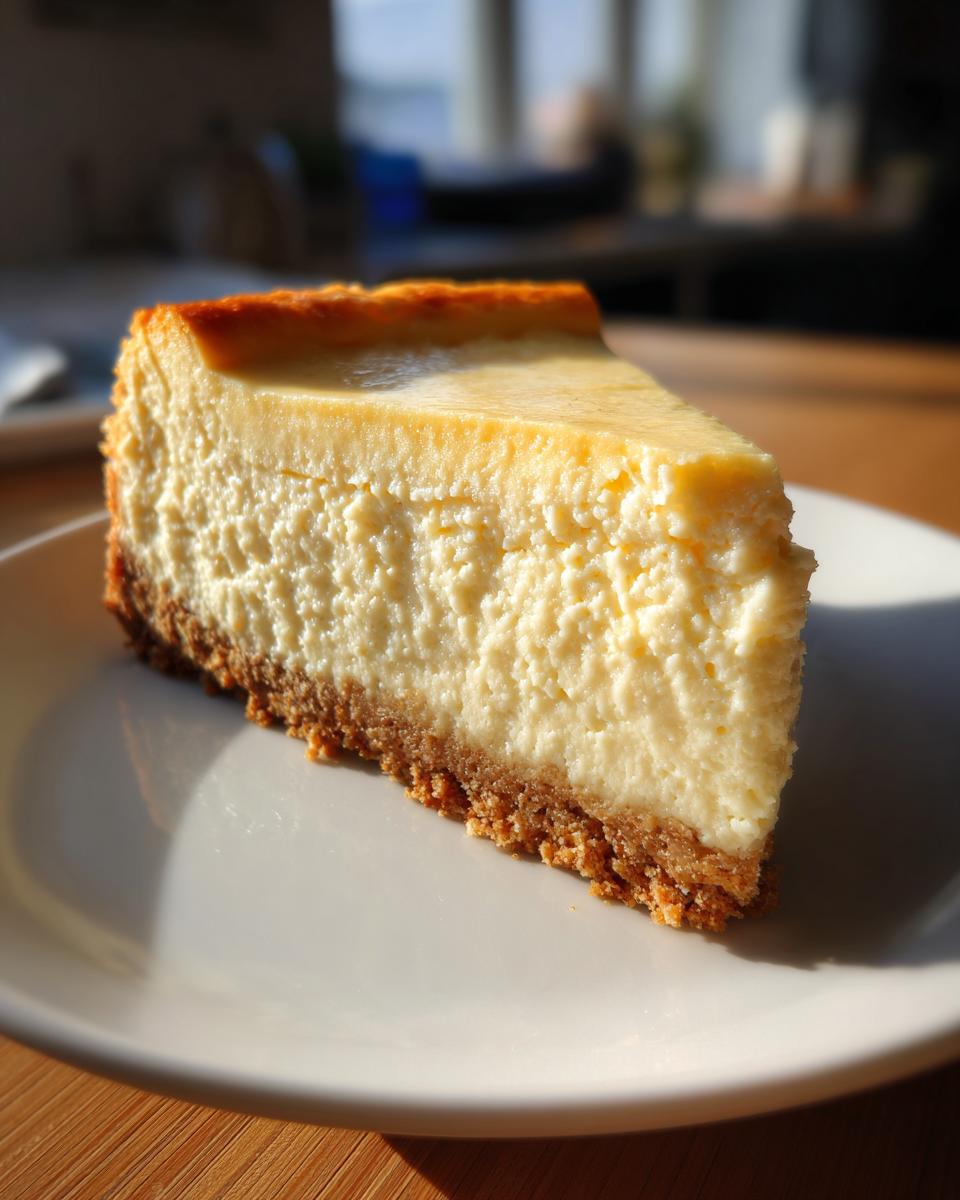
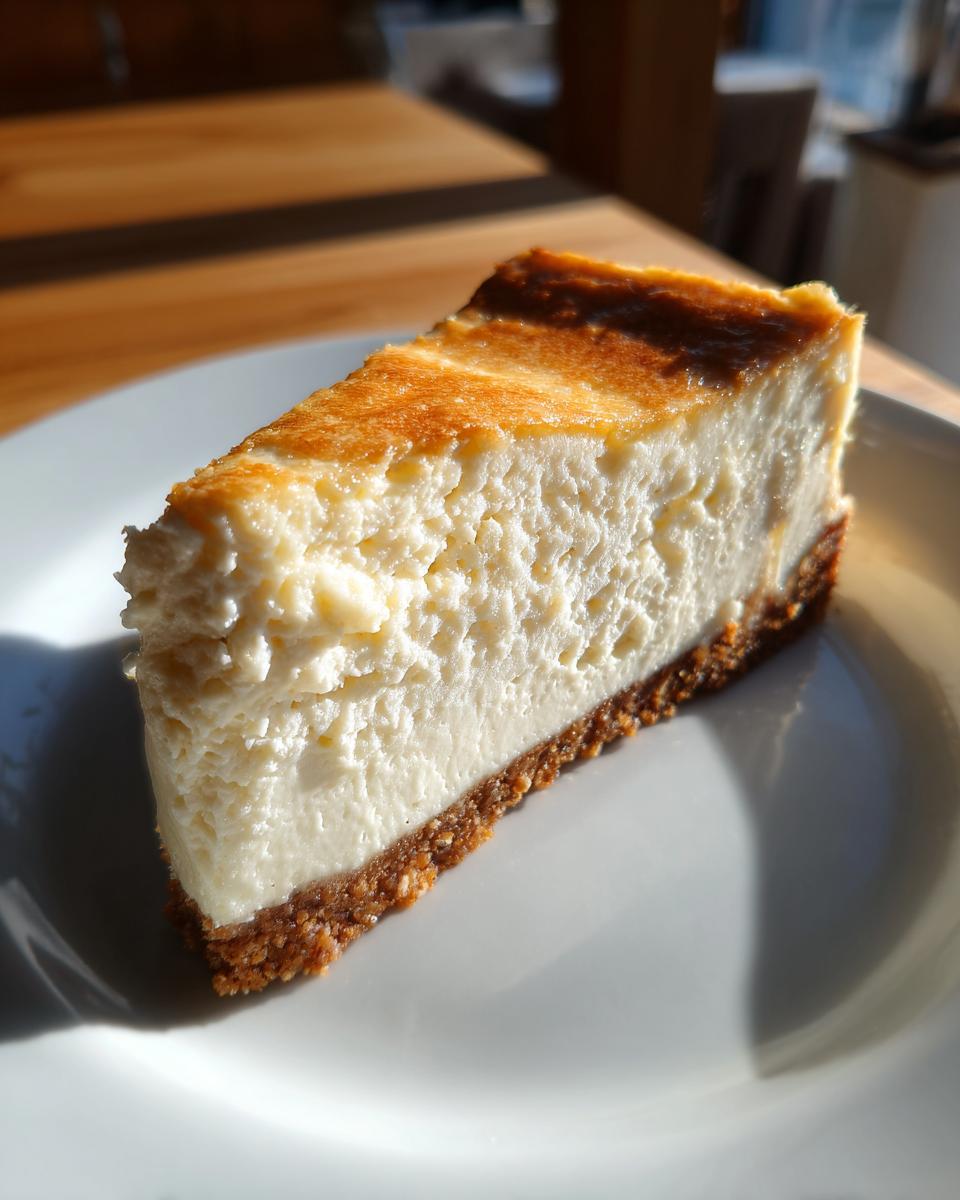
Oh, getting that perfectly smooth, creamy texture in a cheesecake is the dream, isn’t it? For years, I honestly thought a truly crack-free dessert was only possible if you stood over a boiling water bath for hours. Growing up in my Midwest kitchen, we valued simple, delicious results, not fussy techniques! Well, friends, I’ve cracked the code—literally. This is my Easy, No-Crack, Creamy New York Style Cheesecake recipe that skips the water bath entirely. This fundamental cheesecake recipe delivers the rich, velvety experience you crave, and trust me, it’s so much simpler than those classic but intimidating instructions make it sound.
- Why This Easy Cheesecake Recipe Delivers Homemade Dessert Perfection
- Ingredients for Your Creamy Cheesecake Recipe
- Step By Step Cheesecake: Baking Your New York Style Cheesecake Guide
- Tips for Success with Your Best Homemade Cheesecake
- Storage & Make Ahead Desserts: Enjoying Your Cheesecake Recipe Later
- Serving Suggestions for Your Classic Cheesecake Dessert
- Frequently Asked Questions About This Cheesecake Recipe
- Estimated Nutritional Data for This Cheesecake Recipe
- Share Your Ultimate Cheesecake Experience
Why This Easy Cheesecake Recipe Delivers Homemade Dessert Perfection
You might look at this and think it’s one of those desserts that needs constant attention, but this cheesecake recipe is built for real life. I’ve spent years tweaking this so we can all enjoy that rich, New York Style experience without the fuss. It truly is the best way to get that homemade dessert perfection on the first try.
- This method guarantees a dense, creamy texture that people usually only read about.
- We get the tangy, rich dessert flavor we love without needing that scary hot water bath you see in other recipes.
- It’s incredibly reliable; once you follow these steps, you’ll have a truly crack-free cheesecake every time. I promise!
Achieving Velvety Cheesecake Filling Texture
Listen, lumps are the enemy of a beautiful cake. That smooth, velvety cheesecake filling only happens if your cream cheese, eggs, and sour cream are all completely at room temperature. If they are cold, they won’t blend right, no matter how fancy your mixer is! Also, keep that mixer speed low once the eggs go in. We are blending, not whipping air into it.
The Secret to a No Crack Cheesecake
This is the part that trips up everyone trying to make an easy cheesecake recipe no water bath. The crack happens when the cake shrinks too fast! My trick, learned after too many sad, cracked tops, is the slow cool down. Once your timer goes off, turn the oven OFF, prop the door open just a tiny crack—use a wooden spoon if you need to—and let it just hang out in there for a full hour. It brings the temperature down gently, sealing the deal for a perfect top. You can then move it to the counter before chilling. You might like checking out my guide for the perfect classic pumpkin pie recipe while you wait for this one to chill!
Ingredients for Your Creamy Cheesecake Recipe
Okay, let’s get our ingredients organized! Having everything prepped is half the battle when trying to bake a truly first-class cheesecake recipe. Don’t try to substitute the cream cheese type, though; you absolutely need the full-fat stuff if you want that incredible density. Remember, room temp is non-negotiable for a smooth batter!
For the Graham Cracker Crust Recipe
- 1 1/2 cups graham cracker crumbs
- 1/4 cup granulated sugar (for crust)
- 6 tablespoons unsalted butter, melted
Don’t skimp on pressing this crust down hard into that springform pan; you want it sturdy enough to hold up all that creamy goodness!
For the Rich Dessert Filling
- 3 (8 ounce) packages full-fat cream cheese, softened
- 1 1/2 cups granulated sugar (for filling)
- 1/2 cup sour cream, room temperature
- 4 large eggs, room temperature
- 1 teaspoon vanilla extract
- 1/4 teaspoon salt
Seriously, make sure those eggs and that sour cream have been sitting out. It saves so much heartache later trying to smooth out cold lumps!
Step By Step Cheesecake: Baking Your New York Style Cheesecake Guide
Now for the fun part! Putting it all together. Don’t let those steps scare you; we’re taking this slow and easy, just like my grandmother taught me about handling delicate things. Following these exact steps is how we guarantee that classic, rich flavor without any fuss. You’ll see we’re getting close to the ultimate dessert experience here! You can pair this with some perfectly creamy sides, like learning how to make creamy baked mashed potatoes recipe!
Preparing the Crust and Pan for This Cheesecake Recipe
First things first, preheat your oven to 325 degrees Fahrenheit. Grab that 9-inch springform pan and wrap the outside *really* well with heavy-duty aluminum foil. Even though we are skipping the traditional water bath, this wrap is a good safety net just in case any moisture tries to sneak in through the latch. Mix up those crust ingredients until they look like wet sand. Press that mixture down firmly into the bottom of your prepared pan. Then, pop it into the oven for just 10 minutes to set the crust. Let it cool a bit while you work on the filling.
Mixing the Velvety Cheesecake Filling
This is where we must treat the ingredients gently! Start by beating your softened cream cheese by itself until it is absolutely, completely smooth—scrape down those sides often! Then, add the sugar, vanilla, and salt, beating just until it comes together. Next, mix in the sour cream. Finally, the eggs go in one by one. You must only beat until each egg is *just* incorporated before adding the next. Seriously, keep that mixer speed on low. Introducing air here is what causes those dreaded cracks, and we are working hard for that no crack cheesecake finish!
Baking and Slow Cooling for a Crack-Free Cheesecake
Pour that beautiful batter over your ready crust and tap the pan gently on the counter a few times to release any obvious bubbles. Bake this for 55 to 65 minutes. When you check it, the edges should look set, but the middle inch or two should still have a little wobble, like Jell-O. This is crucial! When that time is up, turn the oven OFF. You need to prop the door open slightly—I just use a wooden spoon—and let your cheesecake cool inside that warm oven environment for a full hour. This slow transition prevents the sudden temperature shock that causes sinking or cracking. You can then move it to a rack to finish cooling before you refrigerate it. This slow cooling method is the real key to an easy homemade cheesecake recipe!
Tips for Success with Your Best Homemade Cheesecake
I want you to succeed with this! Baking that best homemade cheesecake should feel rewarding, not stressful. After all my attempts, I learned those small hiccups can totally derail your beautiful dessert. Don’t worry if you’ve had issues before; just focus on these key pointers. They make all the difference between an okay cake and what I call homemade dessert perfection. I learned this same slow and careful approach when working on my lemon cookies, too—patience pays off!
Ingredient Temperature Matters for This Cheesecake Recipe
I can’t stress this enough: everything needs to be room temperature! If your cream cheese is even slightly chilly, you’re going to get lumps, and those lumps mean you have to overmix to smooth them out, which brings back the dreaded air bubbles. So, please, let the cream cheese, eggs, and sour cream hang out on the counter for at least an hour before you even think about turning on the mixer.
Flavor Variations for Your Next Cheesecake Recipe
If you master this creamy base, you can start playing around! For a little extra brightness, add the zest of one whole lemon or orange when you mix in the vanilla extract for an instantly tangy cheesecake flavor. Also, if you find yourself out of sour cream, substituting half of it with plain Greek yogurt makes a wonderful substitute, giving you that classic richness with just a slightly different mouthfeel. For more ideas on world-class baked goods, check out this New York Style Cheesecake guide.
Storage & Make Ahead Desserts: Enjoying Your Cheesecake Recipe Later
One of the best things about this rich dessert is that it’s meant to be made ahead of time! This truly is a fantastic option when you’re planning make ahead desserts for a big weekend, especially if you need something special for holiday cheesecake recipes. It actually gets better after a long chill, solidifying that creamy texture perfectly.
Once your cheesecake is completely cool from the counter—we talked about that long cooling process, right?—you need to wrap it up snug. I use plastic wrap, making sure it touches the surface of the cake lightly before securing the sides. This keeps it fresh and prevents it from picking up any funny smells from the fridge. You can keep this beauty sealed tightly in the refrigerator for up to 4 or 5 days. It’s perfect for making on Wednesday for a Sunday gathering!
If you need to keep it longer, say for a party next week, freezing is an option too. Just make sure it’s well-wrapped first. You can freeze it for about a month. When you want to serve it, move that frozen cheesecake right back into the fridge to thaw slowly overnight. Don’t rush it! I have a whole post on the best ways to handle make ahead desserts that might give you even more ideas for planning ahead for your next big event.
Serving Suggestions for Your Classic Cheesecake Dessert
After all that careful work ensuring your Classic Cheesecake Dessert is perfectly creamy and crack-free, you deserve a beautiful presentation! Since this is a true New York Style Cheesecake, it really shines on its own, but a little something extra never hurts, right? We want toppings that enhance that rich, slightly tangy flavor, not compete with it.
Keep it super simple if you ask me. Trying to put heavy pies or crumbles on top just hides that beautiful, smooth surface you worked so hard to achieve. My favorite thing to do is just a light whisper of topping, or letting the cheesecake stand proud all by itself!
Here are my go-to ways to dress up this rich dessert:
- Fresh & Bright: A light scattering of fresh, gorgeous berries—raspberries or deep purple blackberries look fantastic against the pale white filling. A little sprinkle of mint leaves looks elegant, too.
- Chocolate Drizzle: If you must have chocolate, don’t use heavy fudge. Melt a small amount of high-quality bittersweet chocolate and draw thin, delicate drizzles across the top using a fork. It contrasts beautifully.
- Simple Fruit Compote: Keep it light! A very thin, slightly tart fruit sauce, like a simple cherry or blueberry compote made with just fruit, sugar, and a squeeze of lemon, can be poured around the edges of each individual slice on the plate. Imagine taking a bite of that tangy slice dipped in the bright fruit sauce! It’s amazing.
If you wanted to find a surprisingly savory pairing for a party spread (though this is strictly for after dinner!), I once shared my favorite homemade nacho cheese sauce recipe, but honestly, save that for game day. This cheesecake needs delicate companions!
Frequently Asked Questions About This Cheesecake Recipe
It’s totally normal to have questions when tackling what might feel like an intimidating dessert! I get asked all the time how to guarantee that smooth, creamy result in my cheesecake recipe. I’ve pulled together a few common worries here to make sure your baking journey is a breeze. Don’t hesitate to reach out if you have other thoughts!
Can I skip the aluminum foil wrapping for this cheesecake recipe?
That’s a fair question! Since we are skipping the messy water bath, you might think the foil is unnecessary, right? Well, here’s the thing: I still tell you to wrap the pan really well with heavy-duty foil. It isn’t so much about keeping water out as it is about protecting the base of your springform pan. Latches can sometimes get temperamental, and we just don’t want any accidents when moving this heavy dessert. It’s strictly a safety precaution for your beautiful rich dessert!
How do I ensure the filling is perfectly smooth for a creamy cheesecake recipe?
This is absolutely crucial for achieving that creamy cheesecake recipe texture! You have to treat the cream cheese like its own separate, very important step. Don’t just dump everything in together. Beat that softened cream cheese by itself, scraping down a few times, until it looks like fluffy frosting. Only then can you slowly introduce the sugar and sour cream before adding the eggs on the very lowest speed. That extra scraping step makes the difference between smooth and slightly gritty.
Is this the best cheesecake recipe for beginners?
Oh, absolutely, yes! I designed this entire thing so that folks who are nervous about beginner cheesecake baking can still succeed. The two biggest hurdles—preventing cracks and dealing with a water bath—are completely removed here. The slow cooling method does all the hard work for us! If you can mix ingredients gently and use an oven timer, you can master this simple cheesecake from scratch.
If you want some quick meal ideas for before dessert comes out, check out my post on easy dinner ideas!
Estimated Nutritional Data for This Cheesecake Recipe
Now, I know we aren’t focusing on dieting when we make something this glorious, but sometimes it helps to have a general idea of what’s in that magnificent slice of New York Style Cheesecake! Remember, as this is a rich dessert made with full-fat ingredients, it packs a punch, but it’s worth every single bite.
Please keep in mind these numbers are just estimates based on the ingredients I listed in the recipe above. These figures can shift around depending on the exact brands of cream cheese or how thick you cut your piece. This data is based on a serving size of 1 slice.
- Serving Size: 1 slice
- Calories: 450
- Fat: 30g (with 18g saturated fat—hello, butter and cream cheese!)
- Carbohydrates: 40g
- Sugar: 35g (It’s a dessert, after all!)
- Protein: 8g
- Cholesterol: 120mg
We’re looking at a solid, satisfying portion for this classic cheesecake dessert. Enjoy it guilt-free, knowing you made something truly special!
Share Your Ultimate Cheesecake Experience
Well, that’s it—you’ve made it through the process for what I truly believe is the Ultimate Cheesecake Experience! Now comes the best part: digging in! But before you grab your fork, I’d be so tickled if you’d come back and tell me how it went. My heart is in these recipes, and knowing that you created something wonderful reminds me why I started Cookin’ Corner in the first place.
Did you manage that perfect, smooth top? Did you pull off that no crack cheesecake finish without even using a water bath? Please, drop a star rating below and leave a comment telling me what you served alongside it. Did you go for the fresh berries or maybe keep it plain?
If you snap a picture of that gorgeous, creamy slice, please share it on social media and tag me! I absolutely love seeing the homemade dessert perfection showing up in your kitchens. It genuinely feels like we are all baking together! If you’re looking for other incredible, reliable recipes that shine every time, you can check out my collection of quick easy recipes for when you need something amazing without a ton of fuss.
Thank you so much for trusting me with your baking adventure. Happy serving!
PrintEasy, No-Crack, Creamy New York Style Cheesecake Recipe

Follow this step-by-step guide to make the best homemade cheesecake. This recipe delivers a rich, velvety, and perfectly creamy texture without cracks, and you can make it without a water bath.
- Prep Time: 25 min
- Cook Time: 65 min
- Total Time: 90 min
- Yield: 12 servings 1x
- Category: Dessert
- Method: Baking
- Cuisine: American
- Diet: Vegetarian
Ingredients
- 1 1/2 cups graham cracker crumbs
- 1/4 cup granulated sugar (for crust)
- 6 tablespoons unsalted butter, melted
- 3 (8 ounce) packages full-fat cream cheese, softened
- 1 1/2 cups granulated sugar (for filling)
- 1 teaspoon vanilla extract
- 1/4 teaspoon salt
- 4 large eggs, room temperature
- 1/2 cup sour cream, room temperature
Instructions
- Preheat your oven to 325 degrees Fahrenheit. Wrap the outside of a 9-inch springform pan tightly with heavy-duty aluminum foil to prevent water seepage, even if you skip the water bath.
- Prepare the crust: Mix graham cracker crumbs, 1/4 cup sugar, and melted butter until combined. Press the mixture firmly and evenly into the bottom of the prepared springform pan. Bake for 10 minutes. Remove from the oven and let it cool slightly.
- Prepare the filling: In a large bowl, beat the softened cream cheese with an electric mixer until completely smooth. Scrape down the sides of the bowl.
- Add 1 1/2 cups sugar, vanilla extract, and salt to the cream cheese. Beat on medium speed until just combined and smooth. Do not overmix.
- Beat in the sour cream until incorporated.
- Add the eggs one at a time, beating only until each egg is just mixed into the batter. Overmixing the eggs introduces air, which causes cracks.
- Pour the filling over the cooled crust. Gently tap the pan on the counter a few times to release any large air bubbles.
- Bake for 55 to 65 minutes. The edges should look set, but the center 2 inches should still have a slight jiggle when gently nudged.
- Turn off the oven, crack the oven door open slightly (use a wooden spoon to prop it open), and let the cheesecake cool inside the oven for 1 hour. This slow cooling prevents cracking.
- Remove the cheesecake from the oven and let it cool completely on a wire rack. Once cool, cover and refrigerate for at least 6 hours, or preferably overnight, before serving.
- Run a thin knife around the edge of the pan before releasing the springform side. Serve your rich dessert.
Notes
- Use room temperature ingredients for the cream cheese, eggs, and sour cream. This prevents lumps and ensures a velvety filling.
- For a crack-free cheesecake, mix the batter on low speed and stop mixing as soon as the ingredients combine.
- If you prefer a tangier flavor, substitute 1/4 cup of the sour cream with an equal amount of plain Greek yogurt.
Nutrition
- Serving Size: 1 slice
- Calories: 450
- Sugar: 35g
- Sodium: 300mg
- Fat: 30g
- Saturated Fat: 18g
- Unsaturated Fat: 12g
- Trans Fat: 0.5g
- Carbohydrates: 40g
- Fiber: 1g
- Protein: 8g
- Cholesterol: 120mg