
Some treats just scream childhood nostalgia, don’t they? That perfect mix of chocolate, peanut butter, and a little bit of crunch from your favorite candy bar just can’t be beaten. If you’re craving something incredibly rich, ridiculously creamy, and requires absolutely zero time hovering over a hot oven, you’ve come to the right corner!
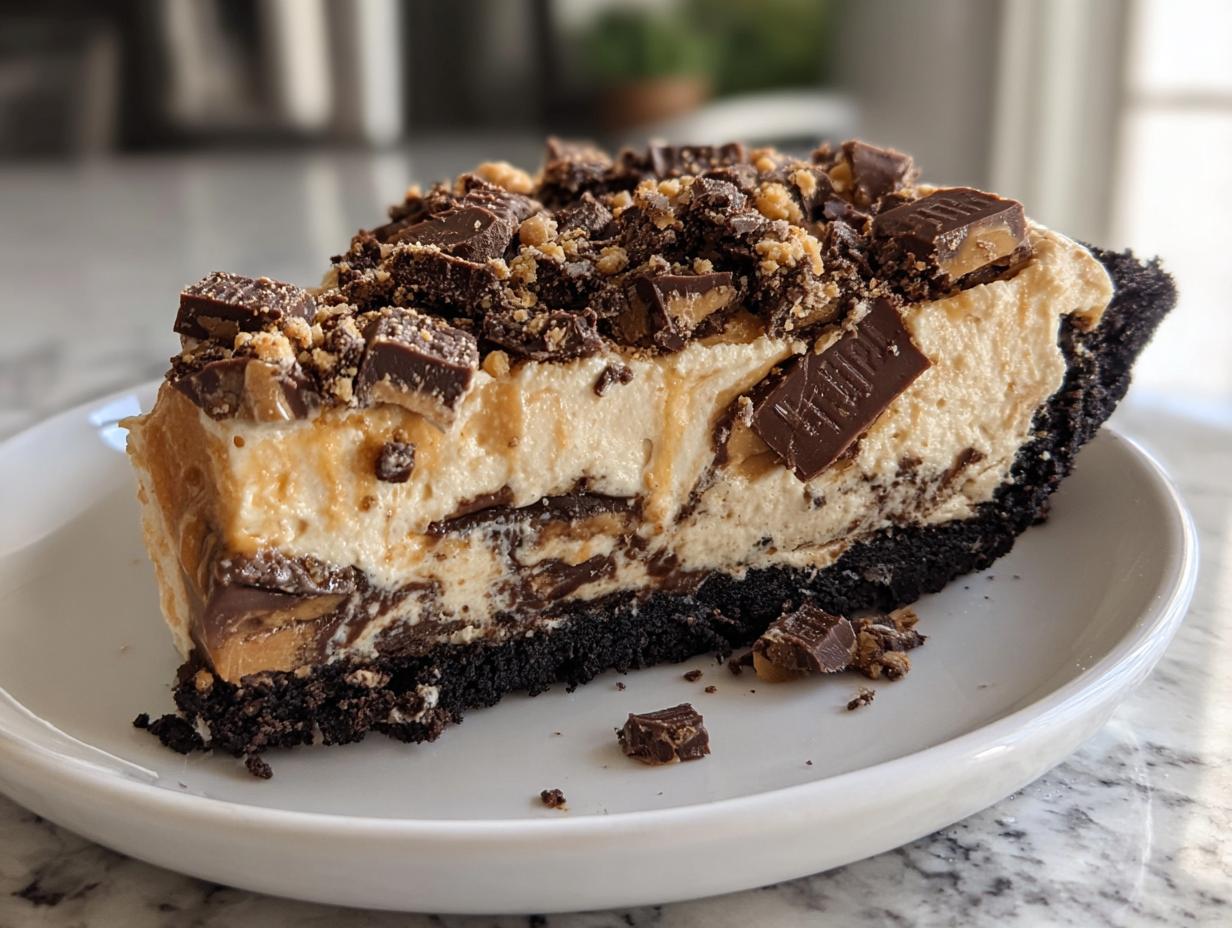
Here at Cookin’ Corner, we’ve perfected the ultimate No-Bake Creamy Butterfinger Pie with Oreo Crust. This isn’t just another recipe; it’s a tried-and-true classic that reliably delivers on decadent flavor and an unbelievably smooth texture every single time you make it. It’s the showstopper dessert you can whip up fast. Trust me, once you try this butterfinger pie, it’ll become your new required dish for every potluck and family gathering! If you love this style of pie, you really must check out our no-bake peanut butter pie recipe too!
- Why This Ultimate No-Bake Butterfinger Pie Works Every Time
- Ingredients for Your Creamy Butterfinger Pie
- Step-by-Step Instructions for Making Perfect Butterfinger Pie
- Tips for Success with Your No Bake Pie Recipe
- Storage and Reheating Instructions for Your Butterfinger Pie
- Serving Suggestions for This Candy Bar Pie
- Frequently Asked Questions About Making Butterfinger Pie
- Estimated Nutrition for This Creamy Candy Dessert
- Share Your Ultimate Holiday Pie Experience
Why This Ultimate No-Bake Butterfinger Pie Works Every Time
I know you’re busy, so let me tell you why this recipe is the MVP of my dessert rotation. We built this butterfinger pie around speed and maximum deliciousness, which makes it perfect for last-minute needs. It hits all the right notes: creamy, crunchy, chocolatey, and peanut-buttery! It’s honestly one of my favorite quick dessert ideas.
- We pack so much of that amazing Butterfinger crunch right into the filling, so you get texture in every single bite—not just on top!
- Because it’s a no bake pie recipe, you don’t need to worry about hot ovens in the summer. Pop it in the fridge, and you’re done!
- It’s the perfect make ahead dessert. In fact, I think it actually tastes better the next day once all those flavors have really settled in together.
Zero Oven Time: The Beauty of a No Bake Pie Recipe
The best part? Absolutely no oven is required for this confection. That means no worrying about preheating or baking times, which is a huge win when it’s scorching hot outside or you’re already juggling turkey basting duties! This is true no oven baking magic; your fridge does all the heavy lifting.
Achieving That Fluffy Peanut Butter Filling
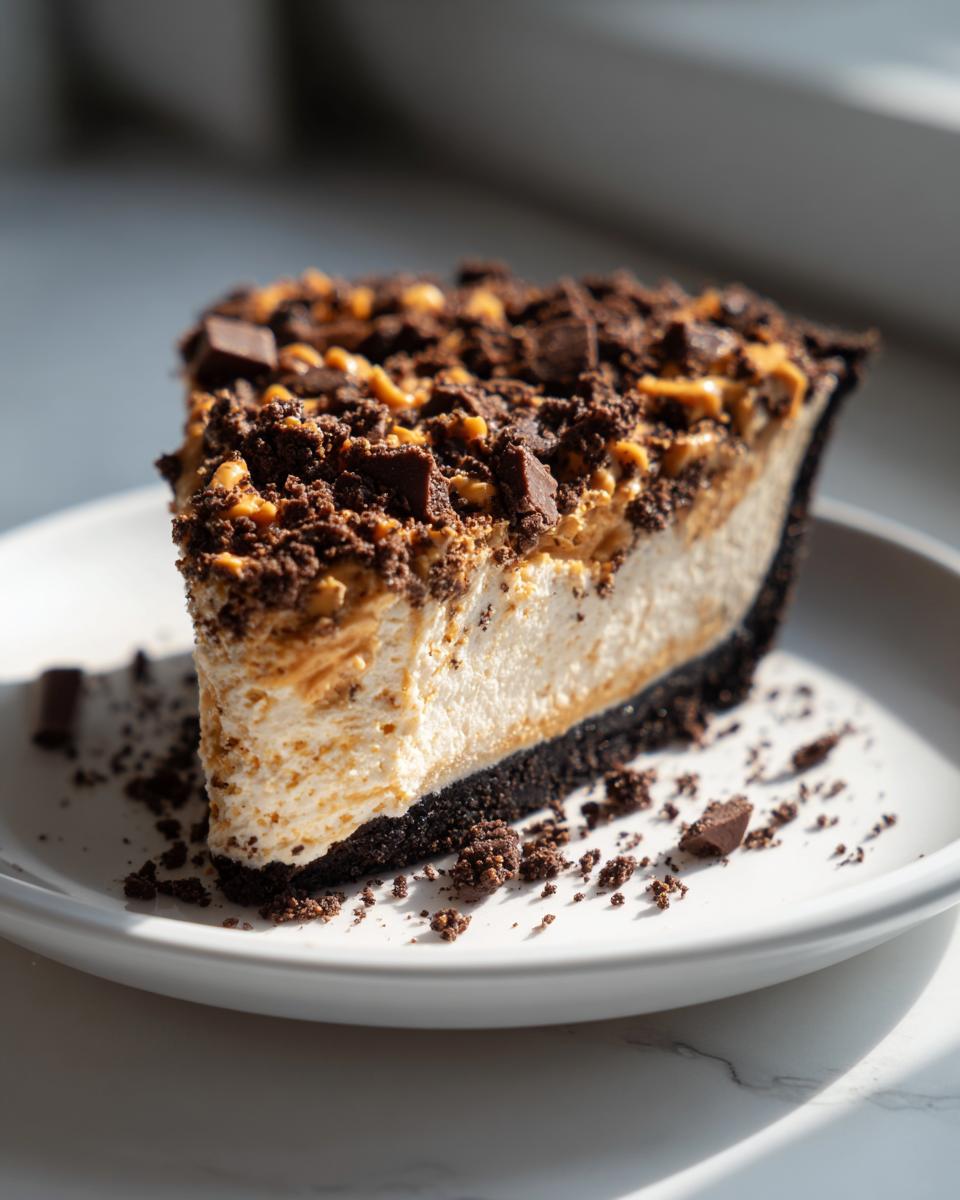
You want creamy, right? I promise you’ll get it here. The secret to that cloud-like texture is the combination of room-temperature cream cheese and the folded-in whipped topping. When you combine those ingredients carefully, you unlock that incredible, fluffy peanut butter filling that melts in your mouth before you even realize you’ve taken a huge bite.
If you want more truly easy, no-fuss desserts, you might love my easy no-bake ice cream pie recipe as well!
Ingredients for Your Creamy Butterfinger Pie
Getting the right ingredients together is probably the most important part of making any dessert, but especially one that doesn’t use the oven, because you can’t bake any little mistakes away! Keep your list neat and check off those items as you grab them from the pantry and fridge. Just like in Grandma’s day, attention to detail here makes the difference between good and jaw-dropping. We want that perfect texture for this easy peanut butter pie, after all!
If you’re looking for other peanut buttery goodness, my recipe for peanut butter cup cookies is next on your list!
For the Chocolate Cookie Crust Pie Base
This dark, rich base really complements the sweet filling perfectly. Don’t skip pressing it firmly!
- 1 1/2 cups chocolate cookie crumbs (that’s usually about 25 whole Oreo cookies, wrappers dumped, crushed up—yep, the whole thing!)
- 6 tablespoons unsalted butter, melted
For the Fluffy Peanut Butter Filling
This is where the magic happens! Make sure your cream cheese is soft, nice and ready to mix smooth.
- 1 (8 ounce) package cream cheese, softened completely
- 1 cup powdered sugar
- 1/2 cup creamy peanut butter (I stick to the standard stuff, never the oily natural kind for this recipe!)
- 1 teaspoon vanilla extract
- 1 (12 ounce) container frozen whipped topping, thawed completely (but don’t overmix it yet!)
- 1 cup crushed Butterfinger candy bars, divided (We use 3/4 cup in the filling now, leaving the rest for the top!)
Optional Whipped Cream Topping Ingredients
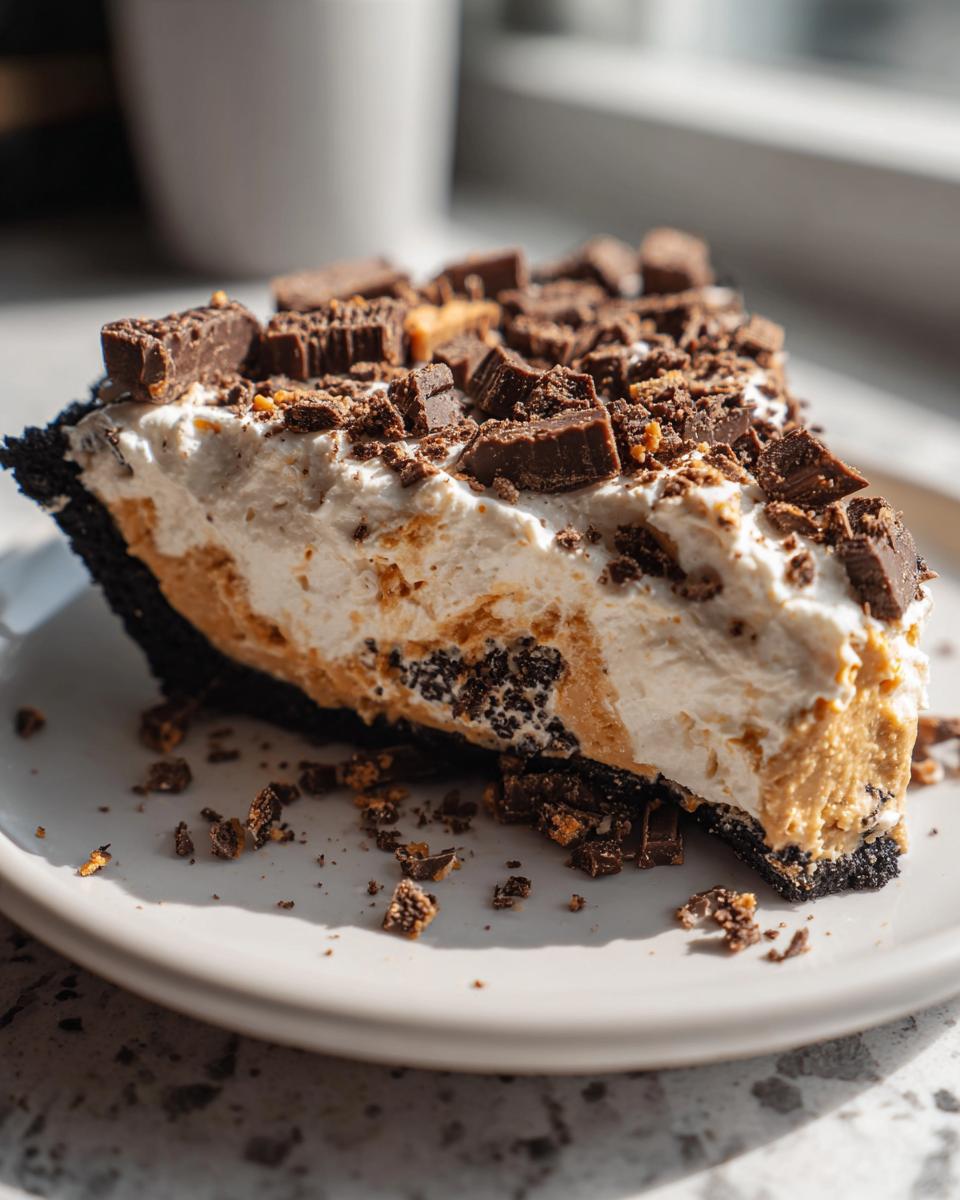
If you want to make this pie look like an absolute showstopper—especially if you’re serving it at a party or saving it for an ultimate holiday pie gathering—you have to try this homemade topping. It layers beautifully over the peanut butter layer.
- 1/2 cup cold heavy cream
- 1 tablespoon powdered sugar
Step-by-Step Instructions for Making Perfect Butterfinger Pie
Okay, now for the fun part! Even though this is a no-bake recipe, the assembly steps are crucial to making sure your slices stand up tall and proud, just like a bakery-quality dessert. We only need about 20 minutes of hands-on time here, which is fantastic!
Preparing the Oreo Crust Pie Shell
First things first, we build our foundation. In a medium bowl, toss your chocolate cookie crumbs with that melted butter until everything looks evenly moistened—it should resemble damp sand, you know?
Take that mixture and press it firmly into the bottom and up the sides of your 9-inch pie plate. Really pack it down so you get a sturdy base for our filling. Once it’s all set, pop that crust into the freezer while you move on to the filling. Seriously, don’t skip the freeze time for this Oreo crust pie!
Mixing the Creamy Filling Base
Grab your biggest mixing bowl! Start by beating that softened cream cheese by itself until it’s totally smooth—no lumps allowed, we are aiming for pure velvet here. Once that’s done, slowly mix in the powdered sugar, the peanut butter, and the vanilla extract. Keep beating until it is perfectly smooth and wonderfully creamy.
Folding in Topping and Assembling the Butterfinger Pie
Now you need a light touch! Gently—and I mean *gently*—fold in about two-thirds of your thawed whipped topping. You want to keep all that air you just beat in, so use a spatula and cut down the middle and up the side, folding over. Once incorporated, fold in 3/4 cup of your crushed Butterfingers. Spread this gorgeous filling evenly into your chilled crust.
Chilling and Garnishing This Make Ahead Dessert
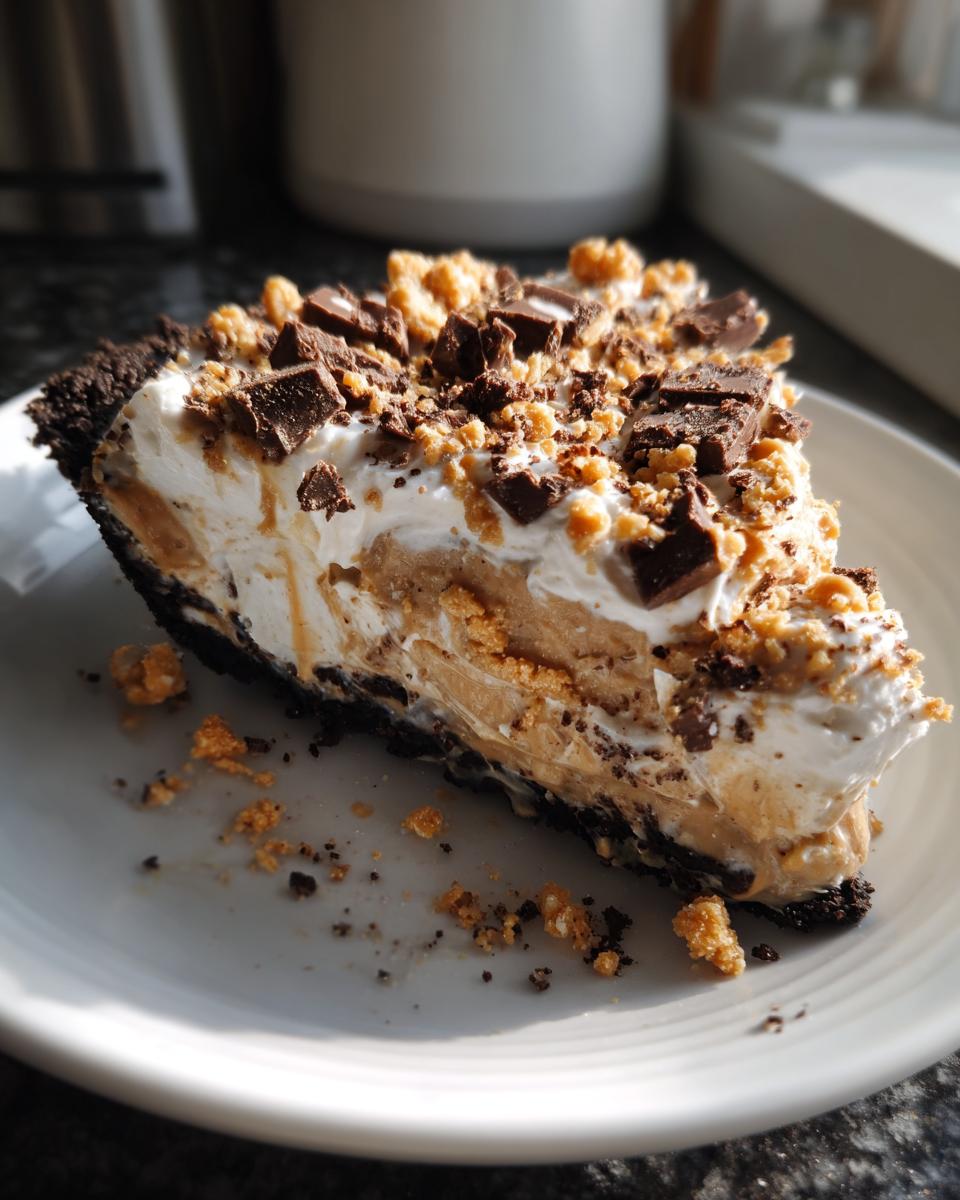
This is the hardest part—waiting! You need to cover your pie loosely and refrigerate it for a minimum of four hours. For the absolute best texture, let it chill for six hours. This allows that fluffy peanut butter filling to really firm up for clean slices. If you made the optional topping, spread it on top, then sprinkle the rest of those amazing crushed Butterfingers over everything just before you serve it! Enjoy this wonderful make ahead dessert!
If you love digging into delicious mixtures like this, you might enjoy my recipe for easy dirt cake recipe!
Tips for Success with Your No Bake Pie Recipe
Even though this is one of the easiest simple dessert recipes out there, a few little tricks can take your butterfinger pie from great to legendary. We want zero lumpy filling and perfect setting every time, right? I’ve learned a few things over the years—little secrets that keep my **creamy candy dessert** expectations high!
Ingredient Temperature for the Fluffy Peanut Butter Filling
Listen up, this is non-negotiable for a truly fluffy peanut butter filling! Your cream cheese must be truly room temperature. I mean, you should be able to press your finger into it without resistance. If it’s cold, the peanut butter and sugar will clump up against it. You’ll spend forever trying to beat out those lumps, and trust me, that overmixing deflates the airy whipped topping we work so hard to fold in later.
If you’re in a rush, I sometimes microwave my wrapped cream cheese block for just 10 seconds total—but wrap it in a paper towel first! Just enough to take the chill off, never enough to melt it. It makes all the difference for a smooth base.
Crust Alternatives for Your Butterfinger Pie
While the chocolate Oreo crust is my personal favorite because it echoes the chocolate shell on the candy bar, sometimes you run out of Oreos, or maybe you just want a slightly different flavor profile. Don’t panic! This recipe is flexible.
If you find yourself needing a swap, you can absolutely use graham cracker crumbs instead. If you go this route, just adjust your butter slightly! Instead of the 6 tablespoons the recipe calls for, use about 1/4 cup of melted butter to bind the crumbs. It gives the pie a little less intense chocolate note, which really lets the peanut butter shine through. You get the same sturdy, press-in base, just with a different flavor twist.

For more peanut butter obsession that doesn’t require a pie plate, you seriously have to try my easy peanut butter cookies recipe!
Storage and Reheating Instructions for Your Butterfinger Pie
Since this amazing butterfinger pie is an honorary member of the no-bake club, we treat it a little differently than a baked dessert, especially since it’s loaded with cream cheese and whipped topping. Storing it correctly is key, especially if you made it ahead of time for that big potluck!
The short answer is: we never, ever reheat this pie. Seriously, don’t even think about it! Heating up this creamy base would just turn that beautiful, fluffy peanut butter filling into a puddle. We want that cool, satisfying snap from the Butterfingers, not melted goo.
For storage, keeping it chilled is essential. Once it’s fully set—after those glorious minimum four hours in the fridge—you need to cover that pie plate tightly. I usually use plastic wrap, but make sure it doesn’t actually touch the surface of the filling if you used a whipped topping layer, or it might stick!
It holds up really well! You can safely keep this potluck dessert recipe in the refrigerator for up to three days. If you cover it well, it stays wonderfully fresh. Every slice you pull out will taste just as amazing as the first. I sometimes make it on a Friday just to enjoy lingering leftovers on Sunday. If you are looking for other handheld treats that store well, check out my recipe for cake mix cookie bars!
Serving Suggestions for This Candy Bar Pie
Even though this candy bar pie is basically a whole happy meal in one slice, sometimes you want to serve it up alongside something to balance out all that glorious sugar and peanut butter goodness. Don’t worry, I’m not suggesting a salad here—this is Comfort Food Corner, after all!
The key is choosing sides or drinks that cut through that rich, creamy filling without competing with the Butterfinger crunch. Keep it simple, keep it cool, and let that pie be the star of the show.
The Perfect Drink Pairings
You need something refreshing to wash down that heavy peanut butter and chocolate combination. My absolute favorite thing to serve alongside a slice of this decadent pie is an ice-cold glass of milk. Nothing beats the classic pairing. If you want to get fancy, try my recipe for homemade chocolate milk—it doubles down on the chocolate in the best possible way!
For grown-up gatherings, a strong black coffee or a dark stout beer plays surprisingly well with the deep notes of the Oreo crust and the salted peanut flavor in the candy. Just a tiny splash of cream in the coffee is all you need.
Light Sides to Balance the Richness
If you’re bringing this to a potluck, chances are there will be savory dishes nearby, which is great! But if you’re serving it at home and want a tiny break between bites, think light and tart.
- A simple bowl of fresh raspberries or strawberries is perfect. Their slight acidity cuts right through the sweetness of the filling.
- For a slightly more composed offering, a small fruit salad focusing on crisp apples or bright green grapes works wonders, as the crunch factor mirrors the Butterfingers!
Honestly though, most people take one bite of this butterfinger pie and immediately forget everything else on the table. It’s just that good!
Frequently Asked Questions About Making Butterfinger Pie
I know you’ve probably got your ingredients ready to go, but sometimes the little questions pop up right before you start mixing. That’s totally normal! As an experienced home cook making this recipe for years, I’ve heard just about every query imaginable about this dreamy, creamy dessert. Here are the few things that readers ask me most often about this butterfinger pie so you can jump right into making it without hesitation.
If you love easy chocolate desserts, you might want to peek at my recipe for homemade chocolate pudding after you finish this!
Can I make this butterfinger pie ahead of time?
Yes, please! This is one of the best parts about calling this a make ahead dessert. You absolutely should make it ahead of time if you can. Once the pie is fully set up after chilling, it holds beautifully in the fridge. I find that if I give it a good six or even eight hours to chill, the texture is absolutely perfect, firm enough to cut, but still wonderfully creamy. You can prep this pie up to 24 hours in advance of when you plan to serve it, which makes party planning so much easier!
What if I don’t have Oreos for the Oreo crust pie?
Don’t worry about running to the store! While the chocolatey flavor of the actual Oreo cookie pairs perfectly with the peanut butter, you have options for your Oreo crust pie base. If you’re out of them, go ahead and use graham cracker crumbs instead—they make a slightly different, but equally delicious, base.
Remember what I mentioned earlier? If you use graham crackers, you’ll need to slightly reduce the binder. Use 1 1/2 cups of graham cracker crumbs, but only mix that with about 1/4 cup of melted butter instead of the 6 tablespoons required for the Oreos. It works wonderfully!
How long until this no bake pie recipe is firm enough to slice?
This is the most common question about any no bake pie recipe, because nobody wants a filling soup! The absolute minimum time required for the structure to set up enough so you aren’t making a total mess is four hours in the refrigerator. That’s if you’re in a real pinch!
However, if you want those perfect, clean slices—the kind that hold their shape when you lift them onto a plate—you really need to aim for six hours or even overnight. Giving it that extra time ensures that the filling is fully stabilized, translating to the best slice possible for enjoying this easy peanut butter pie.
Estimated Nutrition for This Creamy Candy Dessert
Now, I have to preface this by saying that when you are making something as gloriously decadent as this butterfinger pie, nutrition facts are usually just for a laugh, right? This is pure indulgence, not exactly diet food! But because I want to be as transparent as possible here at Cookin’ Corner, I’ve gathered the estimated nutritional data for one slice based on the standard ingredients listed in the recipe.
Please remember, these are just estimates! The actual numbers will swing depending on the specific brands of peanut butter, cream cheese, and especially the type of Butterfinger bar you use in your tests. Think of this as a general guide for your creamy candy dessert!
- Serving Size: 1 slice
- Calories: 450
- Fat: 30g
- Saturated Fat: 12g
- Carbohydrates: 40g
- Sugar: 35g
- Protein: 6g
- Cholesterol: 45mg
See? Every single slice is packed with flavor! If you are serving this for a gathering, it’s usually best to just bring a big sign that says, “Warning: Extreme Happiness Ahead.” Don’t stress too much about the minutiae when you’re dealing with an absolute classic like this no bake pie recipe!
Share Your Ultimate Holiday Pie Experience
Now that you’ve got the best butterfinger pie recipe in your repertoire, I really want to hear about it! Sharing food is how we connect, and cooking is honestly more fun when we can talk about the results afterwards.
Did you serve it at a big summer cookout or did you sneak a slice while watching a football game? Tell me everything! Drop a comment below and let me know how it went. Did everyone go crazy for the creamy texture? Was the Oreo crust sturdy enough for an easy grab-and-go slice?
Seriously, if you made this no bake pie recipe, please let me know how many stars you’d give it! Knowing that my recipes bring that same nostalgic joy to your kitchen that they bring to mine means the world to me.
And hey, if you took a picture of your beautifully chilled, crunchy creation, tag me on social media! I love seeing where these recipes end up—from my small corner to yours. If you are already looking for your next showstopper, you have to try my snickerdoodle cheesecake recipe next. Happy baking (or, you know, chilling)!
PrintUltimate No-Bake Creamy Butterfinger Pie with Oreo Crust

Make this rich, creamy no-bake Butterfinger Pie featuring a chocolate cookie crust and a filling loaded with crunchy Butterfinger candy pieces. It is a quick dessert perfect for parties.
- Prep Time: 20 min
- Cook Time: 0 min
- Total Time: 4 hr 20 min
- Yield: 8 servings 1x
- Category: Dessert
- Method: No-Bake
- Cuisine: American
- Diet: Vegetarian
Ingredients
- 1 1/2 cups chocolate cookie crumbs (about 25 Oreo cookies)
- 6 tablespoons unsalted butter, melted
- 1 (8 ounce) package cream cheese, softened
- 1 cup powdered sugar
- 1/2 cup creamy peanut butter
- 1 teaspoon vanilla extract
- 1 (12 ounce) container frozen whipped topping, thawed
- 1 cup crushed Butterfinger candy bars, divided
- 1/2 cup cold heavy cream (for optional topping)
- 1 tablespoon powdered sugar (for optional topping)
Instructions
- Prepare the crust: Mix the chocolate cookie crumbs and melted butter in a bowl until the crumbs are evenly moistened. Press the mixture firmly into the bottom and up the sides of a 9-inch pie plate. Place the crust in the freezer while you prepare the filling.
- Make the filling: In a large bowl, beat the softened cream cheese until smooth. Add the powdered sugar, peanut butter, and vanilla extract. Beat until the mixture is fully combined and creamy.
- Fold in the whipped topping: Gently fold in about two-thirds of the thawed whipped topping until no streaks remain. Be careful not to deflate the mixture.
- Add candy pieces: Fold in 3/4 cup of the crushed Butterfinger candy bars into the peanut butter mixture.
- Assemble the pie: Spread the filling evenly into the chilled cookie crust.
- Chill: Cover the pie loosely with plastic wrap and refrigerate for at least 4 hours, or until the filling is firm. This is a key step for a solid no-bake pie.
- Prepare topping (optional): If using, beat the cold heavy cream and 1 tablespoon of powdered sugar until stiff peaks form. Spread or pipe this whipped cream over the chilled pie.
- Garnish and serve: Sprinkle the remaining 1/4 cup of crushed Butterfinger candy bars over the top of the pie just before serving. Slice and enjoy this easy peanut butter pie.
Notes
- For the best results in achieving a fluffy peanut butter filling, ensure your cream cheese is truly at room temperature before mixing.
- If you do not have Oreo cookies, you can substitute with graham cracker crumbs, using 1 1/2 cups of crumbs mixed with 1/4 cup of melted butter for a different crust flavor.
- This make ahead dessert tastes best when chilled for at least 6 hours, allowing the filling to fully set.
Nutrition
- Serving Size: 1 slice
- Calories: 450
- Sugar: 35g
- Sodium: 320mg
- Fat: 30g
- Saturated Fat: 12g
- Unsaturated Fat: 18g
- Trans Fat: 0.5g
- Carbohydrates: 40g
- Fiber: 1g
- Protein: 6g
- Cholesterol: 45mg