

There’s nothing quite like that first, satisfying gulp of cold, rich chocolate milk, is there? It just takes you right back to being ten years old again, sitting on the back porch. It’s funny how food is the language of memory, and for me, that means being able to whip up this perfect glass anytime. Here at Cookin’ Corner, we believe those simple comforts are the most important things we cook! Store-bought cartons are fine in a pinch, but if you want the best homemade chocolate milk—one that tastes deep and comforting but lets you handle the sugar—you’ve come to the right place. My roots are in the Midwest kitchen, and I learned that genuine flavor comes from caring about the simple things. This recipe is lightning fast, incredibly rich thanks to pure cocoa powder, and means you can easily make a less sugar chocolate milk version for yourself tomorrow. If you want to know more about why we value these traditions, you can read all about our story here.
- Why This Is the Ultimate Homemade Chocolate Milk Recipe
- Ingredients for Your Best Homemade Chocolate Milk
- How to Prepare Your Chocolate Milk with Cocoa Powder
- Tips for the Perfect Chocolate Milk Every Time
- Variations: Whipped Chocolate Milk and Chocolate Milk Powder Mix
- Serving Suggestions for Your Chocolate Milk
- Storage and Reheating Instructions for Chocolate Milk
- Frequently Asked Questions About Homemade Chocolate Milk
- Nutritional Snapshot of This Chocolate Milk Recipe
Why This Is the Ultimate Homemade Chocolate Milk Recipe
Look, I’m not going to lie—I used to grab those little shelf-stable cartons when I was in a hurry. But honestly, once you try this easy chocolate milk recipe made from scratch, you realize those mixes just taste… fake. This version uses pure chocolate milk with cocoa powder, which gives you a much deeper, darker chocolate flavor than sugary syrups.
The real magic? We mix the dry ingredients into a little paste first. This one simple move guarantees that you get the creamy chocolate milk texture you want, not a glass full of little bitter lumps. You’ll find this recipe fits perfectly into my collection of quick and easy recipes because it truly only takes a couple of minutes.
Quick Chocolate Drink Fix Ready in Minutes
Seriously, we’re talking three minutes total. If you need a quick chocolate drink fix right now, this is it. You aren’t waiting for syrups to simmer or powders to dissolve in the cold. It’s instant satisfaction when that craving hits!
Achieving Creamy Chocolate Milk Texture
If you want that rich, satisfying mouthfeel, the milk choice matters! Whole milk delivers the absolute best results because the fat content carries the cocoa flavor so well. If you are using a dairy free chocolate milk alternative, oat or soy milk tend to give you a creamier result than almond varieties, trust me on this one.
Ingredients for Your Best Homemade Chocolate Milk
You won’t need any fancy store-bought syrups here, thank goodness! That’s where all those weird stabilizers sneak in. For this chocolate milk recipe from scratch, we are keeping it super simple, just cocoa, sugar, vanilla, and milk. Remember, the whole point of making this at home is control! If you are deliberately trying to make a less sugar chocolate milk, this is where you dial back that sugar measurement just a touch. This is your drink, after all!
- 2 tablespoons unsweetened cocoa powder
- 2 tablespoons granulated sugar (or less, if you’re cutting back!)
- 1/4 teaspoon vanilla extract
- 1 cup cold milk (use dairy or your favorite dairy free alternative)
Ingredient Notes and Substitutions for Chocolate Milk
Every single ingredient plays an important role in that comforting taste. If you have strict dietary needs, don’t worry, we have options! For a truly healthy chocolate milk, I’ve seen folks swap the standard granulated sugar for maple syrup or even a bit of monk fruit sweetener. Just remember that liquid sweeteners might shift the consistency slightly, so you might need a little extra stirring effort.
When it comes to the milk, I mentioned whole milk earlier for ultimate creaminess, but if you’re avoiding dairy, I highly recommend soy or oat. They have a little more body than plain almond milk, which stops your drink from tasting watered down once that cocoa paste dissolves. Don’t let substitutions stress you out; the cocoa is the star!
How to Prepare Your Chocolate Milk with Cocoa Powder
Okay, time for the magic trick! If you’ve ever been frustrated by gritty drinks, this next part is the key—it’s the secret to getting that beautifully smooth, creamy chocolate milk that looks like it came from a fancy café. This method is so foolproof, it makes this my official go-to for a simple drink fix. You can see another great approach to cutting down on sugar over here, but for now, let’s stick to making this perfect cup for one right now. We’ll get into batch-making later!
Creating the Smooth Chocolate Milk Base
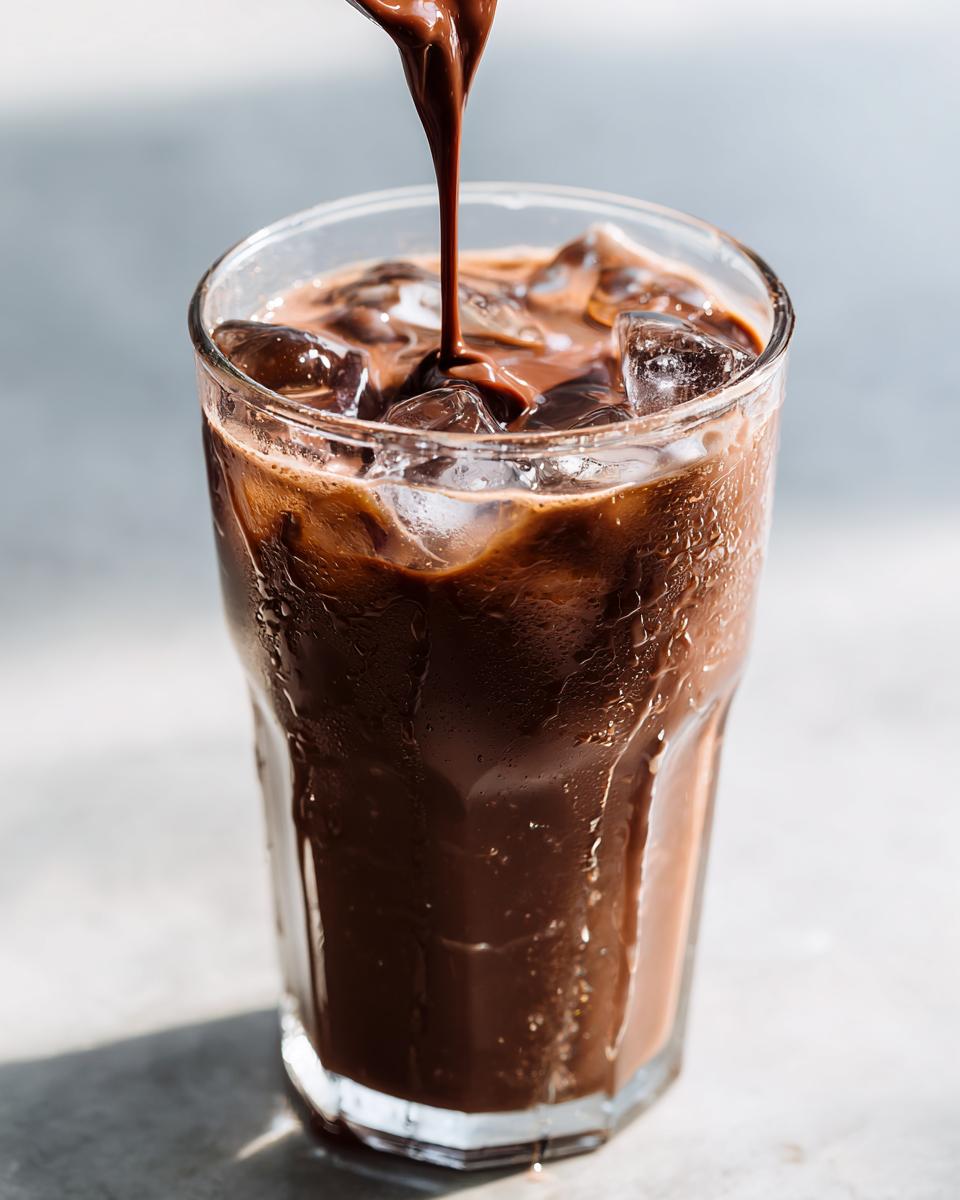
First things first, grab a small glass or a little bowl—don’t try to mix this directly in your big drinking glass yet! You need to combine your dry stuff: the cocoa powder and the sugar. Whisk them together really well until they look unified. Now, here’s the most important part, so pay attention! Add the vanilla extract, and then just pour in maybe two tablespoons of your cold milk. You’re going to stir this vigorously—I mean really work that spoon! You have to beat it until it turns into a thick, shiny, smooth paste. If you skip this step and just dump the powder into a cup of cold milk, you end up with lumps, and nobody wants that.
Finishing the Creamy Chocolate Milk
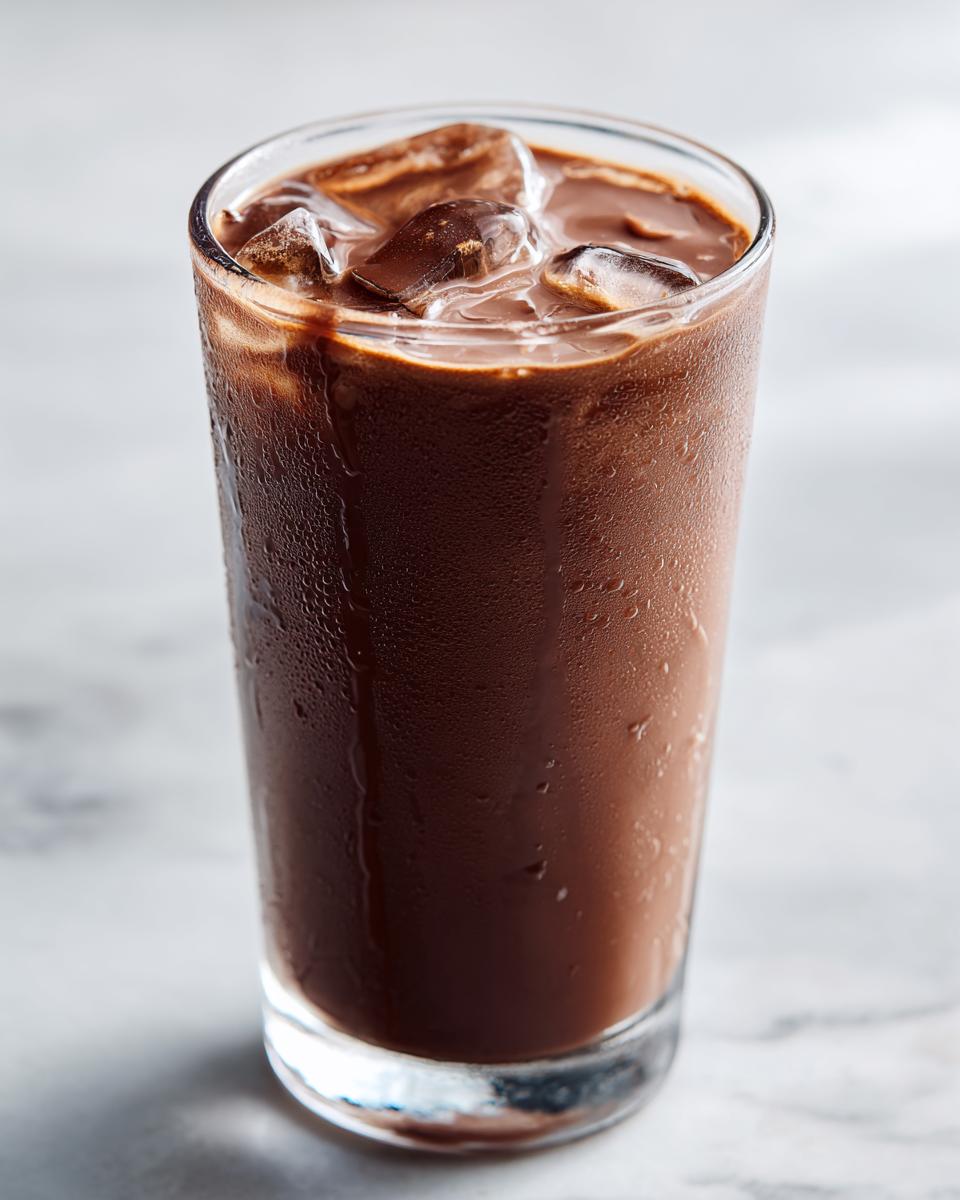
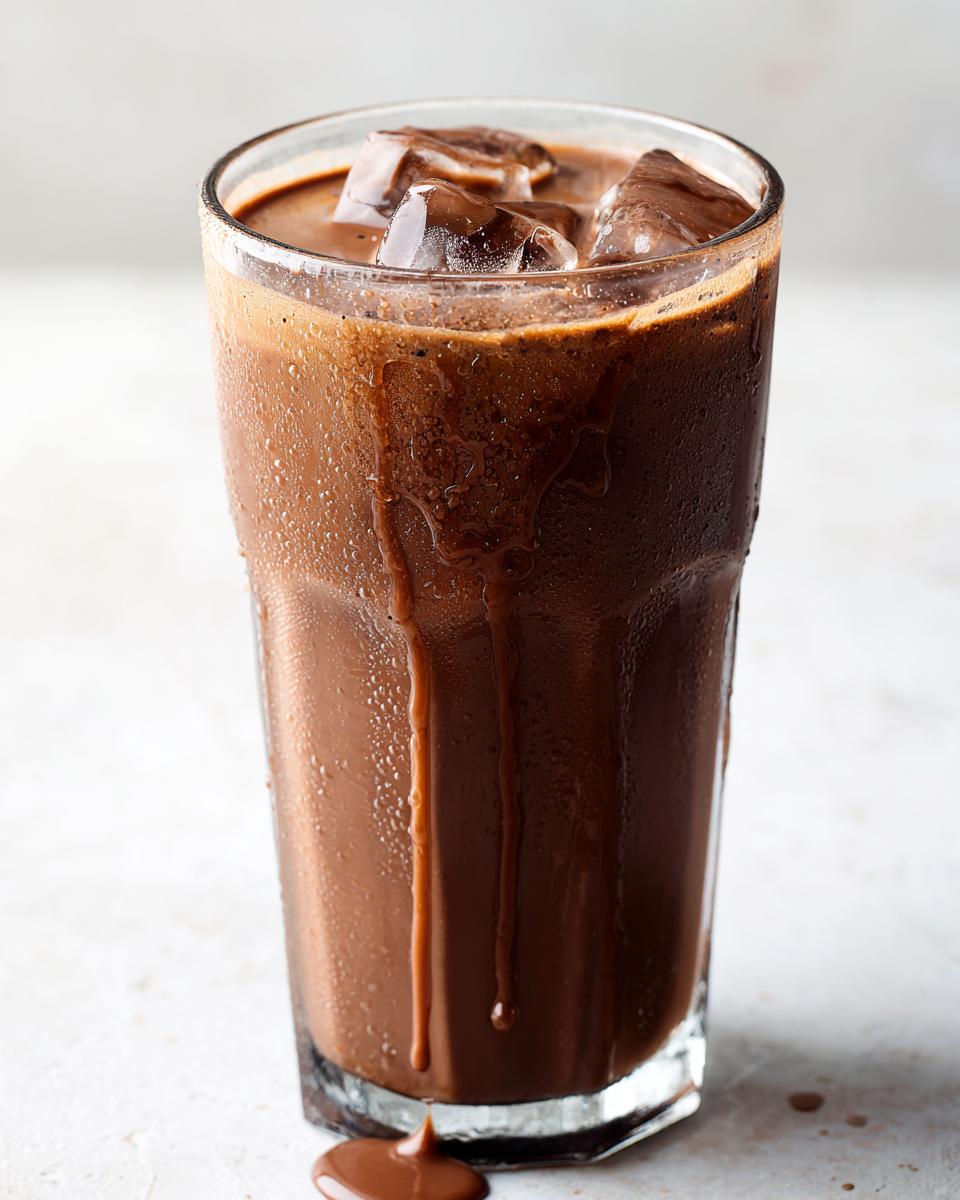
Once that cocoa paste is beautifully smooth, it’s time to bring in the rest of the cold milk! Pour in the remaining milk and mix everything again until that deep chocolate color spreads evenly throughout. This whole process takes zero cooking time and is one of my favorite simple drink recipes because it’s so satisfying.
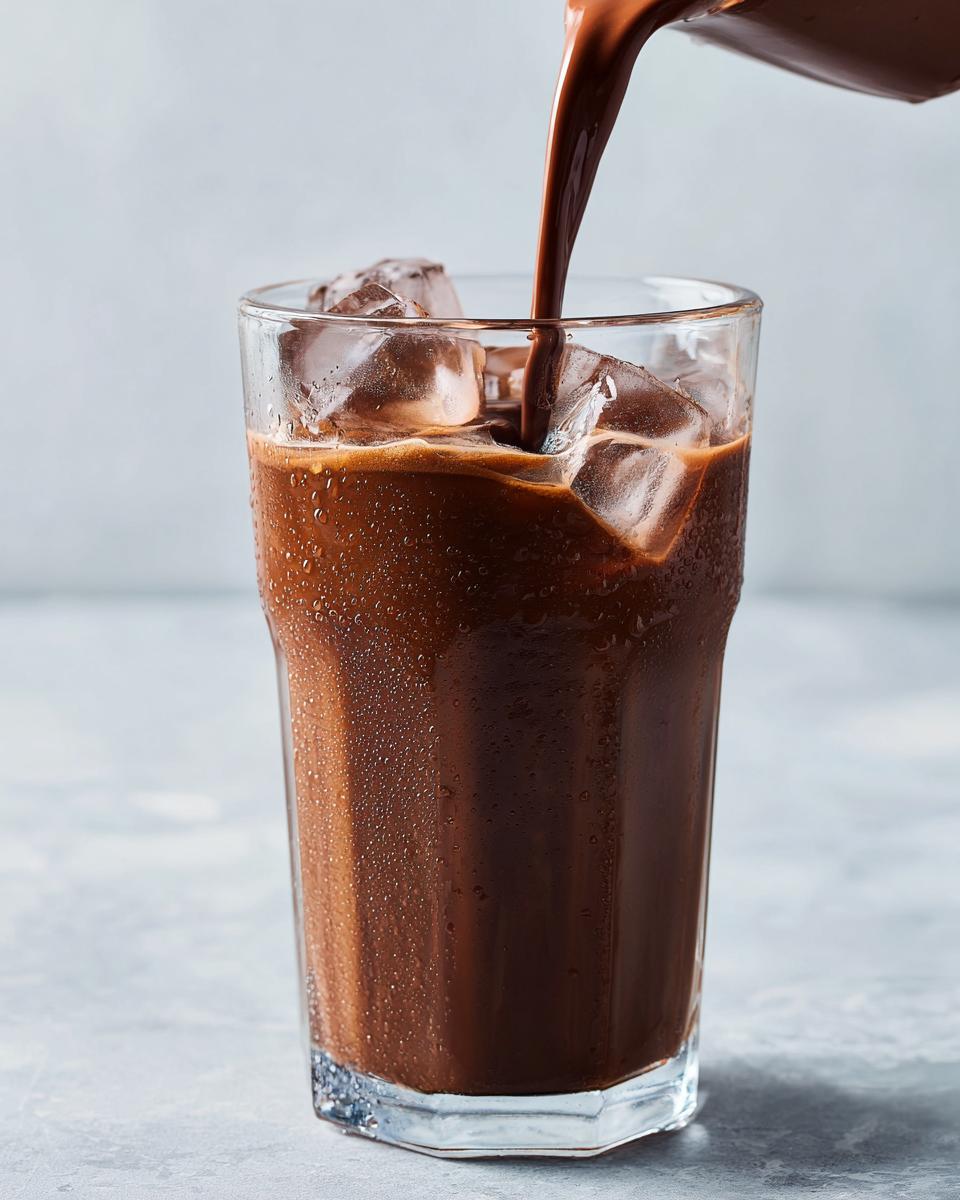
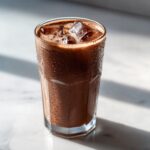
If you want that true sensory experience, scoop some ice into that glass before you pour your creation over it. It turns your rich beverage into a genuine comforting chocolate beverage that hits the spot every single time. Enjoy that perfect glass of homemade chocolate milk!
Tips for the Perfect Chocolate Milk Every Time
Once you get the basic technique down, I swear you’ll never go back to the store-bought stuff again. It’s one of those truly simple drink recipes that feels fancy because the flavor is so much brighter! If you ever wonder about how we prioritize these classic recipes on the site, you can read more here.
If you want that maximum richness, remember my obsession with whole milk—it really makes the difference in how creamy the final product feels. Also, don’t be afraid to play with the sugar! I remember the first time I made this for my cousin visiting from out of town; she was watching her sugar intake, so I cut the granulated sugar down to just one tablespoon. It was still chocolatey, but had that lovely bitter edge that really let the cocoa shine. It proved to me you can customize this chocolate milk perfectly for whoever is drinking it. Remember, care is the secret ingredient, even when mixing up something this quick!
Variations: Whipped Chocolate Milk and Chocolate Milk Powder Mix
Now that you’ve mastered the quick single glass, we can talk about leveling up! It’s fun to know you can always make this chocolate milk base in under three minutes, but sometimes, you want a bit of theater, right? Or maybe you want to keep a stash ready for when the kids—or let’s be honest, me—get a sudden craving.
We can easily adapt this recipe to create an instant powder mix, which is fantastic for grab-and-go situations. And if you’ve seen those beautiful tall glasses of frothy goodness online? That’s usually just a bit of effort dedicated to making a spectacular whipped chocolate milk. I found this cool technique for that foamy top over at this link if you want something Instagram-worthy!
Making a Batch of Chocolate Milk Powder Mix
This is my favorite trick for stocking up! Forget those dusty boxes from the grocery aisle; this chocolate milk powder mix tastes like actual rich cocoa. You just multiply the dry ingredients from the single serving recipe for a big batch. It’s perfect for having that quick drink whenever you need it, just add milk.
Here’s how I do it: Take one full cup of unsweetened cocoa powder, one full cup of granulated sugar (remember, halve this if you are being strict about your sugar!), and one teaspoon of vanilla powder—if you don’t have vanilla powder, just skip it, the cocoa is strong enough. Mix all of that together really, really well. You must break up those cocoa clumps before you store it!
When you are ready for your instant chocolate milk, just scoop about three generous tablespoons of that mix into your glass, add just a splash of milk, mix it into that smooth paste just like we did before, and then fill the rest of the glass with cold milk. It’s instant gratification, and it’s brilliant!
Serving Suggestions for Your Chocolate Milk
A perfect glass of homemade chocolate milk deserves a perfect pairing, doesn’t it? This isn’t just a beverage; it’s a moment! Since this recipe is so pure and focused purely on cocoa flavor, it plays so nicely with classic American comfort foods. When I used to make this for my nephews after school, they always demanded one of two things alongside it.
If you are looking for something truly satisfying for the little ones—or honestly, for me when I feel like being a big kid—this is where the kid-friendly chocolate milk really shines. Pair it with something simple and slightly salty to cut through the richness. Think about a classic peanut butter and jelly sandwich; that salty crunch meets creamy chocolate perfection. It just works!
For dessert pairings, you definitely don’t need anything complicated, which is perfect since this is such a quick drink to whip up. We usually have some simple homemade cookies laying around, and that’s all you need. If you want to find some reliable recipes for those cookies or easy little treats, check out the dessert section over here! A bite of a slightly crisp, buttery shortbread dipped into this cold cocoa is just heavenly. Sometimes, a simple snack deserves the best beverage, and this easy recipe delivers that every single time.
Storage and Reheating Instructions for Chocolate Milk
Because we’re dealing with fresh milk and no preservatives—which is exactly why this tastes so much better than the bottled stuff—the very best way to enjoy your homemade chocolate milk is immediately after you’ve stirred it! That perfect chill and the separation hasn’t even had a chance to happen yet, making it peak deliciousness.
But let’s say you made a double batch because you knew you’d want some later. Don’t worry! You can absolutely store your leftover chocolate milk. Just pour it into an airtight container or a jar with a tight lid and pop it right into the refrigerator. Since it doesn’t have the stabilizers that the store brands cling to, it really does taste best within 24 hours. After that, the cocoa solids might start settling at the bottom, and the flavor dulls a tiny bit, but it’s perfectly safe to drink for up to two days.
Now, about reheating? Well, honestly, I almost never reheat this one. It’s designed to be that ice-cold, refreshing drink fix, especially when the weather is warm. If you absolutely must have a warm chocolate drink—perhaps it’s snowing sideways and you need an emergency treat—you can gently heat it on the stove or in the microwave in short bursts. But please, please, please, do not boil it! Milk tends to scald easily, and you don’t want to ruin that creamy texture we worked so hard to achieve by making that cocoa paste.
If you stored it, you will definitely need to stir or shake it *really* well before serving, or even give it a quick whisk if the cocoa has settled out. Think of it like shaking up a bottle of salad dressing when the oil and vinegar have separated—you just need to re-emulsify everything for a consistent flavor!
Frequently Asked Questions About Homemade Chocolate Milk
I know sometimes even with the best instructions, you just have one last little question nagging at you. That’s totally normal! When I first started straying from store-bought stuff, I had a million questions about how to get that perfect homemade chocolate milk balance. Here are a few things I hear most often from folks trying this recipe for the first time. If you’re looking for more general guidance on tweaks and adjustments, don’t forget to check out our main healthy recipes section!
Can I make this a healthy chocolate milk by skipping sugar?
You absolutely *can* try it, and if you’re aiming for a super less sugar chocolate milk, cutting it down significantly—maybe to just half a teaspoon—will work. But here’s a friendly warning from my kitchen: sugar does more than just sweeten! It actually helps smooth out the cocoa powder and contributes to that velvety mouthfeel we’re aiming for. If you skip it entirely, be prepared for a much more bitter, intense chocolate flavor. You might love it, but you’ll definitely notice the difference in texture!
What is the best milk for the creamiest chocolate milk?
If you are not avoiding dairy, I stand by whole milk every single time for achieving the absolute creamiest chocolate milk. The fat content helps suspend the cocoa particles perfectly and gives you that weight on your tongue that feels so satisfying. If you must go dairy-free, again, reach for oat milk or full-fat soy milk. They mimic the richness of whole milk better than watery options like skim or thin almond milk, ensuring you still get that “wow” factor in your simple drink.
How do I ensure my chocolate milk with cocoa powder is not gritty?
Ah, the dreaded grit! This is why we spend an extra minute making the paste first, remember? That step is the non-negotiable secret weapon for eliminating grit in your chocolate milk with cocoa powder. You must combine that cocoa powder and sugar with just a tiny splash of milk and the vanilla until it is a thick, shiny paste—no dry grains visible at all. When you stir that paste into the rest of the cold milk, everything incorporates smoothly, resulting in a uniformly delicious sip. If you skip the paste, you get grit!
Nutritional Snapshot of This Chocolate Milk Recipe
I know some of you are trying to keep track of what goes into your body, even when enjoying a quick treat. That’s important! While this recipe is simple, figuring out the exact numbers depends heavily on what kind of milk you pour in. When I calculate my numbers, I usually base them on using standard whole dairy milk, but if you use skim or a plant-based milk, those fat and calorie counts will definitely shift down a bit.
This breakdown gives you a good starting point for tracking your homemade chocolate milk. Remember, though, that these figures are just estimates based on standard pantry staples. If you’re opting for a less sugar chocolate milk, your total sugar number will naturally drop below what’s listed here!
Here’s a rough idea of what’s in one serving (one 1-cup glass):
- Calories: Approximately 180
- Total Fat: About 8g
- Protein: Around 8g
- Total Carbohydrates: About 25g
- Total Sugar: Roughly 25g (This is the biggest variable!)
See? It’s not wildly different from some store-bought versions, but the flavors are so much better because the ingredients are real. The best part about making this yourself is knowing you have control over that sugar! Give it a try, enjoy that rich cocoa flavor, and don’t sweat the exact numbers—just enjoy that cold, creamy goodness!
PrintThe Best Homemade Chocolate Milk: Rich Cocoa Flavor in Minutes
Make rich, creamy chocolate milk from scratch using simple cocoa powder. This recipe is quick, tastes better than store-bought mixes, and lets you control the sweetness for a comforting beverage.
- Prep Time: 3 min
- Cook Time: 0 min
- Total Time: 3 min
- Yield: 1 serving 1x
- Category: Drink
- Method: Mixing
- Cuisine: American
- Diet: Vegetarian
Ingredients
- 2 tablespoons unsweetened cocoa powder
- 2 tablespoons granulated sugar (adjust for less sugar chocolate milk)
- 1/4 teaspoon vanilla extract
- 1 cup cold milk (dairy or dairy free alternative)
Instructions
- In a small bowl or glass, combine the cocoa powder and sugar. Mix them well to break up any clumps.
- Add the vanilla extract and about 2 tablespoons of the cold milk to the cocoa mixture. Stir vigorously until you form a smooth, thick paste. This step prevents lumps.
- Pour in the remaining cold milk.
- Stir or whisk the mixture until the chocolate paste is fully dissolved and the milk is uniformly colored and creamy.
- Serve immediately over ice for a quick chocolate drink fix.
Notes
- For a healthier chocolate milk option, reduce the sugar to 1 tablespoon or substitute with your preferred sweetener.
- Use whole milk for the creamiest chocolate milk texture.
- To make a batch of chocolate milk powder mix, combine 1 cup cocoa powder, 1 cup sugar, and 1 teaspoon vanilla powder; store in an airtight container. Use 3 tablespoons of the mix per cup of milk.
Nutrition
- Serving Size: 1 cup
- Calories: 180
- Sugar: 25
- Sodium: 100
- Fat: 8
- Saturated Fat: 5
- Unsaturated Fat: 3
- Trans Fat: 0
- Carbohydrates: 25
- Fiber: 2
- Protein: 8
- Cholesterol: 25