
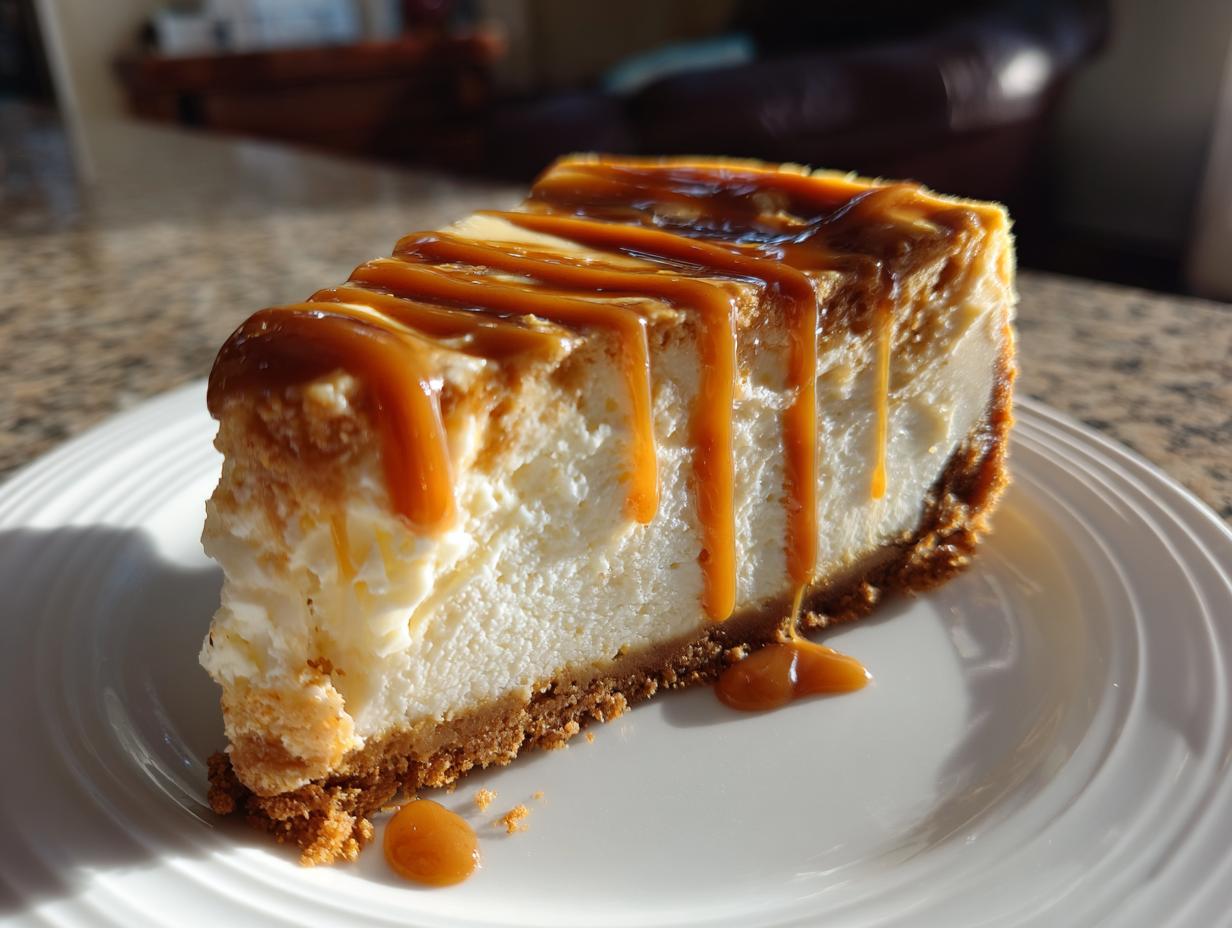
Oh, my friends, if there is one dessert that screams ‘special occasion’ while still feeling like a warm slice of home, it’s a spectacular cheesecake. We’re not talking about just any cake today; we are diving into something truly decadent. Say hello to the Ultra Creamy No-Fail Baked Salted Caramel Cheesecake with a buttery Biscoff Crust. Growing up in my Midwestern kitchen, we believed desserts made with care were the best language of love. This recipe honors that tradition—it’s rich, it’s utterly smooth, and trust me, it is absolutely fail-proof. It’s designed for the home cook who wants that gourmet touch without the stress.
- Why This Baked Salted Caramel Cheesecake is Your New Favorite
- Ingredients for the Ultimate Salted Caramel Cheesecake
- Easy Cheesecake Instructions for a No Fail Salted Caramel Cheesecake
- Tips for the Creamiest Baked Cheesecake Success
- Ingredient Notes and Substitutions for Salted Caramel Cheesecake
- Serving Suggestions for Your Decadent Desserts
- Storage and Reheating Instructions for Salted Caramel Cheesecake
- Frequently Asked Questions About Salted Caramel Cheesecake Recipe
- Sharing Your Perfect Salted Caramel Cheesecake Creation
Why This Baked Salted Caramel Cheesecake is Your New Favorite
I’ll be honest with you: I’ve made a lot of cheesecakes, and they are notorious for being fussy! But this version? This is the one that lets you breathe easy. It delivers on every promise of a truly special dessert. Forget those grainy, sunken versions you might have struggled with before. This recipe is designed to be your go-to for every holiday or celebration.
- That Ultra Creamy Texture: We use the water bath method, which is a game-changer for that silky, smooth mouthfeel you usually only find in fancy bakeries.
- The Biscoff Base: The crust isn’t your standard graham cracker. That hint of spice and crunch from the Biscoff cookies makes the entire experience feel premium and unexpected.
- Perfect Sweet & Salty Harmony: The homemade salted caramel swirls right into the filling, giving you that amazing pull of salty goodness against the rich, sweet cream cheese. It’s simply irresistible.
If you want a guaranteed showstopper, look no further. For other impressive treats, check out my guide on the Ultimate No-Bake Chocolate Cheesecake!
Ingredients for the Ultimate Salted Caramel Cheesecake
Gathering your ingredients is half the battle won when it comes to cheesecake. I find that having everything ready and at the right temperature before I even start mixing is the secret to keeping things smooth and lovely. We need three distinct groups of ingredients here to make this magic happen: the crust, the filling, and that gorgeous drizzle on top. Remember, room temperature items are non-negotiable for a truly creamy baked cheesecake!
For the Biscoff Cookie Crust
- 1 1/2 cups Biscoff cookie crumbs (Don’t skip these crunchy beauties!)
- 1/4 cup granulated sugar
- 6 tablespoons unsalted butter, melted (We want this binding agent nice and ready.)
For the Creamy Salted Caramel Cheesecake Filling
Expert Tip: I always pull out my cream cheese, sour cream, and eggs about two hours before I plan to bake. Cold ingredients equal lumpy batter, and we simply can’t have that in our homemade caramel sauce! Make sure everything is perfectly soft.
- 3 (8 ounce) packages full-fat cream cheese, softened
- 1 1/2 cups granulated sugar
- 1/4 cup all-purpose flour (It seems strange, but this helps prevent cracks!)
- 1 teaspoon vanilla extract
- 1/4 teaspoon salt
- 1 cup sour cream, room temperature
- 3 large eggs, room temperature (Add these slowly, one at a time!)
- 1/2 cup homemade salted caramel sauce, plus extra for topping (This is where the flavor starts!)
Easy Cheesecake Instructions for a No Fail Salted Caramel Cheesecake
Alright, deep breaths! I know big baked desserts look intimidating, but that’s why we’re going step-by-step. Making your salted caramel cheesecake perfect every time comes down to following the mixing order and being gentle when it counts. We’re using the water bath because it’s the secret handshake for a lovely, creamy texture. Don’t skip the foil or you’ll have a soggy bottom—and nobody wants a wet crust!
Preparing and Baking the Biscoff Crust
First things first, get your oven warming up to 325°F (160°C). Grab your 9-inch springform pan. You MUST wrap the outside really well with heavy-duty aluminum foil—and I mean really well, like two or three layers. This is protecting us from the water bath later! While that heats, mix your Biscoff crumbs, the quarter cup of sugar, and that melted butter until it looks like wet sand. Press that firmly into the bottom of your prepared pan. Pop it in the oven for just 10 minutes. Let it cool down for a minute while we tackle the star of the show.
Mixing the Rich Dessert Filling
Time to bring out that gorgeous, softened cream cheese. Beat it until it’s totally smooth first. Then, gently add your 1 1/2 cups of sugar and the flour—mix just until it’s incorporated. Now stir in your sour cream and vanilla until everything looks uniform. Here’s the most important part: add your eggs one at a time, mixing on LOW speed after each one. You only want them mixed in, not beaten! Once the eggs are happy, gently fold in that half cup of salted caramel sauce. Don’t stir it too hard; we want those beautiful, unpredictable streaks of caramel throughout the filling.
The Water Bath and Slow Cooling Technique
Pour that wonderful batter over your cooled crust. Now, place the whole springform pan inside a larger roasting pan. Carefully pour hot water into the roasting pan until it comes halfway up the sides of your cheesecake pan. Bake this setup for about 60 to 75 minutes. You’re looking for edges that are firm but a slight wobble right in the very center. When it looks mostly done, turn the oven OFF! Crack the door open just a tiny crack and let the cheesecake stay in there for a full hour. This slow, gentle cooldown is what prevents those awful cracks, building trust in your rich dessert recipe!
Tips for the Creamiest Baked Cheesecake Success
Achieving that perfectly smooth, creamy baked cheesecake texture really does hinge on a couple of simple rules that my grandma taught me long before I ever touched a springform pan. Honestly, the biggest battle is fighting air bubbles! Air makes things rise, and when they fall, they crack. So, your main goal for this creamy baked cheesecake is minimal mixing, especially once those eggs are in there. Always use your mixer on the lowest speed possible.
Secondly, temperature is everything. If your cream cheese feels even slightly cool, it will fight the sugar and create those tiny lumps we simply cannot have. I know it feels like extra time, but letting those dairy ingredients come up to room temperature, along with your eggs, is the key difference between a rustic bake and a truly gourmet cheesecake experience. If you want more superstar tips for decadent desserts, check out how they handle texture over at Luisa Bakes!
Ingredient Notes and Substitutions for Salted Caramel Cheesecake
You know, the beauty of a classic recipe like this salted caramel cheesecake is that once you understand *why* an ingredient works, you can feel confident making changes. My notes here are all about supporting that rich, luxurious texture we’re aiming for. For example, let’s talk about the cream cheese. You absolutely must use full-fat cream cheese here. The lower fat versions just don’t have the right fat structure to hold up against the moisture from the caramel and maintain that dense yet velvety mouthfeel we crave. Don’t try to substitute it if you want that guaranteed creamy result!
And what if you run out of Biscoff? Don’t panic! If you can’t find those spiced cookies, traditional graham crackers work just fine for the crust. You’ll just slightly miss that warm, biscuity note that the Biscoff brings, but the buttery structure will hold up perfectly. Just treat them the same way—crush them up, mix with melted butter and a little sugar, and press firmly. It’s all about getting that good base locked in before we move on to the filling!
Also, I need to stress the caramel again. If you don’t have my homemade salted caramel sauce ready, grab a decent quality store-bought jar, but please look closely at the label. If it lists corn syrup as the *very first* ingredient, it’s often too thin and watery for swirling into a heavy cheesecake batter. We need something thick that will hold its place when baked—that’s how you get those gorgeous ripples of salty goodness!
Serving Suggestions for Your Decadent Desserts
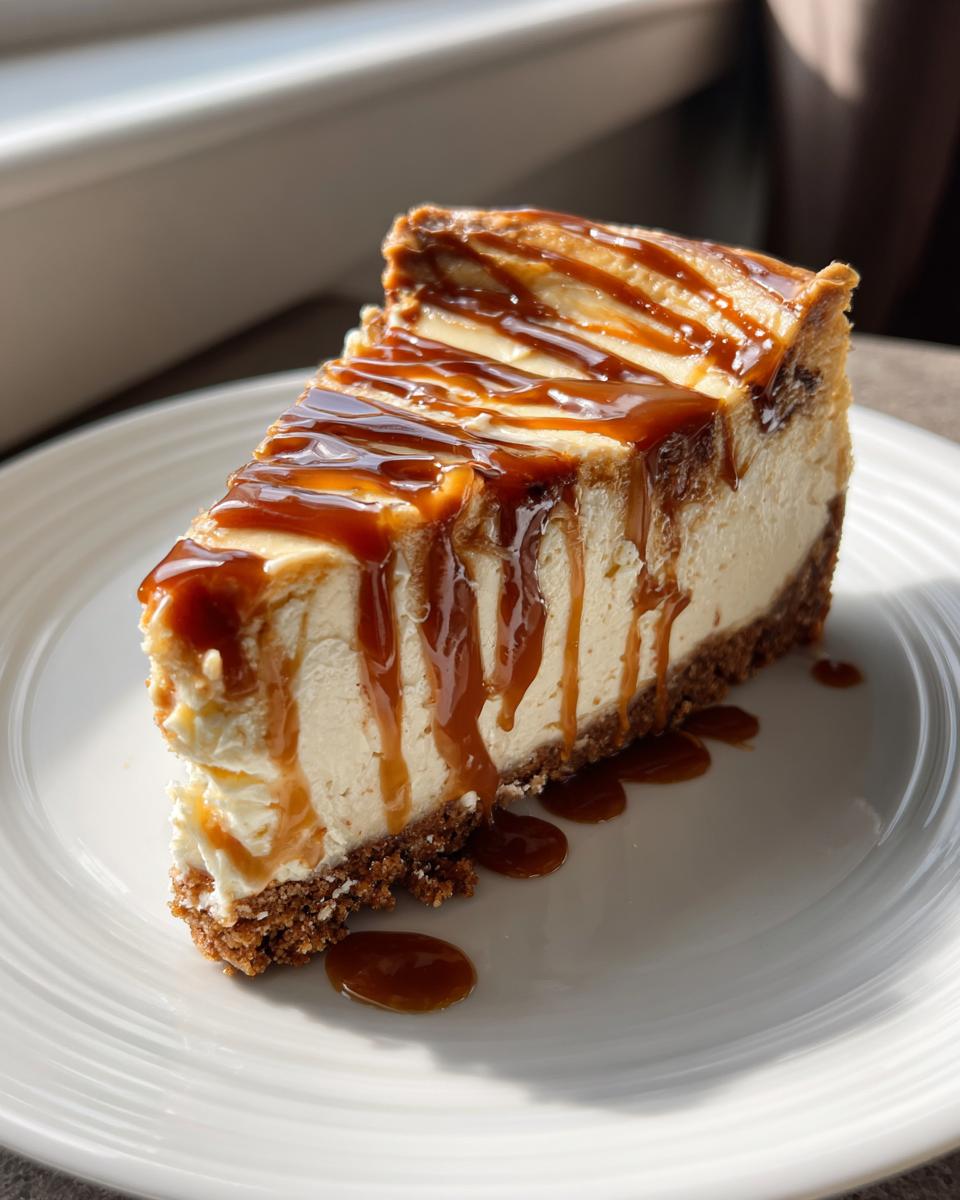
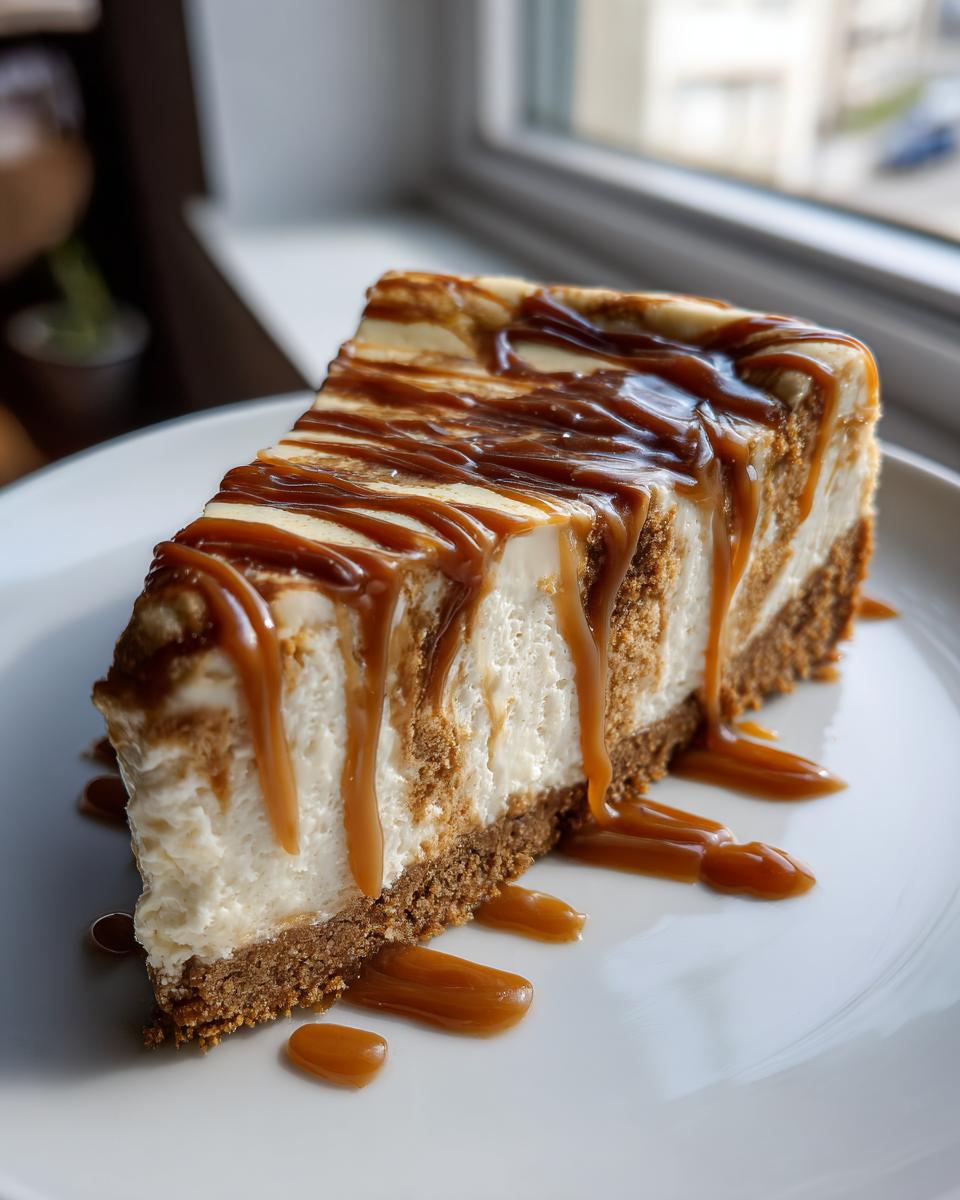
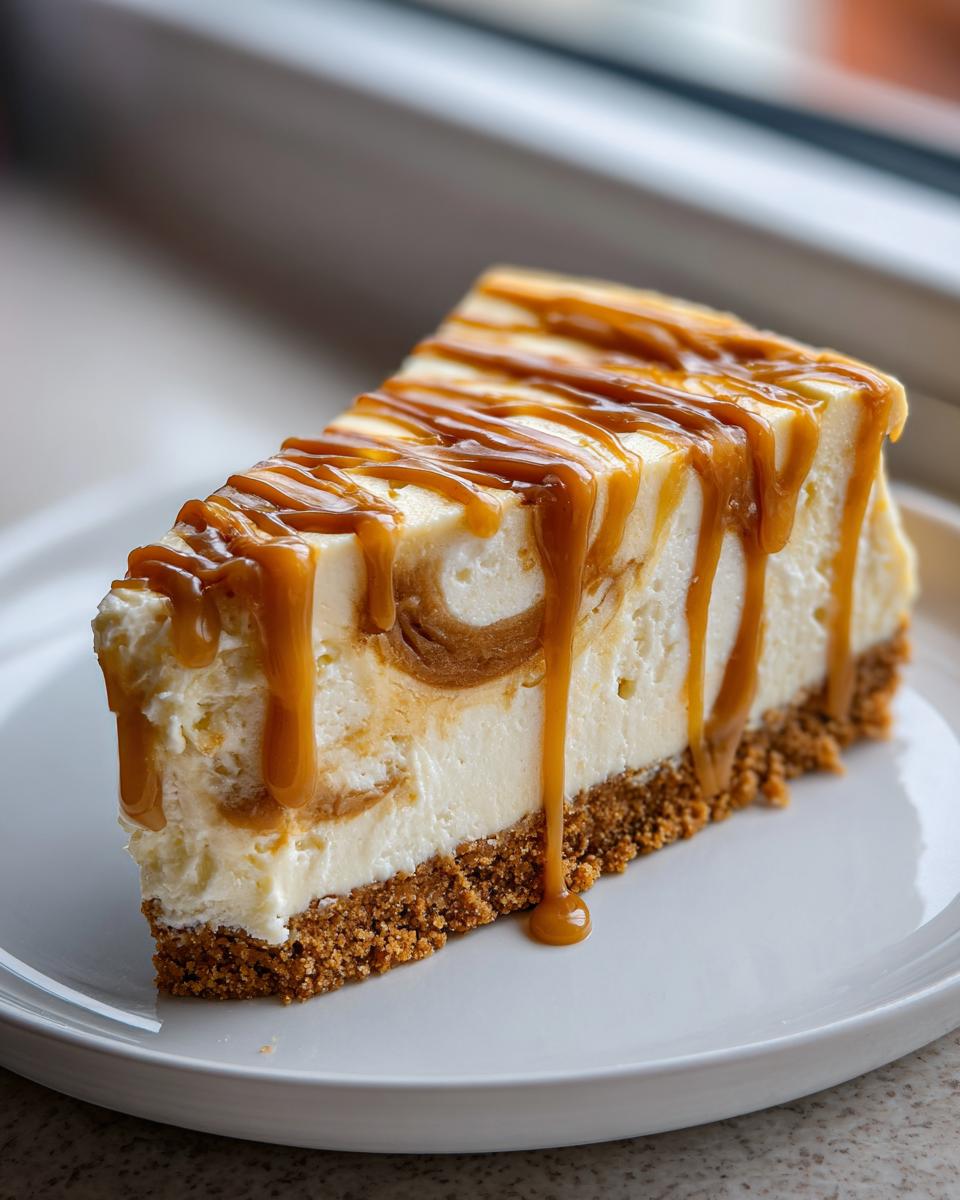
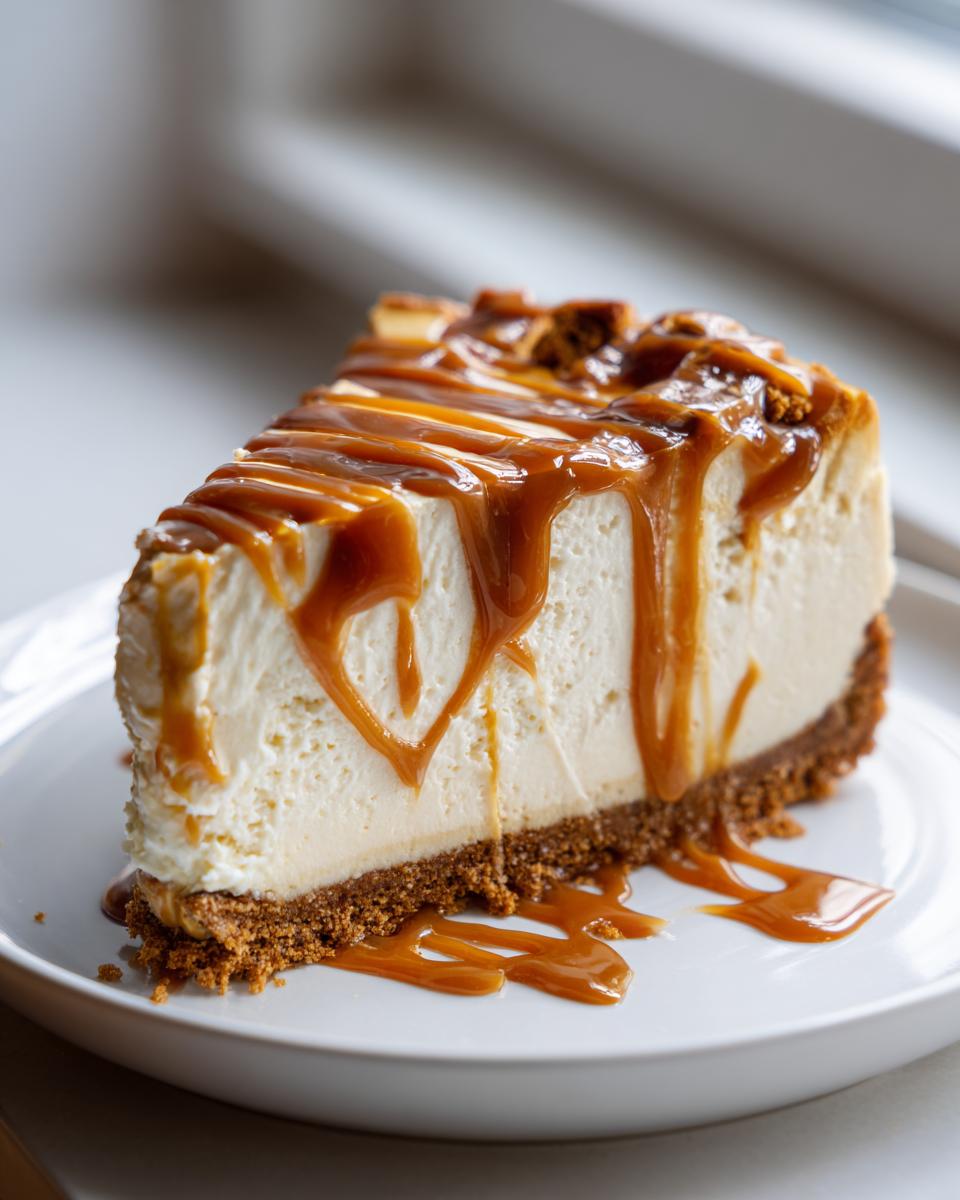
Once you’ve chilled this stunning masterpiece, the fun really begins! Serving it up right makes all the difference when you’re presenting a truly decadent dessert. The contrast between the dark, rich caramel and the pale, creamy cheesecake is already stunning. I like to use a clean, dry paper towel to wipe the rim of the serving plate before I even slice it—it just makes it look sharper.
You’ve got that perfect sweet and salty treat already built in, so accompaniments should be light. A tiny dusting of flaky sea salt right before serving really catches the eye. If you’re feeling ambitious, a small dollop of homemade whipped cream or perhaps a scoop of vanilla bean gelato served alongside feels just right. I love serving mine with my best lemon scones on the side for a light breakfast the next morning, but for the main event, keep it simple!
Storage and Reheating Instructions for Salted Caramel Cheesecake
This is where patience really pays off, because chilling this cheesecake is as important as baking it! If you try to slice into it even slightly warm, you’re just going to end up with a sloppy mess. We need that time for the fats in the cream cheese and the caramel to truly set up again after the heat of the oven. You need to refrigerate this beauty for a bare minimum of six hours, but honestly, if you can manage to wait until the next day, that’s how you get the absolute cleanest slices and the best texture. It’s tough, I know, especially when it smells this good!
When you store it, wrap the springform pan (if you haven’t removed the ring yet) loosely in plastic wrap, or just cover the exposed top gently with foil once it’s completely cool. Try not to let plastic cling directly to the caramel topping; it can sometimes stick weirdly. If you’ve already removed the ring and drizzled it with the extra sauce, just use a cake dome or find a large container it can sit uncovered in the fridge.
Now, about reheating? Don’t even think about microwaving this! Baked cheesecake handles cold temperatures really well, but heat is generally the enemy once it’s set. Microwaving melts the structure too quickly and ruins that gorgeous creamy thing we worked so hard for. If you find that your slice is too cold straight from the fridge—and sometimes they can be a little too firm—just let it sit out on the counter for about 20 to 30 minutes before you serve it. That little bit of time lets the flavors bloom and softens the texture just enough. For another great make-ahead treat, check out my recipe for Cranberry Orange Scones—they hold up just as nicely!
Frequently Asked Questions About Salted Caramel Cheesecake Recipe
I know sometimes things just don’t go according to plan, or maybe you just have a burning question about making the absolute best salted caramel cheesecake. That’s totally normal! Cheesecake making is an art, but armed with the right tips, you’ll nail it every single time. Here are a few things I get asked all the time about achieving that perfect rich dessert!
Can I skip the water bath for this recipe?
Oh, I really wish I could tell you yes! But for this ultra-creamy, no-fail version, the water bath is honestly essential. It creates that steamy environment in the oven. Think of it like a gentle sauna for your batter; it keeps the outside edges from baking faster than the middle! Skiping it is the fastest way to get surface cracks. If you’re desperate, you can try baking it on the lowest rack possible, but wrap that foil securely!
Can this be a no-bake salted caramel cheesecake?
While I love a good no-bake recipe for a quick fix, this one relies on eggs and flour to achieve that dense, gourmet texture. A no-bake version just won’t give you the same richness; it tends to be lighter and more mousse-like. For truly satisfying sweet and salty treats, we need that bake time!
How do I know if my caramel sauce is salty enough?
The salt is crucial for balancing those gorgeous sweet layers! When you’re making your homemade caramel sauce, sprinkle in the salt near the end, right before you remove it from the heat. Taste a tiny, safe bit on a spoon. It should hit your tongue with a distinct salty flavor that immediately mellows into the sweet caramel base. If you can barely taste the salt, add a pinch more. It should be assertive but not overwhelming!
What happens if I substitute the Biscoff cookies?
If you have to substitute the Biscoff for graham crackers, that’s fine—it’s still delicious. But you’ll want to compensate a little extra for the flavor depth. Try adding a tiny teaspoon of ground cinnamon or just a pinch of ginger to your graham cracker crust mixture. That tiny addition helps mimic the warm spice profile we get naturally from the Biscoff.
Sharing Your Perfect Salted Caramel Cheesecake Creation
Now that this beauty is chilling, I really hope you enjoy every single slice! Knowing I’ve helped you create one of these incredible sweet and salty treats fills my heart up. If you made it, please pop back here and leave a rating so others know this recipe is rock solid. I just love keeping these old traditions of comforting American baking alive, one creamy, drizzly cheesecake at a time!
PrintUltra Creamy No-Fail Baked Salted Caramel Cheesecake with Biscoff Crust
Make this rich, creamy baked salted caramel cheesecake featuring a popular Biscoff cookie crust. This recipe balances sweet and salty flavors for a decadent dessert perfect for any special occasion.
- Prep Time: 25 min
- Cook Time: 75 min
- Total Time: 100 min
- Yield: 12 servings 1x
- Category: Dessert
- Method: Baking
- Cuisine: American
- Diet: Vegetarian
Ingredients
- 1 1/2 cups Biscoff cookie crumbs
- 1/4 cup granulated sugar
- 6 tablespoons unsalted butter, melted
- 3 (8 ounce) packages full-fat cream cheese, softened
- 1 1/2 cups granulated sugar
- 1/4 cup all-purpose flour
- 1 teaspoon vanilla extract
- 1/4 teaspoon salt
- 1 cup sour cream, room temperature
- 3 large eggs, room temperature
- 1/2 cup homemade salted caramel sauce, plus extra for topping
Instructions
- Preheat your oven to 325°F (160°C). Wrap the outside of a 9-inch springform pan tightly with heavy-duty aluminum foil to prevent water entry during the water bath.
- Prepare the crust: Mix the Biscoff cookie crumbs, 1/4 cup sugar, and melted butter in a bowl until combined. Press the mixture firmly into the bottom of the prepared springform pan. Bake for 10 minutes. Let cool slightly.
- Prepare the filling: In a large bowl, beat the softened cream cheese with an electric mixer until smooth. Gradually add the 1 1/2 cups sugar and flour, mixing until just combined. Scrape down the sides of the bowl.
- Beat in the vanilla extract and salt. Mix in the sour cream until smooth. Add the eggs one at a time, mixing on low speed after each addition until just incorporated. Do not overmix the batter once the eggs are added.
- Gently fold in the 1/2 cup of salted caramel sauce into the batter until streaks appear; avoid fully mixing it in for a marbled effect.
- Pour the filling over the cooled crust. Place the springform pan inside a larger roasting pan. Carefully pour hot water into the roasting pan until the water reaches halfway up the sides of the springform pan. This is your water bath.
- Bake for 60 to 75 minutes. The edges should look set, but the center 2 inches should still have a slight jiggle.
- Turn off the oven, crack the oven door open slightly, and let the cheesecake cool inside the oven for 1 hour. This slow cooling prevents cracking.
- Remove the cheesecake from the water bath and let it cool completely on a wire rack. Once cool, cover and refrigerate for at least 6 hours, or preferably overnight.
- Before serving, carefully remove the springform ring. Drizzle generously with extra homemade salted caramel sauce.
Notes
- Use room temperature ingredients for the cream cheese, sour cream, and eggs. This prevents lumps in your batter.
- If you do not have Biscoff cookies, you can substitute with graham crackers for the crust.
- For the best texture, avoid scraping the sides of the bowl too much once the eggs are added to minimize air incorporation.
Nutrition
- Serving Size: 1 slice
- Calories: 450
- Sugar: 35g
- Sodium: 320mg
- Fat: 28g
- Saturated Fat: 17g
- Unsaturated Fat: 11g
- Trans Fat: 0.5g
- Carbohydrates: 42g
- Fiber: 1g
- Protein: 7g
- Cholesterol: 110mg