
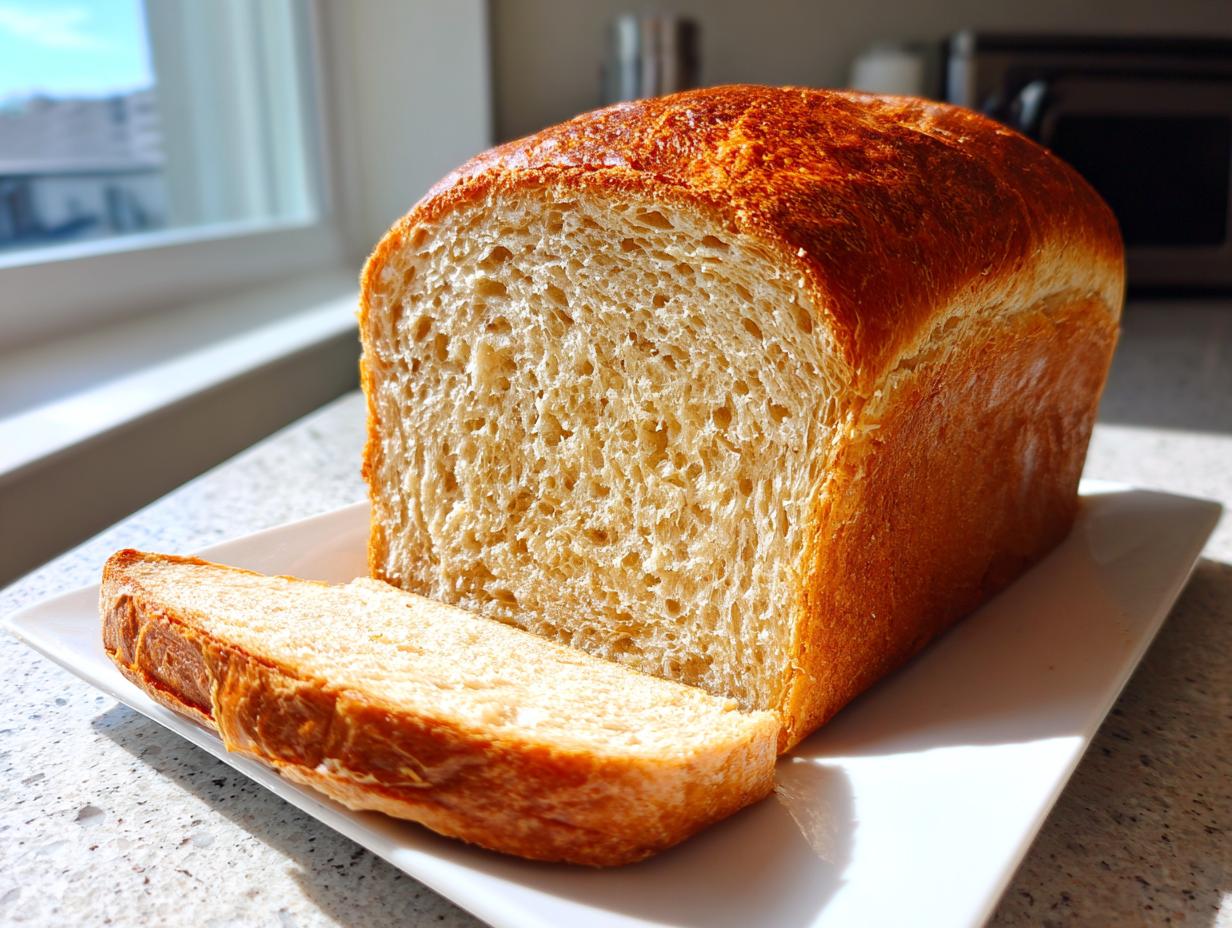
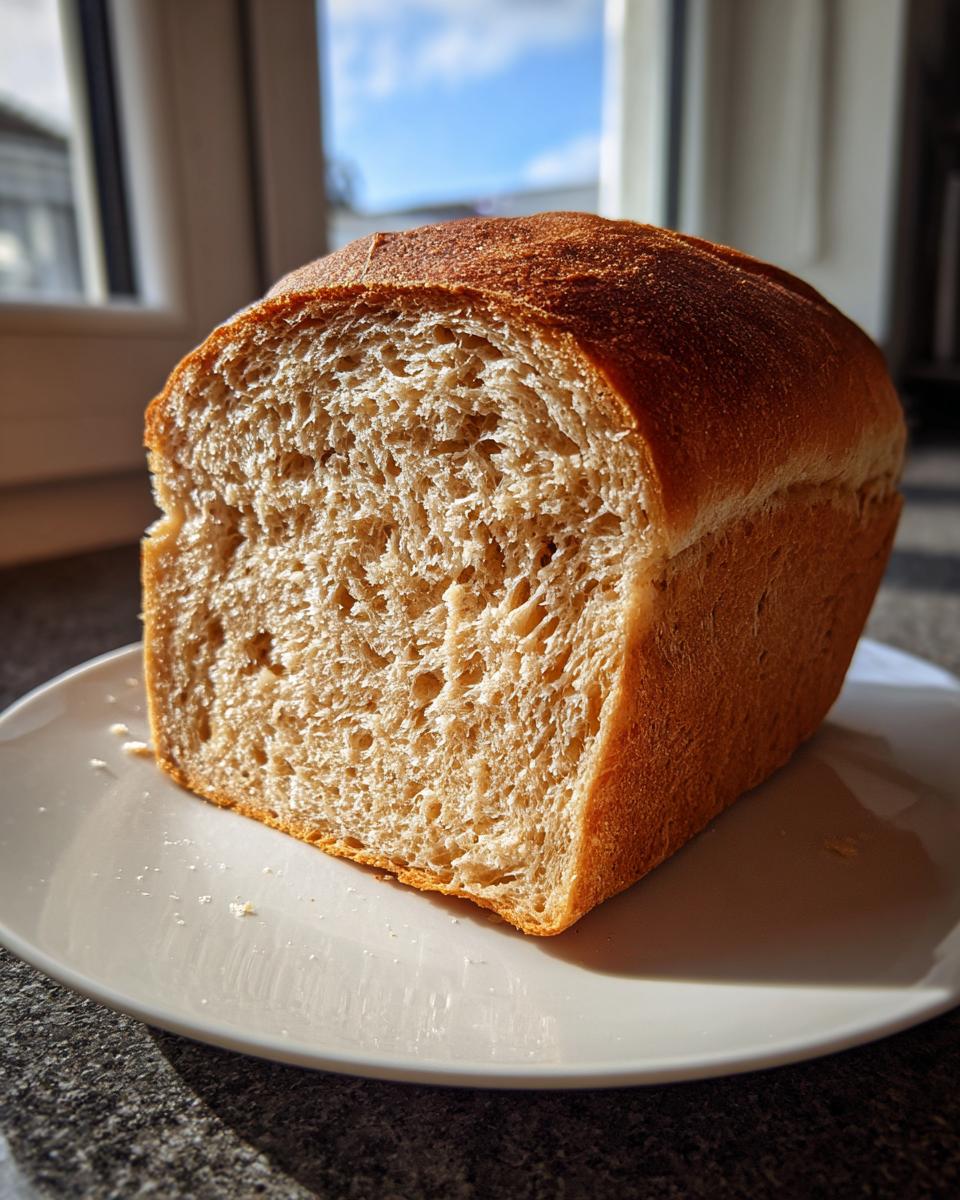
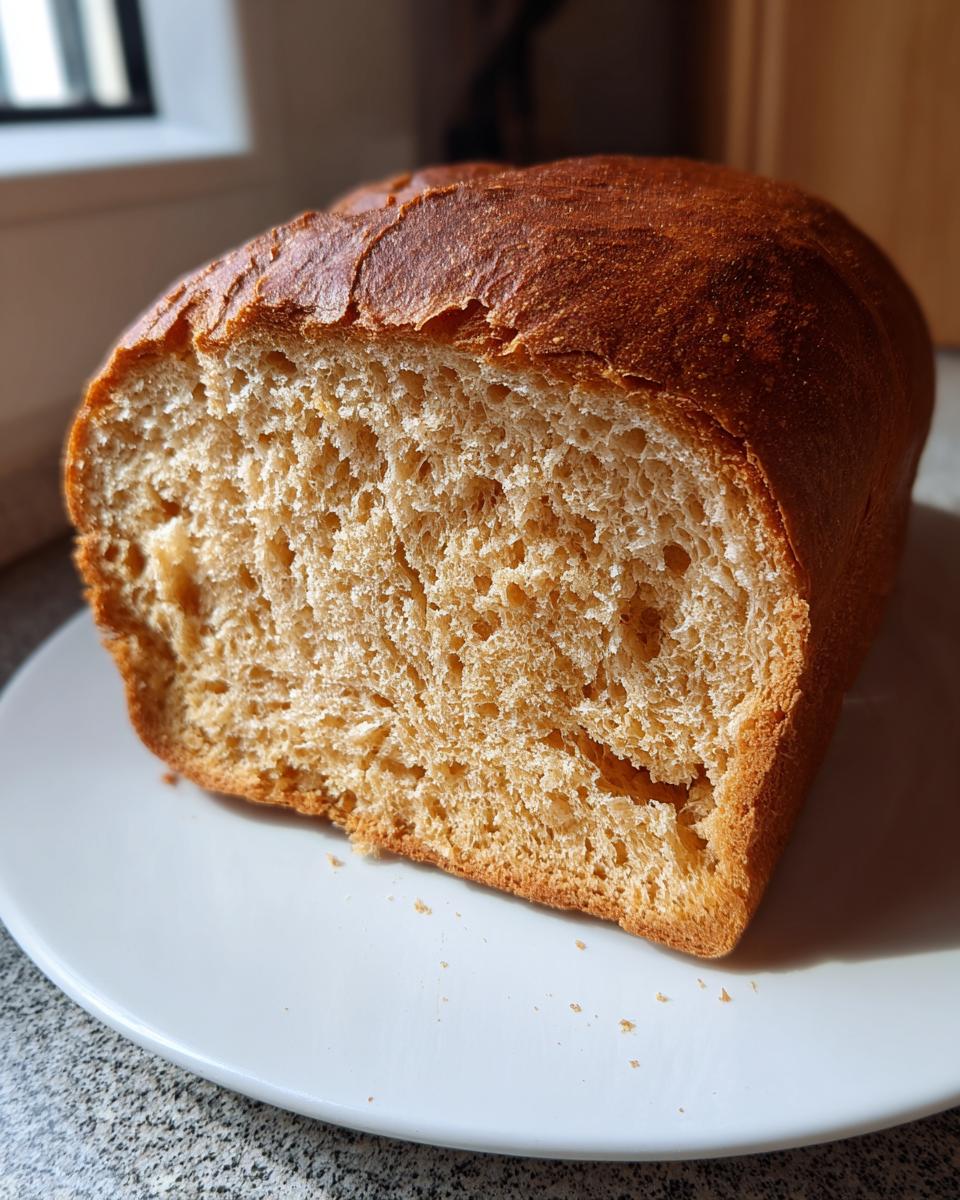
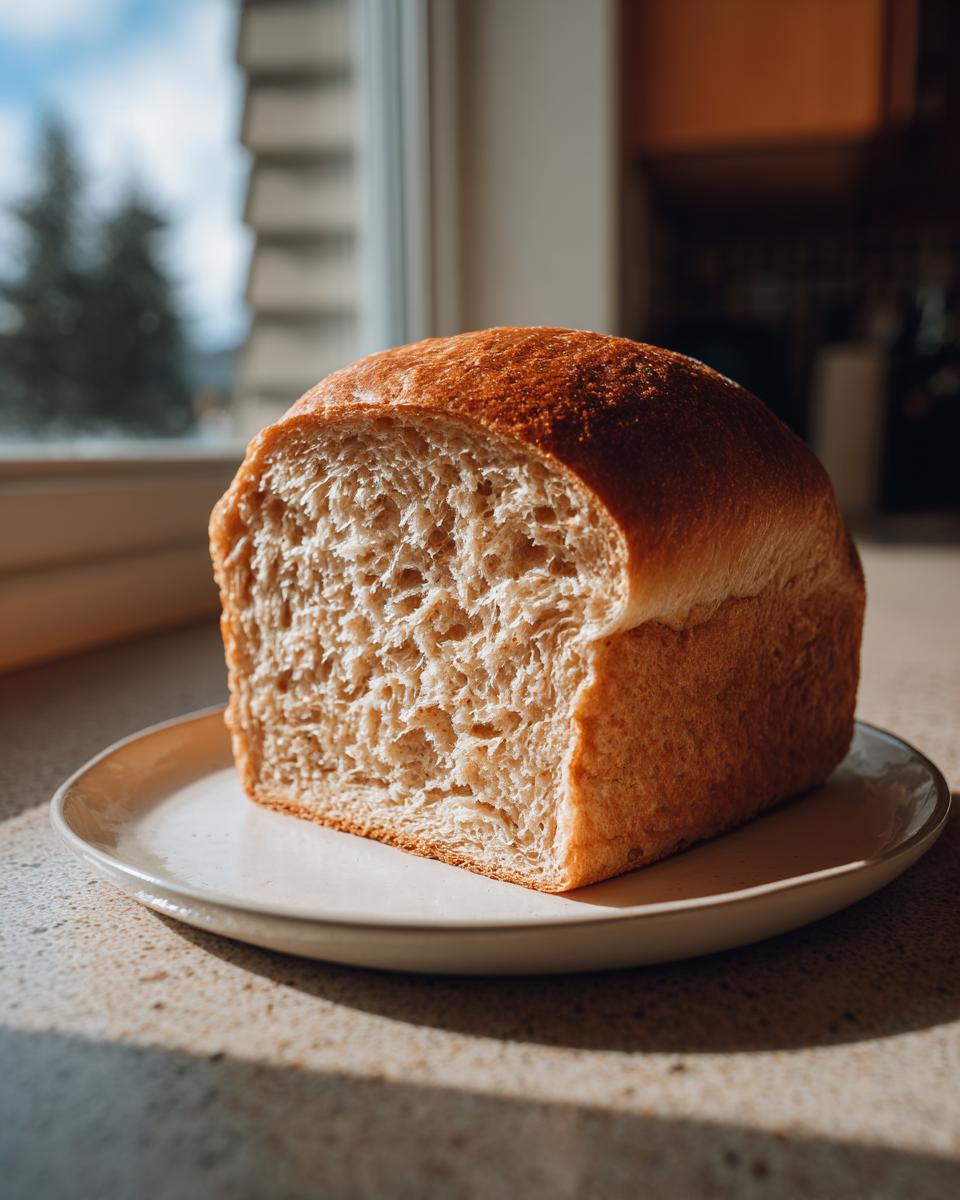
Oh, that smell! There is truly nothing better than walking into your own kitchen and being enveloped by the aroma of fresh baked bread at home. For years, when people thought of whole grain baking, they pictured something heavy or maybe even a little bit dry. Not here! At Cookin’ Corner, we do things differently. This recipe is the key to the softest, fluffiest whole wheat bread you have ever pulled out of your own oven. It’s the best whole wheat sandwich bread recipe I’ve perfected over years of trials in my kitchen, honoring my grandmother’s legacy of reliable, delicious American home cooking. Forget everything you thought you knew about whole wheat—this one is tender!
- Why This Soft Honey Whole Wheat Bread Recipe Works (E-E-A-T Focus)
- Ingredients for Your Soft Honey Whole Wheat Bread
- Step-by-Step Instructions for Homemade Whole Wheat Bread
- Tips for Perfecting Your Whole Wheat Bread
- Making the Best Whole Wheat Sandwich Bread Year-Round
- Frequently Asked Questions About Baking Whole Wheat Bread
- Nutritional Estimate for This Wholesome Bread to Bake
- Share Your Homemade Whole Wheat Bread Creations
Why This Soft Honey Whole Wheat Bread Recipe Works (E-E-A-T Focus)
When I first started baking with whole wheat flour, my loaves came out looking more like bricks than bread, honestly! I learned then that you just can’t throw 100 percent whole wheat flour into a recipe and expect the same lift as white flour. The secret to getting that signature softness in our whole wheat bread is using just a dash of all-purpose flour alongside the hearty whole wheat. Honey also helps keep things tender and supplies that lovely, mild sweetness. It’s a trick I learned long ago, much like how I perfected making that amazing easy herb-crusted prime rib roast—it’s all about balancing the ingredients!
I remember watching my aunt sift the flours together time and time again—she said the flour ratio was everything for a beautiful rise. We’re aiming for wholesome flavor without sacrificing that perfect sandwich texture.
Achieving a Fluffy Whole Wheat Bread Crumb
That little addition of all-purpose flour is so important for structure. Whole wheat is heavier because of the bran, and that bran cuts through the helpful gluten strands that make bread stretchy. By adding just a half-cup of AP flour, we give the dough enough strength to hold all those wonderfully captured air bubbles during the rise. This balance is exactly what delivers that truly fluffy whole wheat bread crumb we all crave for toast or a hearty lunch.
Ingredients for Your Soft Honey Whole Wheat Bread
Gathering your ingredients is the first satisfying step toward that fresh baked bread at home smell! Don’t skip the warming step for your water; that’s critical for waking up the yeast properly. I like to have my measuring cups lined up just like I do when I’m tackling a tricky recipe like my easy chicken gravy recipe with no drippings. Here are exactly what you need for this perfect loaf:
- 1 cup warm water (105-115°F)
- 2 teaspoons active dry yeast
- 1/4 cup honey
- 2 tablespoons unsalted butter, melted
- 1 1/2 teaspoons salt
- 3 cups whole wheat flour
- 1/2 cup all-purpose flour (plus more for dusting)
Step-by-Step Instructions for Homemade Whole Wheat Bread
Alright, let’s get messy! Baking this whole wheat bread is so straightforward, even if you’re brand new to making loaves. We’re following a classic path here, but I’ll give you the little nudges that make all the difference. If you’ve ever made my easy crockpot potato soup, you know I believe in clear steps, and this bread deserves the same attention!
Activating the Yeast and Mixing the Dough
First things first, we need to wake up that yeast! Pour your warm water—and I mean *warm*, not hot, aim for that sweet spot between 105°F and 115°F—into a bowl and sprinkle the yeast on top. Give it five minutes to get foamy; if nothing happens, your water was too cold or too hot, and you’ll need a fresh packet! Once it’s happy, stir in the honey, the melted butter, and the salt. This is our flavor base!
Kneading and the First Rise for Whole Wheat Bread
Now for the flour! Add all 3 cups of your whole wheat flour until you get a shaggy mess—don’t panic! Then, start incorporating the half-cup of all-purpose flour slowly until the dough starts pulling away from the sides of the bowl. Turn that dough out onto a floured surface and knead it for about five to seven minutes. You’re looking for the dough to feel completely smooth and elastic when you’re done. Pop it into a lightly greased bowl, cover it up, and let it double in size. That usually takes a good 1 to 1.5 hours, depending on how warm your kitchen is.
Shaping and Final Proofing
Gently punch the air out of that risen dough—it feels so satisfying! Then, shape it into a snug loaf and tuck it right into your greased 9×5 inch pan. Cover it loosely again and let it rest for that second rise. This one is shorter, about 30 to 45 minutes. The magic marker here is when the dough crowns about one inch over the rim of the pan. If it rises too much before the oven is ready, it can collapse, so time this right!
Baking and Cooling Your Fresh Baked Bread at Home
Get that oven preheating to 375°F while the dough is reaching its peak height. Bake the loaf for about 30 to 35 minutes until the top is gorgeously golden. I always check the internal temperature, and if it hits 200°F, it’s done! The most important step for achieving that soft texture in your whole wheat bread is cooling completely on a wire rack before you even think about slicing it. Trust me on this—slicing hot bread just makes it gummy!
Tips for Perfecting Your Whole Wheat Bread
Now that you know the steps, let me share a few extra bits of wisdom I picked up over the years perfecting my process for baking with whole wheat flour. Mastering homemade whole wheat bread really comes down to paying attention to the little details. I always tell folks that this recipe is a fantastic beginner bread recipe whole wheat, but listening to your dough is what takes it from good to truly spectacular.
Ingredient Notes and Substitutions for Whole Wheat Bread
If you are determined to go fully whole grain—meaning you want that pure 100 percent whole wheat loaf—you can absolutely do it! Just grab a little extra flour from your flour jar. If you swap out that half-cup of all-purpose flour for more whole wheat, the dough will feel really stiff. If that happens, don’t panic like I did the first time! Just mix in one or two extra tablespoons of water until it feels pliable again. Remember that yeast lesson, too: if your water is too hot, you kill your yeast, and then your bread sinks. Keep that thermometer handy, or just test it on your wrist—it should feel pleasantly warm, not hot!
Troubleshooting Common Whole Wheat Bread Issues
The two biggest worries I hear about are density and sticking. If your whole wheat bread comes out a bit dense, nine times out of ten it’s because you rushed one of the rises. Don’t just rely on the clock; rely on the visual cues! It must double for the first rise and crest over the pan by an inch for the second. If you cut into it too soon, the interior structure hasn’t set properly.
As for sticking, whole wheat dough, especially when it has honey, likes to hang onto the pan! If you are worried about getting that beautiful loaf out, you can use my favorite trick: homemade ‘cake goop,’ though for bread, I just brush the pan very generously with melted butter and then give it a very light dusting with extra whole wheat flour instead of white flour. That gives you an extra layer of protection for your soft loaf when you turn it out!
Making the Best Whole Wheat Sandwich Bread Year-Round
Once you pull this beautiful whole wheat bread out of the oven, the temptation to slice into it immediately is strong! I know, I know, it smells like heaven. But keeping that soft, fluffy whole wheat bread texture means you have to be smart about how you store it. We want this to taste just as good on Wednesday as it did on Sunday!
Storage and Reheating Instructions for Soft Whole Wheat Bread
Because we didn’t add any weird preservatives, this is definitely a bread that tastes best fresh—aim to eat it within three days. Store your cooled loaf tightly wrapped in plastic wrap on the counter. That seals in the moisture. Don’t put it in the fridge! The fridge dries out bread faster than you can believe. Now, if day four rolls around and it’s just a little firm, don’t toss it! Slice it up, brush it lightly with a tiny bit of melted butter or even a splash of water, and pop it in a 350°F oven for about five minutes. It comes back to life beautifully, perfect for making my creamy chicken salad sandwich filling!
Variations for Your Whole Wheat Loaf
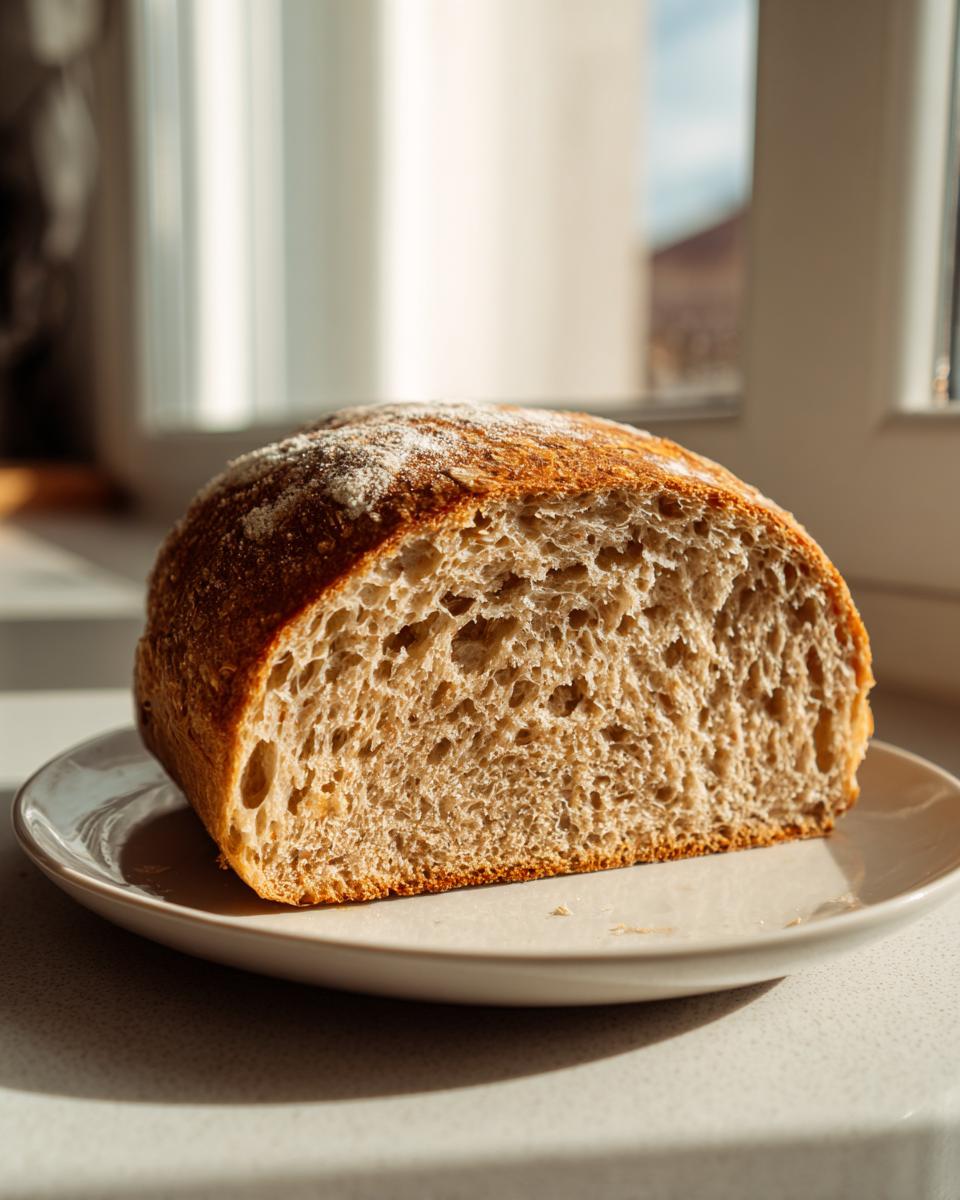
This recipe is such a great base for playing around, too. If you want to lean into a slightly richer, deeper flavor that complements the whole wheat, you can swap out the honey for dark molasses. It gives the crust a darker color and a more rustic, hearty note. That’s a great way to make it feel more like an artisan whole wheat bread without losing the soft crumb.
And for a little texture on the top? Before the second rise, brush the top lightly with water, just like we would for a super crusty loaf—but don’t bake it like one! Sprinkle flax seeds or sunflower seeds right on top of that water glaze. They stick perfectly, bake up beautifully golden, and give you a little crunch on that perfect sandwich slice. If you’re looking for more inspiration on great bread, I always point people to check out the incredible recipes over at Savory Realm.
Frequently Asked Questions About Baking Whole Wheat Bread
I get so many questions about adapting this recipe, and I’m happy to chat through them! Baking is all about learning what works for your kitchen, and understanding the ‘why’ behind the steps really makes a difference in your healthy whole wheat baking journey. If you want more healthy ideas, don’t forget to check out my whole collection of healthy recipes!
Can I use only whole wheat flour for this whole wheat bread recipe?
You totally can, but I have to give you the honest truth about texture! If you use 100 percent whole wheat flour instead of the blend we use here, your loaf is going to be significantly denser. The extra bran in the grain interferes with the gluten formation, making it harder to trap those light air pockets we worked so hard to create during kneading. It won’t be bad bread, but it won’t be the fluffy sandwich bread you see here. If you try it, you’ll need to add a bit more water, like I mentioned earlier!
Is this an easy whole wheat bread recipe for beginners?
Absolutely, this is my favorite starter recipe! Honestly, if you can handle mixing wet things into dry things and have a little patience for the rising times, you can nail this. We aren’t using any complicated starters or pre-ferments. The most important thing for a beginner is learning how the dough feels when it’s kneaded properly—that smooth, slight stretch. It’s a really simple process that yields amazing results for homemade whole wheat bread.
How does this recipe differ from a rustic whole wheat loaf?
This is the key difference between what I call “sandwich bread” and “artisan style.” This recipe is designed for softness, tenderness, and ease of slicing—perfect for a PB&J. A rustic whole wheat loaf, which often gets baked in a Dutch oven or steam injection, aims for a thick, chewy, shatteringly crisp crust and a much more open, irregular crumb structure. If you want that heavy, hearty crust, you might need a different technique, but for soft sandwiches, this recipe is the one!
If you try this recipe and love how soft your bread turns out, why not see what Kate over at Meals by Kate is making for soft loaves too? It always helps to see how other home bakers tackle these standards!
Nutritional Estimate for This Wholesome Bread to Bake
I always bake thinking about how wholesome the ingredients are, and this recipe certainly delivers on that front! Keep in mind these numbers are just estimates based on the honey and butter amounts we use, but they give you a good idea of what you’re enjoying.
- Serving Size: 1 slice
- Calories: 120
- Sugar: 4g
- Sodium: 180mg
- Fat: 2g
- Protein: 4g
It’s a wonderful way to enjoy healthy whole wheat baking right in your own kitchen. These values can change based on what exact whole wheat flour you use, so adjust accordingly for your family’s needs!
Share Your Homemade Whole Wheat Bread Creations
I truly hope you give this recipe a try! When you bake this perfect loaf of whole wheat bread, please come back here and let me know how it turned out! My biggest joy is seeing your creations. Leave a rating—five stars if it made your kitchen smell amazing! I’m dying to know: Are you team toast or team sandwich when it comes to this soft whole wheat bread? If you share photos online, tag me so I can see your beautiful work! If you have any final questions or suggestions, hop over to my contact page!
I’m always chatting about new baking adventures, and you can see what others are trying over at this recipe link, too. Happy baking, friends!
PrintSoft Honey Whole Wheat Bread: The Best Sandwich Loaf Recipe
Bake this easy whole wheat bread recipe at home for soft, fluffy loaves perfect for sandwiches and toast. This recipe uses honey for a touch of sweetness.
- Prep Time: 20 min
- Cook Time: 35 min
- Total Time: 2 hours 5 minutes
- Yield: 1 loaf 1x
- Category: Baking
- Method: Kneading and Baking
- Cuisine: American
- Diet: Vegetarian
Ingredients
- 1 cup warm water (105-115°F)
- 2 teaspoons active dry yeast
- 1/4 cup honey
- 2 tablespoons unsalted butter, melted
- 1 1/2 teaspoons salt
- 3 cups whole wheat flour
- 1/2 cup all-purpose flour (plus more for dusting)
Instructions
- Combine the warm water and yeast in a large bowl. Let it sit for 5 minutes until foamy.
- Stir in the honey, melted butter, and salt into the yeast mixture.
- Gradually add the whole wheat flour, mixing until a shaggy dough forms.
- Add the all-purpose flour one half-cup at a time, mixing until the dough comes together.
- Turn the dough out onto a lightly floured surface. Knead for 5 to 7 minutes until the dough is smooth and elastic. You are looking for a soft, manageable dough.
- Lightly grease a large bowl. Place the dough in the bowl, turning to coat. Cover the bowl with plastic wrap or a clean kitchen towel.
- Let the dough rise in a warm place for 1 to 1.5 hours, or until it has doubled in size. This is the first rise.
- Gently punch down the risen dough. Shape it into a loaf and place it into a greased 9×5 inch loaf pan.
- Cover the pan loosely and let the dough rise again for 30 to 45 minutes, or until the dough crests about 1 inch above the rim of the pan. This is the second rise.
- Preheat your oven to 375°F (190°C) during the last 15 minutes of the second rise.
- Bake for 30 to 35 minutes, or until the top is golden brown and the internal temperature reaches 200°F (93°C).
- Remove the loaf from the pan immediately and place it on a wire rack to cool completely before slicing.
Notes
- For a 100 percent whole wheat loaf, substitute the 1/2 cup of all-purpose flour with more whole wheat flour, but you may need to add 1-2 extra tablespoons of water if the dough feels too stiff.
- If you prefer a crusty exterior, brush the top of the loaf with water just before baking.
- This soft whole wheat bread is best eaten within 3 days. Store tightly wrapped at room temperature.
Nutrition
- Serving Size: 1 slice
- Calories: 120
- Sugar: 4
- Sodium: 180
- Fat: 2
- Saturated Fat: 1
- Unsaturated Fat: 1
- Trans Fat: 0
- Carbohydrates: 23
- Fiber: 3
- Protein: 4
- Cholesterol: 5