
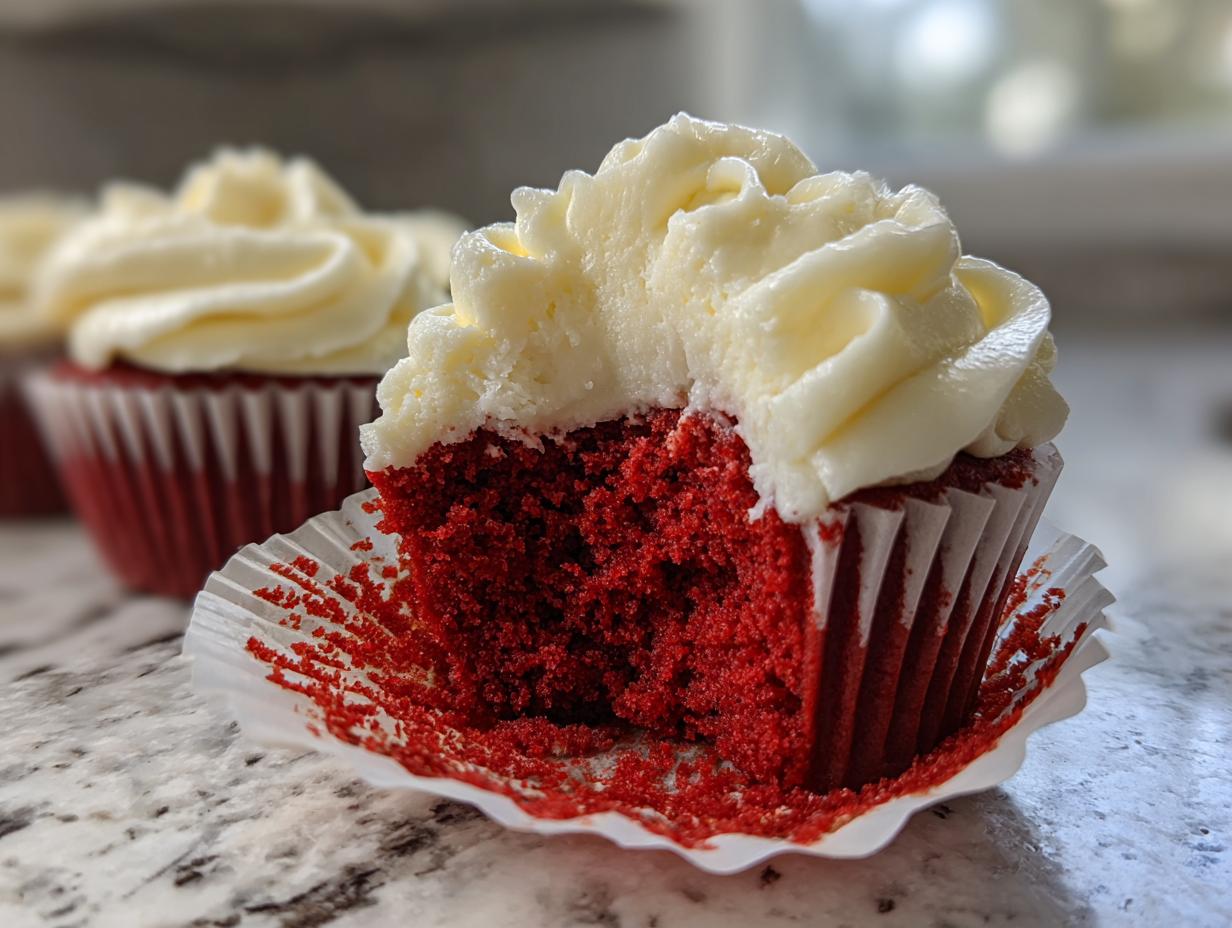
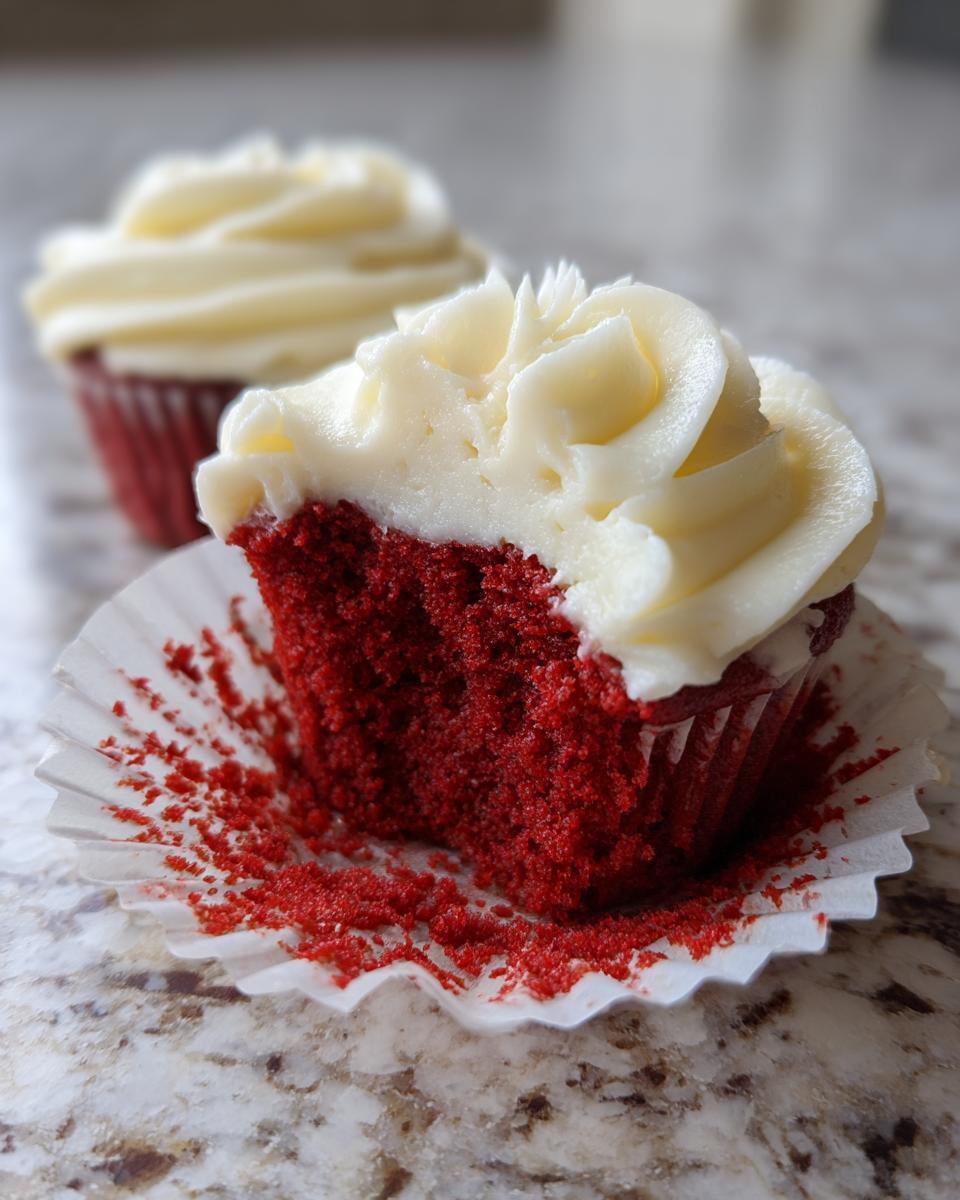
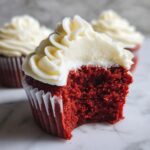
Some flavors just speak to the soul, don’t they? And when it comes to classic American desserts, nothing beats sinking your teeth into a truly perfect red velvet cupcakes. I’m not talking about those dry, slightly sour imitations; I mean the real deal—rich, vibrantly red, and unbelievably moist!
Here at Cookin’ Corner, we aren’t about fancy tricks; we’re about tried-and-true tradition. That’s why I’m sharing the ultimate recipe that guarantees you those fluffy, velvety results every single time. My founder, Sarah Jane Thompson, learned baking from the heart in her Midwest kitchen, and this recipe is proof that baking from scratch, with care, always wins out. Get ready; these are the best red velvet cupcakes you’ll ever make!
- Why Our Recipe for Red Velvet Cupcakes Delivers Bakery-Style Results
- Gathering Ingredients for Moist Red Velvet Cupcakes
- Step-by-Step Instructions: Baking Your Red Velvet Cupcakes
- Expert Tips for Achieving Tender Red Velvet Bites
- Serving Suggestions for Your Classic Red Velvet Dessert
- Storage and Reheating Instructions for Red Velvet Cupcakes
- Frequently Asked Questions About Red Velvet Cupcakes
- Nutritional Estimates for Your Homemade Cupcakes
- Share Your Perfect Red Velvet Cupcakes Experience
Why Our Recipe for Red Velvet Cupcakes Delivers Bakery-Style Results
If you’ve been chasing that elusive, soft, melt-in-your-mouth texture, I want you to stop searching. These aren’t just good; these are truly Moist Red Velvet Cupcakes that rival anything you’d buy at a fancy shop. We are aiming for Bakery Style Cupcakes here, folks, and we achieve it by respecting the science behind the classic flavor!
The secret to that signature velvety cake batter that just sings? It’s all about buttermilk. Trust me on this one, buttermilk is non-negotiable for that light, tender crumb. It reacts perfectly with the baking soda, giving these beauties the lift they need while keeping them unbelievably moist. When you use quality ingredients—especially the right dairy—you get results that just feel special.
Key Components of Perfect Red Velvet Cupcakes
- The Buttermilk Effect: That slight acidity ensures a tender crumb that stays soft for days. It’s the backbone of any great buttermilk cupcakes recipe.
- Just a Hint of Cocoa: We use just a touch of unsweetened cocoa powder. It’s not supposed to taste like a chocolate cupcake; it’s there to deepen the flavor and add complexity, not overwhelm that beautiful red hue.
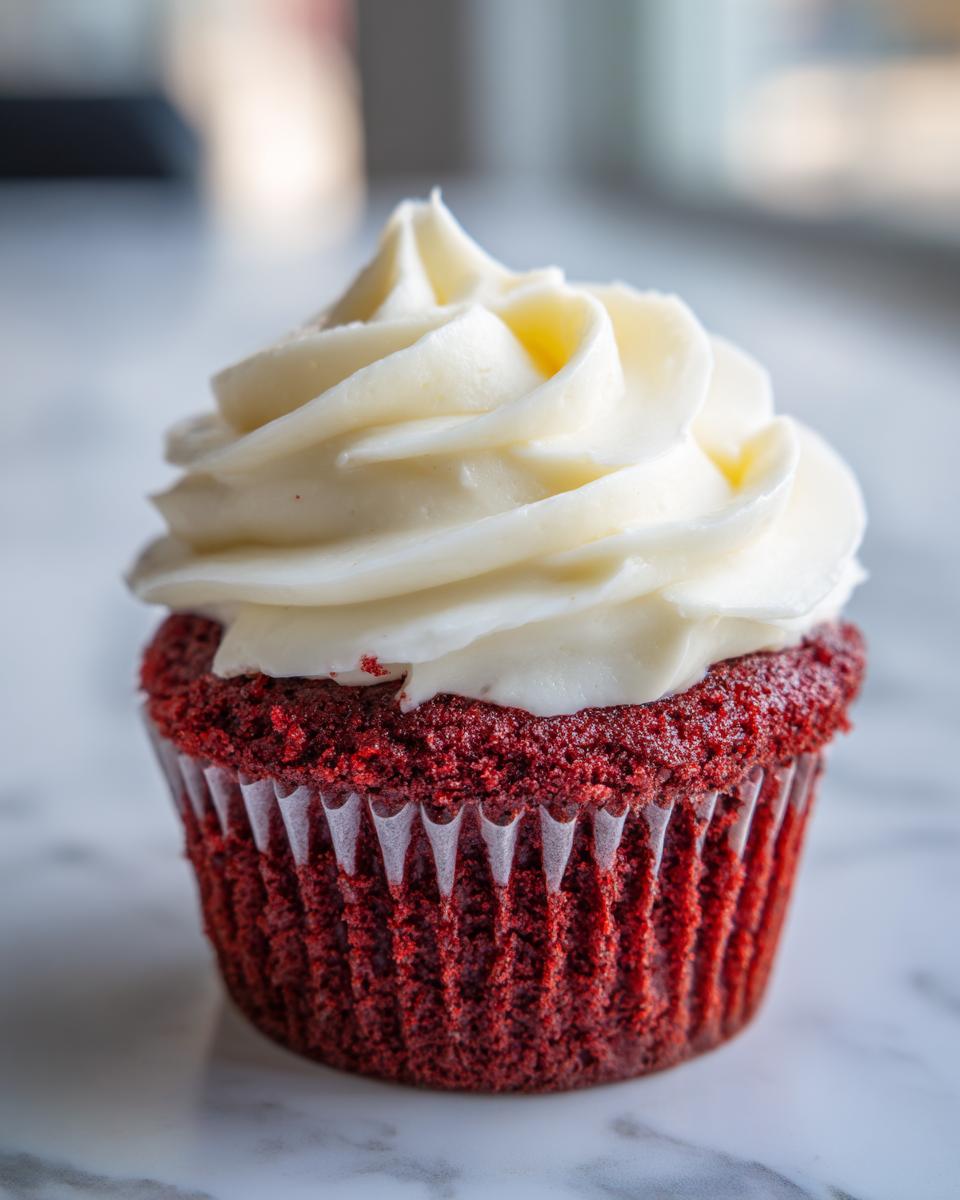
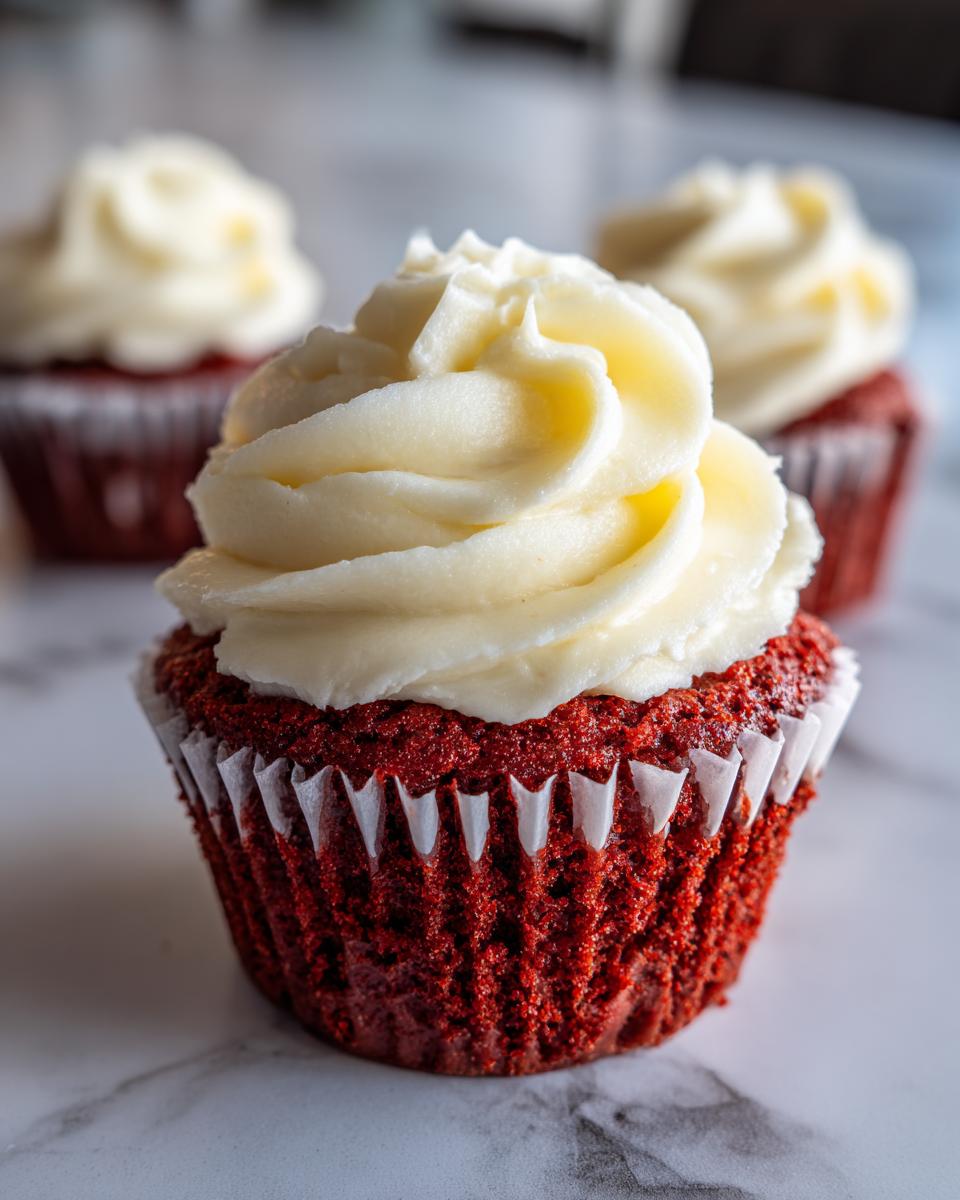
- Vibrant Color: To get that deep, gorgeous red that signals celebration, you’ll need a good amount of food coloring—I highly recommend a gel paste over liquid drops for the best color saturation without thinning out the batter.
Gathering Ingredients for Moist Red Velvet Cupcakes
Alright, now that we know *why* these babies taste so good, we need to talk about what goes into them. When you’re making something as iconic as red velvet cupcakes, precision really matters. Everything needs to be measured out before we even think about turning the mixer on! Precision here is how we ensure that signature moist texture and that trust factor you get from a home baker.
Don’t worry, nothing here is too exotic, but you do need the right amounts of butter—softened, please!—for both the cake and that irresistible topping. If you’ve made a cream cheese pound cake before, you already know the importance of perfectly tempered dairy!
For the Velvety Cake Batter
- 1 1/2 cups all-purpose flour
- 1 teaspoon baking soda
- 1 teaspoon unsweetened cocoa powder
- 1/2 teaspoon salt
- 1 cup granulated sugar
- 1/2 cup unsalted butter, softened
- 2 large eggs
- 1 teaspoon vanilla extract
- 1 cup buttermilk (remember what we said about this!)
- 1 tablespoon red food coloring (gel preferred for color depth)
- 1 teaspoon white vinegar
For the Sweet and Tangy Frosting Recipe
This is the crown jewel of the whole thing. Make sure both your cream cheese and butter are truly softened up so you don’t end up with lumps in your beautiful Cream Cheese Frosting Recipe.
- 1/2 cup cream cheese, softened, for the frosting
- 1/4 cup unsalted butter, softened, for the frosting
- 2 cups powdered sugar, sifted (sifting is key, don’t skip it!)
- 1/2 teaspoon vanilla extract (for frosting)
- 1 tablespoon milk or heavy cream (optional, just to get the right spreadability)
Step-by-Step Instructions: Baking Your Red Velvet Cupcakes
Now for the fun part—getting these beauties into the oven! Remember I said baking from scratch takes a little time, well, 40 minutes total is an absolute steal for homemade cupcakes this delicious. We follow the method to ensure we get those tender treats mentioned in the easy cupcake baking guides. Pay attention to the mixing order; it really locks in that velvety texture we’re after!
Preparing the Cake Batter and Baking
- First thing, get that oven warming up to 350°F (175°C). Line your 12-cup muffin tin with those pretty paper liners—this helps keep things clean, which I always appreciate!
- In one bowl, whisk your dry stuff: flour, baking soda, that little bit of cocoa powder, and salt. Set that aside to wait its turn.
- In a bigger bowl, we cream the half-cup of butter with the sugar until it looks fluffy and light—this creates air pockets! Then beat in the eggs one at a time, followed by the vanilla extract.
- In a small spot, mix your liquids: the buttermilk, the vinegar, and all 1 tablespoon of that essential red food coloring.
- This is crucial: Alternate adding the dry mix and the buttermilk mix into the butter mixture. Start *and* end with the dry ingredients. Mix just until you can’t see white streaks anymore. Seriously, stop mixing right there! Overmixing makes them tough, not velvet.
- Spoon the batter evenly into those 12 liners, filling them about two-thirds full. Bake them for 18 to 20 minutes. Use a pick to check; it needs to come out clean!
Crafting the Classic Cream Cheese Frosting
While those are cooling slightly, we make the star topping, the Sweet and Tangy Frosting. Make sure your cream cheese and the remaining quarter-cup of butter are totally soft. Beat them together until they are absolutely smooth—no lumps allowed! Now, add in your sifted powdered sugar slowly on low speed. Once it’s mostly mixed, crank it up, add the vanilla, and beat until it’s light and luscious. If it seems too stiff to pipe, just dribble in a teaspoon of milk or cream until it’s perfect.
Assembling Your Red Velvet Cupcakes
Step number seven is non-negotiable: let those gorgeous red cakes cool completely! I mean completely. If you try to frost a warm cupcake, even the best Cream Cheese Frosting Recipe will just slide right off into a sad, sweet puddle. Once they are stone cold, you can finally swirl on that glorious topping and get ready for the compliments!
Expert Tips for Achieving Tender Red Velvet Bites
You’ve mastered the “how-to,” but now let’s talk about the “wow!” factor. Getting those rich, decadent results that make people ask, “Did you buy these?” takes a few insider tricks. Since we focus on reliable, home-tested methods here, I want to share how to guarantee that perfect texture for your red velvet cupcakes every time you bake.
This is where you elevate what is already a good recipe into something truly exceptional. Remember, we are aiming for the best of the best in your kitchen, focusing on that unbelievably soft, velvety cake batter!
Color and Crumb Control for Red Velvet Cupcakes
When you mix the buttermilk and vinegar into your batter, you’re setting the stage for that beautiful crumb. The acid in the buttermilk reacts instantly with the baking soda—that’s your lift! That little shot of white vinegar we add just boosts that primary reaction, ensuring you get the fluffiest result possible from your Buttermilk Cupcakes Recipe.
Here’s my biggest baker’s secret for keeping the crumb tender: layering! When you alternate the dry mix and the liquid mix into your creamed butter/sugar base, you are actively managing gluten development. If you dump the liquids in all at once, you overwork the flour and get tough cupcakes. Alternate gently, folding just until combined. You want to see those tiny specks of unmixed flour until the very last gentle stir. That means you haven’t made the batter angry!
Making the Cream Cheese Frosting Hold Its Shape
Look, nobody wants their gorgeous piped swirls turning into cream cheese soup on a warm day. To fight that battle and ensure your Cream Cheese Frosting Recipe looks professional, remember this: temperature is everything.
If your kitchen is warm, try briefly chilling your cream cheese and butter again before you start the frosting—just for about ten minutes. A colder base beats down the heat generated during the mixing process. But honestly, the real game-changer is chilling the cupcakes themselves. Once they are totally cool, stick them in the fridge for 15 minutes before you frost. The slightly cool surface of the cupcake helps that rich, sweet and tangy frosting grip beautifully and hold those perfect ribbons you pipe on top!
Serving Suggestions for Your Classic Red Velvet Dessert
These red velvet cupcakes are showstoppers all on their own, but presentation just elevates the fun! Since they are so rich, they make incredible centerpieces for any party. They are absolutely essential for Valentine Day Cupcakes, but honestly, they work for birthdays or fancy weekend get-togethers too.
If you’re serving them as part of a dessert buffet, keep the pairings simple so the chocolate-buttermilk flavor shines. A tiny, intensely strong cup of coffee cuts through the richness of the cream cheese frosting perfectly. Sometimes, I just serve them alongside a little bowl of fresh raspberries—the tartness balances everything out beautifully. They truly are the perfect desserts for celebrations!
Storage and Reheating Instructions for Red Velvet Cupcakes
Okay, you’ve made these gorgeous, tender treats, and now the big question: how do we keep them tasting just as fresh tomorrow as they do today? Since we use real cream cheese in that luscious topping, refrigeration is going to be your best friend, but we have to be smart about it so they don’t dry out!
Keeping Them Fresh in the Fridge
Because that sweet and tangy frosting is dairy-based, these red velvet cupcakes need to live in the refrigerator if you plan on keeping them more than a day. Pop them into an airtight container first. If you are stacking them, use a sheet of parchment paper between layers so the frosting doesn’t stick and get messed up. They’ll be perfectly fine for up to four days this way.
Bringing the Moisture Back!
Here’s the trick I learned the hard way: eating a refrigerated cupcake is a completely different experience! They firm up when they are cold, and the cake won’t taste as soft or as moist.

So, before you serve them, pull them out about 30 to 45 minutes beforehand. Letting them sit on the counter lets the butter in both the cake and the cream cheese frosting recipe soften up just enough. This small wait time is essential for enjoying that true, velvety texture we worked so hard to achieve in our homemade cupcakes.
Can I Freeze These Tender Red Velvet Bites?
Yes, you absolutely can freeze them, which is great if you are batch baking for a holiday! I find they freeze better unfrosted, but if you *must* freeze them frosted, make sure the frosting is swirled nicely and that you freeze them solid before wrapping. Wrap each one tightly in plastic wrap, and then slip them into a freezer bag. They should last happily for about a month! Thaw them overnight in the fridge, and then let them come to room temperature as I mentioned above.
Frequently Asked Questions About Red Velvet Cupcakes
I get so many wonderful questions once you all start baking these! It’s great that you’re learning the little tricks on how to approach a deeply loved classic red velvet dessert. Here are a few of the things I hear most often when people tackle this recipe for the first time. These are my best tips for making sure your homemade cupcakes are perfect!
Can I make these Red Velvet Cupcakes without buttermilk?
Oh, I know buttermilk isn’t always in everyone’s fridge! While the real deal gives you the absolute best result for a true Buttermilk Cupcakes Recipe, you can make a quick substitute if you absolutely must. Just take 1 cup of regular milk—whole milk works best—and stir in 1 tablespoon of white vinegar or lemon juice. Let that sit on the counter for about five to ten minutes until it looks slightly curdled. That’s your homemade buttermilk substitute!
However, I need to be honest: the flavor profile isn’t quite the same. Buttermilk has a deeper tanginess that works wonders with the cocoa. So, while the substitute will work in a pinch for these red velvet cupcakes, if you want that signature velvety texture, make a quick trip to the store for the real stuff!
How do I get the brightest red color in my red velvet cupcakes?
This is all about the coloring choice! You’re working against a tiny bit of brown from the cocoa and the natural color of the vanilla and butter. If you use those thin, watery liquid food colorings, you need way too much, and that extra liquid thins out your beautifully balanced velvety cake batter.
My advice—and everyone who pins these recipes agrees—is to use a high-quality gel food coloring. Gel concentrates the pigment, so you use less product while achieving that deep, stunning color you see in the pictures. And don’t worry about covering up the subtle chocolate hint; the cocoa is just there for flavor support, not to darken the cake significantly!
Can I freeze the Moist Red Velvet Cupcakes?
Yes, freezing is one of my favorite ways to prep ahead for parties! If you are making these a week ahead, I strongly recommend baking and cooling the moist red velvet cupcakes completely, then storing them unfrosted in an airtight container in the freezer. They stay perfect for about a month!
If you absolutely must freeze them frosted—say, you’ve already piped that gorgeous sweet and tangy frosting on top—make sure you freeze them uncovered until the frosting is rock solid. Then, wrap them individually in plastic wrap before putting them in a freezer bag. To serve, thaw them overnight in the fridge, and then let them sit out on the counter for about 45 minutes before anyone digs in. That time on the counter brings back all the softness!
If you’re looking for more quick baking fixes, check out my guide on easy dessert ideas that save you time later!
Nutritional Estimates for Your Homemade Cupcakes
Now, I know some of you are like me—we bake because we love sharing, and the nutrition label is secondary! But for those of you keeping track, I wanted to give you a general idea of what’s in these gorgeous treats. Remember, these are just estimates based on the ingredients we used to make our 12 perfect red velvet cupcakes.
Since we are talking about rich butter, sugar, and that luscious cream cheese topping, they are certainly a treat! Think of this as the guiding information, not a strict rulebook. As always, if you make huge substitutions, the numbers are going to change!
Here is the breakdown for one single, perfectly frosted, velvety cake bite:
- Serving Size: 1 cupcake
- Calories: 350
- Sugar: 35g
- Sodium: 250mg
- Fat: 18g
- Saturated Fat: 10g
- Unsaturated Fat: 8g
- Trans Fat: 0g
- Carbohydrates: 45g
- Fiber: 1g
- Protein: 4g
- Cholesterol: 55mg
See? Delicious, but definitely a special occasion item! Treat yourself! That’s what these classic red velvet dessert recipes are for, right?
Share Your Perfect Red Velvet Cupcakes Experience
Well, we did it! We took humble ingredients and turned them into a batch of show-stopping, unbelievably moist red velvet cupcakes. Now, the best part of sharing a recipe is seeing how it turns out in your kitchens! Sarah Jane always believed that baking should be a conversation, not a lecture, so I’m just dying to hear what you think.
Once you’ve tasted that amazing combination of rich cake and that perfectly sweet and tangy frosting, please come back and tell me all about it. Did you use them for Valentine’s Day, or were they just a random Tuesday treat? No judgment here—any day is a good day for a Classic Red Velvet Dessert!
- Tell Me How They Tasted! Did you think they were better than store-bought? Did the buttermilk really make a difference for you? Drop a rating down below so other bakers know what to expect!
- Snap a Pic! If you managed to get a good shot of your beautiful red color and fluffy frosting swirl, I’d love to see it. Tag Cookin’ Corner if you share photos on social media. I love seeing all your successes!
If you want to learn more about our mission to capture the heart of American home cooking, you can read up on us over here at the Cookin’ Corner story. Happy baking, and thank you so much for trusting me with your oven!
PrintThe Ultimate Moist Red Velvet Cupcakes with Classic Tangy Cream Cheese Frosting
Bake rich, moist red velvet cupcakes with a hint of cocoa flavor. This recipe yields tender, velvety cake topped with a smooth, tangy cream cheese frosting, perfect for any celebration.
- Prep Time: 20 min
- Cook Time: 20 min
- Total Time: 40 min
- Yield: 12 servings 1x
- Category: Dessert
- Method: Baking
- Cuisine: American
- Diet: Vegetarian
Ingredients
- 1 1/2 cups all-purpose flour
- 1 teaspoon baking soda
- 1 teaspoon unsweetened cocoa powder
- 1/2 teaspoon salt
- 1 cup granulated sugar
- 1/2 cup unsalted butter, softened
- 2 large eggs
- 1 teaspoon vanilla extract
- 1 cup buttermilk
- 1 tablespoon red food coloring (gel preferred)
- 1 teaspoon white vinegar
- 1/2 cup cream cheese, softened
- 1/4 cup unsalted butter, softened (for frosting)
- 2 cups powdered sugar, sifted
- 1/2 teaspoon vanilla extract (for frosting)
- 1 tablespoon milk or heavy cream (optional, for frosting consistency)
Instructions
- Preheat your oven to 350°F (175°C). Line a 12-cup muffin tin with paper liners.
- In a medium bowl, whisk together the flour, baking soda, cocoa powder, and salt. Set this dry mixture aside.
- In a large bowl, cream together the 1/2 cup softened butter and granulated sugar until light and fluffy. Beat in the eggs one at a time, mixing well after each addition. Stir in 1 teaspoon vanilla extract.
- In a small bowl, mix the buttermilk, red food coloring, and white vinegar together.
- Alternate adding the dry ingredients and the buttermilk mixture to the butter mixture, beginning and ending with the dry ingredients. Mix only until just combined; do not overmix the batter.
- Divide the batter evenly among the 12 cupcake liners, filling each about two-thirds full.
- Bake for 18 to 20 minutes, or until a wooden pick inserted into the center comes out clean. Let the cupcakes cool in the pan for 5 minutes before transferring them to a wire rack to cool completely.
- To make the frosting, beat the softened cream cheese and 1/4 cup softened butter together until smooth. Gradually add the sifted powdered sugar, mixing on low speed until incorporated. Add 1/2 teaspoon vanilla extract. Beat on medium speed until light and fluffy. Add milk or cream one teaspoon at a time if needed to reach a spreadable consistency.
- Once the cupcakes are completely cool, frost each one generously with the cream cheese frosting.
Notes
- For the most vibrant color, use a high-quality gel food coloring instead of liquid drops.
- Buttermilk reacts with the baking soda to give these cupcakes their signature tender crumb. Do not substitute with regular milk if you can avoid it.
- For bakery-style results, chill your finished cupcakes briefly before frosting; this helps the frosting hold its shape better.
Nutrition
- Serving Size: 1 cupcake
- Calories: 350
- Sugar: 35g
- Sodium: 250mg
- Fat: 18g
- Saturated Fat: 10g
- Unsaturated Fat: 8g
- Trans Fat: 0g
- Carbohydrates: 45g
- Fiber: 1g
- Protein: 4g
- Cholesterol: 55mg