
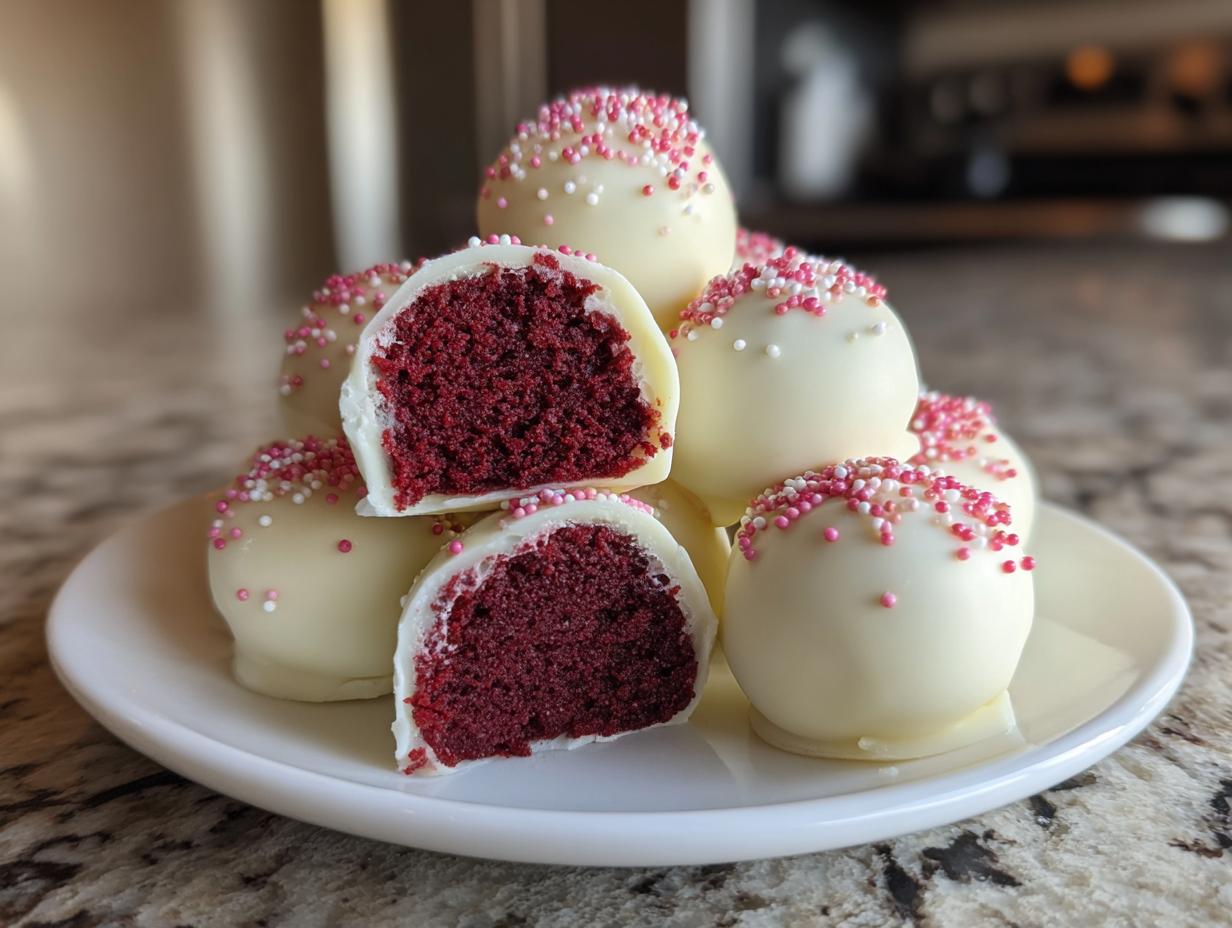
Oh, there’s just something magical about desserts that fit perfectly on a spoon or, even better, on a stick! They take all the decadent flavor we love and turn it into something adorable and completely manageable. Forget messy slices of cake; we are diving headfirst into the world of red velvet cake pops.
I’m Sarah Jane Thompson, and here at Cookin’ Corner, we stick to classics that just work, passed down from my Midwest home kitchen days. This recipe—what I call the “Easy & Moist Red Velvet Cake Pops with Perfect White Chocolate Coating”—is my go-to when I need foolproof, colorful red velvet dessert ideas. We use a simple cake mix hack for the cake part, but trust me, the result is anything but store-bought. These little beauties are rich, unbelievably moist, and absolutely essential for birthday party desserts or any time you want a festive pop of color! If you loved my red velvet cake mix cookies, these are going to be your next obsession.
If you’re looking for how to make perfect cake pops without all the fuss, you’ve landed in the right spot. Seriously, once you try this method, you’ll see why these homemade cake pops become a staple in my baking rotation.
- Why You Will Love These Easy Red Velvet Cake Pops
- Gathering Ingredients for Your Red Velvet Cake Pops
- Essential Equipment for How to Make Perfect Cake Pops
- Step-by-Step Instructions for Moist Red Velvet Cake Pops
- Tips for Success with Cream Cheese Frosting Cake Pops
- Variations and Festive Red Velvet Dessert Ideas
- Storage and Reheating for Your Red Velvet Cake Pops
- Frequently Asked Questions About Red Velvet Cake Pops
- Nutritional Estimates for Homemade Cake Pops
- Share Your Perfect Red Velvet Cake Pops Experience
Why You Will Love These Easy Red Velvet Cake Pops
I promise, these little treats are champions. They are everything you want when you need a reliable sweet for sharing. Here is why they earned a permanent spot in my rotation:
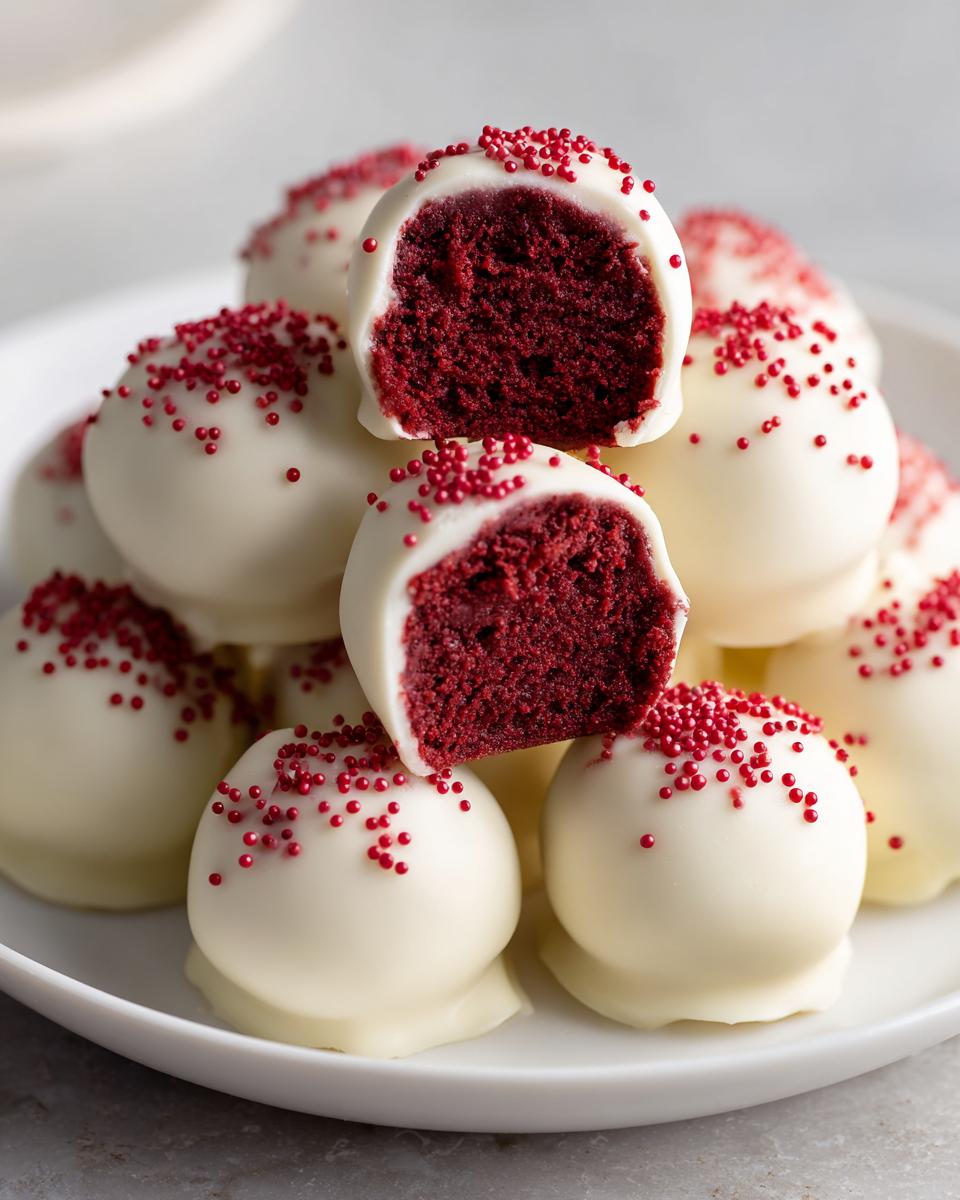
- They produce the most moist red velvet treats, thanks to being paired with tangy cream cheese frosting.
- These are some of the best cake pop recipes easy enough for a baking novice to tackle.
- They use shortcuts like boxed mix and frosting tubs, saving you tons of time.
- They look incredibly festive, making them perfect festive bite sized desserts for any holiday table.
- Cleanup is a breeze compared to frosting a full-sized cake! Check out my moist red velvet cupcakes recipe if you want the full-size version, too!
Gathering Ingredients for Your Red Velvet Cake Pops
When it comes to treats like these, using the right ingredients makes a world of difference, even when we’re taking a little shortcut with the cake mix! I like to keep everything organized before I start mixing, so nothing gets forgotten. Since these are essentially three parts—cake, frosting binder, and coating—it’s easy to keep track.
You’ll need this for the cake base and filling:
- One box (15.25 ounces) of red velvet cake mix. Remember, you still need the eggs, oil, and water that the box calls for to bake it!
- One tub (8 ounces) of store-bought cream cheese frosting. If you have time, my homemade cream cheese cookies frosting recipe doubles as an amazing binder, but the tub works beautifully here too.
For that gorgeous shell, gather:
- 12 ounces of white candy coating wafers, or use good quality white chocolate melting wafers.
- A teaspoon of coconut oil or shortening—this is optional but I always keep it handy for thinning the chocolate just right.
- And of course, all your fun toppings, like red sprinkles, and the sticks for dipping!
Essential Equipment for How to Make Perfect Cake Pops
Okay, gathering your tools is half the battle won, especially when you are working with delicate pops! Believe me, having everything lined up means you won’t rush the steps and end up with a crumbly mess. You want smooth sailing when dipping!
Here is the short list of what you absolutely need ready to go:
- A big mixing bowl—you need room to mush everything together!
- Parchment paper to line your baking sheets; nothing sticks to it.
- Sturdy cake pop sticks.
- A styrofoam block or a dedicated cake pop stand to hold them upright while they dry.
Step-by-Step Instructions for Moist Red Velvet Cake Pops
Now for the fun part! Making these decadent treats is a genuine thrill, especially when you see that rich red color coming together. We’re going to move through this slowly, because what makes these the ultimate red velvet cake pops is patience during the chilling stages. Don’t rush these steps, and you’ll have perfect, non-cracking treats every single time.
Baking and Crumb Preparation
First things first, bake your red velvet cake according to the box directions, typically in a 9×13 pan. Once it’s baked, you must let it cool completely—I mean totally cold! Then, crumble that cake up into a large bowl. Take a moment to pick out any hard-looking edges or bits that look burnt; we only want soft, beautiful cake for our pops.
Creating the Red Velvet Cake Pops Dough
This is where the magic happens for texture! Dump that entire tub of cream cheese frosting right into your cake crumbs. Don’t be shy—use it all! Now, get your hands in there and mix it up. You have to work it until it starts sticking together really well, looking almost like thick, slightly sticky playdough. If it’s too loose, you know that it’ll crumble when you try to roll it.
Rolling and Chilling the Cake Balls
Once that dough is made, start rolling uniform little balls. I aim for about 1 to 1.5 inches—you want them about the size of a big gumball. Line a baking sheet with parchment paper and place all your lovely balls on it. Then? Into the fridge they go for at least 30 minutes. Seriously, chill them until they are ROCK hard. This sets the binder and stops them from dissolving on you later!
Mastering the White Chocolate Cake Pops Coating
While the balls are chilling, prepare your coating. Melt your white candy wafers in the microwave using 30-second bursts, stirring really well in between each blast until it’s perfectly smooth. If it looks thick or reluctant to pour, stir in just a tiny bit of coconut oil or shortening. This makes thin coatings for your white chocolate cake pops so much easier to dip in! We want it smooth, not gloppy.

Dipping and Setting the Red Velvet Cake Pops
Here’s a trick my friend taught me: take the tip of your stick, dip it just a tiny bit into the melted coating, and then pop that stick into a chilled cake ball. Pop the sheet back in the fridge for about 5 to 10 minutes. This basically glues the stick in place! After that, hold the stick, dip the whole ball in the chocolate, swirl it gently, and lift it out. Tilt your bowl and tap the stick lightly against the rim to shake off any big drips. Then, poke it into your drying stand right away!
If you want to see my inspiration for ultra-moist red velvet everything, you should check out my red velvet cheesecake showstopper recipe!
Tips for Success with Cream Cheese Frosting Cake Pops
I’ve learned a few things over the years making these—mostly the hard way, when a pop decided to crumble right as it hit the chocolate! The texture of your final cream cheese frosting cake pops really starts with how soft that initial frosting is. If your store-bought frosting feels really soupy, you might need to chill the cake/frosting mixture for an extra 15 minutes before rolling. A firmer dough is your best friend!
Also, don’t stress if your beautiful white coating gets thick midway through. This happens to everyone! Just pop the bowl back into the microwave for 10 seconds, stir it well, and it should loosen right up. If it’s still stiff, add just a few more drops of coconut oil or shortening. This helps it flow beautifully, preventing thick globs around the base of your pop. You can also peek at another fantastic recipe for inspiration over at this site if you need a visual check on coating consistency. And hey, if you are having trouble with the cake part, remember how much I love turning that flavor into cake mix cookies—that recipe is totally foolproof!
Variations and Festive Red Velvet Dessert Ideas
This recipe is so versatile; it’s not just for birthdays! Because the color is so vibrant, these are ultimate festive bite sized desserts. For Valentine’s Day, I sometimes use a heart-shaped cookie cutter to trim the cooled cake before crumbling it—it’s extra work, but wow, does it look cute when dipped!
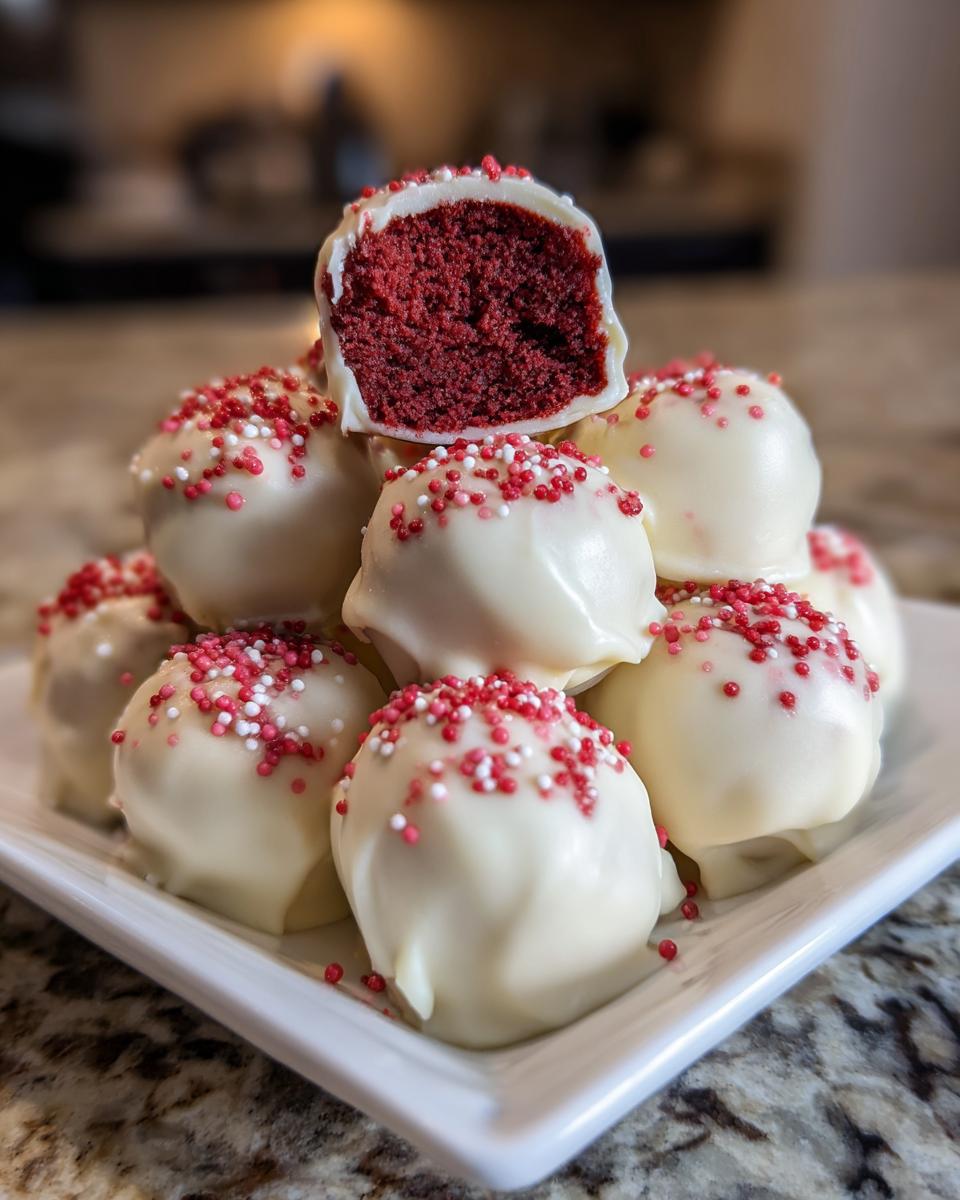
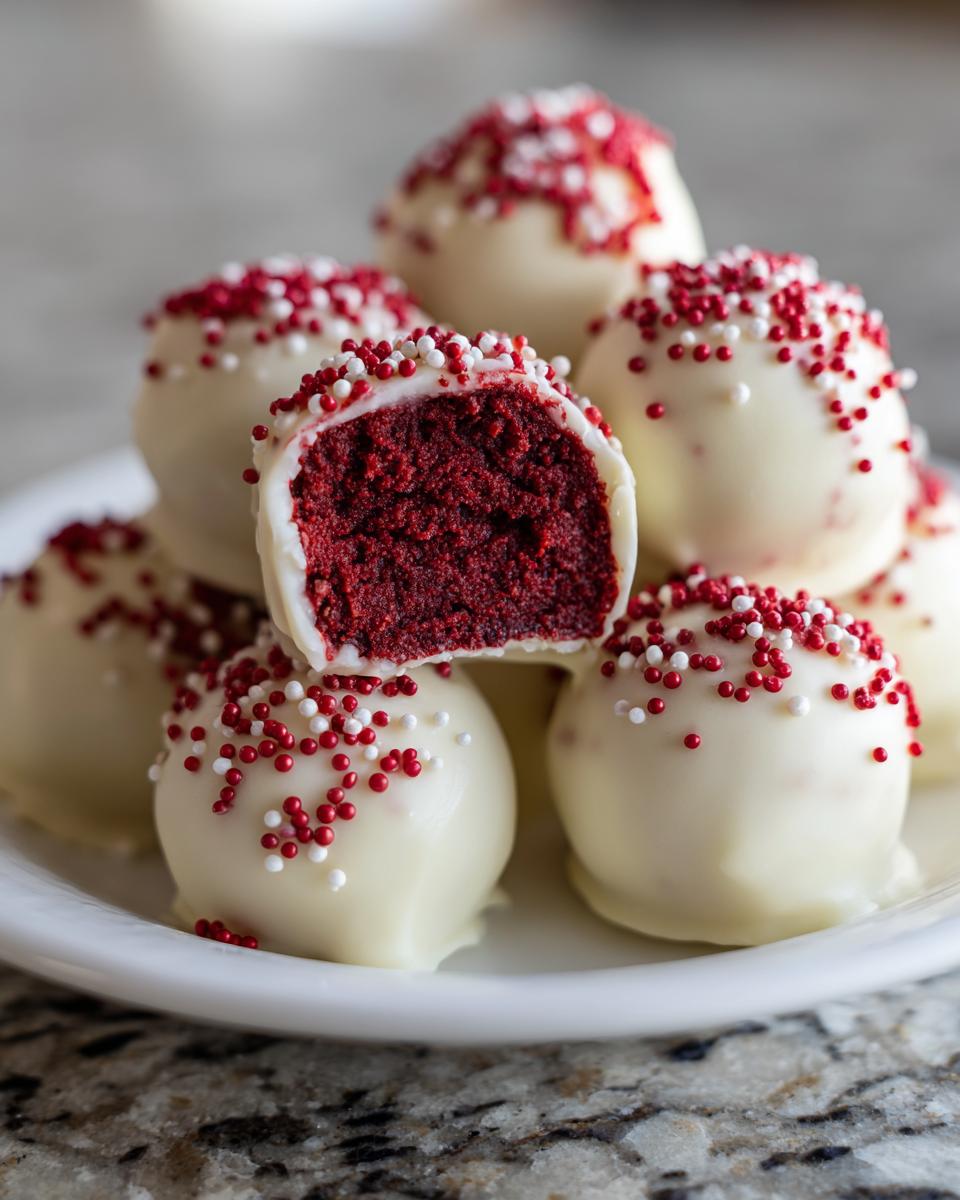
If you aren’t crazy about white chocolate, don’t worry! You can absolutely use dark chocolate or even a mix of the two. Try dipping half in white and half in dark chocolate, then drizzle the contrasting color over the top for a super professional look. For true red velvet dessert ideas, dip them in white and then dust them immediately with crushed pecans or fine red sprinkles before the coating sets. They disappear fast at any holiday gathering. We even sometimes roll the dough balls in toasted coconut before dipping!
If you want something flatter, you can totally skip the sticks and just make chocolate covered cake balls! Just roll them and chill them really well, then dip them and let them set on parchment. For other moist red velvet inspiration, you absolutely must check out my red velvet cheesecake brownies recipe, too!
If you want to see how another great baker handles these for Valentine’s gifting, take a peek at this lovely version—they have some awesome ideas for presentation!
Storage and Reheating for Your Red Velvet Cake Pops
Once you’ve made these stunning little treats, the last thing you want is for them to go bad too soon! Since we are using cream cheese frosting, these do need a little extra care compared to a standard truffle. I always store finished pops in an airtight container in the refrigerator.
They stay perfectly good for about a week if they are sealed up tight. The main thing to watch for is condensation; if you are pulling them out for a party, give them about 15 minutes at room temperature before serving, but don’t leave them out too long, especially if the room is warm. You definitely don’t want to try reheating these, though! They are best enjoyed cool and ready to eat just as they are. If you’re looking for another make-ahead dessert, my recipe for easy no-bake mini cheesecake is a fantastic option!
Frequently Asked Questions About Red Velvet Cake Pops
I know when you read through a recipe, your brain immediately starts thinking up substitutions or worrying about things going wrong! That’s totally normal. Since these make such great birthday party desserts, I have answers to the main questions that pop up.
Can I skip the chilling step when making red velvet cake pops?
Oh, please don’t! I know chilling seems like a waste of time when you are excited to dip, but it’s non-negotiable if you want success. If you skip chilling, those wonderful cake balls will be too soft. When you dip them into the warm melted chocolate, they will almost instantly turn into a soggy, crumbly mess at the bottom of your bowl. Seriously, make sure they are firm to the touch!
What is the difference between cake pops and chocolate covered cake balls?
It’s a super easy distinction, really! The filling—the cake and frosting mixture—is often exactly the same. The way we make these treats, they are technically red velvet cake pops because we put them on sticks! If you make the exact same mixture but skip the sticks altogether, then you have delicious chocolate covered cake balls or truffles. Both are amazing, but the stick makes it easier for grabbing at parties.
Can I use regular chocolate chips instead of candy coating for my red velvet cake pops?
You technically *can*, but I strongly advise against it unless you are an experienced baker! Standard chocolate chips have to be tempered to get that nice, hard, shiny shell that snaps when you bite it. If you just melt regular chips, they cool down soft, sticky, and often look streaky or grayish on the pop. The candy coating wafers or melting wafers are designed for easy dipping—they set up fast and hard without needing any fancy tempering techniques. For the easiest result, stick with the wafers!
If you’re looking for other quick treats, my cake mix cookie bars are another great bake-once-and-go recipe!
For more great tips on coatings, you can also check out the details on this site!
Nutritional Estimates for Homemade Cake Pops
Now, I know some of you are watching those numbers, and while these are made with love, they definitely count as a treat! This estimate is based on the full recipe yielding 24 pops. Please remember these are just close guesses since the amount of frosting you use or the exact cake mix brand changes things up.
- Serving Size: 1 cake pop
- Calories: About 250 (Give or take!)
- Total Fat: Around 15g
- Carbohydrates: Roughly 28g
- Protein: About 3g
If you want another delicious, slightly lighter-feeling dessert that still packs a punch, my strawberry cheesecake dip is always a huge hit!
Share Your Perfect Red Velvet Cake Pops Experience
Well, that’s how I make my favorite red velvet cake pops! Hopefully, you are excited to grab your own ingredients and get started. These are truly marvelous for any party!
I would absolutely love to hear how yours turned out! Did you use fun colors for the coating? Are these going to be for Valentine’s Day sweets or just a Tuesday treat? Head down to the comments below, give this recipe a good five stars if you loved it, and share your decorating successes with me. Don’t forget to check out my recipe for the best classic apple fritter recipe too, for another cozy bake!
If you’re looking for even more fun ideas, you can see some inspiration over at this site!
PrintEasy & Moist Red Velvet Cake Pops with Perfect White Chocolate Coating

Make delicious, bite-sized red velvet cake pops using cake mix and cream cheese frosting. These homemade cake pops are coated in smooth white chocolate for a festive, shareable dessert perfect for birthdays or holidays.
- Prep Time: 30 min
- Cook Time: 30 min
- Total Time: 1 hour 40 min
- Yield: 24 cake pops 1x
- Category: Dessert
- Method: No Bake Assembly
- Cuisine: American
- Diet: Vegetarian
Ingredients
- 1 box (15.25 oz) red velvet cake mix (plus ingredients listed on box for cake)
- 1 tub (8 oz) cream cheese frosting (or homemade cream cheese frosting)
- 12 oz white candy coating wafers (or white chocolate melting wafers)
- 1 teaspoon coconut oil or shortening (optional, for thinning coating)
- Red sprinkles or crushed graham crackers (optional, for decoration)
- Sticks for cake pops
Instructions
- Bake the red velvet cake according to the package directions for a 9×13 inch pan. Let the cake cool completely on a wire rack.
- Crumble the cooled cake into a large bowl. You want fine crumbs, removing any hard edges or burnt spots.
- Add the entire tub of cream cheese frosting to the cake crumbs. Mix by hand until the mixture is fully combined and holds together when pressed. This mixture should resemble thick dough.
- Roll the cake and frosting mixture into uniform balls, about 1 to 1.5 inches in diameter. Place the balls on a parchment-lined baking sheet.
- Chill the cake balls in the refrigerator for at least 30 minutes, or until firm. This step prevents them from falling apart when dipped.
- Prepare the coating: Melt the white candy coating wafers according to package directions, usually in a microwave-safe bowl in 30-second intervals, stirring well after each interval. Stir in the coconut oil or shortening if the coating is too thick to pour easily.
- Dip the tip of a cake pop stick into the melted coating, then insert the stick about halfway into a chilled cake ball. Return the sheet to the refrigerator for 10 minutes to set the stick in place.
- Hold the stick and dip the entire cake ball into the melted coating, rotating gently to cover completely. Tap the stick lightly against the side of the bowl to let excess coating drip off.
- Immediately apply any desired decorations, like red sprinkles, before the coating sets.
- Place the finished cake pop upright in a styrofoam block or cake pop stand to dry completely.
Notes
- For the best texture, use a slightly firmer frosting. If your frosting is very soft, chill the cake mixture longer before rolling.
- If the white chocolate coating becomes too thick while dipping, reheat it briefly or add a few more drops of coconut oil.
- To make these no bake cake balls, you can substitute the baked cake with a store-bought red velvet cake or red velvet brownies.
Nutrition
- Serving Size: 1 cake pop
- Calories: 250
- Sugar: 25g
- Sodium: 180mg
- Fat: 15g
- Saturated Fat: 8g
- Unsaturated Fat: 7g
- Trans Fat: 0.5g
- Carbohydrates: 28g
- Fiber: 1g
- Protein: 3g
- Cholesterol: 20mg