
Oh, my sweet friends, if you’ve ever believed that life is too short for boring desserts, you are absolutely in the right place today! Here at Cookin’ Corner, we live for those incredibly indulgent bakes that stop conversation dead in its tracks. We are talking about the kind of dessert that uses every ounce of effort for a payoff that’s just breathtaking. That’s exactly what we have with these utterly decadent red velvet cheesecake brownies.
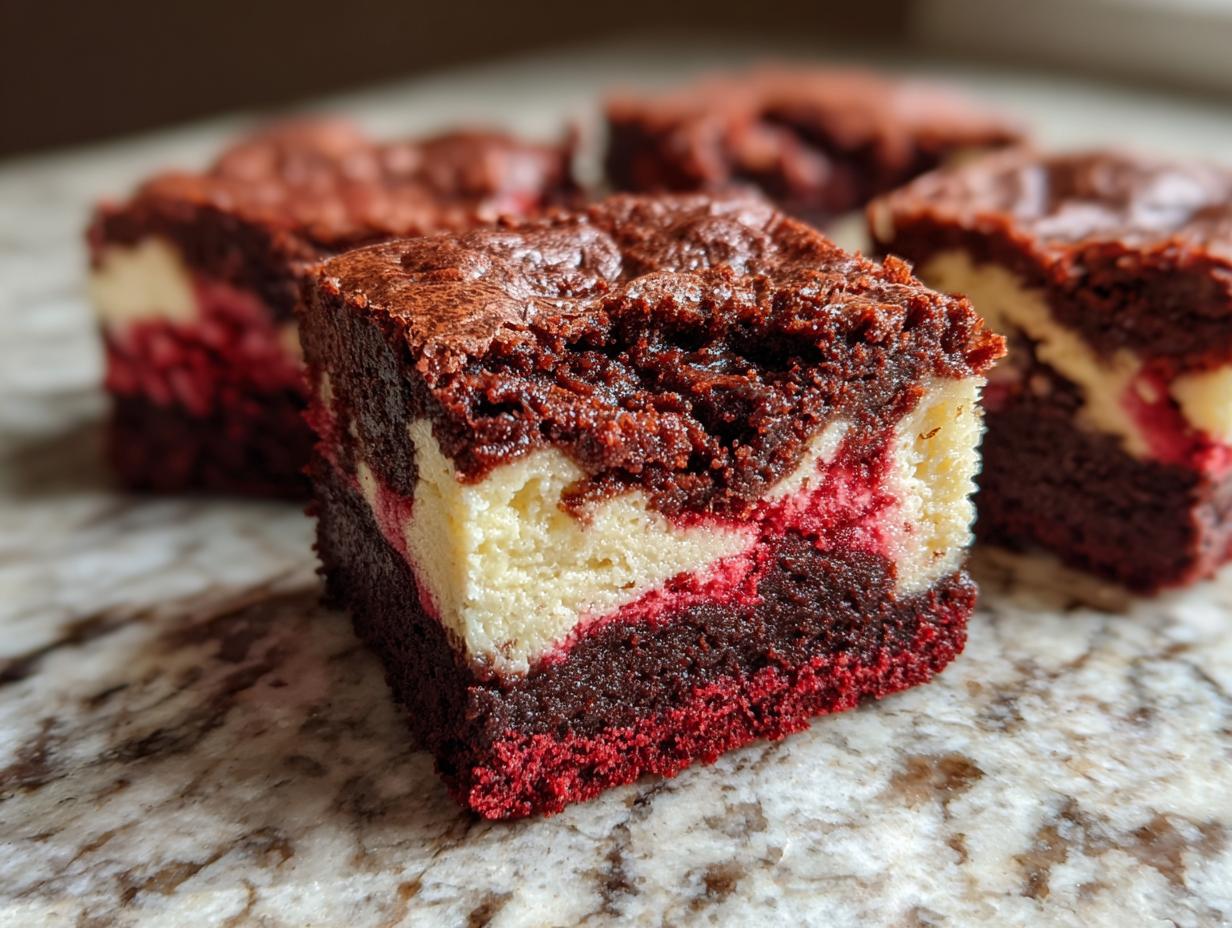
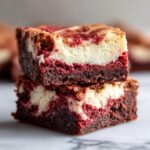
This recipe is the ultimate fusion dessert we perfected in our test kitchen. Imagine a rich, fudgy brownie layer meeting a creamy, tangy ribbon of cheesecake, all marbled together into a stunning visual treat. It combines two of the best things on earth, and after years of making sure our classics deliver pure comfort—like our famous Hot Chocolate Brownies—I promise you, this combination is pure magic. You’ll want to make these for your next big celebration!
- Why This Red Velvet Cheesecake Brownies Recipe is a Showstopper Dessert
- Gathering Ingredients for Your Red Velvet Cheesecake Brownies
- Step-by-Step Instructions for Red Velvet Cheesecake Brownies
- Tips for the Best Cheesecake Brownie Recipe Success
- Making Your Red Velvet Cheesecake Brownies Special for Holidays
- Storage and Reheating for Your Creamy Swirl Brownies
- Frequently Asked Questions About Red Velvet Cheesecake Brownies
- Estimated Nutrition for One Square of Red Velvet Cheesecake Brownies
- Share Your Red Velvet Favorites Creations
Why This Red Velvet Cheesecake Brownies Recipe is a Showstopper Dessert
If you’ve ever needed a recipe to truly wow a crowd, stop searching right now. These red velvet cheesecake brownies are what I personally call a showstopper dessert. Why? Because they aren’t just good; they are the ultimate brownie fusion! We spent weeks perfecting the balance here at Cookin’ Corner to make sure you get that intensely fudgy texture from the red velvet base right next to the smooth, slightly tangy cheesecake. It’s a combination that just sings! Many folks find incredible versions online, like the one at Cheff Recipes, but ours is tested right here at home.
Trust me, getting that perfect marble effect takes practice, but our rigorous testing ensures this doesn’t turn into a muddy mess. We figured out exactly when to stop mixing so the layers stay distinct and gorgeous.
Achieving the Perfect Cheesecake Swirl Recipe
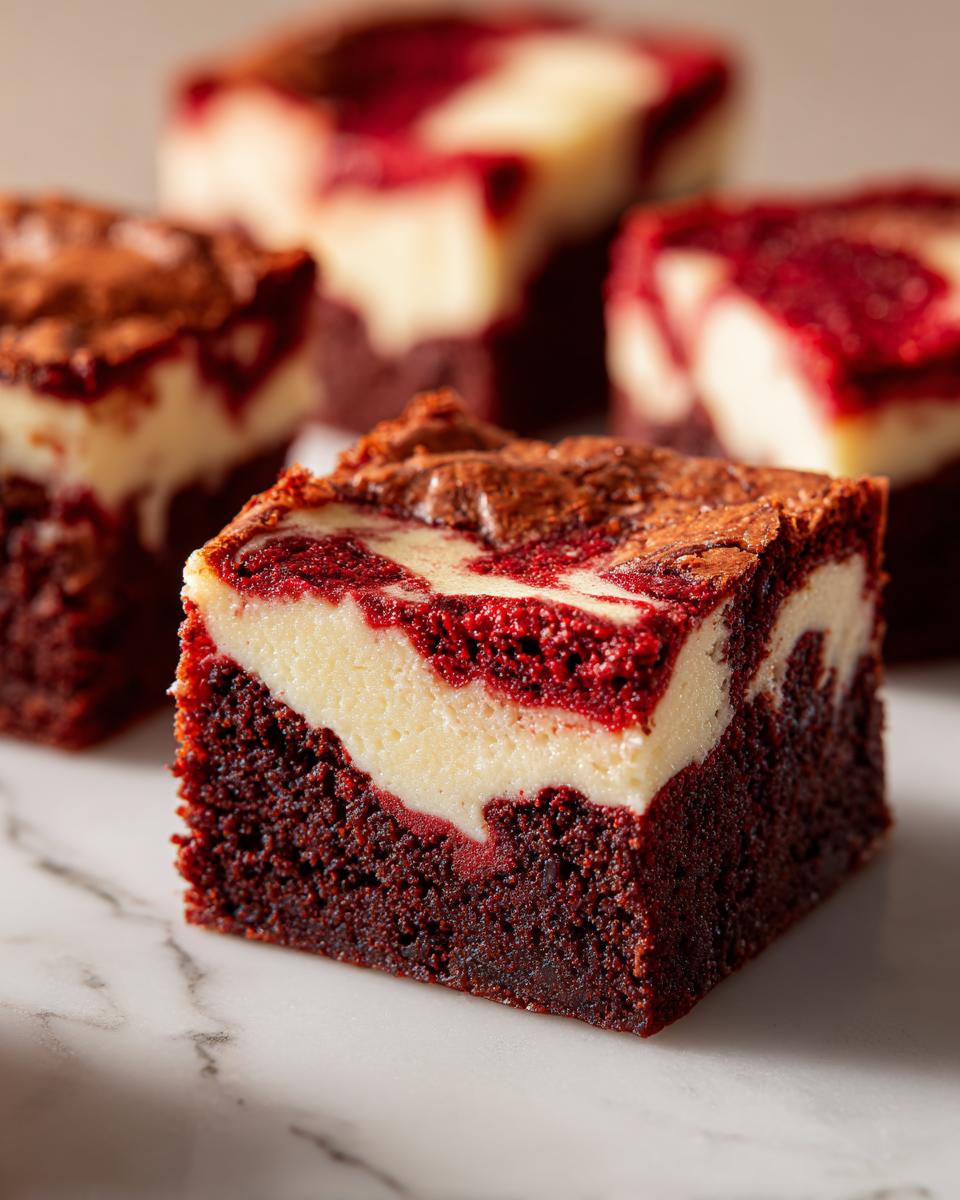
The secret to that beautiful marbling, the one you see in all the pretty photos, is keeping things calm! You absolutely must not overmix the cheesecake filling into the brownie batter. Once you dollop that creamy mixture on top, grab a knife and gently cut through the layers maybe three or four times—no more! That quick, light pass is all it takes to get a beautiful, creamy swirl without blending everything away.
Gathering Ingredients for Your Red Velvet Cheesecake Brownies
Alright, now that you’re excited about making these gorgeous red velvet cheesecake brownies, let’s talk supplies! The key to success—and what keeps this whole thing from getting too fussy—is separating our ingredients right from the start. We have two distinct players here: the tangy, smooth cheesecake part and the rich, fudgy red velvet brownie batter. Having everything ready before you start mixing makes the whole process feel smooth, like pouring water!
When I make my cream cheese pound cake recipe, I always lay everything out first, and I use the exact same method here. We want everything to blend without any fighting! Don’t even think about grabbing that cream cheese straight from the fridge for the filling—it needs time to soften up. We want zero lumps, trust me!
Ingredients for the Creamy Cheesecake Layer
This little layer is the tang that cuts through all that rich velvet flavor. Remember, that cream cheese has to be truly soft, bordering on squishy, so it whips up beautifully smooth. You won’t need much else!
- 8 ounce package cream cheese, softened (This is non-negotiable for smoothness!)
- 1/4 cup granulated sugar
- 1 large egg
- 1 teaspoon vanilla extract
Ingredients for the Rich Red Velvet Dessert Brownie Base
Even though we are using a box mix to keep things wonderfully fast, we add a few little touches to make sure these are truly rich red velvet dessert quality, not just cake from a box. My secret weapon for that classic tang and color pops right here:
- 1 cup (2 sticks) unsalted butter, melted
- 2 cups granulated sugar
- 4 large eggs
- 1 teaspoon vanilla extract
- 1 box (15.25 ounces) red velvet cake mix
- 1/3 cup vegetable oil
- 1/2 cup water
- 2 large eggs (the extra ones for the brownie batter structure!)
- 1 teaspoon white vinegar (This helps activate the tang, just like true from scratch baking!)
- 1 teaspoon red food coloring (optional, but if you want that deep, theatrical red, go ahead and add it in!)
Step-by-Step Instructions for Red Velvet Cheesecake Brownies
Okay, this is where the fun really begins! Making our red velvet cheesecake brownies feel like they have two completely separate personalities that need to be introduced gently. Don’t feel intimidated by the layers; we are just layering wet things on top of wet things, and we are going to be very patient because these are worth the wait. Remember, if you’re coming from a place of loving classic baking like my red velvet brownies, this is just an extra special step!
Preparing the Pan and Cheesecake Filling
First things first, get that oven humming at 350°F (175°C). I always use a 9×13 inch pan for this, and you absolutely must line it with parchment paper first, leaving that overhang on the sides. That overhang is your lifesaver later when you need to pull the whole glorious slab out in one neat piece! Don’t skip greasing the paper lightly, just in case. Now, take that softened cream cheese mixture we talked about and beat it until it is totally, completely smug and smooth. If you want to see how smooth my ultimate no-bake cheesecake mixture gets, that’s the goal here! Set that aside while we whip up the main event.
Mixing the Fudgy Cheesecake Bars Batter
For the red velvet base, we go in stages. Start big: whisk together your melted butter and the 2 cups of sugar. Then, take your time folding in those 4 eggs, one by one, making sure each one is incorporated before moving to the next. Vanilla goes in next. For the dry components, you’ll combine the box mix with the oil, water, the other 2 eggs, vinegar, and that splash of coloring if you’re going for intense color. Mix this just until those streaks of dry mix disappear. Stop stirring right there! Overmixing makes things cakey, and we want fudgy cheesecake bars, remember? We need that rich, dense texture.
Layering and Creating the Marbled Brownie Tutorial Effect
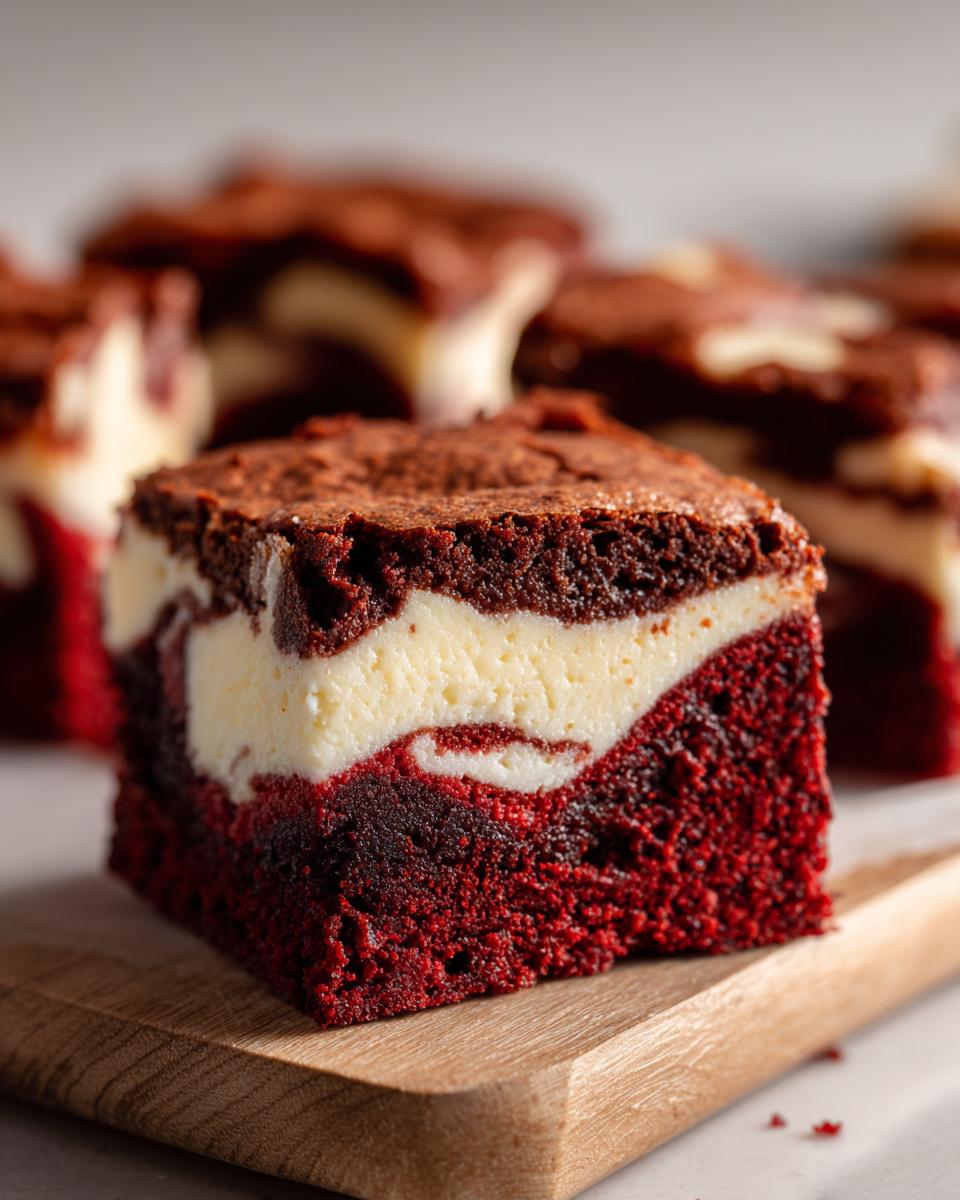
Time to build! Spread about half of that beautiful red velvet batter evenly across the bottom of your prepared pan. Now comes the creamy part; take your smooth cheesecake mixture and dollop spoonfuls all over the top of that first layer. Don’t worry about making it perfect right now! Next, gently spread the rest of the red velvet batter over the top. You should have a red top layer, with creamy white pockets peeking through. This is your moment for drama! Take a butter knife or a thin skewer and gently cut through the layers in a zigzag, figure-eight motion—this is how you create that amazing marbled brownie tutorial look. If you swirl too much, everything turns pink, and we lose that gorgeous contrast. A few gentle passes are plenty!

Pop that pan into that 350°F oven for 35 to 45 minutes. You are looking for the edges to look firm, but when you pull a toothpick out near the center, it should have moist crumbs clinging to it, not wet batter goo. Remember, these will set up more as they cool, which is key for that perfect texture you see detailed on sites like Savor Queen!
Tips for the Best Cheesecake Brownie Recipe Success
Now that you’ve baked these absolutely gorgeous red velvet cheesecake brownies, we hit the hardest part: waiting! If you want the best cheesecake brownie recipe results, especially visually, patience during this cooling stage is everything. My notes section is usually filled with warnings about cutting these too early, but I learned that lesson the hard way!
The single most important tip I can give you for getting those amazing, clean edges—the ones that make this a true showstopper dessert—is to let them calm down completely. Don’t rush it. This isn’t like cutting warm cookies; these are rich and fudgy and need that temperature shift to firm up properly.
Cooling and Slicing for Clean Homemade Red Velvet Squares
When you pull these out of the oven, they look amazing, but inside, that cheesecake layer is still a bit wobbly. First, just let them cool on the counter in the pan for about an hour. You can see how well the structure is setting up, just like when I make my Tiramisu Cheesecake—it needs time to settle.
But here is the hack for achieving those unbelievably clean, photo-ready homemade red velvet squares: Chill them! Once they are room temperature, cover the whole pan tightly with plastic wrap and slide them into the refrigerator for at least an hour, or even two if you can manage it. That firm chilling process makes slicing unbelievably easy. Use the parchment overhang—that little lip you left hanging over the sides—and lift the entire slab out onto a cutting board. A sharp, long knife works best. Wipe the knife clean between cuts if you want those pristine lines that show off the marble.
If you skip the chill and cut them warm, the cheesecake goo drags everywhere, and you end up with more of a messy pile than beautiful bars! Trust me on this one; chilling them is the key to making people think you spent all day fussing over them when really, you just had a little foresight, just like the bakers over at Mandy Cooking suggest!
Making Your Red Velvet Cheesecake Brownies Special for Holidays
You know, one of the reasons I love these red velvet cheesecake brownies so much is that they transition perfectly from a regular weekend indulgence to a full-on showstopper dessert for holidays. They already have that fantastic red color, making them perfect holiday brownie ideas for Christmas or Valentine’s Day, especially since so many of you look for Valentine’s Day recipes!
If you want to take them up a notch beyond just cutting them into squares, don’t overcomplicate things. A very light dusting of powdered sugar looks incredibly elegant on that deep red background. Or, if you want a little extra tang, whip up a thin glaze using powdered sugar and a splash of milk mixed with a hint of lemon juice. It shines beautifully once it sets. Sometimes, the simplest finishing touch, just like when I package up my Christmas jam for gifts, makes all the difference!
Storage and Reheating for Your Creamy Swirl Brownies
So, you’ve managed to resist eating the entire pan in one sitting—that’s fantastic! Now you need to know how to keep these decadent treats tasting great for the next few days. Since we’ve got that beautiful cheesecake layer, these aren’t like your average pantry-stable brownies. If you want to maintain that luxurious, creamy swirl brownies texture, you absolutely must keep them chilled.
Here’s my personal standard operating procedure for keeping these beauties fresh, just like I handle any rich baked good in my kitchen.
Refrigerating for Best Flavor and Texture
The cream cheese filling loves the fridge! To store your cut squares, make sure they are completely cool first, which we talked about being crucial for neat slicing. Once cool, you’ll want to place them in an airtight container. If you have a lot, just layer them, but use parchment paper or wax paper between the layers so the frosting or the tops don’t stick to each other. That way, when you pull one out, it’s perfect!
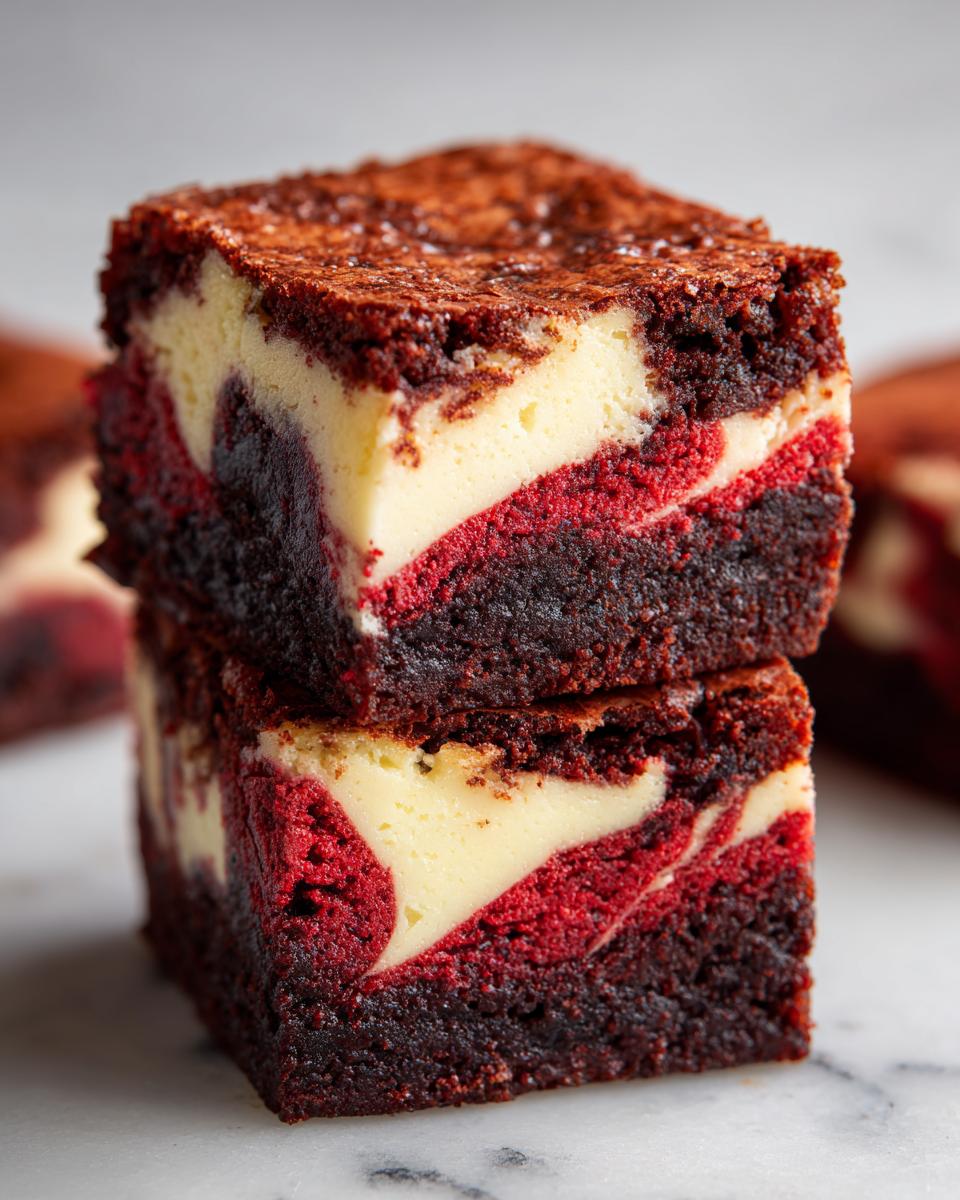
Stored correctly in the refrigerator, these red velvet cheesecake brownies will stay wonderfully moist and fudgy for up to four or five days. I actually find that the texture gets even a little bit denser and richer the day after baking, which is pretty enjoyable!
Freezing Your Indulgent Dessert Baking Stash
Yes, you can totally freeze these, which is perfect for making a huge batch around the holidays! When freezing, it’s best to wrap individual squares tightly in plastic wrap first. Then, place those wrapped squares into a freezer-safe bag or container. This double wrap is essential to prevent any freezer burn from sneaking in and drying out that fudgy base.
They keep wonderfully in the freezer for up to three months. When you want to enjoy one, just pull a square out and let it thaw overnight in the refrigerator. Honestly, they taste almost identical to when they were fresh. Just remember to let them sit on the counter for about 20 minutes after pulling them from the fridge so they aren’t rock hard when you take that first, glorious bite.
Frequently Asked Questions About Red Velvet Cheesecake Brownies
I always love hearing from you all about how your bakes go! It’s totally normal to have questions when you are merging two amazing desserts, like we did with these red velvet cheesecake brownies. Because we designed this recipe to be the ultimate indulgence that’s still pretty straightforward, I get asked the same couple of things over and over. Let’s tackle those baking roadblocks right now so your next batch comes out perfect!
Can I make these Easy Brownie Recipe from scratch without cake mix?
That’s a great question for those of you who really prefer not to use a box mix! You absolutely can, but I want to be honest: using the mix is what makes this recipe such an easy brownie recipe that comes together quickly, which is why I lean on it so heavily here at Cookin’ Corner when I want an extra special treat fast. If you want to go completely from scratch on the red velvet part, you’ll replace the mix with about $1 \frac{1}{2}$ cups of flour, some cocoa powder, a little buttermilk, and baking soda. It adds about twenty minutes of extra mixing time. If you are looking for my dedicated from-scratch directions, check out my main quick and easy recipes page for a guide on switching things up! For those using the mix hack, they love the simplicity, just like the folks over at Baking Whiz!
Why are my Indulgent Dessert Baking layers not swirling properly?
Oh, the dreaded pink-brown blob! Don’t stress, this is the most common hitch in any indulgent dessert baking that involves a swirl. Usually, there are two reasons this happens. First, you might have accidentally overworked the batter after adding the cheesecake dollops. Remember, we just want to gently cut through the layers once or twice! Second, if your cheesecake layer was too cold or runny, it sinks too deep and merges with the bottom layer before baking. Make sure your cheesecake mixture is smooth but not completely liquid, and that the bottom brownie layer seems relatively set before you add the white mixture on top—that contrast keeps the marble effect light and gorgeous!
Is it necessary to use food coloring for this recipe?
For truly authentic-looking red velvet favorites, yes, the coloring helps! Red velvet cake/brownies need that signature vibrant hue to contrast against the creamy white cheesecake. The vinegar we add helps the cocoa powder (which is naturally brown) pop a little bit, but without the red gel coloring, you’ll end up with a very deep, rich chocolate brownie with a cheesecake swirl, which tastes delicious, but it won’t look like the show-stopper reds you see online. I use a heavy-duty gel coloring for the best result!
Can I skip the vinegar in the brownie batter?
Since we are relying partly on a cake mix, which already has chemical leaveners, the vinegar might seem redundant, right? Wrong! That tiny splash of white vinegar is a cornerstone of red velvet flavor. It reacts subtly with the other components to give that signature tangy note that keeps the sweetness from being overwhelming. If you skip it, you might find these fudgy cheesecake bars too sweet overall. Just trust me on this one small addition; it makes a huge difference!
Estimated Nutrition for One Square of Red Velvet Cheesecake Brownies
Now, I know that when we are baking pure indulgence like these red velvet cheesecake brownies, we aren’t necessarily reaching for the health food aisle, but a little knowledge never hurt anyone! I always share the numbers because, hey, keeping track is part of the fun, right? These estimations come from averaging out the high-sugar, high-fat ingredients. Remember, these figures are just general guidelines based on the recipe yielding 16 squares. Your exact numbers might shift based on the specific brand of cake mix or the exact amount of cheesecake filling that makes it into your swirl!
These bars are certainly designed for a special occasion—think Valentine’s Day treat or Christmas baking!—and they deliver that decadent, rich experience that makes them worth every single bite. Here’s the breakdown for one of those gorgeous, marbled squares:
- Serving Size: 1 square
- Calories: 350
- Sugar: 35g
- Sodium: 250mg
- Fat: 20g
- Saturated Fat: 10g
- Unsaturated Fat: 10g
- Trans Fat: 0g
- Carbohydrates: 40g
- Fiber: 1g
- Protein: 4g
- Cholesterol: 75mg
See? Lots of joy packed into that single measurement! If you happen to be tracking macros, this gives you a fantastic baseline for planning your day around enjoying one of these ultimate brownie fusion treats later on. No apologies necessary when the result is this delicious!
Share Your Red Velvet Favorites Creations
Well, friend, that’s truly it! You now have the keys to baking what I consider one of the most impressive, yet shockingly simple, desserts out there. I’m Sarah Jane Thompson, and pouring these tried-and-true family kitchen secrets into your hands is the heart of everything we do here at Cookin’ Corner.
I need to know how your red velvet cheesecake brownies turned out! Did the swirl look perfect? Did your family devour them immediately? Don’t keep the deliciousness a secret! Please rate this recipe right down below and leave me a comment telling me about your success—I absolutely thrive on hearing about your baking wins.
And when you snap pictures of those beautiful, marbled squares (and I know you will!), please tag us on social media! Seeing your creations, whether you made these for a big bake sale or just a quiet Tuesday night treat, keeps our Cookin’ Corner community thriving. It’s all about creating those delicious memories together, one perfectly baked square at a time. If you ever have questions while you’re baking, you know where to find me; just reach out. Happy baking, dear heart!
PrintDecadent Red Velvet Cheesecake Brownies: The Ultimate Fusion Dessert
Make these showstopping red velvet cheesecake brownies that feature a rich, fudgy red velvet base swirled perfectly with a tangy, creamy cheesecake layer. This recipe delivers a beautiful marble effect and an indulgent flavor combination perfect for holidays or special occasions.
- Prep Time: 20 min
- Cook Time: 40 min
- Total Time: 60 min
- Yield: 16 servings 1x
- Category: Dessert
- Method: Baking
- Cuisine: American
- Diet: Vegetarian
Ingredients
- 1 cup (2 sticks) unsalted butter, melted
- 2 cups granulated sugar
- 4 large eggs
- 1 teaspoon vanilla extract
- 1 (8 ounce) package cream cheese, softened
- 1/4 cup granulated sugar (for cheesecake layer)
- 1 large egg (for cheesecake layer)
- 1 teaspoon vanilla extract (for cheesecake layer)
- 1 box (15.25 ounces) red velvet cake mix
- 1/3 cup vegetable oil
- 1/2 cup water
- 2 large eggs (for brownie layer)
- 1 teaspoon white vinegar
- 1 teaspoon red food coloring (optional, for deeper color)
Instructions
- Preheat your oven to 350°F (175°C). Line a 9×13 inch baking pan with parchment paper, leaving an overhang on the sides for easy removal. Lightly grease the paper.
- Prepare the cheesecake layer: In a medium bowl, beat the softened cream cheese, 1/4 cup sugar, 1 egg, and 1 teaspoon vanilla extract until completely smooth. Set this mixture aside.
- Prepare the red velvet brownie batter: In a large bowl, whisk together the melted butter and 2 cups of sugar until combined. Whisk in the 4 eggs one at a time until incorporated. Stir in 1 teaspoon vanilla extract.
- In a separate bowl, combine the dry red velvet cake mix, oil, water, 2 eggs, white vinegar, and red food coloring (if using). Mix until just combined; do not overmix.
- Spread half of the red velvet brownie batter evenly into the prepared baking pan.
- Carefully dollop spoonfuls of the cheesecake mixture over the brownie layer.
- Gently spread the remaining red velvet brownie batter over the cheesecake layer.
- Use a knife or skewer to gently swirl the cheesecake layer into the brownie batter to create a marbled effect. Do not over-swirl, or the layers will blend completely.
- Bake for 35 to 45 minutes, or until the edges are set and a toothpick inserted near the center comes out with moist crumbs attached, not wet batter. The cheesecake portion should look mostly set.
- Let the brownies cool completely in the pan on a wire rack. This step is important for clean slicing.
- Once cool, use the parchment overhang to lift the brownies out of the pan. Cut into squares.
Notes
- For the fudgiest texture, avoid overbaking. The center should still be slightly soft when removed from the oven.
- If you want a truly showstopper dessert, drizzle cooled brownies with a simple cream cheese frosting.
- Chill the brownies for at least one hour before slicing for the cleanest, most beautiful marbled squares.
Nutrition
- Serving Size: 1 square
- Calories: 350
- Sugar: 35
- Sodium: 250
- Fat: 20
- Saturated Fat: 10
- Unsaturated Fat: 10
- Trans Fat: 0
- Carbohydrates: 40
- Fiber: 1
- Protein: 4
- Cholesterol: 75