
Some flavors just feel like a warm hug, right? For me, nothing says comfort quite like a bubbling fruit dessert pulled straight from the oven. Maybe it’s because that smell takes me right back to my grandmother’s kitchen in the Midwest, making the most incredible, rustic baked goods you can imagine. Forget fussy layers or complicated doughs; this **mixed berry cobbler** recipe is the one I rely on when I need something truly special made easily. Trust me, this is the gold standard for a homemade berry dessert. It boasts a perfectly juicy, sweet-tart filling hidden beneath a golden, wonderfully fluffy biscuit topping. And here’s the best part: it works like a charm whether you use fresh summer berries or those handy ones you keep tucked away in the freezer!
- Why This Mixed Berry Cobbler Recipe is a Family Favorite
- Gathering Ingredients for Your Mixed Berry Cobbler
- Step-by-Step Instructions for the Easy Berry Cobbler
- Tips for the Best Fruit Cobbler Success
- Ingredient Notes and Substitutions for Your Mixed Berry Cobbler
- Serving Suggestions for a Warm Berry Dessert
- Storage and Reheating Your Homemade Berry Dessert
- Frequently Asked Questions About Making Mixed Berry Cobbler
- Share Your Summer Fruit Cobbler Creations
Why This Mixed Berry Cobbler Recipe is a Family Favorite
I know you’ve probably seen a thousand fruit crumble recipes out there, but this one—our family’s go-to **mixed berry cobbler**—is different. It’s the sweet spot between rustic effort and incredible payoff. When you need a reliable **quick dessert idea**, this is what you pull out. It’s pure joy in a dish!
- It guarantees a beautifully juicy, sweet-tart filling every single time.
- The topping bakes up golden and genuinely flaky—it’s more biscuit than dense dough!
- Seriously, it works perfectly with frozen berries, so you never have to wait for peak summer.
- We’re talking only 15 minutes of prep time before it heads into the oven. That’s what I call an easy baking recipe!
Gathering Ingredients for Your Mixed Berry Cobbler
Okay, let’s get down to what you need because ingredient quality really shines through in a **homemade berry dessert** like this. Remember, we are keeping this simple but authentic. Everything is divided neatly between the filling—where all that beautiful, jammy fruit lives—and the topping, which is where the magic happens.
The most critical thing I learned from my mom’s kitchen about this **biscuit topping recipe**? Your butter absolutely must be cold. I mean, rock hard cold! If it gets soft or melty before it hits the flour, you end up with a flat, greasy crust instead of those light, fluffy biscuits you’re picturing. Don’t skip chilling that butter!
For the Juicy Berry Filling
This part is so easy; you just toss everything together. We need about six cups of mixed berries—use whatever you have! Make sure you grab that cornstarch; it’s the secret weapon that turns all those wonderful berry juices into a thick sauce instead of leaving you with a runny puddle at the bottom of your baking dish. That cornstarch thickens up perfectly for the **mixed berry cobbler**.
- 6 cups mixed berries (fresh or frozen)
- 3/4 cup granulated sugar
- 2 tablespoons cornstarch
- 1 tablespoon lemon juice
- 1 teaspoon vanilla extract
For the Fluffy Biscuit Topping Recipe
This is the dry mix that becomes our incredible topping. We use a little bit of sugar here too, but the real star is that cold butter. You want it cut into small cubes. When you cut it into the dry ingredients, those little pockets of cold butter create steam in the oven, which lifts the dough so you get those wonderfully flaky layers. That egg wash and coarse sugar on top just ensure it comes out totally golden brown!
- 2 cups all-purpose flour
- 1 tablespoon baking powder
- 1/2 teaspoon salt
- 1/4 cup granulated sugar
- 1/2 cup cold unsalted butter, cut into pieces
- 3/4 cup milk
- 1 large egg, beaten (for egg wash)
- 1 tablespoon coarse sugar (for sprinkling)
Step-by-Step Instructions for the Easy Berry Cobbler
Alright, putting this **mixed berry cobbler** together is so fast, you won’t believe it. Seriously, you can have this in the oven in under 15 minutes, which is why it’s my go-to **quick dessert idea** when company drops by! We’re keeping the steps simple, just like my Midwest roots taught me. If you haven’t made a **rustic berry bake** before, don’t sweat it. Remember, we want to handle those berries gently so they don’t turn to mush before they even hit the heat. For next-level goodness, check out my recipe for an easy homemade apple cobbler for comparison!
Preparing the Berry Base
First things first, make sure your oven is set to 375 degrees Fahrenheit so it’s nice and hot when we’re ready. Then, grease up whatever dish you’re using. Take your beautiful mixed berries, the sugar, cornstarch, lemon juice, and vanilla, and toss them together really delicately. You want them coated, but you don’t want to crush them into juice yet! Pour this lovely mix into your prepared dish.
Making the Biscuit Topping
While the berries chill out, quickly whisk your dry topping ingredients—flour, sugar, baking powder, and salt—in a separate bowl. Now, this is where the cold butter comes in! Use your fingers or a pastry blender to cut that butter in until it looks like coarse, sweet pebbles. Pour in the milk last and stir just until it clumps together. Don’t even think about overmixing it, or those biscuits won’t fluff up properly!
Assembly and Baking the Rustic Berry Bake
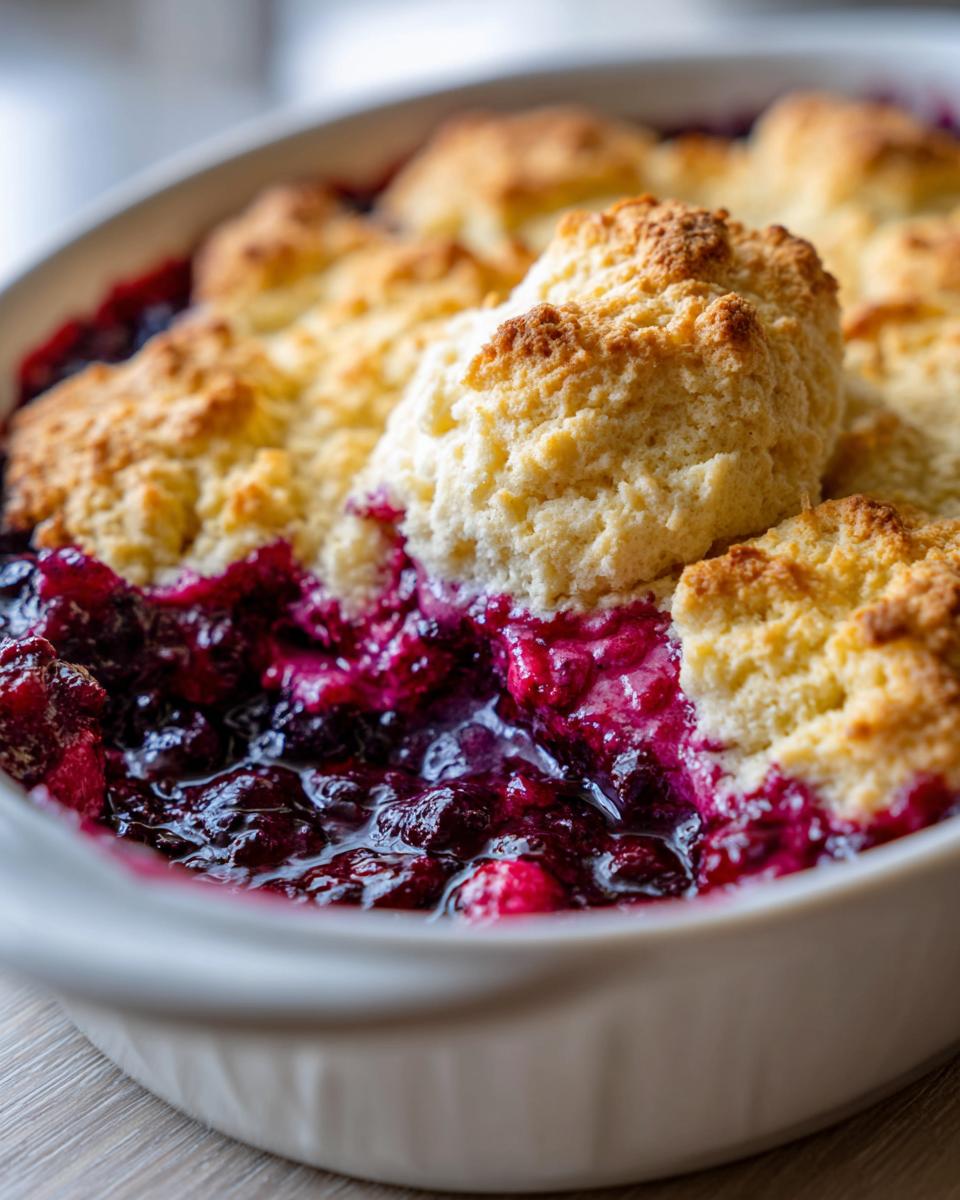
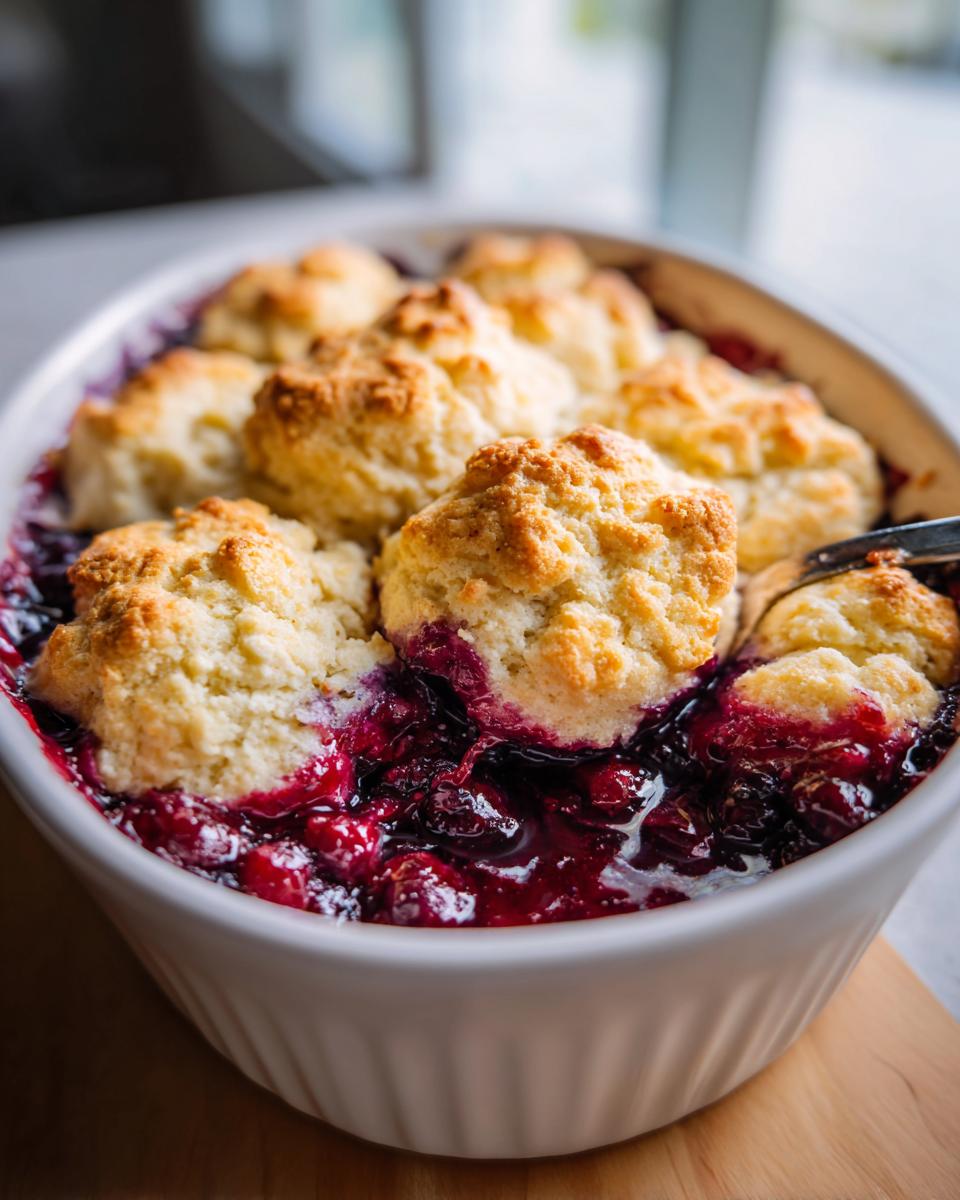
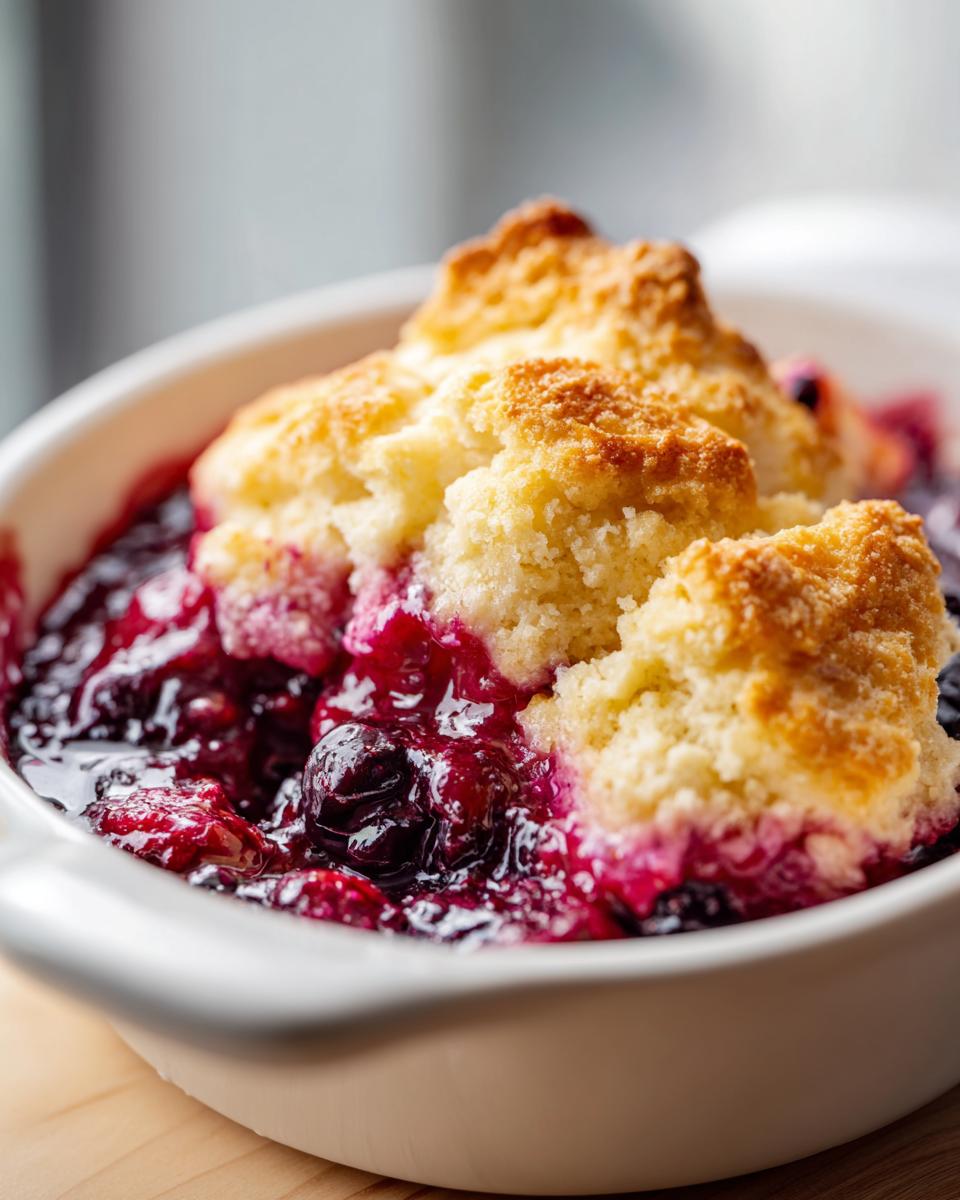
Take those shaggy clumps of dough and drop them right over the top of the berries. It’s okay if spots are exposed—steam needs to escape! Brush the tops of those biscuits gently with the egg wash and sprinkle on your coarse sugar for that crunch. Bake it for about 40 to 50 minutes. You’ll know it’s done when the topping is gorgeously golden brown, and you see the berry juices bubbling happily around the edges.
Tips for the Best Fruit Cobbler Success
I’ve learned a few tricks over the years watching countless batches bake—some successful, and yep, a few that needed rescuing! If you’re worried about that runny filling I mentioned, the cornstarch is your best friend, but you have to give the berries time to cool slightly after baking, too. That cooling rest time (at least 15 minutes!) lets that thick berry sauce set up properly. Trust me, waiting is part of the baking process when you want the **best fruit cobbler**!
Another thing my old recipe cards emphasize for a perfect **summer fruit cobbler** is the dish itself. Since the topping is a biscuit, you want it exposed to the heat to get golden. Don’t cover the whole surface! Those little gaps let the filling bubble up and vent steam. It creates that beautiful rustic look we all love. If you want to swap out fruits later on, thinking about how to handle those juices is key, just like in my recipe for a best old-fashioned apple crisp recipe!
And remember that little note about frozen fruit? You can toss those frozen berries right in, no need to thaw them first! Just know that since they release more initial moisture, you might need to bake it 5 to 10 minutes longer than the fresh batch. That extra time ensures the biscuit topping gets perfectly golden.
Ingredient Notes and Substitutions for Your Mixed Berry Cobbler
Sometimes you look in the fridge and you don’t have a full mix, or maybe you ran out of milk! Don’t stress about it; that’s the beauty of home cooking. When we make this **mixed berry cobbler**, we can certainly change things up a little without losing that comforting flavor. If you only have strawberries or just a ton of blueberries, that’s totally fine—use what you have for the filling!
Now, for the biscuit topping, the texture is dictated by the fat and liquid. If you must substitute the butter, use a high-quality shortening, but know it won’t give you quite the same rich flavor. If you swap the milk, always try to stick to whole milk or heavy cream for the best result; using something too thin, like water, ruins the structure of those biscuit pieces in your **mixed berry cobbler**.
Handling Fresh vs. Frozen Fruit
I get asked this all the time: can I just dump the frozen stuff right into the dish? Yes, you absolutely can! Don’t thaw them first; just follow the recipe as written. Since the frozen fruit releases extra cold liquid, just remember to add 5 to 10 extra minutes to your bake time. That extra time lets everything heat through nice and even!
Serving Suggestions for a Warm Berry Dessert
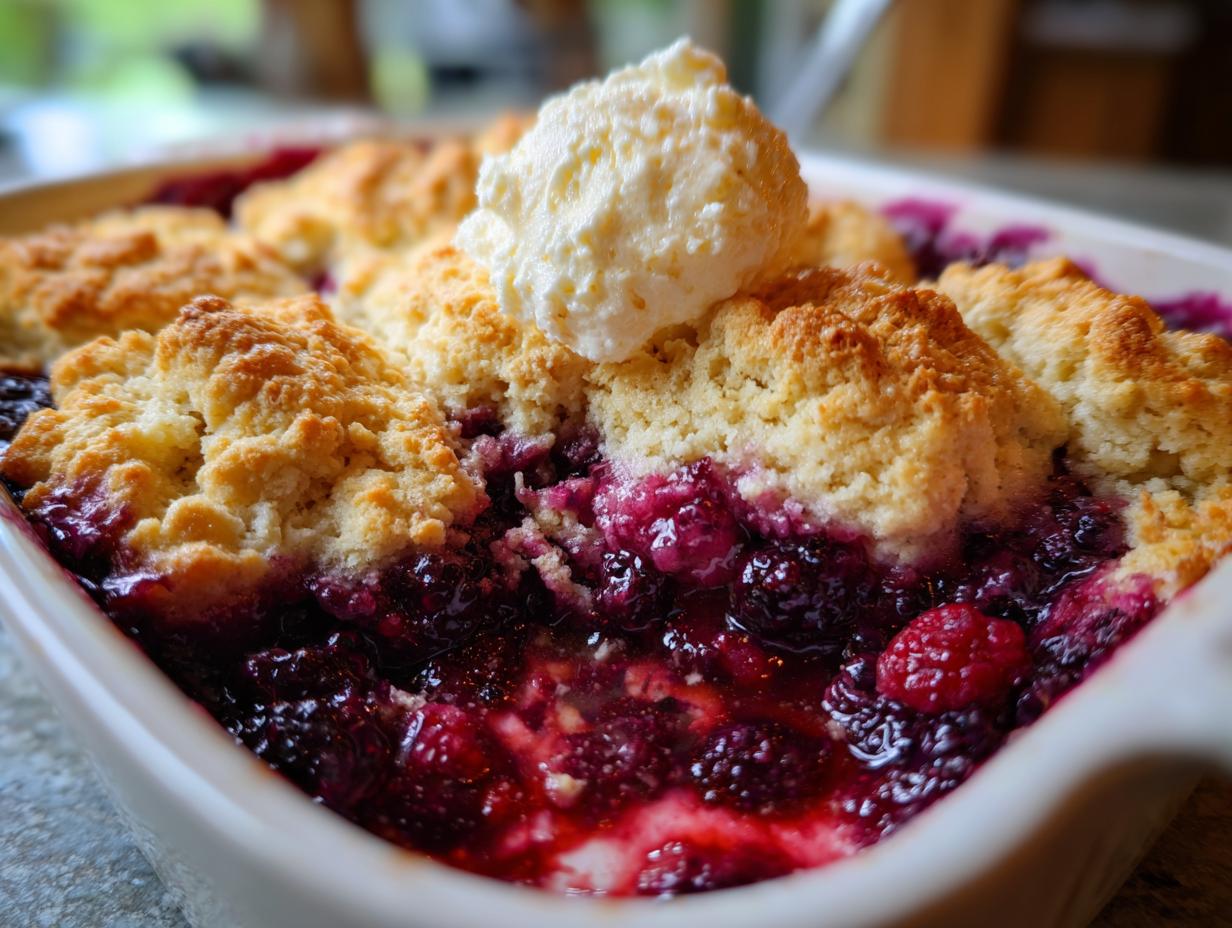
Okay, the hardest part is over—now you get to eat it! While this **mixed berry cobbler** is fantastic piping hot right out of the oven, you have to give it a little rest time so the juices can set up nicely. The ultimate, non-negotiable pairing—the one Grandma always did—is a huge scoop of rich vanilla ice cream melting right into those warm berries. It’s the perfect contrast of hot and cold!
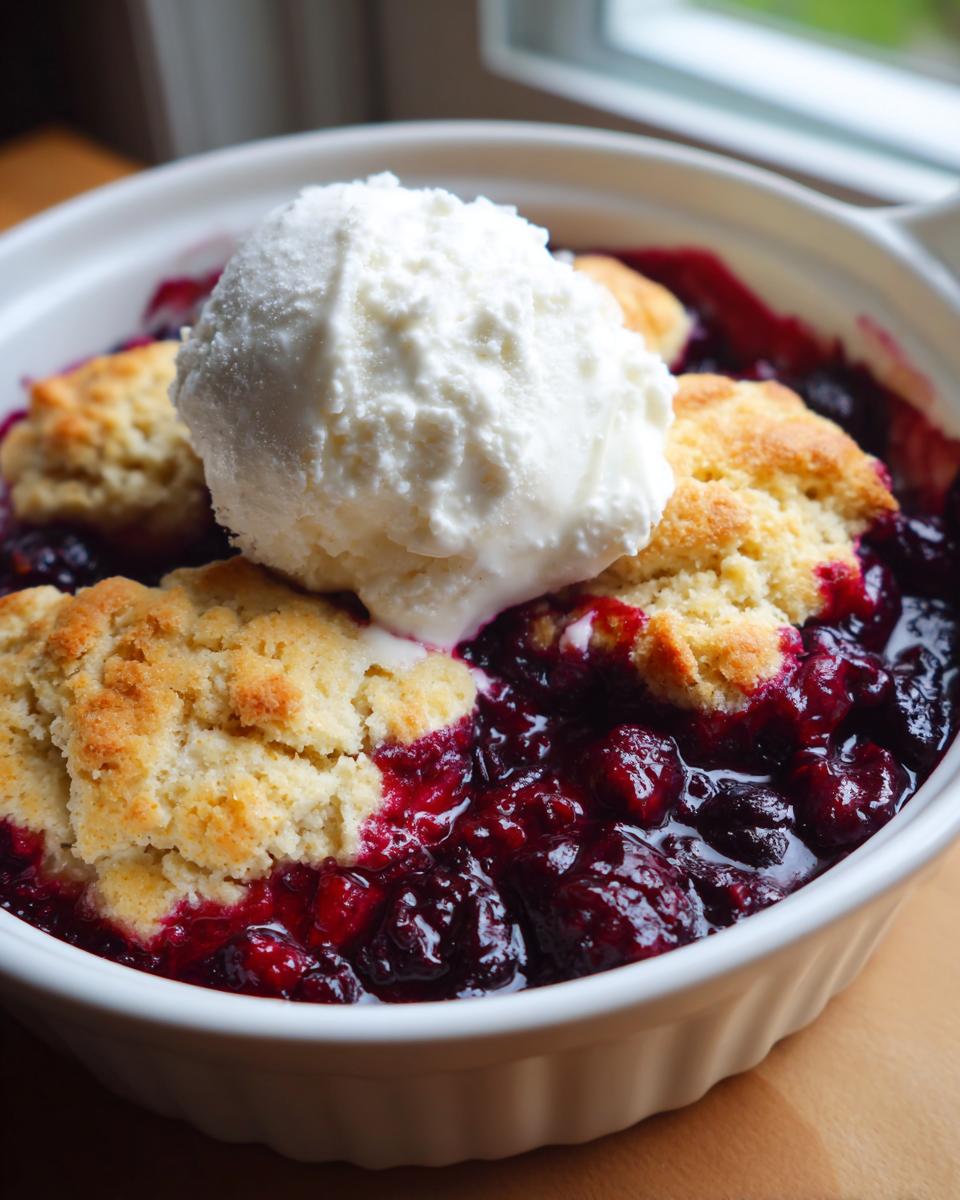
But listen, don’t stop there if you don’t want to! A dollop of lightly sweetened whipped cream is heaven, especially if you dust it with a pinch of cinnamon. If you’re serving this as a serious **Comfort Food Dessert** after a chilly evening, sometimes I drizzle a little warm caramel sauce over the biscuit top before serving. It’s so good; you might even want to enjoy a slice alongside a strong cup of coffee. If you’re looking for another easy, cozy classic, you should definitely save my recipe for homemade chocolate pudding!
Storage and Reheating Your Homemade Berry Dessert
Now, I know what you’re thinking: what if I actually have leftovers of this amazing **homemade berry dessert**? Don’t you worry, this cobbler holds up beautifully! You want to cover it loosely and keep it tucked into the fridge. Honestly, it should be good for about three or maybe four days if you keep it airtight.
When it’s time to bring it back to life, please, please use the oven. Microwaving this beautiful biscuit topping is just going to make it chewy and sad. Pop a slice onto a baking sheet and warm it at 350 degrees for about ten minutes. That quick trip back to the heat will re-crisp the topping and melt those berries just right. Make sure you serve it warm with something cold on top!
Frequently Asked Questions About Making Mixed Berry Cobbler
I always get questions after sharing this recipe, which just proves how much everyone loves a good **summer fruit cobbler**! Since this is such a reliable, **easy baking recipe**, people wonder about quick swaps they can make. I tried to cover the most common things folks ask about when they are making their own batch of this **easy berry cobbler**.
Can I use a cake mix instead of the biscuit topping ingredients?
That’s a clever **quick dessert idea**! You absolutely can use a cake mix hack if you’re really short on time—I’ve seen people sprinkle dry cake mix over the berries and top it with a little melted butter, which makes a nice *simple fruit crumble*. However, I’m old school, and frankly, using the actual **biscuit topping recipe** gives you that true, fluffy texture that makes this the **best fruit cobbler**! If you like playing with mixes, you should check out my recipe for cake mix cookie bars, which is another fun shortcut!
What’s the main difference between a cobbler and a crisp?
It all comes down to the topping, honey! A true **mixed berry cobbler**, like this one, gets a biscuit or small cake-like topping dropped right over the fruit. A crisp, on the other hand, gets a streusel topping—it’s usually oats, flour, brown sugar, and butter, all mixed until crumbly. They are both delicious **homemade berry desserts**, but the texture is totally different!
Can I use only one type of fruit instead of mixed berries?
Please do! The whole point of this **rustic berry bake** is using what you have. If you have a huge haul of fresh peaches, use those! If your freezer is stocked only with blueberries, go for it. The only real change you need to make when you switch the fruit type is checking the thickener. Cornstarch works great for juicy berries, but heavier fruits sometimes need a touch more binder to make sure your **warm berry dessert** sets up right.
How soon after baking should I serve the cobbler?
You should let it rest for at least 15 minutes! I know it’s tough when it smells that amazing, but if you rush it, the filling will just pour out, making a soupy mess. That cooling time lets the fruit juices thicken up thanks to the cornstarch. Serve it warm, not scalding hot, for the best experience.
Share Your Summer Fruit Cobbler Creations
Now that you’ve got the recipe for what I truly believe is the **best fruit cobbler** out there, I really want to know what you think! Once you pull that golden, bubbly dish out of the oven, snap a picture! Seriously, I love seeing everyone’s take on this **summer fruit cobbler**, especially the way your biscuit topping crowned the berries. Did you use all raspberries, or maybe swap in some stone fruit? Tell me all about the wonderful berry combinations you tried!
Leave a star rating right here on the page—it helps other home cooks feel confident trying this **easy baking recipe**, and I use that feedback to make sure Cookin’ Corner stays reliable. If you loved this **mixed berry cobbler**, please save this post for your next **summer baking** project so you don’t forget these simple steps. And if you’re looking for another comforting bake to try next week, you should definitely save my recipe for cinnamon roll muffins. Happy baking, friends!
PrintThe Best Mixed Berry Cobbler Recipe with Fluffy Biscuit Topping

This Mixed Berry Cobbler recipe creates a juicy, sweet-tart filling topped with a golden, flaky biscuit crust. It is a comforting homemade dessert that works well with fresh or frozen berries, perfect served warm with ice cream.
- Prep Time: 15 min
- Cook Time: 50 min
- Total Time: 65 min
- Yield: 6 servings 1x
- Category: Dessert
- Method: Baking
- Cuisine: American
- Diet: Vegetarian
Ingredients
- 2 cups all-purpose flour
- 1 tablespoon baking powder
- 1/2 teaspoon salt
- 1/4 cup granulated sugar
- 1/2 cup cold unsalted butter, cut into pieces
- 3/4 cup milk
- 6 cups mixed berries (fresh or frozen)
- 3/4 cup granulated sugar
- 2 tablespoons cornstarch
- 1 tablespoon lemon juice
- 1 teaspoon vanilla extract
- 1 large egg, beaten (for egg wash)
- 1 tablespoon coarse sugar (for sprinkling)
Instructions
- Preheat your oven to 375 degrees Fahrenheit. Lightly grease a 9-inch deep-dish pie plate or an 8×8 inch baking dish.
- Prepare the berry filling: In a large bowl, gently combine the mixed berries, 3/4 cup granulated sugar, cornstarch, lemon juice, and vanilla extract. Pour this mixture into your prepared baking dish.
- Prepare the biscuit topping: In a separate medium bowl, whisk together the flour, baking powder, salt, and 1/4 cup granulated sugar.
- Cut in the cold butter using a pastry blender or your fingertips until the mixture resembles coarse crumbs.
- Pour in the milk and stir just until a shaggy dough forms. Do not overmix.
- Drop spoonfuls of the biscuit dough evenly over the berry filling. You do not need to cover the entire surface; gaps allow steam to escape and berries to bubble up.
- Brush the tops of the biscuits lightly with the beaten egg wash and sprinkle with coarse sugar.
- Bake for 40 to 50 minutes, or until the topping is golden brown and the berry filling is thick and bubbly.
- Let the cobbler cool on a wire rack for at least 15 minutes before serving warm. Serve with vanilla ice cream for the ultimate treat.
Notes
- You can substitute frozen berries directly into the recipe without thawing; you may need to add 5 to 10 minutes to the baking time.
- For a richer topping flavor, add 1 teaspoon of ground cinnamon to the dry ingredients for the biscuit topping.
- This rustic berry bake is a fantastic dessert for potluck gatherings.
Nutrition
- Serving Size: 1 serving
- Calories: 380
- Sugar: 45g
- Sodium: 180mg
- Fat: 16g
- Saturated Fat: 10g
- Unsaturated Fat: 6g
- Trans Fat: 0g
- Carbohydrates: 58g
- Fiber: 4g
- Protein: 6g
- Cholesterol: 45mg