
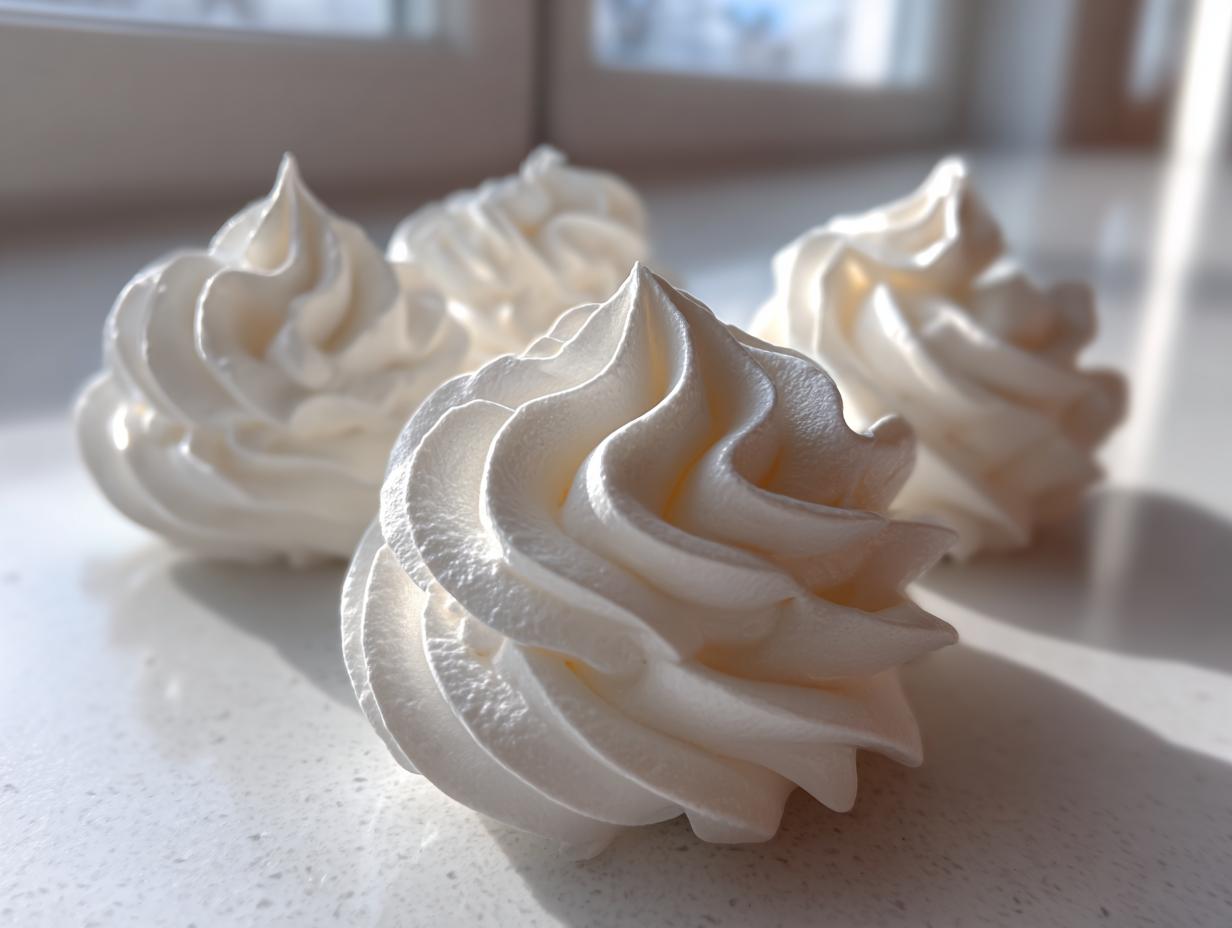
Oh, my friends, if you’ve ever wanted a sweet treat that feels impossible to mess up but looks like you spent hours crafting delicate little clouds, then you are in the right place! There’s something purely magical about biting into a perfect batch of meringue cookies—so light, so airy, they practically float off your tongue. They are the definition of that crispy meringue recipe outcome we all dream about. My goal here at Cookin’ Corner, carried down from my grandmother’s Midwest kitchen where every measurement was an act of love, is to make sure these melt in your mouth cookies are totally foolproof for you, too. Forget the fancy Italian or Swiss methods for now; we are going straight for simple elegance with this easy recipe right here!
- Why This Easy Meringue Cookies Recipe Works Every Time
- Essential Ingredients for Perfect Meringue Cookies
- How to Make Easy Meringue Cookies: Step-by-Step
- Tips for Success When Making Meringue Cookies
- Variations for Your Easy Meringue Cookies Recipe
- Storing Your Crispy Meringue Recipe Treats
- Serving Suggestions for Delicate Sweet Treats
- Frequently Asked Questions About Meringue Cookies
- Nutritional Estimates for Vanilla Meringue Recipe
Why This Easy Meringue Cookies Recipe Works Every Time
When I first started messing around with egg whites, I wanted something that looked incredibly fancy but didn’t require me wrestling with hot sugar syrup! That’s why this Easy Meringue Cookies recipe is so popular for folks just starting out. We’re skipping the complicated steps but keeping all the payoff. You get that delicate, weightless quality that everyone loves in light and airy desserts, but trust me, stability isn’t an issue here.
The real secret to getting that coveted perfect meringue texture without all the drama lies in a few crucial technique choices we make right up front.
Achieving That Crisp Meringue Recipe Finish
The low, slow bake is non-negotiable for a true Crispy Meringue Recipe. We aren’t baking these; we are drying them out! Think of it like a very gentle sauna. After the time is up, you absolutely must turn the oven off and leave the meringues inside until they are fully cool, sometimes even overnight. This slow temperature decrease is what keeps them from cracking or weeping those awful little sugary tears.
The French Meringue Cookies Method for Beginners
For our Beginner Meringue Baking adventure, we stick to the French method—that’s whipping the sugar right into the cold egg whites. It’s the most straightforward approach, and when done correctly, it reliably builds strong, stiff peaks that hold their piped shape perfectly until done. This simple process guarantees you end up with those pure, wonderful melt in your mouth cookies every single time you try!
Essential Ingredients for Perfect Meringue Cookies
When it comes to these meringue cookies, you aren’t hiding much, which means ingredient quality really jumps to the forefront. If you look at the list, it’s simple: egg whites, sugar, vanilla, cream of tartar, and salt. But if I catch you using cold egg whites or trying to sneak in regular granulated sugar, I’m going to have to come right over there! For the absolute best results, we need those egg whites to be just slightly warm—room temperature is key to getting max volume, trust me on this one.
And listen closely about the bowl preparation! If there is even a microscopic smear of grease or a single drop of yolk in your mixing bowl or on your whisk, your egg whites will refuse to whip up properly, and you’ll end up with sad, watery foam.
Ingredient Notes and Substitutions for Meringue Cookies
That sugar needs to be superfine, or caster sugar. Why? Because it has smaller crystals that dissolve much faster into the egg whites. If you use regular sugar, you risk having tiny, crunchy sugar grains stuck in your meringue, which really ruins that melt in your mouth cookies texture we’re aiming for. We want smooth, glossy clouds!
Also, keep the vanilla minimal. We want the pure white color and the structure to shine here. A teaspoon is plenty for flavor, but adding too much liquid extract can tell the proteins in the egg white, “Hold up, slow down!” which can make your batter a little sloppy right before it hits the oven.
How to Make Easy Meringue Cookies: Step-by-Step
Okay, if you’ve followed my ingredient rules—especially the grease-free bowl—then the hard part is already behind you! Now we get to the fun, frankly mesmerizing part: whipping this mixture into something beautiful. This is where you see the transformation happen right before your eyes. Always start slow with your mixer—we don’t want sugar flying everywhere!
First, get those room-temperature egg whites going with the cream of tartar and salt until they look like slightly bubbly bath foam, what we call soft peaks. Then, the main event begins: adding the sugar. Don’t rush this for anything. Slowly, slowly, slowly is the mantra here. If you dump it all in, you will deflate all the beautiful air we just worked so hard to collect like when you’re making my best classic apple fritter recipe!
Whipping the Meringue Cookies to Stiff Peaks
Once all that sugar is finally mixed in—and I mean finally—crank that mixer up to high. You’ll watch that sloppy foam turn into something thick, brilliant white, and super shiny. How do you know when you’ve hit that magical Perfect Meringue Texture? Two ways! First, when you lift the whisk, the peak should stand straight up without drooping at all. Second, and this is my favorite test, pinch a bit between your thumb and pointer finger. If it feels perfectly smooth, you are gold. If you feel any grittiness at all, keep whipping! That grittiness means you haven’t dissolved enough sugar yet.
Piping and Baking Your Simple Egg White Cookies
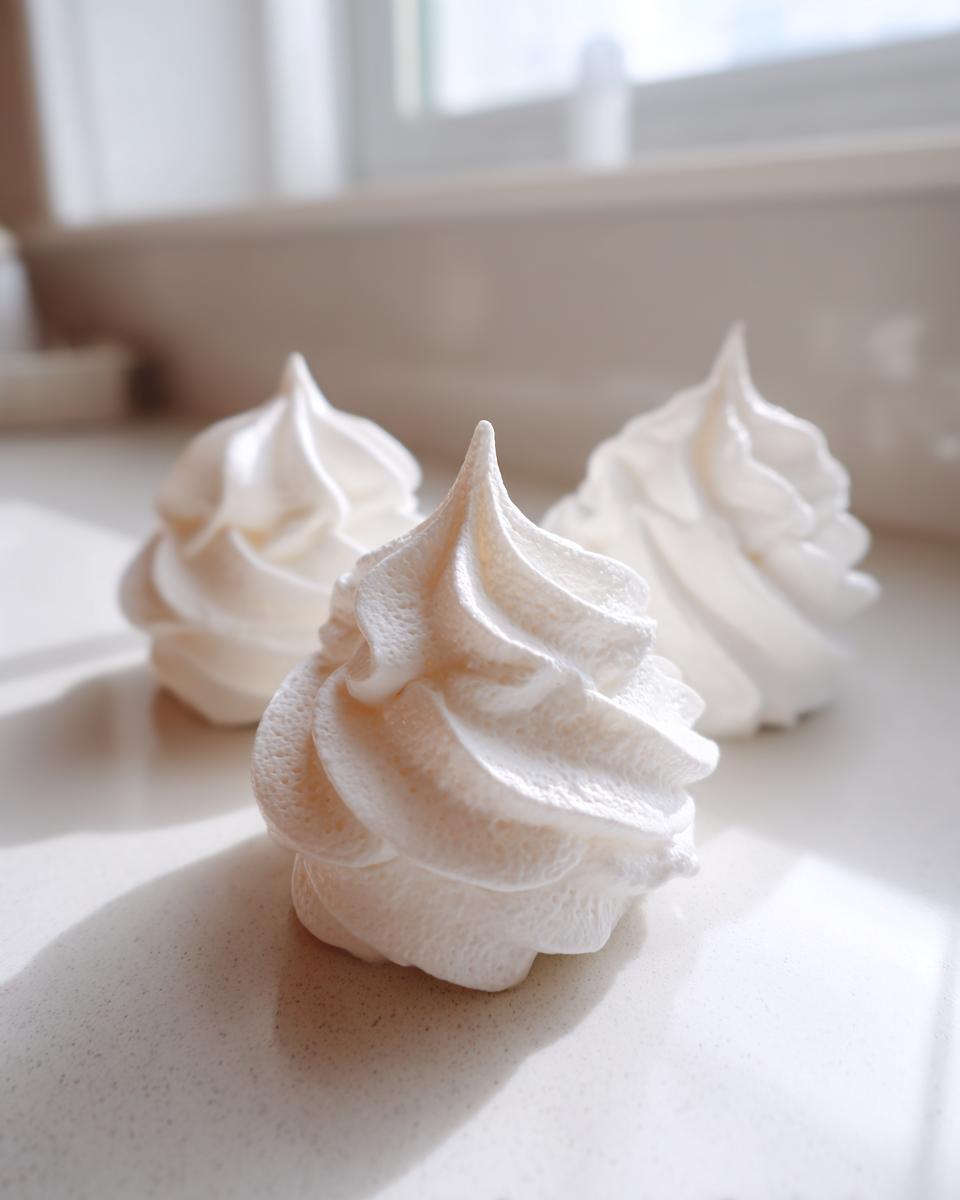
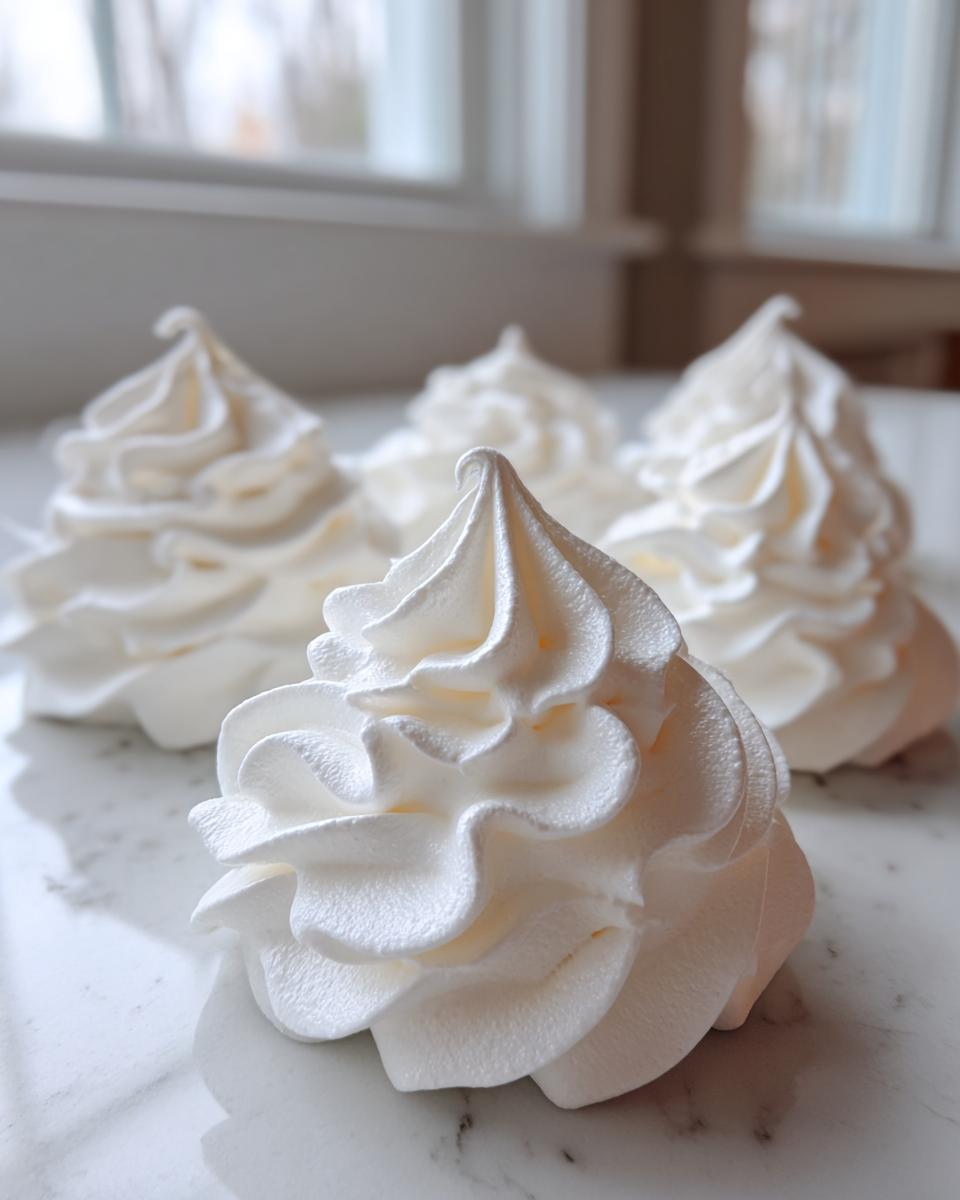
Now that you have that gorgeous, stiff meringue, get your piping bag loaded up. I love using a big star tip, like the Wilton 1M, because it gives you those classic, beautiful swirls that look so impressive—instant holiday presentation! Pipe little kisses onto your parchment-lined sheet, making sure they are spaced out a little bit, since they aren’t going to spread much but still need room to breathe.
Into the oven they go at that super low 200°F. Remember, we are drying them out now, not baking them brown. These Simple Egg White Cookies need a good hour to ninety minutes to become fully crisp. Once they look dry, you simply turn the heat off, prop the door open with a wooden spoon handle—don’t forget that step!—and let them sit in there until they are totally cool. That slow process is the secret to that fantastic Crispy Meringue Recipe finish!
Tips for Success When Making Meringue Cookies
Even with this straightforward recipe, there are always a couple of little pitfalls that can trip up even the best intentions. I learned these the hard way, of course! When I was first learning how to make these beautiful Homemade Meringue Kisses, I remember having a batch that just refused to whip up. They sat there, looking defeated, barely making bubbles. I tried adding more cream of tartar, which didn’t help a bit! It wasn’t until I stopped, took a deep breath, dumped the whole mess out, and cleaned my bowl again with distilled vinegar that I realized my “clean” bowl still had residual fat from the buttery biscuits I’d made the day before. That tiny bit of grease sabotaged everything! That’s why properly cleaning your equipment right before starting is just as important as following the recipe for my best buttermilk biscuits.
So, here are my non-negotiable rules for guaranteed success in your meringue:
- Room Temperature Whites: Seriously, take those eggs out before you even think about starting. Room temperature egg whites whip up faster and achieve far greater volume than cold ones.
- The Clean Freak Rule: Your bowl and whisk attachment must be absolutely, positively spotless and grease-free. If you’re unsure, wipe them down with a little white vinegar or lemon juice first, then dry thoroughly. This is the #1 way to ensure you get those high, stiff peaks.
- Watch the Weather Report: This is my biggest giveaway for you! Meringues hate humidity. If it is drizzling outside or the air feels thick and sticky, you might want to save your meringue cookies for another day. Humidity makes them absorb moisture from the air, leading straight to stickiness on the outside. If you must bake, be prepared to add 15 or 20 minutes to that drying time in the oven.
Follow those steps closely, and you’ll skip the frustration I went through way back when. These treats deserve to be light and crisp, not gooey!
Variations for Your Easy Meringue Cookies Recipe
Once you’ve mastered the basic, beautifully plain vanilla meringue cookies, the sky is the limit! These little clouds are such a fun canvas. If you want to try adding something extra, now is the time to do it, right after the vanilla is mixed in and before you pipe them. Think about tossing in just a half cup of those tiny mini chocolate chips; they look darling nestled in the swirl, kind of like tiny chocolate kisses!
You can also play with color! A few drops of gel food coloring—I stress *gel*, not liquid, because we don’t want extra water—can turn your simple recipe into something festive. Imagine soft pink for Valentine’s Day or brilliant green for a holiday swap. If you are feeling ambitious, you could even try coloring half the batch red and half white, then piping them together for a fun striped appearance. If you’re looking for something a bit more elegant, you might want to check out how others have made holiday meringue cookies into shapes!
For flavor variety that complements the lightness, sometimes I like to add a tiny bit of finely grated lemon zest, which gives it a nice little *zing* against the sweetness. They taste just as wonderful alongside my white chocolate macadamia nut cookies on a platter!
Storing Your Crispy Meringue Recipe Treats
We went through all that trouble whipping, piping, and drying our little clouds to perfection, so we absolutely can’t let them go soft now! Storage is just as crucial as the baking part if you want to maintain that satisfying crunch in your Crispy Meringue Recipe treats. The main enemy here, as I mentioned before, is moisture. If your kitchen is humid, your beautiful meringue cookies will try to drink it right up, and you’ll end up with a sticky mess instead of that delightful crunch.
The rule here is non-negotiable: you must use an airtight container. I mean seal it tight! You can use those nice glass jars with good locking lids, or even a good quality plastic container with a seal—just make sure there are no gaps where air can sneak in. Another trick I sometimes use, especially if I’m stacking them, is placing a small square of paper towel in the bottom of the container before I layer them in. It acts like a tiny little sponge to catch any ambient moisture.
And here’s a wonderful bonus to celebrate: these are naturally wonderful for everyone! Because they are just egg whites and sugar, these are fantastic Gluten Free Meringue Treats. You can freely offer them to friends with dietary restrictions without any worry about cross-contamination from flour. Just make sure you store them away from anything strongly scented, like strong coffee or spices, because they can absorb those odors over time.
If you’re storing them for longer periods, you can even freeze them, although I usually find they never last that long! If you do freeze them, keep them sealed tight, and when you bring them out, let them thaw slowly inside the sealed container at room temperature for several hours unopened. This prevents condensation from forming on the surface. If you ever need some quick pickles to cut the sweetness, I have an easy refrigerator pickles recipe you might want to try!
Serving Suggestions for Delicate Sweet Treats
Now that you have your beautiful, crisp meringue cookies, the question becomes: how do I serve these airy little miracles? Since they are so light—truly the poster child for delicate sweet treats—they pair wonderfully with things that have a bit more weight or temperature contrast. Seriously, they melt away so fast you almost feel guilty eating them!
My favorite way to enjoy them, especially when the weather is a little chilly outside, is right alongside a steaming mug of rich, dark hot chocolate. The warmth and the creaminess of the cocoa are the perfect foil for the cold, crisp meringue. If you’re looking for an incredible companion, you simply must try them dipped into my homemade hot cocoa recipe—it is so much better than any packet mix, I promise!
But don’t just keep them on the cookie tray! These are fantastic garnishes. Try crumbling a few over the top of a store-bought or homemade pudding or mousse just before serving. They add height, texture, and this beautiful snowy appearance. If you happen to be making a layered lemon dessert or a chocolate tart, crushing a few of these over the final plate adds a fantastic visual element and that satisfying *crunch* against the smooth filling.
Honestly, sometimes I just eat them plain while standing over the sink because I can’t trust myself to put them in a formal setting! But I hope these simple ideas help you enjoy these truly delicate sweet treats in all their glory.
Frequently Asked Questions About Meringue Cookies
I know you’ve followed the recipe to the letter, but sometimes these gorgeous meringue cookies can throw a little curveball. That’s okay! Don’t sweat it; most baking issues are easy to fix once you know what you’re looking for. I’ve gathered the questions I get asked the most about achieving that perfect result, especially when aiming for that flawless Crispy Meringue Recipe.
Why are my meringue cookies weeping or sticky?
Ugh, weeping! That’s the least favorite sound a baker can hear regarding meringue. The culprits are almost always the same two things: timing and humidity. If they are sticky on the outside right when you pull them out, they probably haven’t dried out enough—the oven temperature might be too high, or your bake time was too short. You need that low-and-slow approach!
If they start weeping (those little sugary beads) a day later, it’s the humidity getting to them. Meringue is like a sponge for moisture in the air. If it’s a muggy, rainy day where you live, you might have to bake them an extra 15 minutes or keep them sealed up tighter than Noah’s Ark. If you are whipping up a batch, always check to make sure they are perfectly dry, brittle, and cool inside the oven before letting any air near them.
Can I use a hand mixer instead of a stand mixer for meringue cookies?
Absolutely, you can! We aren’t fancy up here at Cookin’ Corner, and I had to use my trusty hand mixer for years before upgrading. The difference is that achieving stiff, glossy peaks for these Easy Meringue Cookies with a hand mixer is going to take effort, like a full-on workout! You have to be patient and keep beating until you hit those stiff peaks.
It might take you 10 to 15 minutes of non-stop beating on high speed where the stand mixer does it in seven or eight. Make sure you take breaks so your mixer doesn’t overheat, but don’t walk away for too long! Consistency is what builds that super strong structure we need for those perfect, light clouds.
And if you’re ever looking for a savory dip that’s just as fast as a quick meringue whip, you should check out my recipe for easy 5-minute creamy peanut sauce—it’s a lifesaver for weeknights!
Nutritional Estimates for Vanilla Meringue Recipe
Now, I always tell people that if you’re making meringues, you aren’t exactly aiming for a health food masterpiece, right? They are pure, fluffy joy! But since we are committed to being transparent here at the Corner, I want to give you a general idea of what’s in these beautiful little meringue cookies. Remember, this is based on our recipe standards—the amount of sugar we use, and the serving size of one cookie. This is just for your best guess, not for exact medical tracking, of course!
Based on using the precise measurements for the 4 large egg whites and 1 cup of sugar, we get about three dozen cookies. That means that for one single Vanilla Meringue Recipe cookie, you’re looking at:
- Calories: Around 45
- Sugar: Roughly 11 grams
- Fat: Zero! (See? It’s basically pure air and sweetness!)
- Protein: About 1 gram
Because these are naturally made with just egg whites and sugar, they are remarkably low in fat which makes them a fantastic choice when you feel like treating yourself without feeling weighed down. But let’s be super clear—that sugar content is what gives them their structure and that incredible creamy peanut sauce-level temptation factor! Just keep them in that airtight container, and enjoy them as the perfect light complement to something richer, like a slice of pie or maybe even served alongside one of my savory dishes when you need a little palate cleanser.
PrintFoolproof Easy Meringue Cookies: Light, Crisp, and Melt-In-Your-Mouth
This recipe shows you how to make perfect, light, and airy meringue cookies using the simple French method. Achieve a wonderfully crisp exterior and a delicate center that melts in your mouth. These are naturally gluten free and ideal for any dessert table.
- Prep Time: 20 min
- Cook Time: 90 min
- Total Time: 110 min
- Yield: About 3 dozen cookies 1x
- Category: Dessert
- Method: Baking
- Cuisine: American
- Diet: Gluten Free
Ingredients
- 4 large egg whites, room temperature
- 1 cup superfine granulated sugar (caster sugar)
- 1 teaspoon pure vanilla extract
- 1/4 teaspoon cream of tartar
- Pinch of salt
Instructions
- Preheat your oven to a low temperature, 200°F (95°C). Line two large baking sheets with parchment paper.
- In a clean, grease-free bowl of a stand mixer fitted with the whisk attachment, combine the egg whites, cream of tartar, and salt. Beat on medium speed until soft peaks form.
- Gradually add the superfine sugar, about one tablespoon at a time, while continuing to beat on medium-high speed. Wait about 30 seconds between each addition.
- Once all the sugar is incorporated, increase the speed to high and beat until the meringue is very stiff, glossy, and holds firm peaks when the whisk is lifted. Rub a small amount between your fingers; it should feel smooth, not gritty.
- Beat in the vanilla extract until just combined.
- Transfer the meringue to a large piping bag fitted with a large star tip (like Wilton 1M) or a round tip.
- Pipe small kisses or swirls onto the prepared baking sheets, leaving about one inch between each cookie.
- Place the baking sheets in the preheated oven. Bake for 60 to 90 minutes. The time depends on your oven and the size of your cookies. You are looking for them to be dry and easily lift off the parchment paper.
- Turn off the oven, prop the door open slightly with a wooden spoon, and allow the meringue cookies to cool completely inside the oven for at least 1 hour, or preferably overnight. This slow cooling helps prevent cracking and weeping.
- Store the finished crispy meringue cookies in an airtight container at room temperature.
Notes
- Use room temperature egg whites for the best volume when whipping.
- Ensure your mixing bowl and whisk attachment are completely free of any grease or yolk residue.
- If your kitchen is humid, baking time may increase, or the cookies may become sticky. Bake on a dry day for the best results.
- For a variation, gently fold in 1/2 cup of mini chocolate chips or a few drops of food coloring before piping.
Nutrition
- Serving Size: 1 cookie
- Calories: 45
- Sugar: 11
- Sodium: 5
- Fat: 0
- Saturated Fat: 0
- Unsaturated Fat: 0
- Trans Fat: 0
- Carbohydrates: 11
- Fiber: 0
- Protein: 1
- Cholesterol: 0