
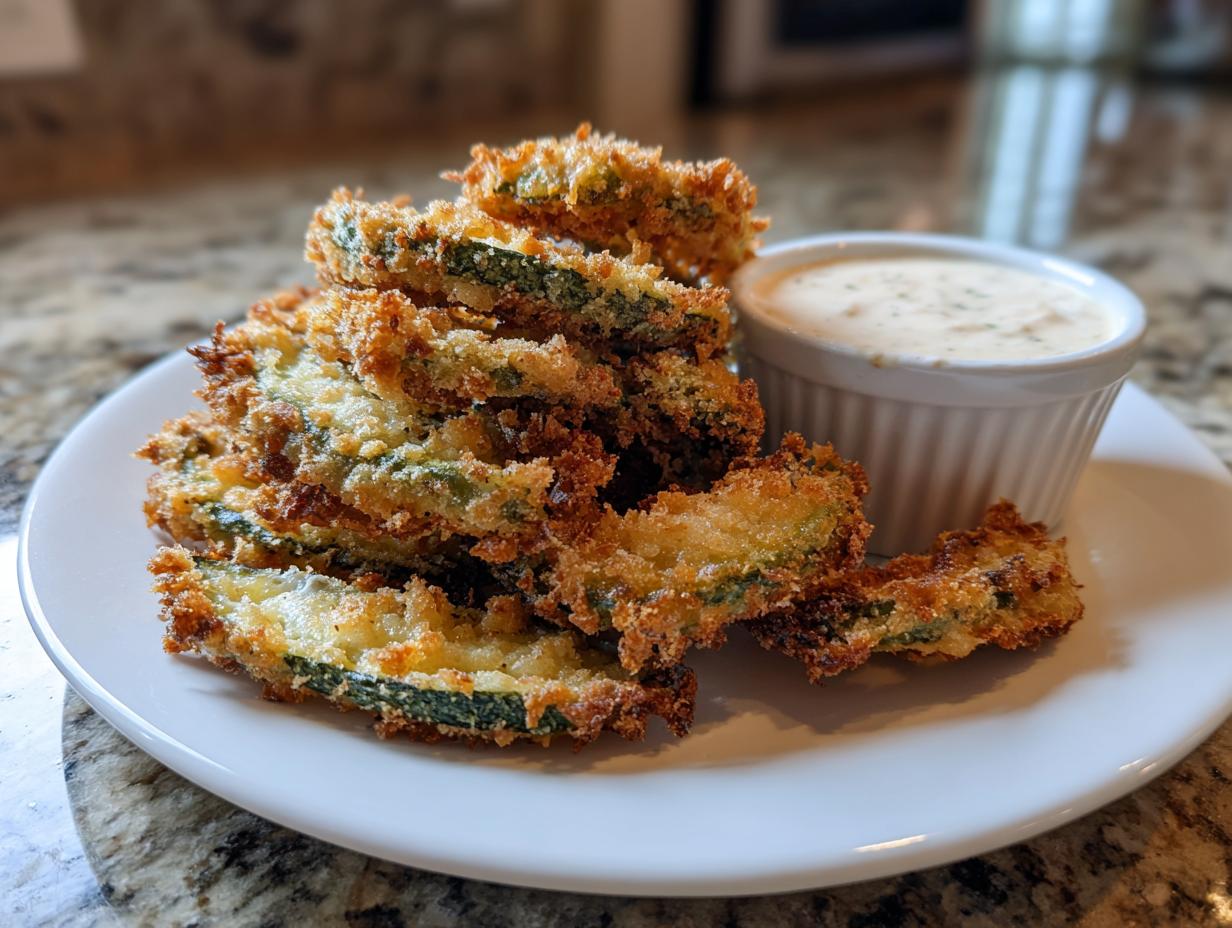
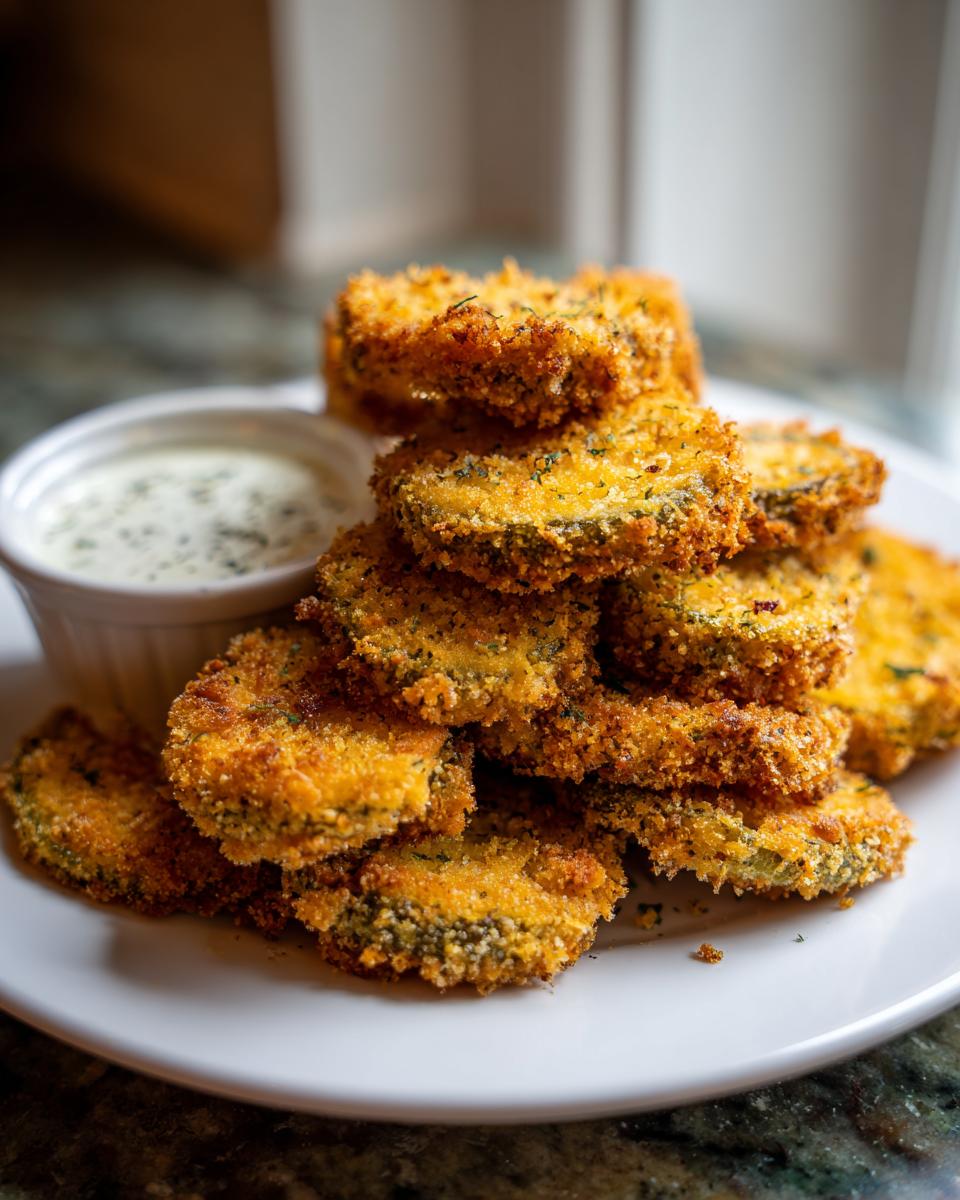
You know those appetizers that just disappear the second they hit the party table? The ones that get everyone talking? For me, that’s always been the classic, tangy kick of Fried Pickles. We grew up making every kind of finger food for holidays and game days, and honestly, a great dip recipe is just as important as the main star. That’s why I spent ages perfecting this recipe for the Ultimate Crispy Deep-Fried Pickles with Zesty Ranch Dip. Trust me, we’ve cracked the code to ultimate crispiness here, and the best part? You can whip up this whole batch, dip and all—or maybe even try my amazing bruschetta dip instead!—in under 30 minutes. It’s fast, it’s easy, and it brings that perfect dose of nostalgia right to your kitchen.
- Why You Will Make These Crispy Fried Pickles Again and Again
- Gathering Ingredients for Your Fried Pickles with Ranch Dip
- Step-by-Step Homemade Fried Pickles Tutorial
- Tips for the Best Crispy Fried Pickles Recipe
- Making Easy Fried Pickles Appetizer Variations
- Serving Suggestions for Game Day Fried Snacks
- Storage and Reheating Instructions for Leftover Fried Pickles
- Frequently Asked Questions About Crispy Fried Pickles Recipe
- Understanding the Nutrition of Deep Fried Pickle Slices
- Share Your Best Fried Pickles Creations
Why You Will Make These Crispy Fried Pickles Again and Again
I know you’ve had soggy fried snacks before. We all have! But these aren’t those. These pickles are built different, and once you taste that snap, you’ll be hooked. Seriously, they are everything you want in a Game Day Fried Snack.
- Unbeatable Crunch Factor: We are using Panko breadcrumbs here for a reason! They create that super light, incredibly crunchy exterior that holds up even after being dipped in the sauce. It’s pure texture magic.
- Faster Than Takeout: Who wants to wait for delivery when you’re hungry *now*? With a total prep and cook time under 30 minutes, this is my go-to Quick 20 Minute Appetizer when the craving hits.
- That Perfect Tangy Bite: The richness of the golden frying batter is perfectly balanced by the sharp, salty dill pickle underneath. They hit every flavor note you want in a Tangy Fried Appetizer.
- The Dip is Non-Negotiable: Honestly, the zesty ranch dip elevates this whole experience. It’s cooling, herby, and begs you to grab another one. If you love ranch, you might want to check out my recipe for Easy Hoagie Dip too—great for game days!
- Crowd-Pleaser Status: If you bring these to a potluck or a gathering, they vanish. They are universally loved and disappear fast, making them a reliable Party Appetizer Idea.
Gathering Ingredients for Your Fried Pickles with Ranch Dip
Okay, you’ve decided you need these crispy, tangy bites in your life—that’s the first and best step! Getting organized with your ingredients is crucial when we’re moving fast, especially since we want these done in under 25 minutes total. I learned early on that having everything measured out before that oil starts heating up is the difference between perfect results and a kitchen panic later. When you grab your items, look for good quality, plain dill slices—that’s the foundation for these Fried Pickles. If you’re looking for other creamy companions, you might want to save my recipe for the Creamy Dill Dip too!
For the Ultimate Crispy Fried Pickles
The most important thing here is making sure those pickles are ready for their close-up. Remember, moisture is the enemy of crunch! You need to drain them really well first, and then pat them absolutely, completely dry with paper towels. That prep work is what guarantees that beautiful golden brown crust.
- One jar (16 ounces) dill pickle slices – must be drained well!
- 1 cup all-purpose flour (for the initial dredge)
- 1 teaspoon salt
- 1 teaspoon black pepper
- 1 teaspoon garlic powder
- 1/2 teaspoon paprika
- 1/4 teaspoon cayenne pepper (only if you like a little kick!)
- 2 large eggs
- 1/2 cup milk
- 1 cup panko breadcrumbs (don’t skimp here—panko is key!)
- Vegetable oil, enough for about 2 inches deep in your pot
For the Homemade Zesty Ranch Dip
While the pickles fry up so quickly, you need a speedy dip ready to go. You can certainly use your favorite jarred buttermilk ranch, but adding just a couple of simple things totally wakes it up and makes it taste zesty and homemade. Seriously, take 30 seconds to mix this up!
- 1 cup buttermilk ranch dressing (use the good stuff, it makes a difference!)
- 1 tablespoon fresh chives, chopped fine
- 1 teaspoon lemon juice (this is the secret zesty ingredient!)
Step-by-Step Homemade Fried Pickles Tutorial
Alright, let’s get frying! This is where the magic happens, and trust me, getting this sequence right transforms good pickles into the crispiest Fried Pickles you’ve ever had. The two most critical things we need to nail are pickle dryness and oil temperature. If the pickles come straight out of the jar and into the oil, you get steam and sogginess—we are aiming for golden shatter! Keep your station set up close, because once that oil hits 375°F (190°C), we move fast. If you want a deep dive into coatings later, check out my post on simple breading techniques!
Preparing the Pickles and Breading Stations
First things first, we need bone-dry pickles. Take all your slices and lay them out on a thick stack of paper towels. Cover them with more towels and press down hard. I mean it—press until you think they can’t get any drier! Seriously, this step is non-negotiable for true crispiness. Once they are prepped, set up three shallow dishes in a line, just like an assembly belt. Dish one gets your seasoned flour mix, dish two gets your whisked egg and milk wash, and dish three gets those beautiful panko breadcrumbs.
Breading for Maximum Crunch on Your Fried Pickles
Now we coat them! Take one dry pickle slice and gently toss it in the flour first; really coat it and then shake off the loose stuff. Next, dunk it completely into the egg wash, letting the excess drip off back into the bowl. Finally, the big payoff: press that piece firmly into the panko breadcrumbs. You want those breadcrumbs to stick *everywhere*. Now, here’s my little secret from watching Grandma: if you want that restaurant-level thickness, try a quick double-dip after the first panko coat! Just dip it back in the egg and then into the dry panko again, pressing hard each time.
Deep Frying to Golden Perfection
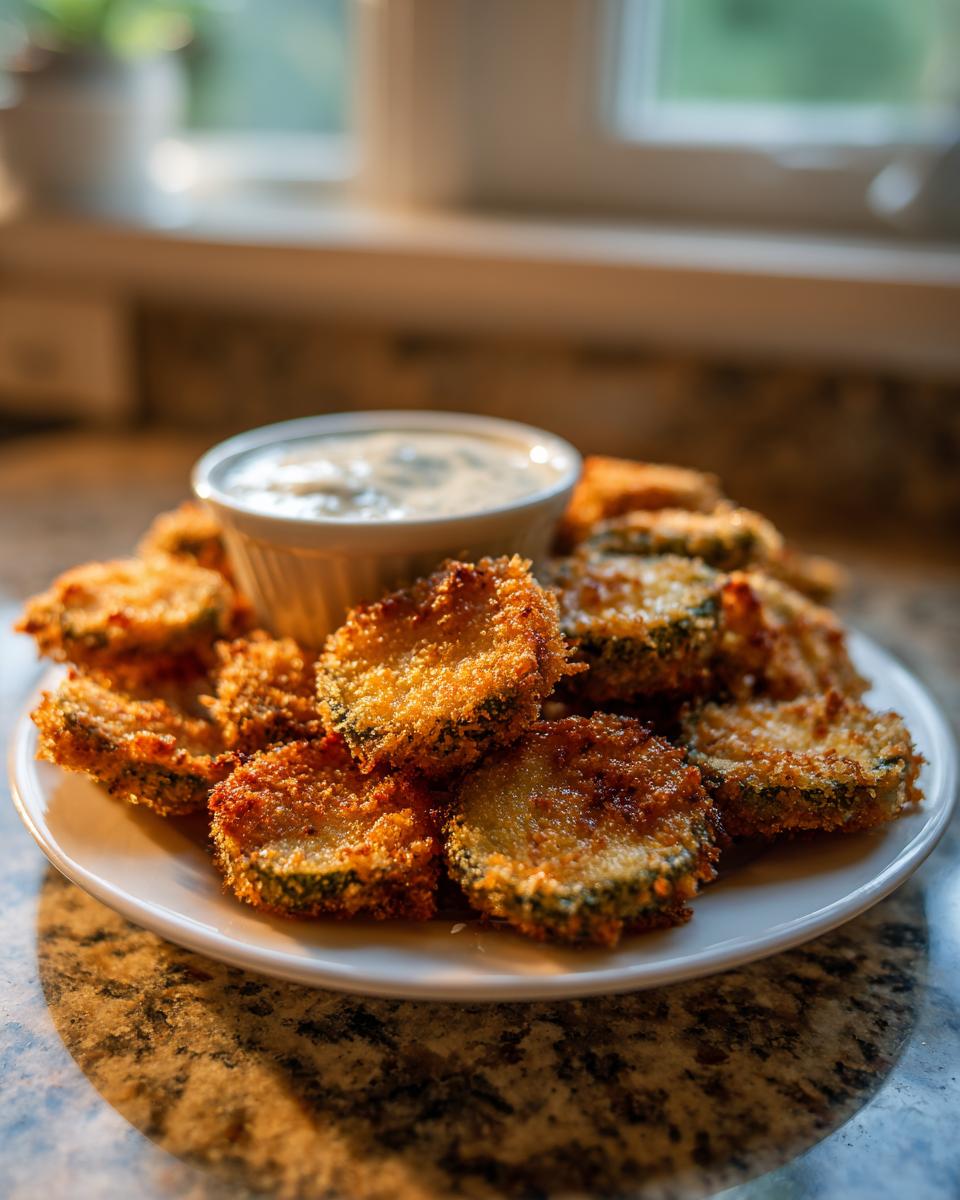
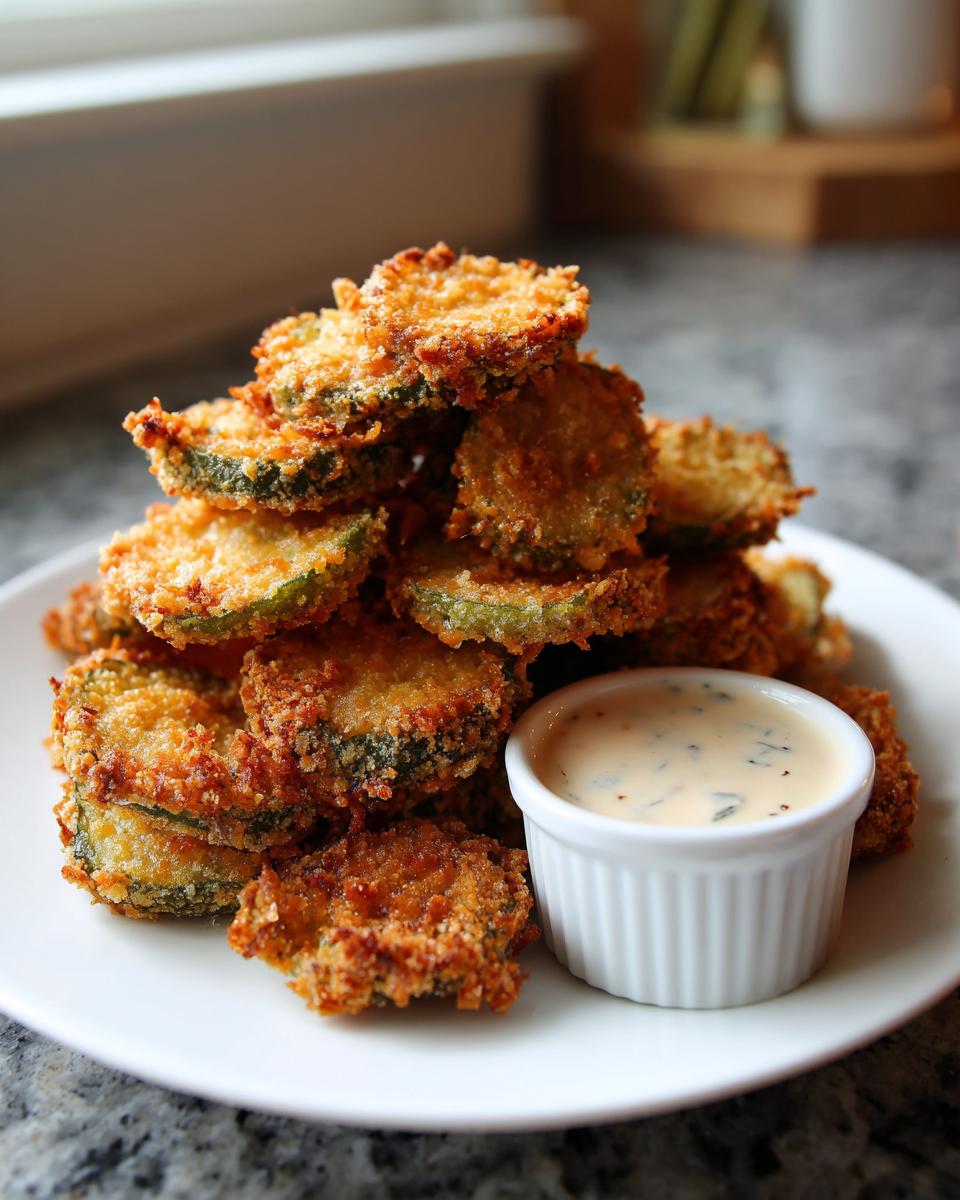
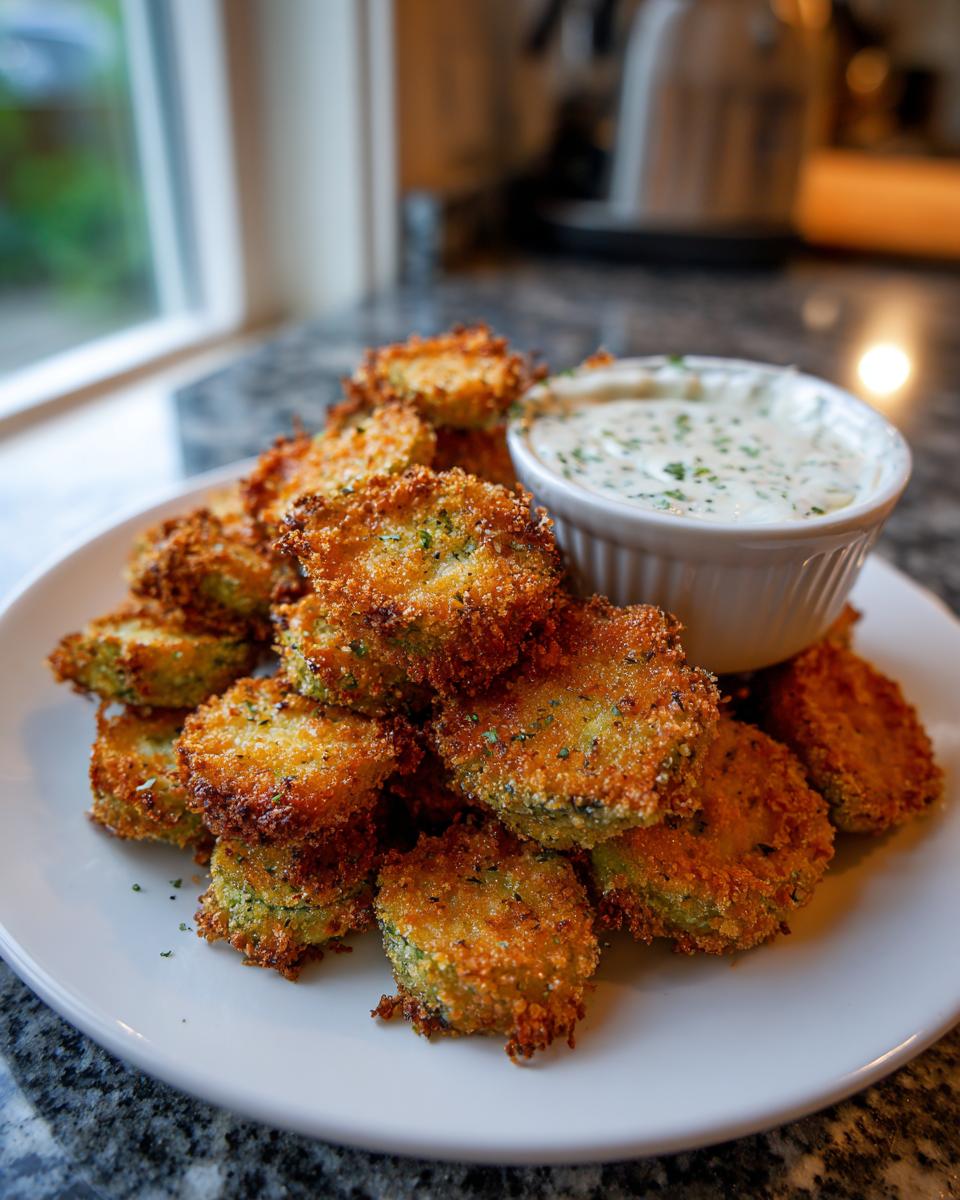
Get your oil hot in a heavy pot—we need that steady 375°F (190°C). Use a thermometer; it’s worth it! Carefully drop your breaded pickles into the oil, being sure not to cram too many in at once. Overcrowding drops the oil temp instantly, and we lose our crunch! Fry them for just 2 to 3 quick minutes, flipping them once, until they look deep golden brown perfection. Pull them out with a slotted spoon and put them straight onto a wire rack immediately. Don’t forget to sprinkle them with a tiny bit of extra salt while they are still steaming hot! You can see how some folks approach this over at Chasety’s method, but I just love that deep fry crunch!
Mixing the Zesty Ranch Dip
While those glorious, crispy spears are draining, whip up your dip! This is ridiculously easy. Just take your favorite buttermilk ranch—I use a good store-bought one for speed here—and stir in the fresh chopped chives and that little squeeze of bright lemon juice. That lemon cuts through the richness of the fried coating perfectly. Mix it up and serve the moment those pickles are ready.
Tips for the Best Crispy Fried Pickles Recipe
Achieving that truly shatteringly crisp exterior on your Fried Pickles comes down to paying sharp attention to just a couple of things, honestly. It’s all prep work! First, I mentioned it before, but it bears repeating: they must be dry. Any remnant of jar juice means your flour coating won’t stick right.
Second, oil temperature is crucial. If you’re cooking for a crowd, work in small batches! If you drop too many in at once, your oil temperature plummets, and you end up simmering instead of frying. That’s sad!
Now, if you are aiming for that famous restaurant texture, you need the secret I found when testing out a Texas Roadhouse copycat version. Throwing just a hint of dried dill weed into your initial flour mixture really amps up that salty, savory flavor note that keeps people reaching for more. It works wonders alongside the Panko crunch! For great tips on how others keep theirs crunchy, check out this write-up on crispy fried goodness.
Making Easy Fried Pickles Appetizer Variations
Not every game day calls for deep frying, even though I swear by it for the ultimate crispiness! Sometimes you want that same tangy crunch with a little less oil, or maybe you just have spears instead of slices on hand. Don’t worry, these fantastic Fried Pickles are super flexible! You can easily adapt the coating process we just went through for slightly different results, and you still get that fantastic Game Day Fried Snack experience.
Air Fryer Fried Pickles Alternative
Okay, let’s talk air fryer. If you’re looking for less hands-on work—and significantly less oil cleanup—this is your ticket. The coating setup (flour, egg, panko) stays exactly the same! That’s the secret to keeping the crunch even without the deep fat. Once they are perfectly breaded according to the steps above, you don’t drop them into a pot of oil.
Instead, you arrange them in a single layer inside your air fryer basket. Don’t crowd them, please, or they steam! Spray them generously with cooking spray—I like avocado oil spray for this—and air fry at about 380°F (193°C) for around 8 to 10 minutes. Flip them halfway through! They won’t be *quite* as deeply golden as the deep-fried ones, but they are amazingly crispy and easy. If you love air frying as much as I do, you should definitely check out my recipe for Air Fryer Pork Chops next!
For even more detailed timing on this method, I always trust guidance, and some excellent tips for getting them perfect can be found over at Feed Grump for their air fryer method.
Using Crunchy Fried Pickle Spears Instead of Slices
If you managed to grab a jar of pickle spears instead of slices, you are in luck—spears make fantastic, sturdy snacks! The breading process is exactly the same, but the cooking time needs a little adjustment, whether you’re deep frying or air frying. Because spears are thicker and taller, you need to make sure that heat penetrates all the way to the center without burning that beautiful panko crust.
If deep frying, keep an eye on them; they might need an extra minute and a half in the oil. If you’re air frying spears, you might bump that temperature up slightly or just let them hang out an extra two minutes. The key is when you test one—make sure that pickle inside is piping hot and tender, not cold and rubbery!
Serving Suggestions for Game Day Fried Snacks
When that big game is on, or we have the neighbors over for a low-key evening, these fried beauties absolutely rule the appetizer tray. They are the perfect finger food because they are sturdy once cooled slightly. Everyone loves dipping and crunching while watching the action, which is why I always make a double batch whenever I call these my special Game Day Fried Snacks.
Of course, the zesty ranch dip is the mandatory running mate for these tangy treats. But if you want to build out a truly epic spread, you need a few other salty, savory friends on the plate to mix things up. Don’t just stop at the pickles!
Here are a few things I always keep on hand when I know these crunchy snacks are going to make an appearance:
- Cheese Sauce: A warm, gooey bowl of homemade cheddar cheese sauce. Dipping a crunchy pickle into rich cheese sauce? It’s an experience, honestly.
- Spicy Mustard: For those who prefer less creaminess, a sharp, grainy Dijon or a spicy brown mustard is fantastic for cutting through the fried batter.
- Fresh Veggies & Hummus: A cool platter of carrots, celery, and bell peppers balances out all that wonderful fried goodness. It gives everyone a little breather before they reach for the next pickle!
- Sweet Heat Element: Pair them with something sweet-and-spicy, like candied jalapeños or a small bowl of slightly sweet BBQ sauce if you’re feeling adventurous.
The point is, these crispy bites are versatile and serve as the perfect salty anchor for any fun spread. Just make sure you have plenty of napkins ready!
Storage and Reheating Instructions for Leftover Fried Pickles
Now, if you are anything like me, you probably don’t end up with many leftovers! When I make a big batch for game day, they usually vanish within the first quarter, bless their crispy hearts. But if, by some miracle, you do have some stragglers left over, you have to handle them carefully. Truly, nothing beats these pickles fresh out of the hot oil, but we can get pretty close!
First rule: Never, ever store them in an airtight container in the fridge. That moisture that was the enemy when frying becomes the killer when storing. The steam gets trapped, and you’re left with sad, soggy breading the next morning. If you must refrigerate, use a shallow container lined with paper towels and leave the lid slightly ajar—but honestly, try to eat them the same day you make them.
The Best Way to Bring Back That Crunch
If you try to reheat them in the microwave, you’re just going to steam them again and ruin that beautiful crust we worked so hard for. Don’t do it! We need dry heat to bring back that golden crispness. The oven or the air fryer are our best friends here.
For the oven, preheat it to about 400°F (200°C). Lay those leftover pickle slices out on a wire rack set over a baking sheet. That rack is important because it lets the hot air circulate all the way around the pickle, not just the top. Bake them for about 6 to 8 minutes. They should crisp right back up!
Air Fryer Rescue Mission
My personal favorite method for reviving any leftover crunchy snack is the air fryer—it just gets things done faster and more evenly. Set your air fryer to about 375°F (190°C). Lay those fried pieces in a single layer; you might have to do this in batches if you have a lot left. Cook them for just 3 to 5 minutes. Keep an eye on them after the 3-minute mark because they heat up super quick! You’ll have a hot, crunchy bite ready to dip again in no time!
If you’re mastering the art of air frying appetizers, you should check out my notes on getting the perfect texture on Air Fryer French Fries—the principles of single-layer cooking are the same!
Frequently Asked Questions About Crispy Fried Pickles Recipe
It’s so common to have questions when you’re making a recipe for the first time, especially one involving hot oil! I remember my first few attempts at getting that perfect texture—it took practice, but now it’s second nature. I’ve gathered the most common things folks ask me about whipping up these Fried Pickles, so hopefully, we can clear up any last-minute doubts before you get started. It’s this kind of detail that makes sure your appetizers are perfect every time, whether it’s pickles or my super simple easy chicken gravy!
Can I use the brine from the pickle jar in my coating?
Oh, goodness no! Don’t even think about it! That brine is extremely wet and salty. If you use that in your flour or egg wash, you’re guaranteeing a soggy coating that will instantly peel off when it hits the hot oil. The most critical step for these crispy delights is draining the slices completely and patting them dry with paper towels first. We want *dry* pickles going into the batter, not wet ones!
What is the absolute best oil to use for deep frying?
When you’re deep frying, you need an oil with a high smoke point so it doesn’t burn or degrade while you’re cooking. My favorite is good old standard vegetable oil—it’s neutral in flavor, relatively inexpensive, and handles the 375°F (190°C) heat perfectly. Canola oil works just as well too! Just make sure you have enough to cover the pickles by at least an inch or two so they cook evenly. If you’re frying in large batches, you might need to refresh the oil, but for this snack recipe, it usually holds up fine.
I don’t want to deep fry. Can I bake these fried pickles?
You absolutely can bake them, and I cover this more in my variations section, but I have to be honest: baking will get you a crispy *pickle*, but not the same satisfying, enveloping crunch you get from deep frying this specific recipe. Baking usually results in a drier, flatter crust. If you must bake, treat them like an oven-fried snack: arrange them in a single layer on a wire rack set over a baking sheet and bake at a high heat—like 425°F—spraying them liberally with oil halfway through. For the full experience, though, deep frying wins every time!
Do these have to be served with ranch dip? They sound delicious!
They are delicious all on their own, but honestly, the ranch dip really ties the whole appetizer together! The cool, herby creaminess is the perfect counterpoint to that hot, salty tanginess. While the ranch is my number one choice—and you can see my zesty recipe in the steps above—feel free to swap it out! A spicy mayo or even a smear of honey mustard makes for a great dipping companion for these Fried Pickles. If you’re looking for more dipping inspiration, take a peek at some great options here: Fried Dill Pickle Spears.
What is the secret to making the batter stick so well?
The sticking power comes from two things we focused on: making sure the pickle is bone dry, and making sure you press firmly into the panko. The three-step dredge (flour, egg, panko) is designed to create layers. The flour gives the egg something to grab onto, and the egg lets the panko adhere like glue. If you really want insurance, try doing that second dip back into the egg and panko mixture—it creates a thicker shell that rarely breaks!
Understanding the Nutrition of Deep Fried Pickle Slices
Now, let’s talk honestly about what we just made! We created something incredibly fun—the ultimate crispy, salty, tangy snack—but because we did deep-fry them, we know they aren’t exactly a kale salad. That beautiful golden crust and rich flavor come from the oil, and that’s reflected in the numbers.
I always like to share this information so you know exactly what you’re serving up for your Game Day Snacks. Remember, these values are just estimates! I calculated them based on the ingredients listed in the recipe and standard frying practices. Everything changes a little based on how much oil you use or exactly what brand of ranch dressing you decide to stir into that zesty dip.
Here is a typical nutritional breakdown for a serving size of about six of these golden beauties (Keep in mind, this data does NOT include a full side of my ranch dip, which will definitely bump up the fat and calories!):
- Serving Size: 6 pickles
- Calories: 350
- Total Fat: 25g (5g Saturated Fat)
- Sodium: 850mg (Yes, they are salty, they’re pickles after all!)
- Carbohydrates: 25g
- Protein: 6g
See? Totally worth it for a party treat! I always balance out savory snacks like this by making sure the rest of the spread has fresh veggies, like those carrots and celery sticks I mentioned earlier. That way, everyone feels like they are getting a little bit of everything. Don’t let the numbers scare you away from something this delicious, just enjoy them responsibly alongside something lighter!
Share Your Best Fried Pickles Creations
And there you have it! We’ve covered everything from making sure those pickles are completely dry for maximum crunch to mixing up the zesty ranch dip that makes these shine. This recipe has been a staple in my kitchen for game days, impromptu gatherings, or just when I need a tangy, crunchy snack to brighten my afternoon.
I really hope this Ultimate Crispy Deep-Fried Pickles recipe becomes a favorite in your house too. When you take that first bite and hear that satisfying *snap*, I want you to know you nailed it! I’m always so thrilled when someone tries one of my family’s kitchen traditions and makes it their own.
So, I’m putting it out there: I want to see your crispy results! Did you use the double-dip trick? Are you sticking to slices or using spears? Maybe you found an even better dip pairing than the ranch? Please rate this recipe below and tell me all about your batch of Fried Pickles in the comments!
It means the world to me when you share your cooking journeys. Happy frying, everyone, and if you loved this appetizer, you might enjoy testing my absolute favorite chewy recipe next—my soft and chewy oatmeal cookies!
PrintUltimate Crispy Deep-Fried Pickles with Zesty Ranch Dip
Make the ultimate party appetizer with these perfectly crispy, golden deep-fried pickles. This easy recipe delivers a satisfying crunch and tangy flavor, served best with a homemade zesty ranch dipping sauce.
- Prep Time: 15 min
- Cook Time: 10 min
- Total Time: 25 min
- Yield: 4 servings 1x
- Category: Appetizer
- Method: Deep Frying
- Cuisine: American
- Diet: Vegetarian
Ingredients
- 1 jar (16 ounces) dill pickle slices, drained well
- 1 cup all-purpose flour
- 1 teaspoon salt
- 1 teaspoon black pepper
- 1 teaspoon garlic powder
- 1/2 teaspoon paprika
- 1/4 teaspoon cayenne pepper (optional, for heat)
- 2 large eggs
- 1/2 cup milk
- 1 cup panko breadcrumbs
- Vegetable oil, for deep frying
- For the Ranch Dip: 1 cup buttermilk ranch dressing (store-bought or homemade)
- For the Ranch Dip: 1 tablespoon fresh chives, chopped
- For the Ranch Dip: 1 teaspoon lemon juice
Instructions
- Drain the pickle slices thoroughly and pat them completely dry using paper towels. Moisture prevents crispiness.
- In a shallow dish, whisk together the flour, salt, black pepper, garlic powder, paprika, and cayenne pepper. This is your dry dredge.
- In a second shallow dish, whisk the eggs and milk together until combined. This is your wet mixture.
- In a third shallow dish, place the panko breadcrumbs.
- Dredge each dry pickle slice first in the flour mixture, shaking off any excess.
- Dip the floured pickle into the egg mixture, allowing excess to drip off.
- Finally, press the pickle firmly into the panko breadcrumbs, coating completely. Place the breaded pickles on a clean plate or baking sheet.
- In a deep, heavy-bottomed pot or deep fryer, heat about 2 inches of vegetable oil to 375 degrees Fahrenheit (190 degrees Celsius). Use a thermometer to monitor the temperature for best results.
- Carefully add the breaded pickles to the hot oil in small batches, ensuring you do not overcrowd the pot.
- Fry for 2 to 3 minutes, turning once, until they are golden brown and very crispy.
- Remove the fried pickles with a slotted spoon and place them on a wire rack set over a baking sheet to drain excess oil. Sprinkle lightly with extra salt immediately.
- While the pickles drain, prepare the dip by mixing the ranch dressing, chopped chives, and lemon juice in a small bowl.
- Serve the hot, crispy fried pickles immediately with the zesty ranch dipping sauce.
Notes
- For the best crunch, make sure your pickles are as dry as possible before breading.
- If you prefer a thicker coating, double-dip the pickles: flour, egg, breadcrumbs, then repeat egg and breadcrumbs again.
- If you want a Texas Roadhouse copycat flavor, use a small amount of dried dill weed in your flour mixture.
Nutrition
- Serving Size: 6 pickles
- Calories: 350
- Sugar: 3
- Sodium: 850
- Fat: 25
- Saturated Fat: 5
- Unsaturated Fat: 20
- Trans Fat: 0
- Carbohydrates: 25
- Fiber: 1
- Protein: 6
- Cholesterol: 75