
Oh, how many times have you opened that familiar bright box only to end up with rice that’s either gluey or crunchy in the middle? That’s the heartbreak of relying on pre-made flavor packets, and we’re putting an end to that right now! Here at Cookin’ Corner, we believe every side dish should sing, and our Easy, Fluffy Homemade Rice Pilaf is truly the star of the show. This is the ultimate healthy, fast alternative that delivers that restaurant-quality fluffiness every single time. Sarah Jane Thompson founded this corner on the idea that reliable home cooking techniques always win, and mastering the simple toast-and-steam method here is your secret weapon for the **best rice pilaf recipe** you’ll ever make. If you love this kind of hearty side, you should definitely check out our recipe for creamy smothered chicken and rice, too!
- Why This Fluffy Rice Pilaf Recipe Beats Boxed Mixes
- Gathering Ingredients for Your Toasted Orzo Rice Pilaf
- The Perfect Rice Pilaf Technique: Step-by-Step Instructions
- Ingredient Notes and Substitutions for Your Rice Pilaf
- Tips for Success: Mastering the Savory Rice Pilaf
- Serving Suggestions for Your Aromatic Rice Side Dish
- Storage and Reheating Instructions for Leftover Rice Pilaf
- Frequently Asked Questions About Making Rice Pilaf
- Nutritional Snapshot of This Simple Grain Side Dish
Why This Fluffy Rice Pilaf Recipe Beats Boxed Mixes
Forget those powdery flavor packets we grew up with! When you make this **savory rice pilaf** from scratch, you get so much more flavor. We focus on using rich, aromatic broth and actual sautéed vegetables instead of mystery fillers. It’s honestly the way rice pilaf was meant to taste. You can see how other cooks rely on this method, too, by checking out different approaches here.
- It’s healthier: You control the salt; no weird additives here!
- Incredible depth: Toasting the orzo and rice builds a nutty, complex flavor base.
- Texture you can trust: We master the technique so you get fluffy grains every time.
Quick Weeknight Rice Pilaf Ready in Under 40 Minutes
I know you’re busy, me too! That’s why I love this side dish so much. Total time clocks in at just 35 minutes, and most of that is just letting the steam do the work while you clean up. It’s truly a fantastic **quick weeknight rice pilaf**.
The Best Rice Pilaf Recipe for Chicken Dinners
This isn’t just plain rice; it’s a fantastic **aromatic rice side dish**. Because it’s so buttery and savory, it pairs perfectly with anything! We usually serve this **rice pilaf for chicken dinners**, but it’s just as wonderful alongside pork chops or pan-seared seafood. It elevates a simple meal instantly.
Gathering Ingredients for Your Toasted Orzo Rice Pilaf
Okay, let’s get organized! Making an amazing **rice pilaf without box mix** starts with having everything ready to go before you even turn on the stove. This recipe is so straightforward, but paying attention to the details on your ingredient list makes all the difference. You’ll need butter, oil, and that key ingredient—orzo pasta—to get that wonderful toasted flavor. For the aromatics, make sure your onion is finely chopped and those garlic cloves are minced up nice and small. Don’t forget to rinse that rice well; I promise it speeds up the fluffiness factor later! If you’re planning on serving this with our easy chicken, you should grab those ingredients too; you can check out the recipe for quick honey garlic chicken skewers for pairing ideas.
- 1 tablespoon unsalted butter
- 1 tablespoon olive oil
- 1/2 cup orzo pasta
- 1 small yellow onion, finely chopped
- 2 cloves garlic, minced
- 1 1/2 cups long-grain white rice (like Basmati or Jasmine), rinsed
- 2 1/4 cups low-sodium chicken broth (or vegetable broth for vegetarian)
- 1/2 teaspoon salt
- 1/4 teaspoon black pepper
- 1 tablespoon fresh parsley, chopped (for garnish)
The Perfect Rice Pilaf Technique: Step-by-Step Instructions
I know rice can be intimidating—it’s so easy to accidentally make a sticky mess! But perfecting this **fluffy rice pilaf recipe** is all about technique, not luck. We’re going to build flavor right in the pan before we even add liquid. Remember that rinsing the rice we talked about? That’s step zero for success because getting rid of extra starch is crucial for preventing mushiness. For more ideas on making perfectly textured grains, take a look at this cilantro lime rice recipe.
Step 1: Toasting the Orzo and Aromatics for Savory Rice Pilaf
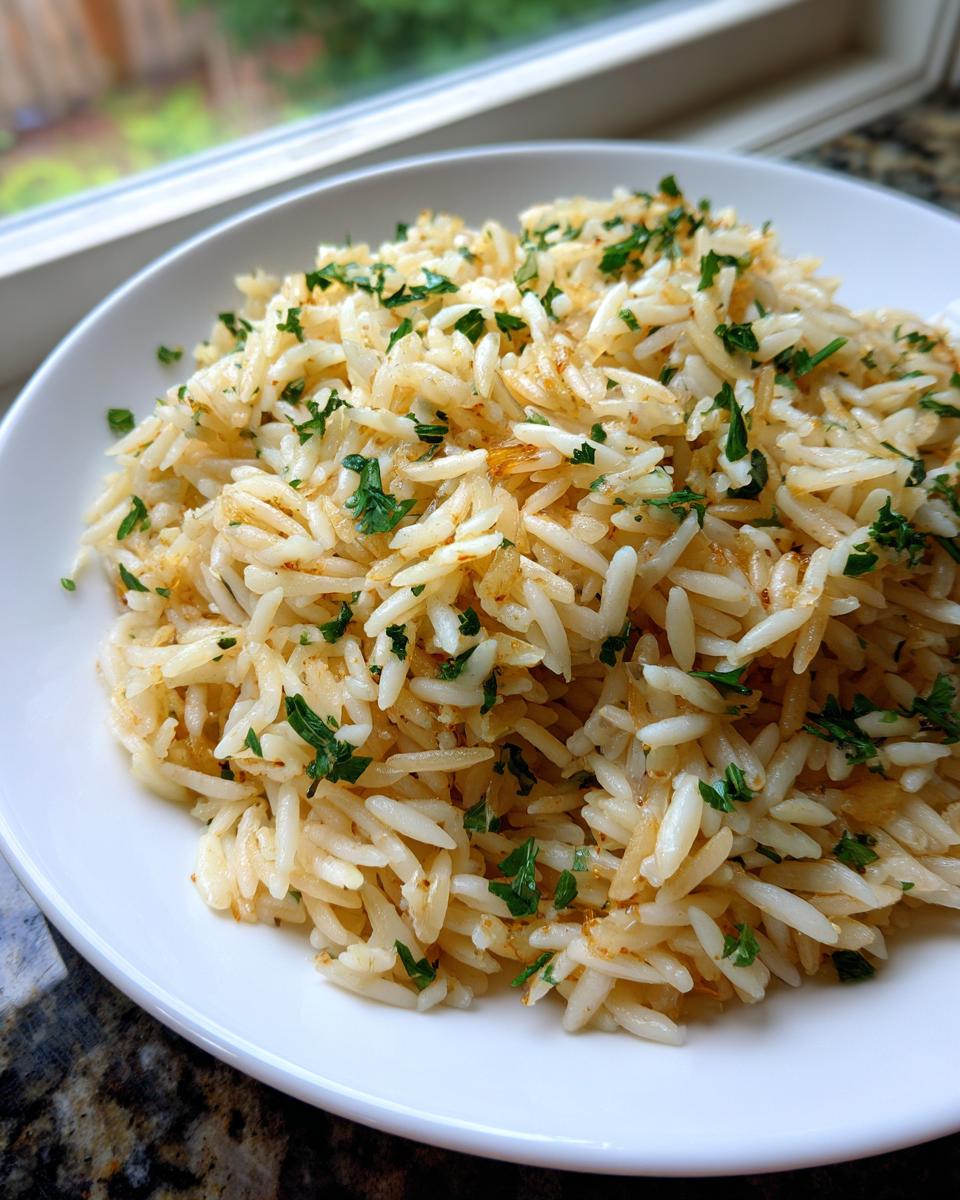
This is where the magic starts! Melt your butter and oil over medium heat. Toss in that 1/2 cup of orzo pasta. You absolutely have to stir this constantly! We’re looking for a lovely light golden brown—think the color of toasted almonds. Once the orzo is nutty smelling, toss in your chopped onion and cook until it softens up. Then, add the minced garlic for just about 60 seconds until you can really smell it. That sautéed base is what makes this better than anything from a box.
Step 2: The Crucial Rice Toasting for Fluffy Rice Pilaf Recipe
Now we add the 1 1/2 cups of rinsed rice. This toasting step is part of the **perfect rice pilaf technique** that guarantees fluffy results. Stir the rice constantly for about two full minutes until those grains look a little shiny and opaque. This helps the outside of the rice grain seal slightly, so it absorbs the liquid evenly instead of dissolving into the broth. Once you pour in the liquid and bring it up to a boil, don’t touch it again!
Step 3: Simmering and Resting for the Ultimate Rice Pilaf
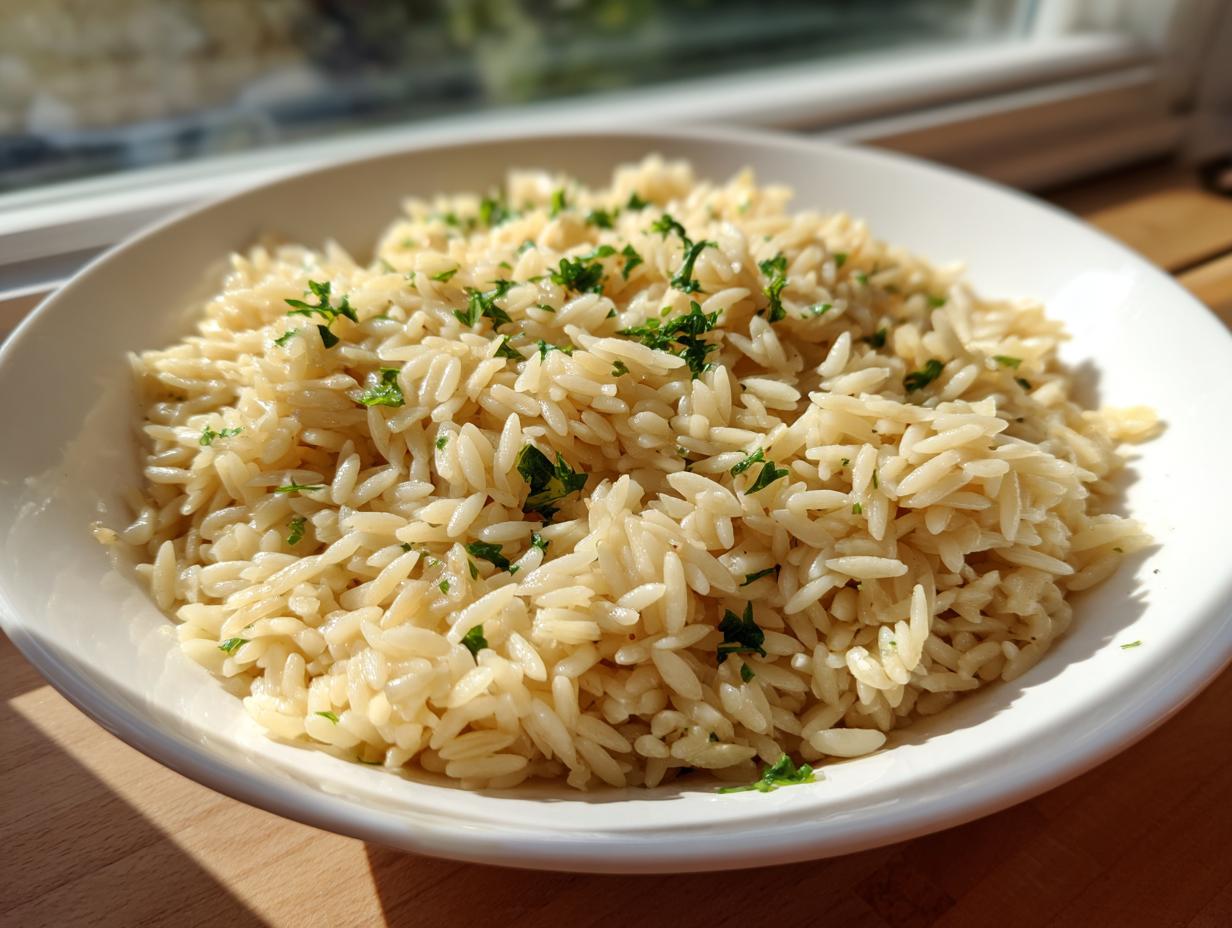
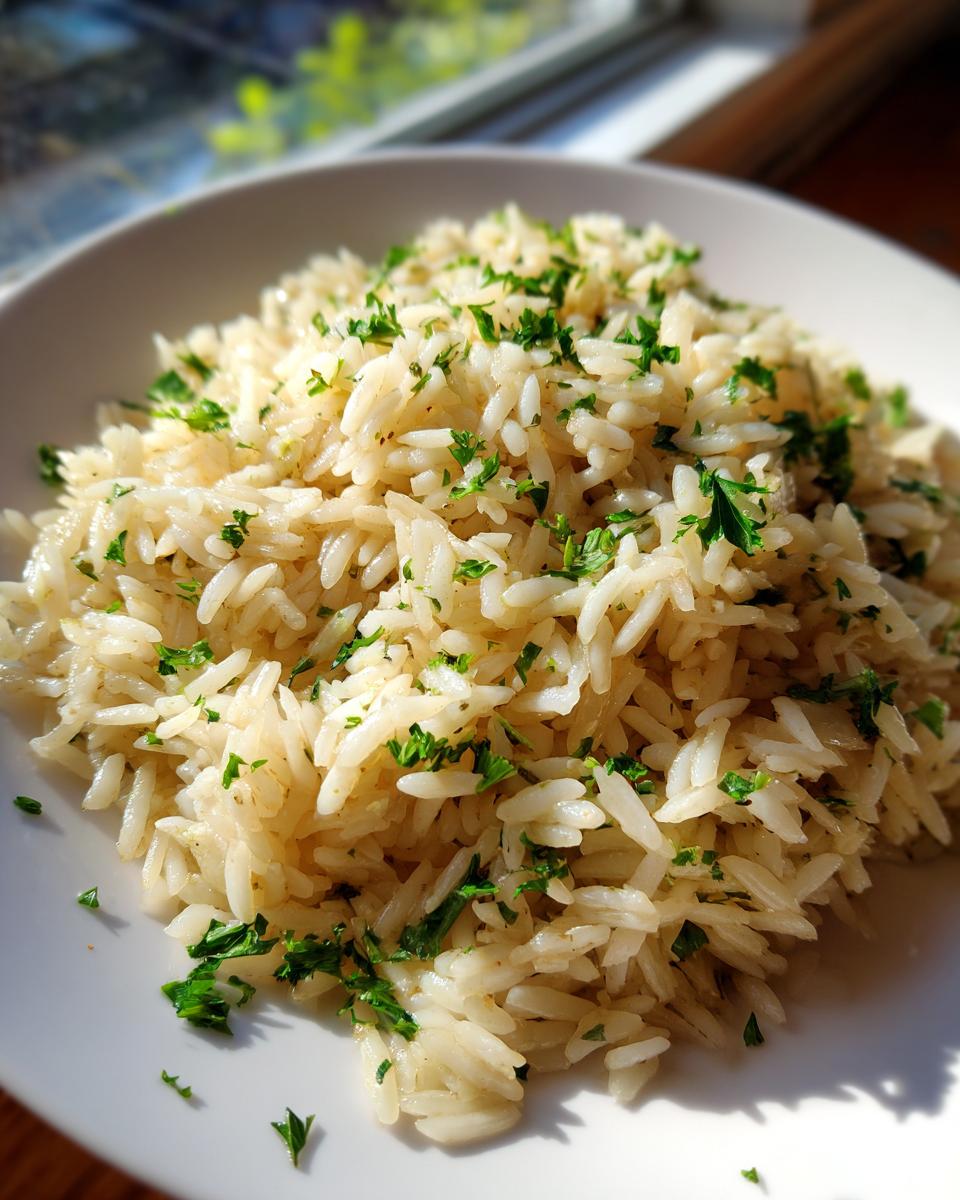
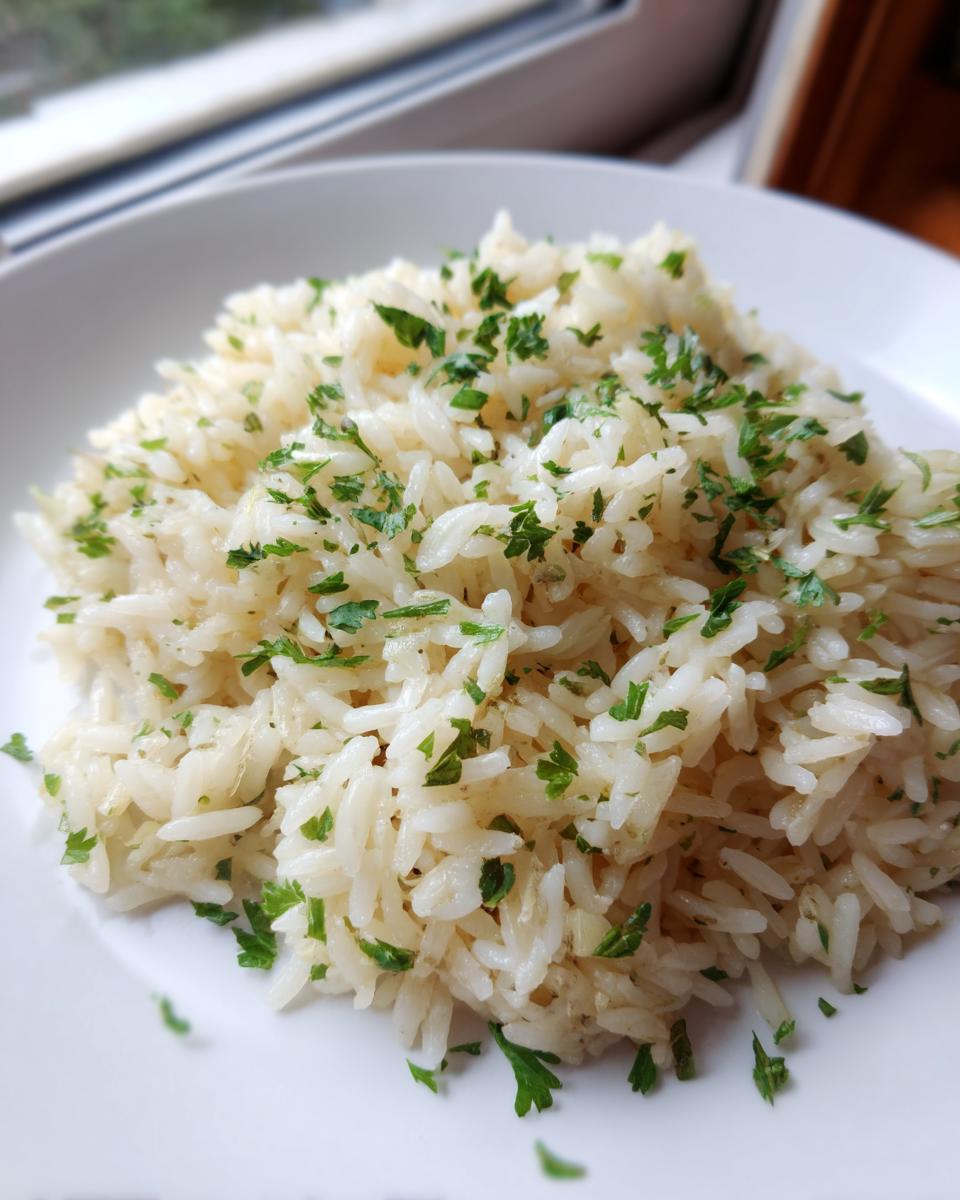
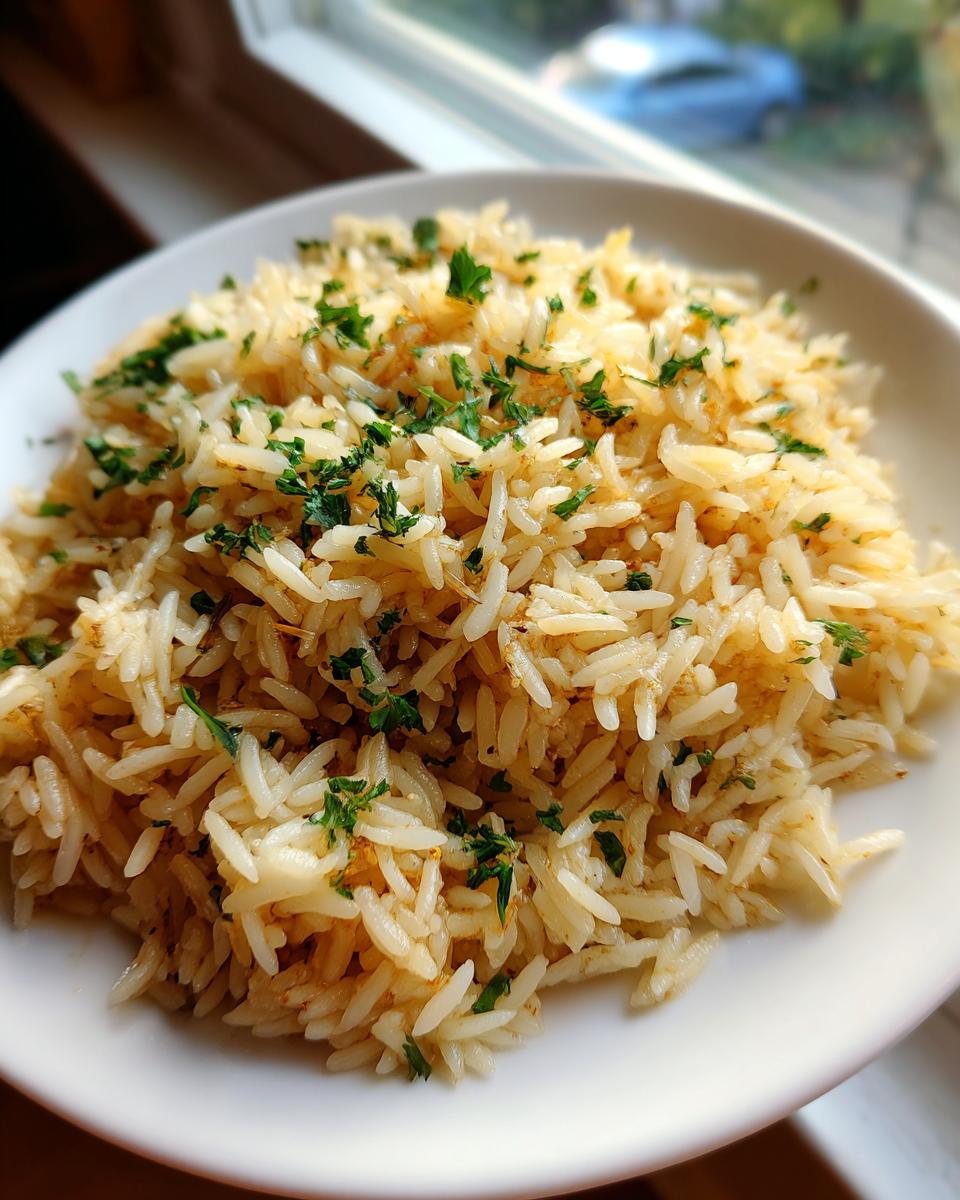
As soon as it hits that boil, drop the heat way down to the absolute lowest setting—we’re talking the tiniest flicker of flame you can manage. Cover it tightly and let it simmer for 15 minutes. Now, here’s the most important part that I always stress: Once the 15 minutes are up, take the whole pan *off* the heat, but **do not lift that lid**! Let it stand covered for a full 10 minutes. That resting time lets the steam distribute perfectly through every single grain. Trust me on this one; lifting that lid stops the process dead in its tracks. When you finally lift it, fluff gently with a fork, garnish with that fresh parsley, and admire your very own restaurant-quality rice! If you’re curious about other great techniques, check out this guide on making perfect pilaf.
Ingredient Notes and Substitutions for Your Rice Pilaf
One of the best things about mastering a classic like this **rice pilaf** is realizing how flexible the base recipe is! Once you nail the technique—which we did with the toasting and the resting—you can start playing around with flavor. I always tell people that while the spirit of this **flavorful rice pilaf recipe** comes from the broth and the toasted orzo, you have total control over the final look and diet considerations. Remember how important it was to rinse the rice? That applies whether you’re using Basmati or Jasmine; rinsing washes away the surface starch that equals sticky rice, giving you that beautiful loose texture we’re looking for.
Making a Vegetarian Rice Pilaf
If you’re serving this as a meat-free **simple grain side dish**, swapping out the broth is super easy—no drama required! The recipe notes let you know that using a good quality vegetable broth instead of chicken broth works perfectly. Sometimes veggie broth can be a little milder, so don’t be afraid to boost the seasonings slightly with a touch more garlic powder during the sauté stage if you feel it needs it. It still shines beautifully every time!
Achieving Buttery Rice Pilaf Flavor
You know I pushed for that perfect balance between the olive oil for sautéing and the butter for richness to get that classic **buttery rice pilaf** taste. Always use real, good-quality butter if you can; substitutes just don’t melt and taste the same way, trust me on this one! Now, for a real treat—especially if you’re serving this with something simple like baked fish—try the trick I mentioned in the notes: swap out about a half cup of your broth for a dry white wine, like Pinot Grigio. Let that wine bubble and steam away completely (that usually takes about two minutes after you add it) before adding the rest of your 2 1/4 cups of broth. It gives the entire dish such a sophisticated, layered flavor!
For more ways to jazz up your favorite grains when you want something different than the standard side, have a peek at my thoughts on making cauliflower fried rice.
Tips for Success: Mastering the Savory Rice Pilaf
Okay, you’ve nailed the toasting and the resting—that’s 90% of the battle won! But there are a few little habits I picked up over the years that make sure this **savory rice pilaf** is perfect every single time. Don’t skip these quick checks!
First, pay attention to your stock. Use low-sodium broth because we are adding salt, and if the broth is high in sodium, your **rice pilaf** will taste way too sharp. Seriously, measure the liquid precisely; a little too much broth means gluey rice, and too little means tough, half-cooked grains. Stick right to that 2 1/4 cup mark!
Second, when you drop the heat, make sure it’s truly the lowest setting. If you think you’ve gone low enough, try going one notch lower. This isn’t supposed to bubble hard; it needs to just barely steam under that lid. If you feel like you need to check on it, don’t; that trapped steam is doing critical work, so trust the process we learned! You can always peek at what other good cooks suggest about technique by reading up here, but honestly, the rest time is non-negotiable for me.
Finally, after the resting period, don’t stir right away like you’re mixing mashed potatoes! Use a light, gentle fork fluffing motion, starting from the edges inward. This keeps those gorgeous, separate grains intact. It’s why this side dish feels light enough for company but comforting enough for a Tuesday night. For more reliable baking and cooking in general, check out my favorite dessert guides, like my recipe for the best old-fashioned apple crisp.
Serving Suggestions for Your Aromatic Rice Side Dish
This isn’t just any rice; this is a rich, **aromatic rice side dish** that can stand up to some serious flavor! Because we toasted the orzo and used that savory chicken broth, this homemade **rice pilaf** acts as the perfect foundation for almost any main course you can dream up. It brings a touch of that comforting, homemade flavor that beats any packet, making your weeknight meal feel special.
If you’re looking for easy pairings, I always default to roasted meats. This pilaf is incredible soaked up with the pan drippings from a good roast. Try making my spatchcock chicken with lemon, garlic, and herbs—the bright, citrusy flavor cuts through the buttery richness of the pilaf beautifully. It’s a match made in heaven!
But don’t stop there! This **simple grain side dish** is versatile enough for:
- Pork: It complements thick, juicy pork chops or slow-cooked pulled pork perfectly.
- Seafood: It’s light enough for baked salmon or shrimp scampi, letting the seafood flavor shine while still offering that satisfying bite from the toasted pasta.
- Vegetarian Night: Serve it next to some roasted root vegetables or topped with some toasted nuts and dried cranberries for a lovely **vegetarian rice pilaf** option that feels complete and hearty.
Honestly, once you have this **quick rice pilaf** in your rotation, you’ll never look back. It makes plating dinner so much easier because you know the side dish is going to be a guaranteed crowd-pleaser!
Storage and Reheating Instructions for Leftover Rice Pilaf
Listen, the best part about making a big batch of this **fluffy rice pilaf recipe** is having those leftovers staring back at you the next day! A good homemade side dish should always hold up well in the fridge; no one wants to microwave last night’s perfect pilaf only for it to turn into a dry brick.
For storage, you want to make sure you let the rice cool down just a touch first, not put a piping hot container straight into the fridge—that’s not great for food safety. Once it’s cooled slightly, pack it into an airtight container. You want it in something that keeps the air out! This **simple grain side dish** should stay great in the refrigerator for about three to four days. I try to use it up within that window, though I’ve definitely stretched it to five in a pinch.
Reheating to Keep That Fluffiness
The secret to reheating, whether you’re using the microwave or the stovetop, is adding a little kiss of moisture back in. Since the grains tighten up when they cool, they need a little steam to open back up and get that soft texture again.
For the microwave, it’s fast and easy. Scoop the amount you want onto a microwave-safe plate and sprinkle just a teaspoon, maybe two, of water or broth over the top—not soaking it, just enough to create steam. Cover the plate loosely with a damp paper towel, and heat in 30-second bursts until it’s warmed through. Give it a gentle fork fluff after each burst.
If you have a few more minutes, I actually prefer the stovetop for the best results. Put the leftover rice pilaf into a small non-stick saucepan over very low heat. Add a tablespoon of broth or even just water, cover it tightly with a lid, and let it heat up slowly for about five minutes. That gentle steam keeps the orzo and rice tender. This batch is so good leftover, I often make extra just so I can toss it into a quick soup the next day, almost like a base for my easy leftover turkey soup! Just fluff it up gently before serving.
Frequently Asked Questions About Making Rice Pilaf
I get so many questions about rice because it’s such a staple! People want that **fluffy rice pilaf recipe** consistency, and honestly, after perfecting this method, I’ve figured out most of the common hiccups. Here are some of the things I hear most often about creating the **perfect rice pilaf technique** at home. For more tips on making great sides ahead of time, check out my guide on making a make ahead rice side!
How to Make Fluffy Rice if My Pilaf Turns Out Sticky?
If you end up with sticky rice, you probably missed one of our two big secrets! First, did you rinse the rice really well? Rinsing gets rid of the starch that turns everything gummy. Second, did you let it rest, covered, for that full 10 minutes off the heat? That resting step is what finishes cooking the grain evenly without adding more moisture. If you check those two things next time, I promise you’ll have **fluffy rice**!
Can This Rice Pilaf Recipe be Made Ahead?
Yes, absolutely, this is a great **make ahead rice side**! You can certainly cook the whole pan of **rice pilaf** the day before. When you reheat it (I highly recommend the stovetop method with a splash of broth, as detailed in the storage section), it comes right back to life. It’s a lifesaver for busy weeknights or when you need a guaranteed **easy homemade side dish** ready to go!
Also, to answer another common question: Yes, you can substitute brown rice, but you’ll need to increase your liquid ratio slightly and add about 20 minutes to the covered simmering time because brown rice takes longer to cook. But honestly, for speed and fluffiness, stick to the long-grain white rice for this specific recipe!
Nutritional Snapshot of This Simple Grain Side Dish
When you’re making wholesome food at home, you want to feel good about what you’re serving, right? That’s another big win for making this **rice pilaf without box mix**—you control every single ingredient! Since we are using olive oil and butter, we’re getting some good fats in there, but overall, this is a fantastic, lower-fat alternative to many richer side dishes you find. It really is a great **simple grain side dish** that supports your healthy cooking goals. If you’re looking for more great options that fit right into a healthy lifestyle, you should check out all my guides for healthy recipes over on the main page!
Now, take a look at the estimates below. Just a little reminder that these numbers are based on standard ingredient measurements being used, so if you splurge a little extra on that buttery flavor, you might see slight variations. But generally speaking, this is a delicious, well-rounded side!
- Serving Size: 3/4 cup cooked
- Calories: 280
- Fat: 5g (with 2g Saturated Fat)
- Carbohydrates: 50g
- Protein: 6g
- Sodium: 350mg (Remember, this relies heavily on using low-sodium broth!)
- Sugar: 1g
Easy, Fluffy Homemade Rice Pilaf (The Ultimate Healthy Alternative to Boxed Mixes)

Make restaurant-quality rice pilaf at home. This easy recipe uses toasted orzo and aromatic broth to create perfectly fluffy, savory rice that is a healthier alternative to boxed mixes. It is a quick side dish perfect for chicken or pork dinners.
- Prep Time: 10 min
- Cook Time: 25 min
- Total Time: 35 min
- Yield: 4 servings 1x
- Category: Side Dish
- Method: Stovetop
- Cuisine: American
- Diet: Low Fat
Ingredients
- 1 tablespoon unsalted butter
- 1 tablespoon olive oil
- 1/2 cup orzo pasta
- 1 small yellow onion, finely chopped
- 2 cloves garlic, minced
- 1 1/2 cups long-grain white rice (like Basmati or Jasmine), rinsed
- 2 1/4 cups low-sodium chicken broth (or vegetable broth for vegetarian)
- 1/2 teaspoon salt
- 1/4 teaspoon black pepper
- 1 tablespoon fresh parsley, chopped (for garnish)
Instructions
- Heat the butter and olive oil in a medium saucepan over medium heat.
- Add the orzo pasta to the pan. Toast the orzo, stirring frequently, until it turns light golden brown, about 3 to 5 minutes. Watch closely to prevent burning.
- Add the chopped onion to the pan and cook until softened, about 4 minutes.
- Add the minced garlic and cook for 1 minute until fragrant.
- Add the rinsed rice to the pan. Stir constantly for 2 minutes to lightly toast the grains. This step is key for fluffy rice.
- Pour in the chicken broth, salt, and pepper. Bring the mixture to a boil.
- Once boiling, immediately reduce the heat to the lowest setting, cover the saucepan tightly with a lid, and simmer for 15 minutes without lifting the lid.
- Remove the pan from the heat and let it stand, covered, for an additional 10 minutes. Do not remove the lid during this resting period.
- Fluff the rice gently with a fork. Stir in the fresh parsley before serving.
Notes
- Rinsing the rice removes excess starch, which helps prevent sticky or mushy results.
- For a richer flavor, substitute half the broth with white wine and let it cook off before adding the rest of the liquid.
- This recipe works well as a vegetarian rice pilaf if you use vegetable broth.
Nutrition
- Serving Size: 3/4 cup cooked
- Calories: 280
- Sugar: 1
- Sodium: 350
- Fat: 5
- Saturated Fat: 2
- Unsaturated Fat: 3
- Trans Fat: 0
- Carbohydrates: 50
- Fiber: 1
- Protein: 6
- Cholesterol: 5