
Oh, listen to me now—there is NOTHING quite as comforting as a tray of bubbling, cheesy pasta fresh from the oven, right? When the craving hits for something truly satisfying, I always turn to my version of stuffed shells. This isn’t some fussy, restaurant-style production, trust me. This is my go-to Easy Baked Beef and Ricotta Stuffed Shells with Marinara Sauce, and I think it might just become your new favorite, too!
As Sarah Jane Thompson often says, the best food comes from reliable home cooking, and I’ve tested this filling combination—savory beef, fluffy ricotta, and plenty of cheese—so many times to make sure it’s simple enough for any busy weeknight. It’s hearty, it’s classic, and it’s everything you want in a delicious, sauce-covered baked pasta dish.

- Why This is the Best Stuffed Shells Recipe You Will Make
- Ingredients for Your Easy Baked Beef and Ricotta Stuffed Shells
- Cooking Jumbo Pasta Shells Recipes Perfectly
- Assembling Your Ricotta Stuffed Shells Classic Filling
- Step-by-Step Instructions for Sauce Covered Stuffed Shells
- Tips for Success with Your Stuffed Shells
- Make Ahead Pasta Dishes and Freezer Friendly Pasta Bakes
- Serving Suggestions for Your Weeknight Pasta Meals
- Frequently Asked Questions About Stuffed Shells
Why This is the Best Stuffed Shells Recipe You Will Make
I get it; you want big comfort flavor without spending half your evening wrestling with pasta. That’s why I am so excited about this recipe. It hits all those high notes—super cheesy, deeply satisfying, and totally fuss-free. When I pull this pan out of the oven, my whole family just gravitates to the kitchen. These truly are the stuffed shells you’ll want to keep in your weeknight rotation.
- It’s truly ready in under an hour, start to finish.
- That filling layer is perfectly balanced between savory meat and creamy ricotta—it never gets watery!
- The topping melts into this gorgeous golden blanket over the marinara.
- It tastes like it should take all day, but honestly, it’s beginner friendly.
If you want more quick and cheesy goodness, make sure you check out my recipe for easy cheesy baked rigatoni pasta bake next!
Quick Prep for Easy Stuffed Shells Dinner
We are talking about hitting that sweet spot here. The total time from when you start browning the meat to when you pull the bubbly casserole out is usually right around 50 minutes. That makes this officially an easy stuffed shells dinner. Seriously, I can get the water boiling, brown the beef, and mix the filling all at the same time. The actual stuffing part is the most active time, but it flies by once you get into a rhythm.
Hearty Ground Beef Stuffed Shells Family Favorite Filling
What makes this filling so fantastic? It’s the marriage of textures! You get the robust, savory flavor from the seasoned ground beef mixed right in with that smooth, slightly tangy ricotta. It creates these substantial, yet somehow still light, bites of pasta. It’s the definition of a hearty Italian meal that satisfies everyone. Forget fancy sauces; this simple meat and cheese mix makes it a true ground beef stuffed shells family favorite. It just tastes like home.
Ingredients for Your Easy Baked Beef and Ricotta Stuffed Shells
Okay, let’s talk about what goes into this magic! I always keep these staples stocked because they are the foundation of this dish. When you see the final quantity, don’t panic—it makes a great casserole, perfect for leftovers or maybe even freezing a portion because these are amazing freezer friendly pasta bakes!
- 1 box (12 ounces) jumbo pasta shells (These are the stars, make sure they are the jumbo kind!)
- 1 pound ground beef (We’re dealing with the fat here, see my instructions below!)
- 1 jar (24 ounces) marinara sauce, divided (I use a good quality jarred sauce to keep things fast, but use your favorite!)
- 1 container (15 ounces) ricotta cheese (Get the whole milk stuff if you can; it’s creamier.)
- 1 cup shredded mozzarella cheese, plus 1 cup for topping (We need a cup *in* the filling and a cup *on top* for that ultimate cheese pull.)
- 1/2 cup grated Parmesan cheese
- 1 large egg (This acts as our little binding agent.)
- 1 teaspoon dried Italian seasoning
- 1/2 teaspoon garlic powder
- Salt and black pepper to taste (Be generous with the pepper, trust me.)
If you want to explore other comforting meals we feature, you should take a peek at my recipe for creamy smothered chicken and rice casserole—it’s pure comfort!
Ingredient Notes and Simple Substitutions
Because we’re home cooks here, we sometimes have to pivot ingredients, and that’s totally fine! The key is understanding what each part does. If you can’t find ricotta, you can absolutely use whole milk cottage cheese, but you’ll want to blend it up first so it’s super smooth. A quick pulse in a food processor makes all the difference!
Regarding the marinara, I use store-bought for speed, but if you have a favorite homemade sauce, use that! Just make sure you have enough to cover the bottom and completely blanket the top of the shells. And remember that note about sneaking in veggies? If you want to switch this up to a spinach and cheese stuffed shells situation—my personal favorite for balancing out all that richness—just grab one cup of frozen spinach, thaw it completely, and squeeeeeze out every single drop of water before tossing it into the ricotta mixture. It blends right in!
Cooking Jumbo Pasta Shells Recipes Perfectly
Alright, let’s talk about the shells themselves! This is where so many batches of homemade stuffed shells go wrong, and we simply cannot have that. If you undercook them, they won’t stuff. If you overcook them? Well, you end up with mushy, broken shells that are impossible to handle when you’re layering them in the baking dish. It’s a total disaster for that gorgeous, structured look we want.
When you look at the box for these jumbo pasta shells recipes, you need to follow the directions exactly—but with one major adjustment. You are targeting al dente, which means they should still have a firm little bite left in the center. I usually pull them out about two minutes *before* the package suggests. That tiny bit of uncooked strength is crucial for stuffing.
The minute you drain them, perform this next step, which is non-negotiable in my book: rinse them gently with cool tap water.
I know, I know! Some purists say you should never rinse pasta because it washes off the necessary starch. But hear me out: we need to cool them down fast so they stop cooking and, more importantly, we need to wash off that sticky exterior. If you don’t rinse them, they will weld themselves together into one giant, starchy clump while they wait to be filled. Trust me on this one—a quick cool rinse keeps them separate and pliable for easy handling later!
Assembling Your Ricotta Stuffed Shells Classic Filling
Now that our jumbo shells are cooled and ready, it’s time for the fun part: creating that amazing filling! This is where the creamy texture of our ricotta stuffed shells classic really comes to life. You need a good, big mixing bowl for this, because you’re going to be combining several ingredients to make one beautiful, savory mash.
First, in that bowl, we start layering. Dump in that creamy ricotta, the cup of mozzarella cheese you reserved specifically for the inside, and that half-cup of Parmesan. Then, add your cooked, drained, and cooled ground beef. Don’t worry if it looks a little dry; the egg and the cheese are going to bind everything up beautifully.
Next up are the flavor boosters: the Italian seasoning and garlic powder. Give it all a good mix. You want to stir until everything is thoroughly combined, but here’s my personal secret—don’t overbeat it! We want the ricotta to stay light and somewhat fluffy, not turn into glue. Stir just until you can’t see distinct patches of white cheese or meat.
Now, for the most important step that sets my recipes apart—the taste test! Since the flavor doesn’t deepen intensely during the bake (that’s more for lasagna), you need to make sure your filling tastes perfect right now. Take a small dab on a spoon. Does it need more salt? A little more black pepper? This is your absolute last chance to adjust seasoning before everything goes under that blanket of sauce. Get it tasting right now, and your final dish will be spot on!
Once you’re happy with the seasoning, that filling is ready to go! You can use a small spoon or even your hands (I like using my fingers best for control) to gently fill each cooled pasta shell. Don’t pack them tight; just fill them until they are nicely mounded. If you’re looking for another hearty, dependable dish to serve alongside this, you have to try my recipe for easy leftover turkey soup recipe—it’s fantastic!
Step-by-Step Instructions for Sauce Covered Stuffed Shells
Okay, this is the grand assembly! We’ve got our shells cooked, we’ve got our savory, creamy filling ready to go, and now we just need to layer everything up so we get that perfect, gooey effect. Don’t worry about making it look perfect right now; once it’s baked, nobody will even notice if one shell is slightly crooked. We are aiming for maximum flavor delivery in these gorgeous, sauce covered stuffed shells.
Here is the order of operations for getting this assembled and into the oven pronto. And while you’re here, if you want to see a totally different kind of comforting pasta, you really must look up my recipe for easy gnocchi soup recipe!
- Get the Oven Ready: First things first—preheat your oven to 375 degrees Fahrenheit. Also, grab that 9×13 baking dish and just brush it lightly with a little oil or cooking spray so nothing tries to stick to the bottom later.
- Sauce the Base: You need just a thin veil of marinara sauce on the bottom of the dish before you start placing the shells. I usually take about 1 cup from the jar and spread it around evenly. This stops the bottom layer of shells from drying out or burning while they bake—it’s important groundwork!
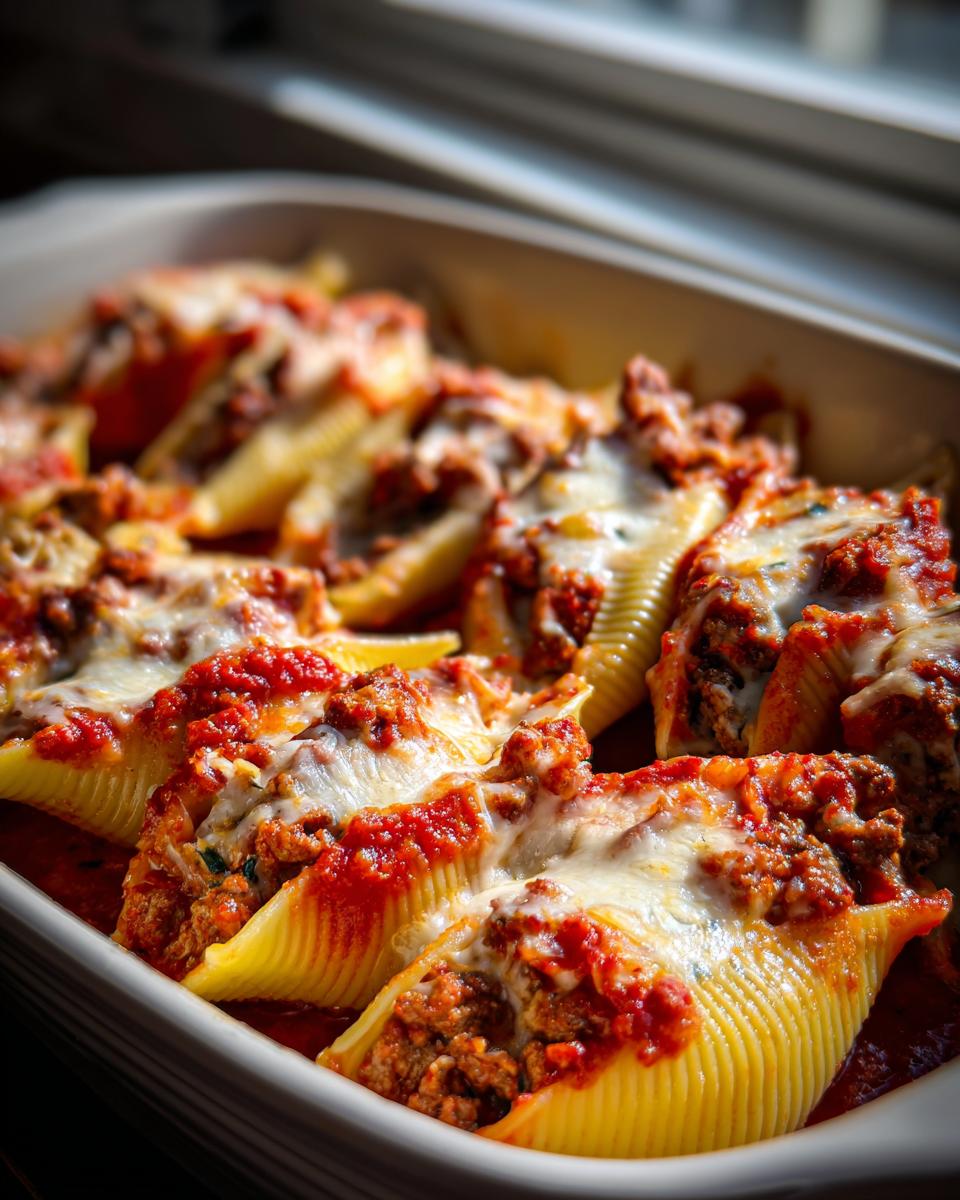
- Get Stuffing: Now, grab those cooled shells and fill them up gently with the beef and ricotta mixture we made earlier. Work systematically around the pan, arranging the filled shells snugly in a single layer over that bottom sauce layer. I usually try to nestle them close together because that helps them hold their structure.
- Cover Completely: Once all your shells are nestled in, it’s time to pour on the rest of that marinara sauce. Pour it right over the top. Try to get sauce into all the little gaps between the shells. This ensures that the pasta stays moist right up until the moment it melts into the cheese.
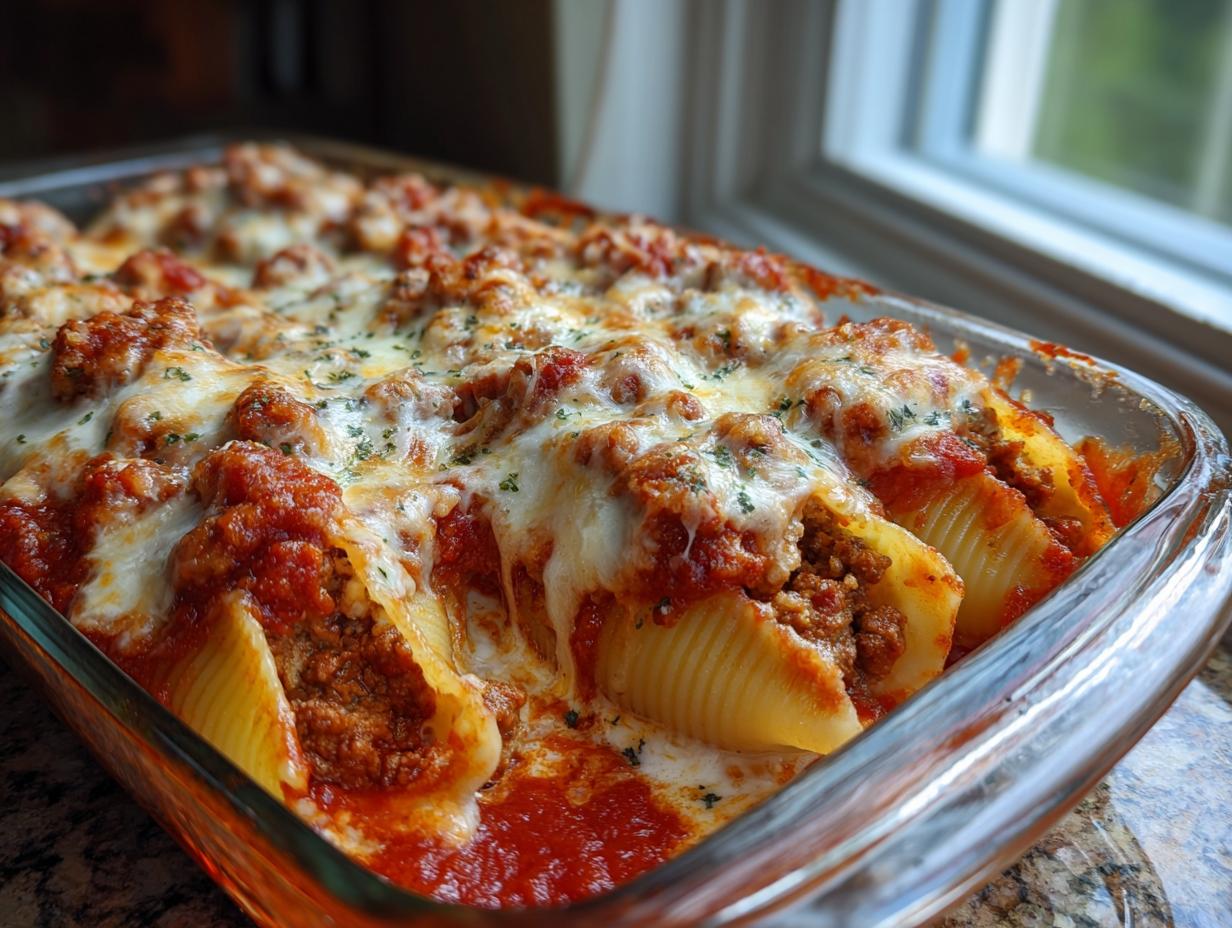
- The Cheesy Finale: Remember those two cups of mozzarella? We used one in the filling; now grab that second cup and sprinkle it evenly all over the top layer of sauce. Don’t leave any uncovered spots! This is what gives you those incredible stretchy cheese pulls we all crave. A final light sprinkle of Parmesan over that mozzarella never hurts, either!
We are almost there! Since we already have the main dish covered, if you want to check out my recipe for easy stuffed shells dinner, you can see another great approach!
Baking Time for Cheesy Baked Pasta
The moment of truth! Slide that beautifully assembled dish into the preheated 375°F oven. You are going to bake it for approximately 25 to 30 minutes. What are we looking for? Don’t just trust the timer! Look for movement:
- You want to see the sides of the sauce starting to really bubble up thickly—not just a gentle simmer, but a real, enthusiastic bubble.
- The cheese on top should be fully melted across the surface and just starting to turn a gorgeous, light golden brown around the edges. If it’s still pale white after 30 minutes, you can carefully pop it under the broiler for 60 seconds, but watch it super closely, or it burns fast!
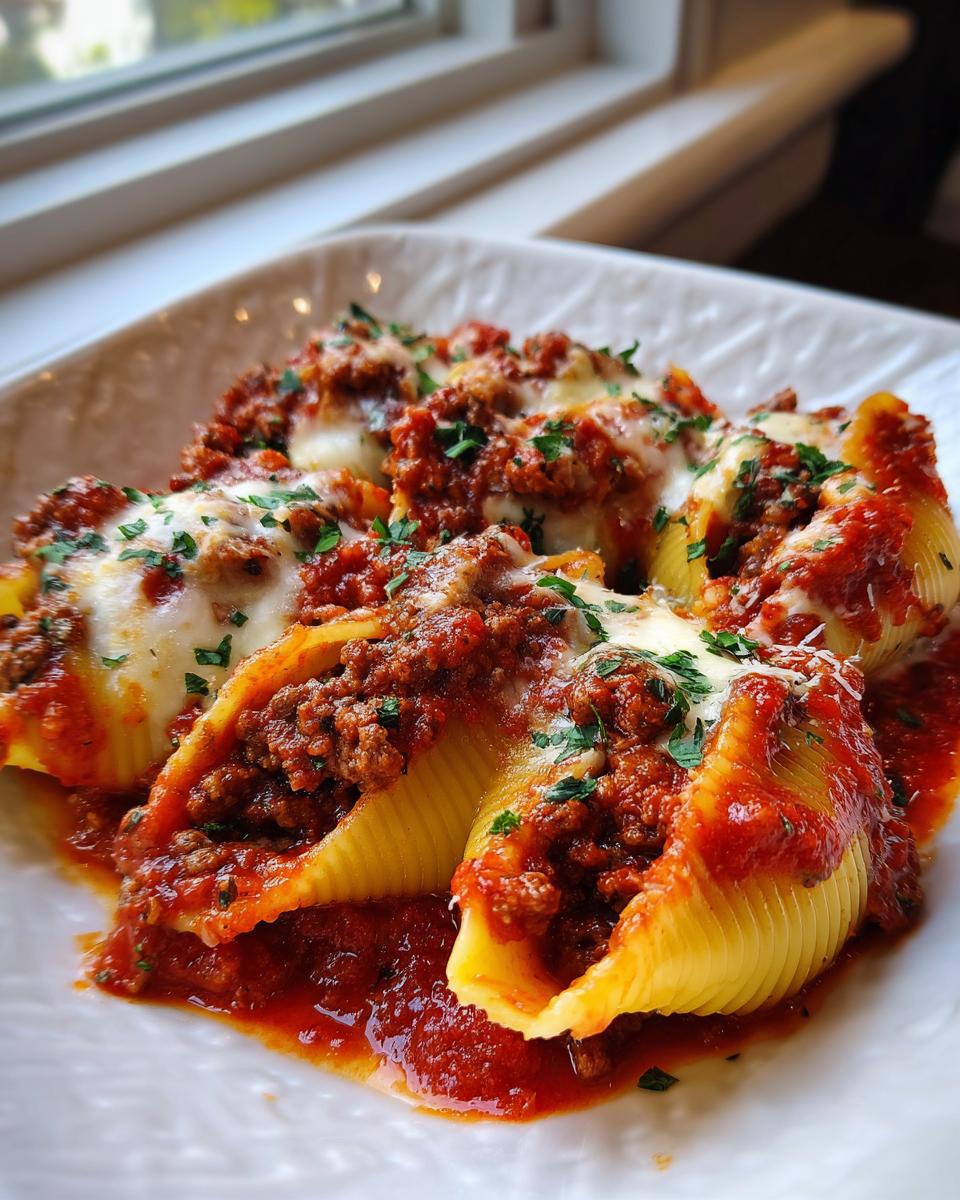
This process gets everything heated through to the center and makes sure that delicious filling is piping hot. After you pull that gorgeous pan of cheesy baked pasta out, you absolutely must let it rest for about five minutes on the counter. Just five minutes! This helps the cheese set up just enough so that when you scoop out a serving, the filling stays put inside that shell instead of sliding out all over your plate. That small pause makes a huge difference!
Tips for Success with Your Stuffed Shells
Even though this is meant to be an easy recipe—and it totally is—there are always a few tricks you pick up over the years that elevate it from “good” to “oh my gosh, can I have the recipe?” I consider these little techniques the secrets that make mine the best stuffed shells recipe around the neighborhood. They mainly focus on texture—making sure we avoid too much liquid, which is the enemy of any casserole!
First off, let’s talk about the beef fat. When you brown your ground beef, you must drain it really well. If you skip this step, that fat liquefies in the oven and can make your entire filling feel greasy or swimming in liquid later on. Seriously, use paper towels held with tongs and blot that meat dry after you drain the bulk of the liquid!
Also, remember what I said about tasting the filling? Make sure that ricotta mixture has enough salt. When you bake something smothered in sauce and topped with cheese, the filling flavor tends to get mellowed out. You need to season it aggressively upfront so it sings once it’s heated through.
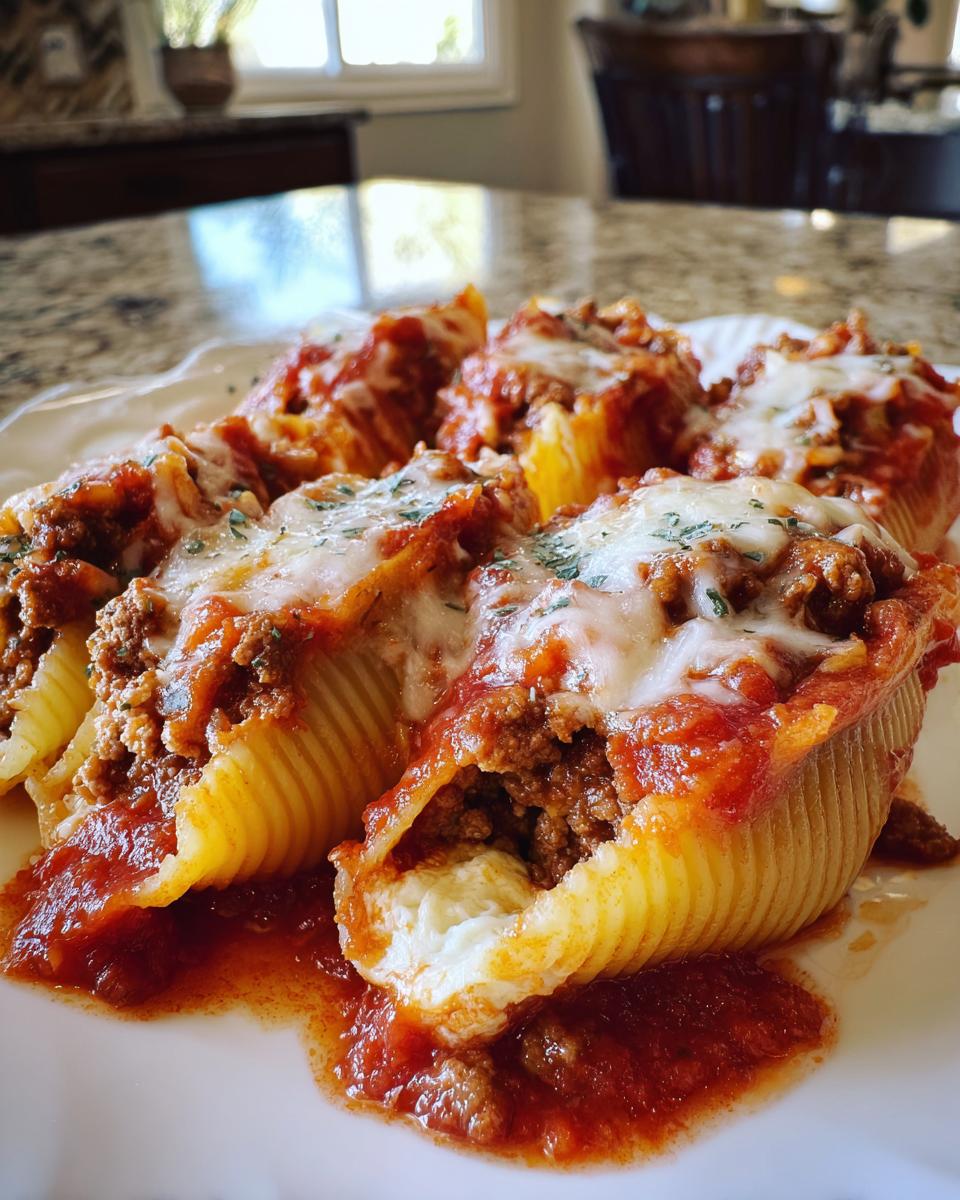
I mentioned resting time earlier, but let me stress it again: Do not cut into this dish straight out of the oven! Give it those five minutes, minimum. That resting period allows the cheese and the ricotta binder to firm up just slightly. If you slice too early, everything oozes out. If you can wait 10 minutes, you’ll have beautiful, self-contained, cheesy pockets that hold their shape perfectly!
If you’re looking for a perfect cozy side dish to pair with this, you absolutely have to try my recipe for the best old-fashioned apple crisp recipe—it’s the perfect sweet follow-up!
Making Stuffed Shells for a Crowd
I’ve made this countless times for potlucks and big family dinners, and it scales up beautifully. If you need to double this recipe, don’t just grab an even bigger, deeper pan. That’s a common mistake! When you stack the shells too high, the shells in the middle end up getting overcooked or mushy before the ones on the edge are even hot.
When you are preparing stuffed shells for a crowd, your best bet is to use two separate 9×13 dishes instead of one giant roasting pan. This ensures you have a good, flat layer of shells that can cook evenly, get coated properly with sauce, and develop that perfect golden-brown cheese crust everywhere. You get more crispy edges this way, and who doesn’t love the crispy edges?
If you’re looking for other great advice on making crowd-pleasing pasta, check out this useful link: Make Perfect Cheesy Stuffed Shells Every Time.
Make Ahead Pasta Dishes and Freezer Friendly Pasta Bakes
One of the absolute best things about assembly-style casseroles like these stuffed shells is that they are phenomenal for planning ahead! You know how sometimes you just don’t have energy to cook after a long day? Having a delicious, hearty Italian dinner waiting in the fridge or freezer is a game-changer. This recipe is designed to handle it beautifully, making it one of my favorite make ahead pasta dishes.
The most important thing to remember when planning ahead is that cold food takes longer to heat up than room-temperature food. We need to account for that in our baking time!
If you assemble the entire casserole—sauce on the bottom, shells stuffed and layered, sauce over the top, and cheese sprinkled on—then cover it tightly with plastic wrap and foil, you can pop it right into the refrigerator. It keeps perfectly well for up to 24 hours. When you’re ready to eat, just pull it out and you’ll need to add about 10 minutes extra to your standard baking time since it starts out chilled. Give it a good 35 to 40 minutes total until it’s bubbly all the way through!
Now, if you want to get really organized and save this for a future busy night, these are fantastic freezer friendly pasta bakes too. Because they are so saucy and full of moist filling, they thaw and reheat like a dream. You can bake the dish completely, let it cool, cover it extra tightly with plastic wrap and then foil (we don’t want freezer burn!), and freeze it for up to three months.
When you realize you need a cozy dinner tomorrow, just move the dish directly from the freezer to the refrigerator the day before you plan to bake it. That overnight thaw ensures even heating. If you’re in an absolute rush and need to bake it straight from frozen, it will take longer—aim for about 50 to 60 minutes, checking that the center is completely hot. You can find some other wonderful meal prep ideas over at easy moist plum cake recipe, though that takes a bit longer to solidify!
If you are interested in seeing another way people prepare these crowd-pleasers for the future, check out this pin for Baked Italian Stuffed Shells for your inspiration files!
Serving Suggestions for Your Weeknight Pasta Meals
Now that you have this incredible tray of cheesy, meaty stuffed shells ready to go, you need the right partner dishes to turn it into a proper family meal, right? Since this dish is so rich—it’s pasta, meat, lots of ricotta, and that glorious blanket of mozzarella—we want sides that are bright, simple, and that don’t steal the spotlight. We’re talking quick accompaniments for your weeknight pasta meals!
First up, you absolutely must have some garlic bread. I mean, you need something crusty to soak up every last drop of that extra marinara sauce pooled around the shells. Seriously, if you leave any sauce behind, you’re doing it wrong! You can use a store-bought loaf, slice it, slather it with butter mixed with fresh garlic and a little parsley, and bake it for the last 10 minutes alongside the shells. It’s divine.
For something fresh, keep it really simple. A crisp green salad is the perfect counterpoint to all that cheesy richness. I always toss together romaine lettuce, maybe some thinly sliced cucumber, and a few cherry tomatoes, dressed very lightly with a sharp vinaigrette. The acidity of the vinaigrette cleanses the palate after a bite of rich ricotta filling.
And listen, if you are looking for something totally fun and unexpected to serve alongside your Italian night—maybe you’re making this for a weekend dinner instead of a Tuesday night dinner—you really have to check out my recipe for easy homemade soft pretzel bites recipe! I know it sounds weird, but dipping a warm pretzel bite into extra marinara sauce is surprisingly delicious. Trust me on the unexpected pairings!
Keep the sides light, keep them fast, and save all the heavy lifting for those perfectly stuffed, sauce-covered shells!
Frequently Asked Questions About Stuffed Shells
When you’re making a classic dish like this, questions always pop up! I’ve gathered the ones I hear most often from friends and family who are trying this recipe for the first time. It’s all about building confidence so your stuffed shells come out perfect every time you make them!
Can I make these stuffed shells vegetarian?
Oh, absolutely! This recipe is incredibly flexible. If you want to skip the ground beef, you have two fantastic options to keep that awesome texture going. Your easiest swap is the one I mentioned briefly—mix in about a cup of thawed, frozen spinach (make sure you squeeze every last drop of water out first!). That gives you wonderful spinach and cheese stuffed shells.
If you want a heartier replacement, try sautéing about 10 ounces of finely chopped mushrooms (cremini work great) along with the garlic powder, salt, and pepper. Cook them until they release their liquid and start to brown before mixing them into the ricotta and cheese base. It adds a wonderful earthy depth, and trust me, nobody misses the meat!
How long do I bake stuffed shells from frozen?
This is where planning ahead really pays off! If you assembled the whole dish, covered it tightly, and froze it unbaked, you need to remember that starting point matters. When baking straight from the freezer—and I mean fully frozen solid—you should plan on total baking time being closer to 50 to 60 minutes, rather than the 30 minutes we use for room-temperature dishes. Remember, you are aiming for that sauce to be ripping hot and bubbly throughout!
If you thawed them overnight in the fridge first (which is what I highly recommend for the best texture overall!), then you should refer back to those make ahead pasta dishes tips: add about 10 extra minutes to your standard baking time. So, plan on about 35 to 40 minutes total for refrigerated shells.
We cover all the reliability points here, but if you want to brush up on other reliable foundations, check out my recipe for easy traditional Irish soda bread recipe!
What if I accidentally overcooked my shells and a few broke when I tried to stuff them? Don’t sweat it! Just break the broken piece into smaller bits and toss those pieces right into the filling mixture! When everything bakes under that glorious cheese and sauce, those little pieces blend right in, adding texture and body to your cheesy baked pasta. No piece goes to waste in my kitchen!
PrintEasy Baked Beef and Ricotta Stuffed Shells with Marinara Sauce
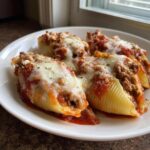
This recipe delivers a comforting, cheesy baked pasta dish using jumbo shells filled with seasoned ground beef and creamy ricotta cheese, covered in marinara sauce. It is a simple, hearty family favorite perfect for weeknight pasta meals.
- Prep Time: 20 min
- Cook Time: 30 min
- Total Time: 50 min
- Yield: 4 servings 1x
- Category: Dinner
- Method: Baking
- Cuisine: Italian-American
- Diet: Vegetarian
Ingredients
- 1 box (12 ounces) jumbo pasta shells
- 1 pound ground beef
- 1 jar (24 ounces) marinara sauce, divided
- 1 container (15 ounces) ricotta cheese
- 1 cup shredded mozzarella cheese, plus 1 cup for topping
- 1/2 cup grated Parmesan cheese
- 1 large egg
- 1 teaspoon dried Italian seasoning
- 1/2 teaspoon garlic powder
- Salt and black pepper to taste
Instructions
- Preheat your oven to 375 degrees Fahrenheit. Lightly grease a 9×13 inch baking dish.
- Cook the jumbo pasta shells according to package directions until al dente. Drain the shells and rinse them briefly with cool water to stop cooking. Set aside.
- In a large skillet over medium heat, cook the ground beef until it is browned completely. Drain off any excess fat.
- In a large bowl, combine the cooked ground beef, ricotta cheese, 1 cup of mozzarella cheese, Parmesan cheese, egg, Italian seasoning, and garlic powder. Mix until all ingredients are well combined. Season with salt and pepper.
- Spread about 1 cup of marinara sauce evenly over the bottom of the prepared baking dish.
- Carefully stuff each cooked pasta shell with the beef and ricotta mixture. Arrange the stuffed shells in a single layer in the baking dish over the sauce.
- Pour the remaining marinara sauce over the stuffed shells.
- Sprinkle the remaining 1 cup of mozzarella cheese evenly over the top.
- Bake for 25 to 30 minutes, or until the sauce is bubbly and the cheese topping is melted and lightly golden brown.
- Let the cheesy baked pasta rest for 5 minutes before serving.
Notes
- For a spinach and cheese stuffed shells variation, mix 1 cup of thawed, squeezed-dry frozen spinach into the ricotta filling mixture.
- You can make this a make ahead pasta dish by assembling the entire casserole, covering it, and refrigerating it for up to 24 hours before baking. Add 10 minutes to the baking time if baking directly from the refrigerator.
- This recipe is freezer friendly; cover tightly and freeze baked or unbaked for up to 3 months. Thaw overnight in the refrigerator before reheating.
Nutrition
- Serving Size: 4 shells
- Calories: 580
- Sugar: 12
- Sodium: 750
- Fat: 30
- Saturated Fat: 14
- Unsaturated Fat: 16
- Trans Fat: 0.5
- Carbohydrates: 45
- Fiber: 4
- Protein: 35
- Cholesterol: 110