
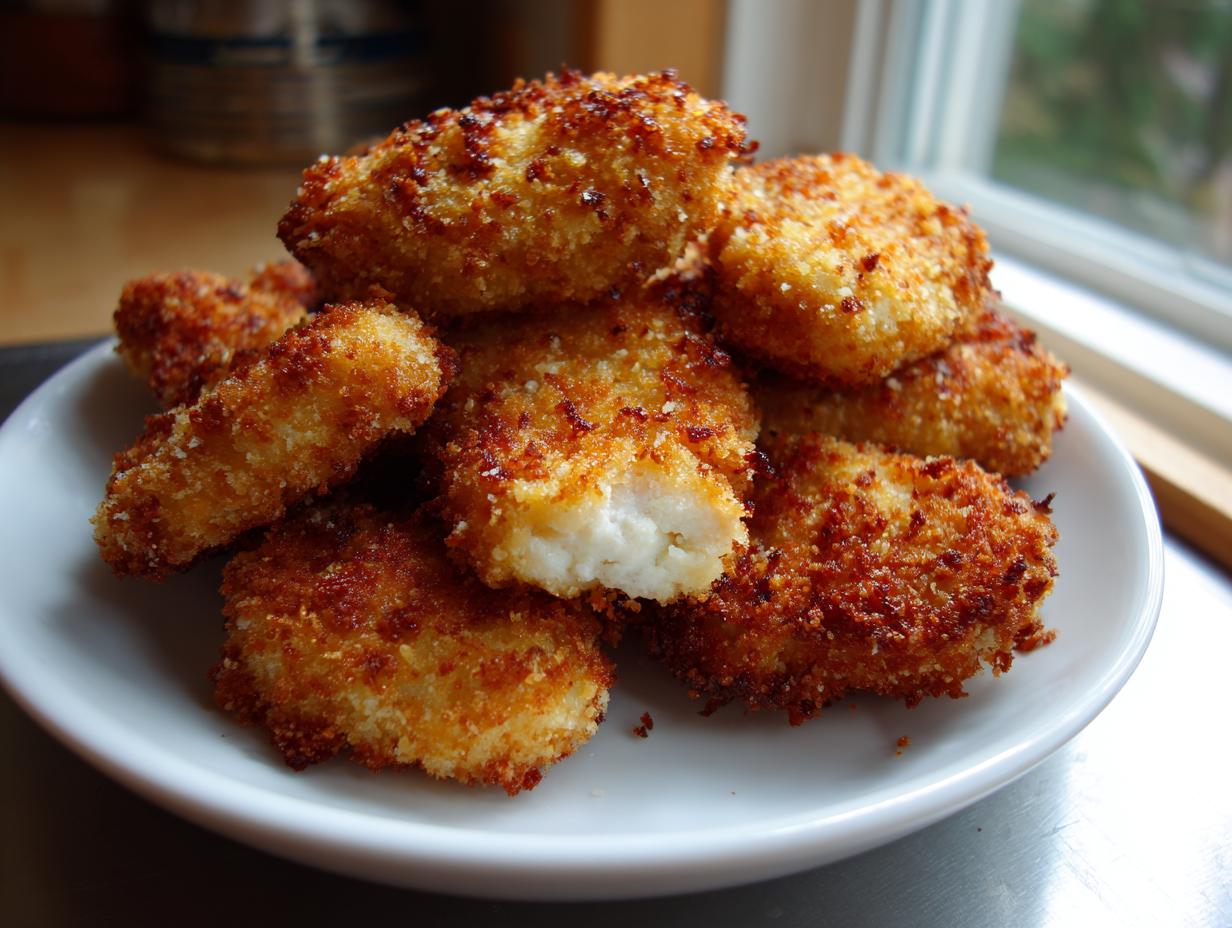
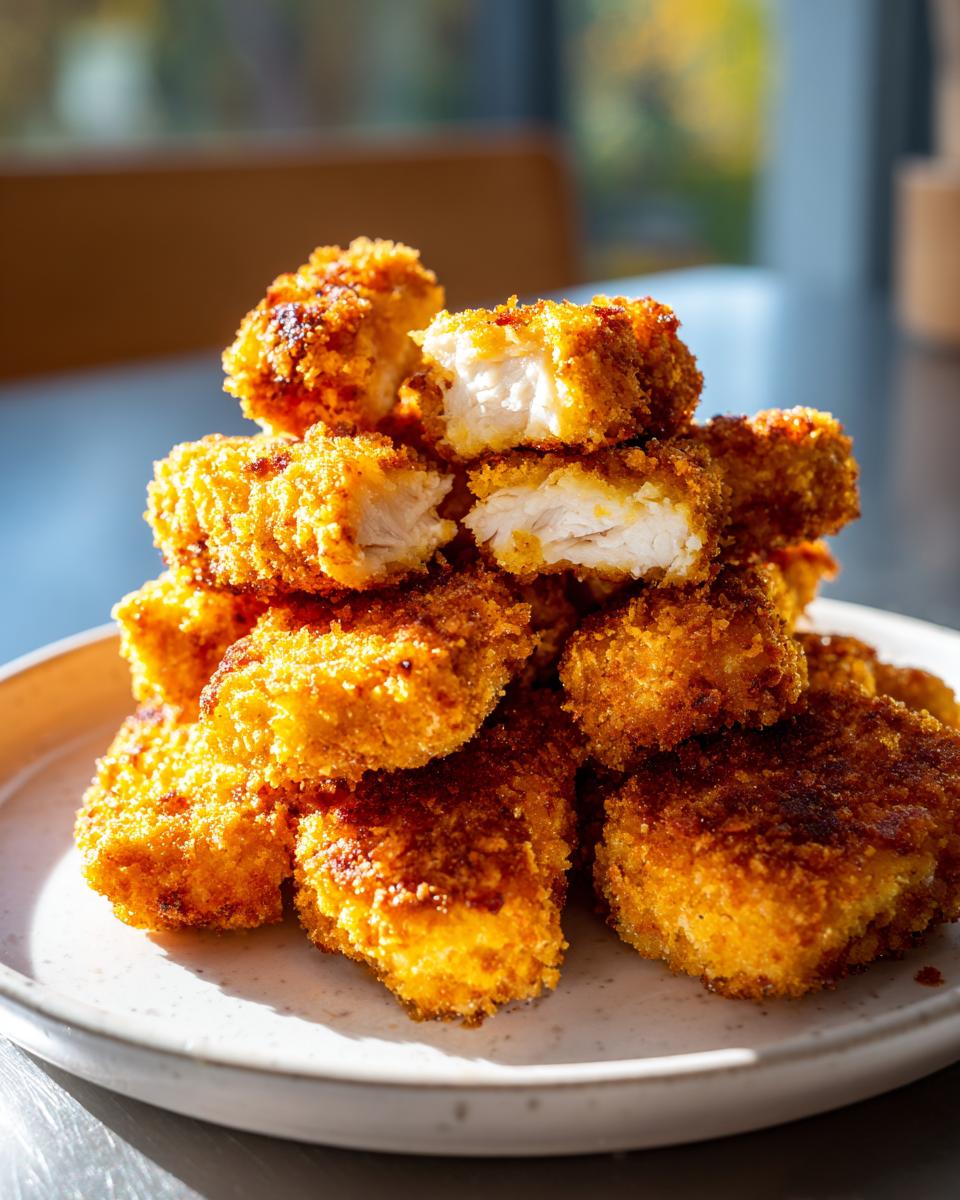
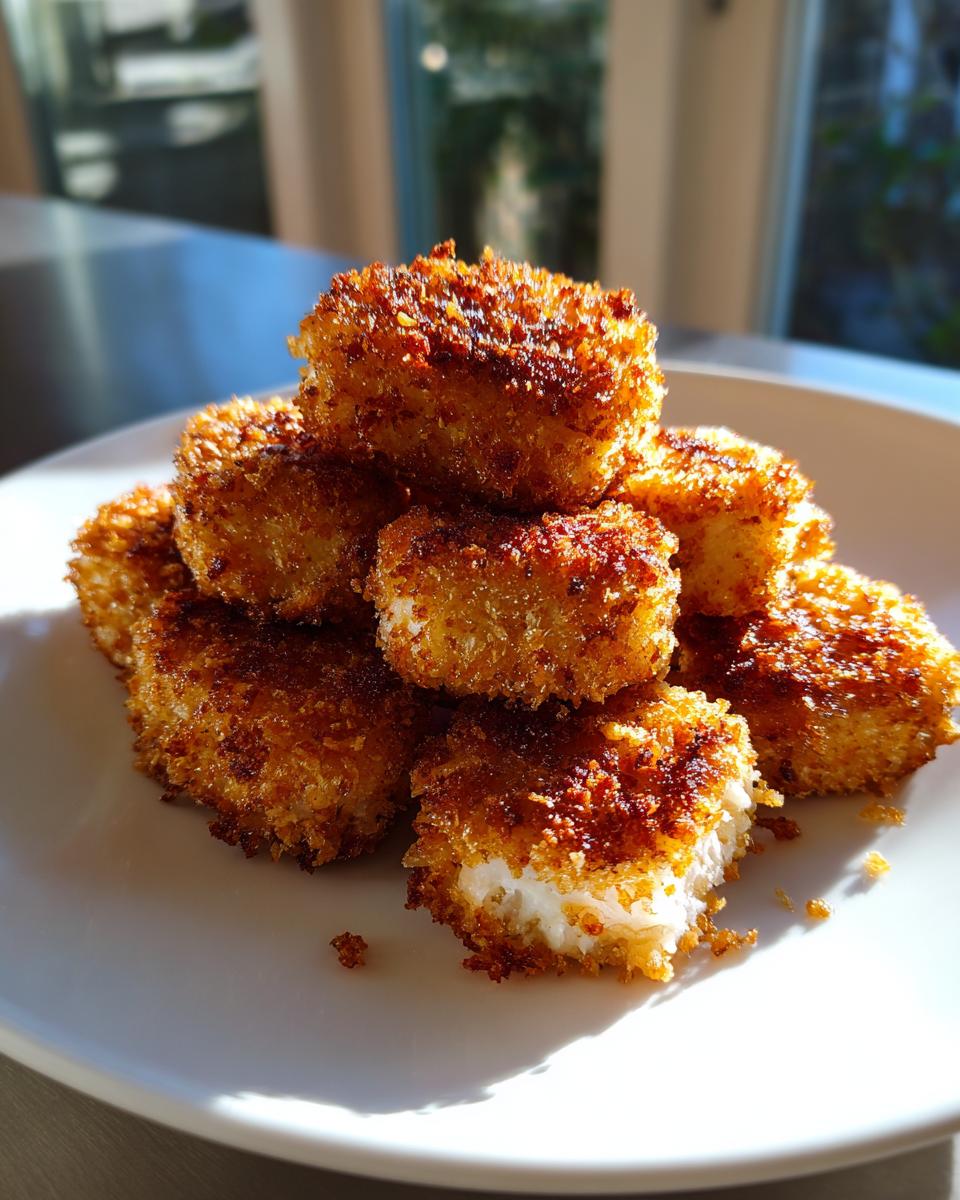
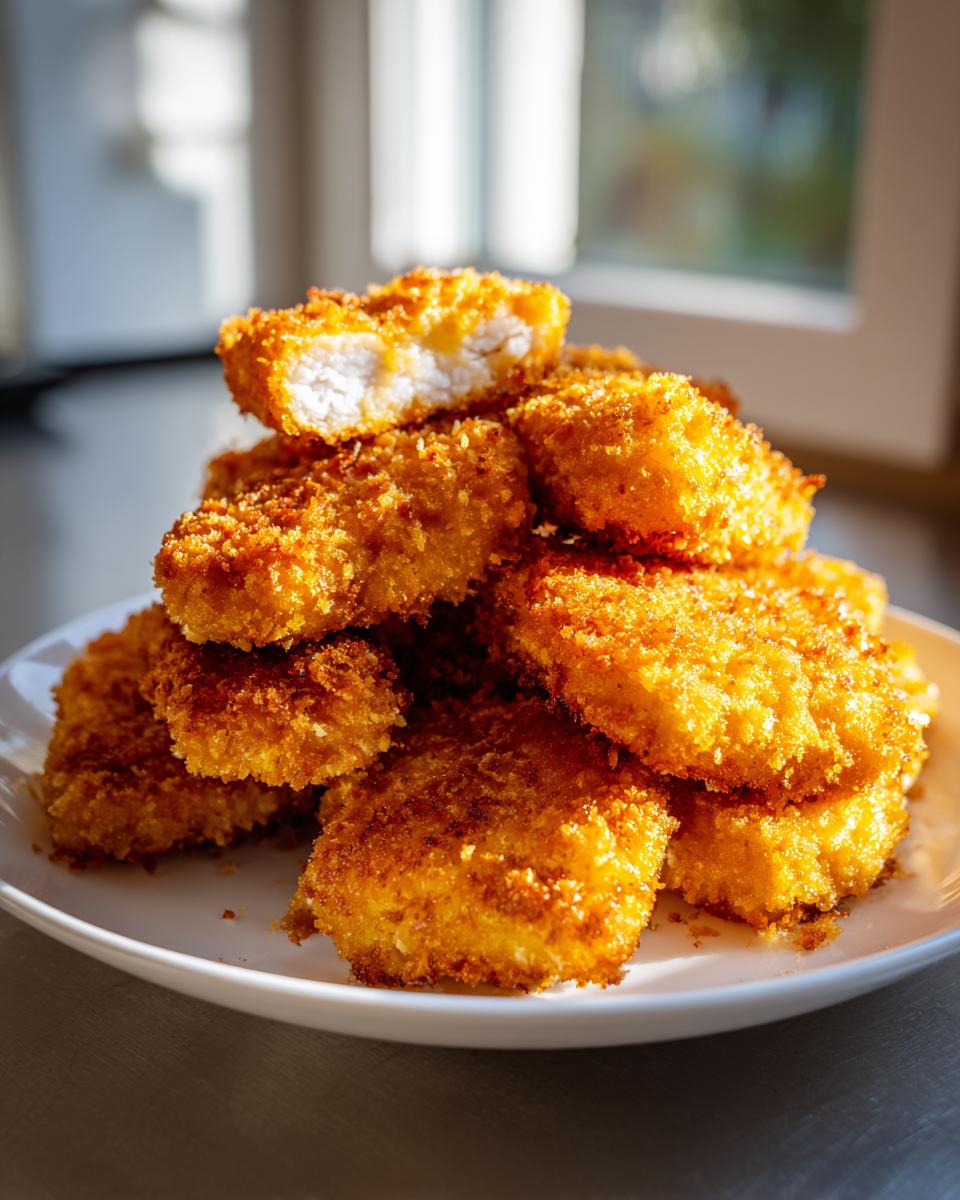
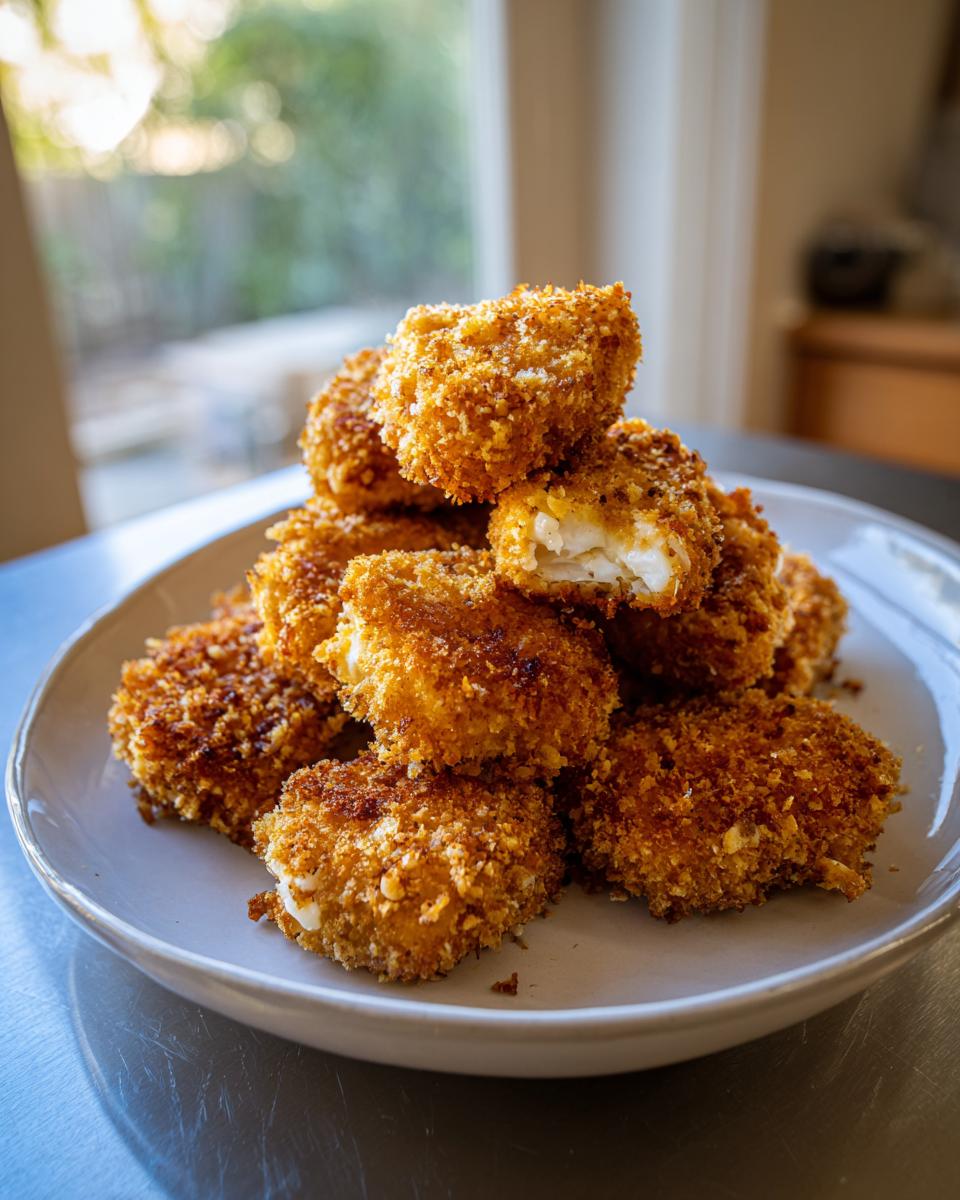
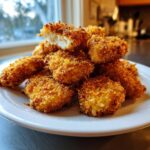
There is just something about a perfectly golden, crispy chicken nugget that takes us right back to childhood favorites, isn’t there? But let’s be honest, the store-bought ones just don’t hold a candle to the real deal. Here at Cookin’ Corner, we are obsessed with bringing that joy back home, but better! Trust me when I say that making the **homemade chicken nuggets** from scratch is easier than you think, and you control every wonderful, flavorful ingredient. We’ve cracked the code on getting that satisfying crunch you crave using the oven or the air fryer—no messy deep frying required! When I bread these beauties, I swear I can smell my grandmother’s kitchen wafting through the air. It’s pure comfort, ready for dinner tonight.
- Why This Is the Best Homemade Chicken Nuggets Recipe
- Gathering Ingredients for Your Homemade Chicken Nuggets
- Step-by-Step Guide to Making Tender Juicy Chicken Bites
- Cooking Your Crispy Homemade Chicken Nuggets (Oven or Air Fryer)
- Tips for Success Making Homemade Chicken Nuggets
- Storage and Make Ahead Chicken Nuggets Instructions
- Serving Suggestions for Your Homemade Chicken Nuggets
- Frequently Asked Questions About Homemade Chicken Nuggets
- Share Your Family Favorite Chicken Recipe Experience
Why This Is the Best Homemade Chicken Nuggets Recipe
I’ve tried so many recipes that promise the world but end up with soggy breading. That’s not us! This really is the absolute **easy chicken nugget recipe** you need because we nail two crucial things: internal tenderness and external crispness. The secret weapon, honestly, is the buttermilk marinade. It truly works magic to transform plain chicken breast into tender juicy chicken bites that absolutely melt in your mouth. It prepares the chicken beautifully for the breading.
But we don’t stop there. We layer our breading just right so that even without dunking them in oil, they come out perfect every time. You’re going to get unbelievable results!
Achieving Crispy Baked Chicken Nuggets Perfection
If you want those legendary results without the grease, you have to trust the Panko! Standard breadcrumbs just don’t give you that satisfying *shatter* when you bite into them. We use Panko exclusively, and then we give the nuggets a light, even spray of cooking oil before they go into the oven or the air fryer. That light oil mist creates the barrier that turns brown and crispy while keeping the inside perfectly moist. It’s how we get crispy baked chicken nuggets that rival any restaurant!
A Family Favorite Chicken Recipe for Quick Weeknight Chicken Dinner
Look, I get it—it’s a weeknight, and nobody wants a complicated meal. This entire process, once you’ve done a practice run, moves lightning fast. That’s why I call this my go-to solution for a genuine **quick weeknight chicken dinner**. The kids gobble these up without a fuss, and honestly, I feel great serving them because I know exactly what went into them. If you need speedier ideas that carry the same comfort factor, you should definitely check out my thoughts on hot honey chicken tenders sometime!
Gathering Ingredients for Your Homemade Chicken Nuggets
Okay, let’s talk supplies! This is where the magic starts, and having everything ready before you begin makes the process virtually foolproof. Remember, for the absolute best homemade chicken nuggets, preparation is everything. Don’t rush measuring out these components—they are the backbone of our fantastic coating and flavor!
Here’s what you’ll need to round up for about four hungry people:
- 1.5 lbs boneless, skinless chicken breast or chicken meat (we’ll discuss ground chicken later!).
- 1 cup buttermilk (the key to tender meat!).
- 1 large egg.
- 1.5 cups all-purpose flour.
- 1 cup panko breadcrumbs (don’t skimp on these, I promise!).
- 1 teaspoon salt.
- 1 teaspoon black pepper.
- 1 teaspoon garlic powder.
- 1 teaspoon onion powder.
- 1/2 teaspoon paprika.
- Oil spray (this is vital for baking or air frying!).
Ingredient Notes and Substitutions for Homemade Chicken Nuggets
When it comes to the meat, you’ve got options, honey! If you want that classic fast-food shape, finely chopping chicken breast works wonders, or you can lean into the convenience of **ground chicken nuggets**. Ground chicken tends to be even faster to shape and frankly, often fools the kids because the texture is so uniform. Either way, measure out 1.5 pounds!
Now, about that buttermilk—if you open your fridge and realize you don’t have any, don’t panic! That’s a perfectly normal kitchen oopsie. You can easily make a substitute that works almost as well. Just take one cup of regular milk, add one teaspoon of lemon juice or white vinegar, stir it gently, and let it sit on the counter for about five minutes until it curdles a little. That slight acidity acts just like the buttermilk, keeping our **buttermilk marinated chicken** soak effective!
Step-by-Step Guide to Making Tender Juicy Chicken Bites
Now for the fun part, where we turn those ingredients into something truly spectacular! This process is all about building layers of flavor and texture. If you follow these steps carefully, you are guaranteed to have some of the most flavorful, tender chicken you’ve ever made at home. My personal rule is: never skip the marinade time! That little bit of waiting is what separates a good nugget from a show-stopping one.
Preparing the Chicken and Buttermilk Marinated Chicken
First things first: we need uniform pieces. If you’re using chicken breasts, take your time to cut them into consistent nugget shapes, about one inch thick. Consistency matters here because it ensures everything cooks through at the same rate. If you went the ground chicken route, just quickly form them into your preferred nugget shape now.
Next, we mix up our soak! Whisk the egg right into the buttermilk in a medium bowl, and then it’s time for the chicken to take a bath. Submerge all those lovely pieces in that **buttermilk marinated chicken** mixture. I know you’re eager to get cooking, but seriously, put this in the fridge for at least 30 minutes. If you can let it go for two to four hours? Wow. That acidity eats away at the chicken just enough to make them unbelievably tender and juicy, and that’s the secret to getting rave reviews! If you are ever looking for another guaranteed winner for the family, you HAVE to check out my recipe for quick honey garlic chicken skewers.
Mastering the Best Coating for Homemade Nuggets
While your chicken is chilling (lucky chicken!), set up your dredging station. You’ll need two shallow dishes, right next to each other. In the first dish, mix up all your dry spices—that’s the flour, salt, pepper, garlic, onion, and paprika. Give it a good whisk so everything is evenly distributed. This spice blend is key to our **best coating for homemade nuggets**!
In the second dish, just dump in your Panko breadcrumbs. Next, pull the chicken out of the buttermilk, letting any extra drip off—we don’t want soup, just a nice wet coating. Dredge it completely in the flour mixture first, shaking off the excess really well. Then, give it a quick swim back in any remaining buttermilk (optional, but great for maximum adherence!) and press it firmly and thoroughly into those Panko crumbs. Make sure every part is coated before placing it on your waiting baking sheet!
Cooking Your Crispy Homemade Chicken Nuggets (Oven or Air Fryer)
Alright, we’ve done the hard prep work—the marinating, the dredging—now we get to the best part: watching them turn golden brown! Since we love versatility here at Cookin’ Corner, this recipe hands you the controls for both oven baking and air frying. You decide what works best for your weeknight schedule!
First, get your tools ready. Preheat your oven to 400°F (200°C) or, if you’re using your air fryer, get that set to 375°F (190°C). If you’re baking, lining your sheet pan with parchment paper is a lifesaver for clean-up, trust me. If you’re air frying, make sure your basket isn’t overloaded; these need space to crisp up!
Now, take those beautiful, breaded nuggets and place them on your prepared surface. Here’s that crucial little trick again: give the tops a light, even coating of cooking oil spray. This is non-negotiable if you want the texture of **crispy baked chicken nuggets** that look like they came from a fryer!
For the Oven Bakers: You’ll bake these for about 18 to 22 minutes. The key is to flip them halfway through. This ensures both sides get that lovely golden color and cook all the way through to that safe 165°F internal temperature. For another fantastic meal using this appliance, you can check out my guide on how to make a air fryer whole chicken—it’s a game changer!
For the Air Fryer Fans: If you’re looking for the quickest route to success, your air fryer is your best friend for these **air fryer chicken nuggets homemade**. They’ll only need 12 to 15 minutes total. Just like baking, shake that air fryer basket halfway through! Shake it good so they tumble around a bit and crisp up evenly. Honestly, either way you go, the resulting flavor is amazing. We’re aiming for that satisfying crunch, and thanks to that Panko, you’re going to get it! If you want to see another great recipe that uses a similar technique as seen on a high-traffic site, check out this version for homemade chicken nuggets.
Pull them out when they are golden brown across the board. Don’t forget that internal temperature check! Serve them hot right away. Honestly, these taste so good straight out of the oven, you might not even make it to the dipping sauce stage!
Tips for Success Making Homemade Chicken Nuggets
Even with the best ingredients, sometimes the cooking gods aren’t exactly smiling on us, right? I want to give you a few tricks I’ve learned over the years here at Cookin’ Corner so you don’t end up with soggy bottoms or unevenly cooked chicken. Remember, these tips are what bridge the gap between ‘homemade’ and ‘I can’t believe this isn’t from a restaurant.’
The number one enemy of crispiness is moisture between the breading and the meat. Beyond patting your marinated chicken dry before dredging, try this little extra step sometimes: the double dredge. After you bread them the first time, let them rest on the tray for maybe five minutes while you finish the batch. Then, dip them quickly back into the flour, then back into the panko, just quick coating, pressing it on lightly. This builds an extra thick barrier which really locks in the juices and creates a texture that is unbelievably crunchy!
Also, never, ever crowd your baking sheet or your air fryer basket. I know it’s tempting when you want to be done fast, but if the nuggets are touching, the steam gets trapped, and that steam is what makes your perfect Panko coating go soft and spongey. Give them room to breathe so the hot air can circulate and brown everything evenly!
Making Copycat Chicken Nuggets Recipe Versions
If you grew up on the perfectly uniform little pieces from the golden arches, you might be looking for that specific texture when you make your **copycat chicken nuggets recipe**. We talked about using ground chicken earlier, and that’s a big step toward that highly processed look, but you can manipulate the breast meat too!
If you want that look, don’t just cube the breast meat. Use a sharp knife and really mince the chicken up finely, almost pounding it a bit before you form it into your shapes. You want less of a defined ‘piece of meat’ texture and more of that homogenous, finely textured center. Pulse it a few times in a food processor if you have one, but be careful not to turn it into a paste! Just chop it down until it’s almost ground. It takes a little extra knife work, but it really sells the theme when you are trying to recreate that classic fast-food experience for the kids!
Storage and Make Ahead Chicken Nuggets Instructions
Nobody wants to go through the whole dredging and breading process twice in one week, I know the feeling! That’s where knowing how to properly execute your **make ahead chicken nuggets** truly saves the day, especially with busy schedules or when you have hungry kids lining up for lunchboxes the next morning. You can absolutely make these ahead, and the best results come from freezing them *before* they ever see the oven or the air fryer.
If you’re planning for a huge batch, follow every step right up until they are fully breaded. Don’t spray them with oil yet! Arrange the raw, breaded nuggets on a single baking sheet lined with parchment paper. We need to freeze them until they are rock solid—we call this ‘flash freezing.’ This keeps the coating from smashing when you bag them up later. Once they’re hard little nuggets, toss them into a heavy-duty, freezer-safe bag or container. Pop them in the freezer; they’ll keep well for about two months!
When you’re ready to cook from frozen, just pull out what you need, give them that light spray of oil we talked about, and add about 5 to 7 minutes extra to whatever cooking time you used for the fresh ones. You can even use the instructions listed here for cooking easy leftover turkey soup as a guide for timing your reheating!
Now, what if you cook them all and have leftovers? That’s totally fine, but reheating needs care to keep the crunch. They will get a little soft sitting in the fridge overnight. Skip the microwave entirely—it steams them, and that kills the crisp! Instead, reheat any leftover cooked nuggets in a 375°F oven for about 8 minutes, or pop them in the air fryer for 4 minutes at the same temperature. That blasts the moisture away and brings back that great texture. If you’re interested in using ground chicken for an even faster approach to batch cooking, check out this information on ground chicken nuggets.
Serving Suggestions for Your Homemade Chicken Nuggets
You’ve done the hard work, and these amazing **homemade chicken nuggets** are piping hot and crispy—now what, right? A nugget is great all by itself, but it really shines when you surround it with great sides and the perfect dipping sauce. Since we’re aiming for that classic, comforting, family-friendly meal vibe here, I like to keep things fun and straightforward. This isn’t the time for fussy side dishes; this is time for dipping!
Let’s start with the dipping situation, because if you ask me, that’s half the fun of eating a nugget! Forget those sad little packets you get from fast-food places. We deserve better! My kids are die-hard fans of classic BBQ sauce, but honey mustard is really where it’s at for me. It’s the perfect blend of sweet, sharp, and tangy that cuts right through the richness of the fried coating.
If you’re feeling ambitious and want to skip store-bought sauces, you absolutely MUST try my quick recipe for homemade cheese sauce. It’s shockingly easy and makes those nuggets irresistible. You can find the recipe for my quick 5-minute nacho cheese sauce recipe right here on the blog! Seriously, cheese sauce changes the game.
As for sides that round out this **family favorite chicken recipe**, you can keep it classic or healthy—it works either way! For the picky eaters, you can never go wrong with a pile of crispy baked fries or maybe some simple sweet potato tots. If you want to sneak in some green, steam some broccoli until it’s bright green, toss it with a little butter and salt, and call it a day. Another winner in my house is a simple cucumber and carrot stick plate, especially if you serve them right alongside the dipping sauce. It keeps the meal moving fast and everyone feels like they got what they wanted for dinner!
Frequently Asked Questions About Homemade Chicken Nuggets
I know you’ve got questions bubbling up! That’s how you know you’re getting serious about mastering a recipe. I’ve tried to cover some of the things that pop up most often when I share this recipe with friends, especially those looking for **healthy homemade nuggets** that don’t taste like cardboard. We want flavor, texture, and convenience—that’s the holy trinity of home cooking!
Here are a few things folks often ask me about serving up these gorgeous **homemade chicken nuggets**:
Can I use already frozen chicken? Oh, absolutely! If you’re in a huge rush, you can use frozen chicken breasts or tenders, but you need to thaw them first, or at least let them sit out until they are pliable enough to cut into uniform pieces. If they are still rock hard, cutting them evenly will be a nightmare, and you’ll end up with little burnt bits next to raw centers. Thaw them naturally in the fridge overnight if you can!
What’s the absolute best way to reheat leftovers to keep them crispy? Skip the microwave, please! I cannot stress this enough; the microwave is the enemy of crisp. For the best results, use the air fryer if you have one. Set it to about 375°F (190°C) for 4 to 6 minutes, depending on the size of your nugget. If you only have an oven, spread them in a single layer on a wire rack over a baking sheet (this lets air get underneath!) and bake at 375°F for about 8 to 10 minutes. This revives that crunch perfectly!
Can I swap the white flour for a healthier alternative? You sure can! For a slightly nuttier flavor, you can use whole wheat flour instead of all-purpose flour in the initial dredging step. It won’t be quite as light, but it still works beautifully with that buttermilk soak. If you’re looking for more **easy dinner ideas** that swap out refined grains, I have a whole section on that, too!
Can I make these healthy homemade nuggets gluten-free?
That’s a fantastic question, especially since everyone seems to have a different dietary need these days! Yes, you can definitely adapt this for a gluten-free meal. The secret is in the final breading layer. Instead of Panko, which is wheat-based, look for certified gluten-free breadcrumbs or use crushed cornflakes (I finely crush mine in a food processor!). The Panko is what gives us that signature crunch, so finding a high-quality GF substitute that keeps its structure is the most important step when making **healthy homemade nuggets** gluten-free.
Share Your Family Favorite Chicken Recipe Experience
That’s it, my friends! I truly hope you give these crispy bites a whirl the next time your family is craving something deeply satisfying but still homemade and wholesome. Getting that crunch without the deep-fry mess is a win, and I know these **homemade chicken nuggets** are going to become part of your regular rotation.
I just love hearing about how these recipes become traditions in your own homes. Did you make them with ground chicken, or did you stick to the breast? Did the kids request honey mustard or BBQ sauce for dipping? Don’t keep all that wonderful feedback to yourself!
Please take a minute to leave a star rating right down below the recipe card—it helps other cooks know this is the real deal! Better yet, snap a picture of your perfectly golden-brown nuggets and share it with me on social media using the Cookin’ Corner tag. I absolutely adore seeing your kitchen creations come to life!
And hey, if you’re already thinking about dessert because you made dinner so quickly—which, thanks to this recipe, is totally possible—you might want to see that unbelievably simple easy no-bake ice cream pie recipe I posted last week. Happy cooking, and I can’t wait to see your nuggets!
PrintCrispy Homemade Chicken Nuggets: Easy Oven Baked or Air Fryer Recipe
Make the best homemade chicken nuggets from scratch. This easy recipe yields tender, juicy chicken bites with a perfectly crispy coating, perfect for a quick weeknight dinner or family favorite meal. Choose to bake or air fry for a healthier, no-fry option.
- Prep Time: 20 min
- Cook Time: 20 min
- Total Time: 50 min
- Yield: 4 servings 1x
- Category: Dinner
- Method: Baking/Air Frying
- Cuisine: American
- Diet: Low Fat
Ingredients
- 1.5 lbs boneless, skinless chicken breast or ground chicken
- 1 cup buttermilk (or milk mixed with 1 tsp lemon juice)
- 1 large egg
- 1.5 cups all-purpose flour
- 1 cup panko breadcrumbs (for extra crispiness)
- 1 teaspoon salt
- 1 teaspoon black pepper
- 1 teaspoon garlic powder
- 1 teaspoon onion powder
- 1/2 teaspoon paprika
- Oil spray (for baking/air frying)
Instructions
- If using chicken breast, cut the chicken into uniform nugget shapes, about 1 inch thick. If using ground chicken, form the mixture into nugget shapes.
- In a medium bowl, whisk together the buttermilk and egg. Submerge the chicken pieces in this mixture and let them marinate in the refrigerator for at least 30 minutes, or up to 4 hours, for tender, juicy chicken.
- Prepare the breading station. In one shallow dish, combine the flour, salt, pepper, garlic powder, onion powder, and paprika. In a second shallow dish, place the panko breadcrumbs.
- Remove chicken from the marinade, letting excess drip off. Dredge each piece first in the flour mixture, shaking off any excess. Then, dip it into the egg/buttermilk mixture (optional second dip for thicker coating), and finally coat thoroughly in the panko breadcrumbs, pressing lightly to adhere.
- Preheat your oven to 400°F (200°C) or your air fryer to 375°F (190°C). Line a baking sheet with parchment paper or use an air fryer basket.
- Place the breaded nuggets on the prepared sheet or basket. Lightly spray the tops of the nuggets with cooking oil spray to help them brown and crisp up.
- Bake for 18–22 minutes, flipping halfway through, until golden brown and cooked through (internal temperature reaches 165°F). If air frying, cook for 12–15 minutes, shaking the basket halfway through.
- Serve your crispy homemade chicken nuggets immediately with your favorite dipping sauce.
Notes
- For a copycat version similar to fast food, finely chop the chicken breast instead of cubing it, or use ground chicken.
- You can make a large batch ahead of time. Freeze the breaded, uncooked nuggets on a tray, then transfer them to a freezer bag. Cook directly from frozen, adding a few extra minutes to the cook time.
- This recipe works well for meal prep and makes great school lunch additions.
Nutrition
- Serving Size: 5 nuggets
- Calories: 280
- Sugar: 2
- Sodium: 450
- Fat: 9
- Saturated Fat: 2
- Unsaturated Fat: 7
- Trans Fat: 0
- Carbohydrates: 18
- Fiber: 1
- Protein: 30
- Cholesterol: 95