
Oh, haven’t we all been on that search? You know, the quest for the loaf that feels like biting into a cloud? I’ve spent years chasing that bakery-style softness, trying every milk soak and tangzhong method under the sun. But sometimes, the best secrets come from sticking closer to home, using simple ingredients in a slightly different way. That’s how I landed on my ultimate go-to: the condensed milk bread. Trust me when I say that adding that little can of magic into your yeast dough delivers a texture so incredibly fluffy and tender, it rivals any sweet loaf out there. It’s one of my favorite techniques I picked up while perfecting classic American comfort bakes, and I just know you’re going to love how easy it is! If you’re looking for another fantastic soft loaf, you absolutely have to try my recipe for whole wheat bread next time.
- Why This Sweet Condensed Milk Bread Recipe Works So Well
- Ingredients for Your Ultra Soft Condensed Milk Bread Loaf
- Step-by-Step Instructions for Fluffy Homemade Bread
- Tips for Success with Your Beginner Bread Recipe Sweet
- Equipment Needed for Making Condensed Milk Bread
- Variations: From Loaf to Tender Sweet Rolls
- Storage and Reheating Instructions
- Frequently Asked Questions About Sweetened Bread for Breakfast
- Nutritional Information Disclaimer
Why This Sweet Condensed Milk Bread Recipe Works So Well
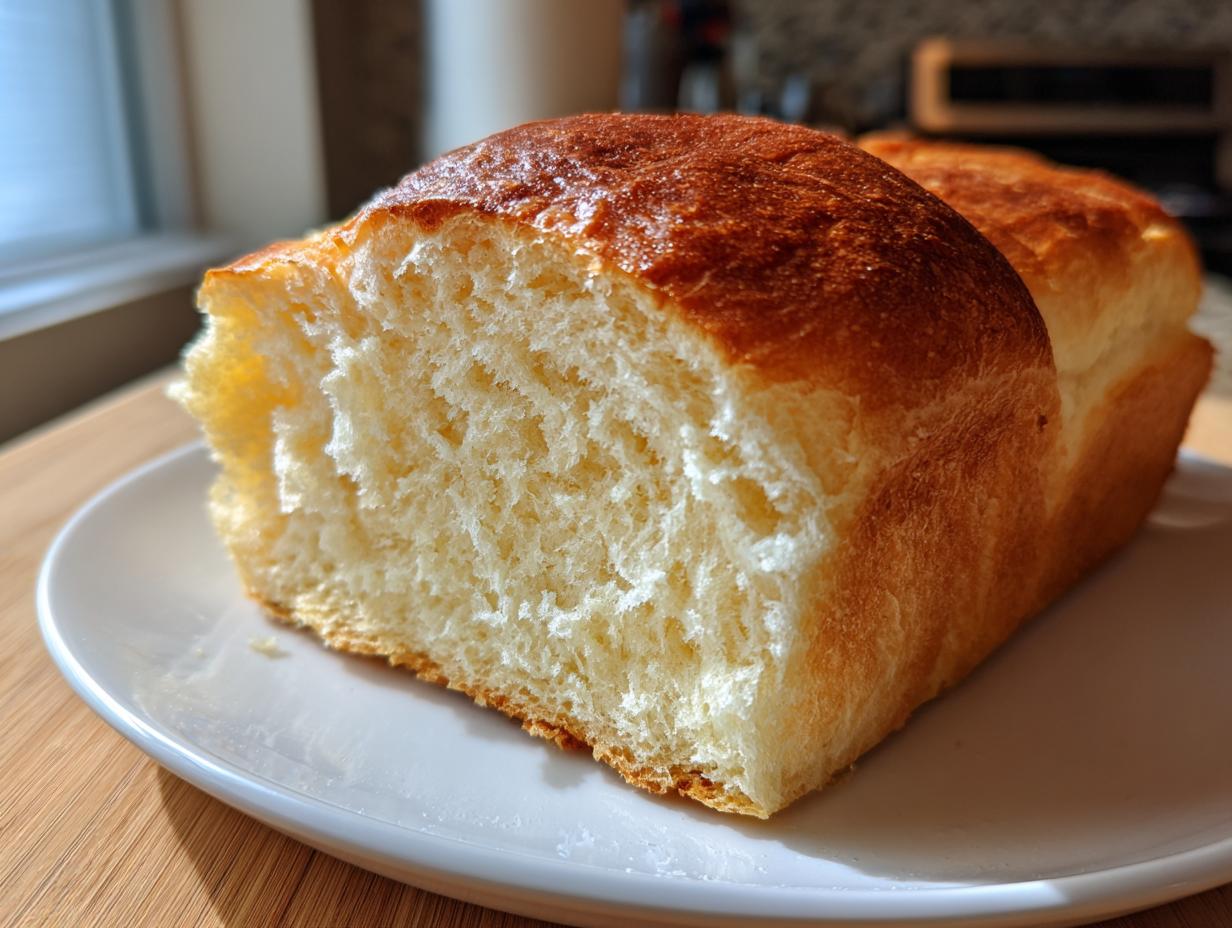
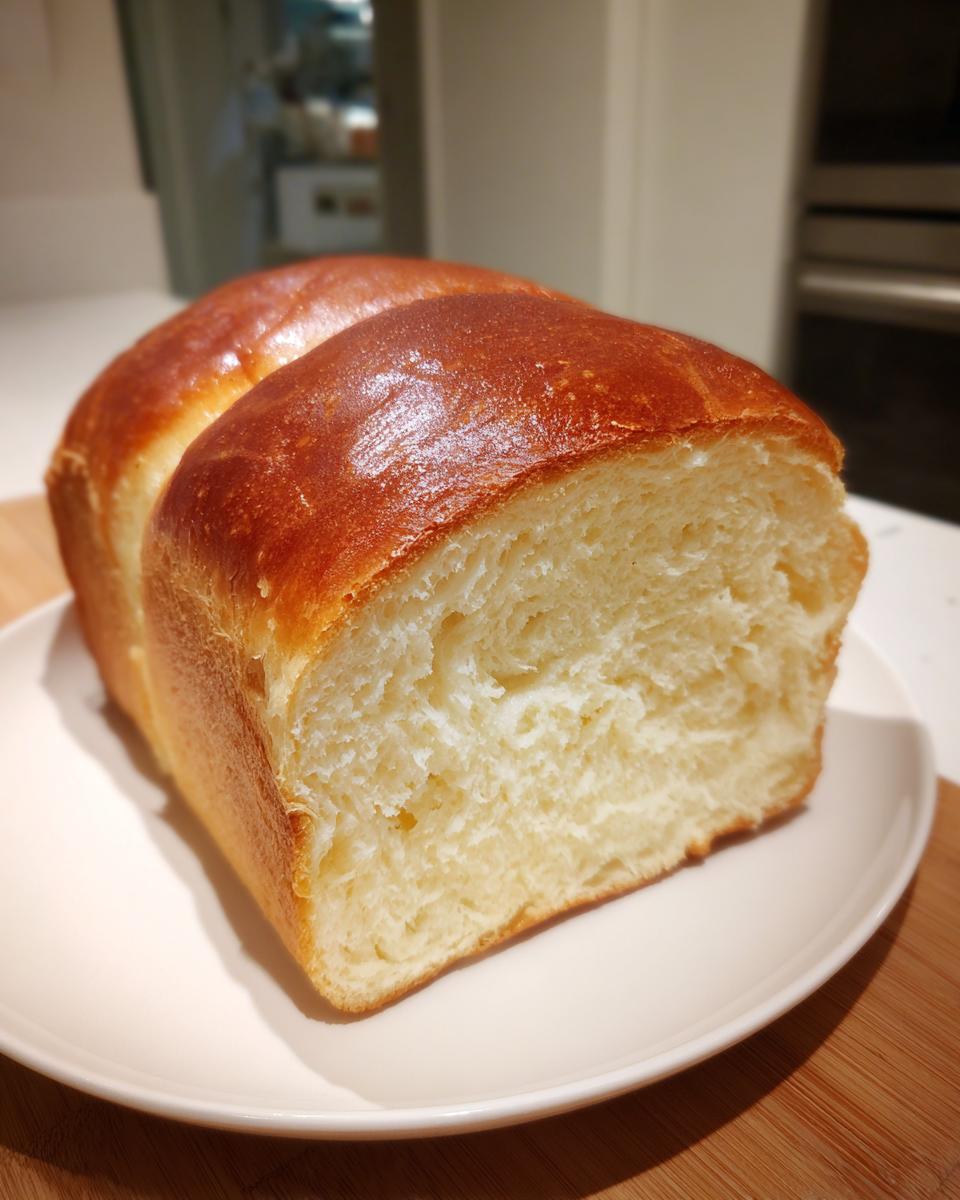
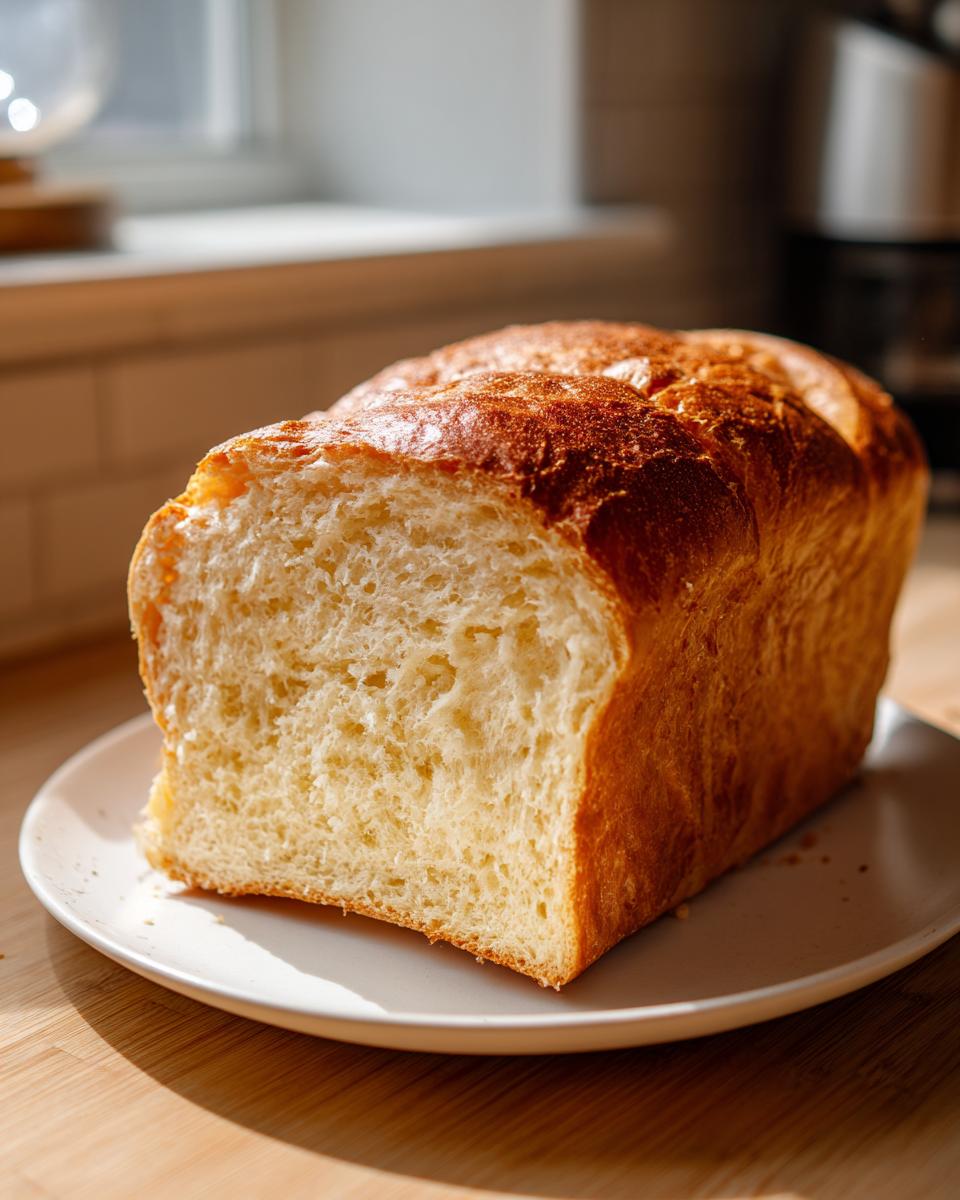
When people ask me what makes this condensed milk bread so different from a standard sweet loaf, I tell them it’s all down to chemistry, but don’t worry, it’s the fun kind of chemistry! The sweetened condensed milk is what gives us that incredible ‘Rich Creamy Bread Texture’ we are chasing. It’s packed with concentrated milk solids and sugar.
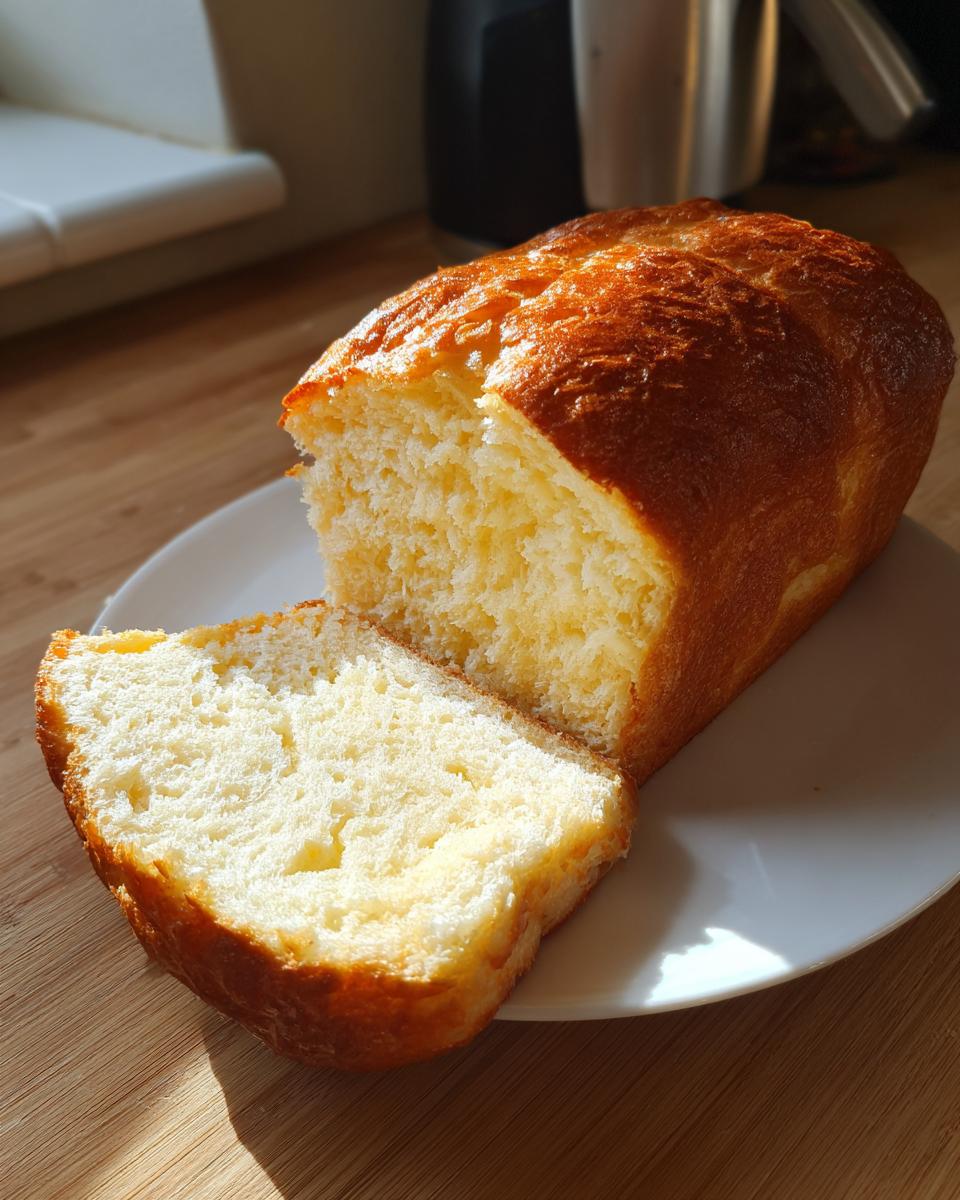
This high concentration of sugar and milk actually interferes just a tiny bit with the gluten structure as you knead. That’s a good thing here! It keeps the crumb gentle, preventing it from getting tough or chewy. The result is this beautifully soft, melt-in-your-mouth loaf—truly an Enriched Sweet Bread that stays soft for days.
Achieving Bakery Style Soft Bread at Home
You might think you need a complicated pre-ferment, like a poolish or tangzhong, to get that perfect ‘Bakery Style Soft Bread’ feel, but not with this recipe. The condensed milk does most of the heavy lifting right in the dough!
My biggest personal tip for maximizing that softness, especially for beginners, is paying attention to your initial liquids. Make sure your milk is genuinely just warm—about 110°F. If it’s too hot, you’ll kill the yeast, and if it’s too cool, your yeast won’t wake up properly. Room temperature ingredients, especially that egg, really help everything incorporate smoothly and evenly, which is key for a great rise!
Ingredients for Your Ultra Soft Condensed Milk Bread Loaf
Okay, let’s get down to the essential list. Getting these amounts right is the difference between a good loaf and the Sweet Condensed Milk Bread Recipe that you’ll make every single week. Because this is an enriched dough, accuracy matters, but don’t panic—it’s mostly pantry staples!
You’re going to need:
One cup of warm milk, and please check that temperature—we are aiming for that sweet spot around 110°F. Then you need a quarter cup of sweetened condensed milk, two and a quarter teaspoons of active dry yeast, a quarter cup of regular granulated sugar, and half a teaspoon of salt. You must use one large egg, and it has to be at room temperature, I promise it makes a difference! Next is a quarter cup of unsalted butter, melted down, and finally, anywhere between three and a half to four cups of all-purpose flour. Start with three and a half cups, and only add more if the dough is completely sticky.
I also highly recommend taking a peek at my recipe for cinnamon roll muffins if you want another quick, sweet bake!
Ingredient Notes and Substitutions for Condensed Milk Bread
I always have to clarify one major thing: You must use sweetened condensed milk here, not evaporated milk! Evaporated milk is just plain cooked-down milk, whereas the condensed kind is what brings all that necessary sugar and moisture to create the perfect condensed milk bread crumb. If you skip that sugar, your texture will be totally different.
Now, about the fat. I specified unsalted butter because I like controlling the salt in my dough, but if you only have salted butter on hand, you can use it. Just reduce that salt measurement slightly—maybe use a scant half teaspoon instead of a full one. If you absolutely can’t use dairy butter for some reason, you can make this with a high-quality vegetarian shortening, but you’ll lose a little bit of that rich flavor that makes this loaf so special. Don’t worry too much, though; the condensed milk is carrying most of the flavor payload!
Step-by-Step Instructions for Fluffy Homemade Bread
This is where the real magic starts, friend, and I promise, this process achieves that incredible Fluffy Homemade Bread texture without needing a special mixer. We’re relying on good old-fashioned elbow grease! Remember, the instructions are clear, but listen to your dough—it tells you what it needs.
- First things first, we need to wake up that yeast! In a large bowl, pour in your warm milk (remember, 110°F) and stir in that sweetened condensed milk. Sprinkle the yeast right over the top and just leave it alone for about five relaxing minutes until it gets foamy and bubbly. That’s your visual cue that everything is alive and ready to work!
- Next up, toss in your sugar, salt, room-temperature egg, and the melted butter. Give that a gentle whisk until it’s all happy and combined.
- Now for the dry stuff. Start adding your flour gradually, one cup at a time. You’ll mix it until you start seeing a shaggy, messy dough forming. Don’t try to mix it all smoothly yet, just get it incorporated.
- Time to get your hands dirty! Turn that shaggy mess out onto a lightly floured surface. This is crucial: You need to knead this dough for a solid 8 to 10 minutes. Seriously, don’t rush this. You want it smooth, elastic, and soft to the touch. It should feel wonderful, not sticky or stiff.
- Once you’ve kneaded it perfectly, lightly grease a clean bowl, toss the dough in there, and turn it over so it gets a nice coat of oil. Cover it up—plastic wrap or a clean kitchen towel works—and put it somewhere warm. Let it hang out for 1 to 1.5 hours, or until it’s doubled nicely in size. That sweetness really helps the rise, as you can see!
- When it’s ready, gently punch the air out—don’t deflate it completely, just encourage it! Shape it carefully into a tight log and place it seam-side down right into your greased 9×5 inch loaf pan.
- Cover the pan again loosely and let it have its second nap in a warm spot. This second rise is important. Aim for 45 to 60 minutes, or until the dough has crowned beautifully, sitting about an inch over the top rim of the pan.
- Preheat your oven to 350°F (175°C). Pop that gorgeous loaf in to bake for 30 to 35 minutes. You’re looking for a deep golden brown top, and using a quick temperature check, you want the inside to hit around 200°F (93°C).
- The moment it comes out, get it out of the hot pan immediately and let it breathe completely on a wire rack before you dare try slicing into it. Patience pays off for that amazing crumb! If you’re interested in diving deeper into yeast techniques, check out my guide on easy milk bread baking!

Proofing and Shaping Your Sweet Loaf Bread
Those two rises are non-negotiable for this kind of texture, so don’t try to rush them! The first rise, where the dough doubles, takes between one hour and an hour and a half using this enriched dough. The second proof in the pan, which gives you that lovely domed top, should take 45 to 60 minutes.
Here’s a little trick, especially if your kitchen is cooler than you’d like it to be—maybe it’s winter! If the dough is stalling during that second rise, sometimes that means the yeast is a little sluggish. You can try placing the covered loaf pan inside your oven with just the oven light on. That tiny bit of ambient heat is usually just enough to encourage this lovely condensed milk bread recipe to get that final perfect puff before baking.
Tips for Success with Your Beginner Bread Recipe Sweet
Baking bread, especially an Easy Milk Bread Baking recipe like this one, can feel intimidating, but I promise you, this dough is very forgiving because of the enrichment! My goal for you is that perfect, soft slice every time, so let’s talk about locking in that glorious, tender crumb.
The biggest thing I always tell new bakers is this: Do not be tempted to add extra flour during the kneading stage, even if it feels a little sticky at first. That stickiness is your friend! The condensed milk is providing a lot of liquid solids. If you add too much flour to make the dough manageable, you’ll end up with a tougher loaf instead of the pillowy soft bread we are aiming for. Use a bench scraper to help you lift and turn the dough if it’s sticking to your counter, but resist the urge to flour the surface too heavily.
Once you pull that golden beauty out of the oven—and trust me, the smell alone will make you proud—you want to act fast to keep that crust soft. Right after you turn the loaf out onto the cooling rack, grab a stick of melted butter and brush the entire top surface immediately. This is simple, effective, and keeps the top crust from hardening up while it cools. It adds a lovely richness, too!
Remember, if you want to try a totally different style of quick bake, my recipe for easy traditional Irish soda bread is a fantastic alternative when you don’t want to wait for yeast to work its magic. Happy baking!
Equipment Needed for Making Condensed Milk Bread
Honestly, one of the reasons I love this condensed milk bread so much is that you don’t need a fancy setup. My grandma certainly never had special tools, and neither do I! You just need the basics to mix, rise, and bake this sweet dough.
Here is the short list of what you absolutely must have on hand for this recipe:
- You’ll need at least two good mixing bowls—one large one for mixing the dough and maybe a smaller one for getting your yeast started.
- A sturdy whisk is perfect for combining the initial wet ingredients together before you add the flour.
- A clean kitchen surface, or a large cutting board, for all that kneading you’ll be doing to build that elasticity.
- The star piece of equipment is your 9×5 inch loaf pan. Make sure it’s well-greased!
- And finally, a wire cooling rack. This is super important! It allows air to circulate underneath the bread so the bottom doesn’t get soggy while it cools down completely.
That’s it! See? No stand mixer required unless you really, really want to use one. If you have one, just use the dough hook attachment, but remember to keep a close eye on it so you don’t over-knead!
Variations: From Loaf to Tender Sweet Rolls
You made the perfect loaf, but maybe you’re thinking, “What if I want something I can rip apart immediately?” I love having options, and this recipe is brilliant because you don’t have to change the dough at all to get amazing rolls!
If you want Tender Sweet Rolls instead of the traditional loaf shape, the process is super simple. After you gently punch down the dough post-first rise, skip shaping it into a log for the pan. Instead, divide that beautiful dough into exactly 12 equal pieces.
Roll each piece tightly into a ball and line them close together in a greased 9×13 inch baking dish. Because they are touching, they will rise up and support each other, giving you that wonderfully soft, pull-apart texture. They bake faster, too—just slide them into the 350°F oven for about 20 to 25 minutes. They’ll be golden and ready to share (or eat all by yourself!). Check out my recipe for soft fluffy dinner rolls for another fun way to shape sweet dough!
Storage and Reheating Instructions
This condensed milk bread is so unbelievably soft that keeping it fresh is just as important as making it! The good news is, because of those lovely milk solids we added with the condensed milk, this loaf really holds its moisture well, especially compared to leaner white breads.
Listen closely: Never put your fresh bread in the refrigerator! It sounds counter-intuitive, but the fridge actually dries bread out faster and makes that lovely fluffy texture turn stale. Keep your loaf on the counter at room temperature, wrapped tightly in plastic wrap or tucked into a bread box. It should stay wonderfully soft for three to four days this way. I always prefer making a smaller loaf if I know we won’t finish it quickly because these comforting bread bakes disappear fast!
Now, if you’re reaching for a slice on Day Three and it seems slightly less tender than when it was fresh, don’t toss it! We can bring that softness right back. Reheating is the secret weapon for preserving that tender crumb bread quality.
You have two great options here, depending on how much time you have:
- For a single slice or two: Wrap them loosely in a paper towel and microwave them for just 10 to 15 seconds. It gets that bread steamy and soft again instantly!
- If you have the whole (or half) loaf left: Pop it quickly into a preheated oven at about 300°F (150°C) for just five minutes. It warms through beautifully, and the outside gets that perfect little edge crispness without drying out the inside.
This quick refresh method is a lifesaver when you want that fresh-from-the-oven feeling for your sweetened bread for breakfast!
Frequently Asked Questions About Sweetened Bread for Breakfast
I get so many wonderful questions once people start baking this recipe! It absolutely deserves a spot in your rotation for quick sweetened bread for breakfast, but sometimes yeast baking throws curveballs. Here are a few things I hear often from folks trying to figure out how to make soft bread at home with this method:
Can I just use a bread machine for this condensed milk bread?
Yes, you totally can! The structure of this dough is a bit richer than your standard whole wheat loaf, so you need to tweak things slightly. If you have a bread machine, use the ‘Sweet Dough’ or ‘Basic White’ cycle, NOT the rapid cycle. And here’s the key: always put the liquids in the machine pan first, then the yeast, then the dry ingredients. Don’t rely on the machine for the final shape, though. I always pull the dough out after the first rise and shape it by hand for the pan, as machine-shaped loaves can sometimes collapse when they bake in a regular oven.
My finished loaf isn’t as fluffy as yours—why is my bread dense?
Ugh, that’s the worst feeling! A dense crumb in an enriched bread usually comes down to two things, and neither is usually the recipe itself. First, check your kneading. Did you knead for a full 8 to 10 minutes? You need that gluten framework built up to trap the gas, or the dough just collapses in on itself during baking. Second, check the temperature of your warm milk during the kickoff. If that water was too hot and killed your yeast, you won’t get the gas needed for the fluff.
Can I cut back on the sugar or the condensed milk?
I totally get wanting to lighten things up, but for this specific recipe, I strongly advise against reducing the sugar content too much. Remember how we talked about the rich creamy bread texture? That richness comes from the sugar and milk solids in the condensed milk interacting with the flour. If you cut those quantities down drastically, you are essentially turning this into a standard white bread, and it will lose that signature tenderness and might dry out a lot faster. It won’t be the same experience! If you are looking for ideas for incorporating less sugar overall, you should definitely look at savory recipes, like my easy no-bake ice cream pie, where sugar plays a slightly different role.
What brand of sweetened condensed milk works best?
Honestly, I’ve used the major store brands and the name brands interchangeably here, and they all work just fine. The most important thing is just making sure you grab the right can—you want the thick, sweet stuff! If you happen to have a whole can left over after baking, these ingredients work wonderfully in my favorite no-bake dessert, so check out the instructions for my easy no-bake ice cream pie for a different kind of treat!
Nutritional Information Disclaimer
Now, I want to talk honestly about the nutrition section that you might see on some other baking blogs. As I mentioned, the heart of Cookin’ Corner is making genuine, delicious, home-style food that brings people together, not counting every single gram!
Because we all measure our ingredients just a touch differently—maybe your egg was slightly larger, or perhaps your can of condensed milk had a few extra milliliters, or maybe you used a salted butter instead of unsalted—the exact nutritional profile can change with every batch you bake. Even my own counts vary slightly depending on the brand of flour I happen to buy that week!
So, for this condensed milk bread, I really encourage you to treat any nutritional estimates you see online (including ones you might have seen elsewhere on this site) as just that—an estimate. They are designed to give you a general idea, but they are not regulated or precise enough for strict dietary planning. The real nutrition here is the joy you get from slicing into homemade bread, warmed up with a little butter on top. That’s the measure I use in my kitchen!
PrintUltra Soft Sweetened Condensed Milk Bread Loaf
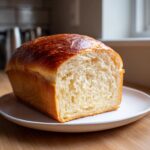
Make an incredibly soft and fluffy loaf of bread using sweetened condensed milk. This easy recipe delivers a rich, tender crumb perfect for breakfast toast or a sweet snack.
- Prep Time: 20 min
- Cook Time: 35 min
- Total Time: 2 hours 5 minutes
- Yield: 1 loaf (about 12 slices) 1x
- Category: Baking
- Method: Yeast Baking
- Cuisine: American
- Diet: Vegetarian
Ingredients
- 1 cup warm milk (about 110°F)
- 1/4 cup sweetened condensed milk
- 2 1/4 teaspoons active dry yeast
- 1/4 cup granulated sugar
- 1/2 teaspoon salt
- 1 large egg, room temperature
- 1/4 cup unsalted butter, melted
- 3 1/2 to 4 cups all-purpose flour
Instructions
- In a large bowl, combine the warm milk and sweetened condensed milk. Sprinkle the yeast over the top and let it sit for 5 minutes until foamy.
- Add the sugar, salt, egg, and melted butter to the yeast mixture. Whisk until combined.
- Gradually add the flour, one cup at a time, mixing until a shaggy dough forms.
- Turn the dough out onto a lightly floured surface. Knead for 8 to 10 minutes until the dough is smooth and elastic. It will feel soft.
- Place the dough in a lightly oiled bowl, turning to coat. Cover the bowl with plastic wrap or a clean towel and let it rise in a warm place for 1 to 1.5 hours, or until doubled in size. This enrichment helps create that rich creamy bread texture.
- Gently punch down the dough. Shape it into a log and place it seam-side down into a greased 9×5 inch loaf pan.
- Cover the pan loosely and let the dough rise again in a warm spot for 45 to 60 minutes, or until the dough has crowned about 1 inch over the rim of the pan.
- Preheat your oven to 350°F (175°C). Bake for 30 to 35 minutes, or until the top is golden brown and the internal temperature reaches 200°F (93°C).
- Remove the bread from the pan immediately after baking and let it cool completely on a wire rack before slicing.
Notes
- For an extra soft top crust, brush the loaf with a little melted butter immediately after removing it from the oven.
- If you prefer sweet rolls instead of a loaf, divide the dough into 12 equal pieces, shape into balls, and place them close together in a 9×13 inch baking dish for a second rise before baking at 350°F for 20-25 minutes.
- The sweetened condensed milk provides moisture, so avoid adding too much extra flour during kneading to keep the crumb tender.
Nutrition
- Serving Size: 1 slice
- Calories: 180
- Sugar: 10
- Sodium: 150
- Fat: 5
- Saturated Fat: 3
- Unsaturated Fat: 2
- Trans Fat: 0
- Carbohydrates: 30
- Fiber: 1
- Protein: 5
- Cholesterol: 25