
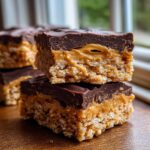
Oh, sometimes you just crave that perfect little hit of nostalgia, don’t you? That feeling when a flavor instantly whisks you back to childhood gatherings? Well, I’ve got something truly special that merges two of the best candy flavors in American history! We’re talking about the ultimate fusion: the rich, creamy core of classic buckeye candy combined with the satisfying snap of a graham cracker. Say hello to buckeye graham crackers!
Here at Cookin’ Corner, founded by Sarah Jane Thompson, we believe in keeping things real and easy. That’s why this recipe is near and dear to my heart; it’s based on reliable Midwest home cooking traditions that never fail. The best part? This entire treat comes together without ever needing to turn on the oven. It’s totally a no-bake recipe, ready when you are!
- Why You Will Love These Buckeye Graham Crackers
- Gathering Ingredients for Buckeye Graham Crackers
- Step-by-Step Instructions for No Bake Buckeye Graham Crackers
- Tips for Perfect Buckeye Graham Crackers Success
- Storage and Make Ahead Tips for Buckeye Graham Crackers
- Variations on Classic Buckeye Graham Crackers
- Serving Suggestions for Your Crunchy Chocolate Bars
- Frequently Asked Questions About Buckeye Graham Crackers
- Share Your Buckeye Graham Crackers Creations
Why You Will Love These Buckeye Graham Crackers
Honestly, what’s not to love? If you’re looking for inspiration for your next batch of No Bake Desserts, stop right here. These little squares are pure magic, and they make the absolute best Quick Party Sweets. I promise you’ll be pulling this recipe out for every single holiday tray!
- They are completely no-bake—seriously, just mixing, chilling, and dipping!
- You capture that essential chocolate and peanut butter flavor combo without the fuss of rolling candy balls.
- Assembly is so fast; you can get these ready for the fridge in about 15 minutes flat.
- They travel beautifully, making them perfect potluck or game-day finger food.
If you’ve ever tried my other lightning-fast confection, you know I love easy recipes, which is why I think you’ll also adore these easy no-bake avalanche cookies when you need another quick fix!
Gathering Ingredients for Buckeye Graham Crackers
Now that you’re excited about these low-effort, high-reward buckeye graham crackers, let’s talk what you need. The beauty here is that everything is so wonderfully pantry-friendly! You likely have most of these items hanging around already, which is why these are my go-to when I need a last-minute sweet fix. Remember, precision matters with the filling so it spreads nicely—no guessing measurements here!
For the Gooey Peanut Butter Filling
- 1 cup creamy peanut butter (seriously, stick to creamy for the smooth texture!)
- 1 cup powdered sugar
- 1/2 cup (1 stick) unsalted butter, softened (it HAS to be room temperature soft)
- 1 teaspoon vanilla extract
- 1/4 teaspoon salt
For Assembly and Chocolate Coating of Buckeye Graham Crackers
- 24 full graham cracker sheets
- 12 ounces semi-sweet chocolate, for melting
- 1 tablespoon vegetable shortening (optional, but I always suggest it for that perfect, drizzle-ready smooth dip)
Having these simple components ready to go means we can move right into the fun part—assembling!
Step-by-Step Instructions for No Bake Buckeye Graham Crackers
Okay friends, this is where the magic happens! Since we’re keeping things fast and easy, you don’t need to worry about preheating anything. We jump right into the filling, which makes these buckeye graham crackers the ultimate stress-free dessert. Just follow these steps carefully, especially making sure that filling gets nice and chilled—that’s the secret to keeping them stable!
Making the Creamy Peanut Butter Base
First things first, we whip up that glorious filling. Get out your mixing bowl! In it, you’re going to combine your peanut butter, powdered sugar, soft butter, vanilla, and salt. You absolutely need to use an electric mixer here, trust me. Hand-mixing this can leave you with lumps, and we want pure, velvety goodness for this filling. Beat it until it looks totally smooth and fluffy, like a dream. That’s Step 1 done!
Assembling and Chilling the Graham Cracker Sandwiches
Now we bring in the crunch! Take those lovely graham cracker sheets and spread a good, even layer of that peanut butter mixture across the top of one cracker. Don’t skimp, but don’t make it so thick it oozes out when you press it! Top it with a second cracker to form your sandwich. Keep repeating this until you have about 12 of these little beauties ready to go on a parchment-lined sheet. Then, they HAVE to go into the fridge for at least 30 minutes. This chilling time is non-negotiable, folks—it firms up the filling so it doesn’t squish out when we dip them.
Melting Chocolate and Dipping Your Buckeye Graham Crackers
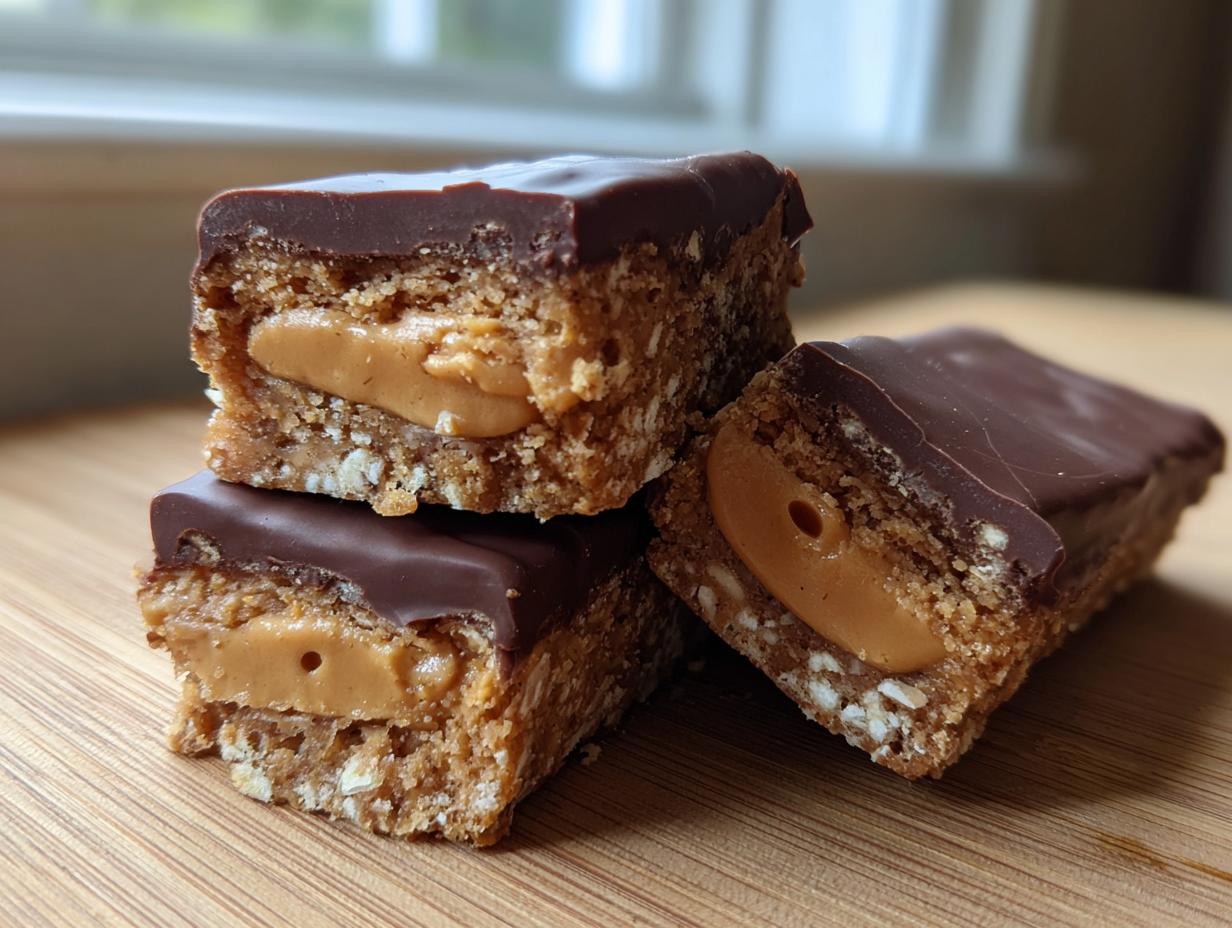
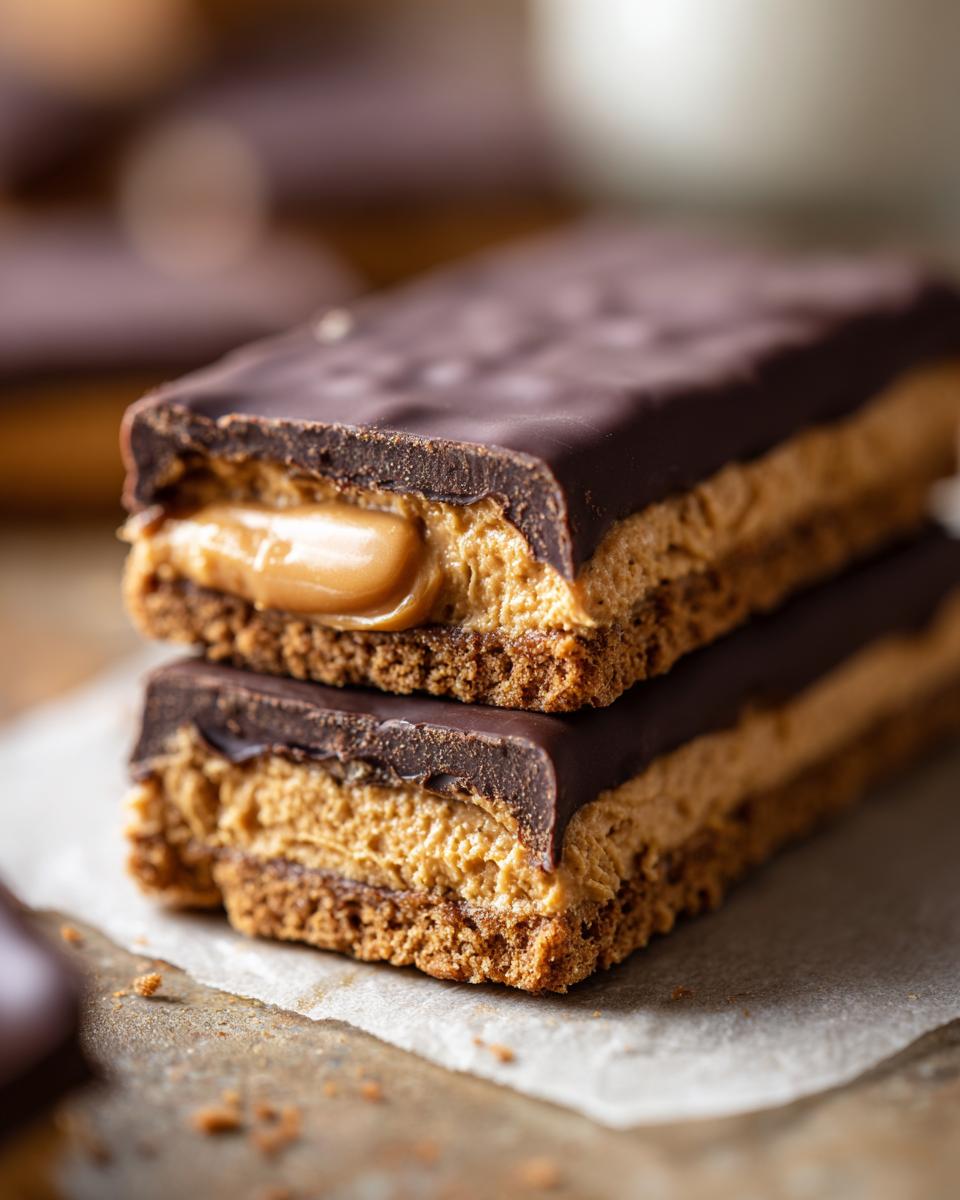
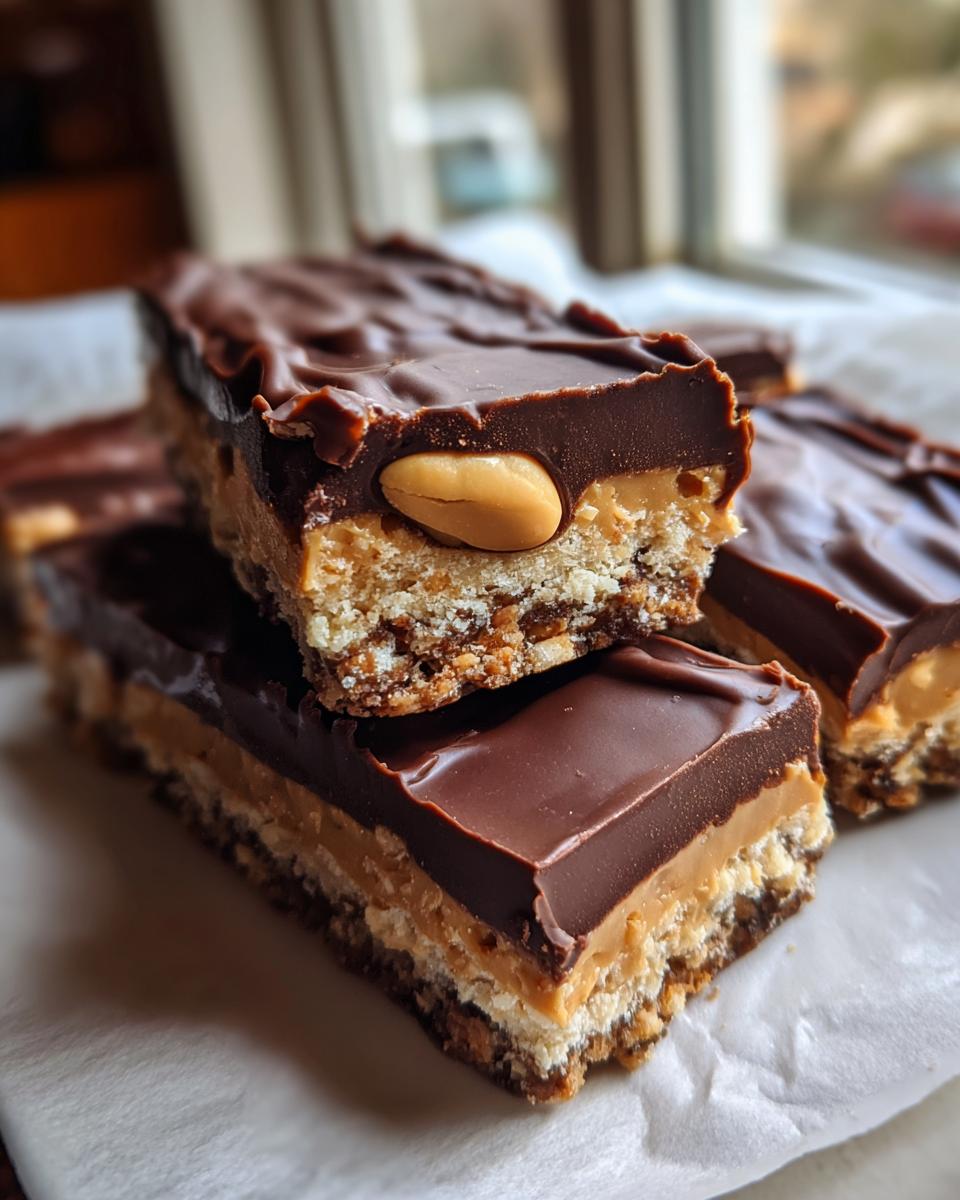
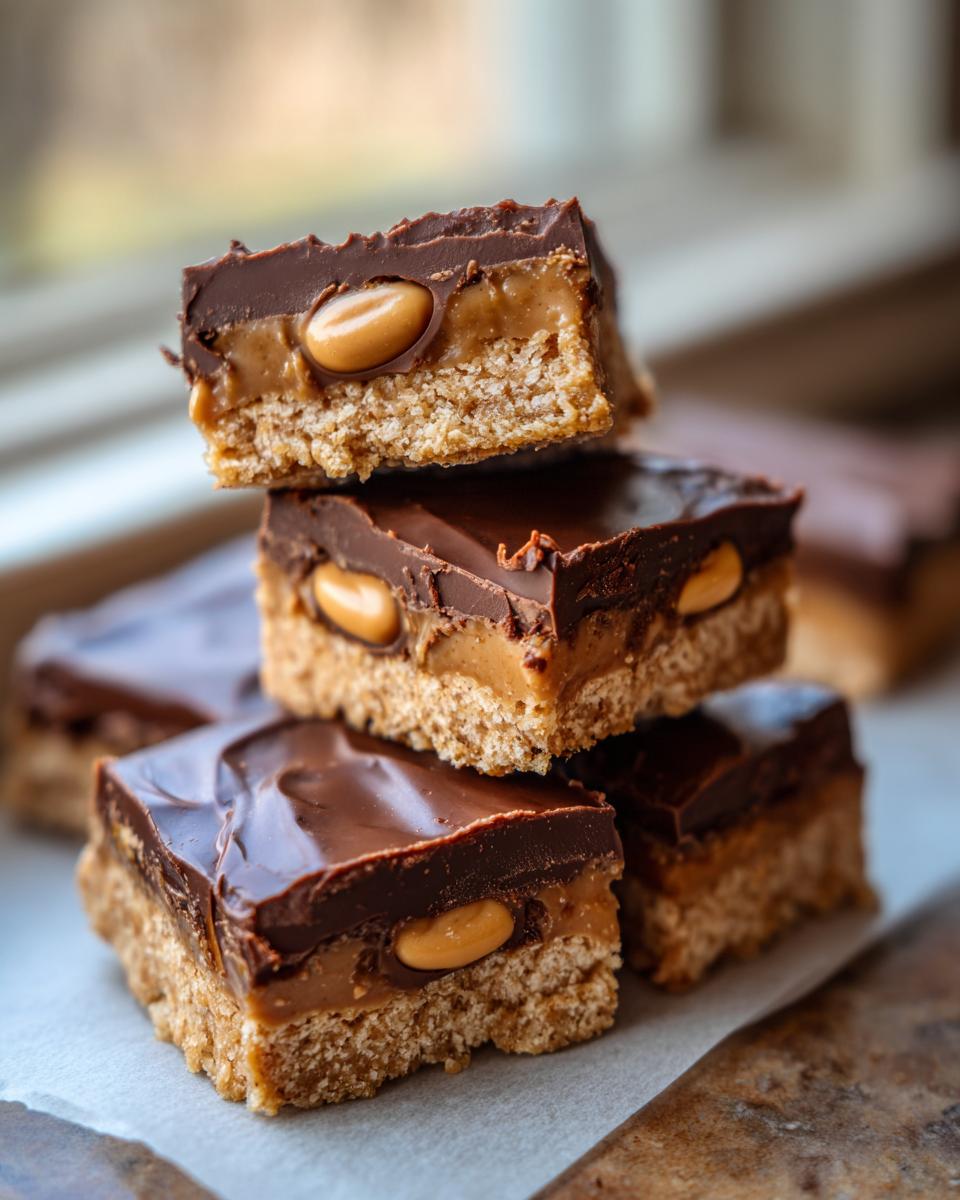
While those chill, melt your chocolate. If you’re using the shortening I mentioned, toss it in with the chocolate chips in a microwave-safe bowl. Heat in short 30-second bursts, stirring vigorously between each one. This prevents scorching! Once it’s perfectly smooth, pull those firm sandwiches out of the fridge. Dip each one, remembering the classic buckeye look: you want to leave a small circle of the peanut butter filling showing at the top. Use a toothpick to gently maneuver it, lifting it out and letting the excess chocolate drip right back into the bowl. Remember, the way you dip these determines the final look, so take your time here!
If you want great results on dipping every time, check out my guide on making incredible chocolate dips for cakes, as the technique is very similar!
Tips for Perfect Buckeye Graham Crackers Success
So, you’ve got the filling chilling and the chocolate ready—fantastic! Now, let me give you a few kitchen secrets I learned the hard way so your buckeye graham crackers turn out like the picture and not a melted mess. The biggest hurdle for folks making any candy layer is keeping that peanut butter center firm enough. If your filling seems too soft even after that 30-minute chill? Don’t panic! Just pop it in for another 15 minutes. We need that glorious, gooey peanut butter filling to hold its shape.
When you’re dipping, remember what makes a true buckeye: that little peek of peanut butter on top! If you coat the whole thing, you end up with a standard chocolate bar, not this candy mashup. I always use a tiny bit of vegetable shortening—or even coconut oil—in my chocolate. It just loosens things up enough so the chocolate flows beautifully and doesn’t seize up when it hits the cool cracker. If your chocolate *does* start getting thick while you work, zap it for just 10 seconds; it’ll smooth right out.
For more amazing candy confidence, check out my tips for easy homemade caramel sauce and candy making! And if you want another fun comparison of peanut butter treats, see what others are doing with their buckeye graham snacks online!
Storage and Make Ahead Tips for Buckeye Graham Crackers
One of the things I adore about these buckeye graham crackers is how perfectly they fit right into my meal plan—they are fantastic make ahead desserts! Because we aren’t dealing with any eggs or high-risk ingredients, they are surprisingly sturdy, provided you keep them cool. After you’ve dipped and set all the chocolate (make sure that chocolate is completely set, please!), you’ll want to transfer these babies into an airtight container. They are definitely best enjoyed chilled, not sitting out on the counter.
If you plan on serving them within four or five days, the refrigerator is your best spot. Chilling keeps the peanut butter filling nice and stable and prevents the chocolate coating from getting too soft, especially if your kitchen runs warm. Pop them in there, and they are ready to go for your next gathering!
But here is the real kitchen secret: they freeze like a dream! If you are prepping for a big holiday tray or just want to hide some away for yourself (no judgment here!), wrap them tightly in plastic wrap—maybe two layers just to be safe—and pop them into a freezer-safe container. These fantastic Peanut Butter Chocolate Treats can last for up to three months frozen. When you want one, just pull it out, let it sit on the counter for about 15 minutes, and that gooey filling will soften just slightly for the perfect bite. If you love the peanut butter base here, you absolutely must try blending it into my easy peanut butter fudge recipe next!
Variations on Classic Buckeye Graham Crackers
Okay, so you’ve mastered the classic buckeye graham crackers—awesome! But maybe you’re feeling a little adventurous, or maybe you know someone who turns up their nose at semi-sweet chocolate (I don’t know why anyone would, but we cater to everyone here!). The beauty of a recipe this simple is that it takes wonderfully to a little experimentation. Don’t feel like you have to stick to the script I gave you!
The easiest place to start tweaking is with the chocolate coating. If semi-sweet is too intense for your crowd, absolutely swap it out for milk chocolate. It gives the whole bar a sweeter, creamier finish that kids especially love. Or, if you want it richer—like, really decadent—use a high-quality bittersweet chocolate. Just be mindful that the better the quality of the chocolate you use, the smoother and glossier your final coating will be.
You can also get creative with that amazing peanut butter filling! I love adding just the tiniest whisper of flavor to differentiate them. Try mixing in maybe a quarter teaspoon of cinnamon or even a tiny splash of bourbon extract (use very little!) right when you finish whipping the filling. It just gives this simple treat another layer of complexity. It’s fun how these little changes, like how we handle butter in our favorite sugar cookies, can totally shift the flavor profile.
The main rule stays: keep the graham crackers crunchy and the filling firm before dipping. Beyond that, have fun making these your own signature twist on an American classic!
Serving Suggestions for Your Crunchy Chocolate Bars
So you’ve got a gorgeous platter of these chocolate-dipped wonders, but how should you serve them? Since these Crunchy Chocolate Bars are so rich, they go perfectly with something simple to cut through the sweetness. My favorite way to serve them is right after dinner alongside a hot mug of coffee—it just balances that creamy peanut butter filling perfectly.
When you’re setting out a dessert table for a party or potluck, don’t make them hide! Space them out among lighter fruits or maybe something tangy. They look fantastic next to a bowl of fresh raspberries or even alongside a velvety cup of my French hot chocolate for an extra dose of indulgence. If you want to see how others serve up their own batch of delicious no-bake treats, take a peek at what other cooks are serving at their gatherings!

Frequently Asked Questions About Buckeye Graham Crackers
I get so many messages about these buckeye graham crackers once people try them, and honestly, I love hearing from you! Most questions come down to ingredients or timing, which is totally normal when you are diving into a new recipe. Like any classic, there are little tricks that can make the difference between good and amazing. Since these are such popular Easy Graham Cracker Recipes, I gathered the things you ask about most often!
Can I use crunchy peanut butter in these Buckeye Graham Crackers?
That is a great question! You *can*, but I really, really encourage you to stick with creamy peanut butter here. Remember, the filling needs to be that super smooth, almost whipped texture so it spreads evenly between the crackers and doesn’t tear up the graham cracker layers when you press them together. If you use crunchy, those peanut bits will create bumps and weak spots in your filling. When we chill the bars, the creamy filling sets up perfectly solid, which is exactly what we need for dipping success.
Are these truly No Oven Required Baking?
Yes, absolutely! That’s the whole draw, right? These are the definition of No Oven Required Baking. You don’t bake the peanut butter filling or the crackers at all. The only heat required is a quick microwave session (or a double boiler, if you prefer) to melt that chocolate coating. That means you can whip these up even when the weather is sweltering hot outside—no need to fire up the stove!
How do I get the chocolate coating smooth?
This is the secret handshake for great dipping! To avoid that thick, clumpy coating, you need the chocolate to flow like silk. I told you earlier to add just a tablespoon of vegetable shortening—that’s my trick! Shortening lowers the viscosity of the chocolate just enough so that when the cold graham cracker sandwich hits the melted chocolate, it coats evenly and drizzles nicely, giving you that classic, thin shell. If you don’t have shortening, a teaspoon of coconut oil works similarly well. Just remember to stir it in really well until it disappears completely!
If you’re ever looking for other simple treats that don’t require any oven heat, I have a whole section dedicated to easy graham cracker recipes that stick to that no-bake philosophy!
Share Your Buckeye Graham Crackers Creations
Well, that’s it! You now have the keys to making what I think is one of the most ridiculously easy and satisfying treats out there. These crunchy, chocolatey, peanut-buttery Simple Peanut Butter Desserts are going to fly off your plate at your next gathering, I just know it!
I truly hope you give these buckeye graham crackers a whirl. When you make them—and I hope you do soon!—please come back here and let me know what you thought. Did you try milk chocolate? Did you leave yours a tiny bit bigger than the traditional buckeye balls? Drop a rating below so others can see how much you loved them, and if you snapped a photo, I’d be thrilled if you shared it! Seeing your successful bakes is genuinely the highlight of my week.
This whole Cookin’ Corner project is built on sharing these tried-and-true favorites, just like the ones Sarah Jane passed down. If you want to learn more about why we keep American classics alive in our kitchens, you can always pop over to the About page! Happy snacking, friends!
PrintUltimate No-Bake Buckeye Graham Cracker Bars (Peanut Butter Chocolate Crunch)
Make these easy, no-bake Buckeye Graham Crackers that combine the creamy filling of classic buckeye candy with the satisfying crunch of graham crackers, all dipped in rich chocolate. These are perfect for parties or simple snacking.
- Prep Time: 25 min
- Cook Time: 5 min
- Total Time: 30 min
- Yield: 12 servings 1x
- Category: Dessert
- Method: No-Bake
- Cuisine: American
- Diet: Vegetarian
Ingredients
- 1 cup creamy peanut butter
- 1 cup powdered sugar
- 1/2 cup (1 stick) unsalted butter, softened
- 1 teaspoon vanilla extract
- 1/4 teaspoon salt
- 24 full graham cracker sheets
- 12 ounces semi-sweet chocolate, for melting
- 1 tablespoon vegetable shortening (optional, for smooth dipping)
Instructions
- Prepare the peanut butter filling: In a medium bowl, beat together the peanut butter, powdered sugar, softened butter, vanilla extract, and salt until the mixture is smooth and creamy.
- Assemble the bars: Take one graham cracker sheet and spread about 1 to 1.5 tablespoons of the peanut butter filling evenly over the top surface. Place a second graham cracker sheet on top to create a sandwich. Gently press the crackers together.
- Repeat this process until all graham crackers and filling are used, creating 12 sandwiches.
- Chill the sandwiches: Place the assembled sandwiches on a baking sheet lined with parchment paper. Transfer the sheet to the refrigerator and chill for at least 30 minutes until the peanut butter filling is firm.
- Melt the chocolate: Place the semi-sweet chocolate and vegetable shortening (if using) in a microwave-safe bowl. Microwave in 30-second intervals, stirring well after each interval, until the chocolate is smooth and fully melted.
- Dip the bars: Remove the chilled sandwiches from the refrigerator. Dip each sandwich into the melted chocolate, ensuring it is mostly coated, leaving a small area of the peanut butter filling exposed, similar to a traditional buckeye candy.
- Set the chocolate: Return the dipped bars to the parchment-lined baking sheet. Allow the chocolate to set completely at room temperature, or place them back in the refrigerator for 10-15 minutes to speed up the process.
- Serve immediately or store in an airtight container in the refrigerator.
Notes
- For a cleaner dip, use a toothpick to gently move the bars in the chocolate, then lift and let excess chocolate drip off before setting.
- You can substitute milk chocolate or dark chocolate for the semi-sweet chocolate based on your preference.
- These **No Bake Desserts** freeze well; store them in a freezer-safe container for up to three months.
Nutrition
- Serving Size: 1 bar
- Calories: 350
- Sugar: 28
- Sodium: 180
- Fat: 22
- Saturated Fat: 9
- Unsaturated Fat: 13
- Trans Fat: 0
- Carbohydrates: 35
- Fiber: 1
- Protein: 6
- Cholesterol: 25