
Oh, dinner time stress! I totally get it. Some nights you just need something spectacular on the table, but you haven’t got the energy (or the time!) for complicated cooking. That’s why I’m sharing my absolute go-to when I need a winner fast. This isn’t just another recipe; this is my secret weapon for serving up the most flavorful, ridiculously juicy baked ranch chicken that’s actually ready in under 30 minutes. Coming from a kitchen where every meal needs that reliable, home-cooked heart, trust me—this one just works every single time. It delivers on flavor without making you stand over the stove, which is exactly what those busy weeknights call for!
- Why This Ultra Easy Baked Ranch Chicken is Your New Weeknight Staple
- Essential Ingredients for Perfect Baked Ranch Chicken
- Step-by-Step Instructions for Simple Weeknight Chicken Bake
- Tips for Success with Your Baked Ranch Chicken
- Variations: Making Cheesy Ranch Chicken Bake
- Serving Suggestions for This Savory Baked Chicken
- Storage and Reheating Instructions for Leftover Baked Ranch Chicken
- Frequently Asked Questions About Ranch Seasoning Chicken
- Nutritional Estimate for Your Easy Baked Chicken Recipe
Why This Ultra Easy Baked Ranch Chicken is Your New Weeknight Staple
Look, I love a long, slow weekend cook, but weeknights are a battlefield, right? This recipe is built for speed, flavor, and, honestly, keeping my sanity intact. If you’re looking for Quick Dinner Chicken Ideas that your whole family will actually ask for again, this is it.
- It’s an absolute winner for Family Friendly Chicken Dinners because everyone loves that ranch flavor.
- The cleanup involved is practically nil—we’re talking one dish, maybe two if you’re a germaphobe like me!
- It’s incredibly forgiving. Even if your timing is a little off, it turns out moist and happy.
- It requires almost zero measuring or complex steps, which is perfect when you’re tired after work.
Ready in Under 30 Minutes Total Time
Seriously, most nights I pull this out of the oven faster than it takes to properly thaw frozen veggies! You’re looking at maybe 10 minutes of prep work tops. Then it just zips into the 400-degree oven for about 25 minutes. It fits perfectly into that sweet spot of 30 Minute Chicken Meals, giving you time to set the table or throw together a quick side salad.
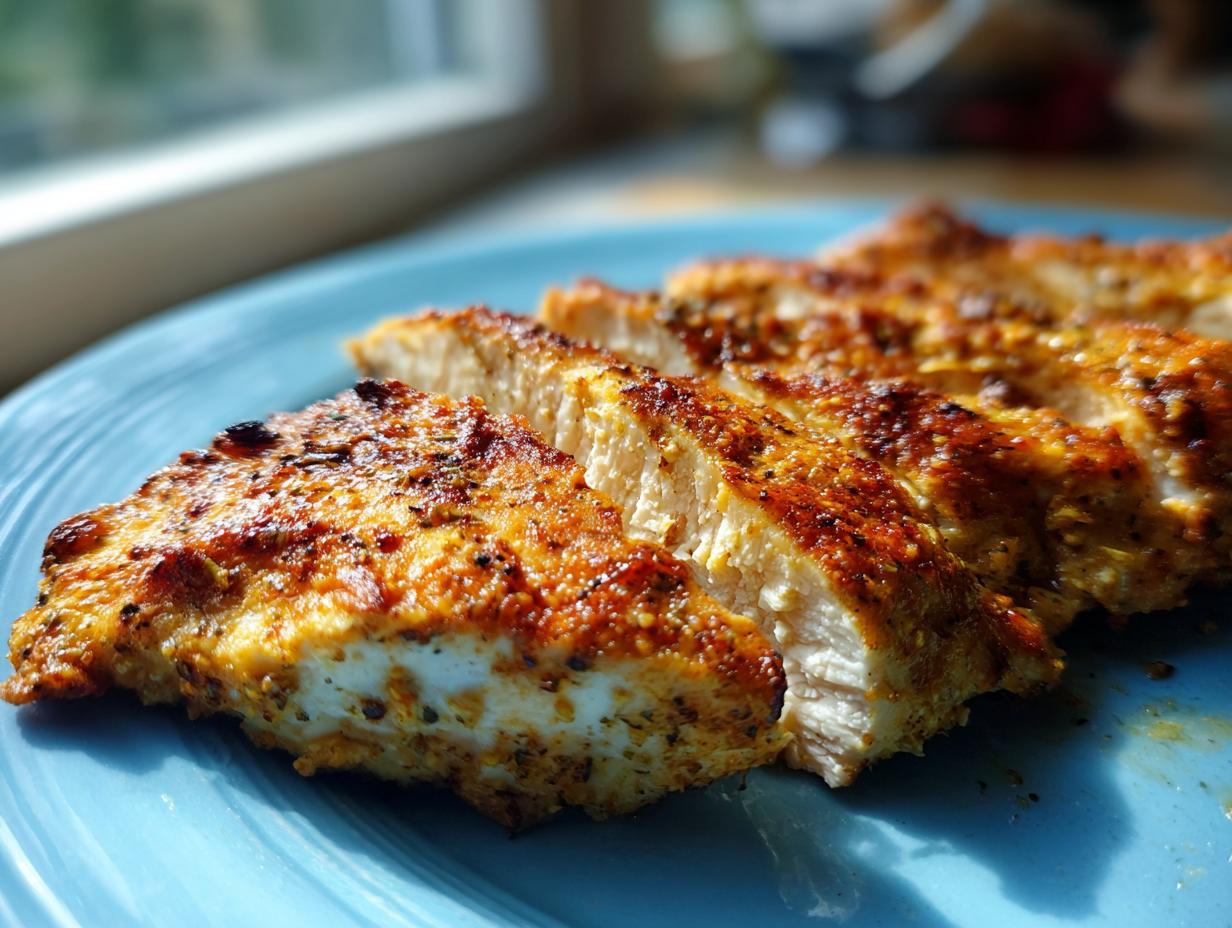
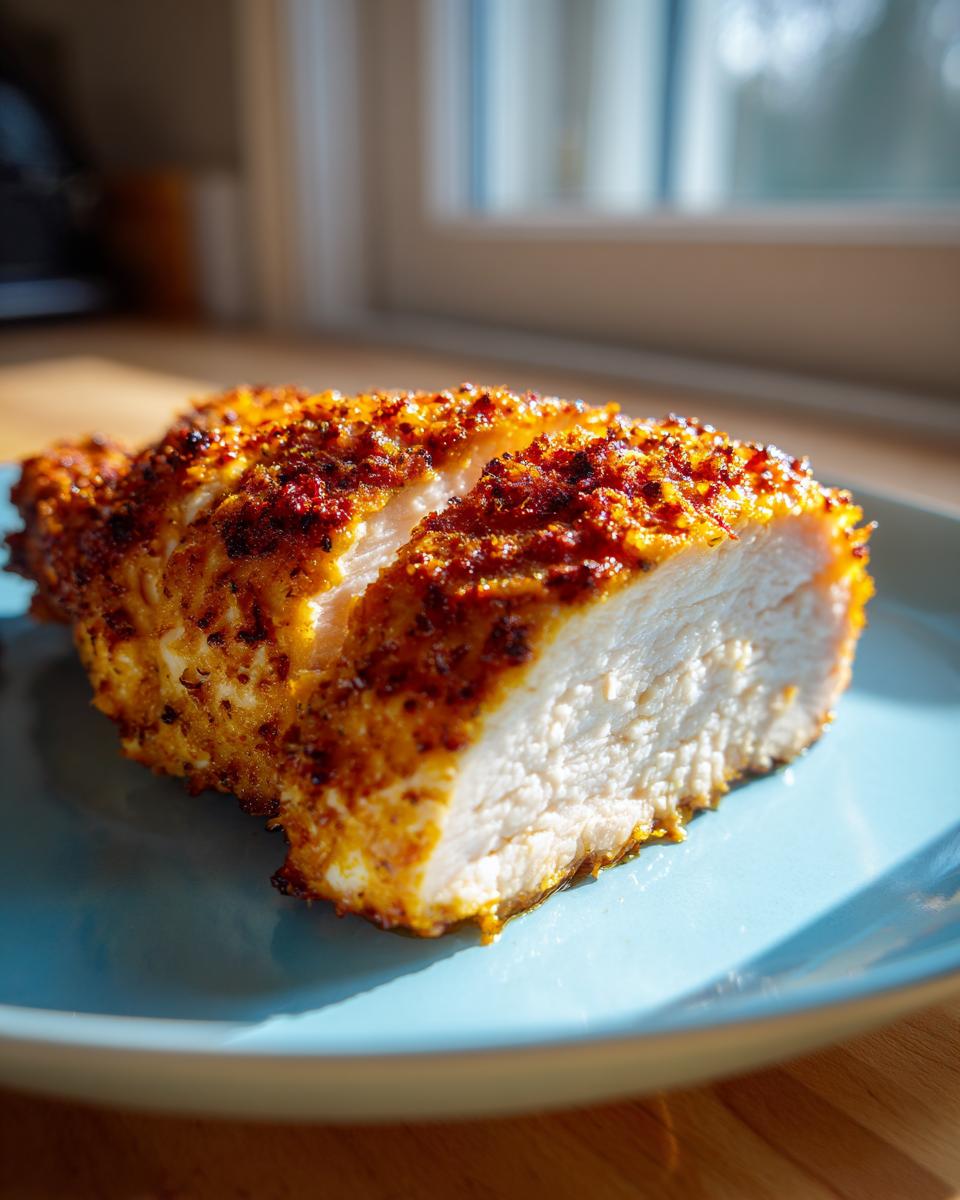
Achieving Juicy Oven Baked Chicken Every Time
Everyone worries about oven chicken turning into shoe leather, and I used to too! But the secret here is that quick coating we make—it acts like a little savory shield. That binder (mayo or olive oil, your choice!) seals in everything marvelous from the ranch seasoning and keeps the moisture locked tight inside. You get that amazing savory crust without sacrificing that tender interior. It’s the definition of Juicy Oven Baked Chicken, I promise you!
Essential Ingredients for Perfect Baked Ranch Chicken
Okay, this is where the magic starts, and usually, it’s just me staring into my pantry realizing I only have a few things on hand. That’s the beauty of this baked ranch chicken recipe! It relies on pantry staples, but the few things we do use need to be the right ones. We are keeping this simple, but if you want that amazing savory crust, you can’t skimp on the core flavor builders here. These ingredients are what turn plain old chicken into something your family will devour tonight.
Coating Components for Your Baked Ranch Chicken
For the main event, you need four things that form the base of the coating. You’ll need four of those nice, plump boneless, skinless chicken breasts. Then, grab one standard full packet of dry ranch seasoning mix—don’t try to eyeball it with less! The wet element is a quarter cup of either mayonnaise or trusty olive oil; mayonnaise seems to make a slightly richer coating, but oil works great too.
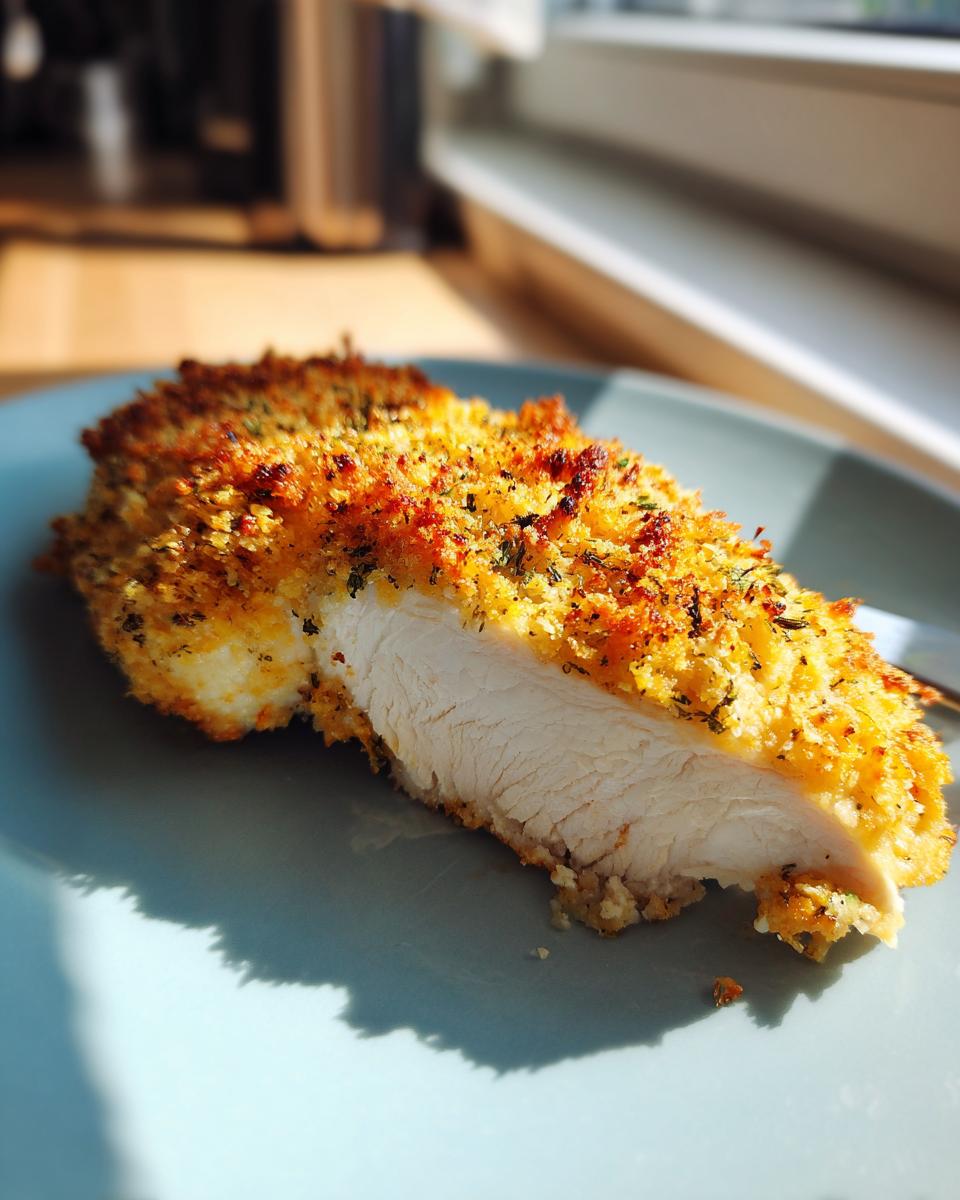
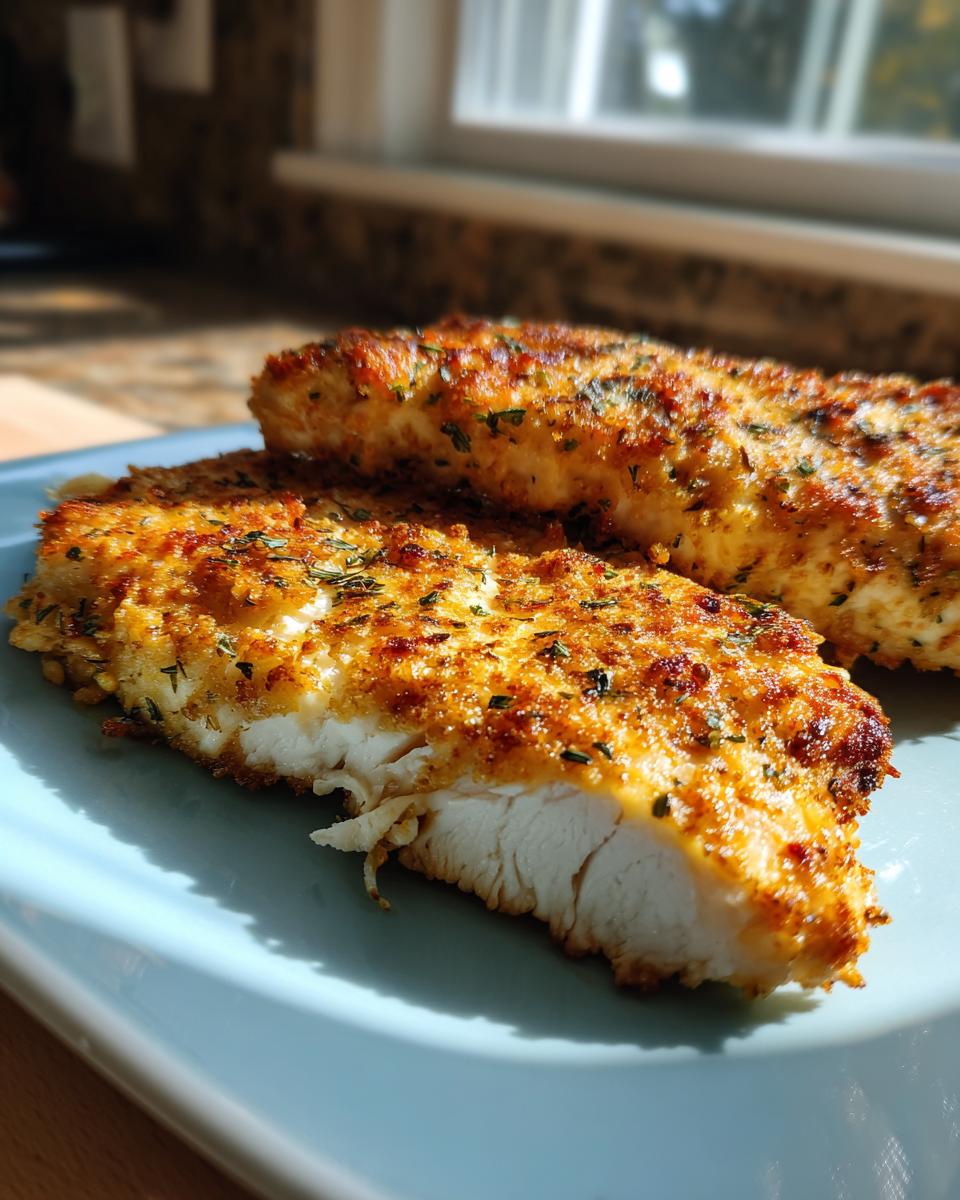
Now, if you want that extra pop, those wonderful crunchy edges that make this recipe fantastic? That’s where the optional bits come in to help create that Crispy Baked Chicken Coating. I love folding in a half cup of crushed crispy corn flakes (yes, cereal works!) or simple breadcrumbs. Don’t forget the Parmesan cheese, either! Just a quarter cup of grated Parmesan stirred right into the crunch mixture really amps up the savory factor on your baked ranch chicken.
Step-by-Step Instructions for Simple Weeknight Chicken Bake
Putting this baked ranch chicken together is almost comically easy. I always tell people that having a reliable recipe means you aren’t stressed, so just breathe and follow these simple steps. We’re aiming for juicy on the inside and perfectly crusted on the outside with that savory ranch flavor. Make sure your oven is hot and ready—that high heat is key for getting things done fast!
Here’s exactly how I make this work seamlessly:
- First things first, crank that oven up to 400°F (200°C). While it heats up, spray your baking dish or line it with parchment paper. If you forget this step, cleanup is rougher, and we are aiming for a No Fuss Chicken Dinner!
- Get your coating ready in a small bowl. Mix that whole packet of ranch seasoning right into your mayonnaise or olive oil. Stir it until it’s completely smooth—you want zero dry spots.
- If you’re using the optional corn flakes or Parmesan, spread those out on a separate plate or shallow dish for easy dipping later.
- Take your chicken breasts and pat them dry—and I mean really dry—with paper towels. This is an expert tip, folks! If the surface is wet, the coating will slide right off when baking, and you won’t get that beautiful savory crust on your baked ranch chicken.
- Take each piece of dry chicken and coat it thoroughly with the creamy ranch mixture. Spread that goodness all over the top and down the sides!
- If you want that extra crunch, press the coated side right into your corn flake/Parmesan mix until it’s stuck on well.
- Lay those perfectly coated beauties into the ready dish and slide them straight into your hot oven!
Preparing the Ranch Coating Base
When you’re mixing the ranch seasoning with your binder, whether it’s the mayo or the oil, take your time just long enough to get it cohesive. We’re not whipping anything, just making sure every speck of that tangy ranch powder is coated. That little bit of fat is doing crucial work here; it keeps the seasoning paste moist and acts as the glue for your baked ranch chicken. Remember what I said: pat the chicken completely dry first! It makes all the difference between a sticky coating and coating that actually bakes into a flavorful crust.
Baking Times and Internal Temperature Check
We bake these guys at a high heat, 400°F (200°C) is perfect for getting that nice color on the crust quickly. They usually take between 20 to 25 minutes total. But here’s the non-negotiable part to guarantee that juicy oven baked chicken texture: you *must* check the temperature. Stick a meat thermometer right into the thickest part of the breast. It’s done when it hits 165°F (74°C). Pull it out right then, and please, let it rest on a cutting board for five minutes before slicing. That resting time lets all those lovely juices settle back into the meat, making your baked ranch chicken amazing!
Tips for Success with Your Baked Ranch Chicken
Even though this is such an easy recipe for baked ranch chicken, I always have a few little tricks up my sleeve to make sure it’s perfect, moist, and savory every single time! It’s the little details that turn a good meal into a great one, right? Don’t worry if you’ve had dry chicken disasters before; these steps set you up for success.
First off, if you want that extra kick of flavor that really brings the ranch spice notes forward, try adding just one teaspoon of garlic powder right into your ranch coating mix. It deepens the savory quality beautifully without adding any complexity to the technique. It’s so simple, but wow, what a difference!
Another thing I learned from my endless tinkering is about temperature. Make sure your baking dish is preheated slightly by letting it sit in the oven for five minutes while the oven comes up to temperature. Cold glass or metal hitting that coating can sometimes make it steam instead of crisp. By giving the dish a little warmth first, you help that coating set up fast. This is great for anyone chasing that crispy baked chicken coating!
If you feel like your chicken breasts aren’t uniform in thickness—you know, thick on one end and thin on the other—you need to spend an extra minute pounding them gently to an even quarter-inch thickness. This is the best way to ensure they all finish cooking at the exact same time for perfect doneness across the board. Stop worrying about that thermometer for a second and aim for even thickness!
And finally, I always try to look at those external tips for inspiration, too! Sometimes browsing what others are doing helps remind you of a great pairing. I saw one great pin suggesting how to serve their Easy Baked Ranch Chicken that made me want to try adding a squeeze of fresh lemon over the top right before serving next time. It’s just a little acid to balance that richness. Don’t be scared to experiment a bit once you’ve mastered the basic baked ranch chicken recipe!
Variations: Making Cheesy Ranch Chicken Bake
Part of the joy of a simple recipe like this baked ranch chicken is knowing you can tweak it easily to make it your own! We’ve established the base is savory and perfectly juicy, but maybe you need something a little more over-the-top for a Friday night dinner. That’s where cheese and different cuts of chicken come in.
If you’re looking for that ultra-comfort food vibe, a little cheese is the perfect addition. I’ve seen so many success stories with folks topping this with sharp cheddar, and I even found a great post about Cheddar Ranch Chicken Thighs that looked divine! If you decide to add shredded cheddar, you only need maybe a half cup tossed over the top.
But here’s the crucial timing note: DO NOT add the cheese at the beginning! If you put cheese on when you start baking, it will just melt off into a greasy puddle and burn before the chicken is even close to cooked. Wait until the last five minutes of baking time. When your internal temperature is reading about 155°F and the chicken is almost done, pull the pan out, sprinkle that lovely cheese over everything, and slide it back in until the cheese is perfectly melted and bubbly. That’s all the time it needs!
Now, about the chicken cut itself. While the recipe is written for breasts, using chicken thighs is a fantastic option for even deeper flavor and guaranteed moisture. Chicken thighs naturally have more fat, so they are much harder to dry out. If you swap out the breasts for bone-in or boneless thighs, you’ll need to adjust your bake time a bit. They usually take closer to 30 to 35 minutes at 400°F to ensure they hit that safe 165°F temperature internally. This makes the baked ranch chicken recipe incredibly flexible for whatever you have in the fridge!
Serving Suggestions for This Savory Baked Chicken
So you’ve got this gorgeous, savory, perfectly seasoned chicken coming out of the oven. Fantastic job! What do you serve with something so rich and punchy? You want sides that either soak up those lovely juices or provide a bright, fresh counterpoint to the ranch seasoning. Since this is a Simple Weeknight Chicken Bake, we aren’t messing around with anything fussy here; we need quick starch and quick green veg!
Here are my three favorite things to pile onto the plate right next to that chicken:
- Creamy Mashed Potatoes: You absolutely have to have something fluffy to scoop up any residual ranch coating that happens to flake off. Potatoes are classic comfort food, and they pair perfectly with the herbs in the ranch. You can use instant ones if you’re in a massive rush, I won’t tell!
- Roasted Broccoli or Asparagus: Something green is essential to cut through all that savory richness. Toss whatever you’re using with a tiny bit of olive oil, salt, and pepper, and roast it right alongside the chicken during those last 15 minutes. They come out perfectly tender-crisp—a great textural contrast to the Savory Baked Chicken.
- A Simple Fresh Salad: Sometimes you need zero cooking at all. A crisp green salad with a sharp vinaigrette (something vinegary, like red wine or balsamic) wakes up your palate after eating the richer components. It keeps the whole meal feeling lively and not too heavy.
Honestly, whatever you choose, the star of the show is that tender chicken. Just make sure you have a side that can absorb those yummy pan drippings!
Storage and Reheating Instructions for Leftover Baked Ranch Chicken
Don’t you just love having leftovers? Especially when it means dinner tomorrow is basically already handled! This baked ranch chicken holds up surprisingly well, which makes it fantastic for meal prep. But you have to store it right, or that beautiful crust we worked so hard to make turns sad and soggy.
First things first: leftovers need to chill out quickly. Make sure your chicken has cooled down a bit after resting—don’t try to put steaming hot chicken straight into an airtight container in the fridge, or you’ll steam it up from the inside out! Once it’s just warm, tuck it into an airtight container. This way, your baked ranch chicken should stay perfectly fine in the refrigerator for about three to four days. Any longer than that, and I’d start worrying!
Tips for Avoiding Soggy Reheated Chicken
Reheating is the tricky part. We want that chicken juicy, not chewy or dried out. My first rule for any leftover chicken breast is to avoid blazing hot microwaves if you can. Microwaves are fast, I grant you, but zap it too long and you end up with rubber. If you have to use the microwave, try just 30-second bursts on medium power.
And here’s a trick I swear by for any poultry reheat: add a tiny splash of liquid before heating. If you’re using the microwave, put a teaspoon or two of water or chicken broth in the bottom of the dish with the chicken before covering it loosely with a damp paper towel. That steam protects the meat from drying out while it warms up.
If you have a bit more time, using the oven is my favorite way to revive the leftover baked ranch chicken. Pop it into a dish at a lower temperature, maybe 325°F (160°C). Again, a tiny bit of broth underneath helps immensely. It takes a little longer— maybe 10 to 15 minutes depending on the thickness—but the heat surrounds the chicken gently, and the crust stays so much better than microwaving! Just make sure you check that internal temperature again to ensure it’s safe and hot.
If you want to respect the original recipe’s integrity and keep things safe, always make sure you review our storage policies when it comes to leftovers, though this recipe is generally very safe when handled correctly. Enjoy knowing you have a flavorful dinner waiting for you!
Frequently Asked Questions About Ranch Seasoning Chicken
I know you’ve got questions! When you find a new go-to like this baked ranch chicken, you want to make sure you can adapt it to your kitchen, your schedule, and whatever you happen to have on hand. This is where we tackle those last-minute doubts so you can get this incredibly flavorful meal on the table without a hitch. Don’t fret if you need to swap something out; that’s what home cooking is all about!
Can I use chicken thighs instead of breasts for this baked ranch chicken recipe?
Yes, absolutely! Chicken thighs are fantastic and often even juicier, which is great for any easy baked chicken recipe. The only change you need to make is time, because thighs are denser and have more fat and bone (if you leave it in). The cooking temperature stays the same—400°F—but instead of 25 minutes, you’ll likely need closer to 30 to 35 minutes. Just use your trusty meat thermometer, pull them out when they hit 165°F internally, and you’re golden. Thicker thighs need just a little more patience!
What is the best way to make this a No Fuss Chicken Dinner?
When I say this is the easiest meal, I mean it! To fulfill that “No Fuss Chicken Dinner” promise, my top tip is heavy-duty parchment paper or aluminum foil lining. After you preheat your oven, line your baking dish completely with foil or parchment paper before you grease anything. It’s your secret weapon against scrubbing caked-on ranch goodness later. Seriously, you can just lift the whole liner out when it’s done, and your pan is virtually clean. It’s the ultimate cheat code for simple weeknight chicken bake nights!
Another thing to keep in mind for minimal fuss is prepping everything first. Measure out your ranch mix and your optional crisps *before* you touch the chicken. Once you start working with the raw meat, things can get messy fast. Having your coating bowl ready, your chicken patted dry, and your pan lined means you can go from counter to oven in under 10 minutes flat. It really streamlines that whole process!
Do you ever have other nagging questions about making sure your ranch seasoning chicken turns out perfect? Need to know about substitutions or cooking temperatures? If I haven’t covered it here, just reach out! You can send me a note through the contact page, and I’m happy to help you troubleshoot your savory baked chicken.
Nutritional Estimate for Your Easy Baked Chicken Recipe
I know some of you count macros, or maybe you’re just curious what’s going into your body, so I wanted to lay out the general estimates for this Easy Baked Chicken Recipe. Keep in mind, this is just a ballpark figure based on the standard ingredients listed (using mayo for the coating, for example). Since every packet of ranch seasoning has slightly different sodium or fat counts, these numbers will shift!
If you’re following the recipe for one serving (one breast), here’s what you can generally expect:
- Calories: Around 320
- Protein: A solid 40 grams! That’s a winner for keeping you full.
- Fat: About 15 grams
- Carbohydrates: Just 5 grams, which is great for keeping things lighter.
- Sugar: A very low 2 grams.
- Sodium: This is the only one to watch—it’s about 650mg, mostly coming from that ranch packet, so if you’re sensitive to salt, use a low-sodium ranch mix or cut it down slightly.
I always recommend checking the specific nutrition label on your ranch seasoning packet and your mayonnaise or oil if you are tracking very closely. We strive for clarity here at Cookin’ Corner, and that extends to honesty in the kitchen. You can read a bit more about our commitment to reliable home cooking over on our About Us page!
PrintEasy Baked Ranch Chicken: Juicy and Crispy Weeknight Dinner

Make this simple baked ranch chicken for a quick, flavorful, and family-friendly dinner. It uses minimal ingredients and bakes up juicy with a savory ranch crust.
- Prep Time: 10 min
- Cook Time: 25 min
- Total Time: 35 min
- Yield: 4 servings 1x
- Category: Dinner
- Method: Baking
- Cuisine: American
- Diet: Low Lactose
Ingredients
- 4 boneless, skinless chicken breasts
- 1 packet (1 oz) dry ranch seasoning mix
- 1/4 cup mayonnaise or olive oil
- 1/2 cup crushed crispy corn flakes or breadcrumbs (optional, for extra crispiness)
- 1/4 cup grated Parmesan cheese (optional)
Instructions
- Preheat your oven to 400°F (200°C). Lightly grease a baking dish or line it with parchment paper.
- In a small bowl, mix the dry ranch seasoning packet with the mayonnaise or olive oil until fully combined. This creates the coating base.
- If using, combine the crushed corn flakes/breadcrumbs and Parmesan cheese in a separate shallow dish.
- Pat the chicken breasts dry with paper towels. This step helps the coating stick and promotes crispiness.
- Coat each chicken breast completely with the ranch mixture, spreading it evenly over the top and sides.
- If desired, press the coated side of the chicken into the corn flake mixture to create a crispy topping.
- Place the coated chicken breasts in the prepared baking dish.
- Bake for 20 to 25 minutes, or until the internal temperature reaches 165°F (74°C) and the chicken is cooked through and juicy.
- Let the chicken rest for 5 minutes before slicing and serving.
Notes
- For extra flavor, add 1 teaspoon of garlic powder to the ranch coating mixture.
- If you prefer a cheesy topping, sprinkle shredded cheddar cheese over the chicken during the last 5 minutes of baking.
- This recipe works well with chicken thighs, but adjust the cooking time as needed.
Nutrition
- Serving Size: 1 breast
- Calories: 320
- Sugar: 2
- Sodium: 650
- Fat: 15
- Saturated Fat: 3
- Unsaturated Fat: 12
- Trans Fat: 0
- Carbohydrates: 5
- Fiber: 1
- Protein: 40
- Cholesterol: 110