
When that crisp air hits and the leaves start turning those gorgeous reds and golds, my kitchen immediately craves the warmth of an oven, and nothing says cozy quite like a perfectly baked apple. Here at Cookin’ Corner, we believe in tastes that transport you, and this classic core and fill baked apple recipe is pure American home cooking nostalgia. Forget those fussy, overly complicated fall dishes; this is the absolute best, easiest way to get that meltingly tender fruit filled with sweet spice right onto your plate. It’s simple, it’s reliable, and it tastes exactly like coming home.
- Why This Is the Best Baked Apple Recipe You Will Make
- Gathering Ingredients for Classic Cinnamon Baked Apples
- How to Bake Apples: Step-by-Step Oven Baked Apples Recipe
- Tips for Success with Your Stuffed Baked Apples
- Serving Suggestions for This Warm Apple Dessert
- Variations: Beyond the Classic Baked Apple
- Storage and Reheating Instructions for Leftover Baked Apple
- Frequently Asked Questions About Making Baked Apples
- Estimated Nutrition for Your Baked Apple Serving
- Estimated Nutrition for Your Baked Apple Serving
Why This Is the Best Baked Apple Recipe You Will Make
I’ve tried pretty much every method out there for transforming apples into dessert, but I always come back to this one. Why? Because these are truly the easy baked apples that always work. If you’re looking for the best baked apple recipe, this is it. We’re skipping the slicing and chopping; honestly, who has time for that when you want a cozy fall treat tonight? This core-and-fill technique seals all the tasty cinnamon sugar inside.
We know you’re busy, so I made sure this recipe honors your time. If you like to see my tips for other simple autumn recipes, you know I share them over on my easy slow-cooker apple butter guide to save you even more time!
Quick Prep for Perfect Baked Apples
This is where this recipe shines brighter than a holiday candle! You’ll be shocked how fast this comes together. Get your oven set, mix up the filling, and pop them in before you can even pour your coffee. We are talking about only 10 minutes of hands-on time here. This means you can whip up this quick apple dessert on a Tuesday night just as easily as you can on a busy Saturday.
Achieving Tender Baked Fruit Every Time
The secret that keeps these from becoming tough, dry little hockey pucks? The liquid at the bottom of the pan! That quarter-cup of water or cider isn’t just for flavor; it creates beautiful steam in the oven. This environment guarantees you get that wonderfully tender baked fruit texture we want, soft enough to cut with a spoon but still holding its shape. It’s foolproof steam magic!
Gathering Ingredients for Classic Cinnamon Baked Apples
Okay, let’s talk about what goes into making these gorgeous treats. This recipe is built on simple, pantry-friendly staples, but the quality of a few things really makes the difference in your final baked apple. When you gather these items, think about that comforting warmth you’re trying to build—that’s what these ingredients deliver, especially when they turn into deeply flavored cinnamon baked apples.
If you love infusing that cinnamon warmth into everything, you absolutely must check out my guide on apple cinnamon overnight oats. It’s another fantastic way to start a cozy morning!
Selecting the Right Apples for Baking
This is crucial, friend! We need apples that can stand up to the heat without turning into complete soup. I rely on firm, crisp varieties like Honeycrisp or Fuji for this trick. They have fantastic natural sweetness, bake up beautifully, and they hold their shape around that filling so you get that stunning presentation. Don’t reach for the soft ones; we want apples that are sturdy enough to stay upright while they bake.
Crafting the Cinnamon Sugar Baked Apples Filling
The filling is where the magic happens! You’re going to mix your rolled oats, brown sugar, cinnamon, and nutmeg. I stress this: use fresh spices! Old spices taste flat, and you want every molecule of flavor coming through. Make sure that brown sugar is nice and packed when you measure it—that density carries the flavor beautifully. Don’t skimp on that cinnamon; it’s the heart of this whole dish.
How to Bake Apples: Step-by-Step Oven Baked Apples Recipe
Alright, let’s get these beauties into the oven! This is the real magic moment where simple ingredients turn into that comforting aroma that fills your entire house. If you are following along for the oven baked apples recipe, the very first thing you absolutely must do is get that oven humming—set it to 375 degrees Fahrenheit and lightly grease whatever baking dish you’re using. Don’t skip the greasing, even if you think this recipe won’t stick!
Now, before we get to the heat, we need to prep the star of the show. I love seeing how people approach the coring; some people use fancy tools, but honestly, a small paring knife works just fine if you’re careful. You need to scoop out the core, but here’s the most important part of this technique: You cannot, I repeat, CANNOT cut all the way through the bottom! Leave about a half-inch border there. That little base is what keeps your lovely filling from just spilling out all over your dish while baking.
If you want to check out some other awesome ways to use up your harvest, make sure you peek at my easy baked apple crumble recipe—it’s a great alternative if you decide you want something crispier on top!
Preparing the Apples and Filling
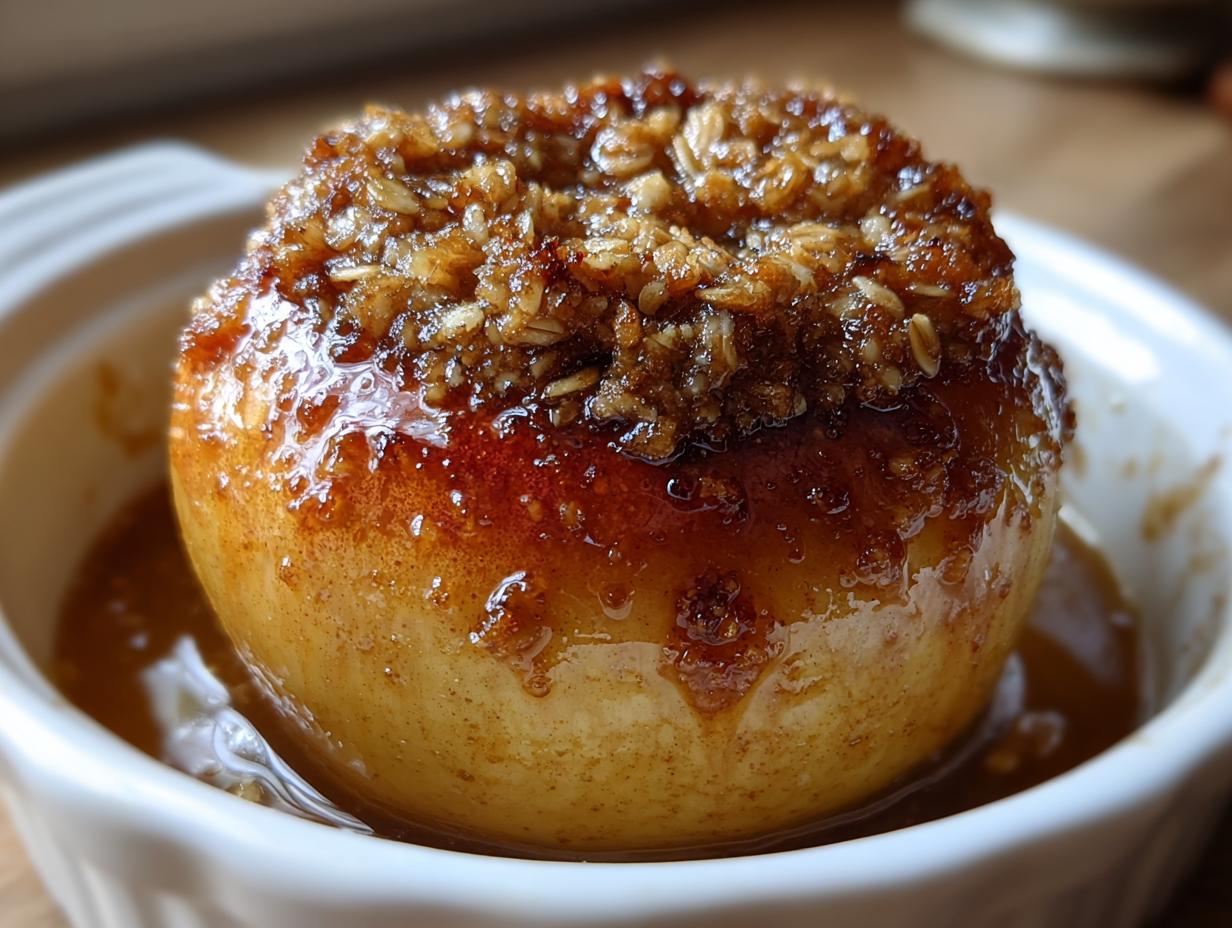
In a separate small bowl—just a little mixing bowl—we are going to bring those filling ingredients together. Toss in the oats, the brown sugar, that cinnamon we love so much—a full teaspoon—and a little pinch of nutmeg. Mix it with a fork until it looks uniform, like moist, sweet dirt, ready to go home inside the apples. Once your apples are cored and sitting snugly in their little dish, spoon that filling mixture into the cavity of each apple. Don’t just dump it in there! Take a moment to gently press it down firmly. You want a nice, dense plug of cinnamon-oat goodness sitting nicely inside. Top each filled apple with those little squares of butter. This butter melt is going to caramelize beautifully with the sugar underneath.
Here is a look at what that filling looks like when it’s ready to go into the apple:
Baking Time and Checking for Doneness
Here’s another crucial piece for success: the liquid. Before this dish goes near the oven, pour about a quarter cup of water or, even better, apple cider, right into the bottom of the baking dish, surrounding the apples. This liquid turns into steam, and steam keeps the fruit from drying out. Once they’re nestled in that steam bath, they head into the 375°F oven for about 35 to 45 minutes. If you’re using smaller apples, they might be done closer to the 35-minute mark. But don’t trust the timer alone! The ultimate test for a successful baked apple is tenderness. Take a fork—yours or a thin knife—and pierce the apple flesh. If the fork slides in with almost no resistance, they are perfect. If you feel resistance, give them another five or ten minutes. You want them soft and warm all the way through, thanks to that steamy environment we created.
When you pull these out, they’ll smell like heaven, and you’ll realize why this is such a classic, fantastic recipe. If you’re looking for other ways to incorporate these flavors, my recipe for moist apple coffee cake is also a huge hit during the fall!
If you want more expert tips on getting the perfect result every single time, check out what the pros say about how to make baked apples.
Tips for Success with Your Stuffed Baked Apples
Making a great baked apple isn’t hard, but knowing these little tricks separates a *good* one from the absolute best one you’ll ever eat. Since we are aiming for that reliable, deeply comforting flavor that defines our American home cooking heritage, let me walk you through a few things I always keep in mind when preparing these stuffed baked apples. You’ll find these small details elevate your entire dessert experience.
If you’re looking for other ways to use up fresh harvest ingredients in a slightly different way, I highly recommend checking out my recipe for easy apple strudel. It’s a wonderful addition to your collection of simple autumn recipes!
Moisture Control: Water vs. Apple Cider
Remember how I mentioned pouring liquid into the bottom of the pan? That’s non-negotiable for getting that perfect texture! While water works just fine, if you want to seriously upgrade your flavor for what I consider the best baked apple recipe experience, use apple cider instead. Cider is already packed with apple goodness, nutmeg notes, and spice. As it heats up, it converts to steam, but instead of just adding moist air, it’s bathing the bottoms of those apples in concentrated, warm apple flavor. It deepens the entire dish, making it taste richer and more complex without adding any extra work.
Adjusting Texture with Foil Covering
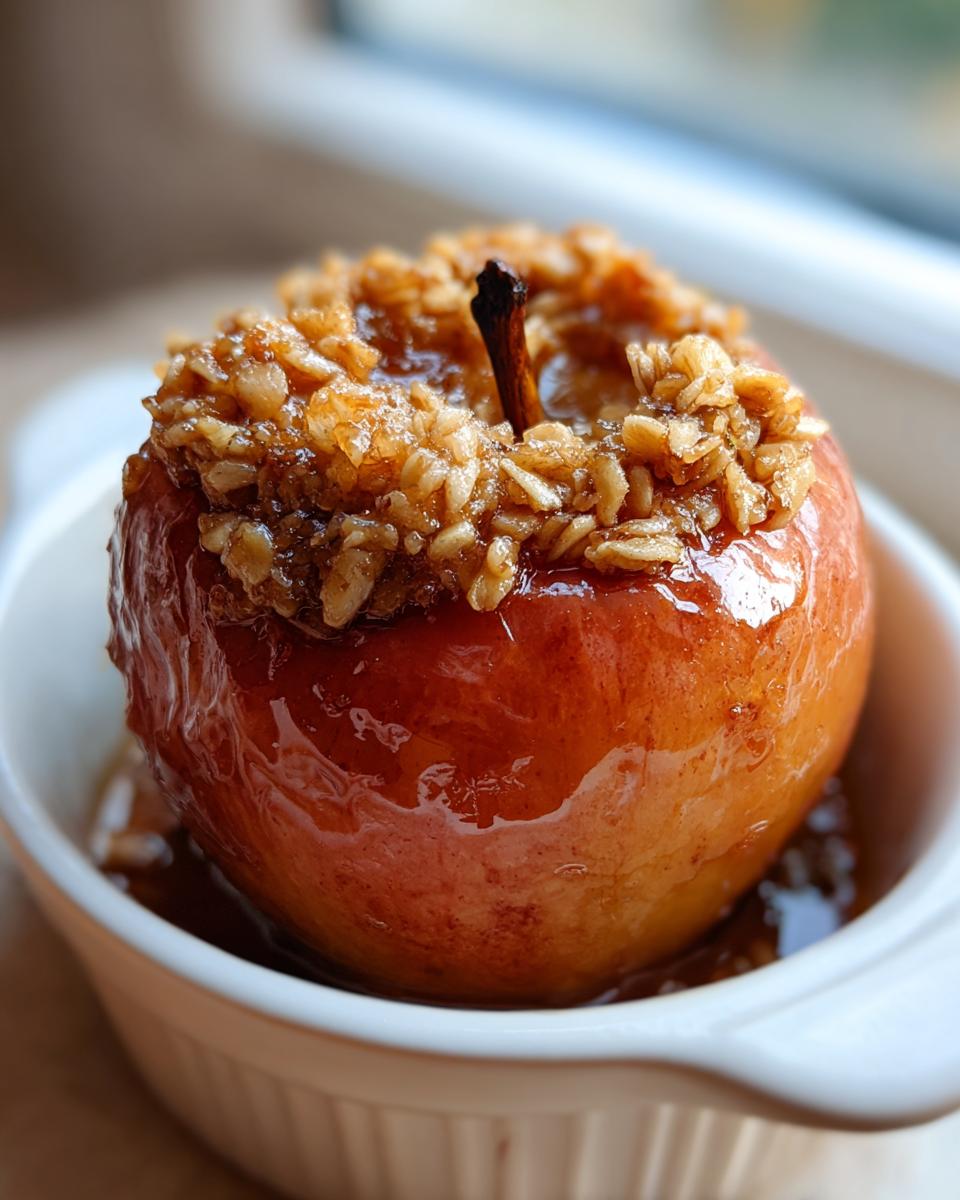
Now, let’s talk about just *how* soft you like your apples. Every apple variety holds heat differently, right? If you’re using a very crisp apple, or if you simply prefer your baked apples to be fork-tender—almost melting down—you can use the foil method. For the first 20 minutes of baking time, cover that baking dish tightly with foil. This traps all the heat and steam right around the fruit, essentially forcing them to cook down faster. Then, you remove the foil for the last 15 to 20 minutes. This allows the tops to brown slightly and the filling to caramelize just a bit before you pull them out. It makes a noticeable difference if you want that ultra-soft texture.
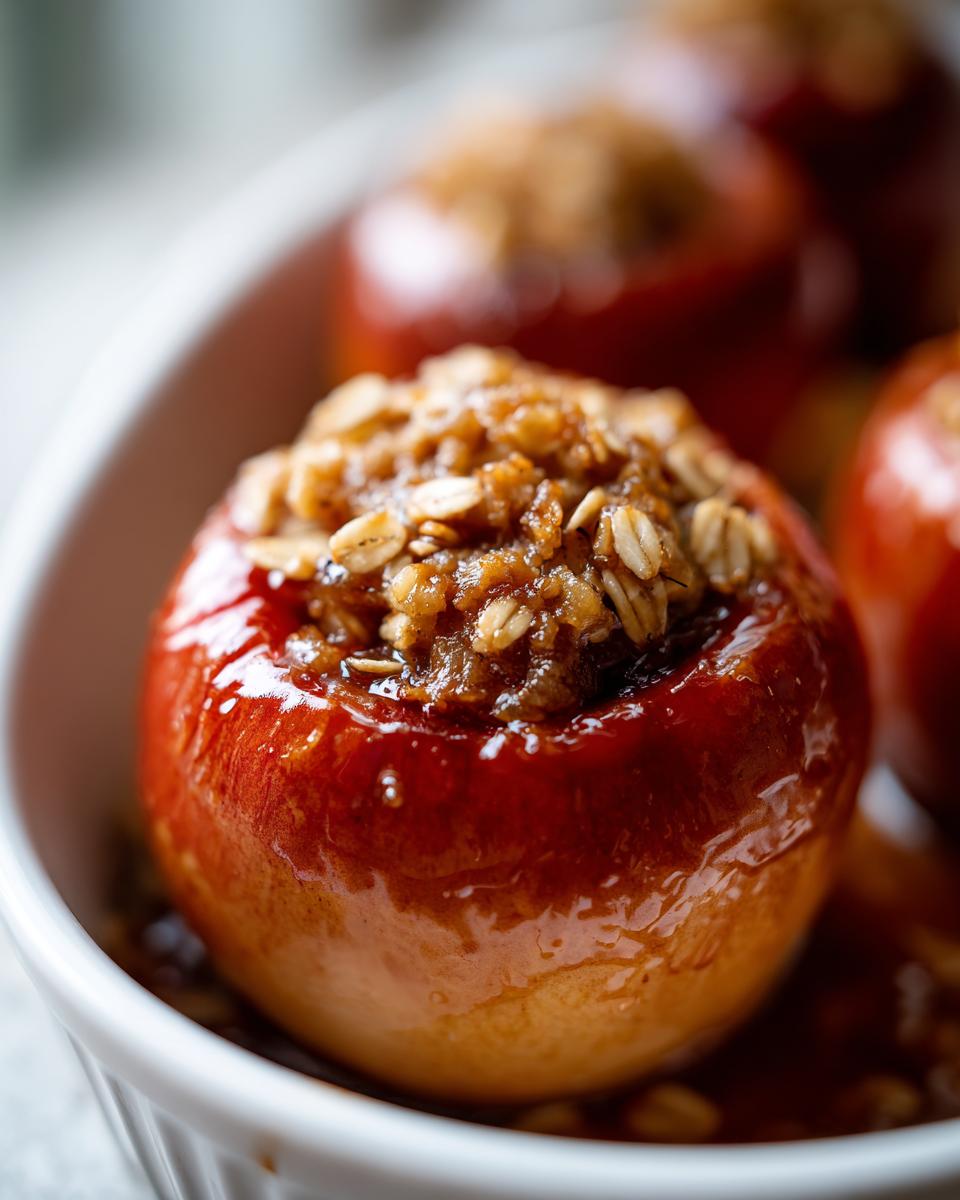
Here is what the apples look like after they have baked and the foil has been removed, allowing the tops to caramelize:
Serving Suggestions for This Warm Apple Dessert
Once those beautiful apples come out of the oven, they create the most intoxicating aroma—it’s the true essence of a cozy fall evening! While they are honestly incredible all on their own, I think we can all agree that elevating a dessert just a little bit makes it special. Serving this warm apple dessert immediately after they cool for just five minutes is key. The residual heat keeps everything soft and gooey.
My absolute favorite pairing, which turns an easy snack into a restaurant-worthy dessert, is a scoop of good vanilla bean ice cream. As the cold cream melts over the hot, spiced apple, it’s just perfection. If you’re feeling extra fancy, you really should try drizzling them with homemade caramel. It’s so easy, and I have a fantastic, reliable recipe for easy homemade caramel sauce that pairs unbelievably well with the tartness of the apple.
Alternatively, a dollop of fresh whipped cream or a spoonful of plain Greek yogurt also cuts the sweetness nicely, especially if you’ve sweetened them on the heavier side. Trust me, serving this fresh from the oven makes everyone feel instantly cared for!
Variations: Beyond the Classic Baked Apple
While I absolutely stand by our core recipe for the perfect baked apple, I know my readers love to tinker! That’s the fun of home cooking, right? You take a solid base, like this one, and you twist it a little to make it totally your own. Whether you want more crunch, less sugar, or just a different presentation, there are tons of ways to adapt this lovely fruit. I often experiment when I have too many apples from the orchard!
If you are looking for other ways to use up seasonal produce, my recipe for sweet potato muffins is another favorite around here that captures that cozy fall vibe.
Adding a Crunchy Apple Crumble Topping
Sometimes, you just need that textural contrast. The soft, warm apple underneath needs a bit of crispness, and that’s where the apple crumble topping comes in handy! If you want to swap out the oat filling, or maybe even add the crumble *on top* of the oats, it’s so simple. You just mix a half cup of all-purpose flour, a half cup of packed brown sugar, and a quarter cup of cold butter. Use your fingers or a pastry cutter to work it until it looks like coarse crumbs. Sprinkle this mixture right on top of the filling before it goes into the oven. The oats give you chewiness, but the crumble gives you crunch—it’s heavenly!
Making Healthier Baked Apples
I totally get it; sometimes we want an indulgent dessert that still fits into a slightly lighter eating plan. You can absolutely achieve great results while making healthy baked apples using this base method. The easiest swap is trading out that brown sugar for pure maple syrup. Maple has such a rich, distinct flavor that complements the spices beautifully. You might need slightly less of it, so start with just two tablespoons instead of the quarter cup. Also, if you’re looking to cut down on saturated fat, you can omit the butter pieces completely. The apples will still soften beautifully thanks to the steam bath we use in the recipe, though they won’t have quite that rich melt-in-your-mouth quality. They still make a wonderful, guilt-free treat!
Storage and Reheating Instructions for Leftover Baked Apple
Oh, if you have leftovers—which means you probably made a double batch because you knew they’d disappear fast! Good job! A leftover baked apple is an absolute treasure, especially for a quick breakfast the next day. Luckily, this style of baked fruit holds up really well, meaning you don’t have to stress about finishing all four in one sitting.
When it comes to storage, you need to let them cool down completely before you cover them up, or you’ll end up with sticky, steamy apples. Once cooled, transfer them into an airtight container. They keep beautifully in the refrigerator for about three to four days. I’ve even stored them like this and they tasted almost as good reheated!
If you want to explore other ways to preserve the lovely flavors of autumn fruit, check out my recipe for easy pear butter—it lasts forever in the pantry!
Reheating them is where you have a choice depending on how much time you have. For the best texture, especially if you want to keep that tender fruit quality, use the oven or toaster oven. Pop your leftover apple onto a small baking sheet at about 325 degrees Fahrenheit for about 8 to 10 minutes. This warms everything through gently without turning the sides mushy, and the residual cinnamon sugar smells amazing again!
Now, if you’re in a real rush—say, you need that baked apple for breakfast right now—the microwave works in a pinch! Just put the apple on a microwave-safe plate and heat it for 30 to 45 seconds. Keep an eye on it; you want it hot, but you don’t want that delicate fruit structure to explode from over-steaming. A quick zap treats you to that warm spiced fruit flavor in seconds!
Frequently Asked Questions About Making Baked Apples
It’s funny how the simplest recipes can bring about the biggest questions! That’s the beauty of home cooking; everyone tweaks things a little bit for their own taste. Over the years, as I’ve shared this classic technique, a few questions about the perfect baked apple seem to pop up again and again. Let’s clear those up right now so your next batch is absolutely flawless.
Before you go, if you’re looking for another simple, buttery treat, my recipe for best lemon scones is an absolute keeper!
Can I make this baked apple recipe ahead of time?
You absolutely can! I often do this when I’m preparing for a big gathering. You can bake the apples completely, let them cool down to room temperature, and then store them in an airtight container in the fridge for up to four days. When you’re ready to serve, just reheat them gently. I prefer using the oven at about 325°F for about 10 minutes to bring them back to that perfect warm temperature without drying them out.
What is the best way to serve baked apple for breakfast?
Oh, I love turning these into a substantial breakfast! If you’re enjoying a leftover baked apple for breakfast, you want to think about balancing that sweetness with some protein or tang. My favorite way is to serve it warm over a scoop of plain Greek yogurt—the cold creaminess is wonderful against the hot spices. You can also stir a spoonful of cottage cheese into the warm center cavity. It still gives you that sweet spiced flavor you crave but adds staying power until lunch!
How do I make caramel baked apples instead?
That’s a great modification if you’re feeling indulgent! To switch this recipe over to rich caramel baked apples, you just need to swap out the filling components. Instead of the oats, brown sugar, and cinnamon mixture, fill the core cavity with 1 tablespoon of soft butter, 1 tablespoon of brown sugar, and about 1 teaspoon of the caramel sauce you plan to drizzle on top later. You’ll still use the water/cider in the bottom of the pan. When they come out, drizzle generously with extra caramel or a drizzle of the sauce you saved from your caramel sauce recipe!
Estimated Nutrition for Your Baked Apple Serving
Here at Cookin’ Corner, while we focus on flavor and memory, I also believe in being transparent about what’s going into our bodies. Providing this guide helps you fit these comforting meals into your overall goals. Below are the estimated nutritional figures based on one serving (one whole apple) using the exact ingredients listed in the recipe.
Please keep in mind that these numbers are just estimates and can shift depending on the specific varieties of apples you choose and how much water or cider you use in the bottom of the dish.
- Serving Size: 1 apple
- Calories: 280
- Sugar: 35g
- Sodium: 5mg
- Fat: 10g
- Saturated Fat: 6g
- Unsaturated Fat: 4g
- Trans Fat: 0g
- Carbohydrates: 48g
- Fiber: 7g
- Protein: 2g
- Cholesterol: 25mg
We work hard to make sure every bite feels like home, and understanding the nutrition helps you enjoy these sweet baked fruit treats responsibly. You can check out more of our healthier options over in the main healthy recipes section!
PrintClassic Core and Fill Baked Apples with Brown Sugar, Oats, and Cinnamon

You can make these easy baked apples with a simple filling of brown sugar, oats, and cinnamon. This warm apple dessert is perfect for a cozy fall treat or a simple breakfast.
- Prep Time: 10 min
- Cook Time: 40 min
- Total Time: 50 min
- Yield: 4 servings 1x
- Category: Dessert
- Method: Baking
- Cuisine: American
- Diet: Vegetarian
Ingredients
- 4 large baking apples (like Honeycrisp or Fuji)
- 1/4 cup rolled oats
- 1/4 cup packed brown sugar
- 1 teaspoon ground cinnamon
- 1/4 teaspoon ground nutmeg
- 2 tablespoons unsalted butter, cut into small pieces
- 1/4 cup water or apple cider
Instructions
- Preheat your oven to 375 degrees Fahrenheit. Lightly grease a small baking dish.
- Wash the apples. Use an apple corer or a small knife to remove the core from each apple, leaving about a half-inch border at the bottom so the filling stays inside. Do not cut all the way through the bottom.
- In a small bowl, mix together the rolled oats, brown sugar, cinnamon, and nutmeg. This makes your cinnamon sugar baked apples filling.
- Place the cored apples into the prepared baking dish.
- Divide the oat and spice mixture evenly among the four apple cavities. Gently press the filling down.
- Place a small piece of butter on top of the filling in each apple.
- Pour the water or apple cider into the bottom of the baking dish around the apples. This creates steam to keep the fruit tender.
- Bake for 35 to 45 minutes, or until the apples are tender when pierced with a fork. Baking time depends on the size and variety of your apples.
- Carefully remove the baked apples from the oven. Let them cool slightly before serving warm.
Notes
- For a richer flavor, substitute apple cider for water when baking.
- If you prefer a softer texture, you can bake the apples covered with foil for the first 20 minutes.
- Serve this warm apple dessert with a scoop of vanilla ice cream or a drizzle of caramel sauce for an extra special touch.
Nutrition
- Serving Size: 1 apple
- Calories: 280
- Sugar: 35g
- Sodium: 5mg
- Fat: 10g
- Saturated Fat: 6g
- Unsaturated Fat: 4g
- Trans Fat: 0g
- Carbohydrates: 48g
- Fiber: 7g
- Protein: 2g
- Cholesterol: 25mg