
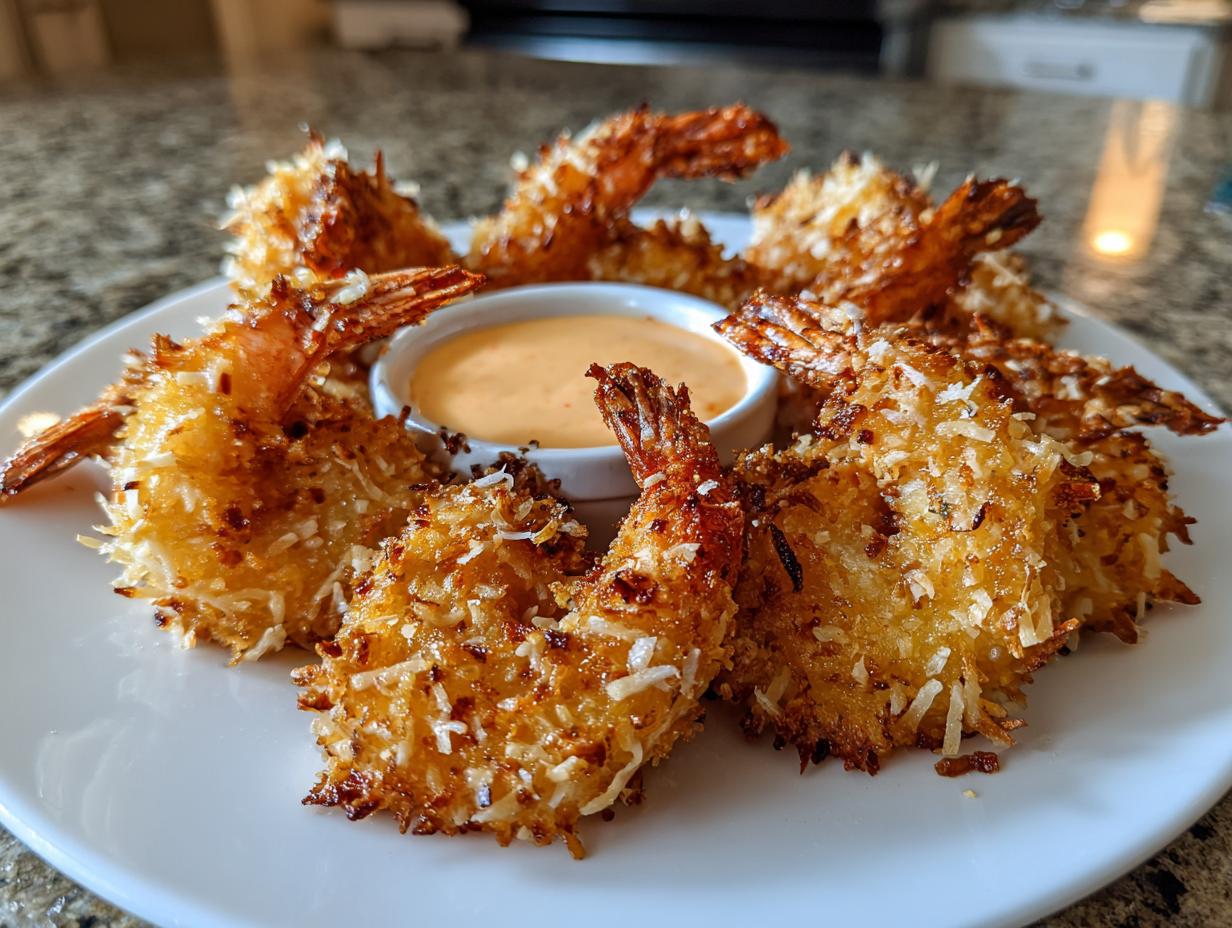
Oh, that glorious sound! Do you know that *crack* when you bite into something perfectly fried or air-fried? That’s the sound of success, and honestly, that is what separates a good shrimp appetizer from one that makes everyone stop talking. For years, I tried to recreate the crunchy, tropical perfection I used to get at those fun beachside restaurants back home, and I finally nailed it.
Forget soggy coatings; this coconut shrimp recipe is my personal game-changer for achieving that restaurant-style crispiness every single time. Plus, we aren’t just stopping at the shrimp! I’m sharing my impossibly easy Sweet Chili Mayo Dip recipe because, let’s be real, the dip matters just as much as the shrimp itself. If you’re looking for that perfect Easy Shrimp Appetizer that takes less than 30 minutes, you’ve landed in the right spot!
It’s funny how simple flavors bring back the best feelings, isn’t it? I developed this recipe because I missed those easy, flavorful appetizers from my youth. You’ll find that that little bit of extra care really makes these shrimp stand out.
- Why This Crispy Coconut Shrimp Recipe Works Every Time
- Essential Ingredients for Your Coconut Shrimp Recipe
- Step-by-Step Instructions for Crispy Coconut Shrimp
- Tips for Restaurant Style Shrimp Success
- Ingredient Notes and Substitutions for Coconut Shrimp
- Serving Suggestions for Your Tropical Shrimp Dinner
- Storage and Reheating Instructions for Leftover Coconut Shrimp Recipe
- Frequently Asked Questions About This Easy Shrimp Appetizer
- Share Your Homemade Coconut Shrimp Recipe Experience
Why This Crispy Coconut Shrimp Recipe Works Every Time
I know you want that snap, snap, snap when you bite into your shrimp, and that’s exactly what this method guarantees! We aren’t messing around with soggy coatings here. My secrets focus on texture and speed so you can get this amazing Coconut Shrimp Recipe on the table fast.
Here is the breakdown of why this always delivers:
- It uses a specific, custom coating blend for maximum crispiness.
- The shrimp are prepped perfectly to ensure the coating actually sticks!
- We have options for frying or using the air fryer—it’s versatile!
Achieving the Ultimate Crunch with Panko Coconut Shrimp
If you use standard breadcrumbs, you won’t get there, trust me. The magic ingredient here is Panko Coconut Shrimp. Panko flakes are jagged and large, so they absorb less oil and create loft. When mixed with the sweetened coconut, you get huge crunch points, making this the best crust for your shrimp.
Quick Seafood Recipe Ready in Under 30 Minutes
Who wants to spend an hour making an appetizer? Not me! Since we’re keeping the dipping sauce simple and the prep focused, this entire process is wrapped up in about 25 minutes total. That’s perfect for a spontaneous weeknight craving or when unexpected guests show up. It truly is a fantastic Quick Seafood Recipe!
Essential Ingredients for Your Coconut Shrimp Recipe
When you look at the ingredient list, you might think, “This is just three steps, Sarah Jane, what’s the big deal?” And you’d be right, it’s simple! But like my grandmother always said, with simple recipes, the quality of what you use really shows through, especially in a flavorful dish like this Coconut Shrimp Recipe. Since this is all about the coating and the dip, we need the right stuff for our dredging setup. I’ve got all the details below, including the star of the show for the dipping sauce!
If you’ve ever made my Easy Cranberry Brie Bites, you know I love layering flavors, and this recipe is no different, even though it’s quick!
For the Crispy Coconut Shrimp
First things first: grab about one pound of large shrimp. They need to be peeled and deveined, but the single most important thing you can do before anything else is pat them bone-dry with paper towels. Seriously, don’t skip this! If they are wet, the flour won’t stick, and you’ll end up with sad, bald shrimp floating in oil later. For the dredging, you’ll need three shallow dishes ready to go. The first gets one cup of regular flour seasoned simply with salt and pepper. The second is for two whole eggs, beaten until they form a nice, frothy liquid. My favorite part is the third dish: you need to mix one cup of sweetened shredded coconut with one cup of panko breadcrumbs. That blend is what gives you that perfect, beautiful shell.
For the Sweet Chili Dipping Sauce
If you only make one thing other than the shrimp, make this dip! It balances the sweetness perfectly. You only need a half cup of mayonnaise—and please, use the good stuff! Then, swirl in a quarter cup of sweet chili sauce—this adds that tropical heat we love. Finally, just a tiny squeeze, about one teaspoon, of fresh lime juice brightens everything up. Whisk it all together until it’s super smooth before you even start coating the shrimp. Trust me, you’ll want that Sweet Chili Dipping Sauce ready to go before the fryer even heats up!
Step-by-Step Instructions for Crispy Coconut Shrimp
Okay, this is where the magic happens for our Coconut Shrimp Recipe! Don’t rush these steps, especially the coating part, because that’s what keeps the crunch locked in, even if you’re aiming for an air fryer finish later. If you want that incredible texture that rivals any takeout spot, take the time to set up your stations properly. It makes all the difference, I promise!
And here’s a little bonus trick I learned from watching professionals: once you have all your shrimp coated, stack them on a baking sheet and pop them in the fridge for about 15 minutes. Seriously! Chilling them right before cooking helps the coating adhere like glue. It’s a simple step, but it ensures you don’t lose any crunch when they hit the heat. I use this same chilling tip when making my Easy Burrito Bake too, because great structure starts before cooking!
Preparing the Shrimp and Setting Up Dredging Stations
First up, you absolutely must tackle the shrimp: take those peeled and deveined beauties and pat every single one down completely dry using paper towels. I mean it—dampness is the enemy of crispiness! Once they are dry, set up your three dredging stations on the counter in order. Dish one holds your seasoned flour (that’s the cup of flour mixed with salt and pepper). Dish two is for your two beaten eggs. Finally, dish three is the grand finale: mix that cup of shredded coconut right into the cup of panko breadcrumbs you prepared earlier. Make sure everything is ready to go!
Coating Technique for Perfect Coconut Shrimp Recipe Adherence
Now we go in sequence, which is non-negotiable for the best results! Take one dried shrimp at a time. First, dredge it in the seasoned flour, making sure every surface is covered, and then—this is important—give it a good shake to knock off any excess flour. You want a light dusting, not a powdery boulder! Next, dunk it into the beaten egg, letting any extra drip away back into the bowl. Lastly, press that shrimp firmly into the coconut-panko mix. Press it right in there so you get a nice, thick layer of texture all the way around. That solid coating is what makes this the ultimate Crispy Coconut Shrimp.
Making the Sweet Chili Dipping Sauce
While those perfectly coated shrimp are chilling out in the fridge, whisk up your dip! Grab a small bowl and combine the half cup of mayonnaise with the quarter cup of sweet chili sauce. Don’t forget that teaspoon of fresh lime juice; it cuts through the richness beautifully. Just whisk until everything looks completely blended and smooth. Boom! Your dip is done and ready to go when the shrimp come out of the oil.
Cooking Methods: Fried vs. Air Fryer Coconut Shrimp
You have options here, depending on how much mess you want to deal with, but both methods yield fantastic results for your **Coconut Shrimp Recipe**!
For Frying: Pour about an inch and a half of vegetable oil into a deep skillet and get it heated up to 350°F (175°C). It’s crucial to keep that temperature steady! Working in small batches so you don’t drop the oil temp too much, carefully drop the shrimp in and let them fry for about two to three minutes on each side. You’re looking for that deep golden brown color. Once they’re gorgeous, pull them out with a slotted spoon and set them on a wire rack to drain.
For the Air Fryer: If you’re keeping it lighter, preheat your machine to 390°F (199°C). Lightly spray those chilled, coated shrimp all over with cooking spray—this helps the browning! Air fry them for about 8 to 10 minutes total, making sure to flip them halfway through so they crisp up evenly on both sides.
Tips for Restaurant Style Shrimp Success
You asked how to get that authentic “restaurant style” texture, and my secrets usually involve a little bit of patience right before the heat hits! Remember that chilling trick I mentioned earlier? I want to emphasize it here because it’s what locks in that incredible crunch for your Coconut Shrimp Recipe. If you have the time, chilling those coated shrimp for even 15 minutes stops the coating from sliding off in the hot oil.
Another thing professionals do? They never overcrowd the pan. Whether you’re frying or air frying, if you cram too much seafood in there at once, the temperature drops instantly, and you end up steaming the coating instead of frying it. This is the same thing I watch for when I’m making my easy, super-moist gingerbread cake! Work in small, manageable batches so every shrimp gets direct, high heat contact. This ensures that sweet coconut gets perfectly toasted and deeply golden before the shrimp inside overcooks. These little adjustments make a huge difference!
Ingredient Notes and Substitutions for Coconut Shrimp
Look, I know everyone’s pantry looks a little different, and sometimes you need to make calls based on what you have on hand. That’s totally fine! This dish is flexible, but if you want that top-tier, **Best Shrimp Appetizer** experience, there are a couple of things I strongly recommend sticking to, and one substitution I want to cover in detail: the coconut itself!
First, about the shrimp size: the recipe calls for large shrimp, which is great because they hold up well to the dredging and cooking process. If you have jumbo shrimp, go for it! They are even better because you get more juicy meat inside that crunchy shell. If you only have medium, that’s okay, just watch your cook time closely because they will cook through in probably less than two minutes.
Now, for the coconut, this is important: we use sweetened shredded coconut because it toasts up beautifully and gives that necessary burst of sweetness that pairs so well with the spicy dip. If all you have is *unsweetened* shredded coconut—don’t panic! You can absolutely use it, but you need to compensate for the missing sugar somewhere else. I usually add an extra tablespoon of sugar, or sometimes even just a pinch more brown sugar, directly into that coconut and panko mixing bowl to make up the difference. It’s just one of those little tricks I picked up.
If you’re looking to make some other classics while you’re at it, you should definitely check out my recipe for the Best Buttermilk Biscuits; the quality of your buttermilk makes or breaks those, just like the quality of your coconut matters here!
Serving Suggestions for Your Tropical Shrimp Dinner
So you’ve got this killer batch of crispy, sweet, and salty shrimp—now what? Making this a full and satisfying meal, perhaps a Tropical Shrimp Dinner, is so easy because the shrimp are so versatile. They pair beautifully with things that are light and bring a bit of freshness to cut through the richness of the fried coating and the creamy dip.
My absolute go-to recommendation when I serve this as a light main course is rice. Not just plain white rice, mind you—I want something that soaks up any accidental sauce drips and adds a little elegance. If you’re looking for something perfectly fluffy and flavorful that complements the coconut vibe, try my recipe for Easy Fluffy Homemade Rice Pilaf.
But if you want to keep things crispier overall, which I often do, you need a slaw! A basic, crisp coleslaw is heaven here. The vinegar tang in the slaw is just the thing to balance the sweetness of the coating. You can use a store-bought baggie mix and whip up a quick dressing with apple cider vinegar, a little sugar, and maybe some celery seed. It’s honestly the best way to keep the whole plate feeling light and bright. Serve a big bowl of that alongside your shrimp and you’ve got a weeknight dinner that feels like a holiday!
Storage and Reheating Instructions for Leftover Coconut Shrimp Recipe
Oh, leftovers! Sometimes even the best appetizers don’t all disappear in one sitting, right? And while these shrimp are certainly best fresh out of the oil or the air fryer basket, I totally get that sometimes you want a second helping the next day. The challenge with anything crispy is reheating it without turning it into a sad, soggy mess. I’ve tested this extensively so you don’t have to waste any delicious shrimp!
First, storage is key if you want to save your **Coconut Shrimp Recipe** leftovers. Make sure the shrimp are completely cooled down before you try to store them. Once cool, place them in a single layer on a paper towel laid inside an airtight container. Don’t pile them up too high, or they’ll steam each other into softness! If you have to stack them, put another paper towel layer in between. This simple step helps absorb any lingering moisture.
The Absolute No-No: Skip the Microwave
I need you to promise me something right now: never, ever try to reheat your crispy shrimp in the microwave. The microwave heats the moisture inside the coating, turning your beautiful crunch into something chewy and sad in about 30 seconds flat. It’s a tragedy, and honestly, it ruins the whole experience. Trust me, after all this effort to get that perfect crust, we aren’t sacrificing it!
Reheating for Maximum Crispness
If you want that snap back, you have to use dry heat! Your best friends here are the oven or, even better, the air fryer. If you’re using the air fryer—which I highly recommend for anything crispy—set it to about 375°F (190°C). Lay those cooled shrimp in a single layer (no overcrowding!) and cook for about 4 to 6 minutes. You just want to heat them through and freshen up that crust.
If you don’t have an air fryer, your oven broiler works almost as well. Set the oven rack to the middle position and preheat the oven to 400°F (200°C). Lay the shrimp on a baking sheet and bake for about 5 to 7 minutes. Keep your eye on them because the coconut can go from golden to dark brown really fast under the broiler!
I use this oven reheating technique all the time for leftovers, especially when I’m reheating my Air Fryer Pork Chops to bring back that beautiful exterior texture after they’ve been chilling in the fridge. It works like a charm every time!
Frequently Asked Questions About This Easy Shrimp Appetizer
It’s natural to have a few questions when you’re trying out a new Shrimp with Dipping Sauce recipe, especially when you’re chasing that perfect crunch! I’ve collected the ones I hear most often from folks trying to get this dish right for the first time. Rest assured, this **Coconut Shrimp Recipe** is pretty forgiving, but a few tips will make it amazing.
Can I make this Coconut Shrimp Recipe ahead of time?
This is a great question for busy cooks! You absolutely can prep ahead, which really helps when you’re hosting. You can get the shrimp all cleaned, dried, and fully coated in the flour, egg, and panko mixture. Cover them tightly and stick them in the fridge for up to a few hours. However, and this is vital for the texture of the **Crispy Coconut Shrimp**, you must cook them right before you plan to serve them! Coatings do best when they go straight from the chilly fridge into the hot oil (or air fryer). If you let them sit coated at room temperature for too long, the moisture from the shrimp starts to soak into the breading, and you lose that glorious crunch we worked so hard for.
What is the best oil for frying Crispy Coconut Shrimp?
When it comes to frying, you need an oil that can handle the heat without smoking or breaking down. For these, I always stick to a neutral oil with a high smoke point. Vegetable oil is my go-to workhorse because it’s affordable and does the job perfectly for deep frying. Canola oil is another fantastic choice for the same reasons. You want the oil steady at 350°F (175°C) so the outside gets golden and crispy before the shrimp inside cooks through. If you are worried about keeping your oil clean, you know I always recommend checking out my tips on keeping things fresh when I tackle my Easy Gochujang Chicken Recipe—similar principles apply to keeping your frying medium clean!
What if I don’t have Panko breadcrumbs for my coating?
I strongly urge you to run to the store for Panko because it really gives you that signature airy crispiness that sets this appetizer apart, but if you’re in a real pinch, you can use finely ground plain breadcrumbs. Just know that they tend to absorb a little more oil, so your resulting crust might be denser and less airy than what you see here. If you use plain breadcrumbs, make sure you really press that coating on firmly and consider using the air fryer method instead of deep frying to help keep them lighter!
Can I turn this into a Baked Coconut Shrimp Guide instead of frying?
Yes, definitely! I know not everyone wants to fry, and for a lighter option, baking is great, although it won’t achieve *quite* the same depth of golden color as frying. To create a proper Baked Coconut Shrimp Guide, you need two things: a wire rack set over a baking sheet, and a good, even spray of cooking oil or melted butter over the tops of the coated shrimp. The rack allows air to circulate underneath, preventing a soggy bottom. Bake around 400°F (200°C) until golden—usually about 12 to 15 minutes.
Share Your Homemade Coconut Shrimp Recipe Experience
Wow, I truly hope you enjoyed making this ultimate Crispy Coconut Shrimp! I can’t wait to hear how it turned out for you. Please leave a rating below—it helps other home cooks find the best recipes. Let me know in the comments if you fried them or went the Air Fryer Coconut Shrimp route! If you snapped a photo, share it with me over on my contact page, I always love seeing your kitchen creations!
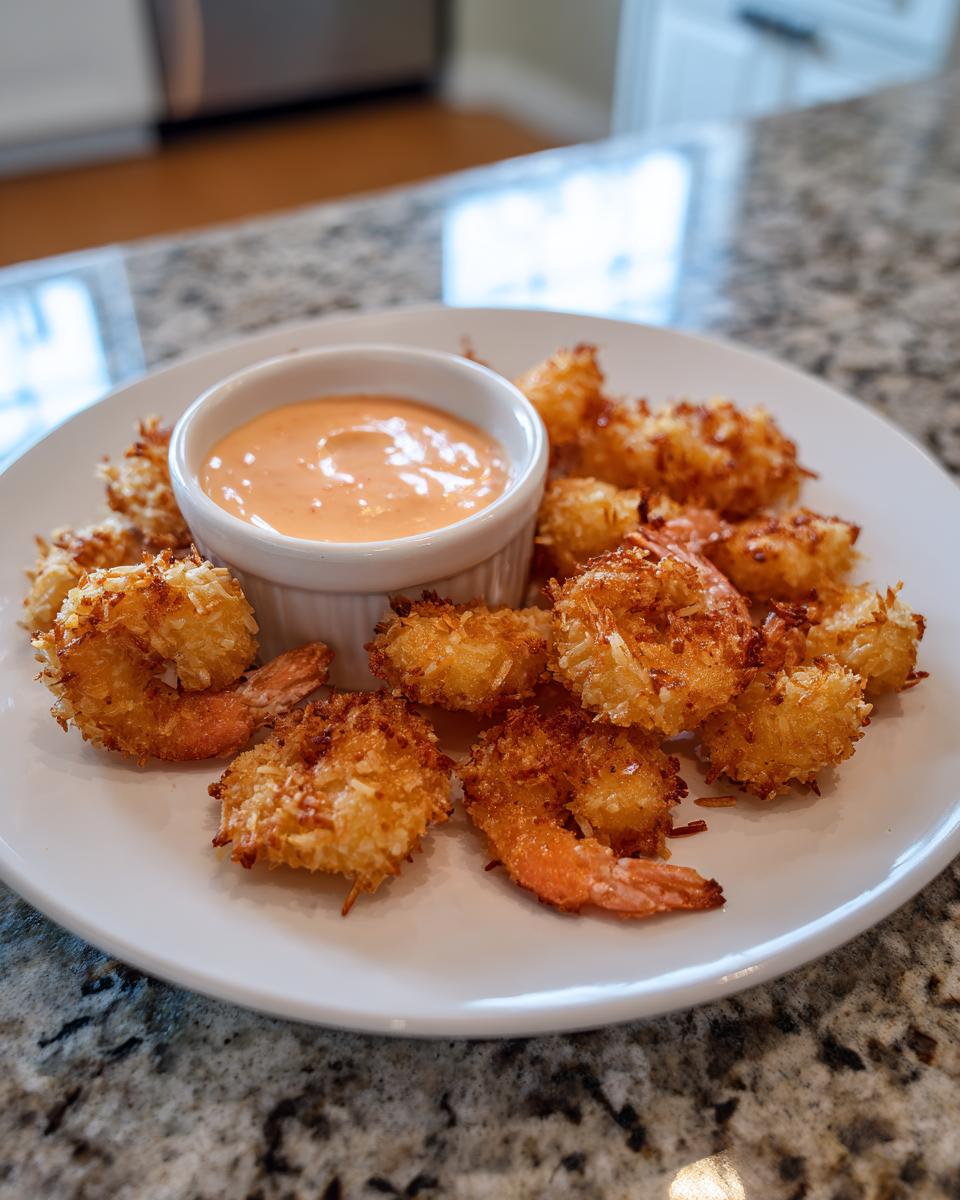
PrintBest Crispy Coconut Shrimp Recipe with Sweet Chili Mayo Dip

Make restaurant-style crispy coconut shrimp at home. This recipe uses a panko and coconut coating for maximum crunch and includes instructions for a simple, sweet chili mayo dipping sauce. It is perfect as a quick appetizer or a light seafood dinner.
- Prep Time: 15 min
- Cook Time: 10 min
- Total Time: 25 min
- Yield: 4 servings 1x
- Category: Appetizer
- Method: Frying or Air Frying
- Cuisine: American
- Diet: Vegetarian
Ingredients
- 1 pound large shrimp, peeled and deveined
- 1 cup all-purpose flour
- 2 large eggs, beaten
- 1 cup sweetened shredded coconut
- 1 cup panko breadcrumbs
- 1 teaspoon salt
- 1/2 teaspoon black pepper
- Vegetable oil, for frying (or cooking spray for baking/air frying)
- For the Sweet Chili Mayo Dip:
- 1/2 cup mayonnaise
- 1/4 cup sweet chili sauce
- 1 teaspoon lime juice
Instructions
- Prepare the shrimp: Pat the peeled and deveined shrimp completely dry using paper towels. This step helps the coating stick.
- Set up the dredging stations: Place the flour seasoned with salt and pepper in one shallow dish. Beat the eggs in a second dish. In a third dish, mix the shredded coconut and panko breadcrumbs together.
- Coat the shrimp: Dredge each shrimp first in the seasoned flour, shaking off excess. Dip it into the beaten egg, allowing excess to drip off. Finally, press the shrimp firmly into the coconut-panko mixture until fully coated.
- Prepare the dipping sauce: In a small bowl, whisk together the mayonnaise, sweet chili sauce, and lime juice until smooth. Set aside.
- Cook the shrimp (Frying Method): Pour about 1 to 1.5 inches of vegetable oil into a deep skillet or pot. Heat the oil to 350°F (175°C). Carefully place shrimp into the hot oil in batches, ensuring not to overcrowd the pan. Fry for 2 to 3 minutes per side, until golden brown and crispy. Remove with a slotted spoon and drain on a wire rack or paper towels.
- Cook the shrimp (Air Fryer Method): Preheat your air fryer to 390°F (199°C). Lightly spray the coated shrimp with cooking spray. Air fry for 8 to 10 minutes, flipping halfway through, until golden and crisp.
- Serve immediately with the homemade sweet chili mayo dipping sauce.
Notes
- For extra crispiness, chill the coated shrimp on a baking sheet for 15 minutes before cooking.
- If you prefer a less sweet dip, reduce the sweet chili sauce amount slightly.
- You can substitute regular breadcrumbs for panko, but panko provides a superior crunch.
Nutrition
- Serving Size: 4 shrimp
- Calories: 350
- Sugar: 12g
- Sodium: 450mg
- Fat: 20g
- Saturated Fat: 10g
- Unsaturated Fat: 10g
- Trans Fat: 0g
- Carbohydrates: 25g
- Fiber: 1g
- Protein: 18g
- Cholesterol: 150mg