
Oh, my goodness, if you think you know decadent desserts, just wait until you meet this pie! We’re talking about the ultimate showstopper, the kind of rich, creamy chocolate dessert that makes everyone gasp when you bring it to the table. This isn’t some flimsy, overly sweet mousse; this is the classic French silk pie recipe, perfected right here in my kitchen, just like my grandmother, Sarah Jane Thompson, would have done. The best part? We’ve tweaked it so you can still achieve that incredible, melt-in-your-mouth texture without any raw eggs, making this truly trustworthy for every gathering. Trust me, once you nail this foundation, you’ll be making it for every holiday!
- Why This Classic Chocolate Pie Recipe is a Showstopper
- Gathering Ingredients for Your Decadent french silk pie Dessert
- Best french silk pie Instructions: Building the Creamy Chocolate Mousse Pie
- Tips for Success Making Your french silk pie
- Serving Suggestions for this Rich Homemade Whipped Cream Topping Dessert
- Storage and Make Ahead Chocolate Desserts with your french silk pie
- Frequently Asked Questions About french silk pie
- Estimated Nutritional Data for this Classic Chocolate Pie Recipe
- Share Your Decadent french silk pie Creation
Why This Classic Chocolate Pie Recipe is a Showstopper
When you talk about a true showstopper, you are talking about the depth of chocolate in this French silk pie. Forget any lightweight mousse you’ve ever had—this is a truly Decadent Silk Pie Dessert. What sets this recipe apart from every other chocolate treat out there is the reliability of that rich flavor combined with the stunningly smooth finish. I promise you, the effort you put into the technique pays off tenfold in texture and taste.
Achieving the Perfect Velvety Texture
That dreamy, luxurious mouthfeel comes from two key places: first, using high-quality bittersweet chocolate that melts down beautifully, and second, the way we incorporate air. We aren’t just stirring; we are gently folding in whipped cream and stiff egg whites. Temperature control is everything here. If your melted chocolate is too hot when you add it to the yolks and butter, you’ll end up with grainy streaks instead of a homogeneous, Velvety Chocolate Filling Recipe.
The Importance of a Homemade Buttery Pie Crust for your french silk pie
You absolutely cannot build a magnificent castle on a shaky foundation, right? That’s why the contrast between the rich, deep filling and a crisp, flaky crust is crucial for a perfect French silk pie. We always blind-bake our crust—meaning we bake it empty first—until it’s lightly golden brown. This ensures that when that cool, heavy filling goes in, you don’t end up with a soggy bottom. That wonderful, flaky snap against the silky chocolate is perfection!
If you’re looking for an alternative to the classic flaky shell, remember you can check out my recipe for chocolate mousse pie for a different spin, but for this classic, a buttery crust is the only way to go!
Gathering Ingredients for Your Decadent french silk pie Dessert
Okay, now that we know this pie is going to be a masterpiece, let’s talk about what you need to grab from the pantry. Making a showstopper like this requires quality ingredients, and paying attention to how they look before they go in makes all the difference in the final result. I know you want that unbelievably rich flavor, so don’t cheat on the chocolate! You’ll see I have my list broken down, but honestly, just having everything prepared—what we call *mise en place*—is half the battle won for any gourmet pie recipe.
Here’s what you need to make this amazing dessert for 8 happy people:
- 1 (9 inch) unbaked pie crust (homemade buttery crust recommended)
- 8 ounces bittersweet chocolate, chopped
- 1 cup granulated sugar
- 1/2 cup unsalted butter, softened
- 4 large eggs, separated (see notes for no-raw-egg option)
- 1 teaspoon vanilla extract
- 1/4 teaspoon salt
- 1 cup heavy cream, cold
- 1/4 cup powdered sugar (for topping)
- Chocolate shavings (for garnish)
It might look like a long list, but many of these items are just for the topping! If you want to see how I make my cakes shine while I’m busy baking pies, take a peek at my moist Southern caramel cake recipe; I always rely on good butter there too!
Ingredient Notes and Substitutions for french silk pie
Let’s tackle the eggs first, because I know that’s what trips people up when they look at a traditional French silk pie recipe. If you aren’t comfortable using raw egg yolks and whites, don’t sweat it! I have a fantastic fix detailed in my notes. For the egg replacement, you’re basically going to rely on extra heavy cream whipped with powdered sugar AND swap some of that bittersweet chocolate for melted milk chocolate chips. This creates a stable, rich filling without any of the worry.
And remember what I said about the crust? A standard flaky crust is amazing, but if you are feeling extra lazy or just want a different texture, you can absolutely swap that in for an Oreo cookie crust. Just press the crumbs firmly into the pie plate and pop it in the fridge to chill while you make the filling. It’s a great way to pivot when planning those last-minute holiday desserts!
Best french silk pie Instructions: Building the Creamy Chocolate Mousse Pie
Alright, let’s get down to the fun part: assembly! Making this amazing French silk pie is a structured process, but it’s so much simpler than it looks on paper. We’re taking a baked crust, melting some gorgeous chocolate, and carefully folding everything together to create that signature light yet rich texture. Don’t rush any cooling steps, or you’ll ruin all that hard work we just put into the ingredients. Just follow these steps exactly, and you’ll have a truly stunning Creamy Chocolate Mousse Pie.
Preparing the Crust and Melting the Chocolate
First things first, make sure that pre-baked pie crust is completely cool on a wire rack. That’s crucial! While it’s cooling, chop up your bittersweet chocolate and set it in a heatproof bowl over barely simmering water—we call that a double boiler. Stir until it’s just perfectly glossy and smooth, then pull it right off the heat. It needs to cool down just a bit before it meets the butter and yolks later; too hot, and you risk scrambling those yolks, which we absolutely do not want!
Creating the Velvety Chocolate Filling Recipe
Now for the magic mixing! Beat your softened butter and sugar until they’re pale and fluffy—this is where we build the air. Then, one by one, beat in those egg yolks, followed by the vanilla. Once that slightly cooled, melted chocolate is mixed in, it’s time for the gentle part. We’re folding in the separately whipped egg whites and the whipped heavy cream. When you fold, use a spatula to cut down the center and sweep up the sides, turning the bowl as you go. This technique keeps the air trapped inside, ensuring you get those beautiful, Silky Smooth Chocolate Treats and it doesn’t deflate into a flat mess.
Setting the french silk pie
Once everything is gently combined and velvety smooth, pour that incredible filling right into your cooled, baked crust. Smooth the top carefully. Now, the hardest part of making a French silk pie: waiting! You must get this into the refrigerator and let it chill for a minimum of six hours, but seriously, overnight is so much better. This long chill is what sets the filling up properly so you can slice it without it collapsing on the plate, and it makes for one fantastic holiday dessert!
If you want to see how I whip up a quick version of a chocolate mousse, check out my guide for easy chocolate mousse recipe, but for the traditional pie, chilling is key.
For inspiration on other decadent pies, you can see this beautiful French silk pie recipe featured online!
Tips for Success Making Your french silk pie
Making a truly stunning French silk pie comes down to a few tiny details that separate a good pie from an unforgettable one. The two biggest pitfalls are grainy filling and deflated creaminess. To battle graininess, make absolutely sure your melted chocolate has cooled down a bit before you incorporate it with the butter and yolks. You don’t want hot chocolate melting that beautifully creamed butter!
For the egg whites and heavy cream—this is vital for achieving that airy lightness—use bowls that are perfectly clean and completely free of any trace of fat or moisture. Even one drop of oil will stop your egg whites from whipping to stiff peaks, and we need those peaks to keep our filling light. If you’re looking for another recipe where clean mixing supplies are key to texture, you’ll want to check out my guide on brown butter chocolate chip cookies!
Also, when you fold in the whipped components, do it slowly. It feels like you might deflate everything, but gentle folding is what traps the air. If you follow these temperature and cleanliness rules, your French silk pie will be perfectly smooth every time, just like the famous versions you see online, like the one from Sandra’s Kitchen!
Serving Suggestions for this Rich Homemade Whipped Cream Topping Dessert
Now that you’ve successfully assembled this incredible, rich chocolate confection, the final step is presenting it! Because this pie is so profoundly rich and decadent, you really want companions that can either cut through the chocolate intensity or enhance its deep, luxurious flavor. This is certainly the kind of dessert that steals the show, making it an absolute star when you are hosting Desserts for Dinner Parties.
My go-to recommendation is always fresh fruit. A simple scattering of bright raspberries or slightly tart blackberries on top of the homemade whipped cream topping? Divine! The acidity from the berries balances the heavy cocoa perfectly. You can also serve individual slices with a very light dusting of sea salt flakes right before serving; that little salty pop really heightens the chocolate notes.
If you’re serving this after a heavier meal, you’ll want a nice palate cleanser alongside it. A very strong cup of black coffee or an espresso is perfect. Or, if you’re looking to make it a full experience, you could mix up a batch of my easy lemon drop martini recipe to serve alongside. The bright citrus acts just like the berries, providing a clean, zesty counterpoint to the silky smooth chocolate.
Storage and Make Ahead Chocolate Desserts with your french silk pie
One thing I absolutely love about this French silk pie is that it’s one of those few desserts that actually tastes *better* the next day! Because the filling relies on chilling to set up that perfect, velvety texture, making it ahead of time is totally encouraged. This really makes it one of the best Make Ahead Chocolate Desserts you can have in your back pocket for big dinners.
You need to cover the pie tightly with plastic wrap, being careful not to let the wrap touch your beautiful whipped cream topping if you’ve already added it. If you haven’t topped it yet—and I often recommend waiting until just before serving—just wrap the unfilled pie plate carefully.
It will keep wonderfully in the refrigerator for up to three or even four days. The texture might firm up just a tiny bit more as it sits, but that’s perfectly fine and still delicious!
Now, about freezing: I usually advise against it for this specific pie. Freezing and thawing can mess up the texture we worked so hard to achieve with all that folding; the filling can get a little grainy or separate once it thaws out. So, stick to the fridge for storage. If you need a crust option that freezes better, you might want to check out my recipe for easy no-bake Oreo pie, which handles the freezer a bit better!
Frequently Asked Questions About french silk pie
I know you’ve got questions! When you’re tackling a famous dessert like this, it’s smart to double-check the tricky spots. We want your French silk pie to come out looking exactly like those pictures we were looking at earlier—dreamy and perfect. Over the years, these are the questions I hear the most when folks are working on their first, second, or even fifth batch of this rich chocolate goodness.
Can I make a french silk pie no bake variation?
That’s a fantastic question, especially if you’re short on oven time! For this specific recipe, you do need that par-baked crust because the filling, relying mostly on eggs and cream for structure, needs a sturdy, completely cool base to sit on. The filling itself technically doesn’t bake, but it firms up through chilling. If you are looking for a true no-bake situation, you’d need to adjust the stabilizers quite a bit, usually by incorporating something like cream cheese or even a little gelatin to mimic structure without heat. For this classic version, please stick to baking that crust!
How long does the french silk pie need to chill?
If you are in a real pinch, you absolutely need to give your French silk pie at least six solid hours in the refrigerator. I mean it—six hours—to let those cream and egg elements fully firm up. But I won’t lie to you; overnight is when it truly transforms. When you chill it longer, the filling gets even denser and smoother, which means those wedges you slice out won’t slump or sag when you try to serve them. Patience here equals a much prettier slice!
If you are interested in other quick, creamy chocolate treats that skip the oven entirely, I have a recipe for creamy chocolate pudding that sets up beautifully in just an hour or two. And speaking of making things easier, remember that you can find great pointers on crust handling over at Handle the Heat!
Estimated Nutritional Data for this Classic Chocolate Pie Recipe
As you prepare to serve this amazing dessert, I wanted to share what the numbers look like. Now, a word of warning: these figures are just estimates based on standard ingredients, especially if you make your own homemade buttery pie crust. If you use a store-bought crust or swap out the sugar for a substitute, your final count will shift a bit.
But generally speaking, for one slice of this wonderfully rich treat, here is what you are looking at. It’s definitely on the decadent side, which is exactly what we want for a special occasion dessert!
- Serving Size: 1 slice
- Calories: 450
- Fat: 30g
- Carbohydrates: 40g
- Protein: 6g
- Sugar: 35g
- Sodium: 150mg
Don’t let the numbers scare you too much, though. This pie is meant for celebration! If you are looking for something lighter that still tastes amazing, you might want to check out some of my other recipes, but nothing quite beats the total indulgence of this creamy chocolate dessert.
Share Your Decadent french silk pie Creation
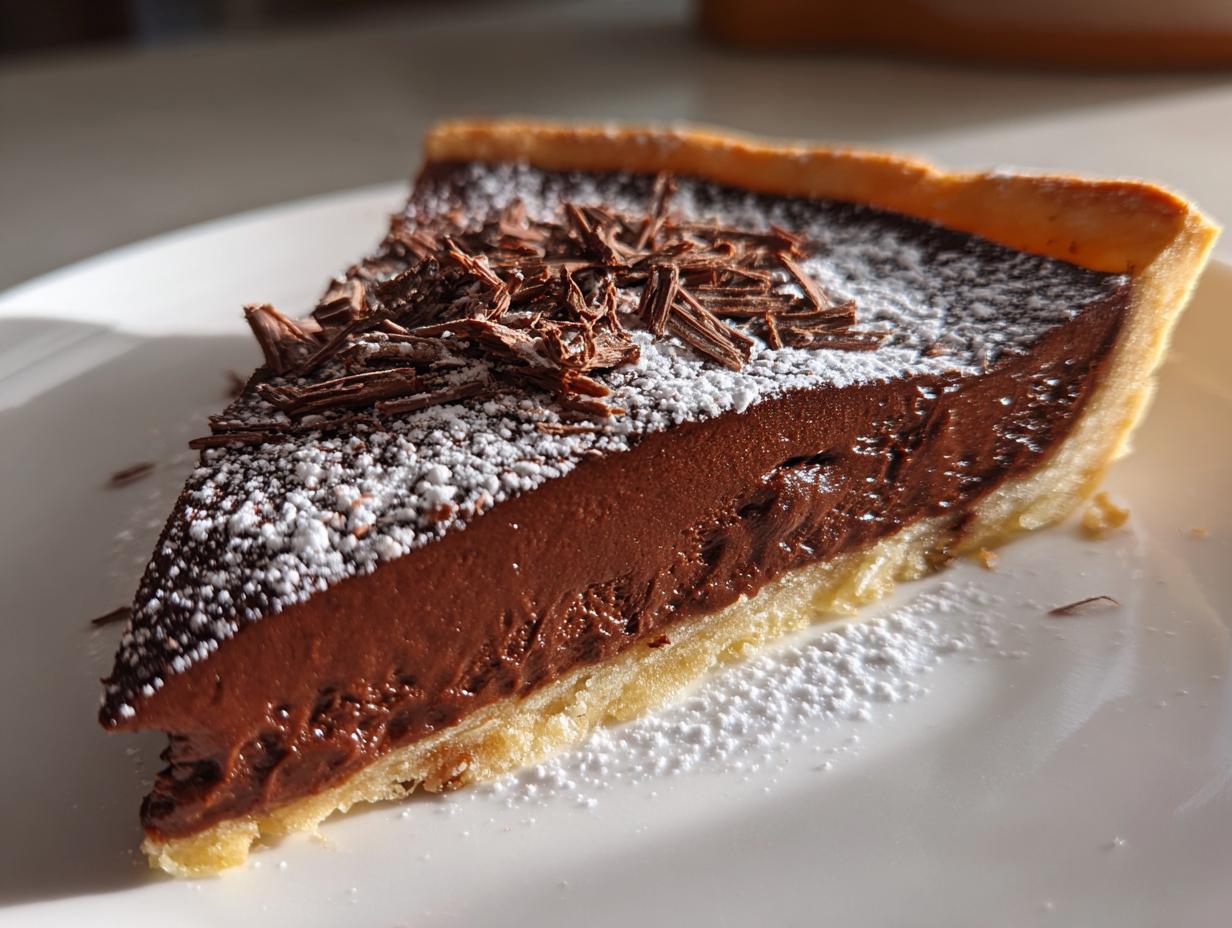
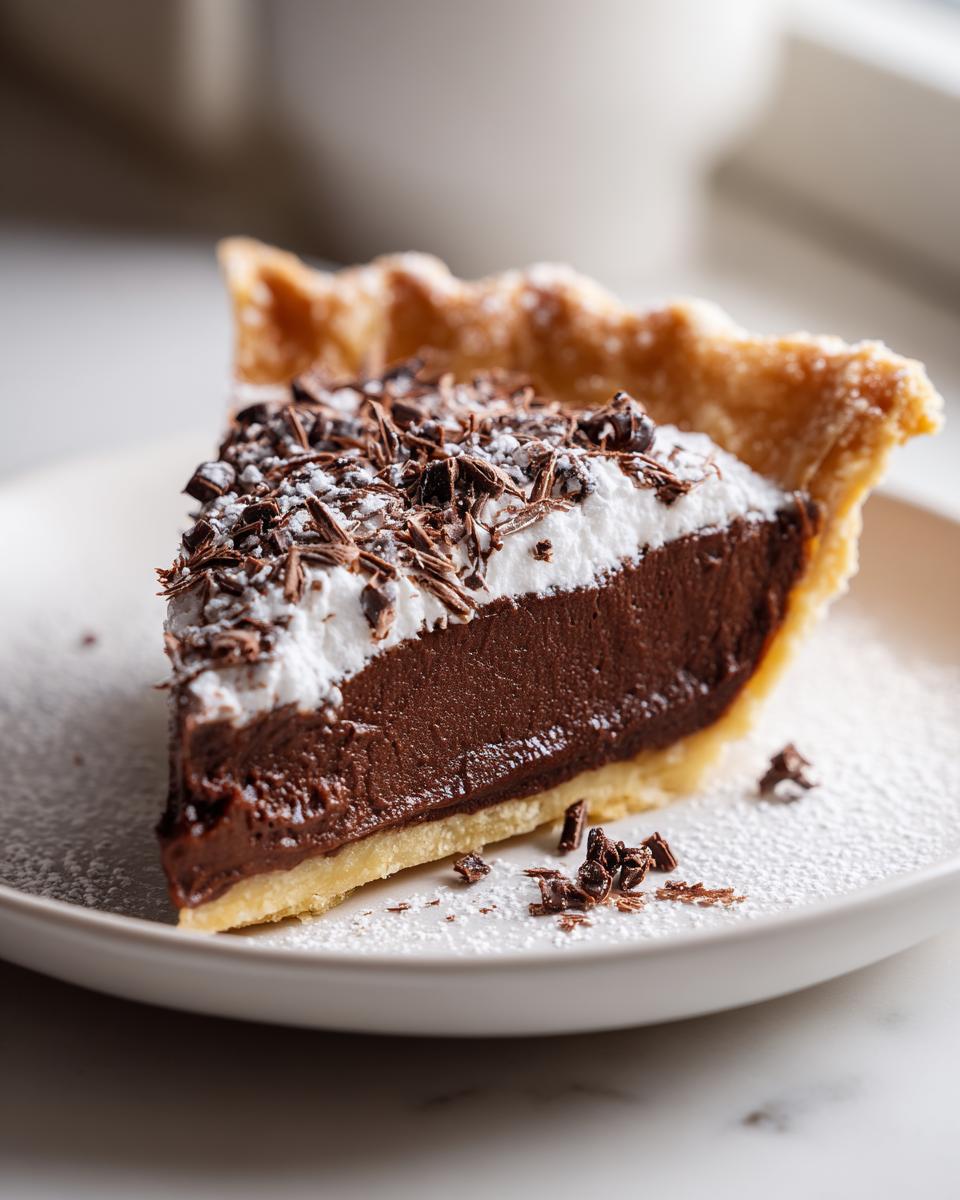
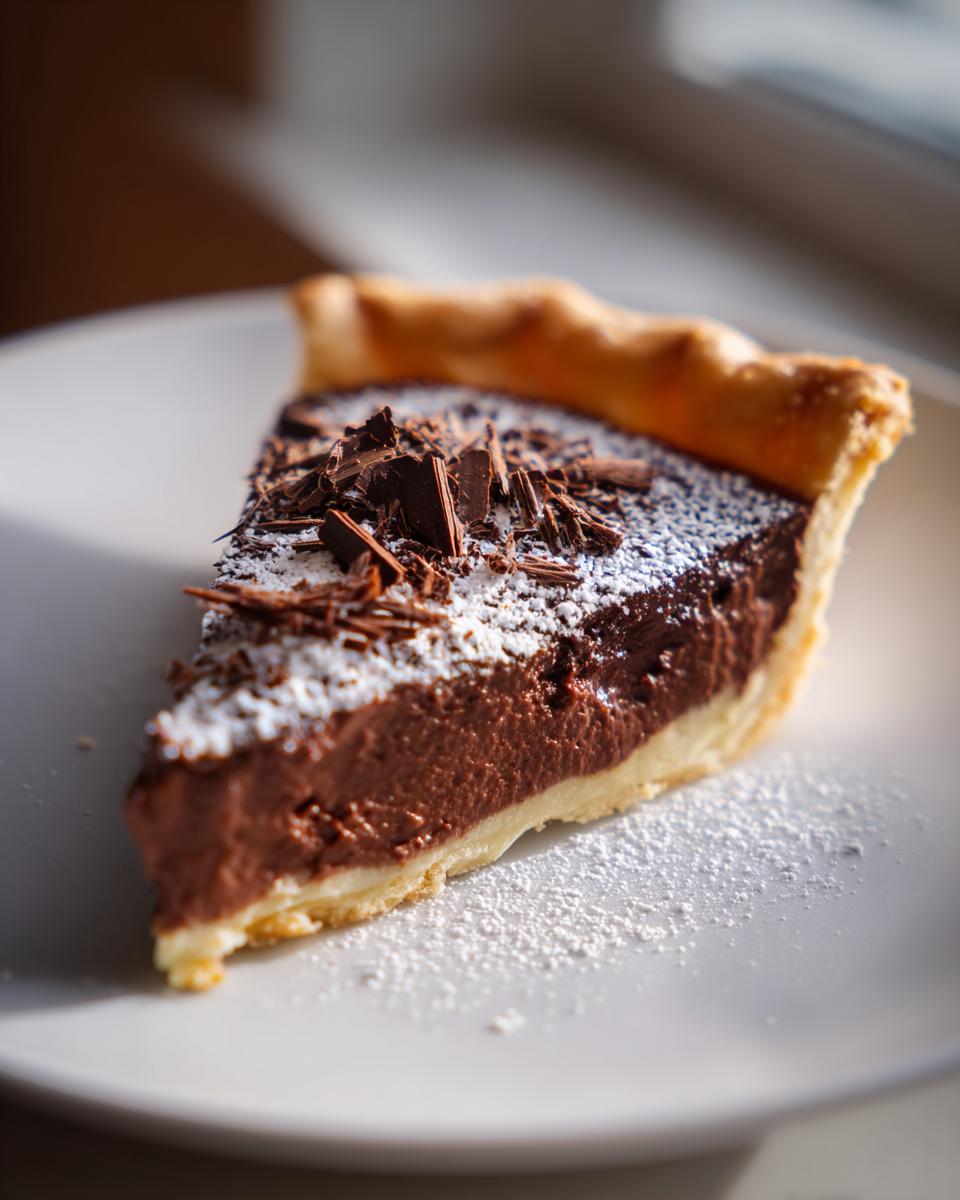
Well, you made it! I sincerely hope you enjoyed every single moment of baking—and smelling—this incredibly rich dessert. There is truly nothing better than pulling that perfectly set French silk pie out of the fridge, swirled high with whipped cream and maybe a few chocolate shavings on top.
Now that you’ve tasted the magic, I would just absolutely love to hear from you! When you serve this up at your next dinner party or holiday gathering, please do me a favor and come back here to the comments section.
Did it set up perfectly? Were your guests impressed by the velvety texture? If you loved it as much as I know you will, please leave me a 5-star rating! That’s the best way you can tell me which recipes should stay front and center here at Cookin’ Corner.
And if you ran into any trouble along the way, or maybe you tried a fun variation I haven’t thought of yet, ask away! I read every comment, and I love seeing how my favorite classics inspire your kitchens differently. Happy baking, and don’t forget to check out my recipe for banana pudding cupcakes when you need another crowd-pleaser!
PrintClassic French Silk Pie: Rich, Creamy Dessert Recipe

Make a truly decadent French Silk Pie with a rich, velvety chocolate filling and a buttery crust. This recipe delivers a showstopper dessert perfect for holidays or dinner parties.
- Prep Time: 30 min
- Cook Time: 15 min
- Total Time: 6 hours 45 min
- Yield: 8 servings 1x
- Category: Dessert
- Method: Chilling
- Cuisine: American
- Diet: Vegetarian
Ingredients
- 1 (9 inch) unbaked pie crust (homemade buttery crust recommended)
- 8 ounces bittersweet chocolate, chopped
- 1 cup granulated sugar
- 1/2 cup unsalted butter, softened
- 4 large eggs, separated (see notes for no-raw-egg option)
- 1 teaspoon vanilla extract
- 1/4 teaspoon salt
- 1 cup heavy cream, cold
- 1/4 cup powdered sugar (for topping)
- Chocolate shavings (for garnish)
Instructions
- Prepare your 9-inch pie crust and bake it according to your preferred recipe until lightly golden. Let the crust cool completely on a wire rack.
- Melt the chopped bittersweet chocolate in a heatproof bowl set over a saucepan of simmering water, stirring until smooth. Remove from heat and set aside to cool slightly.
- In a large bowl, beat the butter and granulated sugar together with an electric mixer until the mixture is light and fluffy.
- Beat in the four egg yolks one at a time, mixing well after each addition. Stir in the vanilla extract.
- Gradually beat the slightly cooled melted chocolate into the butter mixture until fully combined and smooth.
- In a separate clean, dry bowl, beat the cold heavy cream until soft peaks form. Gradually beat in the powdered sugar until stiff peaks form. Set aside.
- In another clean, dry bowl, beat the four egg whites and salt until stiff peaks form.
- Gently fold one-third of the beaten egg whites into the chocolate mixture to lighten it. Then, gently fold in the remaining egg whites until just combined, being careful not to deflate the mixture.
- Carefully fold the whipped cream into the chocolate mixture until no white streaks remain, creating a silky smooth texture.
- Pour the chocolate filling into the cooled, baked pie crust. Smooth the top with a spatula.
- Chill the pie in the refrigerator for at least 6 hours, or preferably overnight, until the filling is completely set.
- Before serving, top the pie with the remaining whipped cream (if desired) and garnish with chocolate shavings.
Notes
- For a no-raw-egg option, substitute the 4 raw eggs with 1 cup of heavy cream mixed with 1/2 cup of powdered sugar, and use 1/2 cup of melted, cooled milk chocolate chips instead of some of the bittersweet chocolate for stability.
- If you use an Oreo cookie crust, you can skip the blind baking step; just press the crumbs firmly into the pie plate and chill while you prepare the filling.
- This decadent chocolate silk pie is best served cold directly from the refrigerator.
Nutrition
- Serving Size: 1 slice
- Calories: 450
- Sugar: 35g
- Sodium: 150mg
- Fat: 30g
- Saturated Fat: 18g
- Unsaturated Fat: 12g
- Trans Fat: 0.5g
- Carbohydrates: 40g
- Fiber: 3g
- Protein: 6g
- Cholesterol: 120mg