
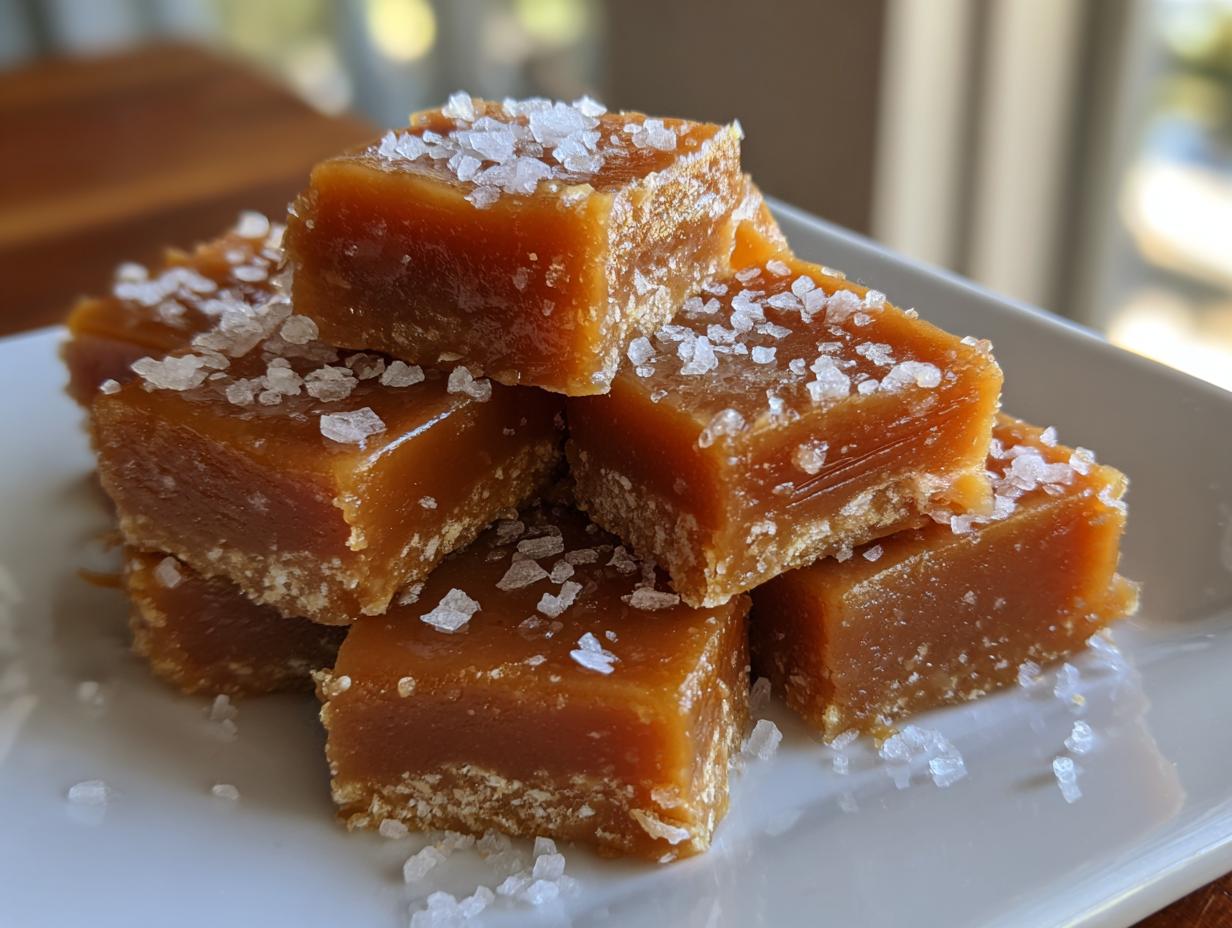
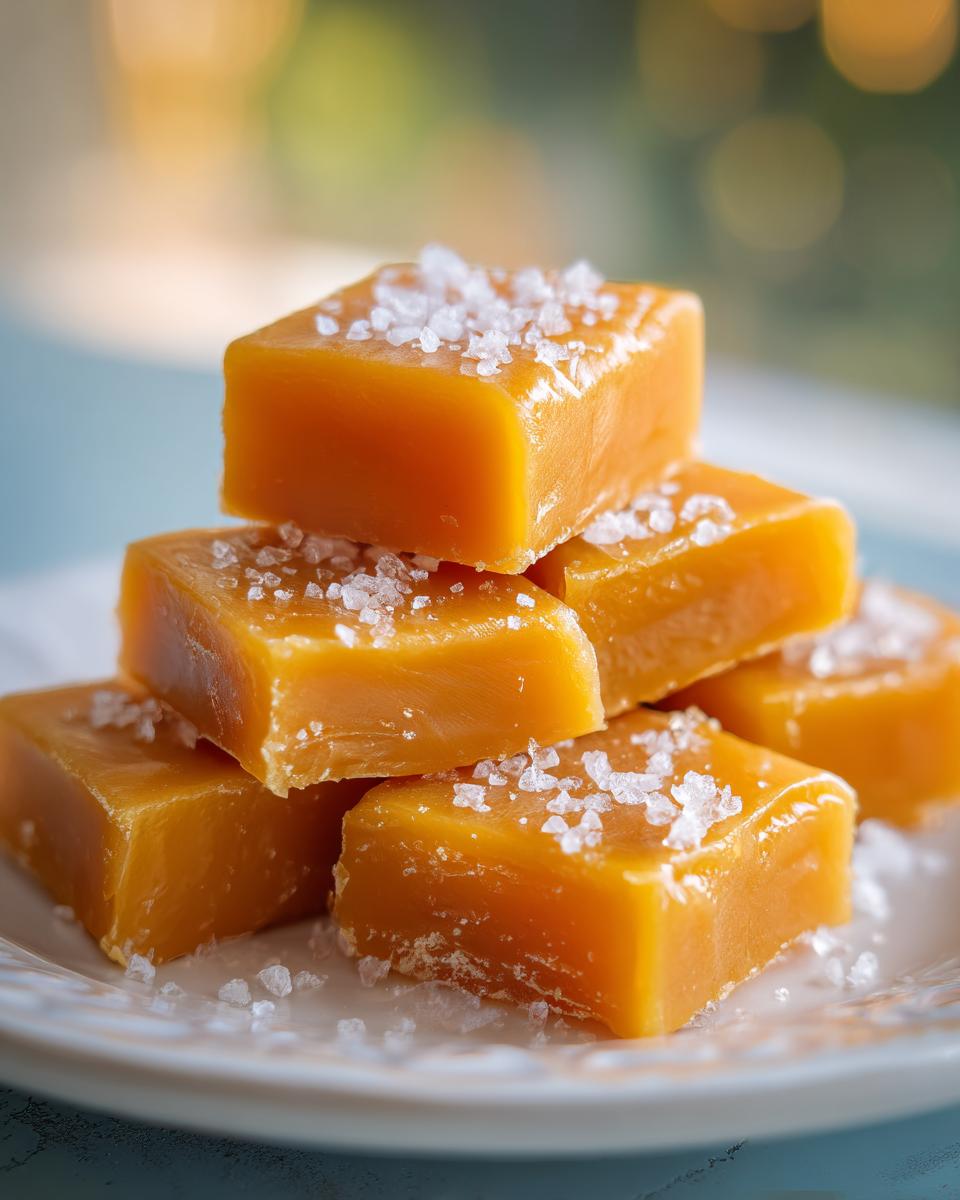
Oh, there is just nothing quite as nostalgic and comforting as a piece of homemade candy, is there? For me, **caramels** instantly transport me straight back to my grandmother’s kitchen, standing on a wobbly stool just trying to see into that bubbling pot. We’re not making those hard, tooth-breaking candies today, though! We are going for the absolute best: soft, chewy sea salt **caramels** that just melt right in your mouth. That balance of sweet, buttery richness cut by a whisper of salt—that’s pure magic. It took me years of tasting and testing to finally nail this stovetop version to get that *perfect* chew, and I can’t wait to share all my secrets with you. If you love pairing caramel with salty crunch, you should definitely check out my recipe for Caramel Ritz Cracker Cookies!
- Why This Soft Caramel Candy Recipe Works So Well
- Gathering Ingredients for Your Buttery Caramels
- Step-by-Step Instructions for Old Fashioned Caramels
- Tips for Success Making Soft Caramel Candy Recipe
- Storage and Gifting Caramels
- Alternative Methods for Quick Microwave Caramels
- Serving Suggestions for Vanilla Caramels
- Frequently Asked Questions About Homemade Caramels
- Nutritional Estimates for These Perfect Chewy Candy Squares
- Nutritional Estimates for These Perfect Chewy Candy Squares
Why This Soft Caramel Candy Recipe Works So Well
When you’re aiming for true melt-in-your-mouth deliciousness, the stovetop is essential. Seriously, forget trying to rush it; the gentle, controlled heat is what creates that wonderfully soft and chewy texture we all crave in homemade **caramels**. We’re using a precise combination of granulated sugar, corn syrup, and brown sugar, and it’s the synergy of these ingredients that keeps the candy smooth instead of grainy. And oh, that sea salt! Adding it right at the end just brightens up all that deep, buttery flavor. It elevates these from a simple sweet treat to something really special. If you’re looking for other classic comfort recipes, you absolutely have to see my Best Old Fashioned Apple Crisp Recipe!
Achieving the Perfect Chewy Caramels Texture
If you take one thing away from this whole process, let it be this: temperature is everything! For these soft, chewy **caramels**, we absolutely must hit the firm ball stage, which is exactly 245 degrees Fahrenheit. That one little number is the gatekeeper to perfect chewiness. If you let it dip even a degree or two lower, you end up with gooey caramel sauce—delicious, but not what we want here! Push it much past 248°F, and suddenly you’re in hard-crack territory, perfect for lollipops but definitely not for these soft squares. Aiming for that precise spot, like the folks over at Perfect Sea Salt Caramels recommend, guarantees that buttery rightness every time.
Gathering Ingredients for Your Buttery Caramels
Okay, when we talk about making authentic, buttery **caramels**, you can’t skimp on the inputs! The quality of these few simple things really shines through in the end product. Since this recipe is so straightforward, we are making about 64 perfect squares, depending on how generous you are with your knife cuts! You’ll need one cup of granulated sugar, one cup of light corn syrup—that’s important, don’t skip it!—one cup of heavy cream, one cup of brown sugar that’s packed down tight, and a whole cup of unsalted butter. We finish it off with one teaspoon of vanilla extract and some fine sea salt, plus some extra for sprinkling on top. If you’re itching to bake something fast after these cool, try my Cinnamon Roll Muffins!
Ingredient Notes and Substitutions for Homemade Caramels
Let’s talk quality control, because these ingredients are the foundation. You simply must use heavy cream here, not milk. Milk has too much water content, and that extra moisture will throw off your temperature reading, resulting in a mushy caramel instead of a chewy one. The corn syrup is our secret weapon against crystallization—it keeps those sugar molecules from locking up and turning grainy on you. Trust me, that little bit of corn syrup is the difference between artisan candy and a pot of sugar paste!
Also, please use real vanilla extract. The flavor notes in those homemade **caramels** are so pure that artificial flavorings stick out like a sore thumb. If you use salted butter instead of unsalted, just cut back on the added sea salt a little bit. But honestly, I prefer controlling the salt myself right at the end. It makes all the difference!
Step-by-Step Instructions for Old Fashioned Caramels
Now for the fun part—turning that gorgeous liquid into solid gold! Making **caramels** on the stovetop feels a little bit nerve-wracking the first time, but I promise, once you follow the steps exactly, you’ll see how reliable this classic method is. First things first, get your 8×8 pan ready. You need to grease it well and line it with parchment paper, making sure that paper hangs over two sides. That overhang is your handle later when lifting the whole slab out! It saves so much hassle, trust me. You combine everything in a heavy pot, stir until it melts, and then you let it boil without touching it until it hits that magic temperature. If you want something quick, you can peek at the Soft Caramel Candies recipe, but for the best results, stick with this method. Don’t forget to check out my Cake Mix Cookie Bars later for another easy treat!
Crucial Candy Thermometer Use for Perfect Caramels
The thermometer is your absolute best friend here, so pay attention! Attach it securely to the side of your pan. The tip needs to be fully soaking in that bubbling mixture, but make sure it isn’t touching the bottom of the pot. If it touches the bottom, you’ll get a wildly inaccurate reading because the bottom caramelizes faster. Watch it rise slowly, and when it hits 245 degrees Fahrenheit, you immediately pull the whole pot off the heat. That’s the signal! Overheating is the enemy of soft candy, so be there hovering over the stove for those last few minutes.
Cutting and Wrapping Your Melt In Your Mouth Candy
Once those beautiful **caramels** have cooled completely—and I mean *completely*, which takes at least three hours at room temperature—it’s time for the final transformation. Use that parchment paper overhang to lift the whole block onto a sturdy cutting board. Now, a sharp, oiled knife works best for clean cuts. If the knife starts sticking, just wipe it down with a little oil between cuts. You want bite-sized squares, about an inch each. Then, the last loving step: wrap each one individually in wax paper or cellophane. This keeps them from melting into a giant caramel blob, which is crucial if you plan on gifting them!
Tips for Success Making Soft Caramel Candy Recipe
So, you’ve made it through the boil, and those lovely, golden **caramels** are cooling down. But even at this stage, we need to remember those little tricks that keep us from getting fussy results. My top tip, which comes straight from my own learning curve, is all about patience during the boil. When that mixture is simmering, resist the urge to stir, even if you think you see a bubble forming weirdly! Stirring introduces air bubbles that shouldn’t be there, and that upsets the crystalline structure we’re trying to achieve for that soft texture. Just let the heat do the work.
Remember what I said about the temperature? It’s worth repeating: hitting exactly 245 degrees Fahrenheit is the key to the softest chew. If you are between batches, or if your thermometer seems iffy, you can always check out the detail on thermometer use over at Inspired Taste’s salted caramel guide—they have great visual ideas! If you’re worried about the final texture, trust me on sticking to that exact temperature reading.
Now, let’s talk troubleshooting for the end game. If you notice your knife is sticking badly while you’re cutting the cooled slab, don’t panic! It just means the caramel is super fresh and gooey. Simple fix: just take a small dollop of neutral oil—like vegetable oil—on a paper towel and lightly grease your knife blade between every couple of cuts. It’s a tiny extra step, but it ensures you get beautiful, clean squares for wrapping, especially when you’re making these for presents. You want them looking as good as they taste, right? If you’re planning a big baking session, these caramels are fantastic chopped up and added to my recipe for Ultimate Fudgy Brownies!
Storage and Gifting Caramels
Once you’ve taken the time to make these luscious **caramels**, the last thing you want is for them to lose that soft, melt-in-your-mouth quality! Storage is actually super simple, but there’s one big rule you have to follow: keep them at room temperature. Yes, I know we all instinctively want to tuck things like candy into the fridge, especially when it’s warm in the house, but please don’t refrigerate these! Chilling the high-fat content can make these **caramels** firm up way too much, and you’ll lose that perfect chewy texture we worked so hard to achieve.
They should be wrapped individually right after cutting, using wax paper or cellophane squares. This wrapping isn’t just polite; it keeps them from getting sticky, even at room temperature. Honestly, they stay perfectly soft and wonderful for about two weeks stored this way in an airtight container. If you’re planning ahead for the holidays, these wrapped squares look fantastic piled high in a pretty tin or clear jar. They make such a thoughtful homemade dessert gift, and honestly, people go crazy for them!
If you’re looking for more holiday baking ideas that travel well and look amazing on a platter, you have to try my Christmas Cookie Bars. They use similar rich flavors but offer a different kind of chewy joy!
Alternative Methods for Quick Microwave Caramels
I get it. Sometimes you’re standing in the kitchen on a chilly evening, you *need* a soft caramel hit, and you just don’t want to babysit a pot on the stove for 20 minutes! I totally understand wanting a quick fix. People often ask me about making **caramels** in the microwave because they see those lightning-fast recipes online. And hey, you absolutely *can* make **caramels** that way, and they are surprisingly effective, especially if you just need a small batch fast.
But I have to be honest with you—and this is my honest opinion as someone who has made hundreds of batches—the microwave versions just don’t have the same deep, complex flavor that the traditional stovetop method coaxes out of the butter and sugars. The slow, steady heat of the pan really allows those buttery notes to meld perfectly. The microwave is great for speed, but the stovetop wins on pure, rich caramel flavor every single time.
If you’re absolutely craving speed and don’t mind a slightly less nuanced flavor profile for your quick fix, you can certainly look up some of those streamlined directions. You can find a popular method over at 6 Minute Microwave Caramels if you decide to go that route. Just know that when I make these for gifting or for holidays, I am always reaching for my heavy saucepan first!
Serving Suggestions for Vanilla Caramels
While these vanilla **caramels** are perfectly wonderful right out of the wrapper—seriously, popping one in your mouth when they’re still a little warm is the best—I think they really shine when you use them as an ingredient in other treats. Why limit the joy? They are so buttery and soft that they blend seamlessly into other recipes.
My very favorite thing to do when I have a leftover batch, or when I just want to elevate a basic dessert, is to chop them up roughly. Then, take a scoop of really good vanilla bean ice cream and fold those chopped squares in right before serving. They get perfectly gooey and create ribbons of flavor throughout!
Another incredibly decadent move is dipping them! Melt down some high-quality dark or milk chocolate—don’t skimp here, it matters—and dip half of each wrapped or unwrapped piece right into the melted goodness. Before the chocolate sets, sprinkle just a tiny pinch of flaky sea salt on top. It is restaurant-level deliciousness, and it makes for stunning presentation if you’re putting out a holiday platter.
If you are a fan of cheesecake—and who isn’t?—you *have* to try chopping these up and folding them into the filling for a cheesecake, or even sprinkling them over the top of a finished pie. I swear by this method when I make my Salted Caramel Cheesecake with Biscoff Crust; they just add that perfect, chewy texture that factory-made candies can never replicate.
Frequently Asked Questions About Homemade Caramels
When you’re wading into the slightly intimidating world of candy making, questions are bound to pop up! I’ve gathered the ones I hear most often about these **caramels** through my emails and comments. It’s all about tackling those little hiccups so you can enjoy that perfect, chewy treat with confidence!
Why are my homemade caramels grainy instead of smooth?
Oh, this is the most heartbreaking failure when making candy! Graininess always means that sugar crystallized, and it usually happens for one of two reasons. First, you might have stirred the mixture *after* it started boiling, which splashes tiny undissolved sugar crystals onto the sides of the pot, which then fall back down and initiate crystallization. Second, you might have let the temperature dip too low or held it too long without the proper stabilizers, like corn syrup. For the smoothest result, make sure you stop stirring once the boil officially starts, and always use that heavy-bottomed pot!
What if I absolutely don’t have a candy thermometer for these chewy caramels?
I totally understand this one, especially if you’re new to this! If you don’t have a thermometer, you have to use the ice water test, but it’s tricky because timing is everything. You need a separate bowl of ice-cold water. When you think you are close to 245°F, drop a tiny bit of the hot mixture into the ice water. If it forms soft, pliable threads that you can easily roll into a ball but that still flatten under pressure, you’ve hit the right spot for **chewy caramels**. If it stays liquid, it needs more time. If it shatters immediately, it’s too hot!
Can I turn this recipe into vegan or dairy-free caramels?
Because this recipe relies so heavily on the specific structure provided by butter and heavy cream, making a truly identical vegan version is tough, but possible! You would need to substitute the heavy cream with a thick, high-fat plant-based cream—like coconut cream, making sure to use the thick solidified top layer—and swap the butter for a high-quality vegan butter block (not the spreadable kind). Crucially, you still need that sugar/syrup ratio to hit 245°F exactly. It changes the flavor profile, but you can definitely get a nice, soft square!
Are these better than the quick microwave caramels?
Yes, in my book, these stovetop **caramels** are vastly superior! The microwave is fantastic for speed, and if you need candy *right now*, it works. However, the stovetop allows for a gradual cooking process where the butter and sugars brown slightly and deepen in flavor. The resulting texture from the stovetop method is just richer, more complex, and consistently achieves that signature melt-in-your-mouth quality we are aiming for. Don’t forget to try mixing chopped pieces of these into my Snickerdoodle Cheesecake for a real treat!
Nutritional Estimates for These Perfect Chewy Candy Squares
I always feel a little guilty right after eating a handful of delicious homemade candy, but knowing what’s in them helps balance the experience! Since these are rich with butter and cream, they are certainly a treat, not an everyday health food. Keep in mind that since your cutting size might vary, these numbers are based on yielding about 64 squares exactly.
- Serving Size: 1 square
- Calories: 105
- Fat: 3g
- Saturated Fat: 2g
- Carbohydrates: 19g
- Sugar: 18g
- Sodium: 35mg
- Protein: 0g
It’s important to remember that since we are using brown sugar and high-quality butter, we get a lot of that rich mouthfeel from the fats, which is what makes them so satisfying! If you make a big batch for the holidays, these look just as amazing as they taste when placed next to something like my Creme Brulee Cheesecake.
PrintBest Soft, Chewy Sea Salt Caramels
Make melt-in-your-mouth, buttery caramels at home. This recipe yields soft, chewy candy perfect for gifting or enjoying as a sweet treat.
- Prep Time: 15 min
- Cook Time: 20 min
- Total Time: 3 hours 35 min
- Yield: About 64 caramels 1x
- Category: Candy
- Method: Stovetop Cooking
- Cuisine: American
- Diet: Vegetarian
Ingredients
- 1 cup granulated sugar
- 1 cup light corn syrup
- 1 cup heavy cream
- 1 cup packed light brown sugar
- 1 cup unsalted butter
- 1 teaspoon vanilla extract
- 1/2 teaspoon fine sea salt, plus extra for sprinkling
Instructions
- Lightly grease an 8×8 inch baking pan and line it with parchment paper, leaving an overhang on two sides for easy removal. Set aside.
- In a heavy-bottomed saucepan, combine the granulated sugar, corn syrup, heavy cream, brown sugar, and butter.
- Stir the mixture constantly over medium heat until the butter melts and the sugars dissolve. Stop stirring once it reaches a boil.
- Attach a candy thermometer to the side of the pan, making sure the tip is submerged but not touching the bottom.
- Cook the mixture without stirring until it reaches 245 degrees Fahrenheit (the firm ball stage). This usually takes about 15 to 20 minutes. Watch carefully to prevent scorching.
- Remove the saucepan from the heat immediately when it reaches 245 degrees Fahrenheit. Carefully stir in the vanilla extract and 1/2 teaspoon of sea salt.
- Pour the hot caramel mixture into the prepared baking pan. Do not scrape the sides of the pan.
- Sprinkle the top lightly with extra sea salt while the caramel is still warm.
- Let the caramels cool completely at room temperature for at least 3 hours, or until firm. Do not refrigerate.
- Once firm, use the parchment paper overhang to lift the caramel block from the pan. Place it on a cutting board.
- Use a sharp, oiled knife or a pizza cutter to cut the block into 1-inch squares.
- Wrap each individual caramel in wax paper or cellophane squares for storage or gifting.
Notes
- For the softest texture, ensure your candy thermometer reads exactly 245 degrees Fahrenheit. Higher temperatures result in harder, chewier candy.
- If you want a quick method, you can try a microwave caramel recipe, but this classic stovetop method gives the best buttery flavor and texture.
- If the caramel sticks to your knife while cutting, lightly oil the blade between cuts.
Nutrition
- Serving Size: 1 square
- Calories: 105
- Sugar: 18g
- Sodium: 35mg
- Fat: 3g
- Saturated Fat: 2g
- Unsaturated Fat: 1g
- Trans Fat: 0g
- Carbohydrates: 19g
- Fiber: 0g
- Protein: 0g
- Cholesterol: 10mg